Beginning C# 2005 Databases PHẦN 3 ppsx
Bạn đang xem bản rút gọn của tài liệu. Xem và tải ngay bản đầy đủ của tài liệu tại đây (663.7 KB, 53 trang )
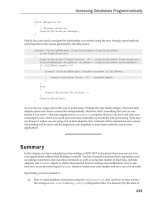
Figure 3-9: Choosing a query command type
On this page you select the type of command that the query should execute. You can choose:
❑ Use SQL Statements: Enables you to create any SQL query you might like to as long as it
returns either no result or a single result. You can also provide a parameterized query by which
you can pass values to be used by the query (such as the ID of a row to delete in a delete query).
❑ Create New Stored Procedure: Similar to the preceding option, but the SQL you enter is used to
create a stored procedure that is then accessed directly by the
Query item. These also can be
parameterized.
❑ Use Existing Stored Procedure: Creates a command that calls an existing stored procedure in
the database, parameterized or not. Care should be taken here to use a stored procedure that
returns no results or a single value; otherwise you cannot predict what you’ll receive as a return
value.
For the first two options, the next stage is to choose the type of SQL statement you are creating, as shown
in Figure 3-10.
As you can see, the only option unavailable is Select Which Returns Rows. You can, however, create any
other type of SQL statement.
The next step for a SQL command or stored procedure based on a SQL command is to enter the text of
the command itself. You can either do that manually or use the SQL command builder, which enables
you to design queries graphically. If you want to parameterize your queries, you can supply variable
names in the form:
@<Variable Name>
80
Chapter 3
44063c03.qxd:WroxBeg 9/15/06 12:42 PM Page 80
Figure 3-10: Choosing a query type
For example, you could make a query as follows:
SELECT StringColumn FROM MyTable WHERE MyTableId = @MyTableId
This would return the value for a single column in a single row, where the row is identified by an ID
value specified as a parameter called
@MyTableId.
If you are using an existing stored procedure, you are presented with a drop-down selector from which
to choose a stored procedure to use. Then you will see the parameters that will be generated and the
value that will be returned.
Using the commands you generate is something that you will typically do from C# code that you write,
although it is equally possible to bind the results of queries to control properties.
TableAdapter
The last object to consider is perhaps the one that you will use most often. Adding a TableAdapter
actually results in the addition of several things. First, of course, you add a TableAdapter to which sev-
eral
Query objects will be added. In addition, you are adding a DataTable to contain the results of the
select query that is added to the
TableAdapter. The DataTable is also used when adding to or modify-
ing database data.
All of this, however, is achieved in a single step.
Adding a
TableAdapter can be done using the Toolbox window or by right-clicking in the DataSet
Designer and selecting Add ➪ TableAdapter. In either case, you are presented with the TableAdapter
Configuration Wizard. On the first page of this wizard, as with other wizards you have seen, you select
or create a data connection to use. The next step is to choose a command type to use, as shown in
Figure 3-11.
81
Viewing Data
44063c03.qxd:WroxBeg 9/15/06 12:42 PM Page 81
Figure 3-11: Choosing a command type
The options here are as follows:
❑ Use SQL Statements: Enables you to create any SQL query you might like to as long as it
returns table data. You can also provide a parameterized query with which you can pass values
to be used by the query (such as the value of a column to use to filter the results returned). If
you don’t use a join to select data from more than one table, the wizard can generate commands
to insert, update, and delete data.
❑ Create New Stored Procedures: Similar to the preceding option, but the SQL you enter is used
to create a stored procedure that is accessed directly by the
TableAdapter item. If you don’t
use a join to select data from more than one table, the wizard can generate stored procedures to
insert, update, and delete data.
❑ Use Existing Stored Procedures: Creates a command that uses stored procedures to select,
delete, modify, and add data.
Assuming that you take the simplest option, and create a SQL select statement that selects tabular data
from a single table, the next step is to create the SQL command. Again, you can use the graphical query
builder to help you here, or you can just type the SQL statement in yourself. You can also choose from a
selection of advanced options, shown in Figure 3-12.
These options include whether to automatically generate insert, update, and delete statements; whether
to generate these statements in such a way as to take concurrency (which is discussed shortly) into
account; and whether the select statement is used to refresh data automatically when changes are sub-
mitted to the underlying database. The latter options are available only if the first option is selected.
Next, you have a few more options to choose from in the generation of the
TableAdapter, as shown in
Figure 3-13.
82
Chapter 3
44063c03.qxd:WroxBeg 9/15/06 12:42 PM Page 82
Figure 3-12: Choosing a command type
Figure 3-13: Choosing a command type
The options here are as follows:
❑ Fill A DataTable: Enables you to generate a method to fill a
DataTable with results — which
you usually want to do. In most circumstances the default name of the method,
Fill(), is all
you need.
❑ Return A DataTable: Generates a utility method that you can use to obtain a
DataTable object
from the
TableAdapter directly, which can be useful in some circumstances as a shortcut. It
certainly doesn’t hurt to leave this functionality in. You can rename the default value of
GetData() if you really want to.
❑ Create Methods To Send Updates Directly To The Database (GenerateDBDirectMethods):
Generates a set of methods that enable you to access the underlying database directly, rather
than making changes to a data table and then submitting your changes in one go. This can be
useful from your custom C# code. Again, it certainly doesn’t hurt to include these methods,
unless you have a real reason not to.
83
Viewing Data
44063c03.qxd:WroxBeg 9/15/06 12:42 PM Page 83
The next step generates the TableAdapter and related/embedded items. Similarly, if you have chosen
to use stored procedures, this completes your configuration. After the wizard has finished its operation,
a new object appears in the DataSet Designer window, similar to that shown in Figure 3-14.
Figure 3-14: The TableAdapter
Configuration Wizard result
The
DataTable and TableAdapter items (Story and StoryTableAdapter in Figure 3-14) are linked
together.
After you have created a
DataTable and TableAdapter combination this way, there is further configu-
ration that you can perform. For example, you can add additional queries to the
TableAdapter (includ-
ing scalar value queries as per the previously mentioned
Query item). You can also see the queries that
have been generated previously by using the Properties window. For example, in the
TableAdapter
shown in Figure 3-14, four queries are generated. In the Properties window, you can see these by looking
at the
SelectCommand, InsertCommand, UpdateCommand, and DeleteCommand properties (expand
them and look at the CommandText subproperty). The queries generated here are as follows:
SELECT StoryId, EndingId, ClassificationId, SourceId, Name, Summary FROM dbo.Story
INSERT INTO [dbo].[Story] ([StoryId], [EndingId], [ClassificationId], [SourceId],
[Name], [Summary]) VALUES (@StoryId, @EndingId, @ClassificationId, @SourceId,
@Name, @Summary);
SELECT StoryId, EndingId, ClassificationId, SourceId, Name, Summary FROM Story
WHERE (StoryId = @StoryId)
UPDATE [Story] SET [StoryId] = @StoryId, [EndingId] = @EndingId,
[ClassificationId] = @ClassificationId, [SourceId] = @SourceId, [Name] = @Name,
[Summary] = @Summary
WHERE (([StoryId] = @Original_StoryId) AND ([EndingId] = @Original_EndingId)
AND ([ClassificationId] = @Original_ClassificationId)
AND ([SourceId] = @Original_SourceId) AND ([Name] = @Original_Name));
SELECT StoryId, EndingId, ClassificationId, SourceId, Name, Summary FROM Story
WHERE (StoryId = @StoryId)
DELETE FROM [Story] WHERE (([StoryId] = @Original_StoryId)
AND ([EndingId] = @Original_EndingId)
AND ([ClassificationId] = @Original_ClassificationId)
AND ([SourceId] = @Original_SourceId) AND ([Name] = @Original_Name))
Some of the automatically generated commands look a little odd. The reasons for this are as follows:
❑ The
SELECT command is exactly what you’d expect — the list of columns is selected from the table.
84
Chapter 3
44063c03.qxd:WroxBeg 9/15/06 12:42 PM Page 84
❑ The INSERT statement is also as expected, except that it includes a SELECT statement. This is a
result of choosing the Refresh The Data Table option shown earlier; after adding a record, the
record is loaded into the data table, using the primary key value
StoryId to identify the new
row. If you use an identity column for the primary key, the primary key won’t be available in
this way because it is automatically generated by the database. In this case, the generated SQL
code will use
SCOPE_IDENTITY(), a SQL Server function that obtains the primary key value
for the last row modified. In this example, the select query is used immediately after the insert
query, so the function would return the primary key value for the row just added.
❑ The
UPDATE statement includes a lot more code than you’d expect, particularly in its WHERE
clause (it also has a SELECT statement, but it is just like the one detailed earlier). Because the
Use Optimistic Concurrency option was selected, this statement checks the value of every col-
umn value against the original row values rather than simply identifying the row to modify by
its ID. This means that the row is modified only if all its values are as they were when the row
was obtained from the database. If the row has changed, perhaps because of an external modifi-
cation, the row won’t be modified, and an exception will be thrown. This is a simple technique
to ensure that concurrency doesn’t become a problem. However, it is often overkill, especially in
applications where the database data isn’t used by multiple users. Unselecting this option
results in far simpler SQL code:
UPDATE [Story] SET [StoryId] = @StoryId, [EndingId] = @EndingId,
[ClassificationId] = @ClassificationId, [SourceId] = @SourceId,
[Name] = @Name, [Summary] = @Summary
WHERE (([StoryId] = @Original_StoryId));
SELECT StoryId, EndingId, ClassificationId, SourceId, Name, Summary FROM Story
WHERE (StoryId = @StoryId)
❑ Similarly, the DELETE statement includes concurrency-checking code. Unselecting this option
results in the following simple code:
DELETE FROM [Story] WHERE (([StoryId] = @Original_StoryId))
Having the extra concurrency-checking code for update and delete commands isn’t that serious a prob-
lem if you don’t need it, although performance may be slightly affected. Perhaps the biggest implication
here is that if you include the concurrency check, you have to add additional code to detect concurrency
violations and act on them, which can complicate your applications. Of course, you can simply ignore
errors, but that may adversely affect the end user experience. You’ll learn a lot more about this in
Chapter 9.
A final point when adding
TableAdapter items this way is that relationships are detected automatically
by the wizard. If you add data from one table, and subsequently add data from a second, related table in
another
TableAdapter, a Relation item is generated for you, matching the relationship defined in the
underlying database.
Adding Objects from the Database Explorer Window
You can add data structures to the DataSet Designer directly from the Database Explorer window. You
can, for example, drag a table from the Database Explorer to the designer. What happens next is a thing
of beauty — everything that you’d otherwise have to do with a wizard happens automatically. The end
result is the same as if you’d added a
TableAdapter item and configured it using the wizard, but all the
options are chosen for you.
85
Viewing Data
44063c03.qxd:WroxBeg 9/15/06 12:42 PM Page 85
If you want to add a subset of the rows in a table, you can — just select the rows you want to add from a
table and drag them onto the DataSet Designer as a single unit. You can add stored procedures in the
same way.
However, this ease of use comes at a price — flexibility. If you want to perform more advanced opera-
tions, you have to use other methods, or customize the resultant objects after you have added them.
In the next Try It Out, you use the DataSet Designer to create a data source manually. Note that some of
the instructions in this Try It Out are deliberately kept short — but don’t worry if you have to refer to the
preceding text and explanations to help you along the way.
Try It Out Manually Configuring a Data Source
1.
In Windows Explorer, copy the contents of the C:\BegVC#Databases\Chapter03\Ex0301 -
Automatic Configuration
directory to a new directory called C:\BegVC#Databases\
Chapter03\Ex0302 - Manual Configuration
.
2. Open the Ex0301 - Automatic Configuration.sln solution file from the version of the
project stored in the new directory (that is, not the version of the solution file saved in the previ-
ous Try It Out, but the new version of the file that you just created by copying the old one).
Opening this file opens Visual C# Express 2005.
3. In the Solution Explorer window, rename both the solution and project to Ex0302 - Manual
Configuration
. This also renames the solution and project files.
4. Save all files.
5. Right-click on the project in Solution Explorer and select Add ➪ New Item.
6. Add a new DataSet item called FolkDBDataSet2.xsd.
7. Right-click in the DataSet Designer for the new data set and select Add ➪ TableAdapter.
8. Use the existing connection, the Use SQL Statements command type, and the following select
query:
SELECT * FROM Story
9. Leave the rest of the options available in the wizard with their default options and click Finish.
10. Drag the Classification and Source tables from the Database Explorer window onto the Data -
Set Designer (note that you have to expand the database and database tables to see these tables).
11. Right-click the DataSet Designer and select Add ➪ Query.
12. Use the existing connection and default options, and add the following scalar query with the
name
StoryCountQuery:
SELECT COUNT(*) FROM Story
13. Right-click QueriesTableAdapter (the table adapter you just added) and click Add Query.
14. Add the following query with default options and the name CharactersByStoryIdCount:
SELECT COUNT(*) FROM CharacterStory WHERE StoryId = @StoryId
15. Save all files and close Visual C# 2005.
86
Chapter 3
44063c03.qxd:WroxBeg 9/15/06 12:42 PM Page 86
How It Works
The first thing you did in this Try It Out was to copy the project created in the previous Try It Out to a
new project with a different name. The steps required to do this (steps 1–4) are ones that you will carry
out several times in this and subsequent chapters (copy the files, open the copied project, rename the
solution and project, and save the files). In other Try It Outs, this series of steps will be abbreviated to
“Copy project X as project Y.” When you see that, you might want to refer back to these steps to make
sure you do things correctly.
Once you had a new project to play with, you added a second data source, but this time you did things
manually. If all has gone as planned, you should have generated a data set just like the one shown in
Figure 3-15.
Figure 3-15: A manually added data set
As with the previous Try It Out, you make use of this data set later in the chapter.
Advanced Data Source Configuration
This section introduces you to some of the more advanced techniques you can use to configure data
sources, namely:
❑ Filtering data
❑ Modifying data set code
Although these topics aren’t covered in depth here, you explore them in more detail later in the book.
87
Viewing Data
44063c03.qxd:WroxBeg 9/15/06 12:42 PM Page 87
Filtering Data
When you bind controls to a data source it is perfectly possible, indeed often desirable, to filter the data
in the data set and display a subset of the records contained therein. There is, however, another option
for filtering: retrieving only the filtered rows from the database. The advantage is that less data is stored
in the data table in the data set; the disadvantage is that the database must be queried every time the fil-
ter changes. For rapidly changing data this needn’t be a problem because the data is refreshed from the
source data when the filter changes, so updates to the database are reflected in the data retrieved.
To do this in practice you must add additional queries to a
TableAdapter item. This procedure works
in much the same way as adding queries to the
TableAdapter used to group Query items, which you
saw earlier. The difference, as with the base query for
TableAdapters linked to DataTable items, is
that a query used to filter row data returns a set of rows, not a single value (or no value).
To add a query to a
TableAdapter, right-click it and select Add Query. The query addition works in the
same way as adding the base query. You start by selecting the command type (SQL Query, SQL Query To
Be Copied To A Stored Procedure, or Existing Stored Procedure). Next, for SQL queries, you choose the
type of query, which should be a select query that returns rows for a filter query (you cannot add a
query of this type to a stand-alone query object, because you can have only queries that return rows for
table adapters with an associated data table). When entering the query, use parameters. For example:
SELECT StoryId, EndingId, ClassificationId, SourceId, Name, Summary FROM Story
WHERE EndingId = @EndingId
Then name the methods used to execute the query; it is typical to use a name that reflects the filter. For
the preceding query you might use
FillByEndingId() and GetDataByEndingId(), as shown in
Figure 3-16.
Figure 3-16: Adding a filter query
88
Chapter 3
44063c03.qxd:WroxBeg 9/15/06 12:42 PM Page 88
You can use this query from data-bound controls (or custom code) to retrieve filtered data. There is no
limit to the number or complexity of additional queries that you can add to a
TableAdapter in this way.
However, you must make the queries return the same set of columns as the base query; otherwise, the
schema of the
DataTable will fail to load the data successfully and you will receive errors.
It is worth noting that when data-binding controls, you can filter data directly from the wizards used to
configure data binding in Windows Forms. Still, there will be times when you want to do this manually,
using the DataSet Designer.
Modifying Data Set Code
By now you’ve probably noticed that generating a typed data set for a data source results in several
types of files being added to your project. In particular, a partial class definition is generated for the data
set, which defines the typed DataSet class. That class inherits from
System.Data.DataSet and includes
the following:
❑ Nested class definitions for tables, rows, relationships, row-changing events, and row-changing
event handlers
❑ Strongly typed methods, properties, and events for accessing rows, columns, and constraints,
using the nested type definitions and reacting to data changes
The nested class definitions also contain a variety of methods and properties to ease navigation between
rows, retrieving specific rows by their primary key value, and accessing related data. For example, the
class definition for a row in a table that is a parent row for child rows in a related table includes a
method to retrieve all child rows in one go.
The naming of all these files, classes, and methods uses the database schema information. A data
set called
MyDataSet containing a TableAdapter that retrieves data for a table called MyTable is
defined in a code file called
MyDataSet.Designer.cs. That file will contain a DataSet-derived class
called
MyDataSet, defined in the default project namespace. It will also contain a class derived from
System.ComponentModel.Component called MyTableTableAdapter, defined in the namespace
<default project namespace>.MyDataSetTableAdapters. This table adapter class contains meth-
ods for populating data table classes and making changes to the database, as well as methods correspon-
ding to each query contained in the table adapter.
The exact code generated reflects the structure of the typed data set you define, including many attrib-
utes relating to XML serialization and such, as well as the types previously mentioned. The best way to
get a feel for this is to play around and see what code is generated. You’ll see the ADO.NET classes being
used throughout the generated code, and while much of the code won’t make a lot of sense at this point,
you’ll get the idea.
Now, the reason for bringing all this up is that the code generated is only a starting point for typed data
set code. Because the code generated is for partial class definitions, you can supply your own code. You
shouldn’t modify the code in the
<data set>.Designer.cs file, but you can supply your own code in a
file called
<data set>.cs. That file isn’t created by default, but as soon as you want to edit it, it’s gener-
ated for you. This happens if, for example, you double-click in the DataSet Designer window, or if you
right-click on the data set in Solution Explorer and select View Code.
89
Viewing Data
44063c03.qxd:WroxBeg 9/15/06 12:42 PM Page 89
When it is first generated, the code in the file is as follows:
namespace <default project namespace>
{
partial class <data set name>
{
}
}
In this class definition you can add whatever code you want. For instance, you could add code to manip-
ulate the rows in a data table using more advanced methods. The nested class definitions and table
adapter class definitions are also defined as partial class definitions, so you can add code to these
classes.
A typical usage of this code is to add methods to row class definitions that set single or multiple
column values without accessing the properties directly. For a row in a product table with a Boolean
Discontinued column, for example, you could add a MarkAsDiscontinued() method to set the col-
umn value to
false using a human-friendly named method.
The possibilities are endless. For basic data binding, however, this isn’t something you need to do often.
The real power comes when you start accessing data programmatically, as you see later in this book.
At this point it’s enough to be aware that this functionality exists and that it makes things highly cus-
tomizable. Now it’s time to tackle data binding.
Binding to Data Sources
Once you have created a data source you can start to link form controls to it using data-binding tech-
niques. This can be as simple or a complicated as you want to make it, and may involve a combination of
declarative techniques (typically using wizards) and programmatic techniques (customizing behavior
using your own code). In this chapter, you examine the simpler end of the scale and use only wizards to
bind data to controls. You learn about more advanced customization later in the book.
You can bind data to pretty much any control you like, but using the wizards you will be binding to the
following controls:
❑ List controls, to display values from a single data column in a list
❑
DataGridView controls, to display data in a spreadsheet-like format
❑
BindingNavigator controls, to navigate though multiple records in a table
❑ Detail views consisting of primitive controls such as
TextBox and Label controls to display
data for single rows
You’ll see how to do all of this, but first you need to examine another control that is central to data bind-
ing:
BindingSource.
90
Chapter 3
44063c03.qxd:WroxBeg 9/15/06 12:42 PM Page 90
The BindingSource Control
The BindingSource control is used as an intermediary between data-bound controls and data sources.
It provides a common interface containing all the functionality that controls require when binding to
data sources. Whenever you bind a control to a data source using wizards, you are actually creating and
configuring a
BindingSource control instance and binding to that.
This architecture gives you a great deal of flexibility, especially in advanced situations, because you can
design data sources in any form you like as long as you provide the capability to communicate with a
BindingSource control. That means that you can use non-database data sources, or custom data
sources that use whatever esoteric data access mechanism you’d care to think of.
For the most part in this book, however, you’ll access typed data set classes using
BindingSource controls.
Configuring a
BindingSource control is something that, as noted earlier, usually happens automati-
cally. However, to avoid too much stuff happening behind the scenes that you aren’t aware of, it’s worth
delving a little deeper into the workings of this control and seeing how to configure it manually.
You can add an instance of this control to your form manually. It is a nonvisual component, and you
won’t see it on your form. Instead, you see the instance displayed below the form in the component area,
as shown in Figure 3-17.
Figure 3-17: A BindingSource component on a form
In Figure 3-17 the
BindingSource instance has been added with its default name — bindingSource1.
You can change that, of course, but for the purposes of this discussion, it’ll be referred to by that name.
You might like to work through this section with code in front of you, and if you create a new
Windows Forms application and add a
BindingSource control to the main form, Form1, this is
exactly how things will look.
The first step in configuring a
BindingSource instance is to set its DataSource property. This can be any
of several types of data sources, including ones you create yourself, but most commonly it’s a typed data
set. Using the Properties window, you can bind to a typed data set in your project, as shown in Figure 3-18.
If you are following along in your own application, you’ll need to add a data source to your project before
this display matches what you see. (After you add a data source, select the
bindingSource1 control; then,
in the Properties window, select the
DataSource property and click the drop-down arrow. From the drop-
down list, select the data source to use. For new data sources using a typed data set, you should then
expand Other Data Sources and then Project Data Sources to find the data source.)
91
Viewing Data
44063c03.qxd:WroxBeg 9/15/06 12:42 PM Page 91
Figure 3-18: Selecting a data source
for a BindingSource component
Figure 3-18 demonstrates the selection of a typed data set called
FolktaleDBDataSet as a data source.
Selecting a typed data set class in this way actually results in an instance of the class being generated.
In this example, selecting a typed dataset with a class
FolktaleDBDataSet results in a new member
field called
folktaleDBDataSet being added to your form. It’s defined in Form1.Designer.cs as
follows:
private FolktaleDBDataSet folktaleDBDataSet;
It is this member that is used as the data source for the BindingSource control.
After you have selected a data source, you set the
DataMember property of the BindingSource control,
which gives more specific information about what data you want to bind to in the data source. When
binding to a typed data set, set this to a data table — which may be populated in any of the ways you
saw earlier in the chapter. In the Properties window you can select from a list of tables in your data set
graphically, as shown in Figure 3-19.
When you add a
DataMember this way, another new member is added to your code — a data adapter:
private <projectNamespace>.FolktaleDBDataSetTableAdapters.StoryTableAdapter
storyTableAdapter;
In addition, code to use this data adapter to populate the relevant table in the data set instance is added
to the
Load event handler in Form.cs:
private void Form1_Load(object sender, EventArgs e)
{
// TODO: This line of code loads data into the ‘folktaleDBDataSet.Story’ table.
// You can move, or remove it, as needed.
this.storyTableAdapter.Fill(this.folktaleDBDataSet.Story);
}
92
Chapter 3
44063c03.qxd:WroxBeg 9/15/06 12:42 PM Page 92
Figure 3-19: Selecting a data member
for a BindingSource component
The auto-generated comment tells you that this is added for your convenience and that you can move it
to wherever you want it. As things stand, the code means that the data is loaded when the form loads,
making it available for use right away — which is often exactly what you want.
Both the data adapter and the typed data set instance are displayed in the components section of the
Form Designer, next to the
BindingSource control. From there you can configure the controls via prop-
erties, including modifying whether members are generated in code and so on.
The following table describes a few other
BindingSource properties that you might want to change,
although they are all optional.
Property Description
AllowNew Whether the BindingSource control allows data-bound controls to
add new items.
Filter A filter expression determining which items will be available to data-
bound controls. This doesn’t affect the data stored in the underlying
data source, unlike adding filter queries, as described earlier in the
chapter.
Sort A comma-separated list of columns to sort by, in SQL format so you
can include
ASC and DESC keywords if desired.
Name The name of the control.
GenerateMember Whether to generate a field in the form class definition to reference
the
BindingSource.
Modifiers If adding a field, what access modifier to apply to the field.
93
Viewing Data
44063c03.qxd:WroxBeg 9/15/06 12:42 PM Page 93
You now have a fully configured BindingSource control that you can use to bind data to other controls.
Alternatively, you can configure a
BindingSource control as part of your configuration of other con-
trols; as mentioned earlier, the available wizards can do this for you.
Binding to List Controls
There are two Windows Forms list controls that support data binding: ListBox and ComboBox. In
Chapter 2 you used a
ListBox to perform simple binding. Both of these controls enable you to create a
list of items from a data source in two columns, one to display text and the other to display the values of
the text items. You can use the same column for both of these purposes.
With both
ListBox and ComboBox controls, there are three important properties relating to data
binding:
❑
DataSource: An object reference to a data source
❑
DisplayMember: The string name of a column to extract string data to display in the list con-
tained by the control
❑
ValueMember: The string name of a column to extract value data for list items
In both controls you can set these properties manually, in the Properties window or in code behind the
form, or you can use the Tasks display for the control. You used the latter in Chapter 2, where you bound
data to a
ListBox control. Figure 3-20 shows the ListBox Tasks window when Use Data Bound Items is
selected.
Figure 3-20: Data binding to a ListBox using the Tasks display
ListView Control Is More Challenging
You may wonder why the ListView control doesn’t support data binding. It is, after
all, a control that displays lists of items. The
ListView control is a more complicated
way of creating a list of items, and it may have a more complex display than simply a
list of strings; it has many options available. For that reason, wizard-based data bind-
ing to a
ListView control isn’t available to you. That isn’t to say you can’t display
database data in a control of this type. You can; you just have to take a different
approach and write custom code to manage data binding in a
ListView control. Many
people derive a control from this class and add custom data-binding logic to achieve
the behavior desired.
94
Chapter 3
44063c03.qxd:WroxBeg 9/15/06 12:42 PM Page 94
Note that a fourth option is available here: Selected Value. It enables you to bind the currently selected
value to data. This is typically used when the list needs to be updated according to data displayed else-
where on a form and is capable of binding to other data set instances that may be in use by other data-
bound controls. For now it’s best to concentrate on the other three properties.
To bind data to a
ListBox or ComboBox, you first select the data source. If you have already created a
BindingSource control, you can simply select a table exposed by that control. Alternatively, you can
select a table within a typed data set, and all the required plumbing will be installed for you: a data set
instance, a
BindingSource instance, and a table adapter instance. As with adding a BindingSource
control, code also is added to the form Load event handler to populate the typed data set. The ListBox
or ComboBox automatically binds to this data after it is loaded, although unless you set the display and
value members, you won’t actually see anything interesting. Instead, you will see a list of what is
obtained when the default
ToString() implementation is called for the items bound to the list: When
you bind to typed data set data, it will be a list of
System.Data.DataRowView objects. This would
result in the
ListBox containing several entries (one for each row of the bound data), all reading
System.Data.DataRowView. Each of these correctly represents a row in the underlying data table, but
it’s much friendlier to display data from the row so that you can tell which is which.
Binding to DataGridView Controls
When you bind to a DataGridView control you gain a great deal of functionality with little effort. The
functionality includes letting users edit and sort data, resize and reorder columns, and so on, simply by
applying the relevant properties.
As with the list controls examined in the last section, you can configure data binding to a
DataGridView
using properties, which you can set using any means you like, including the DataGridView Tasks win-
dow, shown in Figure 3-21.
Figure 3-21: The DataGridView Tasks window
Binding to a table data source using the Choose Data Source drop-down again results in the creation of a
data set instance, a
BindingSource instance, and a table adapter instance. This time, however, more
aspects of the data-bound control are configured for you. For instance, you don’t have to choose a col-
umn to use for item display text or value. Instead, all the columns defined in the table you bind to are
displayed. (There might be more than you want, but you can change this later.) Simply selecting a data
source is all you need to do to get a functioning interface with which users can interact. With the default
options as shown in Figure 3-21, users can even edit the content of the stored data set (although these
changes won’t be committed to the database without further modification to the application).
95
Viewing Data
44063c03.qxd:WroxBeg 9/15/06 12:42 PM Page 95
One of the most important capabilities of the DataGridView control is modifying the columns that are
displayed, including the type of column displayed. The collection of columns in a
DataGridView con-
trol is accessible by clicking the Edit Columns link in the DataGridView Tasks window to display the
Edit Columns window. Figure 3-22 shows an example.
Figure 3-22: The DataGridView column editor
The Edit Columns window is divided into two main areas. On the left is a list of the columns that are
currently included in the display, each of which is listed by type and name. In Figure 3-22, six text
columns are listed on the left, and the
StoryId column is selected (indicated by both the icon in the list
on the left and the highlighted property —
ColumnType — on the right). On the right is a list of properties
associated with the selected column. These properties vary depending on the type of column that is
selected, although many of them apply to all types of column. Not every column must bind to a data
source column, and similarly not all data source columns must be bound to a
DataGridView column.
The available column types are as follows:
❑
DataGridViewTextBoxColumn: A text box used mainly for displaying simple text properties,
although also appropriate for other types (especially numeric types).
❑
DataGridViewCheckBoxColumn: A checkbox used mainly for Boolean (bit) column values.
❑
DataGridViewComboBoxColumn: A drop-down list box allowing for selection from a list of
items. It is possible to bind the list of available items to another data source, making this a good
choice to use at the many end of a one-to-many relationship.
96
Chapter 3
44063c03.qxd:WroxBeg 9/15/06 12:42 PM Page 96
❑ DataGridViewButtonColumn: A button. This isn’t used often to bind to data, although it can be
used for Boolean data or to call a dialog box containing longer text data. More often it is used to
perform an operation on a row, such as confirming changes to the database.
❑
DataGridViewLinkColumn: Similar to DataGridViewButtonColumn but displays as a
LinkButton. More commonly used to view the value of long text fields but also to open
browser windows for URLs and so on.
❑
DataGridViewImageColumn: An image display for when the database contains image data in
binary format.
You’ll look at viewing text data and binding additional data to combo boxes in Try It Out sections com-
ing up shortly. But first take a look at the following table, which describes a few of the properties that
are available when editing the columns in a
DataGridView, in particular those that apply to all column
types.
Property Description
DefaultCellStyle
A collection of style-related properties that you can use to con-
trol how the cells in the column look. For example, you can set
the foreground and background colors of the cell.
HeaderText
The text displayed in the header for the column. There is no
need for this text to match the column name in the underlying
database; indeed, it is often more user friendly to use different
text here.
ContextMenuStrip
If context menus are in use, this property enables you to associ-
ate one with the column.
ReadOnly
Whether the column is editable.
Resizable
Whether users can resize the column.
SortMode
Automatic (sorted by underlying column name and type),
Programmatic (write your own code to sort based on this col-
umn), or
NotSortable (user can’t sort based on this column).
AutoSizeMode
How the column automatically sizes itself. There are several
options available here, so sizing can depend on the column val-
ues, the header text value, the values of only the cells that are
visible, and so on.
Frozen
Whether the column moves when the user scrolls the display. By
setting this to
true you can lock important columns, such as ID
values, so that they are always visible, regardless of scrollbar
position.
97
Viewing Data
44063c03.qxd:WroxBeg 9/15/06 12:42 PM Page 97
In the following Try It Out, you’ll display large text fields.
Try It Out Displaying Large Text Values
When you have a large amount of text contained in a column (for example, using the text data type or
varchar with a large character limit in SQL Server), displaying it in a single text box in a DataGridView
is often not the most useful thing that you can do. One popular option is to provide a link that, when
clicked, displays text in a pop-up dialog box. Here are the steps to accomplish that:
1. Copy the project C:\BegVC#Databases\Chapter03\Ex0302 - Manual Configuration to a
new project,
C:\BegVC#Databases\Chapter03\Ex0303 - Large Text, using the procedure
described in the previous Try It Out.
2. Open Form1 in design view.
3. Add a DataGridView control to Form1.
4. In the DataGridView Tasks window, select Dock In Parent Container.
5. In the DataGridView Tasks window, choose Data Source drop-down, select Other Data
Sources ➪ Project Data Sources ➪ FolktaleDBDataSet2, and then click Story.
6. Resize Form1 so that all the columns fit in the form without having to scroll horizontally.
7. In the DataGridView Tasks window, disable adding, editing, and deleting, and then click Edit
Columns.
8. Change the type of the Summary column by changing the ColumnType property to
DataGridViewLinkColumn.
9. Set the Text property of the Summary column to Show, and set UseColumnTextForLinkValue
to true. Click OK to close the Edit Columns dialog box.
10. Double-click on the DataGridView control to add an event handler to the
DataGridView.CellContentClick event.
11. Modify the code for the event handler as follows:
private void dataGridView1_CellContentClick(object sender,
DataGridViewCellEventArgs e)
{
if (dataGridView1.CurrentCell.OwningColumn.DataPropertyName == “Summary”)
{
string summaryText =
((dataGridView1.CurrentRow.DataBoundItem as DataRowView).Row
as FolkDBDataSet2.StoryRow).Summary;
MessageBox.Show(summaryText, “Story Summary”, MessageBoxButtons.OK);
}
}
12. Run the application and click Show for a row. The result should look like Figure 3-23.
13. Close the application and Visual C# Express.
98
Chapter 3
44063c03.qxd:WroxBeg 9/15/06 12:42 PM Page 98
Figure 3-23: Large text view
How It Works
In this example, you did two things. First, you bound a control to a table in one of the data sources you
created in a previous Try It Out. Second, you customized the data binding such that the
Summary field in
the
Story table (which is a long text field) can be displayed in a pop-up dialog box.
This customization required a small amount of column manipulation and a small amount of custom
code (although not so much as to preclude it from this chapter). It is worth looking at the code in a little
more detail because it illustrates some useful properties of
DataGridView.
The event hander is executed when the user clicks a cell. The code first checks for the column that the
user has clicked:
if (dataGridView1.CurrentCell.OwningColumn.DataPropertyName == “Summary”)
{
The DataGridView.CurrentCell is used to obtain the cell that was clicked. You could use the event
arguments object to achieve this, although the
DataGridViewCellEventArgs class exposes only
indices of the cell. To be sure you are retrieving the column correctly in this case, you should not use
indices — in case columns have been deleted, have changed order, and so on.
Once you have the current cell, check that it is referring to the
Summary column in the database (and
hence is the cell you’re after) using the
CurrentCell.OwningColumn.DataProperty property. When
you are sure that the user has clicked a Show link, you can concentrate on extracting the column value
and displaying it:
string summaryText =
((dataGridView1.CurrentRow.DataBoundItem as DataRowView).Row
as FolkDBDataSet2.StoryRow).Summary;
MessageBox.Show(summaryText, “Story Summary”, MessageBoxButtons.OK);
}
99
Viewing Data
44063c03.qxd:WroxBeg 9/15/06 12:42 PM Page 99
That first line of code, which gets summaryText, needs more explanation:
1. dataGridView1.CurrentRow is a property that exposes the current row in the DataGridView,
that is, the row containing the cell that was clicked. This property is a
DataGridViewRow
object.
2. The DataGridViewRow object obtained this way has a DataBoundItem property that exposes
the underlying data that was bound to the
DataGridView and is responsible for the data dis-
played in the current row. This property is of type
object because there is no restriction saying
that a
DataGridView must be bound to a database. When binding to a data set, however, the
property is actually a
DataRowView object, so you can cast it to this type.
3. The DataRowView class has a Row property that provides access to the actual row of data in the
data set. This property is of type
DataRow, and because you know what the actual row type is
from the typed data set definition you are using, you can cast this to the appropriate type. Here
the type is
FolkDBDataSet2.StoryRow.
4. From the FolkDBDataSet2.StoryRow typed data set row, you can get the value of the
Summary column by using the Summary property.
It is necessary for things to be this way to maintain the flexibility that in possible with the
DataGridView.
If things were made simpler here, you wouldn’t be able to bind a
DataGridView to a different data
source, for example. As with all things .NET, if this really becomes a problem you could simply create
your own class derived from
DataGridView and supply it with the necessary plumbing to make this
kind of thing easier to achieve — but that may be more trouble than it’s worth.
In any case, the result of all this is to obtain the value of the long text value required and to display it to
the user.
In the next Try It Out, you look at binding a foreign key column to a table of related data so that a more
readable text display is obtained.
Try It Out Binding Combo Boxes to Parent Data
In this exercise, you use a combo box to make it easy to edit a column (although that isn’t something
explored in this chapter). Here’s what to do:
1. Copy the project C:\BegVC#Databases\Chapter03\Ex0303 - Large Text to a new project,
C:\BegVC#Databases\Chapter03\Ex0304 - Parent Binding.
2. Open Form1 in design view.
3. In the DataGridView Tasks window for the dataGridView1 control, click Edit Columns.
4. Change the type of the ClassificationId column to DataGridViewComboBoxColumn.
5. Set the following properties of the ClassificationId column:
100
Chapter 3
44063c03.qxd:WroxBeg 9/15/06 12:42 PM Page 100
6. Click OK to exit the Edit Columns dialog box.
7. Run the application and confirm that human-readable classifications are displayed, as shown in
Figure 3-24.
Figure 3-24: Parent binding display
8. Close the application and Visual C# Express.
How It Works
With a simple tweak to the column definition that displays data from the ClassificationId column in
the
Story table, you are now displaying data from the Classification table. Admittedly, you could do
this using a view, or by other means, but the main advantage here is that you get a combo box. In this
example, the combo box is disabled, but that doesn’t mean that you couldn’t enable it for editing data. To
do so you would simply have to set the
DisplayStyle property for the column to a different value —
DropDownButton or ComboBox.
By adding a data source for the list of parent items that was taken from the same typed data set as the
data used for the main display, there was no need to create an additional instance of this data set.
Instead, Visual C# Express simply added a new binding source and a new table adapter to obtain data
from the
Classification table and put it into the existing folkDbDataSet2 member variable.
To make this work properly, two more properties were required:
❑
DisplayMember: Determines the column in the parent table to be displayed.
❑
ValueMember: The column in the parent table to link to the foreign key value to determine
which row in the parent table to display data from. This is typically the primary key of the par-
ent table, as in this example.
Property Value
HeaderText Classification
DisplayStyle Nothing
DataSource
Classification table in the FolkDBDataSet2 data set (select
Other Data Sources ➪ Project Data Sources ➪ FolkDBDataSet2
to get to this item)
DisplayMember Classification
ValueMember ClassificationId
101
Viewing Data
44063c03.qxd:WroxBeg 9/15/06 12:42 PM Page 101
For this exercise, those properties were simple to decide on, particularly because there was only one col-
umn other than the ID that was of any interest — the
Classification column. There might not be such
an obvious choice in other circumstances, such as when you want to display two columns from the
Source table. In such situations, you could include additional columns to provide extra information and
bind them to the same column in the foreign key table. This would work for editing, too — changing the
value of one column would automatically change the value in the other because they are linked by the
underlying foreign key value.
Alternatively, you could display related data in a second
DataGridView control. You see how to do that
later in the book.
The BindingNavigator Control
BindingNavigator is a control that derives from ToolStrip and enables you to navigate through your
data using a standardized interface. Essentially, it’s a
ToolStrip control with a bunch of useful buttons
and ready-to-use linking to data sources ready for you to use. Figure 3-25 shows the
BindingNavigator control.
Figure 3-25: The BindingNavigator control
The control enables you to move from row to row, one row at a time, jump straight to the first or last row
in a data set, and jump to a row by its position by typing in a number. There are also buttons for adding
(
+) and deleting (X) rows from a data set (you can disable or delete these buttons for read-only data).
All you have to do to get this control to navigate through a data source is set its
BindingSource prop-
erty to an instance of the
BindingSource class. That could, for example, be a BindingSource object
that you are using to bind to an existing control such as a
DataGridView. If this is the case — that the
BindingSource is bound to both a data-bound control and the BindingNavigator control — the
BindingNavigator control will allow users to navigate through records in the data-bound control.
If this sounds too good to be true, you’re probably someone who has spent a great deal of time in the
past writing code to achieve just that functionality. Well, now you don’t have to.
Try It Out Using the BindingNavigator Control
The best way to demonstrate the BindingNavigator control is via an example, so follow these steps:
1. Copy the project C:\BegVC#Databases\Chapter03\Ex0304 - Parent Binding to a new
project,
C:\BegVC#Databases\Chapter03\Ex0305 - BindingNavigator.
2. Open Form1 in design view.
3. Add a BindingNavigator control to the form.
102
Chapter 3
44063c03.qxd:WroxBeg 9/15/06 12:42 PM Page 102
4. In the BindingNavigator Tasks window, select the following:
❑ Embed In ToolStripContainer
❑ Dock Fill In Form
❑ Re-parent Controls
❑ Edit Items
5. In the Items Collection Editor dialog box, locate the BindingSource property and use the drop-
down selector to set it to
storyBindingSource.
6. Click OK to exit the Items Collection Editor dialog box.
7. Delete the buttons for adding and deleting rows, and also delete the button separator to the left
of these rows. To delete a button or separator, click it and press Delete.
8. Run the application and confirm that the navigation control works, and that it updates automat-
ically with the current position as you select rows in the data grid, as shown in Figure 3-26.
Figure 3-26: Using a BindingNavigator control
9. Close the application and Visual C# Express.
How It Works
Most of the work in this example has to do with positioning the BindingNavigator control on the
form so as not to obscure the data display. Traditionally, this has been quite a fiddly thing to do with
Windows Forms, although the automated tasks offered by Visual C# Express make things much easier.
By clicking on a few of these tasks in turn, the layout is created for you, and a fine layout it is.
The actual binding of the navigator to data was the work of moments — although this is admittedly in
part because a bound
DataGridView with a BindingSource was already in place. By selecting the
same
BindingSource to use with the BindingNavigator, all the plumbing was integrated, and every-
thing works as it should.
The only other thing you did in this example was to delete the buttons for adding and deleting rows,
and that was purely because you are focusing on data display in this chapter.
Adding a Navigable DataGridView in a Single Step
Okay, it’s time to make an admission. After working through the preceding section, it may come as a
(slightly annoying) shock that you can skip a lot of what you’ve seen already. It is possible to add a com-
bination of a
DataGridView and a BindingNavigator control in one step.
103
Viewing Data
44063c03.qxd:WroxBeg 9/15/06 12:42 PM Page 103
To do that you must have already configured a data source, although as you’ve seen that is something
that can easily done with wizards. Once you have a data source you can expand the data source hierar-
chy in the Data Sources window to the table level, at which point you will find that when you select a
table, you get a drop-down list of options. These options are a variety of techniques that you can use to
automatically add data to a form, including the three options you’ve already seen in this chapter and
one (
Details) that you’ll be looking at shortly. Figure 3-27 shows how to select the DataGridView
option.
Figure 3-27: Selecting DataGridView
The icon to the left of the table name shows the currently selected option for the table. In Figure 3-27 all
the tables have the
DataGridView option selected.
After you’ve selected
DataGridView, drag the table to a form and automatically generate both a
DataGridView control and a BindingNavigator control, along with the typed data set instance (such
as
folkDBDataSet2), BindingSource, and table adapter required.
That certainly saves some time, and it probably makes more sense to do things this way around rather
than adding a
BindingNavigator control later. However, you are still left with responsibility for both
laying out and formatting the controls, including the column modifications discussed earlier. That’s why
you did things this way — it gave you the opportunity to pick up more techniques along the way, with-
out being bogged down by the apparent complexity of function that this technique generates.
Binding to Detail Views
The preceding discussion leads you straight into detail views. A detail view in this context is the display
of a single row of data in a more straightforward way, without displaying other data in the table. Rather
than this data being displayed in a row of a
DataGridView control, a detail view typically consists of a
number of component controls, such as text boxes. This gives you much greater control over what is dis-
played and enables you to make things much more readable. You can, for example, include multiline
text boxes for displaying large text data rather than displaying it in a single
DataGridView cell, or in a
pop-up dialog as you did earlier in this chapter.
You can, if you want to, design a detail view from the bottom up — adding relevant controls to a form,
binding their values to data source columns, and adding a
BindingNavigator to navigate through row
data. However, it is much easier to let Visual C# Express do all this dull work for you. It’s much quicker,
104
Chapter 3
44063c03.qxd:WroxBeg 9/15/06 12:42 PM Page 104