Oracle XSQL combining sql oracle text xslt and java to publish dynamic web content phần 9 doc
Bạn đang xem bản rút gọn của tài liệu. Xem và tải ngay bản đầy đủ của tài liệu tại đây (699.57 KB, 60 trang )
There is only one method left to document—the writeError. This is a simple util-
ity method for writing out any errors. Since it is the last method, this code snippet also
contains the closing brace for the class:
void writeError(String mesg) {
System.out.println(“An error occurred”);
System.out.println(mesg);
}
}
Now you can put this code to use. In Chapter 7, you used a table called newsletter
to study the XML handling actions. In this example, you use the command line tool to
input some rows into the table. Here is the XSQL that will exist on the Web server side;
the filename is insert-to-newsletter-plain.xsql:
<?xml version=”1.0”?>
<page connection=”momnpup” xmlns:xsql=”urn:oracle-xsql”>
<xsql:insert-request table=”newsletter”/>
</page>
As discussed in Chapter 7, the xsql:insert-request action assumes that there
is an XML document in the canonical rowset schema contained in the HTTP request.
Our SimpleServicesApp will load a file and embed the XML in the request. Here is
what the file looks like, which we’ll call newsletter.xml:
<?xml version = ‘1.0’?>
<ROWSET>
<ROW num=”1”>
<NAME>test name2</NAME>
<EMAIL></EMAIL>
</ROW>
<ROW num=”2”>
<NAME>test name2</NAME>
<EMAIL></EMAIL>
</ROW>
</ROWSET>
You invoke the SimpleServicesApp as follows:
prompt> java SimpleServicesApp http://localhost/xsql/momnpup/insert-
request.xsql newsletter.xml
When the request arrives at the HTTP server, it looks like this:
POST /xsql/momnpup/insert-request.xsql HTTP/1.1
Content-Type: text/xml
User-Agent: Java1.3.1_02
Host: localhost
Accept: text/html, image/gif, image/jpeg, *; q=.2, */*; q=.2
Connection: keep-alive
460 Chapter 16
Content-length: 226
<?xml version = ‘1.0’?>
<ROWSET>
<ROW num=”1”>
<NAME>test name2</NAME>
<EMAIL></EMAIL>
</ROW>
<ROW num=”2”>
<NAME>test name2</NAME>
<EMAIL></EMAIL>
</ROW>
</ROWSET>
There are two differences between this and a standard post. First, the Content
-Type is set to text/xml. The second difference is more obvious. Instead of having a
list of name-value pairs in the body of the request, you have the XML document con-
tained in newsletter.xml.
XSQL processes the data into the database and then returns the result. In this case,
the result looks like this:
Opening http://localhost/xsql/momnpup/insert-request.xsql
<?xml version = ‘1.0’?>
<page>
<xsql-status action=”xsql:insert-request” rows=”2”/>
</page>
The result isn’t transformed, so you get a plain xsql-status message. Likewise,
you had to have your input in the plain-vanilla canonical format as well. If you are
forced to deal with the XML like this, your Web services wouldn’t be very flexible. As
with the application development discussed in Chapter 14, the secret lies with XSLT.
The remaining sections focus on how you can use XSLT to create truly independent
Web services.
XML-to-XML Transformations
In most examples given in earlier chapters, the target of the transformation is HTML.
The HTTP client makes a request and the XSQL application transforms XML to HTML
by using XSLT. In this section, you’ll see how to transform into XML, which is required
by most Web services consumers. Your stylesheet starts with XML in the canonical Ora-
cle format and then transforms that into another XML document. Consequently, the
Web services consumer takes the outputted XML document. This discussion looks at
the specifics on how to perform XML transformations.
The XSLT stylesheet is referenced in the XSQL page exactly as it is in other cases. The
key syntax difference is to use the xsl:output element so that XML is sent to the
consumer.
Web Services with XSQL 461
<xsl:output method=”xml”/>
This should be an immediate child of the root element of your stylesheet. Depending
on the requirements of your Web services consumer, you may also need to use some of
the other attributes of the xsl:output element. The most commonly used are
encoding, doctype-public, and doctype-system. All of these are covered in
Chapter 14, so here we’ll just look at them in terms of how they apply to Web services.
The encoding attribute controls what character encoding the XSLT processor will
use when it sends the output to the Web services consumer. If your Web services con-
sumer expects a particular character encoding, then you’ll need to set it in the xsl:out-
put element. Otherwise, you may encounter some very difficult-to-solve errors.
The doctype-public and doctype-system attributes concern DTDs. You
haven’t seen DTDs actually used yet because Web browsers don’t need them. But in
Web services, you will usually have some kind of schema definition. The consumer
may just assume that it always receives valid XML, but more likely it wants to have the
schema referenced in the document. The doctype-public and doctype-system
attributes take care of this when you use the DTD schema language. If you need to
have a DTD in your document that looks like the following,
<!DOCTYPE mydef PUBLIC “-//SOME_DEF//DTD MYDEF 1.1//EN”
“npup/DTD/my_def.xml”>
you can create it by using the following xsl:output element:
<xsl:output method=”xml”
doctype-public=”-//SOME_DEF//DTD MYDEF 1.1//EN”
doctype-system=” />If you use an XML-based schema language, such as W3C’s XML Schema, you can set
the schema as you would any other XML data. In the case of XML Schema, you would
include only the following as static text in your stylesheet:
<root
xmlns=”http://momnpup/ns/my_namespace”
xmlns:xsi=” />xsi:schemaLocation=” file:my_def.xsd”>
From here, your stylesheet transformations will be just like the transformations that
you’ve been doing all along. Instead of conforming to HTML, you conform to the rules
of the Web consumer’s expected schema. This usually means that you make a lot of use
of the xsl:element and xsl:attribute elements.You’ll start with the simple
XSQL tricks; then you’ll look at the XSLT techniques. For this example, imagine that
the Web services consumer expects a document like the following when it requests a
list of products:
<PRODUCTS>
<PRODUCT>
462 Chapter 16
<PRODUCT_ID>3</PRODUCT_ID>
<PRODUCT_NAME>Step Ladder</PRODUCT_NAME>
<PRODUCT_PRICE>30.00</PRODUCT_PRICE>
</PRODUCT>
<PRODUCT>
<PRODUCT_ID>4</PRODUCT_ID>
<PRODUCT_NAME>Coffee Mug</PRODUCT_NAME>
<PRODUCT_PRICE>20.00</PRODUCT_PRICE>
</PRODUCT>
</PRODUCTS>
Here’s the query that gets the data:
SELECT id,
name,
price
FROM product
Unfortunately, this doesn’t solve the problem, because the consumer expects prod-
uct_id, product_name, and product_price elements. This can be easily
addressed just by aliasing the column names in SQL so that you get the following
XSQL page:
<xsql:query connection=”momnpup”
xmlns:xsql=”urn:oracle-xsql”>
SELECT id AS product_id,
name AS product_name,
price AS product_price
FROM product
</xsql:query>
This gets you closer—you end up with the following output:
<ROWSET>
- <ROW num=”1”>
<PRODUCT_ID>3</PRODUCT_ID>
<PRODUCT_NAME>Step Ladder</PRODUCT_NAME>
<PRODUCT_PRICE>30.00</PRODUCT_PRICE>
</ROW>
- <ROW num=”2”>
<PRODUCT_ID>4</PRODUCT_ID>
<PRODUCT_NAME>Coffee Mug </PRODUCT_NAME>
<PRODUCT_PRICE>20.00</PRODUCT_PRICE>
</ROW>
Now you can use the rowset-element and row-element attributes in your
XSQL to rename the rowset and row elements:
<xsql:query connection=”momnpup”
xmlns:xsql=”urn:oracle-xsql”
Web Services with XSQL 463
rowset-element=”PRODUCTS”
row-element=”PRODUCT”>
SELECT id AS product_id,
name AS product_name,
price AS product_price
FROM product
</xsql:query>
This gives the consumer the following output, which is almost perfect:
<PRODUCTS>
- <PRODUCT num=”1”>
<PRODUCT_ID>3</PRODUCT_ID>
<PRODUCT_NAME>Step Ladder</PRODUCT_NAME>
<PRODUCT_PRICE>30.00</PRODUCT_PRICE>
</PRODUCT>
- <PRODUCT num=”2”>
<PRODUCT_ID>4</PRODUCT_ID>
<PRODUCT_NAME>Coffee Mug</PRODUCT_NAME>
<PRODUCT_PRICE>20.00</PRODUCT_PRICE>
</PRODUCT>
There is only one problem with our output. Each product has an attribute num, but
the schema requires that it be count. This can be fixed by setting the id-attribute
in the xsql:query as follows:
<xsql:query connection=”momnpup”
xmlns:xsql=”urn:oracle-xsql”
rowset-element=”PRODUCTS”
row-element=”PRODUCT”
id-attribute=”count”>
SELECT id AS product_id,
name AS product_name,
price AS product_price
FROM product
</xsql:query>
For this simple example, the output is valid according to the schema, and you
didn’t need XSLT at all. The next example requires XSLT. You need to output data that
looks like this:
<CATEGORY_LIST>
<CATEGORY id=”7”>
<NAME>Bathroom</NAME>
<DESCRIPTION>Keep clean and healthy with these products</DESCRIPTION>
<PRODUCT id=”10”>
<NAME>Band-aids</NAME>
<PRICE>5.31</PRICE>
</PRODUCT>
464 Chapter 16
<PRODUCT id=”3”>
<NAME>Tweezers</NAME>
<PRICE>3.99</PRICE>
</PRODUCT>
</CATEGORY>
<CATEGORY id=”8”>
<NAME>Outdoor Clothing Men</NAME>
<DESCRIPTION>Functional wear for the outdoorsmen</DESCRIPTION>
<PRODUCT id=”11”>
<NAME>Jeans</NAME>
<PRICE>25.99</PRICE>
</PRODUCT>
</CATEGORY>
This query is immediately out of scope of the XSQL tricks, because the id is the
product id, not the row number. Also, it has a tree format that isn’t reproducible with
XSQL. You can get all of the data with a single query by using cursors, but XSQL will
put a “_ROW” suffix at the end of the cursor field. Here’s the XSQL page that will get
the data:
<?xml version=”1.0” encoding=”UTF-8”?>
<xsql:query connection=”momnpup”
xmlns:xsql=”urn:oracle-xsql”
rowset-element=”PRODUCT_CATEGORIES”
row-element=”CATEGORY”>
SELECT pc.id, pc.name,pc.description,
CURSOR(SELECT p.id,p.name,p.price
FROM product p,prod_cat_joiner pcj
WHERE p.id=pcj.product_id
AND
pc.id=pcj.product_cat_id) AS products
FROM product_category pc
ORDER BY pc.name
</xsql:query>
The output of this XSQL is as follows:
<PRODUCT_CATEGORIES>
<CATEGORY num=”1”>
<ID>7</ID>
<NAME>Bathroom</NAME>
<DESCRIPTION>Keep clean and healthy with these products</DESCRIPTION>
<PRODUCTS>
<PRODUCTS_ROW num=”1”>
<ID>10</ID>
<NAME>Band-aids</NAME>
Web Services with XSQL 465
<PRICE>5.31</PRICE>
</PRODUCTS_ROW>
</PRODUCTS>
</CATEGORY>
</PRODUCT_CATEGORIES>
The XSLT faces a couple of challenges. You have to rename several of the element
names, and you have to add the id attribute for the CATEGORY and PRODUCT ele-
ments. It would be possible to create a highly verbose stylesheet that has a template for
every single element. For this example, the stylesheet is much more concise. It assumes
that all the elements are in the correct order, and it makes use of the xsl:element,
xsl:attribute, and xsl:copy-of to translate the structure. The header informa-
tion and the top-level template is as follows:
<?xml version = ‘1.0’?>
<xsl:stylesheet xmlns:xsl=” />version=”1.0”>
<xsl:output method=”xml”/>
<xsl:template match=”/PRODUCT_CATEGORIES”>
<CATEGORY_LIST>
<xsl:apply-templates select=”CATEGORY”/>
</CATEGORY_LIST>
</xsl:template>
The top-level template makes CATEGORY_LIST the root and then defers to the
CATEGORY template to do the rest of the work. Of course, you could change the
rowset-element to CATEGORY_LIST in the XSQL page. However, the preceding
example illustrates an important point—if the element name is essentially static, you
can always just name it in the template like this. If you don’t mind verbosity, you can
just structure the entire document with static text like this. But for this example, you
can use a cleaner approach, as follows:
<xsl:template match=”CATEGORY”>
<xsl:element name=”CATEGORY”>
<xsl:attribute name=”id”><xsl:value-of select=”ID”/></xsl:attribute>
<xsl:copy-of select=”*[name()!=’ID’ and name()!=’PRODUCTS’]”/>
<xsl:apply-templates select=”PRODUCTS/PRODUCTS_ROW”/>
</xsl:element>
</xsl:template>
The preceding template overcomes two challenges. First, it sets the id element as an
attribute of the category element. Incidentally, you can use the id-attribute and
id-attribute-column attributes of xsql:query to accomplish the same thing.
You would set id-attribute to “id” and set id-attribute-column to “ID”.
Regardless, sooner or later you will probably have to use the preceding template. If
you need to set more than one attribute, you’ll have to use this template.
Second, it copies all the values of the children into the output, except for PRODUCTS
and ID. You can use the xsl:copy-of element if the element name in the XSQL
466 Chapter 16
datagram is the same as the one desired and if you want to keep all the attributes (if
there are any) and child nodes. In our case, the name in the datagram is right. This
name is more than coincidental. You can control the names of elements in the result set
by aliasing them to what you want. You can also control whether the element has child
nodes. When you work at this level of a datagram, you will not have child nodes unless
you reference a cursor, collection, or object. The PRODUCTS element does represent a
cursor, so it is handled in the following template:
<xsl:template match=”PRODUCTS/PRODUCTS_ROW”>
<xsl:element name=”PRODUCT”>
<xsl:attribute name=”id”><xsl:value-of select=”ID”/></xsl:attribute>
<xsl:copy-of select=”*[name()!=’ID’]”/>
</xsl:element>
</xsl:template>
</xsl:stylesheet>
This template handles the problem with the PRODUCTS and PRODUCTS_ROW ele-
ments. You don’t need them, though you do want their children. This template creates
a new element for each of the children and effectively skips two levels in the XSQL
datagram. As before, an attribute is set by using a child value; the other elements are
then copied. The id element isn’t needed, so it is ignored in the xsl:copy-of ele-
ment. This template is the last in the stylesheet, so the closing tag is included in the
code snippet.
The two examples show a few ways how you can easily convert the XML datagram
to the correct output. You can use the XSQL tricks described here to get the output close
to if not entirely correct, and then you can greatly simplify your XSLT stylesheets by
making use of xsl:element, xsl:attribute, and xsl:copy-of.
XML Handling Actions
The previous discussion showed how to create the XML that is sent to a Web services
consumer. Just as important as that is dealing with the XML that is sent to XSQL as part
of a Web services consumer’s request. XSQL has three actions that handle the posted
XML: insert-request, update-request, and delete-request. These actions
are covered in detail in Chapters 5 and 7.
For each of these actions, you can specify a single stylesheet used to interpret the
posted XML. The XML must be transformed into the canonical row format as dis-
cussed before. All of the XML handling actions use the same posted XML, but each can
transform it with different stylesheets. This means that a single posted XML document
can be used by multiple XML handling actions. Each action can use only the data that
it needs out of the posted document.
The real work is transforming the data with XSLT as described in this chapter. The
same XSLT techniques can apply but aren’t necessarily as available. When you push
the data into the database, you can’t count on aliasing. The element names must be the
same as they are in the table. Thus, it is more likely that you will need a verbose
stylesheet that specifically changes each element’s name and that the xsl:copy-of
technique shown in this chapter won’t be as useful.
Web Services with XSQL 467
Moving On
In this chapter you have learned about how Web services can work with XSQL. This
and the previous chapter showed you that XSQL can be very useful beyond traditional
Web pages. From the next chapter on, you’ll start learning how to extend the XSQL
framework with Java. The next chapter covers how to use XSQL from inside your
applications. In Chapter 18, you’ll see how to write your own custom action handlers
and serializers.
468 Chapter 16
469
So far, you’ve used XSQL as a framework. You encapsulate SQL and PL/SQL in an
XSQL file, reference an XSLT stylesheet, and produce a result. In the next chapter,
you’ll see how to extend the framework by writing your own custom action handlers.
This chapter looks at a completely different approach—how to use XSQL inside your
programs.
Oracle provides a Java API for XSQL. You can instantiate an XSQLPageRequest
object and then run it against the database. It will return the result as XML. At that
point, you can transform it by using a stylesheet. This gives you some advantages. For
example, you can keep the SQL outside of your programming logic. If you need to
change the SQL, you can do so in an external file instead of having to recompile code.
Now you have an XML document that can be used by other parts of your application.
Instead of having to process a result set and create your own XML document, this is all
done automatically. Also, you can transform the document programmatically by using
a stylesheet.
This chapter looks at how to use XSQL programmatically, starting with a
sample program. You will get an idea of what you can do with the APIs. Then the
XSQLPageRequest class and XSLTPageProcessor class are studied in detail. The
last two discussions look at the DOM and SAX APIs provided by Oracle, which give
you two ways of processing XML documents.
XSQL Beyond Web Browsing
CHAPTER
17
A Sample Program
The sample program presented here runs from the command line. It loads an XSQL
file, processes it against the database, outputs the XSQL datagram to the console, and
transforms the datagram with a supplied stylesheet and outputs that as well. As with
the example code for stylesheets given in the previous chapter, this sample program is
very utilitarian. It shows you how to use some of the major functionality entry points.
It should also serve as a good foundation for the other discussions in this chapter.
The usage of the program is as follows:
Usage: CommandLineExample XSQLPageURL [StylesheetURL] [Param=Val]
The program itself consists of two methods: the main method and a parameter set-
ting method. The start of the class and the parameter setting method is as follows:
import oracle.xml.xsql.XSQLRequest;
import oracle.xml.parser.v2.XMLPrintDriver;
import oracle.xml.parser.v2.XMLDocument;
import oracle.xml.parser.v2.XMLDocumentFragment;
import oracle.xml.xsql.XSQLStylesheetProcessor;
import oracle.xml.parser.v2.XSLProcessor;
import oracle.xml.parser.v2.XSLStylesheet;
import oracle.xml.parser.v2.DOMParser;
import oracle.xml.parser.v2.XMLNode;
import oracle.xml.jaxp.JXDocumentBuilderFactory;
import org.w3c.dom.traversal.NodeIterator;
import org.w3c.dom.traversal.NodeFilter;
import org.w3c.dom.Document;
import java.util.Hashtable;
import java.io.PrintWriter;
import java.net.URL;
import java.net.MalformedURLException;
import javax.xml.parsers.DocumentBuilderFactory;
import javax.xml.parsers.DocumentBuilder;
import org.apache.xerces.jaxp.DocumentBuilderFactoryImpl;
public class CommandLineExample {
static URL stylesheetURL=null;
470 Chapter 17
static Hashtable params=new Hashtable();
static String xsqlPageStr=””;
private static boolean setParams(String[] args) {
if (args.length==0) {
System.out.println(“Usage: CommandLineExample XSQLPageURL
[StylesheetURL] [Param=Val] ”);
return false;
}
xsqlPageStr=args[0];
int paramPos=1;
if (args.length>1) {
String secondParam=args[1];
if (args[1].indexOf(“=”)==-1) {
try {
stylesheetURL=new URL(secondParam);
} catch (MalformedURLException e) {
System.out.println(“Stylesheet argument is malformed”);
}
paramPos++;
}
while (paramPos<args.length) {
String paramStr=args[paramPos];
int eqPos=paramStr.indexOf(“=”);
String key=paramStr.substring(0,eqPos);
String val=paramStr.substring(eqPos+1,paramStr.length());
params.put(key,val);
}
return true;
}
This method gathers the parameters of the command line and readies them for pro-
cessing by the main method. The real action is in the main method itself. Here, the
XSQL page is read in and instantiated as an XMLDocument. The document is then used
to create an XSQLPageRequest object, which is then processed. An XML document is
returned and printed. Then a stylesheet, if one has been provided, is applied, and the
result of the transformation is printed to the output.
public static void main( String[] args) throws Exception {
// Set the parameters
if (!setParams(args)) {
return;
XSQL Beyond Web Browsing 471
}
DOMParser parser=new DOMParser();
parser.parse(new URL(xsqlPageStr));
XMLDocument xDoc=parser.getDocument();
This code parses the document using the JAXP method. You get a document builder
factory and then parse the results of the URL. As with the command line utility, you
have to be careful when you use an HTTP URL. If the XSQL page at that URL refer-
ences a stylesheet and the XSQL servlet is configured, you will get the transformed
result. This will probably be HTML, which won’t parse as an XML document at all.
Even if it happens to be XML, it won’t be what you want. If you use a file:// URL,
you will avoid this problem entirely.
The next few lines of code instantiate an XSQLRequest object, execute it, and prints
the results to the console. The XML document that you instantiated in the previous line
is passed to the XSQLRequest object along with the original URL. The URL is passed
so that any URLs contained in the document can be properly resolved. You can also
instantiate the XSQLRequest object based solely on the URL. The example does it this
way so that you can see how to create an XML document from a file. If you want, you
could modify the XSQL source itself before continuing with the XSQLRequest instan-
tiation.
XSQLRequest req=new XSQLRequest(xDoc,new URL(xsqlPageStr));
XMLDocument xsqlDoc=(XMLDocument)req.processToXML(params);
System.out.println(“++++++ XML Output +++++++++”);
XMLPrintDriver pDriver=new XMLPrintDriver(System.out);
pDriver.printDocument(xsqlDoc);
At this point in the program, the resulting XML datagram has been printed to the
screen. There is a lot more you can do with it if you like. You can take the xsqlDoc
object and work with it through the Oracle XML DOM APIs. You can add, remove, and
modify nodes, and you can even merge nodes with other documents. You’ll see some
of this functionality in the next chapter.
The last step for the code is to apply a stylesheet if one has been specified. This func-
tionality is very simple and is more or less completely demonstrated in the following
example. This code just executes the transformation, while the real code lies in the
stylesheet itself. Here, the XSLProcessor is instantiated. Then a stylesheet object is
created and is passed to the processXSL method along with the XSQL datagram and
the output stream. In this case, the output stream is the console. Of course, you could
also pipe the results over the network or in to a string object.
if (stylesheetURL!=null) {
System.out.println(“+++ XSLT Transformation +++”);
XSLProcessor xslProc=new XSLProcessor();
472 Chapter 17
xslProc.setBaseURL(stylesheetURL);
XSLStylesheet
stylesheet=xslProc.newXSLStylesheet(stylesheetURL);
xslProc.processXSL(stylesheet,xsqlDoc,System.out);
}
}
}
This example shows you how the pieces can fit together in a simple application. The
next section delves deeper into the XSQL classes used programmatically. You will use
these same classes when, in Chapters 18 and 19, you develop custom action handlers
and serializers.
Guide to the XSQL Classes
In the previous code, you used the XSQLRequest class to create the request and exe-
cute the page. This section acts as a guide for the various XSQL pages. You’ll be mak-
ing more use of these classes in the next chapter as you write action handlers. This
section acts as a guide to the XSQLRequest class and the other classes in the
oracle.xml.xsql package. You’ll find the complete javadoc for all of the classes in the
XSQL distribution.
When using XSQL programmatically, you’ll have to use the XSQLResult class. In
the previous example, you constructed it with an XMLDocument. XMLDocument
objects are in-memory XML documents. You’ll learn more about them later in this sec-
tion. For now, it’s important to note that you can use XMLDocument to create XML doc-
uments in your applications. This means that you can programmatically create XSQL
pages—you don’t have to define the XSQL in a file. You’ll see an example of this later
in this chapter.
You don’t have to create an XMLDocument object to use the XSQLResult object.
You can also construct an object from a URL. Although you won’t have any program-
matic control of the XSQL, you won’t have to hassle with parsing the file first. Here’s
how you would use the XSQLResult class by just passing it a URL:
XSQLRequest req=new XSQLRequest(new URL(xsqlPageStr));
XMLDocument xsqlDoc=(XMLDocument)req.processToXML();
In the preceding example, you processed the XSQL request and got an XMLDocu-
ment object in return. This is convenient if you wish to do further processing on the
result. You can use the DOM APIs that you’ll learn about later. But again, you have
flexibility in how to deal with the results. If you don’t need to process the XML,
you can have the XSQLRequest class write out the results directly to a stream. The
following statement writes the results directly to the console when you execute from
the command line:
req.process(System.out,System.err);
XSQL Beyond Web Browsing 473
Almost every XSQL page that you’ve developed so far in the book has parameters.
You need a way to pass parameters to the XSQL page that you wish to process. There
are two ways to do this. First, both the processToXml() and process() methods
allow you to pass a dictionary object. The keys and values inside the dictionary object
are used as the parameter and parameter values inside the XSQL page. You used this
method, with the dictionary subclass Hashtable, in the earlier example. In its sim-
plest form, it looks like this:
Hashtable table=new Hashtable();
table.put(“param1”,”value1”);
table.put(“param2”,”value2”);
Then, you pass the parameters to either the process() or the processToXML()
method:
req.process(table,System.out,System.err);
XMLDocument xDoc=req.processToXML(table);
The second way to pass parameters is as part of an XSQLPageRequest object. Each
of the constructors described here can optionally take an XSQLPageRequest object as
a parameter. The XSQLPageRequest has a variety of methods that are especially help-
ful when you write action handlers. In the next section, you’ll get a sampling of how to
use the XSQLPageRequest when you see how to use XSQL from servlets. If you
wish to use the XSQLPageRequest in a nonservlet application, you’ll need to imple-
ment the XSQLPageRequest interface. The easiest way to do that is by subclassing
XSQLPageRequestImpl.
Using XSQL from Within Servlets
When you use XSQL in the simple manner, the XSQL servlet processes the URL and
writes the output. But what if you want to use the capabilities of XSQL inside your own
servlet? Obviously, you could do that with the method described earlier. But then you
have to gather all of the parameters from the servlet and create a Hashtable yourself,
as well as handle the XSLT transformation. There is an easier way. You create an
XSQLServletRequest object, which implements the XSQLPageRequest interface,
and pass that to the XSQLRequest constructor. Here is an example:
public class XSQLProgServlet extends HttpServlet {
public void service(HttpServletRequest request,
HttpServletResponse response)
throws IOException, ServletException
{
474 Chapter 17
PrintWriter out = response.getWriter();
ServletContext context=getServletConfig().getServletContext();
String xsqlPageStr=”http://localhost/xsql/momnpup/emp-
servlet.xsql.txt”;
XSQLServletPageRequest pageReq=new XSQLServletPageRequest(request,
response,
context);
response.setContentType(“text/html”);
XSQLRequest req=new XSQLRequest(xsqlPageStr,pageReq);
XMLDocument xsqlDoc=(XMLDocument)req.processToXML();
//Do stuff with the results
XMLPrintDriver pDriver=new XMLPrintDriver(out);
pDriver.printDocument(xsqlDoc);
}
}
As with the command line example, you can perform a transformation on the results.
Just use the XSLStylesheet and XSLProcessor classes. You can also manipulate the
data in any other manner that you like.
XML Parsing: DOM versus SAX
There are two primary models of XML parsing available today: DOM and SAX. The
DOM model is based on a W3C standard and is object-based, while SAX is event-
based. You used DOM in the previous examples. An XML document was created as a
tree of objects. You can traverse and manipulate that tree of objects inside your code.
When you finish manipulating the objects, you can save them, if you’d like, or perhaps
write the result out to the network.
SAX works differently. Although DOM models consume a lot of memory, the SAX
model is very lightweight. You register handlers that respond to events. The events are
raised while the document is being processed. For instance, if you register a handler for
elements with the name foo, the SAX parser will call your handler each time an ele-
ment named foo is encountered. It is then up to you to decide what should be done.
XSQL doesn’t provide a direct interface to SAX. However, you can use the SAX APIs
in conjunction with streams. Just use XSQLResult.process() to write to a stream;
then have your SAX parser consume that stream.
XSQL Beyond Web Browsing 475
Oracle DOM API
Oracle provides an implementation of DOM. It is completely compatible with W3C
DOM. It offers some advantages beyond DOM, including XPath integration and a
simple way to import nodes from one document to another. If you have other code that
uses DOM, any coding you do in Oracle DOM should be compatible. For instance, if a
method expects a DOM object such as Node, you can always pass it an instance of Ora-
cle’s implementation, XMLNode. Thus, you can take advantage of the Oracle-provided
extensions to DOM while your system still remains fully compatible with DOM. This
section looks first at the DOM model and then how Oracle extends it.
DOM is a set of Java interfaces that extend one another. Since Java is a single inher-
itance language, interfaces are often used to specify a standard’s implementation.
Developers have a lot of freedom in how they design their code for implementing the
DOM standard. Figure 17.1 describes the layout of the core classes of DOM.
The Oracle DOM API is a set of classes. There is a class that implements each of the
interfaces in DOM. For instance, XMLDocument implements the document interface.
Since the document interface extends the node interface, XMLDocument also imple-
ments the node interface. All the Oracle classes are prefixed with XML and live in the
oracle.xml.parser.v2 package.
When using the Oracle DOM API, you can cast between the DOM type and its Ora-
cle equivalent. The reverse is also true. In addition, you can also cast to any of the
superclasses of the DOM equivalent, as illustrated by the following code:
Document w3cDoc=req.processToXML();
XMLDocument oraDoc=(XMLDocument)w3cDoc;
Document w3cDoc2=oraDoc;
Element w3cElem=w3cDoc.getDocumentElement();
XMLElement oraElem=(XMLElement)w3cElem;
XMLNode n=(XMLNode)w3cDoc.getDocumentElement();
One of the most useful aspects of the Oracle DOM is the integration with XPath.
The XMLNode class has two sets of methods that will take XPath expressions as argu-
ments—selectNodes() and valueOf(). The selectNodes methods return lists
of nodes, while valueOf retrieves text values. This greatly simplifies the process of
navigating a DOM tree.
There are a variety of other methods in the Oracle DOM API that are worth explor-
ing. For instance, you can also apply a stylesheet to just a particular node by using
the transformNode() method. This has a variety of uses. Also, you can import a
node from one document in to another with just one method call—importNode() in
XMLDocument.
476 Chapter 17
Figure 17.1 DOM interfaces.
Moving On
You learned in this chapter how to embed XSQL into your own applications. Even if
you never actually embed XSQL in this manner, you probably have gained a lot of
insight in how XSQL works. In general, you can find XSQL very useful in conjunction
with your application code. You can configure the SQL and the presentation very eas-
ily, because the XSQL pages and the XSLT stylesheets are outside of your code. In the
following chapters, you’ll see how to extend XSQL with action handlers and serializ-
ers. You can use these in conjunction with XSQL that is invoked programmatically.
org.w3c.dom.Node
DOM Interface
Hierarchy
Oracle DOM
Implementation
oracle.xml.parser.v2.XMLNode
IMPLEMENTS
org.w3c.dom.Element oracle.xml.parser.v2.XMLElement
IMPLEMENTS
org.w3c.dom.Document oracle.xml.parser.v2.XMLDocument
IMPLEMENTS
org.w3c.dom.Text oracle.xml.parser.v2.XMLText
IMPLEMENTS
org.w3c.dom.CDataSectino oracle.xml.parser.v2.XMLCData
IMPLEMENTS
XSQL Beyond Web Browsing 477
479
The time has finally come! You’ve been using the built-in action handlers throughout
the book; now it is time to make your own. As you’ve learned, custom action handlers
are a valuable piece of the XSQL puzzle. You use them to extend the base functionality
of XSQL in almost any direction that you wish.
The chapter starts with a simple action handler. You start with action handlers and
get your environment set up. Next, the APIs that you use for developing action han-
dlers are examined. You’ll learn what functionality is available and how to use it. Then
you’ll see how your action handlers can interact with the database. Examples are given
of how to use built-in actions such as xsql:query. The chapter ends by looking at
parameters and input. You’ll see how to receive and set parameters, handle input from
the XSQL page, and pass objects to other action handlers.
Getting Started
Action handlers are simple to write once you understand the subtleties of their posi-
tion in the XSQL architecture. In this section, you get your feet wet. The first step is to
get a simple action handler working. Then you’ll see how to add XML to the datagram.
These two discussions should give you a good, basic understanding of how action han-
dlers work. The next discussion compares action handler development to servlet
Custom Action Handlers
CHAPTER
18
development. They are both similar in a lot of ways yet have some important differ-
ences. Hopefully this discussion will solidify your understanding of the basic art and
science of action handler development. The last section discusses how to debug action
handlers.
Hello, Action Handler!
On any journey, there is a first step. The first step here is to create a working action han-
dler. The goal of the action handler is simple: It is to add an empty element named
hello to the datagram. As you read this discussion, you’ll see how to write the code,
deploy the class, and invoke the action handler.
The best place to start is on familiar ground. The following is the XSQL page that
will invoke the action handler. When the XSQL page processor sees the xsql:action
action, it loads the class specified by the handler attribute.
<?xml version=”1.0” encoding=”UTF-8”?>
<page xmlns:xsql=”urn:oracle-xsql”>
<xsql:action handler=”HelloActionHandler”/>
</page>
The name must be the fully qualified class name. For these simple examples, the
classes aren’t in a package. If your classes are in packages, you will need to specify the
fully qualified name as follows:
<?xml version=”1.0” encoding=”UTF-8”?>
<page xmlns:xsql=”urn:oracle-xsql”>
<xsql:action handler=”org.ibiblio.mdthomas.HelloActionHandler”/>
</page>
In this particular example, there are no parameters, and the xsql:action element
has no children. This particular action handler doesn’t need them. If there were any
present, they would be ignored. But the xsql:action element can have parameters
and values. You’ll see later in this chapter how to manipulate them from inside the
action handler.
Before moving on to the action handler code itself, it’s worth noting that the
xsql:action element doesn’t have to be a child element. It can be a top-level element
just as any of the other actions can, as shown in the following code. You may have also
noticed that there is no database connection specified. For the simple examples given
in this chapter, you won’t need a database connection. The “Database Interaction” sec-
tion talks about connecting to the database from an action handler.
<?xml version=”1.0” encoding=”UTF-8”?>
<xsql:action handler=”org.ibiblio.mdthomas.HelloActionHandler”
xmlns:xsql=”urn:oracle-xsql”/>
480 Chapter 18
Now it’s time to write some Java code. The following is the HelloActionHandler
class. A Java class is an action handler if it implements the XSQLActionHandler
interface.
import org.w3c.dom.Node;
import oracle.xml.xsql.XSQLActionHandlerImpl;
public class HelloActionHandler extends XSQLActionHandlerImpl {
public void handleAction(Node result) {
addResultElement(result,”hello”,”hello!!”);
}
}
This code subclasses the XSQLActionHandlerImpl class, which implements the
interface. This is the typical way to write action handlers, because the XSQLAction-
HandlerImpl class gives you a lot of great methods to use. You use one of them in
this example—the addResultElement. It takes care of all the details of creating an
element and appending it to the result node.
You’ll learn all the specifics about the XSQLActionHandler interface and
XSQLActionHandlerImpl class in a few pages. The next step is to compile the class
and deploy it. You compile the class just as you would any Java class. In this case, you
need to make sure that all the Oracle jars are on your class path. These should be the
same jars that your servlet engine uses; otherwise, you risk compiling code that won’t
run. The easiest way to set this up is to add to the classpath all the jars that are speci-
fied in the installation instructions.
With the classpath configured, you should be able to compile the action handler.
Now you need to deploy the class. The class needs to live on the classpath of your
servlet engine. The classpath can vary from servlet engine to servlet engine. If you
want to package the classes in a jar or have the action handler classes in their own
directory, you can alter the classpath for the servlet engine to point to the new jars and
directories. If you used the default Apache/JServ install that comes with the Oracle
database, the easiest thing to do is to put the class files in the oracle/classes direc-
tory. It should already be on the classpath, so you don’t have to reconfigure anything.
If you do wish to add to the classpath, you can do that on the default install by modi-
fying the jserv.properties file. You can find it by going to the home directory for Oracle
and then proceeding to apache/jserv/conf.
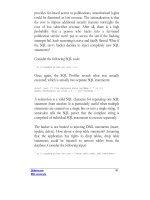
With the class compiled, you should be ready to go. Your final step is to access the
code. First, you’ll need to restart the servlet engine. With the default install, the easiest
way to do this is to restart the Apache Web server. Then, you just go to the URL of the
hello.xsql page. You should see the result seen in Figure 18.1.
As you modify the code, you will probably need to restart your servlet engine each
time. For the default install, you will need to restart. Now that you have the simplest
action handler possible working, you can move on to more advanced functionality.
Custom Action Handlers 481
Figure 18.1 Your first action handler.
Adding XML to the Datagram
In the previous example, you added a single XML element to the datagram in place of
the action handler. Adding data to the datagram is usually one goal of any custom
action handler. This section looks at the specifics of adding data to the datagram. Some
knowledge of the Oracle DOM classes, covered in detail in Chapter 17, is needed.
The simplest way to add an element to the datagram is by using the
addResultElement method of the XSQLActionHandlerImpl class. This is what
you used in the previous example. It creates an element that has the name of the first
second argument and the value of the third argument, and it attaches the element as a
child to the node argument. It’s a great convenience method, but it isn’t powerful
enough to create complex element trees. There is no way to create attributes or children.
To create elements, you use the DOM APIs. The following example shows you how
to create the same output as before, except that this time you have an attribute in the
element:
import oracle.xml.xsql.XSQLActionHandlerImpl;
import oracle.xml.parser.v2.XMLDocument;
import oracle.xml.parser.v2.XMLElement;
import oracle.xml.parser.v2.XMLText;
import org.w3c.dom.Node;
public class ComplexHelloActionHandler extends XSQLActionHandlerImpl {
public void handleAction(Node result) {
XMLDocument doc=(XMLDocument)result.getOwnerDocument();
XMLElement elem=(XMLElement)doc.createElement(“hello”);
elem.setAttribute(“attr1”,”val1”);
XMLText tNode=(XMLText)doc.createTextNode(“hello!”);
482 Chapter 18
elem.appendChild(tNode);
result.appendChild(elem);
}
}
In this example, the Oracle DOM classes are used. This is consistent with the dis-
cussion in the last chapter. You got some more functionality by using the Oracle
classes, and can always interoperate with the base DOM interfaces.
The code itself is fairly straightforward. The node result, which is passed to the
handleAction method, is the parent of the xsql:action element that invokes this
action handler. If you want to provide XML back to the datagram, you will need to
append it to the result node. To create elements and other node types, you will need to
use the appropriate create method of the owner document. You can get a handle to the
owner document through the getOwnerDocument() method of the node class.
The next example expands on the following one. This time, you create the same ele-
ment as the preceding one and then add a couple of child elements. Since the first ele-
ment has an attribute, you will need to create it from scratch. The second one doesn’t
have an attribute, so you can use the addResultElement() convenience method.
public void handleAction(Node result) {
XMLDocument doc=(XMLDocument)result.getOwnerDocument();
XMLElement elem=(XMLElement)doc.createElement(“hello”);
result.appendChild(elem);
elem.setAttribute(“attr1”,”val1”);
XMLText tNode=(XMLText)doc.createTextNode(“hello!”);
elem.appendChild(tNode);
XMLElement child1=(XMLElement)doc.createElement(“child”);
elem.appendChild(child1);
child1.setAttribute(“attr2”,”val2”);
tNode=(XMLText)doc.createTextNode(“A child”);
child1.appendChild(tNode);
addResultElement(elem,”child”,”another child”);
}
You can continue in this way to create as many elements as you want. You’ll proba-
bly never write an action handler that doesn’t output at least one element to the data-
gram. A lot of the examples in the rest of the chapter show you different ways to output
elements. You won’t always have to do it as manually as it was done in the previous
example. As you’ll see, you can use the built-in action handlers to ease this process.
Custom Action Handlers 483
Before moving on, it’s important to note some practices that should be avoided.
First, you’ll notice that you can access the entire datagram. This means that you could
append elements anywhere you like. The following code, for instance, appends an ele-
ment off the document root:
public void handleAction(Node result) {
XMLDocument doc=(XMLDocument)result.getOwnerDocument();
XMLElement docElem=(XMLElement)doc.getDocumentElement();
addResultElement(docElem,”bad”,”bad text”);
}
This is a bad idea. Instead, you should append only to the result node that is passed to
the handleAction method. Once you start traversing the document in this manner,
you open the potential for all kinds of conflicts. You may interfere with other action
handlers and can make XSLT development very hard. Going beyond the result node to
read data is likewise risky. You are making assumptions about the rest of the datagram
that may or may not be true. It’s best to operate within the confines of the result node
that is passed to you. In fact, attempts to access siblings and the parent directly through
the node methods will result in null pointer exceptions.
Another no-no is appending more than one element to the result node. In the fol-
lowing example, you add two elements to the result node:
public void handleAction(Node result) {
addResultElement(result,”bad1”,”text”);
addResultElement(result,”bad2”,”text”);
}
This code will work. It will even produce valid XML, as long the xsql:action
action that invokes it has a parent. But what if the xsql:action is the root element of
your document, as with this XSQL page?
<?xml version=”1.0” encoding=”UTF-8”?>
<xsql:action handler=”BadActionHandler” xmlns:xsql=”urn:oracle-xsql”/>
</xsql:action>
This will result in an invalid XML document. An XML document can have only one
root element, but the action element creates two root elements. Even if you decide that
you are willing to live with an action handler that can never be a root element, you will
still make writing XSLT stylesheets difficult. It is simpler to have a single element at the
top of all XML elements that your action handler adds to the datagram. Your stylesheet
will have an easier time finding the elements you add if they are kept under a single
root element.
Comparing Action Handler and Servlet Development
Hopefully, you have a general feel for what action handlers can do and how they can
do it. To flesh out this understanding a bit, it may be helpful to compare action handler
484 Chapter 18