adobe photoshop 6 bible phần 3 potx
Bạn đang xem bản rút gọn của tài liệu. Xem và tải ngay bản đầy đủ của tài liệu tại đây (1.63 MB, 105 trang )
177
Chapter 4 ✦ Defining Colors
STEPS: Using the Multichannel Mode as an Intermediary Step
1. Open an RGB image. If the image is already open, make sure that it is saved
to disk.
2. Choose Image ➪ Mode➪ Multichannel. This eliminates any relationship
between the formerly red, green, and blue color channels.
3. Click the new channel icon at the bottom of the Channels palette. Or choose
the New Channel command from the palette menu and press Return to accept
the default settings. Either way, you add a mask channel to the image. This
empty channel will serve as the black channel in the CMYK image. (Photo-
shop won’t let you convert from the multichannel mode to CMYK with less
than four channels.)
4. Press Ctrl+I. Unfortunately, the new channel comes up black, which would
make the entire image black. To change it to white, press Ctrl+I or choose
Image ➪ Adjust ➪ Invert.
5. Choose Image ➪ Mode➪ CMYK. The image looks washed out and a tad bit
dark compared to its original RGB counterpart, but the overall color scheme
of the image remains more or less intact. This is because the red, green, and
blue color channels each have a respective opposite in the cyan, magenta,
and yellow channels.
6. Press Ctrl+Shift+L. Or choose Image ➪ Adjust➪ Auto Levels. This punches up
the color a bit by automatically correcting the brightness and contrast.
7. Convert the image to RGB, and then back to CMYK again. The problem with
the image is that it lacks any information in the black channel. So although it
may look okay on-screen, it will lose much of its definition when printed. To
fill in the black channel, choose Image ➪ Mode ➪ RGB Color, and then choose
Image ➪ Mode ➪ CMYK Color. Photoshop automatically generates an image
in the black channel in keeping with the standards of color separations (as
explained in Chapter 18).
Keep in mind that these steps are by no means a recommended procedure for con-
verting an RGB image to a CMYK image. Rather, they are merely intended to suggest
one way to experiment with channel conversions to create a halfway decent image.
You can likewise experiment with converting between the Lab, multichannel, and
RGB modes, or Lab, multichannel, and CMYK.
Replacing and swapping color channels
If you truly want to abuse the colors in an RGB or CMYK image, there’s nothing like
replacing one color channel with another to produce spectacular effects. Color
Plate 4-4 shows a few examples applied to an RGB image.
178
Part II ✦ Painting and Retouching
✦ In the first example, I used the Channel Mixer to replace the red channel with
the blue. I did this by setting the Output Channel to Red, changing the Red
value to 0 percent and the Blue value to 100 percent. The result is a green
woman floating in a green sea under a purple sky.
✦ To achieve the next example, I again started from the original RGB image and
used Channel Mixer to replace the green channel with the red. The result this
time is a yellow woman against a deep blue background.
✦ To create the purple woman in a green world on the right side of Color Plate
4-4, I replaced the blue channel with the red.
You can create more interesting effects by using Color Mixer to swap the contents of
color channels. For example, in the lower left example of Color Plate 4-4, I swapped
the contents of the red and blue channels to create a blue woman on a green sea
under an orange sky. To accomplish this, I set the Output Channel to Red, set the
Red value to 0 and the Blue to 100. Then I switched to the Blue channel (Ctrl+3) and
set the Red value to 100 and the Blue to 0.
The next two examples along the bottom of Color Plate 4-4 show the results of
swapping the red and green channels (for a bright green woman) and the green and
blue channels. Because the green and blue channels contain relatively similar data,
this produces the subtlest effect, chiefly switching the sea and sky colors and turn-
ing the swimsuit pink.
✦✦✦
Painting and
Editing
Paint and Edit Tool Basics
Here it is, Chapter 5, and I’m finally getting around to explain-
ing how to use Photoshop’s painting tools. You must feel like
you’re attending some kind of martial arts ritual where you
have to learn to run away, cry, beg, and attempt bribery
before you get to start karate-chopping bricks and kicking
your instructor. “The wise person journeys through the funda-
mentals of image editing before painting a single brushstroke,
Grasshoppa.” Wang, wang, wang. (That’s a musical embellish-
ment, in case you didn’t recognize it. Man, I hate to have to
explain my jokes. Especially when they’re so measly.) Now
that you’ve earned your first belt or tassel or scouting patch
or whatever it is you’re supposed to receive for slogging this
far through the book, you’re as prepared as you’ll ever be to
dive into the world of painting and retouching images.
You might think these tools require artistic talent. In truth,
each tool provides options for almost any level of proficiency
or experience. Photoshop offers get-by measures for novices
who want to make a quick edit and put the tool down before
they make a mess of things. If you have a few hours of experi-
ence with other painting programs, you’ll find Photoshop’s
tools provide at least as much functionality and, in many cases,
more. (The one exception is Painter, which is several times
more capable than Photoshop in the painting department.)
And if you’re a professional artist —well, come on now —you’ll
have no problems learning how to make Photoshop sing. No
matter who you are, you’ll find electronic painting and editing
tools more flexible, less messy, and more forgiving than their
traditional counterparts.
5
5
CHAPTER
✦✦✦✦
In This Chapter
Exploring Photoshop’s
paint and edit tools
Painting straight and
perpendicular lines
Smudging colors
Adjusting saturation
and contrast with
the sponge tool
Selecting brushes and
tool options from the
Options bar
Saving and editing
custom brush sets in
the Preset Manager
Creating lines that
fade away or taper
to a point
Working with
pressure-sensitive
drawing tablets
Selecting brush
modes from the
keyboard
✦✦✦✦
180
Part II ✦ Painting and Retouching
If you screw something up in the course of painting your image, stop and choose
Edit ➪ Undo (or press Ctrl+Z). If this doesn’t work, press Ctrl+Alt+Z to step back
through your paint strokes. (These shortcuts assume that you haven’t changed the
default Redo Key setting in the Preferences dialog box; see Chapter 2 for more infor-
mation.) You also can select a previous state in the History palette, as explained in
Chapter 7. The History palette lists brushstrokes and other changes according to
the tool you used to create them.
Meet your tools
Photoshop provides three paint tools: pencil, paintbrush, and airbrush. You also get
six edit tools: smudge, blur, sharpen, burn, dodge, and sponge. Figure 5-1 shows all
the tools along with the keyboard shortcuts for selecting them.
Figure 5-1: The three paint tools and six edit tools;
note that the pencil and paintbrush now share a
toolbox slot and a keyboard shortcut.
Cross-
Reference
181
Chapter 5 ✦ Painting and Editing
When two or more tools share a slot in the toolbox, click or drag on the arrow in the
lower corner of the tool icon to display a flyout menu of all the tools, as shown in
Figure 5-1. Or you can just press the keyboard shortcut listed in the menu to cycle
through the tools. However, if you turn on the Use Shift Key for Tool Switch option
in the General panel of the Preferences dialog box (Ctrl+K), you must press Shift
and the shortcut to switch tools.
You can vary the performance of the paint and edit tools by using the controls on
the new Options bar, which contains tool settings formerly accessed through the
Options palette and the Brushes palette. If you don’t see the Options bar, shown in
Figure 5-2, double-click any tool icon or just press Enter to display it. You also can
choose Windows➪ Show Options. If you want to keep other palettes close by, you
can dock them in the Options bar, which appears if you set your monitor’s screen
resolution to display more than 800 pixels horizontally. Just drag the palette tab to
the docking well, labeled in Figure 5-2. Upcoming sections in this chapter explain
all the ways to adjust the paint and edit tools. Check out Chapter 2 for more details
about the Options bar.
If you want to return a tool to its default settings, click the tool’s icon at the left end
of the Options bar and choose Reset Tool from the pop-up menu. Click Reset All
Tools to return every tool back to its original state.
Figure 5-2: Tool settings formerly contained in the Options and Brushes palettes
now hang out in the Options bar.
In addition to the paint and edit tools, Photoshop 6 provides a set of tools for drawing
vector objects. I cover these tools in Chapter 14.
Cross-
Reference
Reset tool(s) Options bar Docking wellDocked palette
6
Photoshop
6
6
Photoshop
6
182
Part II ✦ Painting and Retouching
The paint tools
The paint tools apply paint in the foreground color. In this and other respects,
they work like their counterparts in other painting programs, but there are a few
exceptions:
✦ Pencil: Unlike pencil tools found in most other painting programs — which
paint lines 1 pixel thick —Photoshop’s pencil paints a hard-edged line of any
thickness you specify. Figure 5-3 compares the default 1-pixel pencil line with
a fatter pencil line, a paintbrush line, and an airbrush line.
If you’re used to selecting the pencil tool by pressing P (as in Photoshop 3),
Y (as in Version 4), or N (as in Version 5), prepare for yet another change.
The new pencil tool shortcut is B, same as for the paintbrush. Toggle back
and forth between the two tools by pressing B repeatedly (or Shift+B,
depending on your Preferences setting for keyboard tool switches).
Figure 5-3: Five lines painted in black with the pencil,
paintbrush, and airbrush tools. The Wet Edges option
(second from right) causes the line to appear translucent.
I held the airbrush tool in place for a few moments at the
end of the line located at the far right.
✦ Paintbrush: The paintbrush works like the pencil tool, except it paints an
antialiased (softened) line that blends in with its background.
Thin
pencil line
Thick
pencil line
Paintbrush
line
Paintbrush
with wet
edges
Airbrush
line
6
Photoshop
6
183
Chapter 5 ✦ Painting and Editing
When you select the Wet Edges check box on the Options bar, the paintbrush
creates a translucent line with darkened edges, much as if you were painting
with watercolors. Soft brush shapes produce more naturalistic effects.
Figure 5-3 shows an example of this effect.
✦ Airbrush: Dismissing Photoshop’s airbrush tool as a softer version of the
paintbrush is tempting because it uses a softer brush shape by default.
Photoshop’s default airbrush settings also call for a lighter pressure, so
the airbrush paints a translucent line. But unlike the paintbrush, which
applies a continuous stream of color and stops applying paint when you
stop dragging, the airbrush applies a series of colored dollops and continues
to apply these dollops as long as you press the mouse button. Figure 5-3
shows the dark glob of paint that results from pressing the mouse button
while holding the mouse motionless at the end of the drag.
The edit tools
The edit tools don’t apply color; rather, they influence existing colors in an image.
Figure 5-4 shows each of the six edit tools applied to a randomized background.
Future sections cover the tools in more detail, but here’s a brief introduction:
✦ Blur: The first of the two focus tools, the blur tool blurs an image by lessening
the amount of color contrast between neighboring pixels.
✦ Sharpen: The second focus tool selectively sharpens by increasing the contrast
between neighboring pixels. Generally speaking, both the blur and sharpen
tools are less useful than their command counterparts in the Filters menu. They
provide less control and usually require scrubbing at an image. Maybe I’ve been
using a computer too long, but my wrist starts to ache when I use these tools. If,
unlike me, you like the basic principle behind the tools, but you want to avoid
carpal tunnel syndrome, you can achieve consistent, predictable results with-
out scrubbing by using the tools in combination with the Shift key, as described
in the next section, “Basic techniques.”
✦ Smudge: The smudge tool smears colors in an image. The effect is much like
dragging your finger across wet paint.
✦ Dodge: The first of three toning tools, the dodge tool lets you lighten a portion
of an image by dragging across it. Named after a traditional film exposure tech-
nique, the dodge tool is supposed to look like a little paddle thingie —you
know, like one of those spoons you put over your eye at the optometrist’s—
that you wave over photographic paper to cast a shadow and thereby lighten
the exposure. Thank golly we no longer have to wave little paddle thingies in
our modern age.
✦ Burn: The burn tool lets you darken a portion of an image by dragging over it.
The effect is similar to burning a film negative, which you apparently do by
holding your hand in a kind of O shape in an effort to focus the light, kind of
like frying a worker ant using a magnifying glass (except not quite so smelly).
At least, that’s what they tell me. Sadly, I’ve never had the pleasure of trying it.
184
Part II ✦ Painting and Retouching
Figure 5-4: Dragging with Photoshop’s edit tools creates these effects.
The boundaries of each line are highlighted so that you can clearly see
the distinctions between line and background.
If you’re like most folks, you have difficulty remembering which tool lightens
and which one darkens. So here’s a little tip: That little hand icon looks like it
could be holding a piece of toast, and when you burn toast, it gets darker.
Hand, toast, burn, darker. That other tool, the eye doctor paddle, is not hold-
ing toast, so it must lighten. You’ll never have problems again.
✦ Sponge: The final toning tool, the sponge tool, robs an image of both saturation
and contrast. Or you can set the tool so it boosts saturation and adds contrast.
For more information, stay tuned for the upcoming section “Mopping up with
the sponge tool.”
To access the sharpen tool temporarily when the blur tool is selected, press and
hold Alt while using the tool. The sharpen tool remains available only as long as
you press Alt. You also can press Alt to access the blur tool when the sharpen tool
is selected, to access the burn tool when the dodge tool is selected, and to access
the dodge tool when the burn tool is selected. (If the sponge tool is active, pressing
Alt has no effect, except maybe to give your finger a cramp.)
Tip
Blur Sharpen Smudge Dodge Burn Sponge
185
Chapter 5 ✦ Painting and Editing
You can replace the blur tool with the sharpen tool in the toolbox by Alt-clicking on
the tool’s icon. Alt-click again to select the smudge tool and yet again to cycle back
to the blur tool. Likewise, you can Alt-click the dodge tool icon to cycle between the
dodge, burn, and sponge tools.
As explained in Chapter 2, the keyboard shortcuts also toggle between the tools.
When the blur tool is selected, press R to switch to the sharpen tool. Repeated press-
ings of R take you to the smudge tool and back to the blur tool. When the dodge tool
is selected, press O to toggle to the burn tool; press O again to get the sponge.
If these shortcuts don’t work for you, head for the General panel of the Preferences
dialog box (Ctrl+K). Chances are, the Use Shift for Tool Switch check box is selected,
which means that you have to press Shift plus the keyboard shortcut to cycle through
tools. Turn the check box off to give your Shift finger a rest.
Basic techniques
I know several people who claim that they can’t paint, and yet they create beautiful
work in Photoshop. Even though they don’t have sufficient hand-eye coordination
to write their names on screen, they have unique and powerful artistic sensibilities,
and they know many tricks that enable them to make judicious use of the paint and
edit tools. I can’t help you in the sensibilities department, but I can show you a few
tricks to boost your ability and inclination to use the paint and edit tools.
Painting a straight line
You probably already know that you can draw a straight line with the line tool. And
you may be wondering why I don’t include the line tool in my discussion of painting
tools. Well, the reason is that as a painting tool, the line tool is pretty limited in its
usefulness.
In the line tool’s defense, it has evolved in Version 6. You now can draw either vector
lines or raster lines using the tool, and you also can set the tool to create a work path.
You set the tool’s function through the trio of icons on the left end of the Options bar.
Click the first button to create a vector shape on a new layer, as discussed in Chapter
14; click the middle button to create a work path, a topic I cover in Chapter 9; and
click the third button to paint a regular, pixel-based line.
About the only reason I ever use the line tool in painting mode is to create arrows.
(I explain how in the “Applying Strokes and Arrowheads” section of Chapter 8.) If
you don’t want arrows, you’re better off using Photoshop’s other means for creat-
ing straight lines: the Shift key. Using this method, you can paint with different
brushes and access other options not available when you work with the line tool.
6
Photoshop
6
6
Photoshop
6
Tip
186
Part II ✦ Painting and Retouching
To paint a straight line with any of the paint tools, click at one point in the image
and then press Shift and click at another point. Photoshop connects the start and
end points with a straight stroke of paint. Use this same technique to apply an edit
tool in a straight line.
To create free-form polygons, continue to Shift-click with the tool. Figure 5-5 fea-
tures a photograph and a tracing I made on a separate layer (covered in Chapter
12) exclusively by Shift-clicking with the paintbrush tool. As an academic exercise,
I never dragged with the tool, I never altered the brush size, and I used just two
colors: black and gray.
Figure 5-5: Starting from an image by photographer Barbara Penoyar (left),
I created a stylized tracing (right) by clicking and Shift-clicking with the paintbrush
tool on a separate layer.
The Shift key makes the blur and sharpen tools halfway useful. Suppose that you
want to edit the perimeter of the car shown in Figure 5-6. The arrows in the figure
illustrate the path your Shift-clicks should follow. Figure 5-7 shows the effect of
Shift-clicking with the blur tool; Figure 5-8 demonstrates the effect of Shift-clicking
with the sharpen tool.
Tip
187
Chapter 5 ✦ Painting and Editing
Figure 5-6: It takes
one click and 24
Shift-clicks to soften
or accentuate the
edges around this
car using the blur
or sharpen tool.
Figure 5-7: These are the
results of blurring the car’s
perimeter with the pressure
set to 50 percent (top) and
100 percent (bottom). Set
the pressure by using the
Pressure pop-up menu in
the Options bar.
188
Part II ✦ Painting and Retouching
Figure 5-8: The results of sharpening the car with the
pressure set to 50 percent (top) and 100 percent (bottom).
Painting a perpendicular line
To create a perpendicular line —either a vertical or a horizontal line —with any of
the paint tools, press and hold the mouse button, press Shift, and begin dragging in
a vertical or horizontal direction. Don’t release Shift until you finish dragging or until
you want to change the direction of the line, as shown in Figure 5-9. Press Shift in mid-
drag to snap the line back into perpendicular alignment. Again, these techniques
work with the edit tools as well as the paint tools.
One way to exploit the Shift key’s penchant to snap to the perpendicular is to draw
“ribbed” structures. Being left-handed, I dragged from right to left with the paintbrush
to create both of the central outlines around the skeleton that appears at the top of
Figure 5-10. I painted each rib by pressing and releasing Shift as I dragged with the
paintbrush tool. Pressing Shift snapped the line to the horizontal axis, whose location
was established by the beginning of the drag.
189
Chapter 5 ✦ Painting and Editing
Figure 5-9: Pressing Shift after you start to drag with a
paint or edit tool results in a perpendicular line for as
long as the key is pressed.
In the figure, I represented the axis for each line in gray. After establishing the basic
skeletal form, I added some free-form details with the paintbrush and pencil tools,
as shown in the middle image in Figure 5-10. I then selected a general area around
the image and chose Filter ➪ Stylize ➪ Emboss to create the finished fossil image.
Nobody’s going to confuse my painting with a bona fide fossil, but it’s not bad for
a cartoon.
It’s no accident Figure 5-10 features a swordfish instead of your everyday round-
nosed carp. To snap to the horizontal axis, I had to establish the direction of my
drag as being more horizontal than vertical. If I had instead dragged in a fish-faced
convex arc, Photoshop would have interpreted my drag as vertical and snapped to
the vertical axis.
Painting simple shapes with the drawing tools
As I alluded to a section or two ago, you can use the new shape tools to create
raster —that is, pixel-based — objects, as well as vector objects (see Chapter 3
if you need a refresher course on the difference). After selecting the rectangle,
rounded rectangle, ellipse, polygon, line, or custom shape tool, click the Fill Region
icon on the Options bar, labeled in Figure 5-11. Then use the tools as described in
Chapter 14 to create your shapes, which Photoshop fills with the foreground color.
Press mouse button, press Shift, begin drag
Release Shift
Release mouse button, release Shift
Press Shift again. . .
. . . to snap line back to perpendicular
190
Part II ✦ Painting and Retouching
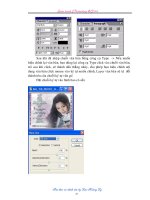
Figure 5-10: To create the basic structure for our bony pal,
I periodically pressed and released Shift while dragging with
the paintbrush (top). Then I embellished the fish using the
paintbrush and pencil (middle). Finally, I applied the Emboss
filter to transform fish into fossil (bottom).
Figure 5-11: Click the paint bucket icon to create rasterized shapes with the shape
tools (line, rectangle, ellipse, polygon, and custom shape).
Fill Region
Shape tool icons Click for more options
191
Chapter 5 ✦ Painting and Editing
When Fill Region is selected, you can adjust the opacity and blend mode of your
paint strokes through the Opacity and Mode menus on the Options bar. You also
can select the Anti-aliased check box to soften the transition between a shape and
its surroundings. I created the left star in the figure with Anti-aliased turned off; the
right star shows the same shape painted with the check box turned on. If you click
the down-pointing triangle at the end of the strip of tool icons, you display addi-
tional options for the selected tool.
Painting with the smudge tool
Many first-time Photoshop artists misuse the smudge tool to soften color transi-
tions. In fact, softening is the purpose of the blur tool. The smudge tool smears
colors by shoving them into each other. The process bears more resemblance to
the finger painting you did in grade school than to any traditional photographic-
editing technique.
In Photoshop, the performance of the smudge tool depends in part on the settings
of the Pressure and Finger Painting controls on the Options bar, which you access
by pressing Enter when the smudge tool is active. Here’s what you need to know
about these options:
✦ Pressure: Measured as a percentage of the brush shape, this option determines
the distance the smudge tool drags a color. Higher percentages and larger brush
shapes drag colors farthest. A Pressure setting of 100 percent equates to infinity,
meaning the smudge tool drags a color from the beginning of your drag until the
end of your drag, regardless of how far you drag. Cosmic, Daddy-O.
✦ Finger Painting: The folks at Adobe used to call this effect dipping, which I think
more accurately expressed how the effect works. When you select this option,
the smudge tool begins by applying a smidgen of foreground color, which it
eventually blends in with the colors in the image. It’s as if you dipped your fin-
ger in a color and then dragged it through an oil painting. Use the Pressure
setting to specify the amount of foreground color applied. If you turn on Finger
Painting and set the Pressure to 100 percent, the smudge tool behaves exactly
like the paintbrush tool.
You can reverse the Finger Painting setting by Alt-dragging. If the option is off,
Alt-dragging dips the tool into the foreground color. If Finger Painting is turned
on, Alt-dragging smudges normally.
For some examples of the smudge tool in action, look at Figure 5-12. The figure shows
the effects of using the smudge tool set to four different Pressure percentages and
with the Finger Painting option both off and on. In each instance, the brush shape is
13 pixels in diameter and the foreground color is set to black.
Tip
6
Photoshop
6
192
Part II ✦ Painting and Retouching
The Use All Layers option (previously called Sample Merged) instructs the smudge
tool to grab colors in all visible layers and smudge them into the current layer.
Whether the option is on or off, only the current layer is affected; the background
and other layers remain intact.
For example, suppose the inverted eyes of the woman at the top of Figure 5-13 are on
a different layer than the rest of the face. If I use the smudge tools on the eyes layer
with Use All Layers turned off, Photoshop ignores the face layer when smudging the
Figure 5-12: Eight drags with the smudge tool subject to different
Pressure and Finger Painting settings.
Finger Painting off
30%
Finger Painting on
50% 70% 90%
193
Chapter 5 ✦ Painting and Editing
eyes. As a result, details such as the nose and teeth remain unsmudged, as you can
see in the lower-left example. If I turn Use All Layers on, Photoshop lifts colors from
the face layer and mixes them in with the eyes layer, as shown in the lower-right
example.
Figure 5-13: The original image (top) features inverted eyes on a layer
above the rest of the face. I first smudged the eyes with Use All Layers
turned off (lower left) and then with the option turned on (lower right).
Note that all this activity occurs exclusively on the eyes layer. To give you a better
look, the two lower examples on the eyes layer are shown independently of those
on the face layer in Figure 5-14. You can now clearly see the proliferation of face
details mixed into the eyes in the right example. Meanwhile, the face layer remains
absolutely unaffected.
194
Part II ✦ Painting and Retouching
Figure 5-14: The eyes layer from the previous figure shown by itself.
In Version 6, you can further vary the smudge tool effects through the Brush and
Brush Dynamics palettes. The upcoming section “Brush Shape and Opacity” explores
these options, so I won’t waste space repeating everything here. For now, just know
that you can set the smudge tool to create gradually tapering and/or fading strokes —
and you can now use your mouse as well as a pressure-sensitive tablet to generate
these effects.
Mopping up with the sponge tool
The sponge tool is actually a pretty simple tool, hardly worth expending valuable
space in a book as tiny as this one. But I’m a compulsive explainer, so here’s the deal:
Press Enter when the sponge tool is active or double-click the tool icon in the toolbox
to display the sponge tool controls on the Options bar. Then select either Desaturate
or Saturate from the Mode pop-up menu to create one of the following results:
✦ When set to Desaturate, the tool reduces the saturation of the colors over which
you drag. When you’re editing a grayscale image, the tool reduces contrast.
✦ If you select Saturate, the sponge tool increases the saturation of the colors
over which you drag or increases contrast in a grayscale image.
You can switch between the Desaturate and Saturate modes from the keyboard.
Press Shift+Alt+D to select the Desaturate option. Press Shift+Alt+S for Saturate.
6
Photoshop
6
195
Chapter 5 ✦ Painting and Editing
No matter which mode you choose, higher Pressure settings produce more dramatic
results. Your settings in the Brushes and Brush Dynamics palettes also affect the
sponge tool’s performance; see the next section, “Brush Shape and Opacity,” for
more information.
Color Plate 5-1 shows the sponge tool in action. The upper-left example shows the
original PhotoDisc image. The upper-right example shows the result of applying
the sponge tool set to Desaturate. I dragged with the tool inside the pepper and
around the corn area. The Pressure was set to 100 percent. Notice that the affected
colors are on the wane, sliding toward gray. In the lower-right example, the effect
is even more pronounced. I applied the sponge tools here with great vim and vigor
two additional times. Hardly any hint of color is left in these areas now.
To create the lower-left example in Color Plate 5-1, I applied the sponge tool set to
Saturate. This is where the process gets a little tricky. If you boost saturation levels
with the sponge tool in the RGB or Lab color modes, you can achieve colors of abso-
lutely neon intensity. However, these high-saturation colors don’t stand a snowball’s
chance in a microwave of printing in CMYK. So, use View ➪ Proof Colors (Ctrl+Y) to
preview your image in CMYK before boosting saturation levels with the sponge tool.
This way, you can accurately view the results of your edits. (Adobe changed the
CMYK preview features in Version 6; Chapter 16 explains the new preview options
if you need help figuring them out.)
Figure 5-15 shows the yellow channel from each of the images in Color Plate 5-1.
Because yellow is the most prevalent primary color in the image, it is the most
sensitive to saturation adjustments. When I boosted the saturation in the lower-left
example, the yellow brightness values deepened, adding yellow ink to the CMYK
image. When I lessened the saturation in the two right examples, the amount of
ink diminished.
One of Adobe’s recommended uses of the sponge tool is to reduce the saturation
levels of out-of-gamut RGB colors before converting an image to the CMYK mode.
I’m not too crazy about this technique because it requires a lot of scrubbing.
Generally, selecting the out-of-gamut area and reducing the colors using more auto-
mated controls is easier (as discussed in Chapter 11). You might prefer to use the
sponge tool, however, when a more selective, personal touch is required, as when
curbing a distracting color that seems to leap a little too vigorously off the screen
or boosting the saturation of a detail in the CMYK mode.
Tip
196
Part II ✦ Painting and Retouching
Figure 5-15: The yellow channel from Color Plate 5-1 shows the greatest a
mount of variation when reducing and boosting the saturation with the
sponge tool.
Brush Shape and Opacity
So far, I mentioned the words brush shape several times, and I have yet to explain
what the Sam Hill I’m talking about. Luckily, it’s simple. The brush shape is the size
and shape of the tip of your cursor when you use a paint or edit tool. A big, round
brush shape paints or edits in broad strokes. A small, elliptical brush shape is useful
for performing hairline adjustments.
By default, your cursor outline reflects the selected brush shape. If your cursor
instead looks like a crosshair or tool icon, press Ctrl+K to bring up the Preferences
dialog box and press Ctrl+3 for the Display & Cursors panel. Then select Brush Size
from the Painting Cursors radio buttons. Now you can create a brush as big as 999
pixels in diameter and have your cursor grow accordingly.
197
Chapter 5 ✦ Painting and Editing
When you use a very small brush, four dots appear around the cursor perimeter,
making the cursor easier to locate. If you need a little more help, press the Caps
Lock key to access the more obvious crosshair cursor.
The Brushes palette
Unless you were completely asleep at the wheel when you launched Photoshop 6
for the first time, you no doubt noticed the Options bar stretching across the top
of the program window. In computer lingo, the Options bar is known as a context-
sensitive toolbar, meaning that the options on the bar change depending on what
tool you’re using. When you work with the paint and edit tools, the Options bar
gives you access to a choice of brush shapes. To browse through the available
brushes, open the Brush palette by clicking the triangle next to the brush icon,
as shown in Figure 5-16.
Figure 5-16: The new Brush drop-down palette looks and acts like the
old Brushes palette in some regards, but can’t be freed from the confines
of the Options bar or grouped with other palettes.
Click to display Brush palette Click for palette menu
6
Photoshop
6
Tip
198
Part II ✦ Painting and Retouching
Adobe refers to the Brush palette as the Brush menu, but I’m going to be contrary
and go with “drop-down palette.” For the most part, the Brush menu looks and
works like the old Brushes palette. You can resize it by dragging the size box. And
clicking the triangle in the upper-right corner displays a submenu, just as in a
palette. Because I can’t bring myself to refer to this submenu as the “Brush menu
menu,” I’m sticking with Brush drop-down palette. Sometimes I may even get really
bold and just use “palette.” I trust you will not be too distressed by the court’s
ruling on this matter.
That said, this Brush palette does differ from a regular palette in a few important
ways. You can’t tear it away from the Options bar or combine it with other palettes,
as you can with the “real” palettes (Layers, Channels, and other palettes listed on
the Window menu). Furthermore, the old shortcut for displaying the Brushes palette,
F5, has absolutely no effect on the new Brush palette. You have to press Enter with
a paint or edit tool active, double-click the tool’s icon in the toolbox, or choose
Window➪ Show Options to display the Options bar and all its drop-down palettes.
You can switch brush shapes without opening the Brush palette by pressing the
left-bracket key and right-bracket key, as in previous editions of Photoshop. But
if you’re in the habit of using these shortcuts, listen up, because the bracket keys
work differently now: Each press of the left bracket decreases the diameter of the
active brush by 10 pixels. Pressing the right bracket increases the brush diameter
by 10 pixels. The brush icon on the Options bar shows the current diameter.
If all you want to do is move from one brush in the palette to another, use the arrow
keys. For example, press the up-arrow key to select the brush that’s immediately
above the current brush. You have to use this technique if you want to switch from
a hard brush to a soft one using the keyboard. Unfortunately, the old shortcut for
selecting the first brush and the last brush, Shift and the bracket keys, no longer
has any effect.
If you haven’t altered the current brush — changing its softness, for example— you
can also use these shortcuts: Press the comma key to toggle to the previously
selected brush. Press the period key to go the other direction. You also can press the
greater than key (Shift plus the period key) to select the last brush in the palette;
press the less than key (Shift plus the comma key) to select the first brush in the
palette.
Editing and creating brush shapes
To edit the shape of the currently selected brush, click the brush icon in the Options
bar to display the brush options shown in Figure 5-17. (Be sure to click the icon and
not the adjacent triangle; otherwise, you display the Brush palette.) After you select
your brush settings, press Enter, click an empty area of the program window, or just
begin working with the tool to close the dialog box. If you change your mind and
decide to leave the brush alone, press Esc or click the brush icon again to close
the dialog box.
6
Photoshop
6
Tip
Tip
Note
199
Chapter 5 ✦ Painting and Editing
Figure 5-17: To change the size, shape, and hardness
of the current brush, click its icon in the Options bar.
If you want to create a new brush shape, choose New Brush from the palette menu
or click an empty brush slot in the palette. Photoshop displays the New Brush dia-
log box, which is just like the dialog box in Figure 5-17 except that it has a title bar.
Whether you’re editing an existing brush or creating a new one, you have the
following options at your disposal:
✦ Name: You now can give your custom brushes a name to help you keep track
of them. If you don’t enter a name, Photoshop labels the brushes Brush 1,
Brush 2, and so on. If you later want to rename a brush, just double-click its
icon in the Brush drop-down palette.
✦ Diameter: This option determines the width of the brush shape. If the brush
shape is elliptical instead of circular, the Diameter value determines the longest
dimension. You can enter any value from 1 to 999 pixels. Brush shapes with
diameters of 30 pixels or higher are too large to display accurately in the Brush
drop-down palette and instead appear as circles with inset Diameter values.
✦ Hardness: Except when you use the pencil tool, brushes are always antialiased.
You can further soften the edges of a brush, however, by dragging the Hardness
slider bar away from 100 percent. The softest setting, 0 percent, gradually
tapers the brush from a single solid color pixel at its center to a ring of trans-
parent pixels around the brush’s perimeter. Figure 5-18 demonstrates how low
Hardness percentages expand the size of a 100-pixel brush beyond the Diameter
value (as demonstrated by the examples set against black). Even a 100-percent
hard brush shape expands slightly because it is antialiased. The Hardness set-
ting is ignored when you use the pencil tool.
6
Photoshop
6
Click to edit current brush New brush icon
200
Part II ✦ Painting and Retouching
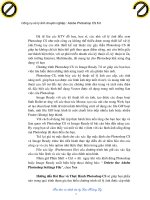
Figure 5-18: A 100-pixel diameter
brush shown as it appears when set
to a variety of Hardness percentages.
I changed the background pixels below
from white to black so that you can
see the actual diameter of each brush
shape. The tick marks indicate 10-pixel
increments.
✦ Spacing: The Spacing option controls how frequently a tool affects an image as
you drag, measured as a percentage of the brush shape. Suppose the Diameter
of a brush shape is 12 pixels and the Spacing is set to 25 percent (the setting
for all default brush shapes). For every 3 pixels (25 percent of 12 pixels) you
drag with the paintbrush tool, Photoshop lays down a 12-pixel wide spot of
color. A Spacing of 1 percent provides the most coverage but may also slow
down the performance of the tool. If you deselect the Spacing check box, the
effect of the tool is wholly dependent on the speed at which you drag; this can
be useful for creating splotchy or oscillating lines. Figure 5-19 shows examples.
✦ Angle: This option enables you to pivot a brush shape on its axes. Unless the
brush is elliptical, though, this won’t make a difference in the appearance of
the brush shape.
100%
75%
50%
0%
25%
102
pixels
120
pixels
132
pixels
166
pixels
150
pixels
201
Chapter 5 ✦ Painting and Editing
Figure 5-19: Examples of
lines drawn with different
brush Spacing values. Gaps
or ridges generally begin
to appear when the
Spacing value exceeds 30
percent. The final line was
created by turning off the
Spacing option.
✦ Roundness: Enter a value of less than 100 percent into the Roundness option
to create an elliptical brush shape. The value measures the width of the brush
as a percentage of its height, so a Roundness value of 5 percent results in a
long, skinny brush shape.
You can adjust the angle of the brush dynamically by dragging the gray arrow
inside the box to the left of the Angle and Roundness options. Drag the han-
dles on either side of the black circle to make the brush shape elliptical, as
demonstrated in Figure 5-20. And try this trick: Click anywhere in the white
box to move the arrow to that point.
I heartily recommend that you take a few moments soon to experiment at length
with the available brush options. By combining paint and edit tools with one or
more specialized brush shapes, you can achieve artistic effects unlike anything
permitted by traditional techniques. Starting with a PhotoDisc image lightened and
filtered to serve as a template, I painted Figure 5-21 using the flat, 45-pixel brush
shape shown in the dialog box. No other brush shape or special effect was applied.
Think of what you can accomplish if you don’t limit yourself as ridiculously as I did.
Tip
100%
1%
25%
50%
75%
150%
No spacing