photoshop CS2 essential skills phần 1 potx
Bạn đang xem bản rút gọn của tài liệu. Xem và tải ngay bản đầy đủ của tài liệu tại đây (6.61 MB, 36 trang )
mark galer
philip andrews
AMSTERDAM • BOSTON • HEIDELBERG • LONDON • NEW YORK • OXFORD
PARIS • SAN DIEGO • SAN FRANCISCO • SINGAPORE • SYDNEY • TOKYO
Focal Press is an imprint of Elsevier
Focal Press
An imprint of Elsevier
Linacre House, Jordan Hill, Oxford OX2 8DP
200 Wheeler Road, Burlington MA 01803
First published 2004
Copyright 2004, Mark Galer and Philip Andrews. All rights reserved
The right of Mark Galer and Philip Andrews to be identifi ed as the author of
this work has been asserted in accordance with the Copyright, Designs and
Patents Act 1988
No part of this publication may be reproduced in any material form (including
photocopying or storing in any medium by electronic means and whether
or not transiently or incidentally to some other use of this publication) without
the written permission of the copyright holder except in accordance with the
provisions of the Copyright, Designs and Patents Act 1988 or under the terms of
a licence issued by the Copyright Licensing Agency Ltd, 90 Tottenham Court Road,
London, England W1T 4LP. Applications for the copyright holder’s written
permission to reproduce any part of this publication should be addressed
to the publisher
Permissions may be sought directly from Elsevier’s Science and Technology Rights
Department in Oxford, UK: phone: (+44) (0) 1865 843830; fax: (+44) (0) 1865 853333;
e-mail: You may also complete your request on-line via the
Elsevier homepage (www.elsevier.com), by selecting ‘Customer Support’ and then ‘Obtaining
Permissions’
British Library Cataloguing in Publication Data
A catalogue record for this book is available from the British Library
Library of Congress Cataloguing in Publication Data
A catalogue record for this book is available from the Library of Congress
ISBN 0 240 51951 5
Printed and bound in Italy
For more information on all Focal Press publications
visit our website at: www.focalpress.com
Acknowledgements
To our families:
Dorothy, Matthew and Teagan and
Karen, Adrian and Ellena
for their love, support and understanding.
Picture credits
Paul Allister; Catherine Dorsen; Zarah Ellis; Tamas Elliot; Samantha Everton,
Shaun Guest; Orien Harvey; Guy Israeli, Itti Karuson; Anitra Keogh; MiAe
Jeong; Seok-Jin Lee; Benedikt Partenheimer; Raphael Ruz; Fabio Sarraff;
Michael Wennrich; Amber Williams; Stuart Wilson.
Also our thanks go to www.ablestock.com for supporting this venture with the
supply of various tutorial images.
All other images and illustrations by the authors.
iv
Contents
Introduction x
Acquisition of skills x
Application of skills x
A structured learning approach xi
The skills xi
Web site xi
Research and resources xi
Essential information xii
The Digital Darkroom 1
Digital setup 2
Monitor settings 3
Desktop alias or shortcut 5
Managing your photos 6
Getting started with Photoshop 7
Settings and preferences 10
Opening images 12
Navigation and viewing modes 13
Rulers and guides 17
Storage for digital photographs 18
Keyboard shortcuts 20
Mouse or graphics tablet? 22
Mac or PC? 22
Digital Basics 25
Introduction 26
File size 27
Modes and channels 28
Bit depth 29
Hue, saturation and brightness 30
Color and light 31
Color perception 32
File formats 34
Lossy and lossless compression 37
Resolution 40
Capture, image and output resolutions 41
Calculating fi le size and scanning resolution 43
Image size 45
Resampling 46
v
Capture and Enhance 51
Introduction 52
Image capture 52
Image adjustment 54
Correcting a weak histogram 56
Image size 57
Optimizing quality 59
Save 61
Capturing in RAW 63
Digital Printing 67
Printing to an inkjet printer 68
Monitor calibration and working color space 69
RGB and CMYK 70
Profi les 70
Prefl ight checklist 71
Soft proofi ng 72
Print preview 73
Printer settings 74
Output levels 74
Creating a ‘ringaround’ 75
Analysis of the test print 76
Creating a ‘preview master’ 77
Printing overview 77
Printing using a professional laboratory 78
Printing monochromes 80
foundation module
>>
Contents
vi
advanced skills
>>
Layers and Channels 83
Introduction 84
Layers overview 85
Layer types 89
Channels 92
Adjustment layers 94
Layer masks 95
Working with layers and masks 96
Layer Blends 107
Introduction 108
The ‘Darken’ group 110
The ‘Lighten’ group 112
The ‘Overlay’ group 114
Blend modes for tinting and toning 116
Luminosity 118
Difference and Exclusion 119
Creating a simple blend 120
Advanced blending techniques 123
Selections 129
Introduction 130
Selection tools overview 130
Modifying your selections 132
Saving and loading selections 134
Feather and anti-alias 135
Defringe and Matting 136
The ‘Magic Wand’ 137
Quick Mask 139
Color Range 141
Channel masking 143
Extract fi lter 145
Contents
vii
Advanced Retouching 165
Introduction 166
16-bit image editing 167
Target values – using the eyedroppers 169
Controlling tones using the Shadow/Highlight feature 170
Dust and scratches 172
The History Brush technique 174
Correcting perspective 175
Capturing high contrast scenes 196
Special Effects 201
Layer comps 202
Gradient maps 209
Cast shadows 216
Posterization 220
Cross process effect 225
Lith printing – the digital way 227
Digital Diffusion 230
Split toning 236
Selective toning 238
Creating digital depth of fi eld effects 241
Lens Blur DOF effects 244
Digital Polaroid transfer effect 246
Filters 251
Filtering in Photoshop 252
New for Photoshop CS – The Filter Gallery 253
Fade Filter command 254
Improving fi lter performance 254
Installing and using third party fi lters 255
Filtering a shape or text (vector) layer 255
Filters 101 255
Filter DIY 265
Contents
viii
Graphics 269
Introduction 270
Working with typography 270
Vector graphics 275
Creating a simple vector logo 277
Layer styles 281
Creating an animated graphic for the web 284
Combined use of fi lters and styles 287
Images for the Web 293
Introduction 294
ImageReady 295
Image resolution and the web 296
Web page construction 301
Slice the image canvas 304
Save for Web command 305
Creating the rollovers 306
Preview and save web pages 307
graphics, web &
workflow
>>
Contents
ix
Automated Features 309
Customizing your frequently used commands 310
Keyboard shortcuts 310
Actions 311
Editing an action 313
Actions and Batch commands 314
Contact Sheet 315
Picture Package 316
Photomerge 317
PDF presentation 318
Web Photo Gallery 319
Glossary 327
Keyboard shortcuts 337
Web links 339
Contents
x
Introduction
Photoshop has helped revolutionize how photographers capture, edit and prepare their images
for viewing. Most of what we now see in print has been edited and prepared using the Adobe
software. The image editing process extends from basic retouching and sizing of images, to the
highly manipulated and preconceived photographic montages that are commonly used by the
advertising industry. This book is intended for photographers and designers who wish to use
the ‘digital darkroom’ rather than the traditional darkroom for creative photographic illustration.
The information, activities and assignments contained in this book provide the essential skills
necessary for competent and creative image editing. The subject guides offer a comprehensive
and highly structured learning approach, giving comprehensive support to guide Photoshop users
through each editing process. An emphasis on useful (essential) practical advice and activities
maximizes the opportunities for creative image production.
Acquisition of skills
The fi rst section of this book is a foundation
module designed to help the user establish
an effective working environment and act as
a guide for successful navigation through
the image editing process from capture to
print. Emphasis is placed on the essential
techniques and skills whilst the terminology
is kept as simple as possible using only those
terms in common usage.
Application of skills
The subsequent modules extend and build
on the basic skills to provide the user with
the essential techniques to enable creative
and skilful image editing. The guides explore
creative applications including advanced
retouching, photomontage, vector graphics,
special effects and preparing images for the
web. Creative practical tasks, using a fully
illustrated and simple step-by-step approach,
are undertaken in each of the guides to allow
the user to explore the creative possibilities
and potential for each of the skills being
offered.
Anitra Keogh
xi
essential skills
>>>>>>
A structured learning approach
The study guides contained in this book offer a structured learning approach and an independent
learning resource that will give the user a framework for the techniques of digital imaging as well
as the essential skills for personal creativity and communication.
The skills
To acquire the essential skills to communicate effectively and creatively takes time and motivation.
Those skills should be practised repeatedly so that they become practical working knowledge
rather than just basic understanding. Become familiar with the skills introduced in one study guide
and apply them to each of the following guides wherever appropriate.
Web site
A dedicated web site has been set up where it is possible to download images required to complete
the activities within the study guides. The address for the Internet web site is:
www.photoshopessentialskills.com
Research and resources
You will only realise your full creative potential by looking at a variety of images from different
sources. Artists and designers fi nd inspiration in many different ways, but most fi nd that they are
infl uenced by other work they have seen and admired.
The web site associated with this book has images available for download
PHOTOSHOP CS
>>>
introduction
xii
essential skills
>>>>>>
Essential information
The basic equipment required to complete this course is access to a computer with Adobe
Photoshop version 8 (versions 6 and 7 would suffi ce for most of the activities contained in the
book). The photographic and design industries predominantly use Apple Macintosh computers but
many people choose IBM compatible PCs as a more cost effective alternative. When Photoshop
is open there are minor differences in the interface, but all of the features and tools are identical. It
is possible to use this book with either IBM compatible PCs or Apple Macintosh computers.
Storage
Due to the large fi le sizes involved with digital imaging it is advisable that you have a high capacity,
removable storage device attached to the computer or use a CD writer to archive your images.
Avoid bringing magnetic disks such as Zip disks into close contact with other magnetic devices
such as can be found in mobile phones and portable music players – or even the speakers attached
to your computer.
Commands
Computer commands which allow the user to modify digital fi les can be accessed via menus and
submenus. The commands used in the study guides are listed as a hierarchy, with the main menu
indicated fi rst and the submenu or command second, e.g. Main menu > Command or Submenu >
Command. For example, the command for opening the Image Size dialog box would be indicated
as follows: Edit > Image Adjustments > Image Size.
Keyboard shortcuts
Many commands that can be accessed via the menus and submenus can also be accessed via
keyboard ‘shortcuts’. A shortcut is the action of pressing two or more keys on the keyboard to
carry out a command (rather than clicking a command or option in a menu). Shortcuts speed
up digital image processing enormously and it is worth learning the examples given in the study
guides. If in doubt use the menu (the shortcut will be indicated next to the command) until you
become more familiar with the key combinations. See pages 20 and 21 in ‘The Digital Darkroom’
for a list of the most frequently used shortcuts.
Note > The keyboard shortcuts indicate both the Mac and PC equivalents.
Example: The shortcut for pasting objects and text in most applications uses the key combination
Command/Ctrl + V. The Macintosh requires the Command key (next to the spacebar) and the V key
to be pressed in sequence whilst a PC requires the Control key (Ctrl) and the V key to be pressed.
essential skills: photoshop CS
PHOTOSHOP CS
>>>
~ Set up the computer, monitor and software preferences for effective digital image editing.
~ Create an effective image fi le management system.
~ Gain familiarity with the Photoshop interface.
~ Review Photoshop’s basic tools and commands for navigating images on screen.
the digital darkroom
essential skills
Seok-Jin Lee
2
essential skills: photoshop CS
essential skills
>>>>>>
PHOTOSHOP CS
>>>
Digital setup
Photoshop is the professional’s choice for digital image editing. Photoshop affords precise control
over images that are destined to be viewed on screen and in print. In order to maximize this control
it is necessary to spend some time setting up the software and hardware involved in the imaging
process in order to create a predictable and effi cient workfl ow.
This chapter will act as a prefl ight
checklist so that the user can create
the best possible working environment
for creative digital image editing. The
degree of sophistication that Photoshop
offers can appear daunting for the novice
digital image-maker, but the time required
setting up the software and hardware in
the initial stages will pay huge dividends
in the amount of time saved and the
quality of the images produced.
Commands and shortcuts
This chapter will guide you to select various
options from a list of menus on your computer.
If a command or dialog box is to be found in a
submenu which in turn is to be found in a main
menu it will appear as follows: ‘Main menu >
Submenu > Command’. Many of the commands
can be executed by pressing one or more of the
keyboard keys (known as ‘keyboard shortcuts’).
Keyboards: Mac and PC keyboards have different layouts. The ‘Alt’ key on a PC is the
‘Option’ key on a Mac. The functions assigned to the ‘Control’ key on a PC are assigned
to the ‘Command’ key on a Mac (the key next to the spacebar with the apple on it). When
the text lists a keyboard command such as ‘Ctrl/⌘ Command + Spacebar’ the PC user will
press the Control key and the spacebar whilst the Mac user is directed to press only the
Command key together with the spacebar.
3
the digital darkroom
essential skills
>>>>>>
PHOTOSHOP CS
>>>
Monitor settings
Resolution and colors
Set the monitor resolution to ‘1024 × 768’ pixels or greater and the monitor colors to ‘Millions’. If
the ‘Refresh Rate’ is too low the monitor will appear to fl icker. The best monitors will enable a high
resolution with a fl icker-free or stable image. It is possible to use a monitor resolution of 800 × 600
but the size of the palettes, and the lack of a ‘palette well’ in which to store these palettes, results in
a lack of ‘screen real estate’ or monitor space in which to display the image you are working on.
Color temperature – selecting a white point
The default ‘color temperature’ of a new monitor is most likely to be too bright and too blue
for digital printing purposes (9300). Reset the ‘Target White Point’ (sometimes referred to as
‘Hardware White Point’ or ‘Color Temperature’) of your monitor to ‘D65’ or ‘6500’, which is
equivalent to daylight (the same light you will use to view your prints). Setting the white point is
part of the ‘calibration’ process that ensures color accuracy and consistency.
Calibration
Full monitor calibration is not recommended until a new monitor has had time to ‘bed in’ or ‘settle
down’. You should, however, select an appropriate color temperature for the monitor from the
start. This can be adjusted using either the software ‘Adobe Gamma’ or ‘Monitor Calibrator’.
4
essential skills: photoshop CS
essential skills
>>>>>>
PHOTOSHOP CS
>>>
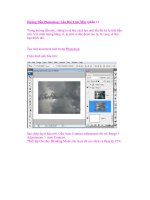
Once a new monitor has had time to ‘bed in’ you should complete a full monitor calibration. Switch
on the monitor and allow the image to stabilize for at least half an hour. Then set the brightness,
contrast, gamma and color temperature of the monitor using calibration software. This will ensure
that the appearance of an image on your screen will be the same on any other calibrated screen.
Monitor calibration will also ensure that your prints will appear very similar to your screen image.
When using an older Macintosh operating system (OS9) or Windows open the software ‘Adobe
Gamma’ (found in the ‘control panel’ or ‘control panels’ on a PC and Mac). Alternatively go to
‘System Preferences > Displays > Color > Calibrate’ when using Macintosh OSX. This will launch
the monitor calibrator software. Choose ‘6500’ as the ‘Target White Point’ or the ‘Hardware White
Point’ and ‘Adjusted White Point’ if using Adobe Gamma. The software will also guide the user to
set the contrast, brightness and ‘gamma’ of the monitor. On completion of the calibration process
you must save the newly calibrated monitor settings by giving it a profi le name. It is advised that
when you name this profi le you include the date that you carried out the calibration. It is usual to
check the calibration of a monitor every 6 months.
Note > When you choose 6500 as your target white point your monitor will initially appear
dull and a little yellow compared to what you are used to seeing.
5
the digital darkroom
essential skills
>>>>>>
PHOTOSHOP CS
>>>
Desktop picture
Although images of tropical beaches and sunsets may look pretty relaxing, splashing them on
your screen when editing digital images is not recommended. Any colors we see on the monitor
– including the richly saturated colors of our desktop picture – will infl uence our subjective analysis
of color, and our resulting image editing. It is therefore highly recommended to replace the
desktop picture with a solid tone of gray. When using Mac OSX select desktop from the System
Preferences.
Note > If you do not have a solid gray image in your ‘Desktop Pictures’ folder you can
create one using the image editing software.
Desktop alias or shortcut
Create an alias or shortcut for Photoshop so
that it is quick to launch from the desktop, Apple
menu or ‘Dock’. Open the Photoshop folder in
the applications folder to locate the Photoshop
application icon. Select the Photoshop
application icon and right click in the destination
you wish to create the shortcut. When using a
Mac drag the application icon into the ‘Dock’ in
OSX to automatically create an alias. To create
an alias anywhere else on a Macintosh (such as
the ‘Apple Menu Items’ in the ‘System Folder’ on
OS9) simply hold down the command and option
keys as you move the Photoshop icon. Dragging
images onto the Photoshop alias/shortcut will
automatically open them in the software.
6
essential skills: photoshop CS
essential skills
>>>>>>
PHOTOSHOP CS
>>>
Managing your photos
There are many software applications available (such as ‘Photoshop Album’ or ‘iPhoto’) to help catalog
and index image fi les so they are quick to access, edit, output and archive.
Searching for an image fi le that is over a year old with a fi le name you can only begin to guess at is
a task best avoided. The software enables ‘Keywords’ or ‘Tags’ to be assigned to the image so that
a year down the track you can search for your images by date, name or content to simplify the task.
Subsets of images can be displayed based on your search criteria. Some packages even provide the
option of locating your images via a calendar display where the pictures are collated based on the date
they were taken.
For the Mac OSX user it is advised that all images are stored in the ‘Pictures’ folder associated with
each ‘User’. For those readers with Windows machines it is good advice to save your pictures in
the ‘My Pictures’ folder. These folders are often set as
the default images folder by the indexing or browser
programs. Storing your pictures here will mean that the
program will automatically retrieve, index and display
images newly added to your system.
Many of the software packages available allow you to
assign an image editing program in the preferences
so that the image opens in this software when double-
clicked. If you are provided with this option select
Photoshop as your default image editing program.
iPhoto for Macintosh
7
the digital darkroom
essential skills
>>>>>>
PHOTOSHOP CS
>>>
Getting started with Photoshop
The interface of Photoshop is highly organized and presents the user with an effective interface
offering maximum control over the process of image editing. If all of the information and control
relating to a single image were on display there would be no room left on a standard monitor for
the image itself. Most of the features of the editing software therefore are hidden from view but
can be quickly accessed once the user starts to understand how the software is organized. The
Photoshop interface consists of the:
• Main menu
• Toolbox
• Options bar
• Image window
• Palettes
• Palette well
Note > Adobe Photoshop is available for both the Macintosh and Windows platforms.
The interface for each system is very similar, with the only differences being the result
of the underlying operating system of each computer. Once inside the program items
like the menu structure and palette design are exactly the same irrespective of the
computer platform you are working with. In practical terms the main difference between
the two systems is that Windows and Macintosh use different key stroke combinations for
shortcuts and most Macintosh systems use a single button mouse.
Photoshop Album for Windows
Organise your photographs according
to date taken or content catagory
8
essential skills: photoshop CS
essential skills
>>>>>>
PHOTOSHOP CS
>>>
The main menu
The main menu gives you access to the main commands. The menu is subdivided into main
categories. Clicking on each menu category gives you access to the commands in this section.
A command may have a submenu for selecting different options or for launching various ‘dialog
boxes’. Many of the commands can be accessed without using the menu at all by simply pressing
a key combination on the keyboard called a ‘shortcut’.
The toolbox
To select a tool to work on your image you simply click on it in the toolbox. If you leave your mouse
cursor over the tool Photoshop will indicate the name of the tool and the keyboard shortcut to
access the tool. Some of the tools are stacked in groups of tools. A small black arrow in the bottom
right corner of the tool indicates additional tools are stacked behind. To access any of the tools in
this stack hold the mouse clicker down on the uppermost tool for a second.
Photoshop’s tools can be reset by going to
Window > Tool Presets > ‘Reset All Tools’
9
the digital darkroom
essential skills
>>>>>>
PHOTOSHOP CS
>>>
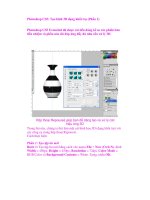
The Options bar
The ‘Options’ bar gives you access to the controls or specifi cations that affect the behavior of the
tool selected. The options available vary as different tools are selected.
The image window
The fi le name, magnifi cation, color mode and document size are all indicated by the image
window. If the image is larger than the open window the scroll bars can control the section of the
image that is visible.
The palettes
The palettes provide essential information and control over the image editing process. They can
be arranged in stacks and moved around the screen. Icons at the base of each palette provide
access to frequently used commands whilst additional options are available from the palette fl y-
out menu. Double-clicking the palette tabs or title bars will collapse the palettes to save additional
screen real estate. Pressing the ‘Tab’ key will temporarily hide the palettes. If you want to open a
palette that has been closed it can be launched from the ‘Window’ menu.
Note > Pressing the ‘Tab’ key will hide the palettes and toolbox from view. Pressing the
Tab key again returns the palettes and toolbox. Holding down the Shift key whilst pressing
the Tab key will hide all the palettes but keep the toolbox on the screen.
The palette well
Palettes can be dragged to the ‘palette well’ so that maximum screen space is available for the
image window. Clicking on a tab in the palette will temporarily open the palette. Clicking away from
the palette will automatically collapse the palette back into the well.
Fly-out menu
Additional palettes
Control icons
10
essential skills: photoshop CS
essential skills
>>>>>>
PHOTOSHOP CS
>>>
Settings and preferences
Before you start working with an image in Photoshop it is important to select the ‘Color Settings’
and ‘Preferences’ in Photoshop. This will not only optimize Photoshop for your individual computer
but also ensure that you optimize images to meet the requirements of your intended output device
(monitor or print). These settings are accessed through either the ‘Photoshop’ menu or ‘Edit’ menu
from the main menu at the top of the screen.
Memory (the need for speed)
If you have a plentiful supply of RAM (256 RAM or greater) you have to give permission for
Photoshop to tap into these RAM reserves to a greater or lesser extent when using OS9 or OSX.
Seventy-fi ve percent of the available RAM will automatically be assigned to Photoshop when
using a PC. The best advice is to close all non-essential software when you are using Photoshop
and allocate more RAM from the ‘Memory & Image Cache’ preferences (70% is a good starting
point).
Image cache
The Image cache setting controls the speed of the screen redraw (how long it takes an image to
reappear on the screen after an adjustment is made). If you are working with very high-resolution
images and you notice the redraw is very slow you can increase the redraw speed by raising the
image cache setting (it can be raised from the default setting of 4 up to 8 depending on the speed
required). The drawback of raising this setting is that the redraw is less accurate on screen images
that are not displayed at 100%.
Macintosh OS9: If you are using an older version of Photoshop on Macintosh OS9 you will
need to allocate more memory. In order to allocate this additional memory you must select the
application icon in the application folder and then go to ‘File > Get Info > Memory’. You cannot
allocate the total amount of RAM you have installed to either Photoshop as the operating system
requires a proportion of this RAM. If RAM is not plentiful you will also need to switch the operating
system’s ‘Virtual Memory’ on (go to ‘Control Panels > Memory > Virtual Memory’). Choose a
fi gure that is greater than the installed amount of RAM (256M or greater is recommended).
11
the digital darkroom
essential skills
>>>>>>
Scratch disks
As well as using RAM, Photoshop also requires a plentiful amount of free memory on the hard
drive to use as its ‘scratch disk’ (a secondary memory resource). To avoid memory problems when
using Photoshop it is best to avoid eating into the last gigabyte of your hard drive space. As soon
as you see the space dwindling it should be the signal for you to backup your work or consider the
installation of a second hard drive. If you have a second hard drive installed you can select this as
your ‘Second Scratch Disk’ by going to ‘Preferences > Plug-ins and Scratch Disks’.
Note > If you are intending to work on a very large image fi le it is recommended that the
scratch disk and image fi le location are using separate drives.
Effi cient use of memory
When you have set up your memory specifi cations you can check how effi ciently Photoshop is
working as you are editing an image. Clicking to the right of the document size information (at
the base of the image window) will reveal that additional information is available. Choosing the
‘Scratch Sizes’ option will display how much RAM and how much memory from the scratch disk
are being used to process the image.
Choosing effi ciency will display whether Photoshop is using the scratch disk to perform the image
editing tasks. Values less than 100 % indicate that if more RAM were made available to Photoshop
the operations would be faster. Simply closing software that is not being used can often increase
effi ciency, or closing additional images that have been opened but are not required for the editing
process.
Photoshop’s ‘Color Settings’
If you were launching Photoshop for the fi rst time you may have already been invited to choose
a ‘Color Setting’ that you would like to use as your default working space. The most appropriate
color setting for image-makers who wish to output to print is Adobe RGB (1998). If Photoshop has
already been launched this can be changed in the RGB drop-down menu by going to the ‘Color
Settings’ command, found in the ‘Photoshop’ or ‘Edit’ menu.
Additional information
PHOTOSHOP CS
>>>
12
essential skills: photoshop CS
essential skills
>>>>>>
PHOTOSHOP CS
>>>
Default settings
It is possible to reset all of the software preferences to their default settings at the time of opening.
Press and hold Alt + Control + Shift (Windows) or Option + Command + Shift (Mac OS) as the
software is launching. A screen prompt will invite you to delete the current settings. This is useful
when using a shared computer so that each tool behaves as you would expect it to. Return the
working space to its default setting when the application is already open by going to ‘Window >
Workspace > Reset Palette Locations’.
Page Setup
Select the paper size and orientation (vertical or horizontal) by going to File > Page Setup. When
you have chosen the paper size you can quickly gain an idea of how large your image will be
printed by holding down the Alt/Option key and clicking on the document size at the base of the
image window. The window that springs open shows the relationship between the paper and the
image (represented by a rectangle with a large cross).
Note > A shaded area around the edge of the paper indicates the portion of the paper that
cannot be printed (older style printers).
Opening images
Double-clicking an image on the desktop should automatically
open the fi le into image editing software. If the fi le does not
open into the image editing software you can launch it by
going to the ‘File > Open’ menu in the software program. If
you prefer your Adobe software to handle all of your image
fi les you should select it as the default image editing software
in your system preferences. In OSX click once to select a fi le
that would normally be opened in software other than Adobe,
e.g. QuickTime. Then select ‘Get Info’ from the ‘File’ menu of
the ‘Operating System’ menu. Choose the Adobe software
program in the ‘Open With’ submenu. Then select the ‘Change
All’ button for all future documents of a similar format and fi le
type to be opened by Adobe automatically.