photoshop CS2 essential skills phần 5 pot
Bạn đang xem bản rút gọn của tài liệu. Xem và tải ngay bản đầy đủ của tài liệu tại đây (10.31 MB, 36 trang )
132
essential skills: photoshop CS
essential skills
>>>>>>
PHOTOSHOP CS
>>>
Tolerance
How identical a pixel has to be to the original is determined by the Tolerance value in the Options
bar. The higher the value, the less alike the two pixels need to be, whereas a lower setting will require
a more exact match before a pixel is added to the selection. Turning on the Contiguous option will
only include the pixels that are similar and adjacent to the original pixel in the selection.
Moving a selection
If the selection is not accurate it is possible to move the selection without moving any pixels.
With the Selection tool still active place the cursor inside your selection and drag the selection to
reposition it. To move the pixels and the selection, use the Move tool from the tools palette. Press
the spacebar to realign a marquee selection before the selection is completed.
To remove a selection
Go to Select > Deselect or use the shortcut ‘Command/Ctrl + D’ to deselect a selection.
Modifying your selections
Basic selections of standard, or regular-shaped, picture parts can be easily made with one simple
step – just click and drag. But you will quickly realize that most selection scenarios are often a
little more complex. For this reason the thoughtful people at Adobe have provided several ways
of allowing you to modifying your selections. The two most used methods provide the means to
‘add to’ or ‘subtract from’ existing selections. This, in conjunction with the range of Selection tools
offered by the program, gives the user the power to select even the most complex picture parts.
Skillful selecting takes practice and patience as well as the ability to choose which Selection tool
will work best for a given task.
Photoshop CS provides two different ways to modify an existing selection.
1. The fi rst uses keyboard shortcuts in conjunction with the Selection tools to ‘add to’ and ‘subtract
from’ the selection. Using this approach is fast and convenient and is the one preferred by most
professionals.
2. The second uses the mode buttons located in a special portion of the tool’s Options bar. This
way of working is a great way to start changing your selections. The default mode is ‘New Selection’
which means that each selection you make replaces the last. Once another option is selected the
mode remains active for the duration of the selection session. This is true even when you switch
Selection tools.
Better with a tablet:
Many professionals prefer to work
with a stylus and tablet when creating
complex selections.
133
selections
essential skills
>>>>>>
PHOTOSHOP CS
>>>
Add to a selection
To add to an existing selection hold down the Shift
key whilst selecting a new area. Notice that when
the Shift key is held down the Selection tool’s cursor
changes to include a ‘+’ to indicate that you are in the
‘add’ mode. This addition mode works for all tools
and you can change Selection tools after each new
selection is complete.
Subtract from a selection
To remove sections from an existing selection hold down the Alt key (Option – Macintosh) whilst
selecting the part of the picture you do not wish to include in the selection. When in the subtract
mode the cursor will change to include a ‘-’.
Selection intersection
In Photoshop often the quickest route to selection perfection is not the most direct route. When
you are trying to isolate picture parts with complex edges it is sometimes quicker and easier to
make two separate selections and then form the fi nal selection based on their intersection. The
fourth mode available as a button on the Selection tool’s Option bar is the Intersect mode. Though
not used often this mode provides you with the ability to defi ne a selection based on the area in
common between two different selections.
134
essential skills: photoshop CS
essential skills
>>>>>>
PHOTOSHOP CS
>>>
Inversing a selection
In a related technique, some users fi nd it helpful to select what
they don’t want in a picture and then instruct Photoshop to select
everything but this area. The Select > Inverse command inverts
or reverses the current selection and is perfect for this approach.
In this way foreground objects can be quickly selected in pictures
with a smoothly graduated background of all one color (sky,
snow or a wall space) by using the Magic Wand to select the
background. Then the act of inversing the selection will isolate
the foreground detail.
Professionals who know that the foreground will be extracted
from the picture’s surrounds often shoot their subjects against
an evenly lit background of a consistent color to facilitate the
application of this technique.
Saving and loading selections
The selections you make remain active whilst the image is open
and until a new selection is made, but what if you want to store all
your hardwork to use on another occasion? As we have already
seen in the previous chapter Photoshop CS provides the option
to save your selections as part of the picture fi le. Simply select
Select > Save Selection and the existing selection will be stored
with the picture.
To display a selection saved with a picture, open the fi le and
choose Load Selection from the Select menu. In the Load Selection dialog click on the Channel
drop-down menu and choose the selection you wish to reinstate. Choose the mode which the
selection will be added to your picture from the Operation section of the dialog. Click OK to
fi nish.
135
selections
essential skills
>>>>>>
PHOTOSHOP CS
>>>
Feather and anti-alias
The ability to create a composite image or ‘photomontage’ that looks subtle, realistic and
believable rests with whether or not the viewer is able to detect where one image starts and the
other fi nishes. The edges of each selection can be modifi ed so that it appears as if it belongs, or
is related, to the surrounding pixels.
Options are available with most image processing software to alter the appearance of the edges
of a selection. Edges can appear sharp or soft (a gradual transition between the selection and the
background). The options to effect these changes are:
• Feather
• Anti-aliasing.
Feather
When this option is chosen the pixels at
the edges of the selection are blurred.
The edges are softer and less harsh. This
blurring may either create a more realistic
montage or cause loss of detail at the edge
of the selection.
You can choose feathering for the Marquee
or Lasso tools as you use them by entering
a value in the tool options box, or you can
add feathering to an existing selection
(Select > Feather). The feathering effect
only becomes apparent when you move or
paste the selection to a new area.
Anti-aliasing
When this option is chosen the jagged
edges of a selection are softened. A more
gradual transition between the edge pixels
and the background pixels is created. Only
the edge pixels are changed so no detail is
lost. Anti-aliasing must be chosen before
the selection is made (it cannot be added
afterwards). It is usual to have the anti-
alias option selected for most selections.
The anti-alias option also needs to be
considered when using type in image
editing software. The anti-alias option may
be deselected to improve the appearance
of small type to avoid the appearance of
blured text.
136
essential skills: photoshop CS
essential skills
>>>>>>
PHOTOSHOP CS
>>>
Defringe and Matting
When a selection has been made using
the anti-alias option some of the pixels
surrounding the selection are included. If
these surrounding pixels are darker, lighter
or a different color to the selection a fringe
or halo may be seen. From the Layers menu
choose Matting > Defringe to replace the
different fringe pixels with pixels of a similar
hue, saturation or brightness found within the
selection area.
The user may have to experiment with the most appropriate method of removing a fringe. The
alternative options of remove white matte and remove black matte may provide the user with
a better result. If a noticeable fringe still persists it is possible to contract the selection prior to
moving it using the Modify > Contract option from the Select menu.
Saving a selection as an alpha channel
Selections can be permanently stored as ‘alpha channels’. The saved selections can be reloaded
and/or modifi ed even after the image has been closed and reopened. To save a selection as an
alpha channel simply click the ‘Save selection as channel’ icon at the base of the channels palette.
To load a selection either drag the alpha channel to the ‘Load channel as selection’ icon in the
channels palette or Command/Ctrl-click the alpha channel.
It is possible to edit an alpha channel (and the resulting selection) by using the painting and editing
tools. Painting with black will add to the alpha channel whilst painting with white will remove
information. Painting with shades of gray will lower or increase the opacity of the alpha channel.
The user can selectively soften a channel and resulting selection by applying a Gaussian Blur
fi lter. Choose Blur > Gaussian Blur from the Filters menu.
Note > An image with saved selections cannot be saved as a JPEG.
Fringe
Defringe
137
selections
essential skills
>>>>>>
PHOTOSHOP CS
>>>
The ‘Magic Wand’
If you are new to the magic of the wand, enter the default setting of 32 in the tolerance fi eld of the
Options bar (raising the value makes the ants increasingly frisky). Make sure the ‘Anti-aliased’ box
is checked as this smoothes the edge of the selection (to stop it looking like the mouth of ‘Jaws’).
Also check the ‘Contiguous’ box, as this will make sure your ants respect any boundaries and
borders they encounter. Before attempting to make a selection decide which is easier – selecting
the background around the object or selecting the object itself (choose the one with fewest colors).
You can always ‘Inverse’ the selection when you are done (Select > Inverse). A careful selection
of the background can quickly be turned into a selection of the subject in this way.
Unleashing the trained magic ants
Unlike real magic wands you can’t wave this one around but have to click on the area you wish to
select instead. It is very unlikely that your ants will magically gravitate to the edges of your subject
in one hit. These ants have to be trained. You can either click on the ‘Add to selection’ icon in the
Options bar (holding down the Shift key has the same effect) or raise the tolerance of the Magic
Wand and try again.
Choose the ‘Add to selection’ option to select the pixel islands
138
essential skills: photoshop CS
essential skills
>>>>>>
PHOTOSHOP CS
>>>
If you raise the tolerance of the wand but the selection is either patchy or excessive go to ‘Edit >
Undo’ and try the following. Raise the setting of the eyedropper tool from ‘Point Sample’ to ‘5 by 5
Average’. The wand usually becomes a little more stable and the ants just might be encouraged
to make the selection you are looking for.
There is no feather option with the Magic Wand tool so this important step is often overlooked. A
small amount of feather is nearly always needed – even with seemingly sharp edges. One of the
problems with the Magic Wand is that the magic ants have a fear of edges. They prefer to stand
back and admire the view from a safe distance.
139
selections
essential skills
>>>>>>
PHOTOSHOP CS
>>>
Move the reluctant ants closer to the edge by expanding the selection (Select > Modify > Expand).
This will counteract the halo effect that is all too often seen with poor selection work.
‘Quick Mask’
The problem with feathering and modifying selections using the ‘Select’ menu items is that the
ants give very poor feedback about what is actually going on at the edge. Viewing the selection as
a ‘Mask’ in ‘Quick Mask Mode’ allows you to view the quality and accuracy of your selection. Zoom
in on an edge to take a closer look. Double-click the Quick Mask icon to change the mask color,
opacity and to switch between ‘Masked Areas’ and ‘Selected Areas’. If the mask is still falling short
of the edge, expand the selection again. If the mask is over the edge you can contract the selection
(also from the ‘Select > Modify’ menu). Alternatively give the Select menu the fl ick and proceed to
work on the mask directly. A ‘Levels’ adjustment in Quick Mask mode provides a ‘one-stop shop’ for
editing the mask giving you the luxury of a preview as you modify the resulting selection.
140
essential skills: photoshop CS
essential skills
>>>>>>
PHOTOSHOP CS
>>>
Using a ‘Levels’ adjustment (Image > Adjustments > Levels) in Quick Mask mode allows you to
modify the edge quality if it is too soft and also reposition the edge so that it aligns closely with your
subject. Dragging the shadow and highlight sliders in towards the center will reduce the softness
of the mask whilst moving the midtone or ‘Gamma’ slider will move the edge itself.
Note > The selection must have been feathered prior to the application of the levels
adjustment for this to be effective.
Save the selection as an alpha channel. This will ensure that your work is stored permanently in
the fi le. If the fi le is closed and reopend the selection can be reloaded. Finish off the job in hand
by modifying or replacing the selected pixels. If the Magic Wand is not working for you, you should
explore the following alternatives.
141
selections
essential skills
>>>>>>
PHOTOSHOP CS
>>>
‘Color Range’
Photoshop has many alternative methods for creating selections. The ‘Color Range’ option from
the ‘Selection’ menu should be considered next. This option is useful for selecting subjects that are
defi ned by a limited color range (suffi ciently different from those of the background colors). This
option is especially useful when the selection is to be used for a hue adjustment.
Use a Marquee tool (from the tools palette) to limit the selection area before you start using the
Color Range option.
Note > The Color Range option can misbehave sometimes. If the selection does not seem
to be restricted to your sampled color press the Alt/Option key and click on the reset option
or close the dialog box and re-enter.
Use the ‘Add to sample’ eyedropper and drag the eyedropper over the subject area you wish to
select. In the later stages you can choose a matte color to help the task of selection. Adjust the
fuzziness slider to perfect the selection. Black and white pixels can be left out of the selection if it
is to be used for a hue adjustment only.
142
essential skills: photoshop CS
essential skills
>>>>>>
PHOTOSHOP CS
>>>
Select OK and view the selection in Quick Mask mode to gain an idea of the selection’s suitability
for the job in hand. The selection can be feathered from the Select menu (Select > Feather) or a
Gaussian Blur fi lter can be applied to the Quick Mask. The latter option has the advantage of a
preview taking the guesswork out of choosing an appropriate feather value.
A selection prepared by the ‘Color Range’ command is ideal for making a hue adjustment. It is
also recommended to view the individual channels to see if the subject you are trying to isolate
is separated from the surrounding information. If this is the case a duplicate channel can act as a
starting point for a selection.
143
selections
essential skills
>>>>>>
PHOTOSHOP CS
>>>
Channel masking
An extremely quick and effective method for selecting a subject with reasonable color contrast to
the surrounding pixels is to use the information from one of the channels to create a mask and then
to load this mask as a selection.
Click on each individual channel to see which channel offers the best contrast and then duplicate
this channel by dragging it to the ‘New Channel’ icon.
Apply a levels adjustment to the duplicate channel to increase the contrast of the mask. Slide the
shadow, midtone and highlight sliders until the required mask is achieved. The mask may still not
be perfect but this can be modifi ed using the painting tools.
144
essential skills: photoshop CS
essential skills
>>>>>>
PHOTOSHOP CS
>>>
Select the default settings for the foreground and background colors in the tools palette, choose a
paintbrush, set the opacity to 100% in the Options bar and then paint to perfect the mask. Zoom
in to make sure there are no holes in the mask before moving on. To soften the edge of the mask,
apply a small amount of Gaussian Blur.
Note > Switch on the master channel visibility or Shift-click the RGB master to view the
channel copy as a mask together with the RGB image. This will give you a preview so that
you can see how much blur to apply.
Click on the active duplicate channel or drag it to the ‘Load channel as selection’ icon. Click on the
RGB master before returning to the layers palette.
Channel masking may at fi rst seem a
little complex but it is surprisingly quick
when the technique has been used a
few times. This technique is very useful
for photographers shooting products for
catalogs and web sites. A small amount
of color contrast between the subject and
background is all that is required to make
a quick and effective mask.
145
selections
essential skills
>>>>>>
PHOTOSHOP CS
>>>
Extract fi lter
Photoshop’s ‘Extract fi lter’ can be an indispensable tool for montage work. With a suitable edge
the Extract fi lter works well, e.g. a sharp outline on a contrasting background. If the fi nal montage
is to be effective the new background also needs to complement the tone and color of the subject’s
edge pixels. Many of the problems encountered when trying to achieve effective and sophisticated
extractions usually lie with the images chosen and not with the Extract fi lter itself. As soon as
the edge is diffi cult for the fi lter to detect the results are often less than convincing. If unsuitable
images are chosen a lot of patching, rebuilding or manual removal of the unwanted background
pixels may follow.
A studio backdrop that is lit independently of the subject will make extraction easier. You may,
however, not have access to a studio where the background illumination and content can be
controlled so effectively. When on location the photographer can choose the least busy background
and use shallow depth of fi eld (wide aperture on a telephoto lens) to help delineate the edge of the
subject clearly to help the Extract fi lter perform its task.
The fi lter has diffi culty extracting a background where the edge contrast is low
Simple and challenging images for extraction
146
essential skills: photoshop CS
essential skills
>>>>>>
PHOTOSHOP CS
>>>
The Extract fi lter is about as magic as the wand! It helps if the edge of the subject you are trying
to isolate is clearly defi ned by an edge. The strength of the fi lter is its ability to select complex
outlines with soft edges.
Duplicate the layer you are working before starting the extraction process as the extraction process
removes rather than hides the pixels surplus to requirement. To start the process select the layer
and go to ‘Filter > Extract’. The next step is to use the Edge Highlighter tool to defi ne the edge of
transition. The highlighter outline should be wider than the soft edge. The highlighter can extend
broadly into the background but must not extend into the subject for any great distance. Smart
highlighting adjusts the width as it goes. Alternatively an outline can be loaded from an alpha
channel (fi rst create a new channel, then stroke the selection and fi nally invert the channel).
Unless the edge is sharp and clearly defi ned it is preferable to move to ‘Preview’ rather than hit
‘OK’. From the Preview menu choose a suitable ‘matte’ color against which to view your extracted
subject. The ‘Cleanup’ and ‘Edge Touchup’ tools can help to perfect the edges.
147
selections
essential skills
>>>>>>
PHOTOSHOP CS
>>>
If the extraction is not perfect there are still a few options up Photoshop’s sleeve. Command/Ctrl-
click the layer thumbnail to load the pixels on the layer as a selection and then click on the ‘Add
layer mask’ icon. The mask can either be softened by applying the Gaussian Blur fi lter or shrunk
using the ‘Minimum’ fi lter (Filter > Other > Minimum) to exclude any remaining halo present.
Overview
These selection techniques will never replace the need for the Lasso or Pen tool completely but
they do provide an insight into the range of tools that can be used to approach the business of
separation. As knowledge of the tools available increases, the choice of background becomes an
important issue for photographers who ‘create’ rather than ‘capture’ images for digital editing. And
if you still can’t grow to love the Lasso consider burying the mouse in the garden and invest in a
‘graphics tablet’!
Selection shortcuts
Add to selection
Hold ⇧ key and select again
Subtract from selection
Hold ⌥/Alt key and select again
Copy
⌘/Ctrl + C
Cut
⌘/Ctrl + C
Paste
⌘/Ctrl + V
Paste Into
⌘/Ctrl ⇧ + V
Free Transform
⌘/Ctrl + T
Distort image in free transform
Hold ⌘ key + Move handle
Feather
⌘/Ctrl ⌥/Alt + D
Select All
⌘/Ctrl + A
Deselect
⌘/Ctrl + D
Inverse selection
⌘/Ctrl + I
Edit in Quick Mask Mode Q
148
essential skills: photoshop CS
essential skills
>>>>>>
PHOTOSHOP CS
>>>
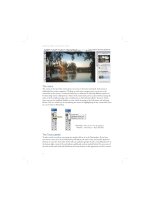
ACTIVITY 1
www.photoshopessentialskills.com/selections.html
A common task in digital image editing is to strip out the subject and place it against a new
background – the simplest form of montage. The effectiveness of such a montage is often
determined by whether the image looks authentic (not manipulated).
In order to achieve this the digital photographer
needs to modify the edge of any selection so that it
is seamless against the new background. A crude
or inappropriate selection technique will make
the subject appear as if it has been cut out with
the garden shears and is fl oating above the new
background. A few essential masking skills can turn
the proverbial sow’s ear into the silk purse.
149
selections
essential skills
>>>>>>
PHOTOSHOP CS
>>>
Open the stock images for this tutorial (‘sax.jpg’ and ‘zoom.jpg’) from the supporting web site. As
with any montage work it is advisable to check that the pixel dimensions of each image are similar
and the image modes (RGB or Grayscale) are the same. For a quick check depress the Alt/Option
key and click the document size box at the base of the image window.
Note > The resolution and image mode of an image pasted into another image will
automatically be adjusted to match the resolution and mode of the new host fi le. The
‘Transform’ command can be used to adjust the scale of the imported image using
‘Interpolation’ but excessive scaling can lower the overall quality of the image. It is better
to ‘downsample’ the larger image (decrease the total number of pixels) rather than sample
up the smaller one. Exceptions can be made for background images where there is little
fi ne detail, e.g. water, sky, fi re, etc.
1. Start by selecting the majority of the sax image’s background using a combination of the Magic
Wand and Lasso tools. Keep the Shift key depressed to build on, or add to, each successive
selection. Areas around the saxophone player’s trousers will be diffi cult to select using these tools
due to the tonal similarities. Use the ‘Quick Mask Mode’ to complete the selection work.
150
essential skills: photoshop CS
essential skills
>>>>>>
PHOTOSHOP CS
>>>
2. Set the foreground and background colors to their default setting in the tools palette and then
click on the ‘Edit in Quick Mask Mode’ icon in the tools palette. Double-clicking the icon will open
up the ‘Quick Mask Options’. Choose either ‘Masked Areas’ or ‘Selected Areas’ depending on your
preference. Click the color swatch to open the ‘Color Picker’ and select a contrasting color to that
found in the image you are working on. Set the color to a saturated green with 50% opacity.
Useful shortcuts for masking work
Brush size and hardness: Using the square bracket keys to the right of the letter P on the
keyboard will increase or decrease the size of the brush. Holding down the Shift key whilst
depressing these keys will increase or decrease the hardness of the brush.
Foreground and background colors: Pressing the letter D on the keyboard will return the
foreground and background colors to their default setting (black and white). Pressing the
letter X will switch the foreground and background colors.
Zoom and Hand tools: Use the Command/Ctrl + Spacebar shortcut to access the Zoom
tool and the spacebar by itself to drag the image around in its window. The combination of
these shortcuts will make shorter work of creating accurate selections.
151
selections
essential skills
>>>>>>
PHOTOSHOP CS
>>>
3. Select the Paintbrush tool from the tools palette and an appropriate hard edged brush from the
Options bar. Painting or removing a mask with the brush will result in a modifi ed selection when
the edit mode is returned to normal (the icon next to the ‘Quick Mask Mode’ icon). The foreground
and background colors can be switched when painting to subtract or add to the mask. Zoom in on
areas of fi ne detail and reduce the size of the brush when accuracy is called for. Click on ‘Edit in
Standard Mode’ when the painted mask is complete.
Note > If you select the ‘Move’ tool in the tools palette and drag the saxophone player a
short distance you will notice that the selection has a fringe of dark pixels surrounding it
(part of the original background image). Selections can be modifi ed by going to the ‘Select’
menu and choosing either the ‘Feather’ or ‘Modify’ options. There are no previews available
for these commands so we will modify the edge quality using channels and fi lters. Undo
the move (Command/Ctrl + Z) or go back in the ‘Histories’ to the point prior to the move.
4. Save the selection as an alpha channel by going to the channels palette and clicking on the
‘Save selection as channel’ icon. Now that the selection is stored, save your work in progress and
go to ‘Select > Deselect’.
Note > Change the name of the original fi le and save as a TIFF or PSD (the JPEG fi le format
does not support additional channels). The alpha channel contains a record of your selection.
This selection can be recalled if the selection is lost or the fi le is closed and reopened.
152
essential skills: photoshop CS
essential skills
>>>>>>
PHOTOSHOP CS
>>>
5. Click on the Alpha 1 channel to view the mask by itself or the ‘visibility’ or ‘eye’ icon to view
the mask and image together. Before returning to the layers palette switch off the alpha channel
visibility and select the master RGB channels view at the top of the channels palette.
6. Position the new background image (zoom) alongside the saxophone image. Click on the
background layer in the layers palette and drag it to the saxophone image. A border will appear
momentarily around the saxophone image to indicate that it will accept the new layer. Depress the
Shift key as you let go of the zoom layer to center the zoom image in the canvas area.
153
selections
essential skills
>>>>>>
PHOTOSHOP CS
>>>
7. The image now comprises two individual layers. The background layer is concealed by the zoom
layer. Select the top layer (the zoom image) and then go to ‘Edit > Free Transform’ (Command/Ctrl +
T). Drag a corner handle to resize the image to fi t the background. Holding down the Shift key whilst
you drag will constrain the proportions whilst dragging inside the bounding box will move the image.
Press the ‘Commit’ icon in the options bar or press the return/enter key to apply the transformation.
8. To reload your selection go to the alpha channel in the channels palette. Drag the channel to
the ‘Load channel as selection’ icon at the base of the channels palette or Command/Ctrl-click the
alpha channel. Return to the layers palette and with the zoom layer as the active layer click on the
‘Add Layer Mask’ icon. The layer mask will conceal the portion of the zoom image to reveal the
saxophone player. It is important to note that the section of the zoom image that is no longer visible
has been masked and not removed permanently.
154
essential skills: photoshop CS
essential skills
>>>>>>
PHOTOSHOP CS
>>>
Note > The ‘masked’ and ‘selected’ areas are the reverse of each other. Areas that were not
part of the original selection become the masked areas. Holding down the Option key as you
select ‘Add Layer Mask’ reverses the layer mask so that the selection becomes the mask.
9. The edge of the mask at the moment has a sharp well-defi ned edge that is not consistent with
the edge quality in the original image. This will be modifi ed so that the edge quality does not stand
out now that the saxophone player is viewed against a lighter background color. Click on the layer
mask to make it active and return to the channels palette. This layer mask is now available as a
temporary channel. Double-click the ‘Layer 1 Mask’ channel to open the ‘Display Options’. Select
the same options that you used for the ‘Quick Mask Mode’ earlier.
10. Contract the mask by going to ‘Filters > Other > Maximum/Minimum’. Increasing the pixel
radius will move the edge of the mask to conceal any fringe pixels that are being displayed from
the background layer.
Note > As well as moving the edge of the mask 1 pixel at a time the mask also becomes
more ‘rounded’ and this can have a detrimental effect on any fi ne detail present at the edge
of the subject.
155
selections
essential skills
>>>>>>
PHOTOSHOP CS
>>>
11. With the Layer 1 Mask as the active channel go to ‘Filters > Blur > Gaussian Blur’. Soften the
edge by increasing the pixel radius in this dialog box. One or two pixels will usually do the trick.
Switch off the visibility of the Layer 1 mask channel and review the edge quality of the saxophone
player. The Gaussian Blur softens the edge of the mask but may reveal some of the background
as a dark halo around the lighter edges. If this occurs return to the Maximum fi lter once again and
shrink the mask by a further pixel.
12. Any imperfections still evident can be corrected by clicking on the mask thumbnail in the layers
palette and then painting with black to increase the mask or painting with white to remove sections
of the mask. You will need to match brush hardness with the slightly soft edge of the mask if your
work is to go unnoticed. You can test the brush quality on a new layer created above the zoom
layer before working in the mask itself. Save the completed montage as a PSD image (complete
with all layers). Remember to duplicate and fl atten the image before applying the Unsharp Mask.
156
essential skills: photoshop CS
essential skills
>>>>>>
PHOTOSHOP CS
>>>
ACTIVITY 2
www.photoshopessentialskills.com/selections.html
The Extract fi lter can effectively work with a soft or blurred edge, but when this edge is viewed
against a very different tone, the edge looks out of place. These ‘soft edges’ can, however, be
‘worked’ so that they can be blended into the new background.
1. If you are starting with a grayscale image
and would like to introduce color you must fi rst
convert the image mode to RGB (Image > Mode
> RGB). The next step is to import or create a new
background. It is possible to create a background
using the ‘Clouds’ fi lter that resembles the
brushed canvas backdrops used by many portrait
photographers. To achieve this effect click on the
‘New Layer’ icon in the layers palette. In the tools
palette set the foreground color to black and the
background color to a light shade of gray (double-
click the color swatch and then choose a color
from the ‘Color Picker’). To apply the clouds effect
go to ‘Filter > Render > Clouds’.
Photography by Benedikt Partenheimer