The Essential Guide to Flash CS4 friends of ED ADOBE LEARNING LIBRARY PHẦN 3 ppt
Bạn đang xem bản rút gọn của tài liệu. Xem và tải ngay bản đầy đủ của tài liệu tại đây (1.31 MB, 43 trang )
THE ESSENTIAL GUIDE TO FLASH CS4
64
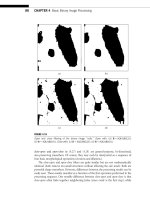
You will be presented with the screen shown in Figure 3-3.
Figure 3-3. The blank Flash banner
The gene-with-envy logo will be the layer below the masked layer. We are now going to
import the logo onto the stage.
5. From the File menu, select Import ¢ Import to Library as shown in Figure 3-4.
6. Browse to where you have saved the gene-with-envy logo and click OK.
7. Click the Library tab that is behind the Properties tab. You will see that cajahkck*
flc has been imported, as shown in Figure 3-5.
Remember, if your tabs and windows get rearranged, you can reset your work
space using the drop-down menu to the left of the search button at the top-
right corner of the screen.
We are now going to place the logo onto the stage.
GETTING YOUR HANDS DIRTY: LAYERS, MASKS, AND PHOTOSHOP
65
3
Figure 3-4. Importing a graphic to the Flash Library
THE ESSENTIAL GUIDE TO FLASH CS4
66
8. From the Library, drag cajahkck*flc onto the stage as shown in Figure 3-5.
Figure 3-5. Dragging the logo from the Library onto the stage
9. Rename the Layer 1 on the timeline Image.
We now need to convert the image to a
Movie Clip symbol, just as we did in Chapter 1
when we created a motion tween.
10. Right-click the image on the stage and choose Convert to Symbol.
11. Ensure that Type is set to Movie Clip and give the symbol the name of logo as shown
in Figure 3-6.
Figure 3-6. Renaming your movie clip
The movie clip is now set up. Next we are going to create a layer above it, where we’ll
place the shape of the mask.
GETTING YOUR HANDS DIRTY: LAYERS, MASKS, AND PHOTOSHOP
67
3
12. Click OK to close the Convert to Symbol dialog box.
13. Create a new layer on the timeline by clicking the New Layer button . Name it
Mask Shape as shown in Figure 3-7.
Remember: to rename a layer, simply double-click on the layer name and type
the new name over it.
Figure 3-7. Adding a new layer to your timeline
With the new layer created, it’s time to place the shape on it.
14. Draw a solid circle on the Mask Shape layer with the Oval tool as shown in
Figure 3-8. Before you draw the circle on the stage, remove any stroke in the
Properties Inspector. You can draw a perfect circle by pressing the Shift key as you
draw the circle on the stage.
The Oval tool is one of five tools available as part of the Shape toolset. By
default, the
Rectangle tool is displayed. To select the Oval tool, simply click
and hold the
Rectangle tool, and all of the options will become available for
you to select.
Figure 3-8. Click and hold the rectangle tool
to reveal the Oval tool.
THE ESSENTIAL GUIDE TO FLASH CS4
68
15. Right-click frame 15 on the timeline of the Mask Shape layer and select Insert
Keyframe
.
16. Right-click on frame 15 on the timeline of the Image layer and select Insert Frame.
Your timeline should appear as shown in Figure 3-9.
Figure 3-9. Setting up the timeline for the masked-layer animation
17. Click on the Selection tool, and then right-click on the oval on the stage and select
Convert to Symbol.
18. Convert the symbol to a movie clip and
give it the name
spotlight_mc in the
Convert to Symbol dialog box.
19. Click OK to close the Convert to Symbol
dialog box.
20. With keyframe 15 selected on the Mask
Shape
layer, click on the Free Transform
tool and drag the oval by one of its
control handles until it completely cov-
ers the logo, as shown in Figure 3-10.
21. Right-click between the first and last
keyframes on the
Mask Shape layer
and select
Create Classic Tween.
Figure 3-10. Creating the mask animation
by dragging the oval outward
GETTING YOUR HANDS DIRTY: LAYERS, MASKS, AND PHOTOSHOP
69
3
22. Select Control ¢ Test Movie from the menu to see
what has happened to your movie.
The
Mask Shape layer expands to cover the logo and
loops. All that is left now is to make the white expanding
circle into a mask layer.
23. Right-click on the Layer icon next to the Mask
Shape
text on the timeline.
24. Select Mask from the menu, as shown in
Figure 3-11.
25. Select Control ¢ Test Movie from the menu to see
what has happened to your movie.
You will notice that the oval on the stage has been effec-
tively reversed—it has become a porthole that expands
to display the entire logo. This is just a simple demonstra-
tion of using a mask in a Flash CS4 movie. Through care-
ful planning and design, masks can help to create truly
compelling Flash movies.
Combining mask layers and ActionScript
In this section we will create a Flash CS4 movie that combines mask layers with ActionScript.
This exercise will demonstrate how combining the different features of Flash CS4 can take
your movies to the next level of interactivity.
To complete the following exercise, you will need to download the _d0[i]oga`[]o*BH= file
from the Downloads section at sss*bneaj`okba`*_ki.
1. Open the _d0[i]oga`[]o*BH= file in Flash CS4.
You will see that we have already imported the logo onto the stage for you. Now let’s cre-
ate a new layer as we did in the previous exercise.
2. Create a new layer on the timeline. Call it Mask Shape, as shown in Figure 3-12.
Figure 3-12. Creating a new shape for
the mask on the timeline
3. With the Oval tool selected, go to the Properties Inspector and remove the stroke
altogether, then select the green radial gradient from the color picker, as shown in
Figure 3-13.
Figure 3-11. Converting a
normal layer to a mask layer
THE ESSENTIAL GUIDE TO FLASH CS4
70
Figure 3-13. Selecting the radial gradient
from the color picker
4. Draw a circle on the Mask Shape layer roughly in the middle of the logo on the
stage, as shown in Figure 3-14.
To expand the circle in a way that keeps its dimensions, simply hold down the
Shift key as you drag it.
Figure 3-14. Using the Oval tool to draw a circle
in the middle of the logo
Let’s change the gradient slightly to create a realistic spotlight. In the next part of the exer-
cise, we will apply a transparent gradient on the edge of the circle.
5. Click on the Gradient Transform tool and then click on the oval on the stage.
If you can’t find the Gradient tool, type F (the shortcut for the Gradient tool) or
click and hold the
Free Transform tool.
GETTING YOUR HANDS DIRTY: LAYERS, MASKS, AND PHOTOSHOP
71
3
6. Open the Color panel (Figure 3-15) by choosing Window ¢ Color
from the menu bar.
You can also open the Color panel via the
Shift+F9 shortcut.
7. In the Color panel select Radial from the Type drop-down list if it is not already
selected.
8. Set the right handle on the gradient bar to the same value as the left handle. The
value is
R: 0 G: 255 B: 0.
The gradient will become solid. To complete it for use as our spotlight, we need to make
the edges transparent.
9. With the right handle still selected, change the Alpha field to
10% as shown in Figure 3-16.
We’re going to create the “spotlight” effect on the circle on the stage by
manipulating the gradient just a little further.
10. Drag the left handle toward the middle to ensure that only the
edges of the shape are transparent, as shown in Figure 3-17.
Figure 3-17. The gradient
handles enable you to specify
the degree of transparency.
You’ve finished the spotlight for this section. Your stage should look like
Figure 3-18. You might be thinking that this doesn’t look like a spotlight,
and you’re right, it doesn’t—yet! Next we will apply masking to trans-
form our banner ad.
Figure 3-18. The “spotlight” on the stage
Figure 3-15. The Color panel
is opened by selecting Window
¢ Color.
Figure 3-16. When you
manipulate the Alpha value of
a color, you are manipulating
its transparency/opacity
settings.
THE ESSENTIAL GUIDE TO FLASH CS4
72
11. Transform the green oval on the stage into a movie clip by right-clicking with the
Selection tool and selecting Convert to Symbol.
12. Name the movie clip Spotlight, as shown in Figure 3-19.
Figure 3-19. Renaming the movie clip Spotlight
We need to change the registration point to the middle of the stage because the final
animation will be tied to the movement of the mouse pointer, which we want defaulted to
the center of the stage, not the top of it.
13. Click the middle square of the Registration area as shown in Figure 3-20 and click
OK to close the Convert to Symbol screen.
We’re now going to use ActionScript 3.0 to associate the
Spotlight movie clip to the mouse
pointer. This is an action we will be completing multiple times, as we want the spotlight to
be constantly tied to the location of the mouse cursor. To achieve this we will create an
AJPAN[BN=IA ActionScript 3.0 event. This event will continually check the location of the
mouse pointer when it rolls over the movie and will ensure that the spotlight follows it
accordingly.
Events are the processes that you employ in ActionScript to make your Flash
CS4 movie react to mouse clicks, mouseovers, and the like. Chapter 8 will
investigate event-handling procedures in ActionScript 3 in depth.
Before we do this, however, we need to give the Spotlight an instance name on the stage.
14. Click on the oval on the stage to select it.
15. In the Properties tab, give the oval the instance name of spotlight_mc, as shown in
Figure 3-21.
Figure 3-21. Naming the spotlight_mc
instance
Figure 3-20.
Changing the
registration enables
you to specify
where the object is
tied to the stage.
GETTING YOUR HANDS DIRTY: LAYERS, MASKS, AND PHOTOSHOP
73
3
We need to create a new layer, called Action, on which to place the ActionScript.
16. Create a new layer by clicking the New Layer button.
17. Name the new layer Action by double-clicking the layer’s name, as shown in
Figure 3-22.
Figure 3-22.
Naming the new
layer Action
18. Select Frame 1 of the Action layer.
19. Select Windows ¢ Actions on the menu bar to open the Actions
panel, which will allow you to write ActionScript, as shown in
Figure 3-23.
You can also open the Actions panel via short-
cuts. Press F9 to open the panel in Windows,
and Option+F9 to open the panel in Mac OS.
20. Type the following code into the Actions panel:
olkphecdp[i_*]``ArajpHeopajan$Arajp*AJPAN[BN=IA(
ikraI]og%7
bqj_pekjikraI]og$a6Arajp%6rke`
w
olkphecdp[i_*t9ikqoaT7
olkphecdp[i_*u9ikqoaU7
y
21. Save your movie.
22. Test your movie by selecting Control ¢ Test Movie.
Remember that you can also test your movie
by pressing Control/Command+Enter on your
computer’s keyboard.
What happens when you mouse over the movie? That’s right! The green
oval follows your mouse pointer. In the next part of the exercise we will
create the mask layer that will give the Flash CS4 movie a spotlight to
highlight the logo.
Unlike its predecessors, Flash CS4 does not offer a movie class method
called i]og$%. Masking is now a property. For the masking animation to
work correctly, you need to apply it to the movie clip you wish to mask.
This is simply a matter of adding a small piece of code to the first line of the ActionScript.
Figure 3-23. Opening the Actions
panel
THE ESSENTIAL GUIDE TO FLASH CS4
74
23. Add the following code to the first line of the script, as shown in Figure 3-24:
hkck[i_*i]og9olkphecdp[i_7
Figure 3-24. Adding the ActionScript to your animation
24. Click on the logo movie clip to select it, and give it an instance name of logo as
shown in Figure 3-25.
Figure 3-25. Giving your movie clip
object an instance name enables the
ActionScript to reference it.
25. Test your movie by pressing Control/Command+Enter on your keyboard.
Remember: you can also test your movie by selecting Control ¢ Test Movie in
the
Control menu.
Upon testing your movie you will see that it has been completely masked in black, with a
little spotlight that enables you to mouse around the movie to reveal the logo. But we’re
not finished! We are now going to ensure that the gradient appears to give the spotlight a
realistic look. Again, we need to employ ActionScript to do this.
26. Add the following code into lines 2 and 3 of your ActionScript, as shown in
Figure 3-26:
olkphecdp[i_*_]_da=o>epi]l9pnqa7
hkck[i_*_]_da=o>epi]l9pnqa7
GETTING YOUR HANDS DIRTY: LAYERS, MASKS, AND PHOTOSHOP
75
3
Figure 3-26. Adding code to your ActionScript to give a realistic gradient
The _]_da=o>epi]l command in ActionScript was designed to give an ease of movement
to Flash movies that contain many moving vector graphics. Vector graphics are very light
graphics that are composed of lines and curves to reproduce images. When you are build-
ing large-scale Flash movies, with many different kinds of movement and animations, you
may notice your vector graphics moving across the stage in a jerky fashion
when your movie is published at a high frame rate, particularly with slower
machines and connection speeds. This jerkiness is caused by the computer
redrawing the graphic on every single frame.
_]_da=o>epi]l dynamically converts a vector image into a bitmap image.
Bitmap images do not need to be redrawn for each frame, which alleviates the
jerkiness in the animation. The trade-off is that bitmap files can be much larger
than vector images. We will cover more about different kinds of graphics in
Chapter 4.
We’re now at the final step, where we transform a normal layer to a masked
layer.
27. Right-click on the Mask Shape layer and select Mask, as shown in
Figure 3-27.
28. Test your completed movie by selecting Control ¢ Test Movie.
As you can see, the mask layer adopts the background color, and the code has
provided interactivity. When you move the mouse pointer over the Flash CS4
movie, the spotlight moves with the mouse to reveal the image underneath, as
shown in Figure 3-28.
Figure 3-27. Creating a mask
layer
THE ESSENTIAL GUIDE TO FLASH CS4
76
Figure 3-28. The completed animation
Special layers can be created that allow you to draw and edit with greater ease and achieve
some really funky effects.
Guide layers
Guide layers enable you to tweak your animations to ensure
that everything in your movie is precisely where you want it.
They assist you in aligning objects on one layer with objects
on another layer.
While you can use animation paths like in Flash CS3, guide
layers enable you to lock objects into place in relation to
other objects. The beauty of guide layers is that they do not
appear in final animations, but enable you to position the
elements on your stage just so. Though motion layers are so
easily made in Flash CS4, guide layers are useful in ensuring
your animation is precise. Motion layers enable to you specify
the path of the animation exactly, but guide layers are impor-
tant because they allow you to place objects on the stage
precisely.
To create a guide layer, select the layer you wish to become a
guide layer and right-click it then select
Guide, as shown in
Figure 3-29.
Control-clicking brings up the menu from
which you choose Guide in Mac OS.
Figure 3-29. Creating a guide
layer
GETTING YOUR HANDS DIRTY: LAYERS, MASKS, AND PHOTOSHOP
77
3
Motion guide layers
Motion guide layers enable you to control the movement of objects in a classic tween
animation. Simply dragging an existing normal layer onto a guide layer creates a motion
guide layer. The normal layer will then be linked to the newly created layer.
When you are working with large Flash CS4 movies that contain multiple
layers, try to arrange all guide layers at the bottom. This will ensure that you
don’t accidentally convert guide layers into motion guide layers.
Importing artwork from Photoshop
Flash CS4 integrates well with other Adobe products. Gone are the Macromedia days when
importing art from Adobe Photoshop would cause hours of headaches. You can now drag
from one Adobe application, such as Photoshop, Illustrator, and Designer, to the other or
go to
File ¢ Import.
For example, you might work in an agency that has a number of departments, meaning
print artwork is created in Adobe Photoshop and the print artwork needs to be translated
to the online medium. This is where Flash CS4 shines. You can import layered files created
in other Adobe Creative Suite programs directly in Flash CS4. This has two very positive
effects: it saves a lot of time that you can now invest in producing amazing animations, and
it protects the layout and integrity of the original file.
Though Flash CS4 has the ability to import images in many and varied formats, it’s the
native Photoshop PSD format that is most popular in importing still images. Flash CS4 is
more compatible with Photoshop than ever; it can preserve the attributes and settings that
were created in Photoshop.
Photoshop will allow you to export PSD files with layers. This is particularly beneficial if
you need to create complicated visual layouts in Flash CS4. When you import a PSD file
into Flash CS4 you can import each PSD layer as an individual Flash CS4 layer or individual
keyframes, or you can import the entire PSD as a single flattened layer in Flash CS4.
Using the PSD importer
The following exercise will demonstrate how to import a layered PSD as a flattened bitmap:
1. Open a new blank document in Flash CS4.
2. Select File ¢ Import ¢ Import to Library as shown in Figure 3-30.
The
Import “layers.psd” to Library dialog box will appear (see Figure 3-31).
THE ESSENTIAL GUIDE TO FLASH CS4
78
Figure 3-30. Importing a PSD file to the Flash CS4 Library
3. Select Flash Layers in the Convert Layers To field.
4. Click on square2 so that it is highlighted.
5. With square2 selected, press the Shift key on your keyboard and then click on the
background layer. All layers will be highlighted as shown in Figure 3-31.
6. To import the PSD in layers, ensure that the Bitmap Image with Editable Layer Styles
radio button is selected in the
Import These Image Layers As section.
7. Click OK.
You will notice that the Library has been populated by assets from the h]uano*lo` file, as
shown in Figure 3-32. You can drag the flattened bitmap of h]uano*lo` onto the stage or
drag an individual asset that has been saved within a folder in the Library.
GETTING YOUR HANDS DIRTY: LAYERS, MASKS, AND PHOTOSHOP
79
3
Figure 3-31. Pressing shift and clicking on your selections allows you to choose them all.
Figure 3-32. The Flash CS4 Library is
populated from the layers.psd file.
We will pause here a moment to examine again the PSD importer. Follow steps 1 through
3 in the previous exercise to open the importer. The
Convert to Layers field, shown in
Figure 3-33, allows you to choose from keyframes or layers.
Figure 3-33. You can
choose how to import a
PSD into Flash CS4.
THE ESSENTIAL GUIDE TO FLASH CS4
80
If you choose to import the PSD as Flash layers, all of the PSD layers are placed on their
own individual layers, which are named the same as the Photoshop layers when they are
placed in the Library folder. If you chose to import the PSD as keyframes, all of the layers
that you have selected to import into Flash CS4 will be placed on individual keyframes on
a new layer. Let’s experiment with that now.
1. Open a new blank document in Flash CS4.
2. Select File ¢ Import ¢ Import to Stage.
Don’t forget there are shortcuts to every action! The shortcut key sequence to
import an object onto the stage is Control/Command+R.
3. Select the h]uano*lo` file and click OK.
4. Click on the square2 layer, press Shift, then click on the square1 layer.
5. At the Convert Layers To field, select Keyframes.
6. Click OK.
What has happened? The layers that you selected to import to the stage have been
imported into separate keyframes on one layer. Select
Control ¢ Test Movie or simply press
Enter on the keyboard to see the keyframes played in sequence. This has been a basic
example, but imagine the possibilities of importing sophisticated PSDs that have a slightly
different image on each frame. It would then be possible to create complex animations
relatively quickly by importing them into Flash CS4.
Flash CS4 and Photoshop compatibility
Though Flash CS4 has extensive compatibility with Photoshop, it’s important to note that
there are some attributes that can’t be accurately imported, or that can’t be edited in
Flash CS4 after they have been imported.
While Flash CS4 can convert CMYK colors in images, it doesn’t always preserve the color
exactly. You will get a better result from converting CMYK images to RGB in Photoshop
and then importing the images into Flash CS4. This approach ensures consistency across
suites of ads, from offline print to online banners and sites. This also ensures that the col-
ors of corporate collateral remain true to guidelines.
GETTING YOUR HANDS DIRTY: LAYERS, MASKS, AND PHOTOSHOP
81
3
Not all Photoshop blend modes can be imported into Flash CS4; you may need to rasterize
a layer in Photoshop previous to importing. Once you have rasterized a layer you will no
longer be able to edit it. You can import the following Photoshop blend modes into Flash
CS4 without having to rasterize them, which allows them to be edited in the Flash CS4
authoring environment:
Darken
Difference and Overlay
Hard Light
Lighten
Multiply
Normal
Screen
Photoshop Smart Objects cannot be edited once they have been imported to Flash CS4,
because they are automatically rasterized and imported to Flash as bitmaps. This is also
true for
Image and Fill layers.
When you are importing objects that contain transparent areas, the objects on the layers
behind the transparent layers will be visible (providing they are also imported). If you do
not want them to be visible, you can import the transparent object as a flattened bitmap
in the PSD importer.
Summary
In this chapter you learned about Flash CS4’s adaptability. You learned how diverse masks
can be, and how beautiful illustrations that you have created in Photoshop can now be
imported with little mess or fuss.
In Chapter 4 you will begin to pull design and technical knowledge together to create an
artistic logo from a concept that was sketched by hand, and you’ll learn more about using
the drawing tools and different types of graphics in Flash CS4.
CHAPTER 4
DRAW ME A PICTURE: USING THE
DRAWING TOOLS
THE ESSENTIAL GUIDE TO FLASH CS4
84
Your life is inundated by branding, whether you realize it or not, regardless of what you
are doing, whether it be listening to the radio, riding the subway, reading the newspaper,
or surfing the Internet. Even advertisement-free television has branding in it in the form of
product placement! You may have become so immune to it that it doesn’t register con-
sciously to you, but be assured, it is there. Every company has a logo that it uses to estab-
lish brand recognition, whether it is a tag line or a graphic that people immediately
associate with their business. Think of the McDonald’s golden arches, MSN’s multicolored
butterfly, and the Mercedes Benz three-pointed star. These logos all immediately indicate
which company they represent.
All too often, the importance of the logo is lost in purely online marketing campaigns, or
logos are hastily thrown together prior to the website launch. Though the beauty of online
marketing is that it is relatively cost effective when it is compared to the price of produc-
ing equivalent campaigns in other media, the downside is that these campaigns are often
thrown together with little thought about branding or positioning in the market place.
So how do you start to even conceive of a logo? To begin with, you need to consider a
tagline or a graphic that demonstrates what service or product your company or website
offers and begin to play with words and concepts that fit with your overall vision.
Whether a picture is drawn in sand or sculpted from empty beer cans, most of us can find
a contextual relevance. The human brain is highly dedicated to pattern recognition, par-
ticularly visual pattern recognition.
Humans are visual creatures by nature and graphics underpin our psychology. Even when
mating, our biological instincts are driven by the interpretation of point, line, and plane.
From art to advertising, an understanding of visual attraction goes a long way.
In Chapter 2, we looked at design principles. In this chapter, we will look at the powerful
drawing tools in Flash CS4 and the four important kinds of symbols. Then we will create an
appealing logo by implementing the psychological concepts from the previous chapter via
the Flash CS4 drawing tools.
A picture is worth a thousand words
Since the dawn of civilization, humans have sought ways to reconstruct and illustrate phys-
ical reality. Sand, stone, papyrus, canvas, or pixel, no matter where in time we are, humans
want to draw. Today people are drawing in pixels. In the future, it may be the building
blocks of mental imagery, but for now the question is this: Exactly what are pixels?
Not to be confused with pixies, which are tiny mythical creatures of Celtic origin, pixels are
the tiny dots that create all the text, images, and backgrounds that your computer can
display.
DRAW ME A PICTURE: USING THE DRAWING TOOLS
85
4
All about pixels
A pixel is the most basic piece of information used to transmit data from a computer’s
memory chip to the screen or display. Pixels are arranged in a rectangular grid pattern, and
are also used to describe screen resolutions. 800
600 means 800 columns of 600 rows of
pixels. That’s 480,000 pixels! The more pixels you have, the better curves, photos, and
nonlinear shapes will look on the screen.
Pixels get their name from the joining of two words, picture (pix) and element (el). Pixel
colors are created using a mixture of the three primary colors; red, green, and blue. This is
what the term RGB stands for.
You may recall from art class that the primary colors are red, blue, and yellow. Yellow
and blue make green, remember? Well, in the digital realm, and also in the human eye,
the primary colors are different: they are red, green, and blue. You make yellow using
red and green. You make orange using red and half the amount of green that yellow is
composed of.
On the Web, pixel colors are described by the intensity of the mix of red, green, and blue.
The intensity is described using a 255-degree scale starting from 0; 255 equates to 100%,
127 equates to 50%, and 0 equates to 0%. To describe the color red to your browser, you
would use RGB(255,0,0). This means 100% red, 0% green, 0% blue.
How would you describe bright purple? You may remember from finger painting that
purple is a mix of red and blue (100% red and 100% blue). So this would translate to the
RGB scale as RGB(255,0,255).
Notice that we are using 100% intensities. This creates bright and vivid colors. To instead
create a dark purple, we would turn down the intensity of each value. A darker purple
might be 20% red and 20% blue, which would translate to RGB(51,0,51). Why 51? Because
51 is 20% of 255.
Notice, however, that we retained the proportions of the color mix, which in turn retains the
hue—that is, the quality—of purple, which is simply altering the intensity of light allowed to
flow into the pixel. How then, would we create black? Actually, black is no colors. It’s just 0%
red, 0% green, and 0% blue. White is the opposite: 100% red, green, and blue.
Before the pixel, people didn’t use displays when they output computer data, as there
were no LCD or tube monitors, televisions, or calculator screens. People, mostly mathema-
ticians, would receive their computer information from a series of flashing lights. Some
would get their data from holes punched from pieces of card. Earlier still, this information
was gleaned from the beads in abacas calculators (even earlier, from the shadow cast
through the eyes of the Stonehenge computer!).
From a philosophical point of view, our eyes show us an interpretation of reality. In the
same sense, pixels create a sample of reality and display it on the screen. If a photograph
is scanned in at high resolution, it will look clearer and sharper. It will resemble the original
source better. Digital cameras with a high megapixel rating will capture the image of phys-
ical reality better than their lower-rated counterparts.
THE ESSENTIAL GUIDE TO FLASH CS4
86
In this chapter, we’ll take the design principles covered in Chapter 2 and apply them to a
real-life example. The final output of the chapter will be the logo for our gene-with-envy
Flash CS4 site.
Types of image formats
I mentioned earlier that pixels sit in rectangular grids. Images are created on the screen by
changing the color of the pixels in the grid. But where do the images come from in the
first place? And how are they redrawn on screen?
Well, they actually come from many sources. The image may be created internally, hand-
drawn using software like Adobe Photoshop, or from external sources such as a digital
camera or a DVD screen grab. The source must be interpreted and stored in a uniform way
that can be edited, shared, and redrawn on the screen or printed. The different ways of
redrawing the graphics on the screen give rise to the various graphics formats.
But first, you need to understand exactly what image file formats are. In the digital sense,
image formats are the standardized means of storing images. In it’s most literal definition,
an image file format is an image file that is composed of bitmap or vector data that is
rasterized (converted) to pixels when it is rendered on the screen. The pixels are dis-
played on the image in a grid, with each pixel displayed as an RGB measure.
Bitmap or raster graphics
Images can be stored as a series of dots in a grid. Using an analogy of the beads on an
abacus, the more beads you have, the more accurately the image represents reality. A bit
is the smallest piece of data a computer deals with. A bit can either be on or off. Another
way of saying this is that it can either be true or false, or represent a 1 or a 0. A map, as
you know, is a relational guide to places. Likewise, a bitmap is literally a guide to the con-
tents of visual memory in a computer. Bitmaps replicate exact details and color tones. Skin
tones, in particular, replicate very well. The problem with bitmaps is that all that detail
(especially in things like curved lines) needs lots of pixels to be reproduced accurately. This
leads to bitmapped graphics having very large file sizes. As you know, large files don’t
move fast on the Net, so various methods of image compression were devised to try and
solve this problem.
Image compression reduces the size of large bitmaps. One of the most well-known com-
pression methods—the JPEG compression algorithm—looks for areas of similar color and
groups those pixels, meaning it takes less information to describe the shape. At low com-
pression levels, this can lead to big reductions in size with little visible difference, but as
the level of compression is increased, you will notice artifacts appear on the image. These
artifacts are visual corruption in the form of blockiness, blurring, color streaking, and halos
caused by the compression algorithm being pushed to its limits. The upshot is you’ll have
smaller files, but worse image quality, and that’s something that you’ll have to balance
individually across your images. Bitmap file formats that Flash CS4 can interpret are BMP,
GIF, PNG, JPEG, TIFF, and TGA.
DRAW ME A PICTURE: USING THE DRAWING TOOLS
87
4
Vector graphics
Vector graphics are images that are described by geometry rather than by plotting each
individual pixel. For example, to draw a simple line of 10 pixels in a bitmap, the computer
would have to set the color information, brightness, and so on for each of those 10 pixels.
For a vector, however, the computer just needs to say, “Draw a line between point A and
point B.” Much less information is required, and no matter how long the line is, the same
amount of information is needed (whereas for a bitmap you have to keep adding informa-
tion whenever you need more pixels). This also means that when you scale up a vector
(e.g., if you’re zooming in on an image, the vector will still be perfectly crisp because it is
still just a mathematical line, whereas the bitmap shape will become blocky). The disadvan-
tage of a vector is that it is inefficient for describing details. So if you have an image, such
as a photograph, where the color information changes with each pixel, then it’s preferable
to use a bitmap than to mathematically describe every individual pixel using vectors.
The fact that vector graphics utilize both line and curve formulas to reproduce images
makes vector files much smaller than bitmaps. Vector graphics also have the advantage of
scalability. A vector graphic can be enlarged to fill a massive billboard using the same file
created to display it on the screen. A bitmap file would have to be equally massive to allow
for all the data used to describe such a large billboard.
Paths
In physics, a vector is a formula that describes an object’s direction and magnitude. In
graphics, a vector is a formula that describes a path of pixels. When you draw a line in
Flash CS4, it is called a path. Paths are vector lines and can be composed of straight or
curved segments. You can close up a path to create a shape.
Direction lines and points
Paths are made up of straight and curved lines. These lines are created using the Pen tool,
which lets users place anchor points on the display that can be linked by straight lines or
curves (called Bezier curves). Bezier curves are particularly useful in Flash CS4 as they do
not follow the same constraints as rasterized images, since they are smooth curves that
can be indefinitely scaled. This makes them ideal to use in graphics such as logos, as they
can be scaled to fit the smallest banner and remain sharp, and increased in size with no
degradation in line quality.
What can the drawing tools do?
Flash began life as an illustration and animation system for the Web, and has gradually had
more tools and complex abilities added to it. At its heart, though, Flash CS4 still shows its
illustration heritage in the form of its drawing tools.
THE ESSENTIAL GUIDE TO FLASH CS4
88
The drawing tools are found on the Tools panel, as shown in Figure 4-1.
Flash CS4 offers not only the same the drawing tools as its predecessors, but also powerful
new capabilities that allow you to bring your illustrations to life.
Before you draw and paint in Flash, it is important to understand how Flash creates art-
work, and how drawing, painting, and modifying shapes can affect other shapes on the
same layer.
Drawing objects
Like its predecessors, Flash CS4 allows you to draw shapes in two modes: Merge Drawing
mode and Object Drawing mode. However, Flash CS4 comes with a new mode that
allows you to manipulate shapes more easily: Primitive Shape mode. Let’s take a look at
the different methods of drawing shapes.
Using Merge Drawing mode
The Merge Drawing tool is displayed as the default, and it automatically merges shapes
when you overlap them. We’ll quickly investigate this in the following exercise.
1. Open a new blank document in Flash CS4 (ActionScript 3.0).
2. Using the Oval tool, draw a blue oval on the stage, as shown in Figure 4-2.
As discussed, Merge Drawing mode is the default for Flash CS4, but if you have changed
the default settings, you can switch between Object Drawing mode and Merge Drawing
mode by toggling the
Object Drawing Mode button on the Tools panel.
Figure 4-2. Using the Oval tool to draw an oval on the stage
Figure 4-1. The
drawing tools are
found on the Tools
panel of Flash CS4.