Beginning microsoft Visual Basic 2010 phần 3 docx
Bạn đang xem bản rút gọn của tài liệu. Xem và tải ngay bản đầy đủ của tài liệu tại đây (3.58 MB, 72 trang )
110
❘
CHAPTER 4 CONTROLLING THE FLOW
lstData.Items.Add(intCount.ToString)
Next
End Sub
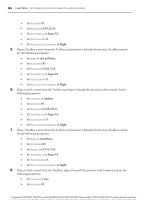
3. Run the project and click the Backwards for Next Loop button.
You should see results like those shown in Figure 4-20.
How It Works
FIGURE 4-20
Let’s review. If you use a negative number, like
-1
,
For
tries to add
-1
to the current control value. Adding a negative number has the effect
of subtracting the number, so
intCount
goes from its start value of
10
to its new value of
9
, and so on until the stop value is reached.
The For Each Next Loop
In practical, day-to-day work, it’s unlikely that you’ll use
For
Next
loops as illustrated here. Because
of way the .NET Framework typically works, you’ll usually use a derivative of the
For
Next
loop
called the
For Each
Next
loop.
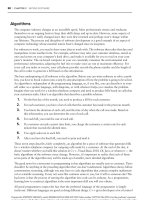
In the algorithms you design, whenever a loop is necessary, you’ll have a collection of things to work
through, and usually this set is expressed as an array. For example, you might want to look through
all of the files in a folder, looking for those that are larger than a particular size. When you ask the
.NET Framework for a list of files, you are returned an array of strings, with each string in that array
describing a single file.
TRY IT OUT For Each Loop
In this Try It Out, you’ll modify your Loops application so that it returns a list of folders contained at the
root of your C drive.
1. Return to the Forms Designer, add another Button control to your form, and set its
Name
property
to btnForEachLoop and its
Text
property to For Each Loop.
2. Double-click the button and add the following bolded code to the
Click
event handler:
Private Sub btnForEachLoop_Click(ByVal sender As System.Object, _
ByVal e As System.EventArgs) Handles btnForEachLoop.Click
‘Clear the list
ClearList()
‘List each folder at the root of your C drive
For Each strFolder As String In _
My.Computer.FileSystem.GetDirectories("C:\")
‘Add the item to the list
lstData.Items.Add(strFolder)
Next
End Sub
Loops
❘
111
3. Run the project and click the For Each Loop button. You should see a list of folders that are at the
root of your C drive.
How It Works
In the For Each Loop example, the
My
namespace in the .NET Framework exposes several classes that make
it easy to find the information that you’ll use on a daily basis. In particular, the
Computer
class provides
several other classes related to the computer on which your program is running. Since you want to find out
about files and folders, you use the
FileSystem
class, which provides methods and properties for working
with files and folders.
The
GetDirectories
method returns a collection of strings representing names of directories (or folders) on
your computer. In this case, you use it to return a collection of folder names in the root of the computer’s
Cdrive.
The concept with a
For Each
Next
loop is that for each iteration, you’ll be given the ‘‘thing’’ that
you’re supposed to be working with. You need to provide a source of things (in this case, a collection
of strings representing folder names) and a control variable into which the current thing can be put. The
GetDirectories
method provides the collection, and the inline variable
strFolder
provides the control
variable:
‘List each folder at the root of your C drive
For Each strFolder As String In _
My.Computer.FileSystem.GetDirectories("C:\")
Next
This means that on the first iteration,
strFolder
is equal to the first item in the string collection (in this
case,
"C:\$Recycle.Bin"
). You then add that item to the list box:
‘Add the item to the list
lstData.Items.Add(strFolder)
As with normal
For
Next
loops, for every iteration of the loop, you’re given a string containing a
folder name, and you add that string to the list. When there are no more folders to be returned, execution
automatically drops out of the loop.
The Do Loop Loops
The other kind of loop you can use is one that keeps happening until a certain condition is met. This is
known as a
Do
Loop
, and there are a number of variations.
The first one you’ll learn about is the
Do Until
Loop
. This kind of loop keeps going until something
happens.
TRY IT OUT Using the Do Until Loop
For this Try It Out, you’re going to use the random number generator that’s built into the .NET Frame-
work and create a loop that will keep generating random numbers until it produces the number
10
.When
you get the number
10
, you’ll stop the loop.
112
❘
CHAPTER 4 CONTROLLING THE FLOW
1. Return to the Forms Designer in the Loops project, add another Button control to your form, and
set its
Name
property to btnDoUntilLoop and its
Text
property to Do Until Loop.
2. Double-click the button and add the following bolded code to its
Click
event handler:
Private Sub btnDoUntilLoop_Click(ByVal sender As System.Object, _
ByVal e As System.EventArgs) Handles btnDoUntilLoop.Click
‘Declare variables
Dim objRandom As New Random
Dim intRandomNumber As Integer = 0
‘Clear the list
ClearList()
‘Process the loop until intRandomNumber = 10
Do Until intRandomNumber = 10
‘Get a random number between 0 and 24
intRandomNumber = objRandom.Next(25)
‘Add the number to the list
lstData.Items.Add(intRandomNumber.ToString)
Loop
End Sub
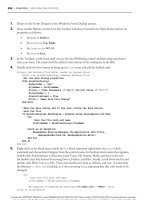
3. Run the project and click the Do Until Loop button. You’ll see results similar to the results shown
in Figure 4-21. Keep clicking the button. The number of elements in the list is different each time.
How It Works
FIGURE 4-21
A
Do Until
Loop
keeps running the loop until the given condition
is met. When you use this type of loop, there isn’t a control variable
per se; rather, you have to keep track of the current position of the
loop yourself. You begin by declaring a variable (also known as an
object) for the
Random
class, which provides methods for generating
random numbers. This object has been prefixed with
obj
to specify
that this is an object derived from a class. The next variable that you
declare is the
intRandomNumber
, which is used to receive the random
number generated by your
objRandom
object:
‘Declare variables
Dim objRandom As New Random()
Dim intRandomNumber As Integer = 0
Then you clear the list of any previous items that may have been added:
‘Clear the list
ClearList()
Next, you set up the loop, indicating that you want to keep running the loop until
intRandomNumber
is
equal to
10
:
‘Process the loop until intRandomNumber = 10
Do Until intRandomNumber = 10
With each iteration of the loop, you ask the random number generator for a new random number and
store it in
intRandomNumber
. This is done by calling the
Next
method of
objRandom
to get a random number.
Loops
❘
113
In this case, you’ve passed
25
as a parameter to
Next
, meaning that any number returned should be between
0
and
24
inclusive — that is, the number you supply must be one larger than the biggest number you ever
want to get. In other words, the bounds that you ask for are non-inclusive. You then add the number that
you got to the list:
‘Get a random number between 0 and 24
intRandomNumber = objRandom.Next(25)
‘Add the number to the list
lstData.Items.Add(intRandomNumber.ToString)
Loop
The magic happens when you get to the
Loop
statement. At this point, Visual Basic 2010 returns not to
the first line within the loop, but instead to the
Do Until
line. When execution returns to
Do Until
,the
expression is evaluated. Provided it returns
False
, the execution pointer moves to the first line within the
loop. However, if
intRandomNumber
is
10
, the expression returns
True
, and instead of moving to the first
line within the loop, you continue at the first line immediately after
Loop
. In effect, the loop is stopped.
Do While Loop
The conceptual opposite of a
Do Until
Loop
is a
Do While
Loop
. This kind of loop keeps iterating
while a particular condition is
true
. Let’s see it in action.
TRY IT OUT Using the Do While Loop
Code file Loops.zip available for download at Wrox.com
In this Try It Out, you will use a
Do While
Loop
to continue while a random number is less than 15.
1. Return to the Forms Designer again and add another Button control to your form. Set its
Name
property to btnDoWhileLoop and its
Text
property to Do While Loop.
2. Double-click the button and add the following bolded code to the
Click
event handler:
Private Sub btnDoWhileLoop_Click(ByVal sender As System.Object, _
ByVal e As System.EventArgs) Handles btnDoWhileLoop.Click
‘Declare variables
Dim objRandom As New Random
Dim intRandomNumber As Integer = 0
‘Clear the list
ClearList()
‘Process the loop while intRandomNumber < 15
Do While intRandomNumber < 15
‘Get a random number between 0 and 24
intRandomNumber = objRandom.Next(25)
‘Add the number to the list
lstData.Items.Add(intRandomNumber.ToString)
Loop
End Sub
114
❘
CHAPTER 4 CONTROLLING THE FLOW
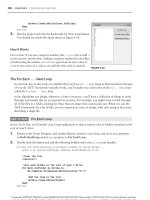
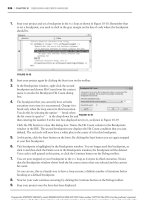
3. Run the project and click the Do While Loop button. You’ll see something similar to the results
shown in Figure 4-22.
How It Works
FIGURE 4-22
Every time you press the button, the loop executes as long as the
random number generator produces a number less than
15
.
A
Do While
Loop
keeps running as long as the given expres-
sion remains
True
. As soon as the expression becomes
False
,the
loop quits. When you start the loop, you check to ensure that
intRandomNumber
is less than
15
. If it is, the expression returns
True
,
and you can run the code within the loop:
‘Process the loop while intRandomNumber < 15
Do While intRandomNumber < 15
‘Get a random number between 0 and 24
intRandomNumber = objRandom.Next(25)
‘Add the number to the list
lstData.Items.Add(intRandomNumber.ToString)
Loop
Again, when you get to the
Loop
statement, Visual Basic 2010 moves back up to the
Do While
statement.
When it gets there, it evaluates the expression again. If it’s
True
, you run the code inside the loop once
more. If it’s
False
(because
intRandomNumber
is greater than or equal to
15
), you continue with the first
line after
Loop
, effectively quitting the loop.
Acceptable Expressions for a Do Loop
You might be wondering what kind of expressions you can use with the two variations of
Do
Loop
.
If you can use it with an
If
statement, then you can use it with a
Do
Loop
. For example, you can
write this:
Do While intX > 10 And intX < 100
or
Do Until (intX > 10 And intX < 100) Or intY = True
or
Do While String.Compare(strA, strB) > 0
In short, it’s a pretty powerful loop!
Other Versions of the Do Loop
It’s possible to put the
Until
or
While
statements after
Loop
, rather than after
Do
. Consider these two
loops:
Do While intX < 3
intX += 1
Loop
and
Do
Loops
❘
115
intX += 1
Loop While intX < 3
At first glance, it looks like the
While intX < 3
has just been moved around. You might think that these
two loops are equivalent — but there’s a subtle difference. Suppose the value of
intX
is greater than
3
(such as
4
) when these two
Do
loops start. The first loop will not run at all. However, the second loop
will run once. When the
Loop While intX < 3
line is executed, the loop will be exited. This happens
despite the condition saying that
intX
must be less than
3
.
Now consider these two
Do Until
loops:
Do Until intX = 3
intX += 1
Loop
and
Do
intX += 1
Loop Until intX = 3
Again, although at first glance it looks like these two loops are equivalent, they’re not; and they behave
slightly differently. Let’s say that
intX
is
3
this time. The first loop isn’t going to run, as
intX
already
meets the exit condition for this loop. However, the second loop will run once. Then, when you execute
Loop Until intX = 3
the first time,
intX
is now
4
, so you go back to the start of the loop and increment
intX
to
5
, and so on. In fact, this is a classic example of an infinite loop (discussed later in this chapter)
and will not stop.
NOTE When you use
Loop While
or
Loop Until
, you are saying that, no matter
what, you want the loop to execute at least once. In general, it’s best to stick with
Do While
and
Do Until
, rather than use
Loop While
and
Loop Until
.
You may also come across a variation of
Do While
Loop
called
While
End While
. This convention
is a throwback to previous versions of Visual Basic, but old-school developers may still use it with .NET
code, so it’s important that you can recognize it. These two are equivalent, but you should use the first
one:
Do While intX < 3
intX += 1
Loop
and
While intX < 3
intX += 1
End While
Nested Loops
You might need to start a loop even though you’re already working through another loop. This
is known as nesting, and it’s similar in theory to the nesting demonstrated when you looked at
If
statements.
116
❘
CHAPTER 4 CONTROLLING THE FLOW
TRY IT OUT Using Nested Loops
Code file Loops.zip available for download at Wrox.com
In this Try It Out, you’ll see how you can create and run through a loop, even though you’re already
working through another one.
1. In the Forms Designer, add another Button control to your form and set its
Name
property to
btnNestedLoops and its
Text
property to Nested Loops.
2. Double-click the button and add the following bolded code to its
Click
event handler:
Private Sub btnNestedLoops_Click(ByVal sender As System.Object, _
ByVal e As System.EventArgs) Handles btnNestedLoops.Click
‘Clear the list
ClearList()
‘Process an outer loop
For intOuterLoop As Integer = 1 To 2
‘Process a nested (inner) loop
For intInnerLoop As Integer = 1 To 3
lstData.Items.Add(intOuterLoop.ToString & _
", " & intInnerLoop.ToString)
Next
Next
End Sub
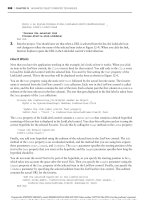
3. Run the program and click the Nested Loops button. You should see results that look like those
shown in Figure 4-23.
How It Works
FIGURE 4-23
This code is really quite simple. Your first loop (outer loop) iterates
intOuterLoop
from
1
to
2
, and the nested loop (inner loop) iter-
ates
intInnerLoop
from
1
to
3
. Within the nested loop, you have
a line of code to display the current values of
intOuterLoop
and
intInnerLoop
:
‘Process an outer loop
For intOuterLoop As Integer = 1 To 2
‘Process a nested (inner) loop
For intInnerLoop As Integer = 1 To 3
lstData.Items.Add(intOuterLoop.ToString & _
", " & intInnerLoop.ToString)
Next
Next
Each
For
statement must be paired with a
Next
statement, and each
Next
statement that you reach always
‘‘belongs’’ to the last created
For
statement. In this case, the first
Next
statement you reach is for the
1To3
loop, which results in
intInnerLoop
being incremented. When the value of
intInnerLoop
gets to be
4
,you
exit the inner loop.
Loops
❘
117
After you’ve quit the inner loop, you hit another
Next
statement. This statement belongs to the first
For
statement, so
intOuterLoop
is set to
2
and you move back to the first line within the first, outer loop — in
this case, the other
For
statement. Once there, the inner loop starts once more. Although in this Try It Out
you’ve seen two
For
Next
loops nested together, you can nest
Do
While
loops and even mix them,
so you can have two
Do
Loop
statements nested inside a
For
loop and vice versa.
Quitting Early
Sometimes you don’t want to see a loop through to its natural conclusion. For example, you might be
looking through a list for something specific, and when you find it, there’s no need to go through the
remainder of the list.
TRY IT OUT Quitting a Loop Early
Code file Loops.zip available for download at Wrox.com
In this Try It Out, you’ll look through folders on your local drive, but this time, when you get to
c:\Program Files
, you’ll display a message and quit.
1. Return to the Forms Designer, add another Button control to your form, and set its
Name
property
to btnQuittingAForLoop and its
Text
property to Quitting A For Loop.
2. Double-click the button and add the following bolded code to the
Click
event handler:
Private Sub btnQuittingAForLoop_Click(ByVal sender As System.Object, _
ByVal e As System.EventArgs) Handles btnQuittingAForLoop.Click
‘Clear the list
ClearList()
‘List each folder at the root of your C drive
For Each strFolder As String In _
My.Computer.FileSystem.GetDirectories("C:\")
‘Add the item to the list
lstData.Items.Add(strFolder)
‘Do you have the folder C:\Program Files?
If String.Compare(strFolder, "c:\program files", True) = 0 Then
‘Tell the user MessageBox.Show("Found it, exiting the loop now.", "Loops")
‘Quit the loop early
Exit For
End If
Next
End Sub
118
❘
CHAPTER 4 CONTROLLING THE FLOW
3. Run the program and click the Quitting a For Loop button. You’ll see something similar to the
results shown in Figure 4-24.
How It Works
This time, with each iteration, you use the
String.Compare
method that was discussed earlier to check the
name of the folder to see whether it matches
C:\Program Files
:
‘Do you have the folder C:\Program Files?
If String.Compare(strFolder, "c:\program files", True) = 0 Then
If it does, then the first thing you do is display a message box:
‘Tell the user
MessageBox.Show("Found it, exiting the loop now.", "Loops")
FIGURE 4-24
After the user has clicked OK to dismiss the message
box, you use the
Exit For
statement to quit the loop.
In this instance, the loop is short-circuited, and Visual
Basic 2010 moves to the first line after the
Next
state-
ment:
‘Quit the loop early
Exit For
Of course, if the name of the folder doesn’t match the
one you’re looking for, you keep looping. Using loops
to find an item in a list is one of their most common
uses. Once you’ve found the item you’re looking for,
using the
Exit For
statement to short-circuit the loop
is a very easy way to improve the performance of your
application. The
Exit For
statement will only exit one
loop at a time so if you are nesting loops be sure to exit
the correct one.
Imagine you have a list of a thousand items to look
through. You find the item you’re looking for on the
tenth iteration. If you don’t quit the loop after you’ve found the item, you’re effectively asking the computer
to look through another 990 useless items. If, however, you do quit the loop early, you can move on and
start running another part of the algorithm.
Quitting Do Loops
As you might have guessed, you can quit a
Do
Loop
in more or less the same way, as you see in the
next Try It Out.
TRY IT OUT Quitting a Do Loop
Code file Loops.zip available for download at Wrox.com
In this example, you will use
Exit Do
to quit a
Do
Loop
.
Loops
❘
119
1. Return to the Forms Designer one last time and add another Button control to your form. Set its
Name
property to btnQuittingADoLoop and its
Text
property to Quitting a Do Loop.
2. Double-click the button and add the following bolded code to the
Click
event handler:
Private Sub btnQuittingADoLoop_Click(ByVal sender As System.Object, _
ByVal e As System.EventArgs) Handles btnQuittingADoLoop.Click
‘Declare variable
Dim intCount As Integer = 0
‘Clear the list
ClearList()
‘Process the loop
Do While intCount < 10
‘Add the item to the list
lstData.Items.Add(intCount.ToString)
‘Increment the count by 1
intCount += 1
‘Should you quit the loop
If intCount = 3 Then
Exit Do
End If
Loop
End Sub
3. Run the project and click the Quitting a Do Loop button. You’ll see a list containing the values 0,
1, and 2.
How It Works
In this case, because you’re in a
Do
Loop
, you have to use
Exit Do
, rather than
Exit For
. However, the
principle is exactly the same.
Exit Do
will work with both the
Do While
Loop
and
Do Until
Loop
loops.
Infinite Loops
When building loops, you can create something called an infinite loop. This is a loop that, once started,
will never finish. Consider this code:
Dim intX As Integer = 0
Do
intX += 1
Loop Until intX = 0
This loop will start and run through the first iteration. Then, when you execute
Loop Until intX = 0
the
first time,
intX
is
1
. Therefore, you return to the start of the loop again and increment
intX
to
2
,and
120
❘
CHAPTER 4 CONTROLLING THE FLOW
so on. What’s important here is that it will never get to
0
. The loop becomes infinite, and the program
won’t crash (at least not instantly), but it may well become unresponsive.
When you suspect a program has dropped into an infinite loop, you need to force the program to
stop. If you are running your program in Visual Studio 2010, flip over to it, and select Debug
➪ Stop
Debugging from the menu. This will immediately stop the program. If you are running your compiled
program, you’ll need to use the Windows Task Manager. Press Ctrl+Alt+Del and select Task Man-
ager. Your program should appear as Not Responding. Select your program in the Task Manager and
click End Task. Eventually this opens a dialog indicating that the program is not responding (which
you knew already) and asking whether you want to kill the program stone dead, so click End Task
again.
In some extreme cases, the loop can take up so much processing power or other system resources
that you won’t be able to open Task Manager or flip over to Visual Studio. In these cases, you can
persevere and try to use either of these methods; or you can reset your computer and chalk it up to
experience.
Visual Studio 2010 does not automatically save your project before running the application the first
time, so you’re likely to lose all of your program code if you have to reset. Therefore, it would be wise
to save your project before you start running your code.
SUMMARY
This chapter took a detailed look at the various ways that programs can make decisions and loop
through code. You first saw the alternative operators that can be used with
If
statements and exam-
ined how multiple operators can be combined by using the
And
and
Or
keywords. Additionally, you
examined how case-insensitive string comparisons could be performed.
You then looked at
Select Case
, an efficient technique for choosing one outcome out of a group of
possibilities. Next you examined the concept of looping within a program and were introduced to the
two main types of loops:
For
loops and
Do
loops.
For
loops iterate a given number of times, and the
derivative
For Each
loop can be used to loop automatically through a list of items in a collection.
Do
While
loops iterate while a given condition remains
True
,whereas
Do Until
loops iterate until a given
condition becomes
True
.
In summary, you should know how to use:
➤
If
,
ElseIf
,and
Else
statements to test for multiple conditions
➤ Nested
If
statements
➤ Comparison operators and the
String.Compare
method
➤ The
Select Case
statement to perform multiple comparisons
➤
For
Next
and
For
Each
loops
➤
Do
Loop
and
Do While
Loop
statements
Summary
❘
121
EXERCISES
1. When using a
Select Case
statement, how do you allow for multiple items in the
Case
statement?
2. What is the difference between a
Do Until
and a
Loop Until Do
loop?
3. Is ‘‘Bryan’’ and ‘‘BRYAN’’ the same string as Visual Basic sees it?
4. When you use the
string
.
compare
method, what is the last parameter (a Boolean parameter) used
for?
5. In a
Select Case
statement, how do you put in a catch all case for items that do not have a match?
6. When writing a
For Each
Loop, how do you have the loop iterate backwards?
7. What keyword do you use to exit a loop early?
122
❘
CHAPTER 4 CONTROLLING THE FLOW
WHAT YOU HAVE LEARNED IN THIS CHAPTER
TOPIC CONCEPTS
Comparison Operators To compare items, you can use the following operators:
>, >=, <, <=,
=, <>, And, Or
.
Using
If
Use
If
statements to make decisions. For multiple decisions, you can
also use
If
Else
or
ElseIf
.Youcannest
If
Else
statements
for more complex decisions. For simple decisions, you can even use a
single-line If statement.
Using
Select Case
Use
Select Case
to test an item for one of many possible values. To
make sure you find a match, use the
Case Else
statement.
Using
For Loops
Use
For Loops
to execute tasks for a certain number of times. The
statement
Exit For
is used to quit a
For Loop
.
Using
Do Loops
Use
Do Loops
to execute tasks while or until a condition is reached.
The statement
Exit Do
is used to quit a
Do Loop
.
5
Working with Data Structures
WHAT YOU WILL LEARN IN THIS CHAPTER:
➤ Using Arrays
➤ Working with Enumerations
➤ Using Constants
➤ Working with Structures
In the previous chapters, you worked with simple data types — namely,
Integer
and
String
variables. Although these data types are useful in their own right, more complex programs call
for working with data structures — that is, groups of data elements that are organized in a sin-
gle unit. In this chapter, you learn about the various data structures available in Visual Basic
2010. You also will see some ways in which you can work with complex sets of data. Finally,
you learn how you can build powerful collection classes for working with, maintaining, and
manipulating lists of complex data.
UNDERSTANDING ARRAYS
A fairly common requirement in writing software is the need to hold lists of similar or related
data. You can provide this functionality by using an array. Arrays are just lists of data that have
a single data type. For example, you might want to store a list of your friends’ ages in an integer
array or their names in a string array.
This section explains how to define, populate, and use arrays in your applications.
Defining and Using Arrays
When you define an array, you’re actually creating a variable that has more than one dimension.
For example, if you define a variable as a string, you can only hold a single string value in it:
Dim strName As String
124
❘
CHAPTER 5 WORKING WITH DATA STRUCTURES
However, with an array you create a kind of multiplier effect with a variable, so you can hold more
than one value in a single variable. An array is defined by entering the size of the array after the variable
name. For example, if you wanted to define a string array with 10 elements, you’d do this:
Dim strName(9) As String
NOTE The reason why you use
(9)
instead of
(10)
togetanarraywith10
elements is explained in detail later. The basic explanation is simply that because
numbering in an array starts at zero, the first element in an array is zero, the
second element is one, and so on.
When you have an array, you can access individual elements in it by providing an index value between
0 and a maximum possible value — this maximum possible value happens to be one less than the total
size of the array.
For example, to set the element with index 2 in the array, you’d do this:
strName(2) = "Katie"
To get that same element back again, you’d do this:
MessageBox.Show(strName(2))
What’s important is that other elements in the array are unaffected when you set their siblings, so if
youdothis:
strName(3) = "Betty"
strName(2)
remains set to
"Katie"
.
TRY IT OUT Defining and Using a Simple Array
Code file Array Demo.zip is available for download at Wrox.com
Perhaps the easiest way to understand what an array looks like and how it works is to write some code.
FIGURE 5-1
figure
1. In Visual Studio 2010, click File ➪ New Project. In the New
Project dialog, create a new Windows Forms Application called
Array Demo.
2. When the Designer for Form1 appears, add a ListBox control
to the form. Using the Properties window set its
Name
property
to lstFriends and its
IntegralHeight
property to
False
.
3. Add a Button control to the form. Set its
Name
property to
btnArrayElement and set its
Text
property to Array Element.
Arrange your controls so that your form looks similar to
Figure 5-1, as you’ll be adding more Button controls to this
project later.
Understanding Arrays
❘
125
4. Double-click the button and add the following bolded code to its
Click
event handler. You’ll
receive an error message that the
ClearList
procedure is not defined. You can ignore this error
because you’ll be adding that procedure in the next step:
Private Sub btnArrayElement_Click(ByVal sender As System.Object, _
ByVal e As System.EventArgs) Handles btnArrayElement.Click
‘Clear the list
ClearList()
‘Declare an array
Dim strFriends(4) As String
‘Populate the array
strFriends(0) = "Wendy"
strFriends(1) = "Harriet"
strFriends(2) = "Jay"
strFriends(3) = "Michelle"
strFriends(4) = "Richard"
‘Add the first array item to the list
lstFriends.Items.Add(strFriends(0))
End Sub
5. Now create the following procedure:
Private Sub ClearList()
‘Clear the list
lstFriends.Items.Clear()
End Sub
6. Save your project by clicking the Save All button on the toolbar and then run it. When the form
displays, click the Array Element button. The list box on your form will be populated with the
name
Wendy
.
How It Works
In this example, you clear the list box by calling the
ClearList
method. Although the list is empty at this
point, you’ll be adding more buttons to this project in the following Try It Out exercises, and may want to
compare the results of the each of the buttons:
‘Clear the list
ClearList()
When you define an array, you have to specify a data type and a size. In this case, you’re specifying an
array of type
String
and defining an array size of 5. Recall that the way the size is defined is a little quirky.
You have to specify a number one less than the final size you want (more on that shortly). Therefore, here
you have used the following line:
‘Declare an array
Dim strFriends(4) As String
This way, you end up with an array of size 5. Another way of expressing this is to say that you have an
array consisting of 5 elements.
When you are done, you have your array, and you can access each item in the array by using an index.
The index is given as a number in parentheses after the name of the array. Indexes begin at zero and go up
126
❘
CHAPTER 5 WORKING WITH DATA STRUCTURES
to one less than the number of items in the array. The following example sets all five possible items in the
array to the names:
‘Populate the array
strFriends(0) = "Wendy"
strFriends(1) = "Harriet"
strFriends(2) = "Jay"
strFriends(3) = "Michelle"
strFriends(4) = "Richard"
Just as you can use an index to set the items in an array, you can use an index to get items back out. In this
case, you’re asking for the item at position 0, which returns the first item in the array — namely, Wendy:
‘Add the first array item to the list
lstFriends.Items.Add(strFriends(0))
The reason why the indexes and sizes seem skewed is that the indexes are zero-based, whereas humans tend
to number things beginning at 1. When putting items into or retrieving items from an array, you have to
adjust the position you want down by one to get the actual index; for example, the fifth item is actually at
position 4, the first item is at position 0, and so on. When you define an array, you do not actually specify
the size of the array but rather the upper index bound — that is, the highest possible value of the index
that the array will support.
NOTE Why should the indexes be zero-based? Remember that to the computer,
a variable represents the address of a location in the computer’s memory. Given
an array index, Visual Basic 2010 just multiplies the index by the size of one
element and adds the product to the address of the array as a whole to get the
address of the specified element. The starting address of the array is also the
starting address of the first element in it. That is, the first element is zero times the
size of an element away from the start of the whole array; the second element is 1
times the size of an element away from the start of the whole array; and so on.
The method you define contains only one line of code but its reuse becomes apparent in the next Try It
Out. This method merely clears the
Items
collection of the list box.
Private Sub ClearList()
‘Clear the list
lstFriends.Items.Clear()
End Sub
Using For Each Next
One common way to work with arrays is by using a
For Each
Next
loop. This loop was
introduced in Chapter 4, when you used it with a string collection returned from the
My.Computer.FileSystem.GetDirectories
method.
TRY IT OUT Using For Each Next with an Array
Code file Array Demo.zip is available for download at Wrox.com
Understanding Arrays
❘
127
This Try It Out demonstrates how you use
For Each
Next
with an array.
1. Close your program if it is still running and open the Code Editor for Form1. Add the following
bolded variable declaration at the top of your form class:
Public Class Form1
‘Declare a form level array
Private strFriends(4) As String
2. In the Class Name combo box at the top left of your Code Editor, select
(Form1 Events)
.Inthe
Method Name combo box at the top right of your Code Editor, select the
Load
event. This causes
the
Form1_Load
event handler to be inserted into your code. Add the following bolded code to this
procedure:
Private Sub Form1_Load(ByVal sender As Object, _
ByVal e As System.EventArgs) Handles Me.Load
‘Populate the array
strFriends(0) = "Wendy"
strFriends(1) = "Harriet"
strFriends(2) = "Jay"
strFriends(3) = "Michelle"
strFriends(4) = "Richard"
End Sub
3. Switch to the Forms Designer and add another Button control. Set its
Name
property to btn
EnumerateArray and its
Text
property to Enumerate Array.
4. Double-click this new button and add the following bolded code to its
Click
event handler:
Private Sub btnEnumerateArray_Click(ByVal sender As System.Object, _
ByVal e As System.EventArgs) Handles btnEnumerateArray.Click
‘Clear the list
ClearList()
‘Enumerate the array
For Each strName As String In strFriends
‘Add the array item to the list
lstFriends.Items.Add(strName)
Next
End Sub
FIGURE 5-2
figure
5. Run the project and click the button. You’ll see results like
those in Figure 5-2.
How It Works
You start this exercise by declaring an array variable that is local to the form, meaning the variable is
available to all procedures in the form class. Whenever variables are declared outside a method in the form
class, they are available to all methods in the form:
‘Declare a form level array
Private strFriends(4) As String
128
❘
CHAPTER 5 WORKING WITH DATA STRUCTURES
Next you added the
Load
event handler for the form and then added code to populate the array. This
procedure will be called whenever the form loads, ensuring that your array always gets populated:
Private Sub Form1_Load(ByVal sender As Object, _
ByVal e As System.EventArgs) Handles Me.Load
‘Populate the array
strFriends(0) = "Wendy"
strFriends(1) = "Harriet"
strFriends(2) = "Jay"
strFriends(3) = "Michelle"
strFriends(4) = "Richard"
End Sub
Chapter 4 shows the
For Each Next
loop iterate through a string collection; in this example, it is used
in an array. The principle is similar; you create a control variable that is of the same type as an ele-
ment in the array and give this to the loop when it starts. This has all been done in one line of code.
The control variable,
strName
, is declared and used in the
For Each
statement by using the
As String
keyword.
The internals behind the loop move through the array starting at element 0 until reaching the last element.
For each iteration, you can examine the value of the control variable and do something with it; in this case,
you add the name to the list:
‘Enumerate the array
For Each strName As String In strFriends
‘Add the array item to the list
lstFriends.Items.Add(strName)
Next
Note that the items are added to the list in the same order that they appear in the array. That’s because
For
Each Next
proceeds from the first item to the last item as each item is defined.
Passing Arrays As Parameters
It’s extremely useful to be able to pass an array (which could be a list of values) to a function as a
parameter.
TRY IT OUT Passing Arrays As Parameters
Code file Array Demo.zip is available for download at Wrox.com
In this Try It Out, you’ll look at how to pass an array to a function as a parameter.
1. Return to the Forms Designer in the Array Demo project and add another Button control. Set its
Name
property to btnArraysAsParameters and its
Text
property to Arrays as Parameters.
2. Double-click the button and add the following bolded code to its
Click
event handler. You’ll
receive an error message that the
AddItemsToList
procedure is not defined. You can ignore this
error because you’ll be adding that procedure in the next step:
Private Sub btnArraysAsParameters_Click(ByVal sender As System.Object, _
ByVal e As System.EventArgs) Handles btnArraysAsParameters.Click
Understanding Arrays
❘
129
‘Clear the list
ClearList()
‘List your friends
AddItemsToList(strFriends)
End Sub
3. Add the
AddItemsToList
procedure as follows:
Private Sub AddItemsToList(ByVal arrayList() As String)
‘Enumerate the array
For Each strName As String In arrayList
‘Add the array item to the list
lstFriends.Items.Add(strName)
Next
End Sub
4. Run the project and click the button. You’ll see the same results that were shown in Figure 5-2.
How It Works
The trick here is to tell the
AddItemsToList
method that the parameter it’s expecting is an array of type
String
. You do this by using empty parentheses, like this:
Sub AddItemsToList(ByVal arrayList() As String)
If you specify an array but don’t define a size (or upper-bound value), you’re telling Visual Basic 2010
that you don’t know or care how big the array is. That means you can pass an array of any size through
to
AddItemsToList
.Inthe
btnArraysAsParameters_Click
procedure, you’re sending your original
array:
‘List your friends AddItemsToList(strFriends)
TRY IT OUT Adding More Friends
Code file Array Demo.zip is available for download at Wrox.com
What happens if you define another array of a different size? In this Try It Out, you’ll see.
1. Return to the Forms Designer of the Array Demo project. Add another Button control and set its
Name
property to btnMoreArrayParameters and its
Text
property to More Array Parameters.
2. Double-click the button and add the following bolded code to its
Click
event handler:
Private Sub btnMoreArrayParameters_Click(ByVal sender As System.Object, _
ByVal e As System.EventArgs) Handles btnMoreArrayParameters.Click
‘Clear the list
ClearList()
‘Declare an array
Dim strMoreFriends(1) As String
‘Populate the array
strMoreFriends(0) = "Elaine"
strMoreFriends(1) = "Debra"
130
❘
CHAPTER 5 WORKING WITH DATA STRUCTURES
‘List your friends
AddItemsToList(strFriends)
AddItemsToList(strMoreFriends)
End Sub
FIGURE 5-3
figure
3. Run the project and click the button. You will see the form
shown in Figure 5-3.
How It Works
What you have done here is prove that the array you pass as a
parameter does not have to be of a fixed size. You created a new
array of size
2
and passed it through to the same
AddItemsToList
function.
As you’re writing code, you can tell whether a parameter is an array type by
looking for empty parentheses in the IntelliSense pop-up box, as illustrated
in Figure 5-4.
FIGURE 5-4
NOTE Not only are you informed that
arrayList
is an array type, but you also
see that the data type of the array is
String
.
Sorting Arrays
It is sometimes useful to be able to sort an array. You may find this useful when you display data to the
user in a manner they can easily search or when you need to evaluate data logically.
TRY IT OUT Sorting Arrays
Code file Array Demo.zip is available for download at Wrox.com
This Try It Out demonstrates how you can sort an array alphabetically.
1. Return to the Forms Designer in the Array Demo project and add another Button control. Set its
Name
property to btnSortingArrays and its
Text
property to Sorting Arrays.
2. Double-click the button and add the following bolded code to its
Click
event handler:
Private Sub btnSortingArrays_Click(ByVal sender As System.Object, _
ByVal e As System.EventArgs) Handles btnSortingArrays.Click
‘Clear the list
ClearList()
‘Sort the array
Array.Sort(strFriends)
Understanding Arrays
❘
131
‘List your friends
AddItemsToList(strFriends)
End Sub
3. Run the project and click the button. You’ll see the list box on your form populated with the
names from your array sorted alphabetically.
How It Works
All arrays are internally implemented in a class called
System.Array
. In this case, you use a method called
Sort
on that class. The
Sort
method takes a single parameter — namely, the array you want to sort. The
method then does what its name suggests, sorting it for you into an order appropriate to the data type of
the array elements. In this case you are using a string array, so you get an alphanumeric sort. If you were
to attempt to use this technique on an array containing integer or floating-point values, the array would be
sorted in numeric order.
‘Sort the array
Array.Sort(strFriends)
The capability to pass different parameter types in different calls to the same method name and to get
behavior that is appropriate to the parameter types actually passed is called method overloading.
Sort
is
referred to as an overloaded method.
Going Backwards
For Each
Next
will go through an array in only one direction. It starts at position 0 and loops
through to the end of the array. If you want to go through an array backwards (from the length –1
position to 0), you have two options.
One, you can step through the loop backwards by using a standard
For
Next
loop to start at the
upper index bound of the first dimension in the array and work your way to 0 using the
Step -1
key-
word, as shown in the following example:
For intIndex As Integer = strFriends.GetUpperBound(0) To 0 Step -1
‘Add the array item to the list
lstFriends.Items.Add(strFriends(intIndex))
Next
Alternately, you can call the
Reverse
method on the
Array
class to reverse the order of the array and
then use your
For Each
Next
loop
TRY IT OUT Reversing an Array
Code file Array Demo.zip is available for download at Wrox.com
This Try It Out shows you how to call the
Reverse
method on the
Array
class to reverse the order of an
array.
1. Return to the Forms Designer and add another Button control. Set its
Name
property to btn
ReversingAnArray and its
Text
property to Reversing an Array.
132
❘
CHAPTER 5 WORKING WITH DATA STRUCTURES
FIGURE 5-5
figure
2. Double-click the button and add the following bolded code
to its
Click
event handler:
Private Sub btnReversingAnArray_Click(ByVal sender As System.Object, _
ByVal e As System.EventArgs) Handles btnReversingAnArray.Click
‘Clear the list
ClearList()
‘Reverse the order — elements will be in
descending order
Array.Reverse(strFriends)
‘List your friends
AddItemsToList(strFriends)
End Sub
3. Run the project and click the button. You’ll see the friends
listed in reverse order, as shown in Figure 5-5.
How It Works
The
Reverse
method reverses the order of elements in a one-dimensional array, which is what you are
working with here. By passing the
strFriends
array to the
Reverse
method, you are asking the
Reverse
method to re-sequence the array from bottom to top:
‘Reverse the order — elements will be in descending order
Array.Reverse(strFriends)
After the items in your array have been reversed, you simply call the
AddItemsToList
procedure to have
the items listed:
‘List your friends
AddItemsToList(strFriends)
NOTE If you want to list your array in descending sorted order, you would call
the
Sort
method on the
Array
class to have the items sorted in ascending order
and then call the
Reverse
method to have the sorted array reversed, putting it
into descending order.
Initializing Arrays with Values
It is possible to create an array in Visual Basic 2010 and populate it in one line of code, rather than
having to write multiple lines of code to declare and populate the array, as shown here:
‘Declare an array
Dim strFriends(4) As String
‘Populate the array
strFriends(0) = "Wendy"
Understanding Enumerations
❘
133
strFriends(1) = "Harriet"
strFriends(2) = "Jay"
strFriends(3) = "Michelle"
strFriends(4) = "Richard"
TRY IT OUT Initializing Arrays with Values
Code file Array Demo.zip is available for download at Wrox.com
You learn more about initializing arrays with values in this Try It Out.
1. Return to the Forms Designer in the Array Demo project and add one last Button control. Set its
Name
property to btnInitializingArraysWithValues and its
Text
property to Initializing Arrays with
Values.
2. Double-click the button and add the following bolded code to its
Click
event handler:
Private Sub btnInitializingArraysWithValues_Click( _
ByVal sender As System.Object, ByVal e As System.EventArgs) _
Handles btnInitializingArraysWithValues.Click
‘Clear the list
ClearList()
‘Declare and populate an array
Dim strMyFriends() As String = {"Elaine", "Richard", "Debra", _
"Wendy", "Harriet"}
‘List your friends
AddItemsToList(strMyFriends)
End Sub
3. Run the project and click the button. Your list box will be populated with the friends listed in this
array.
How It Works
The pair of braces (
{}
) allows you to set the values that should be held in an array directly. In this instance,
you have five values to enter into the array, separated with commas. Note that when you do this, you
don’t specify an upper bound for the array; instead, you use empty parentheses. Visual Basic 2010 prefers
to calculate the upper bound for you based on the values you supply:
‘Declare and populate an array
Dim strMyFriends() As String = {"Elaine", "Richard", "Debra", _
"Wendy", "Harriet"}
This technique can be quite awkward to use when populating large arrays. If your program relies on
populating large arrays, you might want to use the method illustrated earlier: specifying the positions and
the values. This is especially true when populating an array with values that change at runtime.
UNDERSTANDING ENUMERATIONS
So far, the variables you’ve seen had virtually no limitations on the kinds of data you can store in
them. Technical limits notwithstanding, if you have a variable defined
As Integer
, you can put any
number you like in it. The same holds true for
String
and
Double
. You have seen another variable
134
❘
CHAPTER 5 WORKING WITH DATA STRUCTURES
type, however, that has only two possible values:
Boolean
variables can be either
True
or
False
and
nothing else.
Often, when writing code, you want to limit the possible values that can be stored in a variable. For
example, if you have a variable that stores the number of doors that a car has, do you really want to be
able to store the value 163,234?
Using Enumerations
Enumerations enable you to build a new type of variable, based on one of these data types:
Integer
,
Long
,
Short
,or
Byte
. This variable can be set to one value of a set of possible values that you define,
ideally preventing someone from supplying invalid values. It is used to provide clarity in the code, as it
can describe a particular value.
TRY IT OUT Using Enumerations
Code file Enum Demo.zip is available for download at Wrox.com
In this Try It Out, you’ll look at how to build an application that checks the time of day and, based on
that, can record a
DayAction
of one of the following possible values:
➤ Asleep
➤ Getting ready for work
➤ Traveling to work
➤ At work
➤ At lunch
➤ Traveling from work
➤ Relaxing with friends
➤ Getting ready for bed
1. Create a new Windows Forms application in Visual Studio 2010 called Enum Demo.
2. Set the
Text
property of Form1 to What’s Richard Doing?
3. Now add a DateTimePicker control and set the following properties:
➤ Set
Name
to dtpHour.
➤ Set
Format
to Time.
➤ Set
ShowUpDown
to True.
➤ Set
Value
to 01:00 am. VS will add the current date in the property to the time.
➤ Set
Size
to 90, 20.
FIGURE 5-6
figure
4. Add a Label control to the form, setting its
Name
property to
lblState and its
Text
property to State Not Initialized. Resize your
form so it looks similar to Figure 5-6.