Feedback.Control.for.a.Path.Following.Robotic.Car Part 9 pptx
Bạn đang xem bản rút gọn của tài liệu. Xem và tải ngay bản đầy đủ của tài liệu tại đây (98.96 KB, 10 trang )
Patricia Mellodge Chapter 6. Hardware Implementation 70
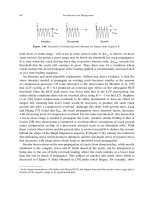
Figure 6.8: The location of the sensors on the vehicle.
tible to interference from ambient light. However, they require the presence of a magnetic
field which is not embedded in most roadways.
6.4.3 Data Format
An array of IR sensors and magnetic sensors is placed on both the front and rear of the
FLASH car. The thickness of the line and the spacing of the sensors is such that two are
turned on at a time. The sensor configuration is shown in Fig. 6.8. Note that the rear
sensors are directly between the rear wheels. This is done so that the error from the rear
sensors gives the lateral placement, d, directly (see Fig. 3.3). At the time of this writing,
12 IR sensors and 8 magnetic sensors are used for each array and provide good resolution.
However, the software is configured so that any numb er of sensors can be used. So the
number of sensors is limited by the width of the data bus.
Patricia Mellodge Chapter 6. Hardware Implementation 71
Table 6.9: Technical information for the digital camera.
Device name OV7610
Manufacturer OmniVision
Operating voltage 5 V
Operating current 40 mA
Array size 644 x 484 pixels
Pixel size 8.4 µm x 8.4 µm
Effective image area 5.4 mm x 4 mm
Communication interface I
2
C
Package size 40 mm x 28 mm
6.5 Vision System
The vision system includes the use of a digital camera mounted on the front of the vehicle
facing forward. The use of the camera in the lateral control algorithm was described in
Chapter 4. This camera provides the images of the roadway ahead of the car. The camera’s
specifications are given in Table 6.9.
At the time of this writing, the camera has not been incorporated into the FLASH vehicle.
The C31 DSP does not have enough on-board memory to hold a frame of the image nor
can it perform the necesssary processing on the image while controlling the vehicle at the
same time. The camera captures images sized 640x480 pixels, thus requiring over 300 Kb of
memory to store one image. The C31 DSP has only 8 Kb of internal memory and there is
no memory located on the DSP circuit board.
To remedy this, the DSP on the car will be upgraded to a more powerful device with
more memory on-board and more located off the chip on the evaluation circuit board. In
addition, the processor itself will be faster. With these improvements, the image transfer
can be performed over the data bus using direct memory access (DMA). DMA allows the
processor to transfer data in the background while still performing other tasks. With the
necessary upgrade, the DSP will be able to control the car and use the image information
simultaneously.
6.6 Ultrasonic System
An ultrasonic sensor is mounted on the front of the car to detect the presence of another
vehicle in front. This information is used to perform adaptive cruise control, a mechanism
to maintain a minimum distance between cars. Although the ultrasonic sensor is not used
Patricia Mellodge Chapter 6. Hardware Implementation 72
Table 6.10: Technical information for the ultrasound sensor.
Device name Ultrasonic Owl Scanner Kit #3-705
Supplier Mondo-tronics
Operating voltage 9 V - 12 V
Sensor Polaroid transducer
Signal frequency 40 kHz
Communication interface RS232 @ 9600 baud
Analog output 0 V - 5 V
Measured distances 150 mm - 2.6 m
Distance resolution 10 mm
Circuit board size 90 mm x 55 mm
Transducer size 1.513” diameter
by the controller described in this thesis, a brief description of its operation is given here.
For complete details of the adaptive cruise controller on the FLASH car, see [15].
The specifications for the ultrasound kit are given in Table 6.10. The ultrasound kit consists
of a Polaroid transducer and control module. The control module circuit provides 40 kHz
signals to the Polaroid transducer to make it vibrate. If an object is in front of the transducer,
the reflected signal is detected. The control module interprets the signal from the transducer
and converts the distance into a voltage from 0-5 V. The transducer can detect objects
between 150 mm and 2.6 m. 0 V indicates that the object is 150 mm away or closer. 5 V
indicates that the object is at least 2.6 m away. This voltage is sent to the A/D converter
on the DSP circuit board and gets read into the DSP as the distance from the front car (or
some other object).
6.7 Power and Recharging System
With all of the electronics described above on the car, the nickel metal hydride (NiMH)
battery provides about 1.5 hours of runtime. And because this car is part of a musuem
exhibit, it is desirable to have the car run with as little intervention from the staff as possible.
Thus the car should be capable of self-monitoring and automatic recharging. As of this
writing, the automatic recharging system is still under development. An overview of this
subsystem’s operation is given in this section.
The flowchart for the recharging algorithm is shown in Fig. 6.9. While the car is operating
normally, the DSP will monitor the battery voltage and current through a monitoring circuit.
The DSP must know both the voltage and current so that the true battery voltage is known.
After reading in this data, it must be filtered so that noise in the sensor does not falsely
Patricia Mellodge Chapter 6. Hardware Implementation 73
cause the car to go into recharge mode. If the battery voltage is sufficient, the car continues
along the path. If the voltage is below some threshold, however, the car goes into recharge
mode.
In normal running mode, the car uses the IR sensors as the primary input for path following.
However, in recharge mode, the car switches to the magnetic sensors as the primary sensors.
The magnets under the track deviate from the main path and lead the car into the recharging
station. Once in the recharging station, the car can detect that the battery is receiving
current and shuts down all unnecessary circuitry. When charging is done, the car re-enables
itself and exits the recharging station, rejoining the main track and switches back to the IR
sensors.
While the car can run for about 1.5 hours, recharging can take up to 5 hours. Thus there
is a need for multiple cars in the exhibit, some driving while the others recharge, so there
can be cars driving on the track during the entire day. Each car has its own station so that
recharging can be done in parallel. To coordinate the multiple cars and multiple recharging
stations, the track itself is intelligent. A central computer oversees the operation of the
stations, knowing which have cars in them. Stations that have cars in them are disabled by
turning off the magnetic field underneath to ensure that a car needing a recharge does not
come crashing into the car that is already there.
6.8 Controller Performance
This section describes the implementation and performance of the input scaling controller
on the hardware described in the previous sections.
6.8.1 Simulation vs. Hardware
As is to be expected, the actual car did not perform exactly the same as the simulated car.
There are several reasons for this, the major one being differences between the modeling and
true vehicle dynamics.
In MATLAB, the kinematic model given in (3.9) was used to simulate the movement of the
car. This model does not account for slippage, inertia, or any other dynamic effects that may
take place on the actual car. These effects are most evident in the turns at higher speeds
where the forces on the car are greater and the tires may lose traction with the track. At
lower speeds, the car did not experience these forces as much and performed more like the
kinematic model. This is noticable in the performance of the controller.
The simulation is also unrealistic in that it does not take into account the dynamics of the
actuators. Using the controller in the simulation, it was possible to instantaneously change
the steering angle and velocity of the vehicle. This is not possible in the real world and this
Patricia Mellodge Chapter 6. Hardware Implementation 74
Figure 6.9: Flowchart for the recharging system.
Patricia Mellodge Chapter 6. Hardware Implementation 75
affected the controller gains that could be used for stable operation. The dynamics of the
vehicle’s velocity were taken into account by utilizing speed feedback in the lateral controller.
As described above in the section on the car’s hardware architecture, the DSP commands a
velocity and the PIC micro controller is responsible for reaching and maintaining that speed.
The PIC implements a PID controller using feedback from an optical encoder attached to
the rear axle. Because the PIC is a low level processor, an optimal PID controller is difficult
to implement. Therefore the speed of the car does vary somewhat. However, to take this into
account in the lateral controller, the PIC sends the actual speed (given by the encoder) back
to the DSP. This actual speed is used by the lateral controller and the curvature estimator
as u
1
.
In addition to the motor dynamics, there are the dynamics of the steering servo. There is a
lag of about 0.25 seconds between the servo control pulse being sent and the servo turning
to the corresponding position. While this is very fast in terms of the car’s time frame, it is
very slow to the DSP operating at 50 MHz and could potentially cause instability.
Differences in the program code itself were few. Aside from the expected differences between
the syntax of MATLAB and C, the programs were similar. As in the simulation, there was
again difficulty typing equations (3.14)-(3.18) correctly.
6.8.2 Controller Performance
This section describes the performance of the controller under various conditions. Unfor-
tunately, the car does not have any data logging and the variables that it calculates as it
is driving are not available for analysis. As such, only a qualitative discussion of the car’s
performance can be given here.
Controller Implementation
One of the first problems that was noticed was that if the car lost the line completely, it
would have trouble finding its way back. Initially this was puzzling because the car was
programmed to ”know” on which side the line was because it had the last known location
stored in memory. Then it was realized that if the line was lost by each sensor array to the
same side, the lateral controller used a value of zero for θ
p
. With the given gains, a value of
zero for θ
p
cause the car to keep going straight rather than turn back towards the desired
path. So the ratio of the gains k
1
, k
2
, and k
3
were modified so that the controller would react
more to the lateral displacement, d, and return to the desired path. With this modification
in gains, the car could find its way back.
However, with the change in gains, the controller had a different problem. When the car
encountered a curve, it would wait until the rear axle was off the line (d = 0) before reacting
to the change. When this happened, the car would suddenly jerk the wheels to get back to
Patricia Mellodge Chapter 6. Hardware Implementation 76
the desired path. The gains had been modified so that too much weight was given to d and
not enough to θ
p
.
Finally the proper gain ratio was found to remedy this problem. The gains where changed to
k
1
= 10λ
2
, k
2
= 3λ
2
, and k
3
= 3λ. These ratios gave the proper weight to d and θ
p
to make
the car stay on the path. Using λ = 20 produced a good response time by the controller.
To aid in the debugging process for the curvature estimator, the qualitative p erformance of
the car under various known conditions was necessary. This way, since the actual program
variables were not known, certain ones (in particular the value being used for the curvature)
could be deduced from the car’s behavior.
The track in the lab consists of straightaways and turns with curvature values of ±1.125m
2
.
To get a feel for the controller’s performance, each of these values was hardcoded and the
car was allowed to travel around the track.
First the curvature was set to zero. The controller actually performed very well with c = 0
everywhere. The car traveled smoothly around the entire track and was able to navigate
the turns without going too far off the line. With the curvature set to 1.125, the car stayed
right on the line in the left turns. On straightaways, the performance was stable but there
was a slight offset to one side. In the right turns, the car went completely off the line most
like due to the large errors in x
2
and x
3
using the erroneous curvature. As is to be expected,
the behavior of the controller with c = −1.125 was identical but opposite to the case where
c = 1.125.
φ Estimator
The first estimator tried was the φ estimator described in Section 4.1.1. Although this
method worked fairly well in simulation, it did not work at all on the car itself.
First, the algorithm was implemented exactly as it was in the simulation. However, the
result was that the car oscillated on the straightaways, while performing well in the turns.
The number of past φ samples to use was increased until there was no more memory on the
DSP (over 1000 samples) but the performance did not improve.
Another approach was tried. The estimated value for c was required to be above or below
a threshold for a certain number of consecutive sample times. But the results were similar,
the car was unstable on the straightaways.
While the variables calculated by the estimator are not available, it is known that when
the car oscillates, the value of c is oscillating. (If the value of c is fixed, even at the wrong
value, the car follows the path in a stable fashion.) If the car’s wheels began to oscillate,
the estimated value for c would oscillate also because it was linearly related to φ. Averaging
over several samples would not help because the average would still be biased to one side.
Patricia Mellodge Chapter 6. Hardware Implementation 77
Model Estimator
Next the model estimator describ ed in Section 4.1.2 was implemented. At first this estimator
was implemented the same as in the simulation but the results were not go od. In the
simulation, the output of the estimator, ˆa was thresholded to choose the actual curvature
value, which was known a priori. However, it was found that ˆa was very unstable and would
oscillate back and forth across the threshold. This resulted in the value used for c to keep
changing and the car’s performance was unstable.
To try to fix this, the threshold values were modified from the original (0.9 on the rising edge
and 0.1 on the falling edge). But no values seemed to improve the performance. So another
approach was tried. It was required that the value of ˆa be above or below the threshold for
a certain number of sampling times before the curvature value was changed. This made the
change in curvature be delayed a bit but the value used for c did not oscillate back and forth
as before. It was found that requiring ˆa to b e above or below the threshold for 600 sample
times produced the best results, reducing the transients to a minimum while not adding too
much delay to the system.
The controller using the results of the estimator in this form performed very well. When
the car was initially placed on the track, it needed about a second to right itself if it was
displaced from the desired path. These transients were not severe however. There were also
some transients as the car entered and exited a turn. This was due to the fact that there
was a delay in c obtaining the correct curvature. It is interesting to note the performance of
the car coming out of a turn. For the first foot or two of the straightaway, the car would be
offset because it was still using the nonzero curvature value. Then when the output of the
estimator indicated, the value of c would change to zero. At that point the car would jerk
slightly and center itself on the road. The maximum speed that could be attained was about
1.2 m/s. If the car was set to travel faster than 1.2 m/s, it was unable to follow the path
smoothly. The maximum speed was due to the controller itself rather than the curvature
estimator.
To make the change between the curve and straighaway less abrupt and ease the transition,
the value of c was changed in increments based on the output of the estimator. If ˆa was
greater than zero, the value for c was incremented by a certain step size. If ˆa was less than
zero, the value for c was decremented. So, c was never set to the actual values for the
curvature, but it was never allowed to exceed ±1.125.
The p erformance of the controller using this method was qualitatively different from the
previous one. Exiting a turn, the car would be biased to one side and gradually shift itself
to the center of the line as the value of c gradually changed. There was no abrupt shift as
before. Using a step value of 0.0003 gave the best results. A value greater than this caused
transients as the car entered or exited a curve. A value less than this cause the car to not
turn quickly enough. As with the method described above, the maximum speed was again
about 1.2 m/s.
Patricia Mellodge Chapter 6. Hardware Implementation 78
While this method worked well in reducing transients, the implications in the controller need
to be studied. Recall that the derivatives of c(s) are assumed to be zero because the path’s
curvature is piecewise constant. However, with this estimation of c, the curvature being used
by the controller is not piecewise constant but changing gradually.
Image Processing Estimator
One feature of the above estimators is that they are coupled to the performance of the
controller. It was necessary to make them robust enough so that if the car went off the path,
they could still provide an accurate curvature value. The method that is independent of the
car’s performance is the image processing method. Using a camera, the curvature estimation
problem is decoupled from system performance to a certain extent (the road line must be in
the camera’s field of view). However this method requires more processing power and time.
At this point, it is still an unanswered question as to how the car performs with the camera.
Overall the performance of the input scaling controller was very good. It performed well in
spite of the differences between the kinematic model from which it was developed and the
actual car. In addition it was not adversely affected by delays in the car’s response time. It
proved itself to be a controller robust to the errors and uncertainties in the system.
Chapter 7
Conclusions
7.1 Concluding Remarks
This thesis has described the current development of the FLASH lab at VTTI. Details of the
car were given and the hardware and software implementation were detailed. The FLASH lab
and the scale model cars contained therein provide a testbed for the small scale development
stage of ITS. In addition, the FLASH lab serves as a home to the prototyp e display being
developed for an educational museum exhibit.
This thesis also gave details of the path following lateral controller implemented on the
FLASH car. The controller was developed using the kinematic model for a wheeled robot.
The mo del was derived using the nonholonomic contraints of the system. The global model
was then converted into the path coordinate model so that only local variables were needed.
This was then converted into chained form and a controller was given for path following.
The path coordinate model introduced a new parameter to the system: the curvature of
the path. Thus it was necessary to provide the path’s curvature value to the controller.
Because of the environment in which the car is operating, the curvature values are known a
priori. Several online methods for determining the curvature were developed. One used the
car’s steering angle only to perform the estimation. The second linearly parameterized the
path coordinate model and used a least square estimator. The third was based on images
received from an on-board camera. For all these methods, the output of the estimator was
used to choose the actual curvature value. In simulation, all of these methods were able to
adequately determine the curvature of the path.
A MATLAB simulation environment was created in which to test the above algorithms.
The simulation used the kinematic model to show the car’s behavior and implemented the
sensors and controller as closely as possible to the actual system. The details of the simulation
program were given and the complete code is provided in the Appendix.
79