Windows Internals Covering Windows Server 2008 and Windows Vista phần 6 pdf
Bạn đang xem bản rút gọn của tài liệu. Xem và tải ngay bản đầy đủ của tài liệu tại đây (396.68 KB, 13 trang )
Chapter 5 Processes, Threads, and Jobs 387
In Windows Vista, the thread pool implementation in user mode was completely re-archi-
tected, and part of the management functionality has been moved to kernel mode in order
to improve efficiency and performance and minimize complexity. The original thread pool
implementation required the user-mode code inside Ntdll.dll to remain aware of how many
threads were currently active as worker threads, and to enlarge this number in periods of
high demand.
Because querying the information necessary to make this decision, as well as the work to cre-
ate the threads, took place in user mode, several system calls were required that could have
been avoided if these operations were performed in kernel mode. Moving this code into
kernel mode means fewer transitions between user and kernel mode, and it allows Ntdll.dll
to manage the thread pool itself and not the system mechanisms behind it. It also provides
other benefits, such as the ability to remotely create a thread pool in a process other than the
calling process (although possible in user mode, it would be very complex given the necessity
of using APIs to access the remote process’s address space).
The functionality in Windows Vista is introduced by a new object manager type called
TpWorkerFactory, as well as four new native system calls for managing the factory and
its workers—NtCreateWorkerFactory, NtWorkerFactoryWorkerReady, NtReleaseWorker-
Fac tory Worker, NtShutdownWorkerFactory—two new query/set native calls (NtQuery-
Infor ma tion WorkerFactory and NtSetInformationWorkerFactory), and a new wait call,
NtWaitFor WorkViaWorkerFactory.
Just like other native system calls, these calls provide user mode with a handle to the
TpWorker Factory object, which contains information such as the name and object attributes,
the desired access mask, and a security descriptor. Unlike other system calls wrapped by
the Windows API, however, thread pool management is handled by Ntdll.dll’s native code,
which means that developers work with an opaque descriptor (a TP_WORK pointer) owned by
Ntdll.dll, in which the actual handle is stored.
As its name suggests, the worker factory implementation is responsible for allocating worker
threads (and calling the given user-mode worker thread entry point), maintaining a minimum
and maximum thread count (allowing for either permanent worker pools or totally dynamic
pools), as well as other accounting information. This enables operations such as shutting
down the thread pool to be performed with a single call to the kernel, because the kernel
has been the only component responsible for thread creation and termination.
Because the kernel dynamically creates new threads as requested, this also increases the scal-
ability of applications using the new thread pool implementation. Developers have always
been able to take advantage of as many threads as possible (based on the number of proces-
sors on the system) through the old implementation, but through support for dynamic pro-
cessors in Windows Vista (see the section on this topic later in this chapter), it’s now possible
for applications using thread pools to automatically take advantage of new processors added
at run time.
388 Windows Internals, Fifth Edition
It’s important to note that the new worker factory support is merely a wrapper to manage
mundane tasks that would otherwise have to be performed in user mode (at a loss of per-
formance). Many of the improvements in the new thread pool code are the result of changes
in the Ntdll.dll side of this architecture. Also, it is not the worker factory code that provides
the scalability, wait internals, and efficiency of work processing. Instead, it is a much older
component of Windows that we have already discussed—I/O completion ports, or more cor-
rectly, kernel queues (KQUEUE; see Chapter 7 for more information).
In fact, when creating a worker factory, an I/O completion port must have already been cre-
ated by user mode, and the handle needs to be passed on. It is through this I/O completion
port that the user-mode implementation will queue work and also wait for work—but by
calling the worker factory system calls instead of the I/O completion port APIs. Internally,
however, the “release” worker factory call (which queues work) is a wrapper around
IoSetIoCompletion, which increases pending work, while the “wait” call is a wrapper around
IoRemoveIoCompletion. Both these routines call into the kernel queue implementation.
Therefore, the job of the worker factory code is to manage either a persistent, static, or
dynamic thread pool; wrap the I/O completion port model into interfaces that try to prevent
stalled worker queues by automatically creating dynamic threads; and to simplify global
cleanup and termination operations during a factory shutdown request (as well as to easily
block new requests against the factory in such a scenario).
Unfortunately, the data structures used by the worker factory implementation are not in the
public symbols, but it is still possible to look at some worker pools, as we’ll show in the next
experiment.
EXPERIMENT: Looking at Thread Pools
Because of the more efficient and simpler thread pool implementation in Windows
Vista, many core system components and applications were updated to make use of it.
One of the ways to identify which processes are using a worker factory is to look at the
handle list in Process Explorer. Follow these steps to look at some details behind them:
1. Run Process Explorer and select Show Unnamed Handles And Mappings from
the View menu. Unfortunately, worker factories aren’t named by Ntdll.dll, so you
need to take this step in order to see the handles.
2. Select Lsm.exe from the list of processes, and look at the handle table. Make sure
that the lower pane is shown (View, Show Lower Pane) and is displaying handle
table mode (View, Lower Pane View, Handles).
3. Right-click on the lower pane columns, and then click on Select Columns. Make
sure that the Type column is selected to be shown.
Chapter 5 Processes, Threads, and Jobs 389
4. Now scroll down the handles, looking at the Type column, until you find a handle
of type TpWorkerFactory. You should see something like this:
Notice how the TpWorkerFactory handle is immediately preceded by an
IoCompletion handle. As was described previously, this occurs because before cre-
ating a worker factory, a handle to an I/O completion port on which work will be
sent must be created.
5. Now double-click Lsm.exe in the list of processes, and go to the Threads tab. You
should see something similar to the image here:
390 Windows Internals, Fifth Edition
On this system (with two processors), the worker factory has created six worker
threads at the request of Lsm.exe (processes can define a minimum and maxi-
mum number of threads) and based on its usage and the count of processors on
the machine. These threads are identified as TppWorkerThread, which is Ntdll.dll’s
worker entry point when calling the worker factory system calls.
6. Ntdll.dll is responsible for its own internal accounting inside the worker thread
wrapper (TppWorkerThread) before calling the worker callback that the applica-
tion has registered. By looking at the Wait reason in the State information for
each thread, you can get a rough idea of what each worker thread may be doing.
Double-click on one of the threads inside an LPC wait to look at its stack. Here’s
an example:
This specific worker thread is being used by Lsm.exe for LPC communication.
Because the local session manager needs to communicate with other compo-
nents such as Smss and Csrss through LPC, it makes sense that it would want a
number of its threads to be busy replying and waiting for LPC messages (the
more threads doing this, the less stalling on the LPC pipeline).
If you look at other worker threads, you’ll see some are waiting for objects such as
events. A process can have multiple thread pools, and each thread pool can have a
variety of threads doing completely unrelated tasks. It’s up to the developer to assign
work and to call the thread pool APIs to register this work through Ntdll.dll.
Chapter 5 Processes, Threads, and Jobs 391
Thread Scheduling
This section describes the Windows scheduling policies and algorithms. The first subsection
provides a condensed description of how scheduling works on Windows and a definition
of key terms. Then Windows priority levels are described from both the Windows API and
the Windows kernel points of view. After a review of the relevant Windows functions and
Windows utilities and tools that relate to scheduling, the detailed data structures and algo-
rithms that make up the Windows scheduling system are presented, with uniprocessor sys-
tems examined first and then multiprocessor systems.
Overview of Windows Scheduling
Windows implements a priority-driven, preemptive scheduling system—the highest-priority
runnable (ready) thread always runs, with the caveat that the thread chosen to run might be
limited by the processors on which the thread is allowed to run, a phenomenon called pro-
cessor affinity. By default, threads can run on any available processor, but you can alter pro-
cessor affinity by using one of the Windows scheduling functions listed in Table 5-15 (shown
later in the chapter) or by setting an affinity mask in the image header.
EXPERIMENT: Viewing Ready Threads
You can view the list of ready threads with the kernel debugger !ready command. This
command displays the thread or list of threads that are ready to run at each priority
level. In the following example, generated on a 32-bit machine with a dual-core proces-
sor, five threads are ready to run at priority 8 on the first processor, and three threads
at priority 10, two threads at priority 9, and six threads at priority 8 are ready to run on
the second processor. Determining which of these threads get to run on their respec-
tive processor is a complex result at the end of several algorithms that the scheduler
uses. We will cover this topic later in this section.
kd> !ready
Processor 0: Ready Threads at priority 8
THREAD 857d9030 Cid 0ec8.0e30 Teb: 7ffdd000 Win32Thread: 00000000 READY
THREAD 855c8300 Cid 0ec8.0eb0 Teb: 7ff9c000 Win32Thread: 00000000 READY
THREAD 8576c030 Cid 0ec8.0c9c Teb: 7ffa8000 Win32Thread: 00000000 READY
THREAD 85a8a7f0 Cid 0ec8.0d3c Teb: 7ff97000 Win32Thread: 00000000 READY
THREAD 87d34488 Cid 0c48.04a0 Teb: 7ffde000 Win32Thread: 00000000 READY
Processor 1: Ready Threads at priority 10
THREAD 857c0030 Cid 04c8.0378 Teb: 7ffdf000 Win32Thread: fef7f8c0 READY
THREAD 856cc8e8 Cid 0e84.0a70 Teb: 7ffdb000 Win32Thread: f98fb4c0 READY
THREAD 85c41c68 Cid 0e84.00ac Teb: 7ffde000 Win32Thread: ff460668 READY
Processor 1: Ready Threads at priority 9
THREAD 87fc86f0 Cid 0ec8.04c0 Teb: 7ffd3000 Win32Thread: 00000000 READY
THREAD 88696700 Cid 0ec8.0ce8 Teb: 7ffa0000 Win32Thread: 00000000 READY
392 Windows Internals, Fifth Edition
Processor 1: Ready Threads at priority 8
THREAD 856e5520 Cid 0ec8.0228 Teb: 7ff98000 Win32Thread: 00000000 READY
THREAD 85609d78 Cid 0ec8.09b0 Teb: 7ffd9000 Win32Thread: 00000000 READY
THREAD 85fdeb78 Cid 0ec8.0218 Teb: 7ff72000 Win32Thread: 00000000 READY
THREAD 86086278 Cid 0ec8.0cc8 Teb: 7ff8d000 Win32Thread: 00000000 READY
THREAD 8816f7f0 Cid 0ec8.0b60 Teb: 7ffd5000 Win32Thread: 00000000 READY
THREAD 87710d78 Cid 0004.01b4 Teb: 00000000 Win32Thread: 00000000 READY
When a thread is selected to run, it runs for an amount of time called a quantum. A quantum
is the length of time a thread is allowed to run before another thread at the same priority
level (or higher, which can occur on a multiprocessor system) is given a turn to run. Quantum
values can vary from system to system and process to process for any of three reasons: sys-
tem configuration settings (long or short quantums), foreground/background status of the
process, or use of the job object to alter the quantum. (Quantums are described in more
detail in the “Quantum” section later in the chapter.) A thread might not get to complete
its quantum, however. Because Windows implements a preemptive scheduler, if another
thread with a higher priority becomes ready to run, the currently running thread might be
preempted before finishing its time slice. In fact, a thread can be selected to run next and be
preempted before even beginning its quantum!
The Windows scheduling code is implemented in the kernel. There’s no single “scheduler”
module or routine, however—the code is spread throughout the kernel in which scheduling-
related events occur. The routines that perform these duties are collectively called the ker-
nel’s dispatcher. The following events might require thread dispatching:
N
A thread becomes ready to execute—for example, a thread has been newly created or
has just been released from the wait state.
N
A thread leaves the running state because its time quantum ends, it terminates, it yields
execution, or it enters a wait state.
N
A thread’s priority changes, either because of a system service call or because Windows
itself changes the priority value.
N
A thread’s processor affinity changes so that it will no longer run on the processor on
which it was running.
At each of these junctions, Windows must determine which thread should run next. When
Windows selects a new thread to run, it performs a context switch to it. A context switch is
the procedure of saving the volatile machine state associated with a running thread, loading
another thread’s volatile state, and starting the new thread’s execution.
As already noted, Windows schedules at the thread granularity. This approach makes sense
when you consider that processes don’t run but only provide resources and a context in
Chapter 5 Processes, Threads, and Jobs 393
which their threads run. Because scheduling decisions are made strictly on a thread basis, no
consideration is given to what process the thread belongs to. For example, if process A has 10
runnable threads, process B has 2 runnable threads, and all 12 threads are at the same prior-
ity, each thread would theoretically receive one-twelfth of the CPU time—Windows wouldn’t
give 50 percent of the CPU to process A and 50 percent to process B.
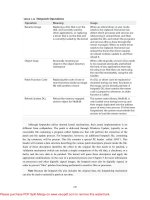
Priority Levels
To understand the thread-scheduling algorithms, you must first understand the priority lev-
els that Windows uses. As illustrated in Figure 5-12, internally Windows uses 32 priority levels,
ranging from 0 through 31. These values divide up as follows:
N
Sixteen real-time levels (16 through 31)
N
Fifteen variable levels (1 through 15)
N
One system level (0), reserved for the zero page thread
FIGURE 5-12 Thread priority levels
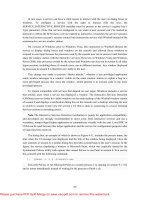
Thread priority levels are assigned from two different perspectives: those of the Windows API
and those of the Windows kernel. The Windows API first organizes processes by the priority
class to which they are assigned at creation (Real-time, High, Above Normal, Normal, Below
Normal, and Idle) and then by the relative priority of the individual threads within those pro-
cesses (Time-critical, Highest, Above-normal, Normal, Below-normal, Lowest, and Idle).
In the Windows API, each thread has a base priority that is a function of its process priority
class and its relative thread priority. The mapping from Windows priority to internal Windows
numeric priority is shown in Figure 5-13.
394 Windows Internals, Fifth Edition
Real-time
time critical
Real-time idle
Dynamic time
critical
Dynamic idle
Used for zero page thread—not available to Win32 applications
Idle
Below
Normal
Normal
Above
Normal
High
Real-time
31
24
16
15
13
10
8
6
4
0
1
FIGURE 5-13 Mapping of Windows kernel priorities to the Windows API
Whereas a process has only a single base priority value, each thread has two priority values:
current and base. Scheduling decisions are made based on the current priority. As explained
in the following section on priority boosting, the system under certain circumstances
increases the priority of threads in the dynamic range (1 through 15) for brief periods.
Windows never adjusts the priority of threads in the real-time range (16 through 31), so they
always have the same base and current priority.
A thread’s initial base priority is inherited from the process base priority. A process, by
default, inherits its base priority from the process that created it. This behavior can be over-
ridden on the CreateProcess function or by using the command-line start command. A pro-
cess priority can also be changed after being created by using the SetPriorityClass function or
Chapter 5 Processes, Threads, and Jobs 395
various tools that expose that function, such as Task Manager and Process Explorer (by right-
clicking on the process and choosing a new priority class). For example, you can lower the
priority of a CPU-intensive process so that it does not interfere with normal system activities.
Changing the priority of a process changes the thread priorities up or down, but their relative
settings remain the same. It usually doesn’t make sense, however, to change individual thread
priorities within a process, because unless you wrote the program or have the source code,
you don’t really know what the individual threads are doing, and changing their relative
importance might cause the program not to behave in the intended fashion.
Normally, the process base priority (and therefore the starting thread base priority) will
default to the value at the middle of each process priority range (24, 13, 10, 8, 6, or 4).
However, some Windows system processes (such as the Session Manager, service controller,
and local security authentication server) have a base process priority slightly higher than the
default for the Normal class (8). This higher default value ensures that the threads in these
processes will all start at a higher priority than the default value of 8. These system processes
use an internal system call (NtSetInformationProcess) to set their process base priority to a
numeric value other than the normal default starting base priority.
Windows Scheduling APIs
The Windows API functions that relate to thread scheduling are listed in Table 5-15. (For
more information, see the Windows API reference documentation.)
TABLE 5-15 Scheduling-Related APIs and Their Functions
API Function
Suspend/ResumeThread Suspends or resumes a paused thread from execution.
Get/SetPriorityClass Returns or sets a process’s priority class (base priority).
Get/SetThreadPriority Returns or sets a thread’s priority (relative to its process base
priority).
Get/SetProcessAffinityMask Returns or sets a process’s affinity mask.
SetThreadAffinityMask Sets a thread’s affinity mask (must be a subset of the process’s
affinity mask) for a particular set of processors, restricting it to
running on those processors.
SetInformationJobObject Sets attributes for a job; some of the attributes affect schedul-
ing, such as affinity and priority. (See the “Job Objects” section
later in the chapter for a description of the job object.)
GetLogicalProcessorInformation Returns details about processor hardware configuration (for
hyperthreaded and NUMA systems).
Get/SetThreadPriorityBoost Returns or sets the ability for Windows to boost the priority of
a thread temporarily. (This ability applies only to threads in the
dynamic range.)
SetThreadIdealProcessor Establishes a preferred processor for a particular thread, but
doesn’t restrict the thread to that processor.
396 Windows Internals, Fifth Edition
API Function
Get/SetProcessPriorityBoost Returns or sets the default priority boost control state of the
current process. (This function is used to set the thread priority
boost control state when a thread is created.)
WaitForSingle/MultipleObject(s) Puts the current thread into a wait state until the specified
object(s) is/are satisfied, or until the specified time interval (fig-
ured in milliseconds [msec]) expires, if given.
SwitchToThread Yields execution to another thread (at priority 1 or higher) that
is ready to run on the current processor.
Sleep Puts the current thread into a wait state for a specified time in-
terval (figured in milliseconds [msec]). A zero value relinquishes
the rest of the thread’s quantum.
SleepEx Causes the current thread to go into a wait state until either an
I/O completion callback is completed, an APC is queued to the
thread, or the specified time interval ends.
Relevant Tools
You can change (and view) the base process priority with Task Manager and Process Explorer.
You can kill individual threads in a process with Process Explorer (which should be done, of
course, with extreme care).
You can view individual thread priorities with the Reliability and Performance Monitor,
Process Explorer, or WinDbg. While it might be useful to increase or lower the priority of a
process, it typically does not make sense to adjust individual thread priorities within a pro-
cess because only a person who thoroughly understands the program (in other words, typi-
cally only the developer himself) would understand the relative importance of the threads
within the process.
The only way to specify a starting priority class for a process is with the start command in the
Windows command prompt. If you want to have a program start every time with a specific
priority, you can define a shortcut to use the start command by beginning the command
with cmd /c. This runs the command prompt, executes the command on the command line,
and terminates the command prompt. For example, to run Notepad in the low-process prior-
ity, the shortcut would be cmd /c start /low Notepad.exe.
Chapter 5 Processes, Threads, and Jobs 397
EXPERIMENT: Examining and Specifying Process and
Thread Priorities
Try the following experiment:
1. From an elevated command prompt, type start /realtime notepad. Notepad
should open.
2. Run Process Explorer and select Notepad.exe from the list of processes. Double-
click on Notepad.exe to show the process properties window, and then click on
the Threads tab, as shown here. Notice that the dynamic priority of the thread in
Notepad is 24. This matches the real-time value shown in this image:
3. Task Manager can show you similar information. Press Ctrl+Shift+Esc to start Task
Manager, and go to the Processes tab. Right-click on the Notepad.exe process,
and select the Set Priority option. You can see that Notepad’s process priority
class is Realtime, as shown in the following dialog box.
398 Windows Internals, Fifth Edition
Windows System Resource Manager
Windows Server 2008 Enterprise Edition and Windows Server 2008 Datacenter Edition
include an optionally installable component called Windows System Resource Manager
(WSRM). It permits the administrator to configure policies that specify CPU utilization,
affinity settings, and memory limits (both physical and virtual) for processes. In addi-
tion, WSRM can generate resource utilization reports that can be used for accounting
and verification of service-level agreements with users.
Policies can be applied for specific applications (by matching the name of the image
with or without specific command-line arguments), users, or groups. The policies can
be scheduled to take effect at certain periods or can be enabled all the time.
After you have set a resource-allocation policy to manage specific processes, the WSRM
service monitors CPU consumption of managed processes and adjusts process base
priorities when those processes do not meet their target CPU allocations.
Chapter 5 Processes, Threads, and Jobs 399
The physical memory limitation uses the function SetProcessWorkingSetSizeEx to set a
hard-working set maximum. The virtual memory limit is implemented by the service
checking the private virtual memory consumed by the processes. (See Chapter 9 for an
explanation of these memory limits.) If this limit is exceeded, WSRM can be configured
to either kill the processes or write an entry to the Event Log. This behavior could be
used to detect a process with a memory leak before it consumes all the available com-
mitted virtual memory on the system. Note that WSRM memory limits do not apply to
Address Windowing Extensions (AWE) memory, large page memory, or kernel memory
(nonpaged or paged pool).
Real-Time Priorities
You can raise or lower thread priorities within the dynamic range in any application; how-
ever, you must have the increase scheduling priority privilege to enter the real-time range. Be
aware that many important Windows kernel-mode system threads run in the real-time prior-
ity range, so if threads spend excessive time running in this range, they might block critical
system functions (such as in the memory manager, cache manager, or other device drivers).
Note
As illustrated in the following figure showing the x86 interrupt request levels (IRQLs),
although Windows has a set of priorities called real-time, they are not real-time in the common
definition of the term. This is because Windows doesn’t provide true real-time operating system
facilities, such as guaranteed interrupt latency or a way for threads to obtain a guaranteed execu-
tion time. For more information, see the sidebar “Windows and Real-Time Processing” in Chapter
3 as well as the MSDN Library article “Real-Time Systems and Microsoft Windows NT.”
Interrupt Levels vs. Priority Levels
As illustrated in the following figure of the interrupt request levels (IRQLs) for a 32-bit
system, threads normally run at IRQL 0 or 1. (For a description of how Windows uses
interrupt levels, see Chapter 3.) User-mode code always runs at IRQL 0. Because of this,
no user-mode thread, regardless of its priority, blocks hardware interrupts (although
high-priority real-time threads can block the execution of important system threads).
Only kernel-mode APCs execute at IRQL 1 because they interrupt the execution of a
thread. (For more information on APCs, see Chapter 3.) Threads running in kernel mode
can raise IRQL to higher levels, though—for example, while executing a system call that
involves thread dispatching.