Beginning XNA 2.0 Game Programming From Novice to Professional phần 3 ppt
Bạn đang xem bản rút gọn của tài liệu. Xem và tải ngay bản đầy đủ của tài liệu tại đây (568.69 KB, 45 trang )
Shake, Baby!
Your game is almost ready. Now let’s add one more effect to the game: the vibration.
When players collide with a meteor, in addition to the explosion sound, you’ll make the
Xbox 360 gamepad vibrate so they can feel the collision impact.
As you saw in the previous chapter, you can start and finish the Xbox 360 gamepad
vibration through the
SetVibration() method. You’re going to create a nonvisual
GameComponent that will help you with this effect. So, add a new GameComponent to the
project as usual and add the following code:
#region Using Statements
using System;
using System.Collections.Generic;
using Microsoft.Xna.Framework;
using Microsoft.Xna.Framework.Input;
#endregion
namespace FirstGame
{
/// <summary>
/// This component helps shake your Xbox 360 gamepad
/// </summary>
public class SimpleRumblePad : Microsoft.Xna.Framework.GameComponent
{
private int time;
private int lastTickCount;
public SimpleRumblePad(Game game)
: base(game)
{
}
/// <summary>
/// Allows the game component to update itself.
/// </summary>
/// <param name="gameTime">Provides a snapshot of timing values.</param>
public override void Update(GameTime gameTime)
{
if (time > 0) {
int elapsed = System.Environment.TickCount - lastTickCount;
if (elapsed >= time)
{
time = 0;
CHAPTER 3 ■ CREATING YOUR FIRST 2-D GAME64
9241CH03.qxd 2/21/08 12:10 PM Page 64
GamePad.SetVibration(PlayerIndex.One, 0, 0);
}
}
base.Update(gameTime);
}
/// <summary>
/// Turn off the rumble
/// </summary>
protected override void Dispose(bool disposing)
{
GamePad.SetVibration(PlayerIndex.One, 0, 0);
base.Dispose(disposing);
}
/// <summary>
/// Set the vibration
/// </summary>
/// <param name="Time">Vibration time</param>
/// <param name="LeftMotor">Left Motor Intensity</param>
/// <param name="RightMotor">Right Motor Intensity</param>
public void RumblePad(int Time, float LeftMotor, float RightMotor)
{
lastTickCount = System.Environment.TickCount;
time = Time;
GamePad.SetVibration(PlayerIndex.One, LeftMotor, RightMotor);
}
}
}
In this class, the RumblePad() method receives the amount of time that the controller
should stay vibrating and the vibration motor’s intensity as parameters. So, also as usual,
declare it in the
Game1 class, as follows:
// Rumble Effect
private SimpleRumblePad rumblePad;
I
nitializ
e it in the
Initialize() method of the Game1 class:
rumblePad = new SimpleRumblePad(this);
Components.Add(rumblePad);
CHAPTER 3 ■ CREATING YOUR FIRST 2-D GAME 65
9241CH03.qxd 2/21/08 12:10 PM Page 65
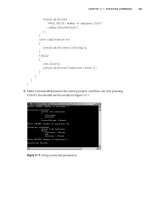
Make the controller vibrate right after executing the explosion sound, in the
DoGameLogic() method:
// Shake!
rumblePad.RumblePad(500, 1.0f, 1.0f);
Congratulations—you’ve just finished your first game!
Modifying and Deploying to the Xbox 360
You know that XNA technology allows you to create games for the PC as well as the Xbox
360, so if you wish to make a console version of Rock Rain, all you have to do is create a
copy of this project for Xbox 360. Just right-click your Windows Project for Rock Rain and
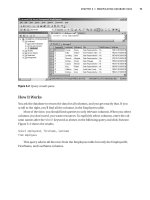
choose Create Copy of Project for Xbox 360, as shown in Figure 3-6. Compile, and it’s
ready to go. You immediately have a game that works on the Xbox 360.
Figure 3-6. Creating an Xbox 360 version of Rock Rain
However, not everything is that simple. First, to deploy your game in the Xbox 360
you need a Creator’s Club subscription, which enables your PC and the correctly regis-
tered console to communicate. This subscription is paid and can be renewed annually or
every three months. Besides this, to deploy the game your console must be connected to
the Xbox LIVE network.
CHAPTER 3 ■ CREATING YOUR FIRST 2-D GAME66
9241CH03.qxd 2/21/08 12:10 PM Page 66
Also note the difference between televisions (used by the consoles) and monitors
(used by the PC). In an ordinary PC monitor you have access to all areas of the screen,
whereas in a TV you’re forced to use what is called the
safe area. Briefly, safe area is a term
used in television production to describe the areas of the television picture that can be
seen on television screens.
In other words, not everything that you put on the screen is visible on an ordinary TV.
Older TVs can display less of the space outside of the safe area than ones made more
recently. Flat panel screens, plasma, and liquid crystal display (LCD) screens generally
can show most of the “unsafe” area.
This leads you to a problem regarding the
margin of the screen. As the player cannot
leave the margin of the screen, knowing exactly where the visible margin of the screen is
can be a problem. Normally, the game industry works with a 3 to 5 percent margin in
relation to the physical margin of the screen.
So, in your
Ship class, which represents the player’s spaceship, add this code in the
part where you calculated the size of the screen, in the class constructor:
#if XBOX360
// On the 360, we need be careful about the TV's "safe" area.
screenBounds = new Rectangle((int)(Game.Window.ClientBounds.Width * 0.03f),
(int)(Game.Window.ClientBounds.Height * 0.03f),
Game.Window.ClientBounds.Width -
(int)(Game.Window.ClientBounds.Width * 0.03f),
Game.Window.ClientBounds.Height -
(int)(Game.Window.ClientBounds.Height * 0.03f));
#else
screenBounds = new Rectangle(0,0,Game.Window.ClientBounds.Width,
Game.Window.ClientBounds.Height);
#endif
All you do is this: if it’s an Xbox 360 project, compile the code that creates the rectan-
gle that defines the screen margin with a size 3 percent smaller than the rectangle of a PC
project, which takes all the monitor space. It’s that simple.
Summary
In this chapter you learned the basics about creating 2-D games, and you went through
a small project phase, focusing on the items that the game programmer and designer
should have in mind before starting to write any code.
You also learned how to model your game using
GameComponents and create the game
logic itself, modifying and testing the state of these components inside the game’s loop.
You saw that you can implement simple sprites using
GameComponents and take advantage
of all the classes that XNA already offers.
CHAPTER 3 ■ CREATING YOUR FIRST 2-D GAME 67
9241CH03.qxd 2/21/08 12:10 PM Page 67
You also saw how you can add sounds and vibration effects to your game, as well as
use a conditional compilation to solve the “safe area” issue of using TVs with video game
consoles.
CHAPTER 3 ■ CREATING YOUR FIRST 2-D GAME68
9241CH03.qxd 2/21/08 12:10 PM Page 68
Improving Your First
2-D Game
Let’s face reality. Rock Rain is cool, fun, but—it’s too simple, isn’t it? In this chapter,
you’re going to add some more characteristics of a “real game” to it. We’ll show you some
more sophisticated techniques you can use to create an even more fun game. Let’s go.
Planning Rock Rain’s New Version
A striking feature of any game is missing in Rock Rain: the presentation screen! When the
player runs the game, he’s immediately thrown in the meteor field without warning. The
ideal would be to show a screen—the game presentation—leading to another screen with
instructions, the game help, and an option to start the game itself. That’s much more
elegant.
Let’s also change some aspects of the playability. Now the game will have animated
sprites and an energy meter, and will be able to be played by two players simultaneously.
That’s more interesting, isn’t it?
So, start creating a new project and call it
RockRainEnhanced, the same way you did
in the previous chapter. Add a new folder called
Core, and add to this folder the
AudioComponent and the SimpleRumblePad that you created in the version of Rock Rain in
the previous chapter, because you’re also going to use these again in this new project. You
can find more media content for this game, including new textures and sounds, in the
Source Code/Download area of the Apress web site at
, so add this
stuff in your
Content project folder.
Creating the Game Screens
All modern games have many screens: a screen for the opening, a screen for the instruc-
tions, a screen for the game itself, and so on. Because in each screen what is shown is a
69
CHAPTER 4
9241CH04.qxd 3/10/08 10:34 AM Page 69
lot more than a simple image, in the game industry it’s common to call these screens
scenes.
A scene is composed (normally) of some background image, background music, and
a group of “actors” that “act” in the scene to show to the user some information about the
game.
For example, look at the opening screen of Rock Rain Enhanced in Figure 4-1.
Figure 4-1. Opening screen
In this scene you have a nice background screen and two words that come up from
the screen’s margin to form the word “Rock Rain,” as well as an options menu for the
game, along with background music.
Note that you have some “actors” here in this scene. Besides the sprites that have
moved to form the game’s title, you have an animated menu that moves with the Xbox
360 gamepad or keyboard. This group of images, sounds, and actors forms this scene.
The user can go to another scene according to the menu options. In this version of Rock
Rain you have three scenes: the
start scene, the help scene, and the action scene. Figure 4-2
shows the flow of these game scenes.
CHAPTER 4 ■ IMPROVING YOUR FIRST 2-D GAME70
9241CH04.qxd 3/10/08 10:34 AM Page 70
Figure 4-2. Flow of the game scenes
Now, using XNA terms, each game scene is a GameComponent that has other
GameComponents representing the actors of the scene. Each scene has its own unique
qualities, but also some things in common. For example, each scene contains its own
collection of
GameComponents that represents the actors in that scene. Also, in each scene
a method shows it or closes it according to the flow of the scenes that the user chose
(when you open the action scene you’ll have to also close the start scene, for example).
You’ll also be able to
pause each scene. This is useful when you want to interrupt a
game for a fast trip to the bathroom, for example. You do this by simply
not executing the
Update() method of the scene’s GameComponents. Remember that XNA calls the Update()
method to update the status of a GameComponent. If it isn’t called, the GameComponent won’t
be updated and it will be “stopped” in the game scene.
In this architecture, the only
GameComponents that will be added to the list of the game’s
components are the scenes, because the other
GameComponents that build the scene itself
will be added to the lists of components of the proper scene.
You’ll initially create the class that implements the common functionality of the
scenes, then add a new
GameComponent called GameScene. For project organization pur-
poses, put it inside the
Core folder.
CHAPTER 4 ■ IMPROVING YOUR FIRST 2-D GAME 71
9241CH04.qxd 3/10/08 10:34 AM Page 71
Start with the code. First, your scene is a visual component, so derive it from
DrawableGameComponent instead of GameComponent. Next, as mentioned, each scene contains
your own list of actors, meaning that it has your own list of
GameComponents. Start declaring
it in the class as follows:
/// <summary>
/// List of child GameComponents
/// </summary>
private readonly List<GameComponent> components;
Also add a property to expose the Components list, to be able to add to new actors to
the scene from the derived classes:
/// <summary>
/// Components of Game Scene
/// </summary>
public List<GameComponent> Components
{
get { return components; }
}
In the constructor of this class, you’ll initialize this list and set that the component
will not be visible or will have its status updated initially, using the attributes
Visible and
Enabled of the DrawableGameComponent class:
/// <summary>
/// Default Constructor
/// </summary>
public GameScene(Game game) : base(game){
components = new List<GameComponent>();
Visible = false;
Enabled = false;
}
Then,
to sho
w or hide the scene
, change the v
alues of these attr
ibutes. You create two
methods for this:
/// <summary>
/// Show the scene
/// </summary>
public virtual void Show()
{
Visible = true;
Enabled = true;
CHAPTER 4 ■ IMPROVING YOUR FIRST 2-D GAME72
9241CH04.qxd 3/10/08 10:34 AM Page 72
}
/// <summary>
/// Hide the scene
/// </summary>
public virtual void Hide()
{
Visible = false;
Enabled = false;
}
Now you have to handle the actors of the scene correctly. For each call to the Update()
method of the scene, you have to call the respective method for each actor in the scene,
to update your status. If the object of the scene is disabled (
Enabled = false), then XNA
won’t call the
Update() method, and none of the actors of the scene will be updated either,
because its respective
Update() methods won’t have executed:
/// <summary>
/// Allows the GameComponent to update itself.
/// </summary>
/// <param name="gameTime">Provides a snapshot of timing values.</param>
public override void Update(GameTime gameTime)
{
// Update the child GameComponents (if Enabled)
for (int i = 0; i < components.Count; i++)
{
if (components[i].Enabled)
{
components[i].Update(gameTime);
}
}
base.Update(gameTime);
}
The
dr
awing code for the actors is similar
. F
or each
Draw() method executed in the
scene
, call the
Draw() method for each DrawableGameComponent that is inser
ted in the list of
components of the scene:
/// <summary>
/// Allows the GameComponent to draw your content in the game screen
/// </summary>
public override void Draw(GameTime gameTime)
{
// Draw the child GameComponents (if drawable)
CHAPTER 4 ■ IMPROVING YOUR FIRST 2-D GAME 73
9241CH04.qxd 3/10/08 10:34 AM Page 73
for (int i = 0; i < components.Count; i++)
{
GameComponent gc = components[i];
if ((gc is DrawableGameComponent) &&
((DrawableGameComponent) gc).Visible)
{
((DrawableGameComponent) gc).Draw(gameTime);
}
}
base.Draw(gameTime);
}
In short, all that this GameComponent does is correctly manipulate calling the Draw()
and Update() methods of the game class, drawing and updating the other GameComponents
that compose a scene. Also, note that the
Show() and Hide() methods show and hide a
game scene, avoiding the execution of the
Draw() and Update() methods using the Visible
and Enabled properties. Simple, isn’t it?
Let’s create three
GameComponents derived from this class: one for the start scene of the
game, another for the help scene, and another for the action scene itself. The game class
will show the correct scene according to the game state. That is, you start in the opening
scene, then players can go to the action scene, and go back to the opening after losing all
their lives. Alternatively, players can choose to go to the help scene from the start scene,
and so on, until they choose the option to leave the start scene.
So, add three
GameComponents called StartScene, HelpScene, and ActionScene, respec-
tively. As you start with the help scene, declare it in the
Game1 class of your game, as
follows:
// Game Scenes
protected HelpScene helpScene;
// Active Game Scene
protected GameScene activeScene;
N
ote
that these thr
ee
GameComponents
will be der
iv
ed fr
om the
GameScene class
, seen
befor
e
. H
o
wever, you don’t need to change them now—you’ll go back to each of them
shor
tly
.
The
activeScene attr
ibute contains the activ
e scene in the game
.
Creating the Help Screen
Let
’
s
start with the most simple scene in this game. In this scene, you’ll show the game
instr
uctions
, and the user will be able to click the A button on the Xbo
x 360 gamepad or
the E
nter key on the keyboar
d to go back to the initial scene
.
CHAPTER 4 ■ IMPROVING YOUR FIRST 2-D GAME74
9241CH04.qxd 3/10/08 10:34 AM Page 74
This scene contains only the instructions of how to play the game, and you can cre-
ate it just by showing a simple image with the game instructions. However, as the scene is
composed of
GameComponents, first you need one GameComponent to draw images.
Add a new
GameComponent to the Core folder and name it ImageComponent.cs. Again, this
component is a visual component, so derive it from
DrawableGameComponent instead of
GameComponent.
This
GameComponent is able to draw a texture on the screen in centered mode or
stretched mode, to fit the image on the screen. To do so, add the following enumeration,
which the constructor will use to inform the component that the image has to be drawn:
public enum DrawMode
{
Center = 1,
Stretch,
};
You already know that you need a Texture2D object, a Rectangle object, and a
SpriteBatch object to draw an image, besides the proper attribute that describes how
the image will be drawn in this case. Declare these objects in the class:
// Texture to draw
protected readonly Texture2D texture;
// Draw Mode
protected readonly DrawMode drawMode;
// SpriteBatch
protected SpriteBatch spriteBatch = null;
// Image Rectangle
protected Rectangle imageRect;
In the class constructor, calculate the destination rectangle of the image on the
screen, which depends on how the image will be drawn, in the
DrawMode enumeration
value:
/// <summary>
/// Default constructor
/// </summary>
/// <param name="game">The game object</param>
/// <param name="texture">Texture to Draw</param>
/// <param name="drawMode">Draw Mode</param>
public ImageComponent(Game game, Texture2D texture, DrawMode drawMode)
: base(game)
{
this.texture = texture;
CHAPTER 4 ■ IMPROVING YOUR FIRST 2-D GAME 75
9241CH04.qxd 3/10/08 10:34 AM Page 75
this.drawMode = drawMode;
// Get the current spritebatch
spriteBatch = (SpriteBatch)
Game.Services.GetService(typeof (SpriteBatch));
// Create a rectangle with the size and position of the image
switch (drawMode)
{
case DrawMode.Center:
imageRect = new Rectangle((Game.Window.ClientBounds.Width -
texture.Width)/2,(Game.Window.ClientBounds.Height -
texture.Height)/2,texture.Width, texture.Height);
break;
case DrawMode.Stretch:
imageRect = new Rectangle(0, 0, Game.Window.ClientBounds.Width,
Game.Window.ClientBounds.Height);
break;
}
}
In the Draw() method, you just use the SpriteBatch object to draw the image:
/// <summary>
/// Allows the GameComponent to draw itself.
/// </summary>
/// <param name="gameTime">Provides a snapshot of timing values.</param>
public override void Draw(GameTime gameTime)
{
spriteBatch.Draw(texture, imageRect, Color.White);
base.Draw(gameTime);
}
Obser
v
e that
putting an image in a scene might not be as simple as pr
eviously
thought. I
f this image is sho
wn on a
T
V or on an ordinary monitor with a 4:3 aspect ratio,
it will be display
ed corr
ectly
. H
owever, if it is drawn on a widescreen monitor or regular
T
V
, it can be distor
ted and it will look weird on the screen.
S
o
, y
ou can create two images: one for the 4:3 monitors and TVs, and another for
widescr
een.
Y
ou can choose the image to be drawn according to the screen type,
although y
ou
’
ll always have to create two versions of each image that you want to show.
Another often used alter
nativ
e is to dr
aw
two o
v
erlapping images
. One image is in the
backgr
ound, distor
ted to take up the whole scr
een (widescreen or not), and another is
dr
awn center
ed on top
, so it looks okay whether in widescreen or not. In your game,
y
ou
’
ll use the textures in Figure 4-3.
CHAPTER 4 ■ IMPROVING YOUR FIRST 2-D GAME76
9241CH04.qxd 3/10/08 10:34 AM Page 76
Also note the treatment that was given to the input processing. You always compare
the device’s previous state with its current state to control if a user in fact pressed a but-
ton or key in the current scene.
Figure 4-3. Images that are part of the help scene
That way, your help scene has only two GameComponents that draw images: one to draw
the background image and another to draw the foreground image with the instructions.
Add a new class called
HelpScene and add the code from Listing 4-1.
Listing 4-1. H
elp Scene G
ameComponent
#region Using Statements
using Microsoft.Xna.Framework;
using Microsoft.Xna.Framework.Graphics;
using RockRainEnhanced.Core;
#endregion
namespace RockRainEnhanced
{
/// <summary>
CHAPTER 4 ■ IMPROVING YOUR FIRST 2-D GAME 77
9241CH04.qxd 3/10/08 10:34 AM Page 77
/// This is a GameComponent that represents the help scene
/// </summary>
public class HelpScene : GameScene
{
public HelpScene(Game game, Texture2D textureBack, Texture2D textureFront)
: base(game)
{
Components.Add(new ImageComponent(game, textureBack,
ImageComponent.DrawMode.Stretch));
Components.Add(new ImageComponent(game, textureFront,
ImageComponent.DrawMode.Center));
}
}
}
Also add the following code in the Game1 class and change the LoadContent() method
to see this component in action. You just load the associated content, create an instance
of
HelpScene, and execute the Show() method of the HelpScene object:
// Textures
protected Texture2D helpBackgroundTexture, helpForegroundTexture;
/// <summary>
/// LoadContent will be called once per game and is the place to load
/// all your content.
/// </summary>
protected override void LoadContent()
{
// Create a new SpriteBatch, which can be used to draw textures.
spriteBatch = new SpriteBatch(graphics.GraphicsDevice);
Services.AddService(typeof (SpriteBatch), spriteBatch);
// Create the Credits / Instruction Scene
helpBackgroundTexture = Content.Load<Texture2D>("helpbackground");
helpForegroundTexture = Content.Load<Texture2D>("helpForeground");
helpScene = new HelpScene(this, helpBackgroundTexture,
helpForegroundTexture);
Components.Add(helpScene);
helpScene.Show();
activeScene = helpScene;
}
CHAPTER 4 ■ IMPROVING YOUR FIRST 2-D GAME78
9241CH04.qxd 3/10/08 10:34 AM Page 78
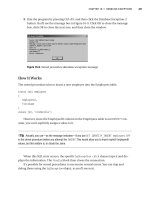
Execute the code. The result appears in Figure 4-4. See how the scene is adequately
shown both in normal format (4:3) and in widescreen (16:9).
Figure 4-4. Help scene in normal and widescreen format
Creating the Opening Screen
The opening screen of a game always gives a “taste” of the game itself. Normally it’s
something striking, which must show some of the game features and give the user a navi-
gation menu between the game itself, options, help, and so on.
For Rock Rain, you’ll create a scene with the game name in large letters coming from
the screen borders and an option menu right beneath (1980s arcade style), with a back-
ground with some meteor theme. You’ll use the textures in Figure 4-5 to do this.
CHAPTER 4 ■ IMPROVING YOUR FIRST 2-D GAME 79
9241CH04.qxd 3/10/08 10:34 AM Page 79
Figure 4-5. Textures of the opening screen
Then, you’ll have four actors in the opening screen. One is named “Rock,” which
comes into the scene from the left and goes to the center. The second one is named
“Rain,” and comes from the right also to the center of the screen. The third is named
“enhanced,
” which keeps blinking right below the word “Rain.”
The fourth actor shows after the preceding three, and is a menu with the game
options
. Because it’s a little more sophisticated than just a sprite animation, you’ll first
cr
eate a
GameComponent to handle menus
.
Cr
eating the Menu Component
Your menu for the game will be simple and functional at the same time. It will be drawn
using two different fonts, where the bigger font will highlight the selected item.
Start adding a new
GameComponent called TextMenuComponent in the Core folder. Again,
this component is a visual component, so derive it from
DrawableGameComponent instead of
GameComponent.
In this component, you’ll need two fonts to draw the text in normal and selected
status, a
string list with the items to be drawn, the color of the regular and selected items,
CHAPTER 4 ■ IMPROVING YOUR FIRST 2-D GAME80
9241CH04.qxd 3/10/08 10:34 AM Page 80
the size and position of the menu and, as always, a SpriteBatch object to draw the text in
the screen. So, add the following code to the class to declare these objects:
/
/ SpriteBatch
p
rotected SpriteBatch spriteBatch = null;
// Fonts
protected readonly SpriteFont regularFont, selectedFont;
// Colors
protected Color regularColor = Color.White, selectedColor = Color.Red;
// Menu Position
protected Vector2 position = new Vector2();
// Items
protected int selectedIndex = 0;
private readonly StringCollection menuItems;
// Size of menu in pixels
protected int width, height;
Also add a set of properties to handle these attributes:
/// <summary>
/// Set the Menu Options
/// </summary>
/// <param name="items"></param>
public void SetMenuItems(string[] items)
{
menuItems.Clear();
menuItems.AddRange(items);
CalculateBounds();
}
/// <summary>
/// Width of menu in pixels
/// </summary>
public int Width
{
get { return width; }
}
/// <summary>
/// Height of menu in pixels
/// </summary>
public int Height
{
get { return height; }
CHAPTER 4 ■ IMPROVING YOUR FIRST 2-D GAME 81
9241CH04.qxd 3/10/08 10:34 AM Page 81
}
/// <summary>
/// Selected menu item index
/// </summary>
public int SelectedIndex
{
get { return selectedIndex; }
set { selectedIndex = value; }
}
/// <summary>
/// Regular item color
/// </summary>
public Color RegularColor
{
get { return regularColor; }
set { regularColor = value; }
}
/// <summary>
/// Selected item color
/// </summary>
public Color SelectedColor
{
get { return selectedColor; }
set { selectedColor = value; }
}
/// <summary>
/// Position of component in screen
/// </summary>
public Vector2 Position
{
get { return position; }
set { position = value; }
}
Notice the CalculateBounds() in the SetMenuItems() method. The items on the menu
are drawn centered horizontally. To do this, you need to calculate the width and the
height of the menu—values that might vary in accordance with the items that have been
added to the component and the font size. The
CalculateBounds() method does this cal-
culation using the
MeasureString() method of the SpriteFont class, which gets the string
size in pixels using this font:
CHAPTER 4 ■ IMPROVING YOUR FIRST 2-D GAME82
9241CH04.qxd 3/10/08 10:34 AM Page 82
/// <summary>
/// Get the menu bounds
/// </summary>
protected void CalculateBounds()
{
width = 0;
height = 0;
foreach (string item in menuItems)
{
Vector2 size = selectedFont.MeasureString(item);
if (size.X > width)
{
width = (int) size.X;
}
height += selectedFont.LineSpacing;
}
}
The Draw() method that draws these elements is simple, because you need only a
loop drawing each item, below each other, using the correct font for the selected and reg-
ular entries. Each item is drawn with a little overlapped shadow, created by drawing the
same text twice, which giv
es a better look to the text. The code of this method follows:
/// <summary>
/// Allows the GameComponent to draw itself.
/// </summary>
/// <param name="gameTime">Provides a snapshot of timing values.</param>
public override void Draw(GameTime gameTime)
{
float y = position.Y;
for (int i = 0; i < menuItems.Count; i++)
{
SpriteFont font;
Color theColor;
if (i == SelectedIndex)
{
font = selectedFont;
theColor = selectedColor;
}
else
{
font = regularFont;
CHAPTER 4 ■ IMPROVING YOUR FIRST 2-D GAME 83
9241CH04.qxd 3/10/08 10:34 AM Page 83
theColor = regularColor;
}
// Draw the text shadow
spriteBatch.DrawString(font, menuItems[i],
new Vector2(position.X + 1, y + 1), Color.Black);
// Draw the text item
spriteBatch.DrawString(font, menuItems[i],
new Vector2(position.X, y), theColor);
y += font.LineSpacing;
}
base.Draw(gameTime);
}
In fact, the drawn part of this class is the simplest part. This component must
handle the user input as well, using the keyboard (up and down arrows) or the Xbox 360
gamepad. You want some sound effects to notify users when they change or select a
menu item. In this case, add some new attributes to this class, to handle sound and user
input:
// Used to handle input
protected KeyboardState oldKeyboardState;
protected GamePadState oldGamePadState;
// For audio effects
protected AudioComponent audioComponent;
As you did before, the Update() method is the right place to handle the user input.
You just check the keyboard and the gamepad state, as you saw in the previous chapters,
to change the attribute’s
selectedIndex value:
/// <summary>
/// Allows the GameComponent to update itself.
/// </summary>
/// <param name="gameTime">Provides a snapshot of timing values.</param>
public override void Update(GameTime gameTime)
{
GamePadState gamepadState = GamePad.GetState(PlayerIndex.One);
KeyboardState keyboardState = Keyboard.GetState();
bool down, up;
// Handle the keyboard
down = (oldKeyboardState.IsKeyDown(Keys.Down) &&
CHAPTER 4 ■ IMPROVING YOUR FIRST 2-D GAME84
9241CH04.qxd 3/10/08 10:34 AM Page 84
(keyboardState.IsKeyUp(Keys.Down)));
up = (oldKeyboardState.IsKeyDown(Keys.Up) &&
(keyboardState.IsKeyUp(Keys.Up)));
// Handle the D-Pad
down |= (oldGamePadState.DPad.Down == ButtonState.Pressed) &&
(gamepadState.DPad.Down == ButtonState.Released);
up |= (oldGamePadState.DPad.Up == ButtonState.Pressed) &&
(gamepadState.DPad.Up == ButtonState.Released);
if (down || up)
{
audioComponent.PlayCue("menu_scroll");
}
if (down)
{
selectedIndex++;
if (selectedIndex == menuItems.Count)
{
selectedIndex = 0;
}
}
if (up)
{
selectedIndex ;
if (selectedIndex == -1)
{
selectedIndex = menuItems.Count - 1;
}
}
oldKeyboardState = keyboardState;
oldGamePadState = gamepadState;
base.Update(gameTime);
}
Finally, in the class constructor you must initialize all these things:
/// <summary>
/// Default constructor
/// </summary>
/// <param name="game">the main game object</param>
CHAPTER 4 ■ IMPROVING YOUR FIRST 2-D GAME 85
9241CH04.qxd 3/10/08 10:34 AM Page 85
/// <param name="normalFont">Font for regular items</param>
/// <param name="selectedFont">Font for selected item</param>
public TextMenuComponent(Game game, SpriteFont normalFont,
SpriteFont selectedFont) : base(game)
{
regularFont = normalFont;
this.selectedFont = selectedFont;
menuItems = new StringCollection();
// Get the current spritebatch
spriteBatch = (SpriteBatch)
Game.Services.GetService(typeof (SpriteBatch));
// Get the current audiocomponent and play the background music
audioComponent = (AudioComponent)
Game.Services.GetService(typeof (AudioComponent));
// Used for input handling
oldKeyboardState = Keyboard.GetState();
oldGamePadState = GamePad.GetState(PlayerIndex.One);
}
More for the Opening Screen
Like you did with the HelpScene, add a new class called StartScene, derived from
GameScene. In this scene, you have an initial animation with two sprites (the “Rock” and
“Rain” words), a menu, background music, and another sprite with the word “enhanced”
flashing on the screen. Start adding the following attributes to the
StartScene class:
// Misc
protected TextMenuComponent menu;
protected readonly Texture2D elements;
// Audio
protected AudioComponent audioComponent;
protected Cue backMusic;
// SpriteBatch
protected SpriteBatch spriteBatch = null;
// GUI Stuff
protected Rectangle rockRect = new Rectangle(0, 0, 536, 131);
protected Vector2 rockPosition;
protected Rectangle rainRect = new Rectangle(120, 165, 517, 130);
protected Vector2 rainPosition;
CHAPTER 4 ■ IMPROVING YOUR FIRST 2-D GAME86
9241CH04.qxd 3/10/08 10:34 AM Page 86
protected Rectangle enhancedRect = new Rectangle(8, 304, 375, 144);
protected Vector2 enhancedPosition;
protected bool showEnhanced;
protected TimeSpan elapsedTime = TimeSpan.Zero;
The attributes rockRect, rainRect, and enhancedRect refer to the rectangle that con-
tains the images for the “Rock,” “Rain,” and “enhanced” in the texture. The attributes
rockPosition, rainPosition, and enhancedPosition contain the position of these items on
the screen. Draw these images in your chosen positions, but change the position of the
“Rock” and “Rain” sprites to obtain a nice initial animation. When the “Rock” and “Rain”
words are in the right place, you’ll flash the “enhanced” word on the screen and show the
initial menu.
All this is done in the
Update() method, as follows. Note the calculations for the
Xbox 360 version, to handle the 16:9 screen width:
/// <summary>
/// Allows the GameComponent to update itself.
/// </summary>
/// <param name="gameTime">Provides a snapshot of timing values.</param>
public override void Update(GameTime gameTime)
{
if (!menu.Visible)
{
if (rainPosition.X >= (Game.Window.ClientBounds.Width - 595)/2)
{
rainPosition.X -= 15;
}
if (rockPosition.X <= (Game.Window.ClientBounds.Width - 715)/2)
{
rockPosition.X += 15;
}
else
{
menu.Visible = true;
menu.Enabled = true;
backMusic.Play();
#if XBOX360
enhancedPosition = new Vector2((rainPosition.X +
rainRect.Width - enhancedRect.Width / 2), rainPosition.Y);
#else
enhancedPosition =
CHAPTER 4 ■ IMPROVING YOUR FIRST 2-D GAME 87
9241CH04.qxd 3/10/08 10:34 AM Page 87
new Vector2((rainPosition.X + rainRect.Width -
enhancedRect.Width/2) - 80, rainPosition.Y);
#endif
showEnhanced = true;
}
}
else
{
elapsedTime += gameTime.ElapsedGameTime;
if (elapsedTime > TimeSpan.FromSeconds(1))
{
elapsedTime -= TimeSpan.FromSeconds(1);
showEnhanced = !showEnhanced;
}
}
base.Update(gameTime);
}
The Draw() method draws the sprites in your actual position and draws the
“enhanced
” sprite if the “Rock” and “Rain” sprites are in their final position (controlled
by the
showEnhanced attribute):
/// <summary>
/// Allows the GameComponent to draw itself.
/// </summary>
/// <param name="gameTime">Provides a snapshot of timing values.</param>
public override void Draw(GameTime gameTime)
{
base.Draw(gameTime);
spriteBatch.Draw(elements, rockPosition, rockRect, Color.White);
spriteBatch.Draw(elements, rainPosition, rainRect, Color.White);
if (showEnhanced)
{
spriteBatch.Draw(elements, enhancedPosition, enhancedRect,
Color.White);
}
}
Y
ou need to do some mor
e wor
k here. The
Show() method must put these spr
ites
in
their initial position and star
t the audio effects
. The
Hide() method must stop the
CHAPTER 4 ■ IMPROVING YOUR FIRST 2-D GAME88
9241CH04.qxd 3/10/08 10:34 AM Page 88