apress pro php and jquery 2010 phần 7 ppsx
Bạn đang xem bản rút gọn của tài liệu. Xem và tải ngay bản đầy đủ của tài liệu tại đây (943.01 KB, 40 trang )
CHAPTER 6 ■ PASSWORD PROTECTION SENSITIVE ACTIONS AND AREAS
225
<input type="hidden" name="token"
value="$_SESSION[token]" />
<input type="hidden" name="action"
value="user_logout" />
</div>
</form>
ADMIN_OPTIONS;
}
else
{
return <<<ADMIN_OPTIONS
<a href="login.php">Log In</a>
ADMIN_OPTIONS;
}
}
private function _adminEntryOptions($id) { }
}
?>
After saving the changes, reload http://localhost/ while logged out to see the administrative
options replaced with a simple Log In link (see Figure 6-9).
CHAPTER 6 ■ PASSWORD PROTECTION SENSITIVE ACTIONS AND AREAS
226
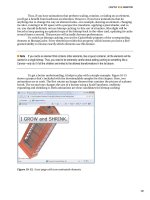
Figure 6-9. While a user is logged out, only a Log In link is displayed
Modifying the Event Options Method
Next, you want add code to prevent the editing and deletion of events by unauthorized users; you do this
by modifying _adminEventOptions() in the Calendar class with the following bold code:
<?php
class Calendar extends DB_Connect
{
private $_useDate;
private $_m;
private $_y;
CHAPTER 6 ■ PASSWORD PROTECTION SENSITIVE ACTIONS AND AREAS
227
private $_daysInMonth;
private $_startDay;
public function __construct($dbo=NULL, $useDate=NULL) { }
public function buildCalendar() { }
public function displayForm() { }
public function processForm() { }
public function confirmDelete($id) { }
private function _loadEventData($id=NULL) { }
private function _createEventObj() { }
private function _loadEventById($id) { }
private function _adminGeneralOptions() { }
private function _adminEntryOptions($id)
{
if ( isset($_SESSION['user']) )
{
return <<<ADMIN_OPTIONS
<div class="admin-options">
<form action="admin.php" method="post">
<p>
<input type="submit" name="edit_event"
value="Edit This Event" />
<input type="hidden" name="event_id"
value="$id" />
</p>
</form>
<form action="confirmdelete.php" method="post">
<p>
<input type="submit" name="delete_event"
value="Delete This Event" />
<input type="hidden" name="event_id"
value="$id" />
</p>
</form>
</div><! end .admin-options >
ADMIN_OPTIONS;
}
else
{
return NULL;
CHAPTER 6 ■ PASSWORD PROTECTION SENSITIVE ACTIONS AND AREAS
228
}
}
}
?>
After inserting these changes, navigate to http://localhost/ while logged out and click an event to
bring up its full view; the administrative options will not be displayed (see Figure 6-10).
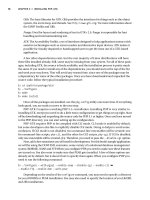
Figure 6-10. The full event view while logged out
Limiting Access to Administrative Pages
As an additional security precaution, you should ensure that any pages that only authorized users should
have access to, such as the event creation/editing form, check for proper authorization before executing.
Disallowing Access to the Event Creation Form Without Login
You can prevent a mischievous user from finding the event creation form while logged out by
performing a simple check that you add to the file. If the user is not logged in, he’ll be sent to the main
calendar view before the script has the chance to execute.
To implement this change, open admin.php and insert the code shown in bold:
<?php
/*
* Include necessary files
*/
include_once ' /sys/core/init.inc.php';
/*
* If the user is not logged in, send them to the main file
*/
CHAPTER 6 ■ PASSWORD PROTECTION SENSITIVE ACTIONS AND AREAS
229
if ( !isset($_SESSION['user']) )
{
header("Location: ./");
exit;
}
/*
* Output the header
*/
$page_title = "Add/Edit Event";
$css_files = array("style.css", "admin.css");
include_once 'assets/common/header.inc.php';
/*
* Load the calendar
*/
$cal = new Calendar($dbo);
?>
<div id="content">
<?php echo $cal->displayForm(); ?>
</div><! end #content >
<?php
/*
* Output the footer
*/
include_once 'assets/common/footer.inc.php';
?>
After saving this file, attempt to navigate to http://localhost/admin.php while logged out. You’ll
automatically be sent to http://localhost/.
Ensuring Only Logged In Users Can Delete Events
Also, to keep unauthorized users from deleting events, insert a check for a valid user session in the
confirmdelete.php file:
<?php
/*
* Enable sessions
*/
session_start();
/*
CHAPTER 6 ■ PASSWORD PROTECTION SENSITIVE ACTIONS AND AREAS
230
* Make sure an event ID was passed and the user is logged in
*/
if ( isset($_POST['event_id']) && isset($_SESSION['user']) )
{
/*
* Collect the event ID from the URL string
*/
$id = (int) $_POST['event_id'];
}
else
{
/*
* Send the user to the main page if no ID is supplied
* or the user is not logged in
*/
header("Location: ./");
exit;
}
/*
* Include necessary files
*/
include_once ' /sys/core/init.inc.php';
/*
* Load the calendar
*/
$cal = new Calendar($dbo);
$markup = $cal->confirmDelete($id);
/*
* Output the header
*/
$page_title = "View Event";
$css_files = array("style.css", "admin.css");
include_once 'assets/common/header.inc.php';
?>
<div id="content">
<?php echo $markup; ?>
</div><! end #content >
<?php
/*
* Output the footer
*/
CHAPTER 6 ■ PASSWORD PROTECTION SENSITIVE ACTIONS AND AREAS
231
include_once 'assets/common/footer.inc.php';
?>
Now save this code and try to directly access http://localhost/confirmdelete.php while logged out.
As expected, you’ll be redirected to http://localhost/ instead.
Summary
In this chapter, you learned how to add user authorization to your calendar app, which means only
authorized users can now make modifications to the calendar. You learned how to create the Admin
class, check login credentials, display admin tools to admins only, and limit access to admin pages.
In the next chapter, you’ll start integrating jQuery into the application to progressively enhance the user
experience.
P A R T 3
■ ■ ■
Combining jQuery with PHP
Applications
With the calendar running properly, you can now enhance the application with jQuery
to improve the user experience. In the following chapters, you’ll create a layer of
JavaScript that will sit on top of your app to add AJAX functionality.
C H A P T E R 7
■ ■ ■
235
Enhancing the User Interface
with jQuery
The application as it stands now is fully functional. Events can be viewed, and users with administrative
clearance can log in to create, edit, or delete events.
The next step is to add a layer of polish to the app that creates that finished look-and-feel, which
you’ll accomplish using a technique called progressive enhancement to add AJAX functionality to the
app.
Adding Progressive Enhancements with jQuery
Progressive enhancement is a term originally coined by Steven Champeon
1
in 2003 to describe a web-
development technique in which applications are designed to be accessible to any Internet connection
and browser using semantic HTML and other technologies that are applied in layers (such as CSS files
and JavaScript markup).
For an application to follow the principles of progressive enhancement, it must adhere to the
following guidelines:
• Basic content is accessible to all browsers using the simplest, most semantic
HTML markup possible.
• All of the basic functionality of the app works in all browsers.
• The user’s preferences are respected; this means that the web app doesn’t
override browser settings (such as window size).
• Externally linked CSS handles the styling and presentation of the document.
• Externally linked JavaScript enhances the user experience, but it remains
unobtrusive, or non-essential to the application’s operation.
Your application already meets the first four guidelines (it’s not pretty, but the application will work
with styles disabled). So as long as your JavaScript doesn’t create any new functionality that can’t be
accessed with JavaScript disabled, you will have successfully created a progressively enhanced web
application.
1
CHAPTER 7 ■ ENHANCING THE USER INTERFACE WITH JQUERY
236
Setting Progressive Enhancement Goals
Using the principles of progressive enhancement, you’ll add the ability to view event information
without a page refresh in a modal window, a content area that sits on top of existing markup to display
additional information. Such windows are usually triggered by JavaScript, and they are used on many of
today’s most popular web sites.
In your calendar application, you’ll use a modal window to display event details after a user clicks
the event title. This will be done without a page refresh using AJAX.
Include jQuery in the Calendar App
As you learned in the introduction to jQuery earlier in this book, using jQuery syntax requires that you
first include the jQuery library. Because JavaScript files should be the last thing in your HTML markup
before you the close body tag (</body>), you’ll include the jQuery library and all subsequent files in
footer.inc.php (/public/assets/common/footer.inc.php). Begin by including the latest version of jQuery
in your app; you accomplish this by adding the following bold lines to footer.inc.php:
<script type="text/javascript"
src="
<script type="text/javascript">
google.load("jquery", "1");
</script>
</body>
</html>
Save this code, then load http://localhost/ in your browser. Open the Firebug console and execute
the following command to ensure that jQuery is loaded in your app:
$("h2").text();
After running this command, the console will display the following output:
>>> $("h2").text();
"January 2010"
■ Note Because you’re using the Google JSAPI, you need to have an Internet connection available, in addition to
your Apache server. If you do not have access to an Internet connection or prefer not to use one, download the
latest version of jQuery from
and include it instead.
CHAPTER 7 ■ ENHANCING THE USER INTERFACE WITH JQUERY
237
Create a JavaScript Initialization File
Your app is following progressive enhancement guidelines, so all scripts will be housed in an external file
called init.js. It will reside in the public js folder (/public/assets/js/init.js), and it will contain all of
the custom jQuery code for your app.
Include the Initialization File in the Application
Before any of your scripts will be available to your app, you will need to include the initialization file in
the application. Your app will use jQuery syntax, so the initialization file needs to be included after the
script that loads the jQuery library in footer.inc.php.
You include the file in your app by inserting the following bold code into footer.inc.php:
<script type="text/javascript"
src="
<script type="text/javascript">
google.load("jquery", "1");
</script>
<script type="text/javascript"
src="assets/js/init.js"></script>
</body>
</html>
Ensuring the Document Is Ready Before Script Execution
After creating init.js, use the document.ready shortcut from jQuery to ensure that no scripts execute
before the document is actually ready to be manipulated. Insert the following code into init.js:
// Makes sure the document is ready before executing scripts
jQuery(function($){
// A quick check to make sure the script loaded properly
console.log("init.js was loaded successfully.");
});
Save this file and load http://localhost/ in your browser with the Firebug console open. After the
file is loaded, you should see the following result appear in the console:
init.js was loaded successfully.
Creating a New Stylesheet for Elements Created by jQuery
To ensure the elements created with jQuery look right when you start building them, you’re going to
jump a bit ahead here and create a new CSS file to store styling information for the elements you’ll create
with the jQuery scripts you’re about to write.
CHAPTER 7 ■ ENHANCING THE USER INTERFACE WITH JQUERY
238
This file will be called ajax.css, and it will reside in the css folder (/public/assets/css/ajax.css).
After creating it, place the following style rules inside it:
.modal-overlay {
position: fixed;
top: 0;
left: 0;
bottom: 0;
width: 100%;
height: 100%;
background-color: rgba(0,0,0,.5);
z-index: 4;
}
.modal-window {
position: absolute;
top: 140px;
left: 50%;
width: 300px;
height: auto;
margin-left: -150px;
padding: 20px;
border: 2px solid #000;
background-color: #FFF;
-moz-border-radius: 6px;
-webkit-border-radius: 6px;
border-radius: 6px;
-moz-box-shadow: 0 0 14px #123;
-webkit-box-shadow: 0 0 14px #123;
box-shadow: 0 0 14px #123;
z-index: 5;
}
.modal-close-btn {
position: absolute;
top: 0;
right: 4px;
margin: 0;
padding: 0;
text-decoration: none;
color: black;
font-size: 16px;
}
.modal-close-btn:before {
position: relative;
top: -1px;
content: "Close";
text-transform: uppercase;
font-size: 10px;
}
CHAPTER 7 ■ ENHANCING THE USER INTERFACE WITH JQUERY
239
Including the Stylesheet in the Index File
Next, open index.php and include the new stylesheet in the $css_files array by adding the line in bold:
<?php
/*
* Include necessary files
*/
include_once ' /sys/core/init.inc.php';
/*
* Load the calendar
*/
$cal = new Calendar($dbo, "2010-01-01 12:00:00");
/*
* Set up the page title and CSS files
*/
$page_title = "Events Calendar";
$css_files = array('style.css', 'admin.css', 'ajax.css');
/*
* Include the header
*/
include_once 'assets/common/header.inc.php';
?>
<div id="content">
<?php
/*
* Display the calendar HTML
*/
echo $cal->buildCalendar();
?>
</div><! end #content >
<?php
/*
* Include the footer
*/
include_once 'assets/common/footer.inc.php';
?>
CHAPTER 7 ■ ENHANCING THE USER INTERFACE WITH JQUERY
240
Creating a Modal Window for Event Data
The modal window you’ll create for this app will be fairly simple; the script to create it will follow these
steps:
1. Prevent the default action (opening the detailed event view in view.php).
2. Add an active class to the event link in the calendar.
3. Extract the query string from the event link’s href attribute.
4. Create a button that will close the modal window when clicked.
5. Create the modal window itself and put the Close button inside it.
6. Use AJAX to retrieve the information from the database and display it in the
modal window.
All of the preceding steps will be carried out when the click event is fired for an event title link.
Binding a Function to the Click Event of Title Links
Begin by adding a new selector to init.js that selects all anchor elements that are direct descendants of
list items (li>a) and use the .live() method to bind a handler to the click event. Insert the following
bold code into init.js:
// Makes sure the document is ready before executing scripts
jQuery(function($){
// Pulls up events in a modal window
$("li>a").live("click", function(event){
// Event handler scripts go here
});
});
Preventing the Default Action and Adding an Active Class
Next, you need to prevent the default action by using .preventDefault(), then add an active class to the
clicked element using .addClass().
This is accomplished by adding the following bold code:
// Makes sure the document is ready before executing scripts
jQuery(function($){
// Pulls up events in a modal window
$("li>a").live("click", function(event){
// Stops the link from loading view.php
CHAPTER 7 ■ ENHANCING THE USER INTERFACE WITH JQUERY
241
event.preventDefault();
// Adds an "active" class to the link
$(this).addClass("active");
// Proves the event handler worked by logging the link text
console.log( $(this).text() );
});
});
After saving this code, reload http://localhost/ in your browser and click any of the event titles.
Instead of going to the event details on view.php, the title of the event is output in the console. For
instance, if you click the New Year's Day event, you will see the following output in the console:
New Year's Day
Extracting the Query String with Regular Expressions
The modal window is being created to display event information, so you’ll need some way of knowing
which event should be displayed. Without adding any extra markup, you can actually pull the event ID
right out of the href attribute using regular expressions.
To do this, you need to extract the query string from the link. (If the href attribute value is
http://localhost/view.php?event_id=1, the query string is event_id=1.)
You will extract the query string using two items: .replace(), a native JavaScript function that
accepts a string or regular expression pattern to match; and a string or pattern that matches should be
replaced with.
Using the Lazy Approach: String-Based Replacement
At a glance, the obvious solution might seem to be the following:
var data = string.replace("http://localhost/view.php?", "");
And, yes, this does work, producing the output "event_id=1" (if you assume the original value of
$string was http://localhost/view.php?event_id=1). Unfortunately, this approach is not flexible
enough; for example, what if the application is moved to another domain name? Or, what if the file name
is changed to event.php? Either change breaks the preceding logic and requires an update to the script.
Adopting a Better Solution: Regular Expressions
However, there is a better solution: regular expressions. Regular expressions are a powerful pattern-
matching tool available in most modern programming languages.
To extract the query string, you’ll use a pattern that looks for the first question mark (?) in a string,
and then returns everything after it. This pattern will look like this:
CHAPTER 7 ■ ENHANCING THE USER INTERFACE WITH JQUERY
242
/.*?\?(.*)$/
Regular expressions in JavaScript are delimited by forward slashes (/) at each end of the expression.
Inside this expression, the pattern looks for zero or more of any character (from left to right) until the
first time it reaches a question mark; it then stores all characters after the question mark until the end of
the string as a named group for use in the replacement.
■ Note You’ll learn much more about regular expressions and how they work in Chapter 9.
Incorporating a Regular Expression into a Script
You want to extract the href value of the link that was clicked, so you’ll use the this keyword. In order to
use jQuery methods, you have to pass this as the selector to the jQuery function first. Now access the
href value with the .attr() method, then call .replace() and extract the query string.
When using regular expressions in .replace(), no quotes are used to enclose the pattern. Using the
regular expression just described, modify init.js to store the query string from the clicked link in a
variable called data; do this by adding the code shown in bold:
// Makes sure the document is ready before executing scripts
jQuery(function($){
// Pulls up events in a modal window
$("li>a").live("click", function(event){
// Stops the link from loading view.php
event.preventDefault();
// Adds an "active" class to the link
$(this).addClass("active");
// Gets the query string from the link href
var data = $(this)
.attr("href")
.replace(/.+?\?(.*)$/, "$1");
// Logs the query string
console.log( data );
CHAPTER 7 ■ ENHANCING THE USER INTERFACE WITH JQUERY
243
});
});
Save this code, then reload http://localhost/ and click a link. You should see something similar to
the following appear in the console:
event_id=1
Creating a Modal Window
The next step is to generate the HTML markup that will actually create the modal window and overlay.
This markup is extremely simple, and it will basically consist of a div element wrapped around other
content. For example, the New Year's Day event modal window markup will look like this:
<div class="modal-window">
<h2>New Year's Day</h2>
<p class="dates">January 01, 2010, 12:00am—11:59pm</p>
<p>Happy New Year!</p>
</div>
You are going to use this same modal window for other features as well (such as for displaying the
editing form for events), so the actual creation of the modal window is going to be abstracted in a
separate function for easy re-use. Because you will re-use more than one function, you’ll organize your
script by placing all utility functions in an object literal, which is a comma-separated list of name-value
pairs (for more information, see the sidebar, “Using an Object Literal for Utility Functions”).
Creating the Utility Function to Check for a Modal Window
At the top of init.js, declare a new object literal called fx to store your utility functions:
// Makes sure the document is ready before executing scripts
jQuery(function($){
// Functions to manipulate the modal window
var fx = {};
// Pulls up events in a modal window
$("li>a").live("click", function(event){
// Stops the link from loading view.php
event.preventDefault();
// Adds an "active" class to the link
$(this).addClass("active");
// Gets the query string from the link href
CHAPTER 7 ■ ENHANCING THE USER INTERFACE WITH JQUERY
244
var data = $(this)
.attr("href")
.replace(/.+?\?(.*)$/, "$1");
// Logs the query string
console.log( data );
});
});
The first function to be stored in fx will be called initModal, and it will check whether a modal
window already exists. If it does, the function will select it; otherwise, it will create a new one and
append it to the body tag.
To see if an element already exists, use the length property after executing the jQuery function with
a selector for that element. If the length property returns 0, the element does not currently exist in the
document object model (DOM).
Perform the check and return a modal window by inserting the following bold code into fx inside
init.js:
// Functions to manipulate the modal window
var fx = {
// Checks for a modal window and returns it, or
// else creates a new one and returns that
"initModal" : function() {
// If no elements are matched, the length
// property will return 0
if ( $(".modal-window").length==0 )
{
// Creates a div, adds a class, and
// appends it to the body tag
return $("<div>")
.addClass("modal-window")
.appendTo("body");
}
else
{
// Returns the modal window if one
// already exists in the DOM
return $(".modal-window");
}
}
};
CHAPTER 7 ■ ENHANCING THE USER INTERFACE WITH JQUERY
245
Calling the Utility Function from the Event Handler
Next, modify the click event handler to load the result of fx.initModal into a variable for use in the
script by adding the following bold code in init.js:
// Pulls up events in a modal window
$("li>a").live("click", function(event){
// Stops the link from loading view.php
event.preventDefault();
// Adds an "active" class to the link
$(this).addClass("active");
// Gets the query string from the link href
var data = $(this)
.attr("href")
.replace(/.+?\?(.*)$/, "$1"),
// Checks if the modal window exists and
// selects it, or creates a new one
modal = fx.initModal();
});
■ Note The semicolon after the data variable has been replaced with a comma in this example.
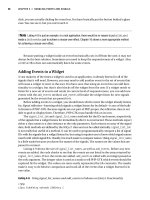
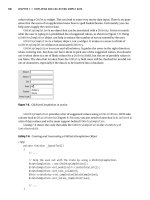
Save, then reload http://localhost/ and click one of the event titles to cause a modal window to
appear on the screen (see Figure 7-1).
CHAPTER 7 ■ ENHANCING THE USER INTERFACE WITH JQUERY
246
Figure 7-1. Clicking an event title causes a modal window to appear
USING AN OBJECT LITERAL FOR UTILITY FUNCTIONS
Utility functions often come into play when writing applications. The more complex the app, the more likely
it is that a large number of utility functions will exist for it, and the harder it is to keep those functions
organized.
One option for keeping utility functions organized is to use object literals. This allows developers to put the
functions in one place or even to group functions according to their usage.
Understanding Object Literals
At its simplest, an object literal is a variable in JavaScript that is an empty set of curly braces, signifying an
empty object literal:
var obj = {};
You can add any number of values to the object literal using comma-separated name-value pairs:
CHAPTER 7 ■ ENHANCING THE USER INTERFACE WITH JQUERY
247
var obj = {
"name" : "Jason Lengstorf",
"age" : "25"
};
To access a value, simply append a dot (.) and the name of the property you wish to access:
alert(obj.name); // alerts "Jason Lengstorf"
What makes object literals so useful is that you can also store functions in them:
var obj = {
"func" : function() { alert("Object literals rule!"); }
};
To call a function stored in an object literal, use the same syntax that you would to access a value;
however, you must also include the parentheses at the end. Otherwise, JavaScript assumes you’re trying
to store that function in another variable and simply returns it:
obj.func(); // alerts "Object literals rule!"
Functions in object literals can accept parameters, as well:
var obj = {
"func" : function(text){ alert(text); }
};
obj.func("I'm a parameter!"); // alerts "I'm a parameter!"
Object Literals vs. Procedural Programming
Keeping functions organized in an object literal makes code more legible and—if the developer makes an
effort to keep the functions abstract enough—can cut down on the time spent maintaining the code in the
future because everything is compartmentalized and easy to find.
That said, object literals are not always the best solution. In instances where you may be dealing with
multiple objects, it can be better to use a full-on object-oriented approach. If hardly any scripting is
required, an object literal may be overkill.
At the end of the day, it’s up to you as a developer to decide what the best approach is for your project.
Ultimately, it’s a matter of taste and comfort; you need to decide what makes your development process
easiest.
Retrieve and Display Event Information with AJAX
Now that the modal window loads, it’s time to load the event information and display it. To do this,
you’ll be using the $.ajax() method.
Using the $.ajax() method, you will send data to a processing file (which you'll build in the next
section) using the POST method, then insert the response into the modal window.
CHAPTER 7 ■ ENHANCING THE USER INTERFACE WITH JQUERY
248
Creating a File to Handle AJAX Requests
Before you put together the call to $.ajax(), it helps to know where and how the data should be sent. In
the inc folder, create a new file called ajax.inc.php (/public/assets/inc/ajax.inc.php). This file will
work very similarly to process.inc.php, except it will deal exclusively with AJAX calls. Because a value
returned from a PHP function can’t be read by JavaScript unless the value is actually output (using echo
or its ilk), process.inc.php will not function properly for this aspect of the application.
Essentially, ajax.inc.php will use a lookup array to determine which objects and methods need to
be used, then output the returned values using echo for use with AJAX.
Start by enabling sessions, loading the necessary configuration information, defining a constant,
and putting together an auto-load function. Now add the following to ajax.inc.php:
<?php
/*
* Enable sessions
*/
session_start();
/*
* Include necessary files
*/
include_once ' / / /sys/config/db-cred.inc.php';
/*
* Define constants for config info
*/
foreach ( $C as $name => $val )
{
define($name, $val);
}
function __autoload($class_name)
{
$filename = ' / / /sys/class/class.'
. strtolower($class_name) . '.inc.php';
if ( file_exists($filename) )
{
include_once $filename;
}
}
?>
Next, define the lookup array with information for loading event data, then put together the code
that will instantiate an object, call the method, and output the returned value using the bold code that
follows:
<?php
CHAPTER 7 ■ ENHANCING THE USER INTERFACE WITH JQUERY
249
/*
* Enable sessions
*/
session_start();
/*
* Include necessary files
*/
include_once ' / / /sys/config/db-cred.inc.php';
/*
* Define constants for config info
*/
foreach ( $C as $name => $val )
{
define($name, $val);
}
/*
* Create a lookup array for form actions
*/
$actions = array(
'event_view' => array(
'object' => 'Calendar',
'method' => 'displayEvent'
)
);
/*
* Make sure the anti-CSRF token was passed and that the
* requested action exists in the lookup array
*/
if ( isset($actions[$_POST['action']]) )
{
$use_array = $actions[$_POST['action']];
$obj = new $use_array['object']($dbo);
/*
* Check for an ID and sanitize it if found
*/
if ( isset($_POST['event_id']) )
{
$id = (int) $_POST['event_id'];
}
else { $id = NULL; }
echo $obj->$use_array['method']($id);
}
function __autoload($class_name)
{