Foundations of Python Network Programming 2nd edition phần 9 doc
Bạn đang xem bản rút gọn của tài liệu. Xem và tải ngay bản đầy đủ của tài liệu tại đây (284.46 KB, 36 trang )
CHAPTER 16 ■ TELNET AND SSH
268
Do you see what has happened? The operating system does not know that spaces should be special;
that is a quirk of shell programs, not of Unix-like operating systems themselves! So the system thinks
that it is being asked to run a command literally named echo [space] hello, and, unless you have created
such a file in the current directory, it fails to find it and raises an exception.
Oh—I said at the beginning of this whole section that its whole premise was a lie, and you probably
want to know what character is, in fact, special to the system! It turns out that it is the null character—
the character having the Unicode and ASCII code zero. This character is used in Unix-like systems to
mark the end of each command-line argument in memory. So if you try using a null character in an
argument, Unix will think the argument has ended and will ignore the rest of its text. To prevent you
from making this mistake, Python stops you in your tracks if you include a null character in a command-
line argument:
>>> import subprocess
>>> subprocess.call(['echo', 'Sentences can end\0 abruptly.'])
Traceback (most recent call last):
TypeError: execv() arg 2 must contain only strings
Happily, since every command on the system is designed to live within this limitation, you will
generally find there is never any reason to put null characters into command-line arguments anyway!
(Specifically, they cannot appear in file names for exactly the same reason as they cannot appear in
arguments: file names are null-terminated in the operating system implementation.)
Quoting Characters for Protection
In the foregoing section, we used routines in Python's subprocess module to directly invoke commands.
This was great, and let us pass characters that would have been special to a normal interactive shell. If
you have a big list of file names with spaces and other special characters in them, it can be wonderful to
simply pass them into a subprocess call and have the command on the receiving end understand you
perfectly.
But when you are using remote-shell protocols over the network (which, you will recall, is the
subject of this chapter!), you are generally going to be talking to a shell like bash instead of getting to
invoke commands directly like you do through the subprocess module. This means that remote-shell
protocols will feel more like the system() routine from the os module, which does invoke a shell to
interpret your command line, and therefore involves you in all of the complexities of the Unix command
line:
>>> import os
>>> os.system('echo *')
Makefile chapter-16.txt formats.ini out.odt source tabify2.py test.py
Of course, if the other end of a remote-shell connection is using some sort of shell with which you
are unfamiliar, there is little that Python can do. The authors of the Standard Library have no idea how,
say, a Motorola DSL router's Telnet-based command line might handle special characters, or even
whether it pays attention to quotes at all.
But if the other end of a network connection is a standard Unix shell of the sh family, like bash or
zsh, then you are in luck: the fairly obscure Python pipes module, which is normally used to build
complex shell command lines, contains a helper function that is perfect for escaping arguments. It is
called quote, and can simply be passed a string:
>>> from pipes import quote
>>> print quote("filename")
filename
>>> print quote("file with spaces")
CHAPTER 16 ■ TELNET AND SSH
269
'file with spaces'
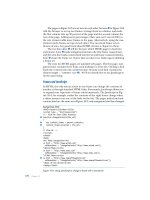
>>> print quote("file 'single quoted' inside!")
"file 'single quoted' inside!"
>>> print quote("danger!; rm -r *")
'danger!; rm -r *'
So preparing a command line for remote execution generally just involves running quote() on each
argument and then pasting the result together with spaces.
Note that using a remote shell with Python does not involve you in the terrors of two levels of shell
quoting! If you have ever tried to build a remote SSH command line that uses fancy quoting, by typing a
local command line into your own shell, you will know what I am talking about! The attempt tends to
generate a series of experiments like this:
$ echo $HOST
guinness
$ ssh asaph echo $HOST
guinness
$ ssh asaph echo \$HOST
asaph
$ ssh asaph echo \\$HOST
guinness
$ ssh asaph echo \\\$HOST
$HOST
$ ssh asaph echo \\\\$HOST
\guinness
Every one of these responses is reasonable, as you can demonstrate to yourself if you first use echo
to see what each command looks like when quoted by the local shell, then paste that text into a remote
SSH command line to see how the processed text is handled there. But they can be very tricky to write,
and even a practiced Unix shell user can guess wrong when he or she tries to predict what the output
should be from the foregoing series of commands!
Fortunately, using a remote-shell protocol through Python does not involve two levels of shell like
this. Instead, you get to construct a literal string in Python that then directly becomes what is executed
by the remote shell; no local shell is involved. (Though, of course, you have to be careful if any string
literals in your Python program include backslashes, as usual!)
So if using a shell-within-a-shell has you convinced that passing strings and file names safely to a
remote shell is a very hard problem, relax: no local shell will be involved in our following examples.
The Terrible Windows Command Line
Have you read the previous sections on the Unix shell and how arguments are ultimately delivered to a
process?
Well, if you are going to be connecting to a Windows machine using a remote-shell protocol, then
you can forget everything you have just read. Windows is amazingly primitive: instead of delivering
command-line arguments to a new process as separate strings, it simply hands over the text of the entire
command line, and makes the process itself try to figure out how the user might have quoted file names
with spaces in them!
Of course, merely to survive, people in the Windows world have adopted more or less consistent
traditions about how commands will interpret their arguments, so that—for example—you can put
double-quotes around a several-word file name and expect nearly all programs to recognize that you are
naming one file, not several. Most commands also try to understand that asterisks in a file name are
wildcards. But this is always a choice made by the program you are running, not by the command
prompt.
CHAPTER 16 ■ TELNET AND SSH
270
As we will see, there does exist a very primitive network protocol—the ancient Telnet protocol—that
also sends command lines simply as text, like Windows does, so that your program will have to do some
kind of escaping if it sends arguments with spaces or special characters in them. But if you are using any
sort of modern remote protocol like SSH that lets you send arguments as a list of strings, rather than as a
single string, then be aware that on Windows systems all that SSH can do is paste your carefully
constructed command line back together and hope that the Windows command can figure it out.
When sending commands to Windows, you might want to take advantage of the list2cmdline()
routine offered by the Python subprocess module. It takes a list of arguments like you would use for a
Unix command, and attempts to paste them together—using double-quotes and backslashes when
necessary—so that “normal” Windows programs will parse the command line back into exactly the same
arguments:
>>> from subprocess import list2cmdline
>>> args = ['rename', 'salary "Smith".xls', 'salary-smith.xls']
>>> print list2cmdline(args)
rename "salary \"Smith\".xls" salary-smith.xls
Some quick experimentation with your network library and remote-shell protocol of choice (after
all, the network library might do Windows quoting for you instead of making you do it yourself) should
help you figure out what Windows needs in your situation. For the rest of this chapter, we will make the
simplifying assumption that you are connecting to servers that use a modern Unix-like operating system
and can keep command-line arguments straight without quoting.
Things Are Different in a Terminal
You will probably talk to more programs than just the shell over your Python-powered remote-shell
connection, of course. You will often want to watch the incoming data stream for the information and
errors printed out by the commands you are running. And sometimes you will even want to send data
back, either to provide the remote programs with input, or to respond to questions and prompts that
they present.
When performing tasks like this, you might be surprised to find that programs hang indefinitely
without ever finishing the output that you are waiting on, or that data you send seems to not be getting
through. To help you through situations like this, a brief discussion of Unix terminals is in order.
A terminal typically names a device into which a user types text, and on whose screen the
computer's response can be displayed. If a Unix machine has physical serial ports that could possibly
host a physical terminal, then the device directory will contain entries like /dev/ttyS1 with which
programs can send and receive strings to that device. But most terminals these days are, in reality, other
programs: an xterm terminal, or a Gnome or KDE terminal program, or a PuTTY client on a Windows
machine that has connected via a remote-shell protocol of the kind we will discuss in this chapter.
But the programs running inside the terminal on your laptop or desktop machine still need to know
that they are talking to a person—they still need to feel like they are talking through the mechanism of a
terminal device connected to a display. So the Unix operating system provides a set of “pseudo-
terminal” devices (which might have less confusingly been named “virtual” terminals) with names like
/dev/tty42. When someone brings up an xterm or connects through SSH, the xterm or SSH daemon
grabs a fresh pseudo-terminal, configures it, and runs the user's shell behind it. The shell examines its
standard input, sees that it is a terminal, and presents a prompt since it believes itself to be talking to a
person.
Download from Wow! eBook <www.wowebook.com>
CHAPTER 16 ■ TELNET AND SSH
271
■ Note Because the noisy teletype machine was the earliest example of a computer terminal, Unix often uses TTY
as the abbreviation for a terminal device. That is why the call to test whether your input is a terminal is named
isatty()!
This is a crucial distinction to understand: the shell presents a prompt because, and only because, it
thinks it is connected to a terminal! If you start up a shell and give it a standard input that is not a
terminal—like, say, a pipe from another command—then no prompt will be printed, yet it will still
respond to commands:
$ cat | bash
echo Here we are inside of bash, with no prompt!
Here we are inside of bash, with no prompt!
python
print 'Python has not printed a prompt, either.'
import sys
print 'Is this a terminal?', sys.stdin.isatty()
You can see that Python, also, does not print its usual startup banner, nor does it present any
prompts.
But then Python also does not seem to be doing anything in response to the commands that you are
typing. What is going on?
The answer is that since its input is not a terminal, Python thinks that it should just be blindly
reading a whole Python script from standard input—after all, its input is a file, and files have whole
scripts inside, right? To escape from this endless read from its input that Python is performing, you will
have to press Ctrl+D to send an “end-of-file” to cat, which will then close its own output—an event that
will be seen both by python and also by the instance of bash that is waiting for Python to complete.
Once you have closed its input, Python will interpret and run the three-line script you have provided
(everything past the word python in the session just shown), and you will see the results on your
terminal, followed by the prompt of the shell that you started at:
Python has not printed a prompt, either.
Is this a terminal? False
$
There are even changes in how some commands format their output depending on whether they
are talking to a terminal. Some commands with long lines of output—the ps command comes to mind—
will truncate their lines to your terminal width if used interactively, but produce arbitrarily wide output if
connected to a pipe or file. And, entertainingly enough, the familiar column-based output of the ls
command gets turned off and replaced with a file name on each line (which is, you must admit, an easier
format for reading by another program) if its output is a pipe or file:
$ ls
Makefile out.odt test.py
chapter-16.txt source
formats.ini tabify2.py
$ ls | cat
Makefile
chapter-16.txt
formats.ini
out.odt
source
CHAPTER 16 ■ TELNET AND SSH
272
tabify2.py
test.py
So what does all of this have to do with network programming?
Well, these two behaviors that we have seen—the fact that programs tend to display prompts if
connected to a terminal, but omit them and run silently if they are reading from a file or from the output
of another command—also occur at the remote end of the shell protocols that we are considering in this
chapter.
A program running behind Telnet, for example, always thinks it is talking to a terminal; so your
scripts or programs must always expect to see a prompt each time the shell is ready for input, and so
forth. But when you make a connection over the more sophisticated SSH protocol, you will actually have
your choice of whether the program thinks that its input is a terminal or just a plain pipe or file. You can
test this easily from the command line if there is another computer you can connect to:
$ ssh -t asaph
asaph$ echo "Here we are, at a prompt."
Here we are, at a prompt.
asaph$ exit
$ ssh -T asaph
echo "The shell here on asaph sees no terminal; so, no prompt."
The shell here on asaph sees no terminal; so, no prompt.
exit
$
So when you spawn a command through a modern protocol like SSH, you need to consider whether
you want the program on the remote end thinking that you are a person typing at it through a terminal,
or whether it had best think it is talking to raw data coming in through a file or pipe.
Programs are not actually required to act any differently when talking to a terminal; it is just for our
convenience that they vary their behavior. They do so by calling the equivalent of the Python isatty()
call (“is this a teletype?”) that you saw in the foregoing example session, and then having “if” statements
everywhere that vary their behavior depending on what this call returns. Here are some common ways
that they behave differently:
• Programs that are often used interactively will present a human-readable prompt
when they are talking to a terminal. But when they think input is coming from a
file, they avoid printing a prompt, because otherwise your screen would become
littered with hundreds of successive prompts as you ran a long shell script or
Python program!
• Sophisticated interactive programs, these days, usually turn on command-line
editing when their input is a TTY. This makes many control characters special,
because they are used to access the command-line history and perform editing
commands. When they are not under the control of a terminal, these same
programs turn command-line editing off and absorb control characters as normal
parts of their input stream.
• Many programs read only one line of input at a time when listening to a terminal,
because humans like to get an immediate response to every command they type.
But when reading from a pipe or file, these same programs will wait until
thousands of characters have arrived before they try to interpret their first batch of
input. As we just saw, bash stays in line-at-a-time mode even if its input is a file,
but Python decided it wanted to read a whole Python script from its input before
trying to execute even its first line.
CHAPTER 16 ■ TELNET AND SSH
273
• It is even more common for programs to adjust their output based on whether
they are talking to a terminal. If a user might be watching, they want each line, or
even each character, of output to appear immediately. But if they are talking to a
mere file or pipe, they will wait and batch up large chunks of output and more
efficiently send the whole chunk at one time.
Both of the last two issues, which involve buffering, cause all sorts of problems when you take a
process that you usually do manually and try to automate it—because in doing so you often move from
terminal input to input provided through a file or pipe, and suddenly you find that the programs behave
quite differently, and might even seem to be hanging because “print” statements are not producing
immediate output, but are instead saving up their results to push out all at once when their output
buffer is full.
You can see this easily with a simple Python program (since Python is one of the applications that
decides whether to buffer its output based on whether it is talking to a terminal) that prints a message,
waits for a line of input, and then prints again:
$ python -c 'print "talk:"; s = raw_input(); print "you said", s'
talk:
hi
you said hi
$ python -c 'print "talk:"; s = raw_input(); print "you said", s' | cat
hi
talk:
you said hi
You can see that in the first instance, when Python knew its output was a terminal, it printed talk:
immediately. But in the second instance, its output was a pipe to the cat command, and so it decided
that it could save up the results of that first print statement and batch them together with the rest of the
program's output, so that both lines of output appeared only once you had provided your input and the
program was ending.
The foregoing problem is why many carefully written programs, both in Python and in other
languages, frequently call flush() on their output to make sure that anything waiting in a buffer goes
ahead and gets sent out, regardless of whether the output looks like a terminal.
So those are the basic problems with terminals and buffering: programs change their behavior,
often in idiosyncratic ways, when talking to a terminal (think again of the ls example), and they often
start heavily buffering their output if they think they are writing to a file or pipe.
Terminals Do Buffering
Beyond the program-specific behaviors just described, there are additional problems raised by
terminals.
For example, what happens when you want a program to be reading your input one character at a
time, but the Unix terminal device itself is buffering your keystrokes to deliver them as a whole line? This
common problem happens because the Unix terminal defaults to “canonical” input processing, where it
lets the user enter a whole line, and even edit it by backspacing and re-typing, before finally pressing
“Enter” and letting the program see what he or she has typed.
If you want to turn off canonical processing so that a program can see every individual character as
it is typed, you can use the stty “Set TTY settings” command to disable it:
$ stty -icanon
Another problem is that Unix terminals traditionally supported a pair of keystrokes for pausing the
output stream so that the user could read something on the screen before it scrolled off and was
CHAPTER 16 ■ TELNET AND SSH
274
replaced by more text. Often these were the characters Ctrl+S for “Stop” and Ctrl+Q for “Keep going,”
and it was a source of great annoyance that if binary data worked its way into an automated Telnet
connection that the first Ctrl+S that happened to pass across the channel would pause the terminal and
probably ruin the session.
Again, this setting can be turned off with stty:
$ stty -ixon -ixoff
Those are the two biggest problems you will run into with terminals doing buffering, but there are
plenty of less famous settings that can also cause you grief. Because there are so many—and because
they vary between Unix implementations—the stty command actually supports two modes, cooked and
raw, that turn dozens of settings like icanon and ixon on and off together:
$ stty raw
$ stty cooked
In case you make your terminal settings a hopeless mess after some experimentation, most Unix
systems provide a command for resetting the terminal back to reasonable, sane settings (and note that if
you have played with stty too severely, you might need to hit Ctrl+J to submit the reset command, since
your Return key, whose equivalent is Ctrl+M, actually only functions to submit commands because of a
terminal setting called icrnl!):
$ reset
If, instead of trying to get the terminal to behave across a Telnet or SSH session, you happen to be
talking to a terminal from Python, check out the termios module that comes with the Standard Library.
By puzzling through its example code and remembering how Boolean bitwise math works, you should
be able to control all of the same settings that we just accessed through the stty command.
This book lacks the space to look at terminals in any more detail (since one or two chapters of
examples could easily be inserted right here to cover all of the interesting techniques and cases), but
there are lots of great resources for learning more about them—a classic is Chapter 19, “Pseudo
Terminals,” of W. Richard Stevens' Advanced Programming in the UNIX Environment.
Telnet
This brief section is all you will find in this book about the ancient Telnet protocol. Why? Because it is
insecure: anyone watching your Telnet packets fly by will see your username, password, and everything
you do on the remote system. It is clunky. And it has been completely abandoned for most systems
administration.
CHAPTER 16 ■ TELNET AND SSH
275
THE TELNET PROTOCOL
Purpose: Remote shell access
Standard: RFC 854 (1989)
Runs atop: TCP/IP
Default port: 23
Library:
telnetlib
Exceptions: socket.error, socket.gaierror
The only time I ever find myself needing Telnet is when speaking to small embedded systems, like a
Linksys router or DSL modem or network switch. In case you are having to write a Python program that
has to speak Telnet to one of these devices, here are a few pointers on using the Python telnetlib.
First, you have to realize that all Telnet does is to establish a channel—in fact, a fairly plain TCP
socket (see Chapter 3)—and to send the things you type, and receive the things the remote system says,
back and forth across that channel. This means that Telnet is ignorant of all sorts of things of which you
might expect a remote-shell protocol to be aware.
For example, it is conventional that when you Telnet to a Unix machine, you are presented with aa
login: prompt at which you type your username, and a password: prompt where you enter your
password. The small embedded devices that still use Telnet these days might follow a slightly simpler
script, but they, too, often ask for some sort of password or authentication. But the point is that Telnet
knows nothing about this! To your Telnet client, password: is just nine random characters that come
flying across the TCP connection and that it must print to your screen. It has no idea that you are being
prompted, that you are responding, or that in a moment the remote system will know who you are.
The fact that Telnet is ignorant about authentication has an important consequence: you cannot
type anything on the command line itself to get yourself pre-authenticated to the remote system, nor
avoid the login and password prompts that will pop up when you first connect! If you are going to use
plain Telnet, you are going to have to somehow watch the incoming text for those two prompts (or
however many the remote system supplies) and issue the correct replies.
Obviously, if systems vary in what username and password prompts they present, then you can
hardly expect standardization in the error messages or responses that get sent back when your password
fails. That is why Telnet is so hard to script and program from a language like Python and a library like
telnetlib. Unless you know every single error message that the remote system could produce to your
login and password—which might not just be its “bad password” message, but also things like “cannot
spawn shell: out of memory,” “home directory not mounted,” and “quota exceeded: confining you to a
restricted shell”—your script will sometimes run into situations where it is waiting to see either a
command prompt or else an error message it recognizes, and will instead simply wait forever without
seeing anything on the inbound character stream that it recognizes.
So if you are using Telnet, then you are playing a text game: you watch for text to arrive, and then try
to reply with something intelligible to the remote system. To help you with this, the Python telnetlib
provides not only basic methods for sending and receiving data, but also a few routines that will watch
and wait for a particular string to arrive from the remote system. In this respect, telnetlib is a little bit
like the third-party Python pexpect library that we mentioned early in this chapter, and therefore a bit
like the venerable Unix expect command that largely exists because Telnet makes us play a textual
pattern-matching game. In fact, one of these telnetlib routines is, in honor of its predecessor, named
expect()!
CHAPTER 16 ■ TELNET AND SSH
276
Listing 16–3 connects to localhost, which in this case is my Ubuntu laptop, where I have just run
aptitude install telnetd so that a Telnet daemon is now listening on its standard port 23. Yes, I
actually changed my password to mypass to test the scripts in this chapter; and, yes, I un-installed
telnetd and changed my password again immediately after!
Listing 16–3. Logging In to a Remote Host Using Telnet
#!/usr/bin/env python
# Foundations of Python Network Programming - Chapter 16 - telnet_login.py
# Connect to localhost, watch for a login prompt, and try logging in
import telnetlib
t = telnetlib.Telnet('localhost')
# t.set_debuglevel(1) # uncomment this for debugging messages
t.read_until('login:')
t.write('brandon\n')
t.read_until('assword:') # let "P" be capitalized or not
t.write('mypass\n')
n, match, previous_text = t.expect([r'Login incorrect', r'\$'], 10)
if n == 0:
» print "Username and password failed - giving up"
else:
» t.write('exec uptime\n')
» print t.read_all() # keep reading until the connection closes
If the script is successful, it shows you what the simple uptime command prints on the remote
system:
$ python telnet_login.py
10:24:43 up 5 days, 12:13, 14 users, load average: 1.44, 0.91, 0.73
The listing shows you the general structure of a session powered by telnetlib. First, a connection is
established, which is represented in Python by an instance of the Telnet object. Here only the hostname
is specified, though you can also provide a port number to connect to some other service port than
standard Telnet.
You can call set_debuglevel(1) if you want your Telnet object to print out all of the strings that it
sends and receives during the session. This actually turned out to be important for writing even the very
simple script shown in the listing, because in two different cases it got hung up, and I had to re-run it
with debugging messages turned on so that I could see the actual output and fix the script. (Once I was
failing to match the exact text that was coming back, and once I forgot the '\r' at the end of the uptime
command.) I generally turn off debugging only once a program is working perfectly, and turn it back on
whenever I want to do more work on the script.
Note that Telnet does not disguise the fact that its service is backed by a TCP socket, and will pass
through to your program any socket.error and socket.gaierror exceptions that are raised.
Once the Telnet session is established, interaction generally falls into a receive-and-send pattern,
where you wait for a prompt or response from the remote end, then send your next piece of information.
The listing illustrates two methods of waiting for text to arrive:
• The very simple read_until() method watches for a literal string to arrive, then
returns a string providing all of the text that it received from the moment it started
listing until the moment it finally saw the string you were waiting for.
CHAPTER 16 ■ TELNET AND SSH
277
• The more powerful and sophisticated expect() method takes a list of Python
regular expressions. Once the text arriving from the remote end finally adds up to
something that matches one of the regular expressions, expect() returns three
items: the index in your list of the pattern that matched, the regular expression
SRE_Match object itself, and the text that was received leading up to the matching
text. For more information on what you can do with a SRE_Match, including finding
the values of any sub-expressions in your pattern, read the Standard Library
documentation for the re module.
Regular expressions, as always, have to be written carefully. When I first wrote this script, I used '$'
as the expect() pattern that watched for the shell prompt to appear—which, of course, is a special
character in a regular expression! So the corrected script shown in the listing escapes the $ so that
expect() actually waits until it sees a dollar sign arrive from the remote end.
If the script sees an error message because of an incorrect password—and does not get stuck waiting
forever for a login or password prompt that never arrives or that looks different than it was expecting—
then it exits:
$ python telnet_login.py
Username and password failed - giving up
If you wind up writing a Python script that has to use Telnet, it will simply be a larger or more
complicated version of the same simple pattern shown here.
Both read_until() and expect() take an optional second argument named timeout that places a
maximum limit on how long the call will watch for the text pattern before giving up and returning
control to your Python script. If they quit and give up because of the timeout, they do not raise an error;
instead—awkwardly enough—they just return the text they have seen so far, and leave it to you to figure
out whether that text contains the pattern!
There are a few odds and ends in the Telnet object that we need not cover here. You will find them
in the telnetlib Standard Library documentation—including an interact() method that lets the user
“talk” directly over your Telnet connection using the terminal! This kind of call was very popular back in
the old days, when you wanted to automate login but then take control and issue normal commands
yourself.
The Telnet protocol does have a convention for embedding control information, and telnetlib
follows these protocol rules carefully to keep your data separate from any control codes that appear. So
you can use a Telnet object to send and receive all of the binary data you want, and ignore the fact that
control codes might be arriving as well. But if you are doing a sophisticated Telnet-based project, then
you might need to process options.
Normally, each time a Telnet server sends an option request, telnetlib flatly refuses to send or
receive that option. But you can provide a Telnet object with your own callback function for processing
options; a modest example is shown in Listing 16–4. For most options, it simply re-implements the
default telnetlib behavior and refuses to handle any options (and always remember to respond to each
option one way or another; failing to do so will often hang the Telnet session as the server waits forever
for your reply). But if the server expresses interest in the “terminal type” option, then this client sends
back a reply of “mypython,” which the shell command it runs after logging in then sees as its $TERM
environment variable.
Listing 16–4. How
to Process Telnet Option Codes
#!/usr/bin/env python
# Foundations of Python Network Programming - Chapter 16 - telnet_codes.py
# How your code might look if you intercept Telnet options yourself
from telnetlib import Telnet, IAC, DO, DONT, WILL, WONT, SB, SE, TTYPE
CHAPTER 16 ■ TELNET AND SSH
278
def process_option(tsocket, command, option):
» if command == DO and option == TTYPE:
» » tsocket.sendall(IAC + WILL + TTYPE)
» » print 'Sending terminal type "mypython"'
» » tsocket.sendall(IAC + SB + TTYPE + '\0' + 'mypython' + IAC + SE)
» elif command in (DO, DONT):
» » print 'Will not', ord(option)
» » tsocket.sendall(IAC + WONT + option)
» elif command in (WILL, WONT):
» » print 'Do not', ord(option)
» » tsocket.sendall(IAC + DONT + option)
t = Telnet('localhost')
# t.set_debuglevel(1) # uncomment this for debugging messages
t.set_option_negotiation_callback(process_option)
t.read_until('login:', 5)
t.write('brandon\n')
t.read_until('assword:', 5) # so P can be capitalized or not
t.write('mypass\n')
n, match, previous_text = t.expect([r'Login incorrect', r'\$'], 10)
if n == 0:
» print "Username and password failed - giving up"
else:
» t.write('exec echo $TERM\n')
» print t.read_all()
For more details about how Telnet options work, again, you can consult the relevant RFCs.
SSH: The Secure Shell
The SSH protocol is one of the best-known examples of a secure, encrypted protocol among modern
system administrators (HTTPS is probably the very best known).
THE SSH PROTOCOL
Purpose: Secure remote shell, file transfer, port forwarding
Standard: RFC 4250–4256 (2006)
Runs atop: TCP/IP
Default port: 22
Library:
paramiko
Exceptions:
socket.error, socket.gaierror, paramiko.SSHException
SSH is descended from an earlier protocol that supported “remote login,” “remote shell,” and
“remote file copy” commands named rlogin, rsh, and rcp, which in their time tended to become much
more popular than Telnet at sites that supported them. You cannot imagine what a revelation rcp was, in
CHAPTER 16 ■ TELNET AND SSH
279
particular, unless you have spent hours trying to transfer a file between computers armed with only
Telnet and a script that tries to type your password for you, only to discover that your file contains a byte
that looks like a control character to Telnet or the remote terminal, and have the whole thing hang until
you add a layer of escaping (or figure out how to disable both the Telnet escape key and all
interpretation taking place on the remote terminal).
But the best feature of the rlogin family was that they did not just echo username and password
prompts without actually knowing the meaning of what was going on. Instead, they stayed involved
through the process of authentication, and you could even create a file in your home directory that told
them “when someone named brandon tries to connect from the asaph machine, just let them in without a
password.” Suddenly, system administrators and Unix users alike received back hours of each month
that would otherwise have been spent typing their password. Suddenly, you could copy ten files from
one machine to another nearly as easily as you could have copied them into a local folder.
SSH has preserved all of these great features of the early remote-shell protocol, while bringing
bulletproof security and hard encryption that is trusted worldwide for administering critical servers. This
chapter will focus on SSH-2, the most recent version of the protocol, and on the paramiko Python
package that can speak the protocol—and does it so successfully that it has actually been ported to Java,
too, because people in the Java world wanted to be able to use SSH as easily as we do when using
Python.
An Overview of SSH
You have reached a point in this book where something very interesting happens: we encounter a new
layer of multiplexing.
The first section of this book talked a lot about multiplexing—about how UDP (Chapter 2) and TCP
(Chapter 3) take the underlying IP protocol, which has no concept that there might actually be several
users or applications on a single computer that need to communicate, and add the concept of UDP and
TCP port numbers, so that several different conversations between a pair of IP addresses can take place
at the same time.
Once that basic level of multiplexing was established, we more or less left the topic behind. Through
more than a dozen chapters now, we have studied protocols that take a UDP or TCP connection and
then happily use it for exactly one thing—downloading a web page, or transmitting an e-mail, but never
trying to do several things at the same time over a single socket.
But as we now arrive at SSH, we reach a protocol so sophisticated that it actually implements its
own rules for multiplexing, so that several “channels” of information can all share the same SSH socket.
Every block of information SSH sends across its socket is labeled with a “channel” identifier so that
several conversations can share the socket.
There are at least two reasons sub-channels make sense. First, even though the channel ID takes up
a bit of bandwidth for every single block of information transmitted, the additional data is small
compared to how much extra information SSH has to transmit to negotiate and maintain encryption
anyway. Second, channels make sense because the real expense of an SSH connection is setting it up.
Host key negotiation and authentication can together take up several seconds of real time, and once the
connection is established, you want to be able to use it for as many operations as possible. Thanks to the
SSH notion of a channel, you can amortize the high cost of connecting by performing many operations
before you let the connection close.
Once connected, you can create several kinds of channels:
• An interactive shell session, like that supported by Telnet
• The individual execution of a single command
• A file-transfer session letting you browse the remote filesystem
• A port-forward that intercepts TCP connections
CHAPTER 16 ■ TELNET AND SSH
280
We will learn about all of these kinds of channels in the following sections.
SSH Host Keys
When an SSH client first connects to a remote host, they exchange temporary public keys that let them
encrypt the rest of their conversation without revealing any information to any watching third parties.
Then, before the client is willing to divulge any further information, it demands proof of the remote
server's identity. This makes good sense as a first step: if you are really talking to a hacker who has
temporarily managed to grab the remote server's IP, you do not want SSH to divulge even your
username—much less your password!
As we saw in Chapter 6, one answer to the problem of machine identity on the Internet is to build a
public-key infrastructure. First you designate a set of organizations called “certificate authorities” that
can issue certs; then you install a list of their public keys in all of the web browsers and other SSL clients
in existence; then those organizations charge you money to verify that you really are google.com and that
you deserve to have your google.com SSL certificate signed; and then, finally, you can install the
certificate on your web server, and everyone will trust that you are really google.com.
There are many problems with this system from the point of view of SSH. While it is true that you
can build a public-key infrastructure internal to an organization, where you distribute your own signing
authority's certificates to your web browsers or other applications and then can sign your own server
certificates without paying a third party, a public-key infrastructure is still considered too cumbersome a
process for something like SSH; server administrators want to set up, use, and tear down servers all the
time, without having to talk to a central authority first.
So SSH has the idea that each server, when installed, creates its own random public-private key pair
that is not signed by anybody. Instead, one of two approaches is taken to key distribution:
• A system administrator writes a script that gathers up all of the host public keys in
an organization, creates an ssh_known_hosts listing them all, and places this file in
the /etc/sshd directory on every system in the organization. They might also make
it available to any desktop clients, like the PuTTY command under Windows. Now
every SSH client will know about every SSH host key before they even connect for
the first time.
• Abandon the idea of knowing host keys ahead of time, and instead memorize
them at the moment of first connection. Users of the SSH command line will be
very familiar with this: the client says it does not recognize the host to which you
are connecting, you reflexively answer “yes,” and its key gets stored in your
~/.ssh/known_hosts file. You actually have no guarantee that you are really talking
to the host you think it is; but at least you will be guaranteed that every
subsequent connection you ever make to that machine is going to the right place,
and not to other servers that someone is swapping into place at the same IP
address. (Unless, of course, they have stolen your host keys!)
The familiar prompt from the SSH command line when it sees an unfamiliar host looks like this:
$ ssh asaph.rhodesmill.org
The authenticity of host 'asaph.rhodesmill.org (74.207.234.78)'
can't be established.
RSA key fingerprint is 85:8f:32:4e:ac:1f:e9:bc:35:58:c1:d4:25:e3:c7:8c.
Are you sure you want to continue connecting (yes/no)? yes
Warning: Permanently added 'asaph.rhodesmill.org,74.207.234.78' (RSA)
to the list of known hosts.
Download from Wow! eBook <www.wowebook.com>
CHAPTER 16 ■ TELNET AND SSH
281
That “yes” answer buried deep on the next-to-last full line is the answer that I typed giving SSH the
go-ahead to make the connection and remember the key for next time. If SSH ever connects to a host
and sees a different key, its reaction is quite severe:
$ ssh asaph.rhodesmill.org
@@@@@@@@@@@@@@@@@@@@@@@@@@@@@@@@@@@@@@@@@@@@@@@@@@@@
@ WARNING: REMOTE HOST IDENTIFICATION HAS CHANGED! @
@@@@@@@@@@@@@@@@@@@@@@@@@@@@@@@@@@@@@@@@@@@@@@@@@@@@
IT IS POSSIBLE THAT SOMEONE IS DOING SOMETHING NASTY!
Someone could be eavesdropping on you right now (man-in-the-middle attack)!
This message will be familiar to anyone who has ever had to re-build a server from scratch, and
forgets to save the old SSH keys and lets new ones be generated by the re-install. It can be painful to go
around to all of your SSH clients and remove the offending old key so that they will quietly learn the new
one upon reconnection.
The paramiko library has full support for all of the normal SSH tactics surrounding host keys. But its
default behavior is rather spare: it loads no host-key files by default, and will then, of course, raise an
exception for the very first host to which you connect because it will not be able to verify its key! The
exception that it raises is a bit un-informative; it is only by looking at the fact that it comes from inside
the missing_host_key() function that I usually recognize what has caused the error:
>>> import paramiko
>>> client = paramiko.SSHClient()
>>> client.connect('my.example.com', username='test')
Traceback (most recent call last):
File " /paramiko/client.py", line 85, in missing_host_key
» raise SSHException('Unknown server %s' % hostname)
paramiko.SSHException: Unknown server my.example.com
To behave like the normal SSH command, load both the system and the current user's known-host
keys before making the connection:
>>> client.load_system_host_keys()
>>> client.load_host_keys('/home/brandon/.ssh/known_hosts')
>>> client.connect('my.example.com', username='test')
The paramiko library also lets you choose how you handle unknown hosts. Once you have a client
object created, you can provide it with a decision-making class that is asked what to do if a host key is
not recognized. You can build these classes yourself by inheriting from the MissingHostKeyPolicy class:
>>> class AllowAnythingPolicy(paramiko.MissingHostKeyPolicy):
def missing_host_key(self, client, hostname, key):
return
>>> client.set_missing_host_key_policy(AllowAnythingPolicy())
>>> client.connect('my.example.com', username='test')
Note that, through the arguments to the missing_host_key() method, you receive several pieces of
information on which to base your decision; you could, for example, allow connections to machines on
your own server subnet without a host key, but disallow all others.
Inside paramiko there are also several decision-making classes that already implement several basic
host-key options:
• paramiko.AutoAddPolicy: Host keys are automatically added to your user host-key
store (the file ~/.ssh/known_hosts on Unix systems) when first encountered, but
any change in the host key from then on will raise a fatal exception.
CHAPTER 16 ■ TELNET AND SSH
282
• paramiko.RejectPolicy: Connecting to hosts with unknown keys simply raises an
exception.
• paramiko.WarningPolicy: An unknown host causes a warning to be logged, but the
connection is then allowed to proceed.
When writing a script that will be doing SSH, I always start by connecting to the remote host “by
hand” with the normal ssh command-line tool so that I can answer “yes” to its prompt and get the
remote host's key in my host-keys file. That way, my programs should never have to worry about
handling the case of a missing key, and can die with an error if they encounter one.
But if you like doing things less by-hand than I do, then the AutoAddPolicy might be your best bet: it
never needs human interaction, but will at least assure you on subsequent encounters that you are still
talking to the same machine as before. So even if the machine is a Trojan horse that is logging all of your
interactions with it and secretly recording your password (if you are using one), it at least must prove to
you that it holds the same secret key every time you connect.
SSH Authentication
The whole subject of SSH authentication is the topic of a large amount of good documentation, as well
as articles and blog posts, all available on the Web. Information abounds about configuring common
SSH clients, setting up an SSH server on a Unix or Windows host, and using public keys to authenticate
yourself so that you do not have to keep typing your password all the time. Since this chapter is primarily
about how to “speak SSH” from Python, I will just briefly outline how authentication works.
There are generally three ways to prove your identity to a remote server you are contacting through
SSH:
• You can provide a username and password.
• You can provide a username, and then have your client successfully perform a
public-key challenge-response. This clever operation manages to prove that you
are in possession of a secret “identity” key without actually exposing its contents
to the remote system.
• You can perform Kerberos authentication. If the remote system is set up to allow
Kerberos (which actually seems extremely rare these days), and if you have run the
kinit command-line tool to prove your identity to one of the master Kerberos
servers in the SSH server's authentication domain, then you should be allowed in
without a password.
Since option 3 is very rare, we will concentrate on the first two.
Using a username and password with paramiko is very easy—you simply provide them in your call to
the connect() method:
>>> client.connect('my.example.com', username='brandon', password=mypass)
Public-key authentication, where you use ssh-keygen to create an “identity” key pair (which is
typically stored in your ~/.ssh directory) that can be used to authenticate you without a password,
makes the Python code even easier!
>>> client.connect('my.example.com')
If your identity key file is stored somewhere other than in the normal ~/.ssh/id_rsa file, then you
can provide its file name—or a whole Python list of file names—to the connect() method manually:
>>> client.connect('my.example.com',
CHAPTER 16 ■ TELNET AND SSH
283
key_filename='/home/brandon/.ssh/id_sysadmin')
Of course, per the normal rules of SSH, providing a public-key identity like this will work only if you
have appended the public key in the id_sysadmin.pub file to your “authorized hosts” file on the remote
end, typically named something like this:
/home/brandon/.ssh/authorized_keys
If you have trouble getting public-key authentication to work, always check the file permissions on
both your remote .ssh directory and also the files inside; some versions of the SSH server will get upset if
they see that these files are group-readable or group-writable. Using mode 0700 for the .ssh directory
and 0600 for the files inside will often make SSH happiest. The task of copying SSH keys to other
accounts has actually been automated in recent versions, through a small command that will make sure
that the file permissions get set correctly for you:
ssh-copy-id -i ~/.ssh/id_rsa.pub
Once the connect() method has succeeded, you are now ready to start performing remote
operations, all of which will be forwarded over the same physical socket without requiring re-negotiation
of the host key, your identity, or the encryption that protects the SSH socket itself!
Shell Sessions and Individual Commands
Once you have a connected SSH client, the entire world of SSH operations is open to you. Simply by
asking, you can access remote-shell sessions, run individual commands, commence file-transfer
sessions, and set up port forwarding. We will look at each of these operations in turn.
First, SSH can set up a raw shell session for you, running on the remote end inside a pseudo-
terminal so that programs act like they normally do when they are interacting with the user at a terminal.
This kind of connection behaves very much like a Telnet connection; take a look at Listing 16–5 for an
example, which pushes a simple echo command at the remote shell, and then asks it to exit.
Listing 16–5. Running an Interactive Shell Under SSH
#!/usr/bin/env python
# Foundations of Python Network Programming - Chapter 16 - ssh_simple.py
# Using SSH like Telnet: connecting and running two commands
import paramiko
class AllowAnythingPolicy(paramiko.MissingHostKeyPolicy):
» def missing_host_key(self, client, hostname, key):
» » return
client = paramiko.SSHClient()
client.set_missing_host_key_policy(AllowAnythingPolicy())
client.connect('127.0.0.1', username='test') # password='')
channel = client.invoke_shell()
stdin = channel.makefile('wb')
stdout = channel.makefile('rb')
stdin.write('echo Hello, world\rexit\r')
print stdout.read()
client.close()
CHAPTER 16 ■ TELNET AND SSH
284
You will see that this awkward session bears all of the scars of a program operating over a terminal.
Instead of being able to neatly encapsulate each command and separate its arguments in Python, it has
to use spaces and carriage returns and trust the remote shell to divide things back up properly.
■ Note All of the commands in this section simply connect to the localhost IP address, 127.0.0.1, and thus
should work fine if you are on a Linux or Mac with an SSH server installed, and you have copied your SSH identity
public key into your authorized-keys file. If, instead, you want to use these scripts to connect to a remote SSH
server, simply change the host given in the
connect() call.
Also, if you actually run this command, you will see that the commands you type are actually echoed
to you twice, and that there is no obvious way to separate these command echoes from the actual
command output:
Ubuntu 10.04.1 LTS
Last login: Mon Sep 6 01:10:36 2010 from 127.0.0.9
echo Hello, world
exit
test@guinness:~$ echo Hello, world
Hello, world
test@guinness:~$ exit
logout
Do you see what has happened? Because we did not wait for a shell prompt before issuing our echo
and exit commands (which would have required a loop doing repeated read() calls), our command text
made it to the remote host while it was still in the middle of issuing its welcome messages. Because the
Unix terminal is by default in a “cooked” state, where it echoes the user's keystrokes, the commands got
printed back to us, just beneath the “Last login” line.
Then the actual bash shell started up, set the terminal to “raw” mode because it likes to offer its own
command-line editing interface, and then started reading your commands character by character. And,
because it assumes that you want to see what you are typing (even though you are actually finished
typing and it is just reading the characters from a buffer that is several milliseconds old), it echoes each
command back to the screen a second time.
And, of course, without a good bit of parsing and intelligence, we would have a hard time writing a
Python routine that could pick out the actual command output—the words Hello, world—from the rest
of the output we are receiving back over the SSH connection.
Because of all of these quirky, terminal-dependent behaviors, you should generally avoid ever using
invoke_shell() unless you are actually writing an interactive terminal program where you let a live user
type commands.
A much better option for running remote commands is to use exec_command(), which, instead of
starting up a whole shell session, just runs a single command, giving you control of its standard input,
output, and error streams just as though you had run it using the subprocess module in the Standard
Library. A script demonstrating its use is shown in Listing 16–6. The difference between exec_command()
and a local subprocess (besides, of course, the fact that the command runs over on the remote machine!)
is that you do not get the chance to pass command-line arguments as separate strings; instead, you have
to pass a whole command line for interpretation by the shell on the remote end.
CHAPTER 16 ■ TELNET AND SSH
285
Listing 16–6. Running Individual SSH Commands
#!/usr/bin/env python
# Foundations of Python Network Programming - Chapter 16 - ssh_commands.py
# Running separate commands instead of using a shell
import paramiko
class AllowAnythingPolicy(paramiko.MissingHostKeyPolicy):
» def missing_host_key(self, client, hostname, key):
» » return
client = paramiko.SSHClient()
client.set_missing_host_key_policy(AllowAnythingPolicy())
client.connect('127.0.0.1', username='test') # password='')
for command in 'echo "Hello, world!"', 'uname', 'uptime':
» stdin, stdout, stderr = client.exec_command(command)
» stdin.close()
» print repr(stdout.read())
» stdout.close()
» stderr.close()
client.close()
As was just mentioned, you might find the quotes() function from the Python pipes module to be
helpful if you need to quote command-line arguments so that spaces containing file names and special
characters are interpreted correctly by the remote shell.
Every time you start a new SSH shell session with invoke_shell(), and every time you kick off a
command with exec_command(), a new SSH “channel” is created behind the scenes, which is what
provides the file-like Python objects that let you talk to the remote command's standard input, output,
and error. Channels, as just explained, can run in parallel, and SSH will cleverly interleave their data on
your single SSH connection so that all of the conversations happen simultaneously without ever
becoming confused.
Take a look at Listing 16–7 for a very simple example of what is possible. Here, two “commands” are
kicked off remotely, which are each a simple shell script with some echo commands interspersed with
pauses created by calls to sleep. If you want, you can pretend that these are really filesystem commands
that return data as they walk the filesystem, or that they are CPU-intensive operations that only slowly
generate and return their results. The difference does not matter at all to SSH: what matters is that the
channels are sitting idle for several seconds at a time, then coming alive again as more data becomes
available.
Listing 16–7. SSH Channels Run in Parallel
#!/usr/bin/env python
# Foundations of Python Network Programming - Chapter 16 - ssh_threads.py
# Running two remote commands simultaneously in different channels
import threading
import paramiko
class AllowAnythingPolicy(paramiko.MissingHostKeyPolicy):
» def missing_host_key(self, client, hostname, key):
CHAPTER 16 ■ TELNET AND SSH
286
» » return
client = paramiko.SSHClient()
client.set_missing_host_key_policy(AllowAnythingPolicy())
client.connect('127.0.0.1', username='test') # password='')
def read_until_EOF(fileobj):
» s = fileobj.readline()
» while s:
» » print s.strip()
» » s = fileobj.readline()
out1 = client.exec_command('echo One;sleep 2;echo Two;sleep 1;echo Three')[1]
out2 = client.exec_command('echo A;sleep 1;echo B;sleep 2;echo C')[1]
thread1 = threading.Thread(target=read_until_EOF, args=(out1,))
thread2 = threading.Thread(target=read_until_EOF, args=(out2,))
thread1.start()
thread2.start()
thread1.join()
thread2.join()
client.close()
In order to be able to process these two streams of data simultaneously, we are kicking off two
threads, and are handing each of them one of the channels from which to read. They each print out each
line of new information as soon as it arrives, and finally exit when the readline() command indicates
end-of-file by returning an empty string. When run, this script should return something like this:
$ python ssh_threads.py
One
A
B
Two
Three
C
So there you have it: SSH channels over the same TCP connection are completely independent, can
each receive (and send) data at their own pace, and can close independently when the particular
command that they are talking to finally terminates.
The same is true of the features we are about to look at—file transfer and port forwarding—so keep
in mind as you read our last two examples that all of these kinds of communications can happen
simultaneously without your having to open more than one SSH connection to hold all of the channels
of data.
SFTP: File Transfer Over SSH
Version 2 of the SSH protocol includes a sub-protocol called the “SSH File Transfer Protocol” (SFTP) that
lets you walk the remote directory tree, create and delete directories and files, and copy files back and
forth from the local to the remote machine. The capabilities of SFTP are so complex and complete, in
fact, that they support not only simple file-copy operations, but can power graphical file browsers and
can even let the remote filesystem be mounted locally! (Google for the sshfs system for details.)
The SFTP protocol is an incredible boon to those of us who once had to copy files using brittle
scripts that tried to send data across Telnet through very careful escaping of binary data! And instead of
CHAPTER 16 ■ TELNET AND SSH
287
making you power up its own sftp command line each time you want to move files, SSH follows the
tradition of RSH by providing an scp command-line tool that acts just like the traditional cp command
but lets you prefix any file name with hostname: to indicate that it exists on the remote machine. This
means that remote copy commands stay in your command-line history just like your other shell
commands, rather than being lost to the separate history buffer of a separate command prompt that you
have to invoke and then quit out of (which was a great annoyance of traditional FTP clients).
And, of course, the great and crowning achievement of SFTP and the sftp and scp commands is that
they not only support password authentication, but also let you copy files using exactly the same public-
key mechanism that lets you avoid typing your password over and over again when running remote
commands with the ssh command!
If you look briefly over Chapter 17 on the old FTP system, you will get a good idea of the sorts of
operations that SFTP supports. In fact, most of the SFTP commands have the same names as the local
commands that you already run to manipulate files on your Unix shell account, like chmod and mkdir, or
have the same names as Unix system calls that you might be familiar with through the Python os
module, like lstat and unlink. Because these operations are so familiar, I never need any other support
in writing SFTP commands than is provided by the bare paramiko documentation for the Python SFTP
client:
Here are the main things to remember when doing SFTP:
• The SFTP protocol is stateful, just like FTP, and just like your normal shell
account. So you can either pass all file and directory names as absolute paths that
start at the root of the filesystem, or use getcwd() and chdir() to move around the
filesystem and then use paths that are relative to the directory in which you have
arrived.
• You can open a file using either the file() or open() method (just like Python has
a built-in function that lives under both names), and you get back a file-like object
connected to an SSH channel that runs independently of your SFTP channel. That
is, you can keep issuing SFTP commands, you can move around the filesystem
and copy or open further files, and the original channel will still be connected to
its file and ready for reading or writing.
• Because each open remote file gets an independent channel, file transfers can
happen asynchronously; you can open many remote files at once and have them
all streaming down to your disk drive, or open new files and be sending data the
other way. Be careful that you recognize this, or you might open so many channels
at once that each one slows to a crawl.
• Finally, keep in mind that no shell expansion is done on any of the file names you
pass across SFTP. If you try using a file name like * or one that has spaces or
special characters, they are simply interpreted as part of the file name. No shell is
involved when using SFTP; you are getting to talk right to the remote filesystem
thanks to the support inside the SSH server itself. This means that any support for
pattern-matching that you want to provide to the user has to be through fetching
the directory contents yourself and then checking their pattern against each one,
using a routine like those provided in fnmatch in the Python Standard Library.
A very modest example SFTP session is shown in Listing 16–8. It does something simple that system
administrators might often need (but, of course, that they could just as easily accomplish with an scp
command): it connects to the remote system and copies messages log files out of the /var/log directory,
perhaps for scanning or analysis on the local machine.
CHAPTER 16 ■ TELNET AND SSH
288
Listing 16–8. Listing a Directory and Fetching Files with SFTP
#!/usr/bin/env python
# Foundations of Python Network Programming - Chapter 16 - sftp.py
# Fetching files with SFTP
import functools
import paramiko
class AllowAnythingPolicy(paramiko.MissingHostKeyPolicy):
» def missing_host_key(self, client, hostname, key):
» » return
client = paramiko.SSHClient()
client.set_missing_host_key_policy(AllowAnythingPolicy())
client.connect('127.0.0.1', username='test') # password='')
def my_callback(filename, bytes_so_far, bytes_total):
» print 'Transfer of %r is at %d/%d bytes (%.1f%%)' % (
» » filename, bytes_so_far, bytes_total, 100. * bytes_so_far / bytes_total)
sftp = client.open_sftp()
sftp.chdir('/var/log')
for filename in sorted(sftp.listdir()):
» if filename.startswith('messages.'):
» » callback_for_filename = functools.partial(my_callback, filename)
» » sftp.get(filename, filename, callback=callback_for_filename)
client.close()
Note that, although I made a big deal of talking about how each file that you open with SFTP uses its
own independent channel, the simple get() and put() convenience functions provided by paramiko—
which are really lightweight wrappers for an open() followed by a loop that reads and writes—do not
attempt any asynchrony, but instead just block and wait until each whole file has arrived. This means that
the foregoing script calmly transfers one file at a time, producing output that looks something like this:
$ python sftp.py
Transfer of 'messages.1' is at 32768/128609 bytes (25.5%)
Transfer of 'messages.1' is at 65536/128609 bytes (51.0%)
Transfer of 'messages.1' is at 98304/128609 bytes (76.4%)
Transfer of 'messages.1' is at 128609/128609 bytes (100.0%)
Transfer of 'messages.2.gz' is at 32768/40225 bytes (81.5%)
Transfer of 'messages.2.gz' is at 40225/40225 bytes (100.0%)
Transfer of 'messages.3.gz' is at 28249/28249 bytes (100.0%)
Transfer of 'messages.4.gz' is at 32768/71703 bytes (45.7%)
Transfer of 'messages.4.gz' is at 65536/71703 bytes (91.4%)
Transfer of 'messages.4.gz' is at 71703/71703 bytes (100.0%)
Again, consult the excellent paramiko documentation at the URL just mentioned to see the simple
but complete set of file operations that SFTP supports.
CHAPTER 16 ■ TELNET AND SSH
289
Other Features
We have just covered, in the last few sections, all of the SSH operations that are supported by methods
on the basic SSHClient object. The more obscure features that you might be familiar with—like remote
X11 sessions, and port forwarding—require that you go one level deeper in the paramiko interface and
talk directly to the client's “transport” object.
The transport is the class that actually knows the low-level operations that get combined to power
an SSH connection. You can ask a client for its transport very easily:
>>> transport = client.get_transport()
Though we lack the room to cover further SSH features here, the understanding of SSH that you
have gained in this chapter should help you understand them given the paramiko documentation
combined with example code—whether from the demos directory of the paramiko project itself, or from
blogs, Stack Overflow, or other materials about paramiko that you might find online.
One feature that we should mention explicitly is port forwarding, where SSH opens a port on either
the local or remote host—at least making the port available to connections from localhost, and possibly
also accepting connections from other machines on the Internet—and “forwards” these connections
across the SSH channel where it connects to some other host and port on the remote end, passing data
back and forth.
Port forwarding can be very useful. For example, I sometimes find myself developing a web
application that I cannot run easily on my laptop because it needs access to a database and other
resources that are available only out on a server farm. But I might not want the hassle of running the
application on a public port—that I might have to adjust firewall rules to open—and then getting HTTPS
running so that third parties cannot see my work-in-progress.
An easy solution is to run the under-development web application on the remote development
machine the way I would locally—listening on localhost:8080 so that it cannot be contacted from
another computer—and then tell SSH that I want connections to my local port 8080, made here on my
laptop, to be forwarded out so that they really connect to port 8080 on that local machine:
$ ssh -L 8080:localhost:8080 devel.example.com
If you need to create port-forwards when running an SSH connection with paramiko, then I have bad
news and good news. The bad news is that the top-level SSHClient does not, alas, provide an easy way to
create a forward like it supports more common operations like shell sessions. Instead, you will have to
create the forward by talking directly to the “transport” object, and then writing loops that copy data in
both directions over the forward yourself.
But the good news is that paramiko comes with example scripts showing exactly how to write port-
forwarding loops. These two scripts, from the main paramiko trunk, should get you started:
Of course, since the port-forward data is passed back and forth across channels inside the SSH
connection, you do not have to worry if they are raw, unprotected HTTP or other traffic that is normally
visible to third parties: since they are now embedded inside SSH, they are protected by its own
encryption from being intercepted.
CHAPTER 16 ■ TELNET AND SSH
290
Summary
Remote-shell protocols let you connect to remove machines, run shell commands, and see their output,
just like the commands were running inside a local terminal window. Sometimes you use these
protocols to connect to an actual Unix shell, and sometimes to small embedded shells in routers or other
networking hardware that needs configuring.
As always when talking to Unix commands, you need to be aware of output buffering, special shell
characters, and terminal input buffering as issues that can make your life difficult by munging your data
or even hanging your shell connection.
The Telnet protocol is natively supported by the Python Standard Library through its telnetlib
module. Although Telnet is ancient, insecure, and can be difficult to script, it may often be the only
protocol supported by simple devices to which you want to connect.
The SSH “Secure Shell” protocol is the current state of the art, not only for connecting to the
command line of a remote host, but for copying files and forwarding TCP/IP ports as well. Python has
quite excellent SSH support thanks to the third-party paramiko package. When making an SSH
connection, you need to remember three things:
• paramiko will need to verify (or be told explicitly to ignore) the identity of the
remote machine, which is defined as the host key that it presents when the
connection is made.
• Authentication will typically be accomplished through a password, or through the
use of a public-private key pair whose public half you have put in your
authorized_keys file on the remote server.
• Once authenticated you can start all sorts of SSH services—remote shells,
individual commands, and file-transfer sessions—and they can all run at once
without your having to open new SSH connections, thanks to the fact that they
will all get their own “channel” within the master SSH connection.
Download from Wow! eBook <www.wowebook.com>
C H A P T E R 17
■ ■ ■
291
FTP
The File Transfer Protocol (FTP) was once among the most widely used protocols on the Internet,
invoked whenever a user wanted to transfer files between Internet-connected computers.
Alas, the protocol has seen better days; today, a better alternative exists for every one of its major
roles. There were four primary activities that it once powered.
The first, and overwhelming, use of FTP was for file download. Just like people who browse the Web
today, earlier generations of Internet users were able to consume far more content than they each
tended to generate. Lists of “anonymous” FTP servers that allowed public access were circulated, and
users connected to retrieve documents, the source code to new programs, and media like images or
movies. (You logged into them with the username “anonymous” or “ftp,” and then—out of politeness, so
they would know who was using their bandwidth—you typed your e-mail address as the password.) And
FTP was always the protocol of choice when files needed to be moved between computer accounts,
since trying to transfer large files with Telnet clients was often a dicey proposition.
Second, FTP was often jury-rigged to provide for anonymous upload. Many organizations wanted
outsiders to be able to submit documents or files, and their solution was to set up FTP servers that
allowed files to be written into a directory whose contents could not, then, be listed back again. That
way, users could not see (and hopefully could not guess!) the names of the files that other users had just
submitted and get to them before the site administrators did.
Third, the protocol was often in use to support the synchronization of entire trees of files between
computer accounts. By using a client that provided for “recursive” FTP operations, users could push
entire directory trees from one of their accounts to another, and server administrators could clone or
install new services without having to re-build them from scratch on a new machine. When using FTP
like this, users were generally not aware of how the actual protocol worked, or of the many separate
commands needed to transfer so many different files: instead, they hit a button and a large batch
operation would run and then complete.
Fourth and finally, FTP was used for its original purpose: interactive, full-fledged file management.
The early FTP clients presented a command-line prompt that felt something like a Unix shell account
itself, and—as we shall see—the protocol borrows from shell accounts both the idea of a “current
working directory” and of a cd command to move from one directory to another. Later clients mimicked
the idea of a Mac-like interface, with folders and files drawn on the computer screen. But in either case,
in the activity of filesystem browsing the full capabilities of FTP finally came into play: it supported not
only the operations of listing directories and uploading and downloading files, but of creating and
deleting directories, adjusting file permissions, and re-naming files.
What to Use Instead of FTP
Today, there are better alternatives than the FTP protocol for pretty much anything you could want to do
with it. You will still occasionally see URLs that start with ftp:, but they are becoming quite rare. Use this
chapter either because you have a legacy need to speak FTP from your Python program, or because you
want to learn more about file transfer protocols in general and FTP is a good, historical place to start.
CHAPTER 17 ■ FTP
292
The biggest problem with the protocol is its lack of security: not only files, but usernames and
passwords are sent completely in the clear and can be viewed by anyone observing network traffic.
A second issue is that an FTP user tends to make a connection, choose a working directory, and do
several operations all over the same network connection. Modern Internet services, with millions of
users, prefer protocols like HTTP (see Chapter 9) that consist of short, completely self-contained
requests, instead of long-running FTP connections that require the server to remember things like a
current working directory.
A final big issue is filesystem security. The early FTP servers, instead of showing users just a sliver of
the host filesystem that the owner wanted exposed, tended to simply expose the entire filesystem, letting
users cd to / and snoop around to see how the system was configured. True, you could run the server
under a separate ftp user and try to deny that user access to as many files as possible; but many areas of
the Unix filesystem need to be publicly readable simply so that normal users can use the programs there.
While servers were eventually written that exposed only part of the host filesystem, this more or less
violated the original intention: that an FTP session would look like a Telnet command-line prompt, even
down to the fact that full pathnames were used that started at the filesystem root.
So what are the alternatives?
• For file download, HTTP (Chapter 9) is the standard protocol on today’s Internet,
protected with SSL when necessary for security. Instead of exposing system-
specific file name conventions like FTP, HTTP supports system-independent
URLs.
• Anonymous upload is a bit less standard, but the general tendency is to use a form
on a web page that instructs the browser to use an HTTP POST operation to
transmit the file that the user selects.
• File synchronization has improved immeasurably since the days when a recursive
FTP file copy was the only common way to get files to another computer. Instead
of wastefully copying every file, modern commands like rsync or rdist efficiently
compare files at both ends of the connection and copy only the ones that are new
or have changed. (They are not covered in this book; try Googling for them.)
• Full filesystem access is actually the one area where FTP can still commonly be
found on today’s Internet: thousands of cut-rate ISPs continue to support FTP,
despite its insecurity, as the means by which users copy their media and
(typically) PHP source code into their web account. A much better alternative
today is for service providers to support SFTP instead (see Chapter 16).
■ Note The FTP standard is RFC959, available at
Communication Channels
FTP is unusual because, by default, it actually uses two TCP connections during operation. One
connection is the control channel, which carries commands and the resulting acknowledgments or error
codes. The second connection is the data channel, which is used solely for transmitting file data or other
blocks of information, such as directory listings. Technically, the data channel is full duplex, meaning
that it allows files to be transmitted in both directions simultaneously. However, in actual practice, this
capability is rarely used.
In the traditional sense, the process of downloading a file from an FTP server ran mostly like this: