Learning XNA 3.0 phần 2 pot
Bạn đang xem bản rút gọn của tài liệu. Xem và tải ngay bản đầy đủ của tài liệu tại đây (674.2 KB, 50 trang )
30
|
Chapter 2: Fun with Sprites
To update the position at which you draw the objects, you need to modify the val-
ues of your position variables,
pos1 and pos2. Add the following lines of code to your
Update method in the place of the TODO comment line:
pos1.X += speed1;
if (pos1.X > Window.ClientBounds.Width - texture.Width ||
pos1.X < 0)
speed1 *= -1;
pos2.Y += speed2;
if (pos2.Y > Window.ClientBounds.Height - textureTransparent.Height ||
pos2.Y < 0)
speed2 *= -1;
There’s nothing too complicated going on here. You update the X property of the
pos1 Vector2 object by adding the value in the variable speed1. The if statement that
follows checks to see if the new position will result in placing the image off the right
or left edge of the screen. If it is determined that the image will be drawn off the edge
of the screen, the value of
speed1 is multiplied by –1. The result of that multiplica-
tion is that the image reverses direction. The same steps are then taken with the
other image, but in the vertical direction rather than horizontally.
Compile and run the project now and you’ll see both images moving, one horizon-
tally and the other vertically. Both images “bounce” and reverse direction when they
run into the edges of the window, as shown in Figure 2-7.
Animation
As mesmerizing as it is to sit and watch moving, bouncing XNA logos, that’s not
exactly the reason you’re reading this book. Let’s get to something a little more excit-
ing by animating some sprites.
The code for this section of the chapter is available with the source
code for the book under Chapter 2 and is titled AnimatedSprites.
As discussed earlier in this chapter, animation in 2D XNA games is done much like a
cartoon flipbook. Animations are made up of a number of standalone images, and
flipping through the images in a cycle causes them to appear animated.
Typically, sprite animations are laid out in a single sheet, and you pull out individual
images from that sheet and draw them on the screen in a specific order. These sheets
are referred to as sprite sheets. An example of a sprite sheet is included in the source
for this chapter, in the AnimatedSprites\AnimatedSprites\Content\Images folder. The
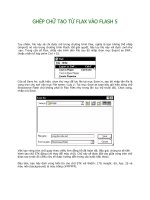
sprite sheet is named threerings.png and is shown in Figure 2-8.
In each of the previous examples, you have drawn a sprite by loading the image into
a
Texture2D object and then drawing the entire image. With a sprite sheet, you need
Animation
|
31
to be able to load the entire sheet into a Texture2D object and then pull out individ-
ual sprite frames to draw as you cycle through the animation. The overload for
SpriteBatch.Draw that you’ve used in the past few examples has a parameter (the
third in the list) that allows you to specify a source rectangle, causing only that por-
tion of the source
Texture2D object to be drawn. Until now you’ve specified null for
that parameter, which tells XNA to draw the entire
Texture2D image.
To get started with the animation, create a new project (File
➝ New ➝ Project ). In
the New Project window, select the Visual C#
➝ XNA Game Studio 3.0 node on the
left. On the right, select Windows Game (3.0) as the template for the project. Name
the project AnimatedSprites.
Once you’ve created the project, add a subfolder to the Content node in Solution
Explorer by right-clicking the Content node and selecting Add
➝ New Folder. Name
the folder Images. Next, you’ll need to add the image shown previously in Figure 2-8
to your project by right-clicking the new Content\Images folder in Solution Explorer
and selecting Add
➝ Existing Item Navigate to the threerings.png image from the
previously downloaded Chapter 2 source code from this book (the image is located
in the AnimatedSprites\AnimatedSprites\Content\Images folder).
Figure 2-7. Nothing says excitement like moving, bouncing XNA logos
32
|
Chapter 2: Fun with Sprites
Figure 2-8. Sample sprite sheet (threerings.png)
Animation
|
33
Load the image into a Texture2D object the same way you’ve done previously with
other images. First, add a class-level variable to your
Game1 class:
Texture2D texture;
Then add the following line of code to the LoadContent method of the Game1 class:
texture = Content.Load<Texture2D>(@"images\threerings");
Now that you have the image loaded into a Texture2D object, you can begin to figure
out how you are going to rotate through the images on the sheet. There are a few
things that you’ll need to know in order to create an algorithm that will cycle
through each image:
• The height and width of each individual image (or frame) in the sprite sheet
• The total number of rows and columns in the sprite sheet
• An index indicating the current row and column of the image in the sprite sheet
that should be drawn next
For this particular image, the size of each individual frame is 75 pixels in width × 75
pixels in height. There are six columns and eight rows, and you’ll start by drawing
the first frame in the sequence. Go ahead and add some class-level variables to reflect
this data:
Point frameSize = new Point(75, 75);
Point currentFrame = new Point(0, 0);
Point sheetSize = new Point(6, 8);
The Point struct works well for each of these variables because they all require a
datatype that can represent a 2D coordinate (X and Y positions).
Now you’re ready to add your
SpriteBatch.Draw call. You’ll use the same Draw call
that you used in previous examples, with one difference: instead of passing in
null
for the source rectangle in the third parameter of the call, you have to build a source
rectangle based on the current frame and the frame size. This can be done with the
following code, which should be added to the
Draw method of your Game1 class just
before the call to
base.Draw:
spriteBatch.Begin(SpriteBlendMode.AlphaBlend,
SpriteSortMode.FrontToBack, SaveStateMode.None);
spriteBatch.Draw(texture, Vector2.Zero,
new Rectangle(currentFrame.X * frameSize.X,
currentFrame.Y * frameSize.Y,
frameSize.X,
frameSize.Y),
Color.White, 0, Vector2.Zero,
1, SpriteEffects.None, 0);
spriteBatch.End( );
34
|
Chapter 2: Fun with Sprites
If you’re confused about the logic used to create the source rectangle, consider this:
with a zero-based current frame—meaning that you’re initializing your
CurrentFrame
variable to (0, 0) instead of (1, 1), or, in other words, that the upper-left image in
your sprite sheet will be referred to as (0, 0) rather than (1, 1)—the X coordinate of
the top-left corner of the current frame will always be the current frame index’s X
value multiplied by the width of each individual frame. Likewise, the Y coordinate of
the top-left corner of the current frame will always be the current frame index’s Y
value multiplied by the height of each individual frame.
The width and height values of the source rectangle are always the same, and you can
use the frame size X and Y values to represent the width and height of the rectangle.
Next, change the background color to white by changing the color passed to the
GraphicsDevice.Clear method within the Draw method of your Game1 class. Then
compile and run the project. You should see the first sprite in the three rings sprite
sheet being drawn in the upper-left corner of the game window.
The sprite still isn’t animating, though, because you are continuously drawing only
the first image in the sheet. To get the image to animate, you need to update the cur-
rent frame index to cycle through the images in the sheet. Where should you add the
code to move the current frame index from one frame to the next? Remember that
you draw in the
Draw method, and you do everything else in Update. So, add this code
to your
Update method, before the base.Update call:
++currentFrame.X;
if (currentFrame.X >= sheetSize.X)
{
currentFrame.X = 0;
++currentFrame.Y;
if (currentFrame.Y >= sheetSize.Y)
currentFrame.Y = 0;
}
All this code does is increment the X property of the CurrentFrame object and then
check to make sure it isn’t greater than or equal to the number of frame columns. If
it is greater than the number of columns, it resets the
X property to 0 and increments
the
Y value to draw the next row of sprites in the sheet. Finally, if the Y value exceeds
the number of rows in the sheet, it resets
Y to 0, which starts the entire animation
sequence over starting with frame (0, 0).
Compile and run the project at this point and you should see your three rings image
spinning in the top-left corner of the window, as shown in Figure 2-9.
It’s about time you saw the fruits of your efforts in XNA. While the spinning rings
isn’t exactly the next great game, it does look really good, and you should be start-
ing to get a sense of how easy XNA is to use and just how powerful it can be. As you
can see, by cycling through images in a sprite sheet it becomes fairly straightforward
to create any kind of animation that can be drawn in sprite sheet format.
Adjusting the Framerate
|
35
Adjusting the Framerate
While the three rings animation looks pretty decent when you run the project, there
may be a time when your animation runs too quickly or too slowly and you want to
change the speed at which it animates.
I mentioned the framerate earlier, but here’s a quick reminder: framerate generally
refers to how many times per second a game redraws the entire scene. In XNA, the
default is 60 frames per second (fps). Unless you’re running the current project on a
very slow machine, you’re most likely seeing the three rings image project being
drawn at 60 fps.
There is also a different type of framerate, related to individual animations. This
framerate (often referred to as the animation speed) reflects the rate at which a given
animation cycles through images in the sprite sheet. Right now, your animation
speed for the three rings image is 60 fps, because you are drawing a new image from
the sprite sheet every time you redraw the scene (which is happening at 60 fps).
Figure 2-9. Three spinning rings…nothing better than that!
36
|
Chapter 2: Fun with Sprites
There are a few different ways you can change the animation speed of your three
rings animation. XNA’s
Game class has a property called TargetElapsedTime that tells
XNA how long to wait between calls to the
Game.Update method. Essentially, this
represents the amount of time between each frame being drawn. By default this is set
to 1/60 of a second, which gives XNA the default 60 fps.
To change the framerate of your project, add the following line of code at the end of
the
Game1 constructor:
TargetElapsedTime = new TimeSpan(0, 0, 0, 0, 50);
This tells XNA to only call Game.Update every 50 milliseconds, which equates to a
framerate of 20 fps. Compile the game and run it, and you should see the same three
rings animation, but animating at a much slower speed. Experiment with different
values in the
TimeSpan constructor (for example, 1 millisecond) and see how fast the
animation cycles through the sprite sheet.
Ideally, you’ll want to keep the framerate at around 60 fps, which means you can
typically leave the default framerate alone. Why is 60 frames per second the stan-
dard? This is the minimum refresh rate of a monitor or television set that won’t ren-
der flickering when viewed by the human eye.
If you push the framerate too high, XNA can’t guarantee that you’ll have the kind of
performance you’re expecting. The speed of the graphics card GPU, the speed of the
computer’s processor, the number of resources you consume, and the speed of your
code, go a long way toward determining whether your game will have that peak
performance.
Luckily, XNA has provided a way to detect if your game is suffering from perfor-
mance issues. The
GameTime object, which is passed in as a parameter in both the
Update and the Draw methods, has a Boolean property called IsRunningSlowly. You
can check this property at any time within those methods; if its value is
true, XNA
isn’t able to keep up with the framerate you have specified. In this case, XNA will
actually skip
Draw calls in an effort to keep up with your intended speed. This proba-
bly isn’t the effect that you desire in any game, so if this ever happens you’ll probably
want to warn the user that her machine is having a hard time keeping up with your
game.
Adjusting the Animation Speed
While adjusting the framerate of the game itself does affect the three rings animation
speed, it’s not the ideal way to do so. Why is that? When you change the framerate
for the project, it will affect the animation speed of all images, as well as things like
the speed of moving objects and so on. If you wanted one image to animate at 60 fps
and another to animate at 30 fps, you wouldn’t be able to accomplish that by adjust-
ing the overall game’s framerate.
Adjusting the Animation Speed
|
37
Remove the line you added in the previous section that set the TargetElapsedTime
member of the Game1 class, and let’s try a different route.
When adjusting a sprite’s animation speed, you typically want to do so for that sprite
alone. This can be done by building in a way to move to the next frame in the sprite
sheet only when a specified time has elapsed. To do this, add two class-level vari-
ables, which you’ll use to track the time between animation frames:
int timeSinceLastFrame = 0;
int millisecondsPerFrame = 50;
The timeSinceLastFrame variable will be used to track how much time has passed
since the animation frame was changed. The
millisecondsPerFrame variable will be
used to specify how much time you want to wait before moving the current frame
index.
The actual cycling of animation frames happens in your
Update method. So, the next
step is to check the elapsed time between animation frames and run the code that
moves the current frame only if the desired elapsed time has been reached. Modify
the code you’ve added to the
Update method to include the surrounding if state-
ment shown here (changes are in bold):
timeSinceLastFrame += gameTime.ElapsedGameTime.Milliseconds;
if (timeSinceLastFrame > millisecondsPerFrame)
{
timeSinceLastFrame -= millisecondsPerFrame;
++currentFrame.X;
if (currentFrame.X >= sheetSize.X)
{
currentFrame.X = 0;
++currentFrame.Y;
if (currentFrame.Y >= sheetSize.Y)
currentFrame.Y = 0;
}
}
As you can see here, you use the gameTime.ElapsedGameTime property to determine
how much time has passed since the previous frame change. This property indicates
how much time has passed since the previous call to
Update. You add the
Milliseconds property of that object to your TimeSinceLastFrame variable. When the
value of that variable is greater than the number of milliseconds you want to wait
between frame changes, you enter the
if statement, adjust the TimeSinceLastFrame
variable by subtracting the value in MillisecondsPerFrame, and then change the ani-
mation frame.
Compile and run the project now, and you should see the three rings image animat-
ing slowly. The important thing to note here is that the animation speed of the three
rings is running at a different framerate (20 fps) than the game itself (60 fps). With
this method, you’re able to run any number of images at different framerates with-
out sacrificing the framerate of your game as a whole.
38
|
Chapter 2: Fun with Sprites
What You Just Did
Good times are here to stay, because you now know how to animate in 2D XNA at
will! Let’s take a minute and review what you accomplished this chapter:
• You investigated what happens behind the scenes in an XNA game, including
the XNA program flow and the XNA game loop.
• You drew your first sprite on the screen.
• You learned a little bit about the content pipeline and its purpose.
• You moved a sprite around the screen.
• You played with sprite transparency, horizontal flipping, and other options.
• You drew sprites in different Z orders based on the layer depth property.
• You drew an animated sprite using a sprite sheet.
• You adjusted the framerate of an XNA game.
• You adjusted the individual animation speed of a sprite.
Summary
• When you create a new XNA project, it has a game loop and program flow built-
in. The game loop consists of an
Update/Draw cycle, while the program flow adds
steps at which the programmer can set game settings (
Initialize), load graphics
and sounds and other content (
LoadContent), and perform special unload opera-
tions (
UnloadContent).
• To draw an image on the screen, you need a
Texture2D object that will hold the
image in memory. The content pipeline prepares the image at compile time by
converting it to an internal XNA format. You then use a
SpriteBatch object to
draw the object on the screen.
• All sprites must be drawn between a
SpriteBatch.Begin and a SpriteBatch.End
call. These calls inform the graphics device that sprite information is being sent
to the card. The
Begin method has several overloads that allow you to change the
way transparency is handled and the way sprites are sorted.
• Animating sprites is typically done via a sprite sheet (a sheet containing multiple
frames of sprite images drawn flipbook-style). Cycling through those images
allows the sprite to appear animated.
• The default framerate of an XNA game is 60 fps. Changing that value will affect
sprite animations that do not use a separate timer to determine animation speed
as well as the overall game speed.
• To adjust the animation speed of an individual sprite, you can set a counter to
keep track of the last time you changed frames and only change frames every X
number of milliseconds.
Test Your Knowledge: Exercise
|
39
• While the default framerate in XNA draws a new frame every 16 milliseconds,
that is nothing compared to the default framerate of Chuck Norris’s fists. On
average, Chuck’s fists punch and mortally wound enemies every 4 milliseconds.
Test Your Knowledge: Quiz
1. What are the steps in an XNA game loop?
2. If you wanted to load a
Texture2D object, in which method should you do that?
3. What line of code should you use to change the framerate of an XNA game to 20
fps?
4. What should you pass in as the parameter of
Content.Load when loading a
Texture2D object?
5. Fact or fiction: the content pipeline will let you know at compile time if you add
an image to your project that it cannot parse.
6. You’re drawing a sprite, and you want the background to be transparent. What
steps do you need to take to draw it with a transparent background?
7. You have two sprites (A and B), and when they collide you always want A to be
drawn on top of B. What do you need to do?
8. What are the things you need to keep track of to cycle through a sprite sheet?
9. In the United States of America, which month is National Horseradish Month?
Test Your Knowledge: Exercise
1. In this chapter, you built an example where two XNA logo images moved
around the screen and bounced off the edges. Take the animated sprite example
that you built at the end of this chapter and make the animated sprite move and
bounce in a similar fashion—but in this case, make the animated sprite move in
both X and Y directions and bounce off of all four edges of the screen.
40
Chapter 3
CHAPTER 3
User Input and Collision Detection 3
As cool as it was to see a nice-looking set of rings spinning around and realize that
you’d made that happen yourself, there’s a long way to go with XNA. While the ani-
mated object looked nice, it didn’t do anything, and you had no control over its
movement. What fun is a game where there’s no interaction on the part of the
player? In this chapter, we’ll explore user input and collision detection as ways to
make your game actually do something besides look nice and pretty.
This chapter uses the code that you built at the end of Chapter 2 (the animated three
rings sprite). Open that project and make the changes discussed in this chapter there.
More Sprites
If you’re going to have a user-controlled object and build in some collision detection
against other objects, you’re going to need at least one more object on the screen.
Let’s add another animated sprite to your project.
Instead of using the same three rings image, we’ll use a different image for the sec-
ond animated sprite. Along with the source code for this book, you’ll find the code
for this chapter. In the AnimatedSprites\AnimatedSprites\Content\Images folder, you’ll
find an image called skullball.png. Add that image file to the project the same way
you’ve added previous image files (right-click the Content\Images folder in Solution
Explorer and select Add
➝ Existing Item, then browse to the skullball.png image and
add it to the solution).
Next, you’ll need to create a number of variables that will allow you to draw and ani-
mate the skull ball sprite. These variables should look somewhat familiar to you, as
they are very similar to the ones you used in Chapter 2 to draw and animate the three
rings sprite. Add the following class-level variables at the top of your
Game1 class:
Texture2D skullTexture;
Point skullFrameSize = new Point(75, 75);
Point skullCurrentFrame = new Point(0, 0);
Point skullSheetSize = new Point(6, 8);
More Sprites
|
41
int skullTimeSinceLastFrame = 0;
const int skullMillisecondsPerFrame = 50;
The skull ball image frames are 75 × 75 pixels, and there are six columns and eight
rows in the sprite sheet. You’ll want to change the names for the variables you’re
using in this game to draw and animate the three rings now to avoid confusion due
to having multiple sprites in your game. Add the word “rings” at the beginning of
each variable name, and change all the references to those variables—this will help
you keep things straight as you move through this chapter. The rings variables
should now be declared as:
Texture2D ringsTexture;
Point ringsFrameSize = new Point(75, 75);
Point ringsCurrentFrame = new Point(0, 0);
Point ringsSheetSize = new Point(6, 8);
int ringsTimeSinceLastFrame = 0;
int ringsMillisecondsPerFrame = 50;
Compile the project and make sure that you don’t have any compilation errors due
to the renaming of these variables. If you do, remember that the variable names
should be the same as in the previous project; you’ve just added the word “rings” to
the beginning of each name. Fix any errors until the game compiles properly.
Chapter 4 will walk you through some basic object-oriented design principles that
will make adding new sprites much easier. For now, you just want to get to some
user input and collision detection, so let’s add the code for the skull ball animation.
Load your skull ball image into the
skullTexture variable in the LoadContent method
in the same way you loaded your three rings image:
skullTexture = Content.Load<Texture2D>(@"Images\skullball");
Next, add the code that will move the current frame through the sequence of frames
on the sprite sheet. Remember, this is done in the
Update method. Because you’re
already doing this with the three rings sprite, you can just copy the code for the three
rings animation and rename the variables to make it work:
skullTimeSinceLastFrame += gameTime.ElapsedGameTime.Milliseconds;
if (skullTimeSinceLastFrame > skullMillisecondsPerFrame)
{
skullTimeSinceLastFrame -= skullMillisecondsPerFrame;
++skullCurrentFrame.X;
if (skullCurrentFrame.X >= skullSheetSize.X)
{
skullCurrentFrame.X = 0;
++skullCurrentFrame.Y;
if (skullCurrentFrame.Y >= skullSheetSize.Y)
skullCurrentFrame.Y = 0;
}
}
42
|
Chapter 3: User Input and Collision Detection
Finally, you need to draw the sprite on the screen. Remember that all drawing takes
place in the
Draw method. Once again, you already have code in that method that
draws the three rings sprite, and you can just copy that code and change the variable
names to draw the skull ball image. So that the two sprites aren’t drawn on top of each
other, change the second parameter of the skull ball’s
Draw call to draw the image at
(100, 100) rather than at (0, 0). Your skull ball
Draw call should look like this:
spriteBatch.Draw(skullTexture, new Vector2(100, 100),
new Rectangle(skullCurrentFrame.X * skullFrameSize.X,
skullCurrentFrame.Y * skullFrameSize.Y,
skullFrameSize.X,
skullFrameSize.Y),
Color.White, 0, Vector2.Zero,
1, SpriteEffects.None, 0);
Compile and run the application at this point and you’ll see both images animating,
as shown in Figure 3-1.
Not bad! In only a few moments, you’ve added a completely new animated sprite to
your game. Software development often yields moments of excitement and accom-
plishment, but that feeling seems to be amplified with game development because of
Figure 3-1. Two animated sprites doing their thing
Keyboard Input
|
43
the added visual (and later auditory) senses involved. These two animating objects
look pretty cool, but things are only just about to get interesting. Now you’ll learn how
to control the objects on the screen and give your application some user interaction.
User input in XNA is done via a combination of multiple device options: the key-
board, the mouse, the Xbox 360 controller, and Xbox 360 peripherals. The Zune
emulates other objects, such as the Xbox 360 controller, to allow you to program for
player input on that platform. Mouse input is never available on the Xbox 360, and
the Zune only supports its emulated controls—you won’t be plugging a mouse, a
keyboard, or any other input devices into a Zune anytime soon.
In this chapter, you’ll add support for the keyboard, the mouse, and the Xbox 360
controller into your game.
In the previous chapter, we discussed polling versus registering for events. The differ-
ence between the two strategies is really never more visible than when dealing with
input devices. Traditional Windows programmers are used to registering for events
such as key down events or mouse move events. With this programming model, the
application performs some actions and then, when the application has idle time, the
messages are pumped into the application and the events are processed.
In game development, there is no idle time, so it would be too expensive to enable
developers to register for events. Instead, it is up to you as the developer to con-
stantly poll input devices asking whether the player has performed any actions on
those devices.
That’s a slightly different way of looking at input and other messages and events, but
once you figure it out, game development will make a lot more sense.
Keyboard Input
Keyboard input is handled via the Keyboard class, which is in the Microsoft.XNA.
Framework.Input
namespace. The Keyboard class has a static method called GetState
that retrieves the current state of the keyboard in the form of a KeyboardState structure.
The
KeyboardState structure contains three key methods that will give you most of
the functionality you’ll need, as shown in Table 3-1.
Table 3-1. Key methods in the KeyboardState structure
Method Description
Keys[] GetPressedKeys( )
Returns an array of keys pressed at the time of the method call
bool IsKeyDown(Keys key)
Returns true or false depending on whether or not the key represented by
the parameter is down at the time of the method call
bool IsKeyUp(Keys key)
Returns true or false depending on whether the key represented by the
parameter is up at the time of the method call
44
|
Chapter 3: User Input and Collision Detection
As an example of the use of the Keyboard class, if you wanted to check to see whether
the “A” key was pressed, you’d use the following line of code:
if(Keyboard.GetState( ).IsKeyDown(Keys.A))
// BAM!!! A is pressed!
In this game, you’ll modify the code to allow the user to control the three rings
sprite, moving it up, down, left, or right with the arrow keys.
The three rings sprite is currently hardcoded to be drawn at (0, 0), but to move it
around the screen, you’ll need to be able to change the position at which you draw
the sprite. You’ll need to use a
Vector2 variable to represent the current position at
which to draw the three rings sprite. You’ll also want to add a variable to represent
the speed at which the three rings sprite will move. Because the speed at which you
move the three rings sprite won’t change during the course of the game, you can
make that variable a constant. Add these class-level variables at the top of your class:
Vector2 ringsPosition = Vector2.Zero;
const float ringsSpeed = 6;
Also, make sure that you change the second parameter of the SpriteBatch.Draw
method you’re using to draw the three rings sprite to use your new ringsPosition
variable rather than the hardcoded position indicated by Vector2.Zero. The second
parameter of that
Draw method represents the position at which to draw the sprite.
Now, you’ll need to add code to check whether the up, down, left, or right arrow
keys are pressed and, if any of them are, move the sprite’s position by changing the
value of the
ringsPosition variable.
Where should you put the code to check for input? Remember that there are only
two methods to choose from when determining where to put certain logic into an
XNA game loop:
Draw, which is for drawing objects, and Update, which is essentially
for everything else (keeping score, moving objects, checking collisions, etc.). So, go
ahead and add the following code to the end of your
Update method, just before the
call to
base.Update:
KeyboardState keyboardState = Keyboard.GetState( );
if (keyboardState.IsKeyDown(Keys.Left))
ringsPosition.X -= ringsSpeed;
if (keyboardState.IsKeyDown(Keys.Right))
ringsPosition.X += ringsSpeed;
if (keyboardState.IsKeyDown(Keys.Up))
ringsPosition.Y -= ringsSpeed;
if (keyboardState.IsKeyDown(Keys.Down))
ringsPosition.Y += ringsSpeed;
What about the code itself—wouldn’t an if/else statement be more efficient than
four
if statements? Well, yes, it would. But an if/else statement would only allow
you to move in one direction at a time, while using four separate
if statements
allows you to move diagonally as well (for example, combining the up and left key
inputs).
Mouse Input
|
45
Also note that instead of calling the GetState method of the Keyboard class in each if
statement, you’re only calling it once and then reusing the result from that call. This
is because the call to
GetState is fairly expensive, and this approach reduces the
number of times you have to make that call.
Compile the project and run it. You should see that now you can move your three
rings sprite object around the screen, as shown in Figure 3-2.
Mouse Input
XNA provides a Mouse class to interact with the mouse that behaves very similarly to
the
Keyboard class. The Mouse class also has a GetState method that you can use to
get data from the mouse in the form of a
MouseState struct. The Mouse class also has
another method worthy of note:
void SetPosition(int x, int y). This method will—
you guessed it—allow you to set the position of the mouse. This position is relative
to the upper-left corner of the game window.
Figure 3-2. Look out—spinning rings on the move!
46
|
Chapter 3: User Input and Collision Detection
The MouseState struct has several properties that will help you understand what is
happening with the mouse at the particular moment in time when you called
GetState. These properties are detailed in Table 3-2.
You may have noticed that by default the mouse cursor is hidden when the mouse is
dragged over an XNA game window. If you want to display the cursor in an XNA
window, you can do so by setting the
IsMouseVisible property of the Game class to
true.
Regardless of whether or not the mouse is visible, the
MouseState struct returned
from a call to
GetState will always hold the current state of the mouse device.
Let’s make the movement of the mouse control the three rings sprite’s movement
around the game window. Leave the keyboard controls added in the previous sec-
tion in place, and you’ll end up with multiple ways to control the sprite.
Because the
MouseState’s X and Y properties tell you the current position of the mouse
cursor, you can just assign the position of the three rings sprite to the current posi-
tion of the mouse.
However, because you’re allowing the player to use the keyboard as well, you can’t
always just set the three rings sprite’s position to the position of the mouse. If you
did, the three rings sprite would stay where the mouse is regardless of whether the
player moved the mouse or not.
Table 3-2. Important properties of the MouseState struct
Property Type Description
LeftButton ButtonState
Returns the state of the left mouse button.
MiddleButton ButtonState
Returns the state of the middle mouse button.
RightButton ButtonState
Returns the state of the right mouse button.
ScrollWheelValue int
Returns the total accumulated movement of the scroll
wheel since the game started. To find out how much the
scroll wheel has moved, compare this value to the previous
frame’s scroll wheel value.
X int
Returns the value of the horizontal position of the mouse in
relation to the upper-left corner of the game window. If the
mouse is to the left of the game window, the value is nega-
tive. If the mouse is to the right of the game window, the
value is greater than the width of the game window.
XButton1 ButtonState
Returns the state of additional buttons on some mice.
XButton2 ButtonState
Returns the state of additional buttons on some mice.
Y int
Returns the value of the vertical position of the mouse in
relation to the upper-left corner of the game window. If the
mouse is above the game window, the value is negative. If
the mouse is below the game window, the value is greater
than the height of the game window.
Gamepad Input
|
47
In order to determine whether the mouse has moved, add a class-level MouseState
variable at the top of your class:
MouseState prevMouseState;
This variable will keep track of the mouse state from the previous frame. You’ll use it
to compare the previous state to the current state of the mouse in each frame. If the
values of the
X and/or Y properties are different, you know the player has moved the
mouse and you can move the three rings sprite to the new mouse position.
Add the following code to the end of your
Update method, just before the call to
base.Update:
MouseState mouseState = Mouse.GetState( );
if(mouseState.X != prevMouseState.X ||
mouseState.Y != prevMouseState.Y)
ringsPosition = new Vector2(mouseState.X, mouseState.Y);
prevMouseState = mouseState;
This code will move the three rings sprite to the position of the mouse, but only if
the mouse has been moved. If you compile and run at this point, you should see that
you are now able to control the rings sprite with the mouse or the keyboard.
Gamepad Input
If you’re developing a game for Windows, you can still program for an Xbox 360
controller. You’ll have to have a wired controller, or you can purchase an Xbox 360
Wireless Receiver for around $20, which will allow you to connect up to four
wireless controllers to a PC.
The wireless Xbox 360 controller actually does come with a wire if you
buy the charge pack for that controller, but there is no data transfer
over that cable, so even when it’s plugged in it’s still a wireless control-
ler. The cable on the charge pack transfers electricity for the charge,
and nothing more.
Just as XNA provides a Mouse class for mouse input and a Keyboard class for key-
board input, it provides a
GamePad class for reading input from an Xbox 360 game-
pad. And yes, that’s right, there’s a
GetState method for the GamePad class, just as
there is for the other devices. There’s something to be said for standards, and
Microsoft’s XNA Framework is, for the most part, a superb example of how stan-
dardization across a large-scale system (in this case, a framework and API) can be of
such great benefit. Most of the time, you can tell how to use an object just by under-
standing the type of the object and knowing how similarly typed objects function.
That’s a tribute to a great design by the XNA team—kudos to them.
The
GetState method for the GamePad class accepts an enum parameter called
PlayerIndex that indicates which player’s controller you want to access, and it
48
|
Chapter 3: User Input and Collision Detection
returns a GamePadState struct that you can use to get data from the selected control-
ler. Key properties of the
GamePadState struct are listed in Table 3-3.
The GamePadState struct contains two methods that will give you most of the func-
tionality you need. These methods are listed in Table 3-4.
Looking at the properties in Table 3-3, you’ll notice that some of the controls are
represented by Boolean or two-state values (either on or off), while others are repre-
sented by values that fluctuate between a range of numbers (0 to 1, or –1 to 1). These
ranged properties are referred to as analog controls, and because they don’t have a
simple on or off value, they offer more accuracy and more precision in a gaming con-
trol. You may have noticed that in some games on an Xbox 360 you can move at dif-
ferent speeds with the triggers or thumbsticks—this is because as you press either
Table 3-3. Key properties of the GamePadState struct
Property Type Description
Buttons GamePadButtons
Returns a struct that tells which buttons are currently
pressed. Each button is represented by a
ButtonState
enum that specifies whether the button is pressed or not
pressed.
DPad GamePadDPad
Returns a struct that tells which directions on the DPad
are pressed.The
DPad structhas fourbuttons (up,down,
left, and right), each of which is represented by a
ButtonState enum that specifies whether the button is
pressed or not pressed.
IsConnected boolean
Indicates whether the controller is currently connected to
the Xbox 360.
ThumbSticks GamePadThumbSticks
Returns a struct that determines the directions of the
thumbsticks. Each thumbstick (left and right) is a
Vector2
object with X and Y values that have limits of -1 to 1 (e.g.,
for the left thumbstick, if you push it all the way left, its
X
value will be -1; if you don’t push it at all, the X value will
be
0; and if you push it all the way to the right, the X value
will be
1).
Triggers GamePadTriggers
Returns a struct that tells whether the triggers are
pressed. The
Triggers struct contains two float values
(left and right). A valueof
0 means the trigger isnot pressed
at all, while a value of
1 means the trigger is fully pressed.
Table 3-4. Key methods of the GamePadState struct
Method Description
bool IsButtonDown(Buttons)
Pass in a button or multiple buttons with a bitwise OR.
Returns
true if all buttons are down, and false otherwise.
bool IsButtonUp(Buttons)
Pass in a button or multiple buttons with a bitwise OR.
Returns
true if all buttons are up, and false otherwise.
Gamepad Input
|
49
button in a given direction, the controller will send a signal to the application in
varying strengths. This is an important concept to remember when programming
against an Xbox 360 controller and a feature that you’ll want to incorporate into
games that you develop. We’ll cover how to do that in this section.
All right, let’s add some code that will let you control your sprite with your Xbox 360
gamepad. Just as before, leave the code for the mouse and keyboard there, too, and
you’ll now have three ways to control your sprite.
Because the thumbsticks can contain
X and Y values ranging from -1 to 1, you’ll want
to multiply those values of the
ThumbSticks property by the ringsSpeed variable. That
way, if the thumbstick is pressed all the way in one direction, the sprite will move at
full speed in that direction; if the thumbstick is only slightly pushed in one direction,
it will move more slowly in that direction.
The following code will adjust your sprite’s position according to how much and in
which direction the left thumbstick on player one’s controller is pressed. Add this
code to the
Update method, just below the code for the keyboard and mouse input:
GamePadState gamepadState = GamePad.GetState(PlayerIndex.One);
ringsPosition.X += ringsSpeed * gamepadState.ThumbSticks.Left.X;
ringsPosition.Y -= ringsSpeed * gamepadState.ThumbSticks.Left.Y;
Compile and run the application now, and you’ll have full control of your three rings
sprite using your Xbox 360 controller.
Let’s spice things up a bit. Using an Xbox 360 controller should be a bit more fun
than it currently is. Let’s add a turbo functionality that doubles your movement
speed when active. Of course, when moving so rapidly around the screen in turbo
mode, you should feel some vibration in your controller due to the dangerous veloc-
ity at which you’ll be moving your sprite. You’ve probably felt the vibrations in an
Xbox 360 controller before. This type of mechanism is referred to as force feedback,
and it can greatly enhance the gameplay experience because it adds yet another sense
that pulls the user into the game.
The method
SetVibration will set vibration motor speeds for a controller. The
method returns a Boolean value indicating whether it was successful (
false means
that either the controller is disconnected or there is some other problem). The
method accepts a player index, and a float value (from 0 to 1) for the left and right
motors of the controller. Set the values to zero to stop the controller from vibrating.
Anything above zero will vibrate the controller at varying speeds. Modify the code you
just added to move the sprite with the Xbox 360 controller to include the following:
GamePadState gamepadState = GamePad.GetState(PlayerIndex.One);
if (gamepadState.Buttons.A == ButtonState.Pressed)
{
ringsPosition.X += ringsSpeed * 2 * gamepadState.ThumbSticks.Left.X;
ringsPosition.Y -= ringsSpeed * 2 * gamepadState.ThumbSticks.Left.Y;
GamePad.SetVibration(PlayerIndex.One, 1f, 1f);
}
50
|
Chapter 3: User Input and Collision Detection
else
{
ringsPosition.X += ringsSpeed * gamepadState.ThumbSticks.Left.X;
ringsPosition.Y -= ringsSpeed * gamepadState.ThumbSticks.Left.Y;
GamePad.SetVibration(PlayerIndex.One, 0, 0);
}
The code first checks to see if the A button on the controller is pressed. If it is, turbo
mode is activated, which means that you’ll move the sprite at twice the normal speed
and activate the vibration mechanism on the controller. If A is not pressed, you deac-
tivate the vibration and move at normal speed.
Compile and run the game to get a sense of how it works.
As you can see, the gamepad adds a different dimension of input and gives a differ-
ent feel to the game itself. It’s a powerful tool, but it won’t work well with all game
types. Make sure you think about what type of input device is best for the type of
game you are creating, because the input mechanism can go a long way toward
determining how fun your game is to play.
Keeping the Sprite in the Game Window
You have probably noticed that the rings sprite will disappear off the edge of the screen
if you move it far enough. It’s never a good idea to have the player controlling an object
that is off-screen and unseen. To rectify this, update the position of the sprite at the
end of the
Update method. If the sprite has moved too far to the left or the right or too
far up or down, correct its position to keep it in the game window. Add the following
code at the end of the
Update method, just before the call to base.Update:
if (ringsPosition.X < 0)
ringsPosition.X = 0;
if (ringsPosition.Y < 0)
ringsPosition.Y = 0;
if (ringsPosition.X > Window.ClientBounds.Width - ringsFrameSize.X)
ringsPosition.X = Window.ClientBounds.Width - ringsFrameSize.X;
if (ringsPosition.Y > Window.ClientBounds.Height - ringsFrameSize.Y)
ringsPosition.Y = Window.ClientBounds.Height - ringsFrameSize.Y;
Compile and run the game at this point, and you should be able to move the rings
sprite around the screen just as before; however, it should always stay within the
game window rather than disappearing off the edge of the screen.
Collision Detection
So, you’ve got a pretty good thing going thus far. Players can interact with your game
and move the three rings around the screen—but still there’s not a lot to do. You
need to add some collision detection in order to take the next step.
Collision Detection
|
51
Collision detection is a critical component of almost any game. Have you ever played
a shooter game where you seem to hit your target but nothing happens? Or a racing
game where you seem to be far away from a wall but you hit it anyway? This kind of
gameplay is infuriating to players, and it’s a result of poorly implemented collision
detection.
Collision detection can definitely make or break a gameplay experience. The reason it’s
such a make-or-break issue is because the more precise and accurate you make your
collision-detection algorithms, the slower your gameplay becomes. There is a clear
trade-off between accuracy and performance when it comes to collision detection.
One of the simplest and fastest ways to implement collision detection is through the
bounding-box algorithm. Essentially, when using a bounding-box algorithm, you
“draw” a box around each object on the screen and then check to see whether the
boxes themselves intersect. If they do, you have a collision. Figure 3-3 shows the
three rings and skull ball sprites with these invisible boxes surrounding the two
objects.
To implement the bounding-box algorithm in the current game, you’ll need to cre-
ate a rectangle for each sprite based on the position of the sprite and the width and
height of the frames for that sprite. The code will make more sense if you change the
position of the skull ball sprite to a variable, as you’ve done with the rings sprite.
Add the following class-level variable, which will be used to hold the position of the
skull ball sprite. Also, initialize the variable to the value that you’re currently setting
as the position of the sprite when you draw it, (100, 100):
Vector2 skullPosition = new Vector2(100, 100);
Next, pass the skullPosition variable as the second parameter to the spriteBatch.Draw
call where you actually draw the skull ball.
OK now that you have a variable representing the position of the skull ball sprite,
you can create a rectangle using that variable and the size of the skull ball frame and
check to see whether it intersects with a similarly created rectangle for the rings
sprite.
Figure 3-3. Bounding boxes around your objects
52
|
Chapter 3: User Input and Collision Detection
Add the following method to your Game1 class, which will create rectangles for each
sprite using the XNA Framework
Rectangle struct. The Rectangle struct has a
method called
Intersects that can be used to determine whether two rectangles
intersect:
protected bool Collide( )
{
Rectangle ringsRect = new Rectangle((int)ringsPosition.X,
(int)ringsPosition.Y, ringsFrameSize.X, ringsFrameSize.Y);
Rectangle skullRect = new Rectangle((int)skullPosition.X,
(int)skullPosition.Y, skullFrameSize.X, skullFrameSize.Y);
return ringsRect.Intersects(skullRect);
}
Next, you need to use the new Collide method to determine if the objects have col-
lided. If so, you’ll want to perform some action. In this case, you’re just going to
close down the game by calling the
Exit method if the sprites collide. Obviously, this
isn’t something you’d want to do in a real game, because just quitting the game
when something like a collision occurs will seem like a bug to a player. But because
we just want to see collision detection in action, this will work for now.
Add the following code to the end of your
Update method, just before the call to
base.Update:
if (Collide( ))
Exit( );
Compile and run the game. If you move your rings object too close to the ball, the
application will shut down.
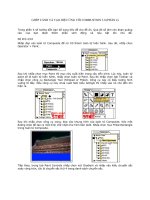
You may notice that the ball and the rings never actually touch. Any idea why this is?
If you look at the sprite sheet for the rings (see Figure 3-4), you’ll see that there’s a
fair amount of space between the images of each frame. The distance is com-
pounded even further when the large ring rotates horizontally. All that whitespace
gets added to the collision check because you’re using your frame size variable as the
size of the object when building the rectangle for your collision check.
One way to rectify this is to adjust your sprite sheet to not have so much whitespace.
Another way is to create a smaller rectangle for use in the collision detection. This
smaller rectangle must be centered on the sprite and therefore needs to be offset
slightly from each edge of the actual frame.
To create a smaller rectangle, define an offset variable for each sprite, which will
indicate how much smaller in each direction the collision check rectangle is than the
overall frame. Add these two class-level variables to your project:
int ringsCollisionRectOffset = 10;
int skullCollisionRectOffset = 10;
Collision Detection
|
53
Figure 3-4. All the whitespace in the rings image creates a less-than-accurate collision check when
using the frame size for collision detection
54
|
Chapter 3: User Input and Collision Detection
Next, you’ll use these variables to construct a rectangle that is slightly smaller than
the actual frame size. Adjust your
Collide method as shown here, and you’ll have
more accurate collision detection:
protected bool Collide( )
{
Rectangle ringsRect = new Rectangle(
(int)ringsPosition.X + ringsCollisionRectOffset,
(int)ringsPosition.Y + ringsCollisionRectOffset,
ringsFrameSize.X - (ringsCollisionRectOffset * 2),
ringsFrameSize.Y - (ringsCollisionRectOffset * 2));
Rectangle skullRect = new Rectangle(
(int)skullPosition.X + skullCollisionRectOffset,
(int)skullPosition.Y + skullCollisionRectOffset,
skullFrameSize.X - (skullCollisionRectOffset * 2),
skullFrameSize.Y - (skullCollisionRectOffset * 2));
return ringsRect.Intersects(skullRect);
}
Compile and run the game to try out the new collision detection. It should be much
more accurate using this method.
There is a closely related algorithm that uses a sphere instead of a box.
You could use that here as well, especially given that your current
objects are circular; however, you’ll be using some noncircular objects
in future chapters, so stick with the bounding-box method for now.
Even now that you’ve fine-tuned the algorithm a bit, running the application will
show that the collision detection is not 100% accurate. In this limited test, the defi-
ciencies are easy to see. The goal in any game, however, is not necessarily to get colli-
sion detection 100% accurate, but rather to get it accurate to the point where the
player won’t know the difference.
This may sound like cheating, but in reality, it boils down to a performance issue.
For example, let’s say you’re working with a sprite that’s not circular, like an air-
plane. Drawing a single box around an airplane will yield some very inaccurate colli-
sion detection. You can get around that by adding multiple, smaller boxes to your
airplane and checking for collisions between each of these smaller boxes and any
other object in the game. Such a bounding-box layout is shown in Figure 3-5.
The example on the left will be fairly inaccurate, while the one on the right will greatly
improve the accuracy of the algorithm. But what problem will you run into? Let’s say
you have two planes in your game and you want to see if they collide. Instead of one
set of calculations for the two planes, you now have to compare each box in each plane
against each box in the opposite plane. That’s 25 sets of calculations to compare two
planes! Imagine if you added more planes to your code—the calculations required
would go up exponentially and could eventually affect the speed of your game.