Professional ASP.NET 2.0 XML phần 8 pot
Bạn đang xem bản rút gọn của tài liệu. Xem và tải ngay bản đầy đủ của tài liệu tại đây (1.25 MB, 60 trang )
Category category2 = new Category();
category2.CategoryID = 2;
category2.CategoryName = “Condiments”;
category2.Description = “Sweet and savory sauces, relishes,” +
“ spreads, and seasonings”;
CategoriesList list = new CategoriesList();
list.AddCategory(category1);
list.AddCategory(category2);
XmlSerializer serializer = new XmlSerializer(typeof(CategoriesList));
TextWriter writer = new StreamWriter(xmlFilePath);
//Serialize the Category and close the TextWriter
serializer.Serialize(writer, list);
writer.Close();
Response.Write(“File written successfully”);
}
</script>
<html xmlns=” >
<head runat=”server”>
<title> Serializing a Collection Object</title>
</head>
<body>
<form id=”form1” runat=”server”>
<div>
</div>
</form>
</body>
</html>
In this code, two instances of the Category class are created and populated with appropriate values.
They are then added to the
CategoriesList collection object. After that, the collection object is passed
to the constructor of the
XmlSerializer object as follows.
XmlSerializer serializer = new XmlSerializer(typeof(CategoriesList));
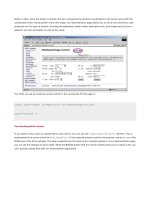
Figure 12-2 shows the resultant XML produced by the page.
Deserializing XML
The XmlSerializer class provides a Deserialize() method that you can invoke to read an XML
stream and use to create and populate objects. You can deserialize from a generic stream, a
TextReader,
or an
XmlReader. The overloads for Deserialize are:
Object Deserialize(Stream);
Object Deserialize(TextReader) ;
Object Deserialize(XmlReader);
Object Deserialize(XmlReader, String);
Object Deserialize(XmlReader, XmlDeserializationEvents);
Object Deserialize(XmlReader, String, XmlDeserializationEvents);
The remaining parameters allow you to pass the encoding style and the XmlDeserializationEvents
object to the deserialization process.
394
Chapter 12
15_596772 ch12.qxd 12/13/05 11:15 PM Page 394
Figure 12-2
To deserialize a
Category object from the file Category.xml (created in the previous example), you can
simply open a file stream, instantiate an
XmlSerializer, and call Deserialize. The complete code is
shown in Listing 12-12.
Listing 12-12: Deserializing an XML File into an Object
<%@ Page Language=”C#” %>
<%@ Import Namespace=”System.IO” %>
<%@ Import Namespace=”System.Xml.Serialization” %>
<script runat=”server”>
void Page_Load(object sender, System.EventArgs e)
{
string xmlFilePath = @”C:\Data\Category.xml”;
XmlSerializer serializer = new XmlSerializer(typeof(Category));
TextReader reader = new StreamReader(xmlFilePath);
//Deserialize the Category and close the TextReader
Category categoryObj = (Category)serializer.Deserialize(reader);
reader.Close();
Response.Write(“CategoryID: “ + categoryObj.CategoryID + “<br>”);
Response.Write(“Category Name: “ + categoryObj.CategoryName + “<br>”);
Response.Write(“Category Description: “ +
categoryObj.Description + “<br>”);
}
</script>
<html xmlns=” >
<head runat=”server”>
<title>Simple XML Deserialization</title>
</head>
<body>
<form id=”form1” runat=”server”>
<div>
395
XML Serialization
15_596772 ch12.qxd 12/13/05 11:15 PM Page 395
</div>
</form>
</body>
</html>
As with serialization using the Serialize() method, the deserialization also requires that the
XmlSerializer object be constructed using the type of the object that is being deserialized.
XmlSerializer serializer = new XmlSerializer(typeof(Category));
You then create an instance of the StreamReader object passing in the path to the XML file as an
argument.
TextReader reader = new StreamReader(xmlFilePath);
After that, you invoke the Deserialize() method with the StreamReader object as an argument.
Category categoryObj = (Category)serializer.Deserialize(reader);
Note that the return value of the Deserialize method is of type Object and it needs to be typecast
into
Category object. After you have the Category object populated with the values, you can display
them onto the browser using the
Response.Write statements.
Handling Events Raised by the XmlSerializer
If the input stream does not match what is expected, the deserialization process will attempt to recover
as best it can, but as a result one or more objects might be set to null when the procedure has completed.
To help you handle these situations, the
XmlSerializer class publishes four events that you can trap.
These events are raised when certain conditions arise. Table 12-3 lists the events that the
XmlSerializer
class triggers during the deserialization process.
Table 12-3. Events of the XmlSerializer Class
Event Description
UnknownAttribute Fires when the XmlSerializer encounters an XML attribute of
unknown type during deserialization
UnknownElement Fires when the XmlSerializer encounters an XML element of
unknown type during deserialization
UnknownNode Fires when the XmlSerializer encounters any XML node, including
Attribute and Element during deserialization
UnreferencedObject Fires when the XmlSerializer encounters a recognized type that is
not used during deserialization; occurs during the deserialization of a
SOAP-encoded XML stream
396
Chapter 12
15_596772 ch12.qxd 12/13/05 11:15 PM Page 396
You can catch these events by creating an appropriate delegate and referencing a method to be executed
when the event is raised. The
System.Xml.Serialization namespace supplies a delegate for each of
these events:
❑
XmlAttributeEventHandler
❑ XmlElementEventHandler
❑ XmlNodeEventHandler
❑ UnreferencedObjectEventHandler
You subscribe to an event by hooking up the delegate for the UnknownElement event with the
XmlSerializer object. The following code shows how to set up the event handler for the
UnknownElement method:
serializer.UnknownElement += new
XmlElementEventHandler(XmlSerializer_UnknownElement);
After you have an event handler registered, you can declare the event handler.
void XmlSerializer_UnknownElement(object sender, XmlElementEventArgs e)
{
//logic
}
Listing 12-13 shows how to set up event handlers to log the event details about nodes the
XmlSerializer could not map to any class members to the browser.
Listing 12-13: Handling Events Raised by the XmlSerializer Class
<%@ Page Language=”C#” %>
<%@ Import Namespace=”System.IO” %>
<%@ Import Namespace=”System.Xml” %>
<%@ Import Namespace=”System.Xml.Serialization” %>
<script runat=”server”>
void Page_Load(object sender, System.EventArgs e)
{
string xmlFilePath = @”C:\Data\Category.xml”;
XmlSerializer serializer = new XmlSerializer(typeof(Category));
serializer.UnknownElement += new
The EventArgs parameter passed to the event handler contains information about
the unexpected element and the position in the input stream at which it occurred.
For example, when the
XmlSerializer fires for an unmapped attribute in the XML
stream, it passes a reference to itself and an
XmlAttributeEventArgs object to the
registered event handler. The arguments object contains the line number and posi-
tion of the attribute within the deserialized XML document, as well as the attribute
itself. You can use this information to take some corrective action or record the fact
that some unexpected input was received.
397
XML Serialization
15_596772 ch12.qxd 12/13/05 11:15 PM Page 397
XmlElementEventHandler(XmlSerializer_UnknownElement);
TextReader reader = new StreamReader(xmlFilePath);
//Deserialize the Category and close the TextReader
Category categoryObj = (Category)serializer.Deserialize(reader);
reader.Close();
Response.Write(“<b>Result of Deserialization:” + “</b><br>”);
Response.Write(“CategoryID: “ + categoryObj.CategoryID + “<br>”);
Response.Write(“Category Name: “ + categoryObj.CategoryName + “<br>”);
}
void XmlSerializer_UnknownElement(object sender, XmlElementEventArgs e)
{
Response.Write(“<b>Unknown Element:” + “</b><br>”);
Response.Write(“Unknown Element Name: “ + e.Element.Name + “<br>”);
Response.Write(“Unknown Element Value: “ + e.Element.InnerText + “<br><br>”);
}
</script>
<html xmlns=” >
<head runat=”server”>
<title>Handling Events Raised by XmlSerializer </title>
</head>
<body>
<form id=”form1” runat=”server”>
<div>
</div>
</form>
</body>
</html>
This code assumes the following declaration of the Category class.
public class Category
{
public long CategoryID;
public string CategoryName;
}
As you can see, the Category class is missing the Description field that was used in the previous exam-
ples. The contents of the XML file used as an input XML document to the Listing 12-13 are as follows:
<?xml version=”1.0” encoding=”utf-8”?>
<Category xmlns:xsi=”
xmlns:xsd=” /><CategoryID>1</CategoryID>
<CategoryName>Beverages</CategoryName>
<Description>Soft drinks, coffees, teas, beers, and ales</Description>
</Category>
By comparing the Category class and the contents of the XML file, you can see that the Description
node in the XML file does not have a matching field in the Category class. When you request the code
in Listing 12-13 in a browser, you will see the output shown in Figure 12-3.
398
Chapter 12
15_596772 ch12.qxd 12/13/05 11:15 PM Page 398
Figure 12-3
During the deserialization, when the
Description node is encountered, the XmlSerializer_
UnknownElement
event handler is invoked wherein you display information about the unexpected node
in the browser.
void XmlSerializer_UnknownElement(object sender, XmlElementEventArgs e)
{
Response.Write(“<b>Unknown Element:” + “</b><br>”);
Response.Write(“Unknown Element Name: “ + e.Element.Name + “<br>”);
Response.Write(“Unknown Element Value: “ + e.Element.InnerText
+ “<br><br>”);
}
Note that the XmlElementEventArgs object exposes a property named ObjectBeingSerialized that
enables you to get reference to the
Category object during the deserialization. This can be very useful
when you want to execute some logic based on the contents of the object being populated.
Mapping SQL Server Data Using Deserialization
When you get it right, XML deserialization is almost trivial, but getting it right relies on you having a
valid XML data and making sure that the class or classes you’re attempting to deserialize into are com-
patible with the contents of that file. This is a common issue when you are trying to map the results of
a sql query onto an object using SQL Server’s XML support and XML serialization.
As you have seen in the previous chapters, SQL Server can return the results of a query in XML format.
The XML document describing the result of a query corresponds to the serialized version of a custom
document and, if you can create a class that matches the schema of the XML document, you will be able
to deserialize SQL Server’s XML response into an instance of the custom class. This section describes a
technique for moving data out of SQL Server and into an instance of a custom class, without using
DataSets. The custom object is an object that represents a customer.
The advantage of this approach, as compared to a straight ADO.NET approach
based on DataSets, is that you don’t have to worry about related tables and accessing
related rows in
DataTable objects. This approach also drastically reduces the
amount of code required to consume data retrieved from a database.
399
XML Serialization
15_596772 ch12.qxd 12/13/05 11:15 PM Page 399
For the purposes of this example, you use the following sql query that queries the Person.Contact
table in the AdventureWorks database and returns the results in the form of an XML document.
Select ContactID, FirstName, MiddleName, LastName, EMailAddress from
Person.Contact as Contacts where ContactID = 2 for xml auto, elements
The last clause of the statement instructs SQL Server to return the result of the query in XML format. The
result of this query is an XML document with the following structure:
<Contacts>
<ContactID>2</ContactID>
<FirstName>Catherine</FirstName>
<MiddleName>R.</MiddleName>
<LastName>Abel</LastName>
<EMailAddress></EMailAddress>
</Contacts>
At this point, you can write a class with public fields that reflect the hierarchy of the XML document
returned by the query.
For the purposes of this example, you manually create the
Contact class as shown in Listing 12-14.
Listing 12-14: Contact Class
[XmlRoot(“Contacts”)]
public class Contact
{
public string ID;
public string FirstName;
public string MiddleName;
public string LastName;
}
400
Chapter 12
Although it’s fairly straightforward to build this class manually, you can use the XSD
command line tool to automate the generation of the class. To use this tool, copy the
XML document returned by the query, paste it into a new text document, and save
the document in a file with a short path with extension XML. You can save it as
Contacts.xml in the root path; then open a Command Prompt window and switch to
the
<DriveName>\Program Files\Microsoft Visual Studio 8\SDK\v2.0\Bin
folder. There you can execute the following statement to extract an XML schema from
the document:
xsd c:\Contacts.xml
The XSD utility will process the XML file and will generate a new file with the doc-
ument’s XSD schema. The XSD file will be saved in the current folder. Run again
the XSD utility, this time specifying the name of the XSD file and two options: the
/classes option (to generate the classes that correspond to the specified schema)
and the
/language option (to generate C# code):
xsd Contacts.xsd /classes /language:cs
This command will generate a new file, the Contacts.cs file, which contains a seri-
alizable class that has the same structure as the XML document.
15_596772 ch12.qxd 12/13/05 11:15 PM Page 400
If you compare the Contacts class declaration with the XML output returned by the sql query, you will
see the following anomalies.
❑ The class name is declared as
Contact whereas the XML output contains <Contacts> node as
the root node. To properly map the
<Contacts> element back to the class, the Contact class is
decorated with an
XmlRoot attribute that specifies the name to be used for deserialization pur-
poses. This ensures proper mapping between the SQL Server data and the
Contact class.
❑ There is an element named
<ContactID> in the XML output whereas the same element is
declared as
ID in the Contact class declaration. The deserialization code handles this using the
XmlAttributeOverrides class that enables you to override an element name at runtime. This
is shown in Listing 12-14.
❑ There is an element named
<EMailAddress> in the XML output, and the Customer class does
not have a corresponding field to hold that value. Listing 12-14 handles this situation by wiring
up an
UnknownElement event handler with the XmlSerializer object.
Now that you have an understanding of the features to implement, take a look at Listing 12-15.
Listing 12-15: Mapping Contacts Data in AdventureWorks Database with the
Contact Object
<%@ Page Language=”C#” %>
<%@ Import Namespace=”System.Collections” %>
<%@ Import Namespace=”System.Web.Configuration” %>
<%@ Import Namespace=”System.Data.SqlClient” %>
<%@ Import Namespace=”System.IO” %>
<%@ Import Namespace=”System.Xml” %>
<%@ Import Namespace=”System.Xml.Serialization” %>
<script runat=”server”>
void Page_Load(object sender, System.EventArgs e)
{
Contact cont;
//Rename the ContactID to ID element and add it as an attribute
XmlElementAttribute contIDElement = new XmlElementAttribute();
contIDElement.ElementName = “ContactID”;
XmlAttributes attributesIdCol = new XmlAttributes();
attributesIdCol.XmlElements.Add(contIDElement);
XmlAttributeOverrides attrOverrides = new XmlAttributeOverrides();
attrOverrides.Add(typeof(Contact), “ID”, attributesIdCol);
string connString =
WebConfigurationManager.ConnectionStrings[“adventureWorks”].
ConnectionString;
SqlConnection sqlConn = new SqlConnection(connString);
sqlConn.Open();
//Instantiate the SqlCommand object and pass the query to be executed
SqlCommand sqlCommand = new SqlCommand(“Select ContactID,” +
“FirstName, MiddleName, LastName, EMailAddress from Person.Contact “ +
“as Contacts where ContactID = 2 for xml auto, elements”, sqlConn);
XmlReader reader = sqlCommand.ExecuteXmlReader();
XmlSerializer serializer = new XmlSerializer(typeof(Contact),
attrOverrides);
serializer.UnknownElement += new
XmlElementEventHandler(XmlSerializer_UnknownElement);
401
XML Serialization
15_596772 ch12.qxd 12/13/05 11:15 PM Page 401
if (serializer.CanDeserialize(reader))
{
cont = (Contact)serializer.Deserialize(reader);
Response.Write(“<b>Result of Deserialization:” + “</b><br>”);
Response.Write(“ID: “ + cont.ID + “<br>”);
Response.Write(“First Name: “ + cont.FirstName + “<br>”);
Response.Write(“Middle Name: “ + cont.MiddleName + “<br>”);
Response.Write(“Last Name: “ + cont.LastName + “<br>”);
}
else
Response.Write(“Cannot serialize data”);
}
void XmlSerializer_UnknownElement(object sender, XmlElementEventArgs e)
{
Response.Write(“<b>Unknown Element:” + “</b><br>”);
Response.Write(“Unknown Element Name: “ + e.Element.Name + “<br>”);
Response.Write(“Unknown Element Value: “ + e.Element.InnerText +
“<br><br>”);
}
</script>
<html xmlns=” >
<head runat=”server”>
<title>
Mapping Contacts Data in AdventureWorks Database with the Customer
Object
</title>
</head>
<body>
<form id=”form1” runat=”server”>
<div>
</div>
</form>
</body>
</html>
Before examining the code in details, the output produced by Listing 12-14 is shown in Figure 12-4.
Figure 12-4
402
Chapter 12
15_596772 ch12.qxd 12/13/05 11:15 PM Page 402
Listing 12-14 starts by mapping the <ContactID> element in the XML output to the ID field in the
Contact class through the XmlAttributeOverrides class. After that, it executes the sql query and
retrieves the XML output of the query onto an
XmlReader object. This XmlReader object is supplied as
an input to the
Deserialize() method. Before invoking the Deserialize() method, the code also
sets up an event handler to handle the
UnknownElement event that will be raised when the serializer
encounters an unexpected node in the input XML.
Generics and XML Serialization
With the release of .NET Framework 2.0, the CLR gets a huge addition in expressive power in that
Generic types get added with full support in the runtime. XML serialization has been extended to sup-
port generic types for serialization and deserialization.
Because of the built-in support for generics, you can take advantage of XML serialization to serialize and
deserialize particular specializations of the generics type by using the following code.
XmlSerializer serializer = new XmlSerializer
(typeof(NameValue<int, string>));
What Are Generics?
Generics are used to help make the code in your software components much more
reusable. They are a type of data structure that contains code that remains the same;
however, the data type of the parameters can change with each use. Additionally, the
usage within the data structure adapts to the different data type of the passed vari-
ables. In summary, a generic is a code template that can be applied to use the same
code repeatedly. Each time the generic is used, it can be customized for different
data types without needing to rewrite any of the internal code. Generics also allow
you to avoid the messy and intensive conversions from reference types to native
types. Additionally, you can create routines that are much more type-safe.
A generic is defined using a slightly different notation. The following is the basic
code for a generic named
Compare that can compare two items of the same type and
return the larger or smaller value, depending on which method is called:
public class Compare<ItemType, ItemType>
{
public ItemType ReturnLarger(ItemType data, ItemType data2)
{
// logic
}
}
This generic could be used with any data type, ranging from basic data types such as
integers to complex classes and structures. When you use the generic, you identify
what data type you are using with it. For example, to use an integer with the previ-
ous
Compare generic, you would write code similar to the following:
Compare<int, int> compare = new Compare<int, int>;
int result = compare.ReturnLarger(3, 5);
403
XML Serialization
15_596772 ch12.qxd 12/13/05 11:15 PM Page 403
Before looking at the code required to serialize or deserialize a generic type, Listing 12-16 examines the
code of the generic type.
Listing 12-16: NameValue Class
using System;
using System.Collections;
using System.Xml.Serialization;
[XmlRoot(“NameValuePair”)]
public class NameValue<KeyType, ValueType>
{
private KeyType _key;
private ValueType _value;
public NameValue()
{
}
public ValueType Value
{
get
{
return _value;
}
set
{
_value = value;
}
}
public KeyType Key
{
get
{
return _key;
}
set
{
_key = value;
}
}
}
In this code, you declare a class named NameValue that accepts two runtime types—one for the key ele-
ment, and another one for the value element. As part of the class declaration, there is also an
XmlRoot
attribute that ensures the root element of the XML document is named as NameValuePair. The code
then contains two public properties named
Value and Key that simply set or get values from the
private variables
_value and _key respectively. Now that you understand the implementation of the
NameValue class, Listing 12-17 discusses the code required to serialize or deserialize the NameValue
class using XML serialization.
404
Chapter 12
15_596772 ch12.qxd 12/13/05 11:15 PM Page 404
Listing 12-17: Performing Serialization and Deserialization with Generics
<%@ Page Language=”C#” %>
<%@ Import Namespace=”System.IO” %>
<%@ Import Namespace=”System.Xml.Serialization” %>
<script runat=”server”>
private string _xmlFilePath = @”C:\Data\NameValue.xml”;
void Serialize(object sender, EventArgs e)
{
NameValue<int, string> nameVal = new NameValue<int, string>();
nameVal.Key = 1;
nameVal.Value = “Manufacturing”;
XmlSerializer serializer = new XmlSerializer
(typeof(NameValue<int, string>));
TextWriter writer = new StreamWriter(_xmlFilePath);
//Serialize the NameValue object and close the TextWriter
serializer.Serialize(writer, nameVal);
writer.Close();
lblResult.Text = “File written successfully”;
}
void Deserialize(object sender, EventArgs e)
{
XmlSerializer serializer = new XmlSerializer
(typeof(NameValue<int, string>));
TextReader reader = new StreamReader(_xmlFilePath);
//Deserialize the Category and close the TextReader
NameValue<int, string> nameVal = (NameValue<int, string>)
serializer.Deserialize(reader);
reader.Close();
lblResult.Text = “Key : “ + nameVal.Key + “<br>”;
lblResult.Text += “Value: “ + nameVal.Value;
}
</script>
<html xmlns=” >
<head runat=”server”>
<title>Using Generics for Serialization and Deserialization</title>
</head>
<body>
<form id=”form1” runat=”server”>
<div>
<asp:Button runat=”Server” ID=”btnSerialize”
OnClick=”Serialize” Text=”Serialize” />
<asp:Button runat=”Server” ID=”btnDeserialize”
OnClick=”Deserialize” Text=”Deserialize” />
<br/><br/>
<asp:Label runat=”Server” ID=”lblResult” Height=”21px” Width=”351px”/>
</div>
</form>
</body>
</html>
405
XML Serialization
15_596772 ch12.qxd 12/13/05 11:15 PM Page 405
Listing 12-17 contains two methods named Serialize() and Deserialize(). The Serialize()
method starts by declaring a NameValue object with the type parameters set to int and string,
respectively.
NameValue<int, string> nameVal = new NameValue<int, string>();
The code then invokes the Key and Value properties of the NameValue object and sets its values
appropriately.
nameVal.Key = 1;
nameVal.Value = “Manufacturing”;
You supply the NameValue object as a parameter to the constructor of the XmlSerializer object, indi-
cating the typed parameters.
XmlSerializer serializer = new XmlSerializer
(typeof(NameValue<int, string>));
That’s all there is to serializing a generic type. The rest of the code is similar to the previous code exam-
ples. The
Deserialize() method also works along the same lines passing in the typed parameters to
the constructor of the
XmlSerializer and then finally invoking the Deserialize() method to deseri-
alize the XML data into an instance of the
NameValue object.
Serializing Generics Collections
In addition to creating simple generic types, you can also create strongly typed generic collections that
provide better type safety and performance than non-generic strongly typed collections. The
System
.Collections.Generic
namespace contains a number of interfaces and classes that allow you to
define generic collections. Consider the following code to understand how to create a strongly typed
categories collection object using the
List class.
List<Category> list = new List<Category>();
Serializing this collection is simple and straightforward. All you need to do is to pass in the type of the
collection to the constructor of the
XmlSerializer class.
XmlSerializer serializer = new XmlSerializer(typeof(List<Category>));
After you indicate the type of the collection, you can simply invoke the Serialize() method to serial-
ize the contents of the
List collection object onto an XML file indicated through the TextWriter object.
serializer.Serialize(writer, list);
Output produced by serializing the strongly typed category collection object is shown in Figure 12-5.
By overriding the attribute overrides, it is also possible to rename the root XML element name
“ArrayOfCategory” to a different value.
406
Chapter 12
15_596772 ch12.qxd 12/13/05 11:15 PM Page 406
Figure 12-5
Pregenerating Serialization Assemblies
The XML serializer is a powerful tool that can transform a fair number of .NET Framework classes into
portable XML code. The key thing to note is that the serializer behaves similar to a compiler. It first
imports type information from the class and then serializes it to the output stream. It also works the
other way around. The serializer reads XML data and maps elements to the target class members.
Because each of these classes is unique in certain way, it is impossible for a generic tool to work effi-
ciently on all possible classes. That’s why when you try to serialize a type for the first time, there can be
an unexpected performance hit that can have a negative impact on your application.
Now with .NET Framework 2.0, there is a new tool named XML Serializer Generator (
Sgen.exe) that
allows you to pregenerate those assemblies and deploy them along with your application. The XML
Serializer Generator creates an XML serialization assembly for types in a specified assembly that can go
a long way in improving the startup performance of an
XmlSerializer.
You can find the sgen.exe in the following path.
<Drive Name>:\Program Files\Microsoft Visual Studio 8\SDK\v2.0\Bin
Navigate to the above path in the command prompt and enter the following command.
sgen.exe <Name of the Assembly that contains the types to be serialized>
By default (without using the XML Serializer Generator), an XmlSerializer gener-
ates serialization code and a serialization assembly for each type every time an
application is run. To avoid this performance hit, it is recommended that you use the
Sgen.exe tool to generate those assemblies in advance. The
SGen.exe generates seri-
alization code for all the types contained in the assembly or executable specified by
file name.
407
XML Serialization
15_596772 ch12.qxd 12/13/05 11:15 PM Page 407
If the assembly containing the type to serialize is named SerializationAssembly.dll, the associated
serialization assembly will be named
SerializationAssembly.XmlSerializers.dll. Output pro-
duced by the serializer generator is shown in Figure 12-6.
Figure 12-6
For more options on using sgen, type in
sgen /? from the command prompt.
After the assembly is generated, you can simply deploy it in the bin directory of the application so that
the CLR can automatically locate the assembly and use it at runtime.
Handling Exceptions
The XmlSerializer throws exceptions to indicate all sorts of problems. In most cases, the Serialize()
or Deserialize() methods will throw a System.InvalidOperationException, which makes the
StackTrace property useless because it does not offer any more insight into the root cause of the excep-
tion. To make matters worse, the exception’s
Message property only yields very generic information. For
example, if you are trying to serialize an undeclared type for example, the
Serialize() method would
throw a
System.InvalidOperationException with the following message: “There was an error gener-
ating the XML document.”
This message is annoying, at best, because you already know that much when the exception is thrown
and this does not provide any help when it comes to troubleshooting the problem. The trick to get to the
real exception information about the problem is to examine the exception’s
InnerException property,
which contains very detailed information about the problem and where it occurred.
Listing 12-18 demonstrates how to set up the exception handler and how to access the
InnerException
property.
The InnerException’s message is usually descriptive and provides everything you
need to know the about the exception. It not only pinpoints the problem but in some
cases it also offers a possible solution.
408
Chapter 12
15_596772 ch12.qxd 12/13/05 11:15 PM Page 408
Listing 12-18: Handling Exceptions Generated by XmlSerializer
void Page_Load(object sender, EventArgs e)
{
try
{
string xmlFilePath = @”C:\Data\Collections.xml”;
List<Category> list = new List<Category>();
Category categoryObj = new Category();
categoryObj.CategoryID = 1;
categoryObj.CategoryName = “Beverages”;
list.Add(categoryObj);
XmlSerializer serializer = new XmlSerializer(typeof(List<Category>));
TextWriter writer = new StreamWriter(xmlFilePath);
serializer.Serialize(writer, list, namespaces);
writer.Close();
Response.Write(“File written successfully”);
}
catch (Exception ex)
{
if (ex.InnerException != null)
ProcessException(ex.InnerException);
}
}
void ProcessException(Exception ex)
{
Response.Write(“Exception : “ + ex.Message);
}
In this listing, the exception generated during serialization is handled using the try.catch block. Within
the catch block, you examine the
InnerException property of the Exception object to check if it con-
tains a valid reference to the
Exception object. If it does, you pass that exception reference to another
private method named
ProcessException(), wherein you display the exception message onto the
browser.
Summary
This chapter provided insight into how to use the serialization and deserialization features of the .NET
Framework to construct representations of objects that can be transported in a portable manner. XML
serialization is one of the major new components of .NET and it’s used heavily throughout the Framework.
The
XmlSerializer class allows you to easily serialize and deserialize classes, arrays, and hierarchical
data structures built from linked objects. The XML serialization is simple and is relatively easy to under-
stand. The XML serialization mechanisms are convenient and quick and can also be tailored by applying
the various XML attribute classes. For example, by placing attributes on an object’s public variables and
property procedures, a program can map values into XML attributes and change their names. Also with
the addition of new features such as generics support, ability to pregenerate serialization assemblies,
XML serialization definitely deserves a serious consideration whenever XML transport mechanism is
required between two object-oriented systems.
409
XML Serialization
15_596772 ch12.qxd 12/13/05 11:15 PM Page 409
15_596772 ch12.qxd 12/13/05 11:15 PM Page 410
XML Web Services
Web services are objects and methods that can be invoked from any client over HTTP. Web ser-
vices are built on the Simple Object Access Protocol (SOAP). Unlike the Distributed Component
Object Model (DCOM) and Common Object Request Broker Architecture (CORBA), SOAP enables
messaging over HTTP on port 80 (for most Web servers) and uses a standard means of describing
data. SOAP makes it possible to send data and structure easily over the Web. Web services capital-
ize on this protocol to implement object and method messaging. Web services function primarily
through XML in order to pass information back and forth through the Hypertext Transfer Protocol
(HTTP). Web services are a vital part of what the .NET Framework offers to programmers. In this
chapter, you get a thorough understanding of the XML Web service by discussing XML Web ser-
vices created using .NET Framework 2.0. After the initial discussion, this chapter goes on to dis-
cuss advanced Web service concepts such as SOAP headers, SOAP extensions, XML serialization
customization, schema importer extensions, asynchronous Web service methods, and asyn-
chronous invocation of Web methods.
By the end of this chapter, you will have a good understanding of the following:
❑ XML Web service
❑ How to build an ASP.NET XML Web service
❑ Creating a
Proxy class for the Web service
❑ How to return complex types from a Web service
❑ How to utilize SOAP headers
❑ How to create SOAP extensions and use that with a Web Service Method
❑ How to asynchronously invoke a Web service from an ASP.NET page
❑ How to asynchronously invoke a Web service from IE browser
❑ How to control XML serialization of custom types using
IXmlSerializable
❑ How to use Schema Importer extensions
16_596772 ch13.qxd 12/13/05 11:20 PM Page 411
XML Web Service
XML Web service in ASP.NET is a new model of exposing application logic. The entire .NET Framework
has been built around the Web services concept, and there are a number of tools and hidden functional-
ity that make it quite simple to build and consume XML Web services in .NET.
Working with XML Web services basically follows the same model as that of a regular ASP.NET page,
except that you are not using ASP.NET to build an interface to activate requests and receive responses over
HTTP. There are many situations where you might want to expose the logic or information in a database,
but you might not want to build a visual interface to that logic or information. Look at an example of this
situation. Say that you are a large wholesaler of a wide variety of widgets, and you have a number of cus-
tomers that depend upon your current inventory status to allow their customers to place appropriate
orders. The entire widget inventory is stored in a SQL Server database, and you want to give your cus-
tomers access to this database. You could build a Web interface to this database in ASP.NET that would
enable a client to log onto your system and gather the information that it needs. What if the customer
doesn’t want that, but instead wants to put this information in its own Web site or extranet for its own cus-
tomers? This is where you can expose your widget information by providing it as an XML Web service.
Doing this enables the end user to utilize this information in whatever fashion it chooses. Now within its
own Web page, the customer can make a call to your XML Web service and get the information in an XML
format to use as it sees fit. So instead of building separate Web interfaces for different clients to access this
data, you can just provide the application logic to the end users and let them deal with it in their own way.
It is true there are component technologies, already available for some time, that perform similar functions; however,
these technologies, such as Distributed Component Object Model (DCOM), Remote Method Invocation (RMI),
Common Object Request Broker Architecture (CORBA), and Internet Inter-ORB Protocol (IIOP) are accessed via
object-model–specific protocols. The main difference between XML Web services and these component technologies is
that XML Web services are accessed via standard Internet protocols such as HTTP and XML. This enables these ser-
vices to be called across multiple platforms, regardless of the platform compatibility of the calling system.
The outstanding thing about using XML Web services is that it does not matter what system the end user
employs to make this request. This is not a Microsoft-proprietary message format that is being sent to
the end user. Instead, everything is being sent over standard protocols. What is happening is that this
message is being sent over HTTP using SOAP, a flavor of XML. So any system that is able to consume
XML over HTTP can use this model.
Building an ASP.NET Web Service
A Web service is an ordinary class with public and protected methods. The WebService class is nor-
mally placed in a source file that is saved with an
.asmx extension. Web service files must contain the
One way to think of an XML Web service is that when you use a Web service, you
are calling a function over Hyper Text Transfer Protocol (HTTP) or by a URL. This
model of Web services is quite different from what was available in the past, but
similar to some models that you are already familiar with. For example, the classic
Active Server Pages model was based upon the client/server technologies. The client
made a request over the Internet or HTTP; and the response, if there was one, was
sent back by the same means. On the receiving end of the request, application logic
or registration was applied and, in most cases, a response was sent back.
412
Chapter 13
16_596772 ch13.qxd 12/13/05 11:20 PM Page 412
@ WebService directive that informs the ASP.NET runtime about the nature of the file, the language in
use throughout, and the main class that implements the service, as shown here:
<%@ WebService Language=”C#” Class=”MyWebService” %>
The Language attribute can be set to C#, VB, or JS. The main class must match the name declared in the
Class attribute and must be public. A complete Web service example is shown in Listing 13-1.
Listing 13-1: A Simple Web Service
<%@ WebService Language=”C#” Class=”MyWebService”%>
using System.Web;
using System.Web.Services;
using System.Web.Services.Protocols;
[WebService(Name=”My Web Service”, Description=”Sample Web Service”,
Namespace=” />[WebServiceBinding(ConformsTo = WsiProfiles.BasicProfile1_1)]
public class MyWebService: System.Web.Services.WebService
{
public MyWebService()
{
}
[WebMethod(CacheDuration=60,Description=”Returns a simple string”,
EnableSession=false)]
public string HelloWorld()
{
return “Hello World”;
}
}
Indicating the base class for a .NET Framework Web service is not mandatory. A Web service can also be
architected starting from the ground up using a new class. Inheriting the behavior of the
WebService
class has some advantages, however. A Web service based on the System.Web.Services.WebService
class has direct access to common ASP.NET objects, including Application, Request, Cache, Session,
and
Server. These objects are packed into an HttpContext object, which also includes the time when
the request was made. If you do not have any need to access the ASP.NET object model, you can do
without the
WebService class and simply implement the Web service as a class with public methods.
With the
WebService base class, however, a Web service also has access to the ASP.NET User object in
the server side, which can be used to verify the credentials of the current user executing the method.
Similar to ASP.NET pages, you can also have code-behind for AS.NET Web services as
well. To this end, you just add the
CodeBehind attribute to the WebService attribute.
CodeBehind=”~/App_Code/MyWebService.cs”
The CodeBehind specifies the source file that contains the class implementing the
Web service when the class is neither located in the same file nor resident in a sepa-
rate assembly. And then create the
MyWebService.cs file to the appropriate location
(in this case, the
App_Code directory). Throughout this chapter, you create Web ser-
vices that have the actual class embedded inside a separate code behind.
413
XML Web Services
16_596772 ch13.qxd 12/13/05 11:20 PM Page 413
The Class attribute is normally set to a class residing in the same file as the @ WebService directive, but
nothing prevents you from specifying a class within a separate assembly. In such cases, the entire Web
service file consists of a single line of code:
<%@ WebService Language=”C#” Class=”MyAssembly.MyWebService” %>
The actual implementation is contained in the specified class, and the assembly that contains the
class must be placed in the bin subdirectory of the virtual folder where the Web service resides. The
@ WebService directive also supports another attribute named Debug that indicates whether the Web
service should be compiled with debug symbols.
The next few sections go through each of the attributes discussed in Listing 13-1.
The WebService Attribute
The WebService attribute is optional and does not affect the activity of the WebService class in terms
of what is published and executed. The
WebService attribute is represented by an instance of the
WebServiceAttribute class and enables you to change three default settings for the Web service: the
namespace, the name, and the description.
The syntax for configuring the
WebService attribute is declarative and somewhat self-explanatory.
Within the body of the
WebService attribute, you simply insert a comma-separated list of names and
values, as shown in the following code. The keyword
Description identifies the description of the Web
service, whereas
Name points to the official name of the Web service.
[WebService(Name=”My Web Service”, Description=”Sample Web Service”,
Namespace=” />public class MyWebService : WebService
{
//Add the code here
}
Changing the name and description of the Web service is mostly a matter of consistency. The .NET
Framework assumes that the name of the implementing class is also the name of the Web service; no
default description is provided. The
Name attribute is used to identify the service in the WSDL text that
explains the behavior of the service to prospective clients. The description is not used in the companion
WSDL text; it is retrieved and displayed by the IIS default page only for URLs with an
.asmx extension.
Each Web service should have a unique namespace that makes it clearly distinguishable from other
services. By default, the .NET Framework gives each new Web service the same default namespace:
. This namespace comes with the strong recommendation to change it as soon
as possible and certainly prior to publishing the service on the Web. Using a temporary name does not
affect the overall functionality, but it will affect consistency and violate Web service naming conventions.
Although most namespace names out there look like URLs, you don’t need to use real URLs. A name
that you’re reasonably certain is unique will suffice.
The only way to change the default namespace of a .NET Framework Web service is by setting the
Namespace property of the WebService attribute, as shown in following code.
414
Chapter 13
16_596772 ch13.qxd 12/13/05 11:20 PM Page 414
[WebService(Name=”My Web Service”, Description=”Sample Web Service”,
Namespace=” />public class MyWebService : WebService
This example uses a namespace named “ks/ProASPNETXML” for the
MyWebService.
The WebServiceBinding Attribute
With the .NET 1.x release, you can build services that conform to the Basic Profile today by following
the guidance in Building Interoperable Web Services; however .NET 2.0 makes it even easier to
build Web services that conform to the Basic Profile 1.0. To accomplish this, you need to add the
WebServiceBinding attribute that allows you to build a WS-I Basic Profile conformant Web service.
Setting
WebServiceBinding.ConformsTo to WsiProfiles.BasicProfile1_1 makes the SOAP 1.1
port exposed by this service conforms to the WS-I Basic Profile 1. As you can see from the following
code, by default, new Web services created by Visual Studio are Basic Profile conformant.
[WebServiceBinding(ConformsTo = WsiProfiles.BasicProfile1_1)]
Note that there are some important service features that would break Basic Profile conformance and would
cause an exception when you invoke the Web service or request its WSDL. For example, if you use SOAP
encoding (by using
SoapRpcService or SoapRpcMethod attributes), your service no longer conforms
to the Basic Profile. To use these non-conforming features, you simply need to indicate that your service
does not conform to the Basic Profile by setting the
WebServiceBindingAttribute.ConformsTo
property to WsiProfiles.None.
When consuming any Web service,
wsdl.exe will check the service’s WSDL for Basic Profile confor-
mance and will display warnings if it finds the service to be non-conformant. These warnings let you
know upfront any conformance issues with the service’s WSDL without preventing you from consum-
ing the service.
The WebMethod Attribute
Unlike the .NET Framework remoting classes, the public methods of a Web service class are not auto-
matically exposed to the public. To be effectively exposed over the Web, a Web service method requires
a special attribute in addition to being declared as public. Only methods marked with the
WebMethod
attribute gain the level of visibility sufficient to make them available over the Web.
In practice, the
WebMethod attribute represents a member modifier similar to public, protected, or inter-
nal. Only public methods are affected by
WebMethod, and the attribute is effective only to callers invok-
ing the class over the Web. This characteristic increases the overall flexibility of the class design. A
software component allowed to instantiate the Web service class sees all the public methods and does
not necessarily recognize the service as a Web service; however, when the same component is invoked
as part of a Web service, the IIS and ASP.NET infrastructure ensure that external callers can see only
methods marked with the
WebMethod attribute. Any attempt to invoke untagged methods via a URL
results in a failure. The
WebMethod attribute features several properties that you can use to adjust the
behavior of the method. Table 13-1 lists the properties.
415
XML Web Services
16_596772 ch13.qxd 12/13/05 11:20 PM Page 415
Table 13-1. Properties of the WebMethod Attribute
Property Description
BufferResponse Indicates that the IIS runtime should buffer the method’s entire response
before sending it to the client. This property is set to true, by default. Even
if set to
false, the response is partially buffered; however, in this case, the
size of the buffer is limited to 16 KB.
CacheDuration Specifies the number of seconds that the IIS runtime should cache the
response of the method. This information is useful when your Web
method needs to handle several calls in a short period of time.
Description Provides the description for the method. The value of the property is
then embedded into the WSDL description of the service.
EnableSession This property makes available the Session object of the ASP.NET
environment to the Web method. Depending on how Session is
configured, using this property might require cookie support on the
client or a Microsoft SQL Server support on the server.
MessageName Allows you to provide a publicly callable name for the method. You can use
this property to give distinct names to overloaded methods in the event that
you use the same class as part of the middle tier and a Web service.
TransactionOption Specifies the level of transactional support you want for the method. A
Web service method can have only two behaviors, regardless of the value
assigned to the standard
TransactionOption enumeration you select —
either it does not require a transaction or it must be the root of a new
transaction.
The following code snippet shows how to set a few method attributes:
[WebMethod(CacheDuration=60,Description=”Returns a simple string”,
EnableSession=false)]
public string HelloWorld()
{
return “Hello World”;
}
This code sets the CacheDuration, Description, and EnableSession attributes of the
WebMethodAttribute class.
Creating a Proxy Class for the Web Service
After you have created the Web service, the next step is for the clients to access the Web service and
invoke its methods. To accomplish this, you need to create a proxy class that acts as an intermediary
between the Web service and the client. After the proxy is created and referenced from the client applica-
tion, whenever the client invokes any of the Web methods, it is the proxy class that receives all of the
requests. The proxy is responsible for communicating with the Web service over the network by process-
ing the SOAP messages sent to and from the XML Web service. There are two ways you can create a
proxy class for the Web Service.
416
Chapter 13
16_596772 ch13.qxd 12/13/05 11:20 PM Page 416
❑ Using the WSDL utility
❑ Using the Add Web Reference option in Visual Studio
Each of these methods is covered in the following sections.
Using the WSDL Utility to Generate Proxy Code
The ASP.NET page framework provides a set of classes and tools that greatly simplifies interacting with
a Web service. The set of classes provides a base set of functionality for creating Web service proxies.
One of the tools is a utility called
WSDL.exe that consumes the WSDL for a Web service and then auto-
matically generates proxy code for you.
WSDL.exe ships with the .NET Framework. You can use it to create a strongly typed proxy for access-
ing the targeted Web service. Just as ASP.NET will map a large number of .NET data types to their
XML counterparts,
WSDL.exe will map XML data types described within the Web service’s WSDL doc-
ument to their .NET equivalents.
To create a proxy for a Web service located at htt
p://localhost/MyProjects/Wrox/Chapter13/
WebService/MyWebService.asmx
, use the following command from the .NET Framework SDK com-
mand prompt.
WSDL http://localhost/MyProjects/Wrox/Chapter13/WebService/MyWebService.asmx?wsdl
The command will parse the WSDL document and generate MyWebService.cs, which contains C# code
you can compile to form a strongly typed .NET
MyWebService proxy class that exposes the functional-
ity of the
MyWebService. By default, WSDL.exe will generate C# code that targets the SOAP implemen-
tation of the Web service interface.
Similar to ASP.NET Web services, WSDL.exe can create proxies only for the HTTP protocol; however,
WSDL.exe-generated proxies can use one of three bindings: SOAP, HTTP GET, or HTTP POST. You can use
optional command line parameters to set the type of binding as well as other configurations such as the
language in which the auto-generated code will be written. Table 13-2 lists the command line switches
that you can specify when you use
WSDL.exe to generate a proxy for a Web service.
Table 13-2. Command Line Switches for WSDL.exe
Switch Description
/<url or path> Specifies the URL or path to a WSDL contract, an XSD schema,
or
.discomap document.
/nologo Suppresses the banner containing the version and copyright
information.
/language:[CS | VB | JS] or Specifies the language in which the proxy code should be
/l:[CS | VB | JS] generated. The default is CS.
/sharetypes Turns on type sharing feature. This new feature allows you to
create one code file with a single type definition for identical
types shared between different services.
Table continued on following page
417
XML Web Services
16_596772 ch13.qxd 12/13/05 11:20 PM Page 417
Table 13-2. (continued)
Switch Description
/verbose or /v Displays extra information when the /sharetypes switch is
specified.
/fields or /f Specifies that fields should be generated instead of properties.
/order Generates explicit order identifiers on particle members.
/enableDataBinding Implements INotifyPropertyChanged interface on all
or
/edb generated types to enable data binding.
/namespace:[namespace] Specifies the .NET namespace in which the proxy code will
or
/n:[namespace] reside.
/out:[filename] or Specifies the name of the file that will contain the generated
/o:[filename] code.
/protocol:[SOAP | Specifies the binding the generated proxy code should target.
HttpPost | HttpGet] The default is SOAP.
/username:[username] Specifies the credentials that should be passed when connecting
or
/u:[username] to a Web server that requires authentication. The supported
/password:[password] authentication types include Basic Authentication and Windows
or
/p:[password] NT Challenge/ Response.
/domain:[domain] or
/d:[domain]
/proxy:[url] The URL of the proxy server. The default is to use the settings
defined within the system’s Internet Options.
/proxyusername:[username] Specifies the credentials that should be used to log into the
or
/pu:[username] proxy server. The supported authentication types include Basic
/proxypassword:[password] Authentication and Windows NT Challenge/ Response.
or
/pp:[password]
/proxydomain:[domain]
or
/pd:[domain]
/appsettingurlkey:[key] Generates code that sets the URL property of the proxy object to
or
/urlkey:[key] the value of the application setting with the specified key in the
configuration file. If the application setting is not found, the
value will be set to the URL that was originally targeted by
WSDL.exe.
/appsettingbaseurl:[url] Generates code that sets the URL property of the proxy object to
or
/baseurl:[url] the concatenation of the specified URL and the value of the
application setting specified by the
/appsettingurlkey switch.
/parsableerrors Prints errors in a format similar to those reported by compilers.
/serverinterface Generates an abstract class for an XML Web service
implementation using ASP.NET based on the contracts.
418
Chapter 13
16_596772 ch13.qxd 12/13/05 11:20 PM Page 418