Teach Yourself the C# Language in 21 Days phần 3 pptx
Bạn đang xem bản rút gọn của tài liệu. Xem và tải ngay bản đầy đủ của tài liệu tại đây (848.29 KB, 81 trang )
Controlling Your Program’s Flow 137
4
LISTING 4.7 foravg.cs—Using the for Statement
1: // foravg.cs Using the for statement.
2: // print the average of 10 random numbers that are from 1 to 10.
3: //
4:
5: class average
6: {
7: public static void Main()
8: {
9: int ttl = 0; // variable to store the running total
10: int nbr = 0; // variable for individual numbers
11: int ctr = 0; // counter
12:
13: System.Random rnd = new System.Random(); // random number
14:
15: for ( ctr = 1; ctr <= 10; ctr++ )
16: {
17: //Get random number
18: nbr = (int) rnd.Next(1, 11);
19:
20: System.Console.WriteLine(“Number {0} is {1}”, (ctr), nbr);
21:
22: ttl += nbr; //add nbr to total
23: }
24:
25: System.Console.WriteLine(“\nThe total of the 10 numbers is {0}”,
26: ttl);
27: System.Console.WriteLine(“\nThe average of the numbers is {0}”,
28: ttl/10 );
29: }
30: }
Number 1 is 10
Number 2 is 3
Number 3 is 6
Number 4 is 5
Number 5 is 7
Number 6 is 8
Number 7 is 7
Number 8 is 1
Number 9 is 4
Number 10 is 3
The total of the 10 numbers is 54
The average of the numbers is 5
OUTPUT
Much of this listing is identical to what you saw earlier in today’s lessons. You
should note the difference, however. In Line 15, you see the use of the for state-
ment. The counter is initialized to 1, which makes it easier to display the value in the
WriteLine routine in Line 20. The condition statement in the for statement is adjusted
appropriately as well.
What happens when the program flow reaches the
for statement? Simply put, the counter
is set to 1. It is then verified against the condition. In this case, the counter is less than or
equal to 10, so the body of the for statement is executed. When the body in Lines 16–23
is done executing, control goes back to the incrementor of the for statement in Line 15.
In this for statement’s incrementor, the counter is incremented by 1. The condition is
then checked again and, if true, the body of the for statement executes again. This con-
tinues until the condition fails. For this program, this happens when the counter is set
to 11.
Understanding the for Statement Expressions
You can do a lot with the initializer, condition, and incrementor. You can actually put any
expressions within these areas. You can even put in more than one expression.
If you use more than one expression within one of the segments of the
for statement, you
need to separate them. The separator control is used to do this. The separator control is
the comma. As an example, the following for statement initializes two variables and
increments both:
for ( x = 1, y = 1; x + y < 100; x++, y++ )
// Do something
In addition to being able to do multiple expressions, you also are not restricted to using
each of the parts of a for statement as described. The following example actually does all
of the work in the for statement’s control structure. The body of the for statement is an
empty statement—a semicolon:
for ( x = 0; ++x <= 10; System.Console.WriteLine(“{0}”, x) )
;
This simple line of code actually does quite a lot. If you enter this into a program, it
prints the numbers 1 to 10. You’re asked to turn this into a complete listing in one of
today’s exercises at the end of the lesson.
138 Day 4
ANALYSIS
You should be careful about how much you do within the for statement’s
control structures. You want to make sure that you don’t make your code
too complicated to follow.
Caution
Controlling Your Program’s Flow 139
4
The foreach Statement
The foreach statement iterates in a way similar to the for statement. However, the foreach
statement has a special purpose: It can loop through collections such as arrays. The
foreach statement, collections, and arrays are covered on Day 7.
Revisiting break and continue
The break and continue commands were presented earlier with the while statement.
Additionally, you saw the use of the break command with the switch statement. These
two commands can also be used with the other program-flow statements.
In the
do while statement, break and continue operate exactly like the while statement.
The continue command loops to the conditional statement. The break command sends the
program flow to the statement following the do while.
With the
for statement, the continue statement sends control to the incrementor statement.
The condition is then checked and, if true, the for statement continues to loop. The break
statement sends the program flow to the statement following the for statement.
The
break command exits the current routine. The continue command starts the next iter-
ation.
Reviewing goto
The goto statement is fraught with controversy, regardless of the programming language
you use. Because the goto statement can unconditionally change program flow, it is very
powerful. With power comes responsibility. Many developers avoid the goto statement
because it is easy to create code that is hard to follow.
The
goto statement can be used in three ways. As you saw earlier, the switch statement is
home to two of the uses of goto: goto case and goto default. You saw these in action ear-
lier in the discussion on the switch statement.
The third
goto statement takes the following format:
goto label;
With this form of the goto statement, you are sending the control of the program to a
label statement.
Exploring Labeled Statements
A label statement is simply a command that marks a location. The format of a label is as
follows:
label_name:
Notice that this is followed by a colon, not a semicolon. Listing 4.8 presents the goto
statement being used with labels.
LISTING 4.8 score.cs—Using the goto Statement with a Label
1: // score.cs Using the goto and label statements.
2: // Disclaimer: This program shows the use of goto and label
3: // This is not a good use; however, it illustrates
4: // the functionality of these keywords.
5: //
6:
7: class score
8: {
9: public static void Main()
10: {
11: int score = 0;
12: int ctr = 0;
13:
14: System.Random rnd = new System.Random();
15:
16: Start:
17:
18: ctr++;
19:
20: if (ctr > 10)
21: goto EndThis;
22: else
23: score = (int) rnd.Next(60, 101);
24:
25: System.Console.WriteLine(“{0} - You received a score of {1}”,
26: ctr, score);
27:
28: goto Start;
29:
30: EndThis:
31:
32: System.Console.WriteLine(“Done with scores!”);
33: }
34: }
140 Day 4
Controlling Your Program’s Flow 141
4
1 - You received a score of 83
2 - You received a score of 99
3 - You received a score of 72
4 - You received a score of 67
5 - You received a score of 80
6 - You received a score of 98
7 - You received a score of 64
8 - You received a score of 91
9 - You received a score of 79
10 - You received a score of 76
Done with scores!
The purpose of this listing is relatively simple; it prints 10 scores that are
obtained by getting 10 random numbers from 60 to 100. This use of random num-
bers is similar to what you’ve seen before, except for one small change. In Line 23,
instead of starting at 1 for the number to be obtained, you start at 60. Additionally,
because the numbers that you want are from 60 to 100, the upper limit is set to 101. By
using 101 as the second number, you get a number less than 101.
The focus of this listing is Lines 16, 21, 28, and 30. In Line 16, you see a label called
Start. Because this is a label, the program flow skips past this line and goes to Line 18,
where a counter is incremented. In Line 20, the condition within an if statement is
checked. If the counter is greater than 10,a goto statement in Line 21 is executed, which
sends program flow to the EndThis label in Line 30. Because the counter is not greater
than 10, program flow goes to the else statement in Line 22. The else statement gets the
random score in Line 23 that was already covered. Line 25 prints the score obtained.
Program flow then hits Line 28, which sends the flow unconditionally to the Start label.
Because the Start label is in Line 16, program flow goes back to Line 16.
This listing does a similar iteration to what can be done with the
while, do,orfor state-
ments. In many cases, you will find that there are programming alternatives to using
goto. If there is a different option, use it first.
OUTPUT
ANALYSIS
Avoid using goto whenever possible. It can lead to what is referred to as
spaghetti code, which is code that winds all over the place and is, therefore,
hard to follow from one end to the next.
Tip
Nesting Flow
All of the program-flow commands from today can be nested. When nesting program-
flow commands, make sure that the commands are ended appropriately. You can create a
logic error and sometimes a syntax error if you don’t nest properly.
Summary
You learned a lot in today’s lesson, and you’ll use this knowledge in virtually every C#
application you create.
In today’s lesson, you once again covered some of the constructs that are part of the
basic C# language. You first expanded on your knowledge of the
if statement by learning
about the else statement. You then learned about another selection statement, the switch
statement. Selection statements were followed by a discussion of iterative program flow-
control statements. This included use of the while, do, and for statements. You learned
that there is another command, foreach, that you will learn about on Day 7. In addition to
learning how to use these commands, you discovered that they can be nested within each
other. Finally, you learned about the goto statement and how it can be used with case,
default, or labels.
Q&A
Q Are there other types of control statements?
A Yes—
throw, try, catch, and finally. You will learn about these in future lessons.
Q Can you use a text string with a
switch statement?
A Yes. A string is a “governing type” for
switch statements. This means that you can
use a variable that holds a string in the switch and then use string values in the case
statements. Remember, a string is simply text in quotation marks. In one of the
exercises, you create a switch statement that works with strings.
QWhyis
goto considered so bad?
A The
goto statement has gotten a bad rap. If used cautiously and in a structured,
organized manner, the goto statement can help solve a number of programming
problems. goto case and goto default are prime examples of good uses of goto.
goto has a bad rap because the goto statement is often not used cleanly; program-
mers use it to get from one piece of code to another quickly and in an unstructured
manner. In an object-oriented programming language, the more structure you can
keep in your programs, the better—and more maintainable—they will be.
142 Day 4
Do comment your code to make clearer
what the program and program flow are
doing.
Don’t use a goto statement unless it is
absolutely necessary.
DO DON’T
Controlling Your Program’s Flow 143
4
Workshop
The Workshop provides quiz questions to help you solidify your understanding of the
material covered and exercises to provide you with experience in using what you’ve
learned. Try to understand the quiz and exercise answers before continuing to the next
day’s lesson. Answers are provided on the CD.
Quiz
1. What commands are provided by C# for repeating lines of code multiple times?
2. What is the fewest number of times that the statements in a
while will execute?
3. What is the fewest number of times that the statements in a
do will execute?
4. Consider the following
for statement:
for ( x = 1; x == 1; x++ )
What is the conditional statement?
5. In the
for statement in Question 4, what is the incrementor statement?
6. What statement is used to end a
case expression in a select statement?
7. What punctuation character is used with a label?
8. What punctuation is used to separate multiple expressions in a
for statement?
9. What is nesting?
10. What command is used to jump to the next iteration of a loop?
Exercises
1. Write an if statement that checks to see whether a variable called file-type is s, m,
or j. Print the following message based on the file-type:
s The filer is single
m The filer is married filing at the single rate
j The filer is married filing at the joint rate
2. Is the following if statement valid? If so, what is the value of x after this code exe-
cutes?
int x = 2;
int y = 3;
if (x==2) if (y>3) x=5; else x=9;
3. Write a while loop that counts from 99 to 1.
4. Rewrite the
while loop in Exercise 3 as a for loop.
5. Bug Buster: Is the following listing correct? If so, what does it do? If not, what is
wrong with the listing (Ex04-05.cs)?
// Ex0405.cs. Exercise 5 for Day 4
//
class score
{
public static void Main()
{
int score = 99;
if ( score == 100 );
{
System.Console.WriteLine(“You got a perfect score!”);
}
else
System.Console.WriteLine(“Bummer, you were not perfect!”);
}
}
6. Create a for loop that prints the numbers 1 to 10 all within the initializer, condition,
and incrementor sections of the for. The body of the for should be an empty state-
ment.
7. Write the code for a
switch statement that switches on the variable name. If the
name is Robert, print a message that says Hi Bob. If the name is Richard, print a
message that says Hi Rich. If the name is Barbara, print a message that says Hi
Barb
. If the name is Kalee, print a message that says You Go Girl!. On any other
name, print a message that says Hi x, where x is the person’s name.
8. Write a program to roll a six-sided die 100 times. Print the number of times each
of the sides of the die was rolled.
144 Day 4
TYPE & RUN
2
Guess the Number!
This is the second Type & Run. Remember, you’ll find a number of Type &
Run sections throughout this book. These sections present a listing that is a lit-
tle longer than the listings within the daily lessons. The purpose of these list-
ings is to give you a program to type in and run. The listings might contain
elements not yet explained in the book.
Two listings are provided in this Type & Run. The first does something a little
more fun and a little less practical. The second does the same thing; however, it
is done within a windows form.
Today’s program is a number-guessing game. It enables you to enter a number
from 0 to 10,000. You then are told whether the number is higher or lower. You
should try to guess the number in as few tries as possible.
I suggest that you type in and run these programs. You can also copy them from
the book’s CD or download them. Regardless of how you start, take the time to
experiment and play with the code. Make changes, recompile, and then rerun
the programs. See what happens.
As with all of the Type & Runs, there isn’t an explanation on how the code works. Don’t
fret, though. By the time you complete this book, you should understand everything
within these listings. In the meantime, you will have had the chance to enter and run
some listings that are a little more fun or practical.
The Guess Type & Run
Enter and compile the following program. If you get any errors, make sure you entered
the program correctly.
LISTING T&R 2.1 Guess.cs
1: // Guess.cs - Pick a Number
2: //
3:
4: using System;
5: using System.Drawing;
6: using System.Text;
7:
8: public class Guess
9: {
10:
11:
12: private static int getRandomNumber( int nbr )
13: {
14: if ( nbr > 0 )
15: {
16: Random Rnd = new Random();
17: return (Rnd.Next(0, nbr));
18: }
19: else
20: {
21: return 0;
22: }
23: }
24:
25: private static void WriteStats(string Guess, int nbr, string err )
26: {
27: Console.WriteLine(“\n==============================”);
28: Console.WriteLine(“Current Guess: {0}”, Guess);
29: Console.WriteLine(“Number of Guesses: {0}”, nbr);
30: if (err != “”)
31: Console.WriteLine( err );
32: Console.WriteLine(“Enter a number from 1 to 10000”);
33: Console.WriteLine(“==============================”);
34:
35: return;
146 Type & Run 2
Guess the Number! 147
36: }
37:
38:
39: public static void Main( string[] args )
40: {
41: int WinningNumber = Guess.getRandomNumber( 10000 );
42: int Guesses = 0;
43: string Curr = “”;
44: int val = 0;
45: string errMsg;
46:
47: bool cont = true;
48:
49: WriteStats(Curr, Guesses, (string) “”);
50:
51:
52: while( cont == true)
53: {
54:
55: Console.Write(“\nEnter Guess: “);
56: Curr = Console.ReadLine();
57:
58: try // try, catch, and finally are covered on Day 9
59: {
60: val = Convert.ToInt32(Curr);
61:
62: // If a number was not entered, an exception will be
63: // throw. Program flow will go to catch statement below
64:
65: Guesses += 1; // Add one to Guesses
66:
67: if( val < 0 || val > 10000 )
68: {
69: // bad value entered
70: errMsg = “Number is out of range Try again.”;
71: WriteStats(Curr, Guesses, errMsg);
72: }
73: else
74: {
75: if ( val < WinningNumber )
76: {
77: errMsg = “You guessed low Try again.”;
78: WriteStats(Curr, Guesses, errMsg);
79: }
80: else
81: if ( val > WinningNumber )
82: {
83: errMsg = “You guessed high Try again.”;
84: WriteStats(Curr, Guesses, errMsg);
85: }
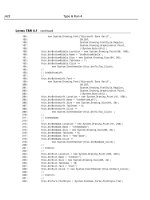
LISTING T&R 2.1 continued
86: else
87: {
88: Console.WriteLine(“\n\nCurrent Guess: {0}\n”, val);
89: Console.WriteLine(“Number of Guesses: {0}\n”, Guesses);
90: Console.WriteLine(“You guessed correctly!!”);
91: cont = false;
92: }
93: }
94: }
95: // Catch format errors
96: catch( FormatException )
97: {
98: errMsg = “Please enter a valid number ”;
99: WriteStats(Curr, Guesses, errMsg);
100: }
101: }
102: }
103: }
Enter the previous listing and compile it. If you need to, refer to Day 1, “Getting Started
with C#,” for the steps to enter, compile, and run a listing. When this program executes,
it displays the following to the screen:
==============================
Current Guess:
Number of Guesses: 0
Enter a number from 1 to 10000
==============================
Enter Guess:
You can enter a number between 0 and 10,000. You’ll then be told that the number is
either too high or too low. When you guess the number correctly, you’re told so.
The WinGuess Type & Run
You may have been surprised to realize that you already have seen nearly everything pre-
sented in the Guess.cs listing. This Type & Run includes a second listing that contains a
number of things that you have not seen. This is a program similar to the previous Guess
program; the big difference is that this new listing uses a windows form.
You should note that support for windows forms comes from the .NET Framework
classes rather than from the C# language. If you are using Microsoft’s .NET Framework
148 Type & Run 2
LISTING T&R 2.1 continued
OUTPUT
Guess the Number! 149
and compiler, this listing will be fully supported. If you are using a different compiler
and .NET runtime, classes in this listing may not be supported. For example, at the time
this book was written, the go-mono project had not completed development of the .NET
forms classes. This means that if you are using the mono compiler and runtime, you may
not be able to compile and run this listing—yet.
LISTING T&R 2.2 WinGuess.cs
1: // WinGuess.cs - Pick a Number
2: //
3:
4: using System;
5: using System.Windows.Forms;
6: using System.Drawing;
7: using System.Text;
8:
9: public class WinGuess : Form
10: {
11: private Label lblTag1;
12: private Button btnGuess;
13: private Label lblInfo;
14: private TextBox txtEntry;
15: private int WinningNumber = 0;
16: private int Guesses = 0;
17:
18: public WinGuess()
19: {
20: InitializeComponent();
21: }
22:
23: private void InitializeComponent()
24: {
25: // Get a random number from zero to 10000
26: WinningNumber = getRandomNumber( 10000 );
27:
28: // Put title into window title bar
29: this.Text = “WinGuess”;
30:
31: // Center form on screen
32: this.StartPosition = FormStartPosition.CenterScreen;
33:
34: // Set form style
35: this.FormBorderStyle = FormBorderStyle.Fixed3D;
36:
37: lblTag1 = new Label(); // Create label
38: lblTag1.Text = “Enter A Number:”;
39: lblTag1.Location = new Point( 50, 20);
40: this.Controls.Add(lblTag1); // Add label to form
41:
42: lblInfo = new Label(); // Create label
43: lblInfo.Text = “Enter a number between 0 and 10000.”;
44: lblInfo.Location = new Point( 50, 80);
45: lblInfo.Width = 200;
46: lblInfo.Height = 40;
47: this.Controls.Add(lblInfo); // Add label to form
48:
49: txtEntry = new TextBox(); // Create text box
50: txtEntry.Location = new Point( 150, 18 );
51: this.Controls.Add(txtEntry); // Add to form
52:
53:
54: btnGuess = new Button(); // Create a button
55: btnGuess.Text = “Try Number”;
56: btnGuess.BackColor = Color.LightGray;
57: // following centers button and puts it near bottom
58: btnGuess.Location = new Point( ((this.Width/2) -
59: (btnGuess.Width / 2)),
60: (this.Height - 75));
61: this.Controls.Add(btnGuess); // Add button to form
62:
63: // Add a click event handler using the default event handler
64: btnGuess.Click += new System.EventHandler(this.btnGuess_Click);
65: }
66:
67: private int getRandomNumber( int nbr )
68: {
69: if ( nbr > 0 )
70: {
71: Random Rnd = new Random();
72: return (Rnd.Next(0, nbr));
73: }
74: else
75: {
76: return 0;
77: }
78: }
79:
80: protected void btnGuess_Click( object sender, System.EventArgs e)
81: {
82: int val = 0;
83: StringBuilder tmpString = new StringBuilder();
84: tmpString.Append(“Current Guess: “);
85: tmpString.Append(txtEntry.Text);
86: tmpString.Append(“\n”);
87:
88: try // try, catch, and finally are covered on Day 9
89: {
150 Type & Run 2
LISTING T&R 2.2 continued
Guess the Number! 151
90: val = int.Parse(txtEntry.Text);
91:
92: // If a number was not entered, an exception will be
93: // throw. Program flow will go to catch statement below
94:
95: tmpString.Append(“Guesses: “);
96:
97: Guesses += 1; // Add one to Guesses
98:
99: tmpString.Append(Guesses.ToString());
100: tmpString.Append(“\n”);
101:
102: if( val < 0 || val > 10000 )
103: {
104: // bad value entered
105: tmpString.Append(“Number is out of range Try again.\n”);
106: tmpString.Append(“Enter a number from 0 to 10000”);
107: }
108: else
109: {
110: if ( val < WinningNumber )
111: {
112: tmpString.Append(“You guessed low Try again.\n”);
113: tmpString.Append(“Enter a number from 0 to 10000”);
114: }
115: else
116: if ( val > WinningNumber )
117: {
118: tmpString.Append(“You guessed high Try again.\n”);
119: tmpString.Append(“Enter a number from 0 to 10000”);
120: }
121: else
122: {
123: tmpString.Append(“You guessed correctly!!”);
124: }
125: }
126: }
127: // Catch format errors
128: catch( FormatException )
129: {
130: tmpString.Append(“Please enter a valid number \n”);
131: tmpString.Append(“Enter a number from 0 to 10000”);
132: }
133: finally
134: {
135: this.lblInfo.Text = tmpString.ToString();
136: this.txtEntry.Text = “”;
137:
LISTING T&R 2.2 continued
As you can see in Figure TR2.1, this new listing has the same functionality as the previ-
ous listing. The difference is that this listing creates a windows form.
138: // Next line will put winning number in window title
139: // this.Text = WinningNumber.ToString();
140: }
141: }
142:
143: public static void Main( string[] args )
144: {
145: Application.Run( new WinGuess() );
146: }
147: }
152 Type & Run 2
LISTING T&R 2.2 continued
FIGURE TR2.1
T&R output.
OUTPUT
The source code for this listing is available on the included CD. Any updates
to the code will be available at www.TeachYourselfCSharp.com.
Note
DAY
5
WEEK 1
The Core of C#
Programming: Classes
As you learned on Day 1, “Getting Started with C#,” classes are critical to an
object-oriented language, including C#. Whether you’ve realized it or not, you
have seen classes used in every example included in the book so far. Because
classes are central to C#, today’s lesson and tomorrow’s are among the two
most important in this book. Today you…
• Revisit the concepts involved in object-oriented programming.
• Learn how to declare a class.
• Learn how to define a class.
• Discover class members.
• Create your own data members.
• Implement properties in your classes.
• Take your first serious look at namespaces.
Digging into Object-Oriented Programming
On Day 1, you learned that C# is considered an object-oriented language. You also
learned that to take full advantage of C#, you should understand the concepts of object-
oriented languages. In the next few sections, you briefly revisit the concepts you learned
about in Day 1. You will then begin to see how these concepts are applied to actual C#
programs.
Recall from Day 1 the key characteristics that make up an object-oriented language:
• Encapsulation
• Polymorphism
• Inheritance
• Reuse
Encapsulation
Encapsulation is the concept of making classes (or “packages”) that contain everything
you need. In object-oriented programming, this means that you can create a class that
stores all the variables that you need and all the routines to commonly manipulate this
data. You can create a Circle class that stores information on a circle. This could include
storing the location of the circle’s center and its radius, plus storing routines commonly
used with a circle. These routines could include getting the circle’s area, getting its cir-
cumference, changing its center point, changing its radius, and much more.
By encapsulating a circle, you allow the user to be oblivious to how the circle works.
You need to know only how to interact with the circle. This provides a shield to the inner
workings of the circle, which means that the variables within the class could be changed
and it would be invisible to the user. For example, instead of storing the radius of the cir-
cle, you could store the diameter. If you have encapsulated the functionality and the data,
making this change impacts only your class. Any programs that use your class should not
need to change. In today’s and tomorrow’s lessons, you see programs that work directly
with a
Circle class.
154 Day 5
Encapsulation is often referred to as “black boxing,” which refers to hiding
the functionality or the inner workings of a process. For a circle, if you send
in the radius, you can get the area. You don’t care how it happens, as long
as you know that you are getting back the correct answer.
Note
The Core of C# Programming: Classes 155
5
Inheritance
In many object-oriented programming books, an animal analogy is used to illustrate
inheritance. The analogy starts with the concept of an animal as a living being.
Now consider reptiles, which are everything that an animal is; plus, they are cold-
blooded. A reptile contains all of the features of an animal, but it also adds its own
unique features. Now consider a snake. A snake is a reptile that is long and skinny and
that has no legs. It has all the characteristics of a reptile, but it also has its own unique
characteristics. A snake can be said to inherit the characteristics of a reptile. A reptile can
be said to inherit the characteristics of an animal.
A second example of inheritance can be shown with a circle. A class can be created
called
shape. All shapes have a number of sides and an area. A circle can be created by
inheriting from shape. It would still have the number of sides and the area that a shape
provides. Additionally, it could have a center point. A triangle could also be created by
inheriting from shape. The triangle would add its own unique characteristics to those that
it gets from shape.
On Day 10, “Reusing Existing Code with Inheritance,” you will see how this same con-
cept is applied to classes and programming.
Polymorphism
Polymorphism is having the capability to assume many forms, which means that the pro-
grams can work with what you send them. For example, you could have a routine that
gives the area of a shape. Because the area of a triangle is calculated differently than that
of other shapes, the routine to calculate the area would need to adapt based on what is
sent. Regardless of whether a triangle, a circle, or another shape is sent, the routine
would be capable of treating them all as shapes and, thus, calculating the area. You will
learn how to program polymorphism on Day 10.
Overloading is another concept that is often related to polymorphism. For example, you
have used the
WriteLine() routine in several of the previous days. You have seen that you
can create a parameter field using {0}. What values does this field print? As you have
seen, it can print a variable regardless of its type, or it can print another string. The
WriteLine() routine takes care of how it gets printed. The routine is polymorphic, in that
it adapts to most of the types that you can send it.
Using a circle as an example, you might want to call a circle object to get its area. You
can do this by using three points or by using a single point and the radius. Either way,
you expect to get the same results. This polymorphic feature is done by using overload-
ing. You’ll learn more about overloading in tomorrow’s lesson, “Packaging Functionality:
Class Methods and Member Functions.”
Reuse
When you create a class, you can reuse it to create lots of objects. By using inheritance
and some of the features described previously, you can create routines that can be used
repeatedly in many programs and in many ways. By encapsulating functionality, you can
create routines that have been tested and are proven to work. You won’t have to test the
details of how the functionality works—only that you are using it correctly. This makes
reusing these routines quick and easy.
Objects and Classes
On Day 1, an example of a cookie cutter and cookies illustrated classes and objects. Now
you are done with cookies and snakes—it is time to jump into some code.
156 Day 5
You will learn about classes by starting with extremely simple examples and
then building on them over the next several days.
Note
Defining a Class
To keep things simple, a keyword called class is used to define classes. The basic struc-
ture of a class follows this format:
class identifier
{
class-body ;
}
identifier is the name given to the class, and class-body is the code that makes up the
class.
The name of a class is like any other variable name that can be declared. You want to
give a class a meaningful name, something that describes what the class does.
The .NET Framework has a large number of built-in classes. You have actually been
using one since the beginning of this book: the
Console class. The Console class contains
several data members and routines. You’ve already used many of these routines, includ-
ing
Write and WriteLine. The class name—the identifier—of this class is Console. The
body of the Console class contains the code for the Write and WriteLine routines. By the
end of tomorrow’s lesson, you will be able to create and name your own classes that
have their own routines.
The Core of C# Programming: Classes 157
5
Declaring Classes
After a class is defined, you use it to create objects. A class is just a definition used to
create objects. A class by itself does not have the capability to hold information or actu-
ally perform routines. Instead, a class is used to declare objects. The object can then be
used to hold the data and perform the routines as defined by the class.
The declaration of an object is commonly referred to as instantiation. Said
differently, an object is an instance of a class.
Note
The format of declaring an object from a class is as follows:
class_name object_identifier = new class_name();
class_name is the name of the class, and object_identifier is the name of the object
being declared. For example, if you have a class called Point, you can create an object
called startingPoint with the following line of code:
point startingPoint = new Point();
The name of the class is Point, and the name of the object declared is startingPoint.
Because startingPoint is an object, it can contain data and routines if they were defined
within the Point class.
In looking at this declarative line of code, you might wonder what the other items are.
Most important, a keyword is being used that you have not yet seen:
new.
As its name implies, the
new keyword is used to create new items. In this case, it creates
a new point. Because Point is a class, an object is created. The new keyword indicates that
a new instance is to be created. In this case, the new instance is a Point object.
When declaring an object with a class, you also have to provide parentheses to the class
name on the right of the assignment. This enables the class to be constructed into a new
object.
If you don’t add the construction code new class_name, you will have
declared a class, but the compiler won’t have constructed its internal struc-
ture. You need to make sure that you assign the new class_name code to the
declared object name to make sure everything is constructed. You will learn
more about this initial construction in tomorrow’s lesson.
Caution
Look at the statement again:
point startingPoint = new Point();
The following breaks down what is happening:
point startingPoint
The Point class is used to declare an object called startingPoint. This piece of the state-
ment is like what you have seen with other data types, such as integers and decimals.
startingPoint =
As with variables, you assign the result of the right side of the assignment operator (the
equals sign) to the variable on the left. In this case, the variable happens to be an
object—which you now know is an object of type Point called startingPoint.
new Point()
This part of the statement does the actual construction of the Point object. The name of
the class with parentheses is a signal to construct—create—an object of the class type—
in this case, Point. The new keyword says to reserve some room in memory for this new
object. Remember, a class is only a definition: It doesn’t store anything. The object
needs to store information, so it needs memory reserved. The new keyword reserves the
memory.
Like all statements, this declaration is ended with a semicolon, which signals that the
statement is done.
The Members of a Class
Now that you know the overall structure for creating an object with a class, it is time to
look at what can be held in a class. Two primary types of items can be contained within
the body of a class: data members and function members.
Data members include variables and constants. These include variables of any of the
types that you learned about on Day 2, “Understanding C# Programs,” and any of the
more advanced types that you will learn about later. These data members can even be
other classes.
The other type of element that is part of a class’s body is function members. Function
members are routines that perform an action. These actions can be as simple as setting a
value to something more complex, such as writing a line of text using a variable number
of values—as you have seen with
Write and WriteLine. Write and WriteLine are member
functions of the Console class. In tomorrow’s lesson, you will learn how to create and use
member functions of your own. For now, it is time to visit data members.
158 Day 5
The Core of C# Programming: Classes 159
5
Working with Data Members, a.k.a. Fields
Another name for a variable is a field. As stated previously, data members within
a class are variables that are members of a class. In the Point class referenced
earlier, you expect a data member to store the x and y coordinates of the point. These
coordinates could be any of a number of data types; however, if these were integers, you
would define the Point class as such:
class Point
{
int x;
int y;
}
That’s it. This is effectively the code for a very simple Point class. You should include
one other item for now: an access modifier called public. A variable is accessible only
within the block where you declare it, unless you indicate otherwise. In this case, the
block is the definition of the Point class. Without adding the word public, you cannot
access x or y outside the Point class.
NEW TERM
Remember, a block is a section of code between two braces ({}). The body
of a class is a block of code.
Note
The change made to the Point class is relatively simple. With the public accessor added,
the class becomes this:
class Point
{
public int x;
public int y;
}
Although the Point class contains two integers, you can actually use any data type within
this class. For example, you can create a FullName class that contains three strings that
store the first, middle, and last names. You can create an Address class that contains a
name class and additional strings to hold the different address pieces. You can create a
customer class that contains a long value for a customer number, an address class, a deci-
mal account balance, a Boolean value for active or inactive, and more.
Accessing Data Members
When you have data members declared, you want to get to their values. As you learned,
the public accessor enables you to get to the data members from outside the class.
You cannot simply access data members from outside the class by their name. For exam-
ple, if you have a program that declares a startingPoint from the Point class, it would
seem as if you should be able to get the point by using x and y—the names that are in the
Point class. What happens if you declare both a startingPoint and an endingPoint in the
same program? If you use x, which point is being accessed?
To access a data member, you use both the name of the object and the data member. The
member operator, which is a period, separates these. To access the
startingPoint’s coor-
dinates, you therefore use this
startingPoint.x
and this:
startingPoint.y
For the ending point, you use this
endingPoint.x
and this:
endingPoint.y
At this time, you have the foundation to try out a program. Listing 5.1 presents the Point
class. This class is used to declare two objects, starting and ending.
LISTING 5.1 PointApp.cs—Declaring a Class with Data Members
1: // PointApp.cs- A class with two data members
2: //
3:
4: class Point
5: {
6: public int x;
7: public int y;
8: }
9:
10: class pointApp
11: {
12: public static void Main()
13: {
14: Point starting = new Point();
15: Point ending = new Point();
16:
17: starting.x = 1;
18: starting.y = 4;
19: ending.x = 10;
20: ending.y = 11;
160 Day 5