My SQL and Java Developer’s Guide phần 8 pdf
Bạn đang xem bản rút gọn của tài liệu. Xem và tải ngay bản đầy đủ của tài liệu tại đây (333.71 KB, 44 trang )
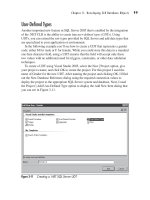
The Insert Row Task
285
{
String value = valueFields[i].getText();
if ( value.length() == 0 )
{
continue;
}
if ( ! isFirst )
{
cols.append( "," );
vals.append( "," );
}
else
{
isFirst = false;
}
cols.append( columnNames[i] );
vals.append( "\"" ).append( value ).append( "\"" );
}
cols.append( ")" );
vals.append( ")" );
return (cols.toString() + " " + vals.toString());
}
private String[] columnNames;
private JTextField[] valueFields;
private final static int FIELD_COLS = 20;
}
}
Listing 12.16 The insert row task delegate. (continued)
Figure 12.6 The insert row task prompt frame.
What’s Next
In this chapter, we detailed the development of a real-world application for
accessing MySQL databases using the Java programming language. Okay,
maybe calling it a real-world application is going a bit far. There is a distinct
lack of bells and whistles, error checking is minimal, and we have taken a few
shortcuts. However, the example does provide some insight into ways in which
Java and MySQL can combine to address real-world problems. In the next chap-
ter, we turn our attention to the topic of database administration.
Building a General Interface for MySQL
286
M
ySQL is a comprehensive relational database management system and
must be managed to achieve optimal functionality. Some of the issues
that you need to understand include how to add users and set up per-
missions, how to import large amounts of data into various tables, when and
how to make backups, and how to replicate data, among other functions. This
chapter provides you with a guide to database administration in a development
or staging environment. For a production-level system, we recommend that you
use a professional database administrator.
Using the mysql Administration Application
One of the most important tools available to the developer is the command-line
interface called simply mysql, which is located in the /bin directory of both the
Unix and Windows systems. mysql is both an interactive and noninteractive
application that gives you complete control over the MySQL database server
and its related tables.
You start the application in interactive mode by issuing the following command
within a terminal window or command prompt:
mysql user=<username> password=<password> database
Replace <username> and <password> with either a previously defined user in
the database or the root user. If you’re executing the mysql application as the
Database Administration
CHAPTER
13
287
root user under Unix or as Administrator under Windows, you need only the
mysql application name. You append the database name to the command line,
which has the same effect as executing the use <database> command. If the
application is in the path of the current user or the system, the output shown in
Figure 13.1 will be generated.
Database Administration
288
Figure 13.1 The mysql application output.
The application allows any type of SQL to be entered at the command line. All
SQL must end with the ; character to indicate the end of a statement. For exam-
ple, we can query all of the rows in our acc_acc database and display the results
in the application. Figure 13.2 shows an example of this query and the resulting
output.
To quit the application, enter the exit command. We use the mysql application
in most of the sections remaining in this chapter.
Figure 13.2 Using mysql to query our database.
Managing Users and Permissions
Once the MySQL server has been installed, you must immediately change the
password for the root user as well as add new users to the server. Adding a new
user involves adding an access configuration to the server as well as assigning
permissions that allow the user access to specific databases, tables, and
columns.
The MySQL database server automatically creates a database called mysql
when you install the server. Within this database are four primary tables for
holding user and permission information:
■■
columns_priv—Defines column-level privileges.
■■
db—Defines database-level privileges.
■■
tables_priv—Defines table-level privileges.
■■
user—Defines the users that can connect to the server.
The MySQL server defines a combination of commands that you can use to add
users and privileges to the server, as we discuss later in this chapter.
Changing Root
Once you’ve installed MySQL, changing the root password to the database
application should be one of your next steps. The root user has complete
authority over the system, just like the root user in Unix or the Administrator in
Windows. The database installs the root user but does not set the password. We
can see this by using a simple SELECT, as shown here:
mysql> use mysql;
Database changed
mysql> select user, password, host from user where user =
'root';
+ + + +
| user | password | host |
+ + + +
| root | | localhost |
| root | | % |
+ + + +
2 rows in set (0.00 sec)
As you can see, the password is blank for the root user, and it creates a big secu-
rity hole. To solve this problem, we need to assign a password. The following
SQL entered into the mysql application will do the trick:
mysql> UPDATE user SET password=PASSWORD('<password>') WHERE
user = 'root';
Managing Users and Permissions
289
This code updates the user table and sets the password field equal to an
encrypted password specified by the <password> placeholder in those rows
where the user field is equal to root. Once the field has been updated, it’s a good
idea to flush the change by using the command
mysql> FLUSH PRIVILEGES;
Adding Users
Adding users to a MySQL database can be accomplished in two ways. The first
involves using the SQL command INSERT to place rows into one or more of the
database tables we discussed earlier. Because the process of giving privileges
can span all of the tables, except host, the MySQL database server provides a
command called GRANT that allows you to easily add users and give them priv-
ileges. Here’s the format of the GRANT command:
GRANT <privileges> (columns)
ON <db>
TO <user>
IDENTIFIED BY <password>
WITH GRANT OPTION
You replace the <privileges> placeholder with a comma-delimited string con-
sisting of the following specifiers as needed:
ALTER—Allows the user to alter tables
CREATE—Allows the user to create databases and tables
DELETE—Allows the user to delete table rows
DROP—Allows the user to drop databases
INDEX—Allows the user to create/drop indexes
INSERT—Allows the user to insert rows
SELECT—Allows the user to select rows
UPDATE—Allows the user to update rows
FILE—Allows the user access to files on a local server
PROCESS—Allows the user to view process information or kill threads
RELOAD—Allows the user to flush logs, privileges, and caches
SHUTDOWN—Allows the user to shut down the database server
ALL—Gives the user all privileges
USAGE—Gives the user no privileges
Database Administration
290
You replace the (columns) placeholder with a comma-delimited list of columns
in the database that will affected by the privileges. This option allows you to
limit a user to specified columns in a database.
The <db> placeholder indicates the level to which the privileges affect the data-
bases in the server. As our examples in this section show, the value can be all
databases, or you can specify certain databases or a single database with lim-
ited columns.
The <user> and <password> placeholders indicate the username/password
combination the new user will use to connect. The <user> placeholder is a
username@host combination that allows connections to be limited to specific
domain or IP addresses. You can substitute a wildcard using the character % in
place of the host to give wider access to the system. A "" value can be used in
place of the username to give any user from a host access to the database.
The WITH GRANT OPTION gives the new user the ability to grant privileges to
new and existing users within the server. Use this option sparingly.
Consider a user john, who needs to access the MySQL server from his office PC,
which has an IP address of 192.168.1.45. You don’t want to give john adminis-
trative access to the system but want to allow him to insert, delete, and so forth
on all of the various tables. To do this, use the following GRANT command:
mysql> GRANT SELECT, INSERT, UPDATE
ON *.*
TO
IDENTIFIED BY "rudy"
This grant gives john basic access to all of the databases in the system. You
could limit him to one database:
mysql> GRANT SELECT, INSERT, UPDATE
ON accounts.*
TO
IDENTIFIED BY "rudy"
By using accounts.* in the ON clause, you ensure that john has access only to
the tables in the accounts database. We could further restrict him to specific
columns:
mysql> GRANT SELECT, INSERT, UPDATE (acc_id, username)
ON accounts.acc_acc
TO
IDENTIFIED BY "rudy"
Here, john will be allowed to see only the acc_id and username columns of the
accounts.acc_acc table. Suppose you must add another user, jim, who will have
more privileges as well as require access from many machines:
mysql> GRANT ALL ON *.* TO jim@"%" IDENTIFIED BY "jimmy"
Managing Users and Permissions
291
The user jim will have access to the server from any host and will be allowed
full privileges. Obviously, there are many different combinations that you can
create using the GRANT command.
There may be times when you have to remove a privilege from a user. In this
case, you use the REVOKE command, which has this format:
REVOKE privileges (columns)
ON <database>
FROM <user >
For example, let’s revoke UPDATE privileges from john:
mysql> REVOKE UPDATE ON *.* FROM
If john will be going on vacation for two weeks and you don’t want to leave his
account open, but you don’t want to delete him from the server, you can revoke
all privileges:
mysql> REVOKE ALL ON *.* FROM
If during those two weeks, John decides to leave the company, you need to
remove him from the database. That way, even if john doesn’t have privileges he
can still connect to the database. The command to remove john from the data-
base is as follows:
mysql> DELETE FROM user WHERE User="john" and Host = "192.168.1.45";
mysql> flush privileges;
This command deletes the row defined for john in the user table, and MySQL no
longer permits him to connect.
Limiting Resources
If you have chosen to use MySQL 4.0.2 or greater, you have the ability to limit
users and processes to the amount of resources they are capable of using. The
resources that can be limited include
■■
Queries per hour
■■
Updates per hour
■■
Connections per hour
You limit resources by specifying user/host values in a user table. These
resources are not limited by default. You can define each of the limits by either
an integer indicating per-hour rates or by a value such as 5 (which would allow
five 5 connections per hour).
You apply limits by using the GRANT command or remove them using
REVOKE. For example, suppose you have a user named smith who connects
Database Administration
292
from host 192.168.1.4. You can limit smith to 30 queries per hour with this
command:
mysql> GRANT ('smith', '192.168.1.4') WITH MAX_QUERIES_PER_HOUR 30;
Notice that here the GRANT command is a little different than when used to
grant privileges to a user. To limit all of the available resources, use the com-
mand
mysql> GRANT ('smith', '192.168.1.4') WITH
MAX_QUERIES_PER_HOUR 30
MAX_UPDATES_PER_HOUR 60
MAX_CONNECTIONS_PER_HOUR 10;
Several things should be noted:
■■
If any of the limits are reached, the user’s connection is terminated and fur-
ther connections are refused.
■■
The system keeps track of the user’s usage of the three resources. To flush
the values for an individual user, issue the GRANT command with one or
all of the MAX_ clauses. To flush all users, use the commands FLUSH
PRIVILEGES, FLUSH USER_RESOURCES, or mysqladmin reload.
■■
The resource limits are activated when the first GRANT command is used
that assigns limits to any one user.
Configuring the Query Cache
The MySQL server includes a query cache that keeps track of recent queries by
users in the system. The cache is kept in memory and is regulated based on the
number and size of the queries hitting the database. By default, the query cache
isn’t activated when the MySQL server is first executed. The best way to con-
figure the query cache is to enter appropriate values in the MySQL configura-
tion file, my.cnf. The arguments available are as follows:
■■
query_cache_limit—Specifies the limit for cached results; the default is
1MB.
■■
query_cache_size—Specifies the memory for the query cache; the default
is 0, which means the cache is disabled.
■■
query_cache_type—Specifies the cache type:
0—Cache is off.
1—Cache is on; no SELECT SQL_NO_CACHE queries are cached.
2—Cache is on; only cache SELECT SQL_CACHE queries are cached.
Configuring the Query Cache
293
To see the current status of the cache, execute the command SHOW STATUS to
display a result like the following in the mysql application:
mysql> SHOW STATUS LIKE "Qcache%";
+ + +
| Variable_name | Value |
+ + +
| Qcache_queries_in_cache | 30 |
| Qcache_inserts | 5 |
| Qcache_hits | 8 |
| Qcache_not_cached | 57 |
| Qcache_free_memory | 5434 |
| Qcache_free_blocks | 254 |
| Qcache_total_blocks | 6532 |
+ + +
7 rows in set (0.00 sec)
Because the query cache is based in memory, it can become fragmented. Even-
tually the cache may not allow a query to be changed because a slot big enough
for the query is not available. You can defragment the cache by issuing the com-
mand FLUSH QUERY CACHE. This command consolidates the queries in the
cache and frees up larger blocks of space for future queries. The FLUSH
TABLES command also defragments the query cache. To remove all queries in
the query cache, issue the RESET QUERY CACHE command.
Forcing a Cache
When you execute a query, MySQL evaluates whether or not the query should
be cached. Some of the criteria for a query include its size and the current state
of the cache; also the MySQL manual defines several functions that aren’t
cached. If you want to be sure that one of your queries is cached, add the
SQL_CACHE clause to the SELECT command. For example:
SELECT SQL_CACHE * from acc_acc;
If you have another query that you want to make sure isn’t cached, use the
SQL_NO_CACHE clause:
SELECT SQL_NO_CACHE * from acc_cert;
The cache determines whether a new query is in the cache by performing a
byte-by-byte comparison. In other words, the cache is case-sensitive since the
system will compare the byte values of the query versus the cache.
Understanding Log Files
The MySQL server automatically generates several log files, including
Database Administration
294
■■
An error log
■■
A general log
■■
A binary log
■■
A slow query log
Error Logs
All of the logs for the MySQL database server are located in the defined data
directory such as /mysql/data. The server writes any errors that it finds during
boot into an error log file called <hostname>.err on Unix and mysql.err on Win-
dows. The contents of the file look something like this:
[jxta@localhost mysql]$ cat localhost.localdomain.err
020602 16:26:04 mysqld started
020602 16:26:09 InnoDB: Started
/usr/sbin/mysqld: ready for connections
020604 0:00:55 /usr/sbin/mysqld: Normal shutdown
020604 0:00:55 InnoDB: Starting shutdown
020604 0:00:59 InnoDB: Shutdown completed
020604 0:00:59 /usr/sbin/mysqld: Shutdown Complete
020604 00:00:59 mysqld ended
020630 21:39:38 mysqld started
InnoDB: Database was not shut down normally.
InnoDB: Starting recovery from log files
InnoDB: Starting log scan based on checkpoint at
InnoDB: log sequence number 0 43902
020630 21:39:42 InnoDB: Started
/usr/sbin/mysqld: ready for connections
020702 20:10:37 mysqld started
It is a good idea to examine the contents of the error file, even when users
haven’t reported problems. The error file is the first place the server starts to
record errors.
General Logs
If you are having difficulties with a client connecting with the database, you can
activate a general log when the mysql executable starts. You activate the gen-
eral log by using the command-line option –log. For example:
mysqld –log[=filename]
When the server executes, it will by default log all connections and queries to a
file called <hostname>.log.
Understanding Log Files
295
Binary Logs
The binary log is used by the MySQL server to record all updates made to the
database. Since this is a binary log, it isn’t designed for troubleshooting, but
instead provides a simple mechanism for master/slave replication. The slave
database can read the binary log to determine what updates have occurred on
the master. You activate the log by using the –log-bin command-line prompt or
through the configuration file.
Slow Query Logs
If you start the server with the command-line option –log-slow-queries, the sys-
tem creates a log file that holds all queries that take longer than
long_query_time to execute. If you suspect that queries are taking a long time
to execute, examine this log.
Maintaining Your Tables
To keep your tables in the best condition possible, it’s a good idea to run
through a check periodically. The CHECK TABLE command works on both
MyISAM and InnoDB tables. The format of the command is
CHECK TABLE tbl_name[,tbl_name ] [option [option ]]
Options include the following:
■■
QUICK—Doesn’t check for bad links.
■■
FAST—Checks only improperly closed tables.
■■
MEDIUM—Checks deleted links.
■■
EXTENDED—Performs a full key lookup for 100-percent consistency.
■■
CHANGED—Checks only tables that have changed since the last check.
Figure 13.3 shows an example of executing CHECK TABLE on the acc_acc
table.
In this example, an extended check is made against the acc_acc table. Any
errors in the table are listed as rows in the result set shown. The last row is
always the final diagnostic report. The goal is for the Msg_text column to have
a value of OK. If the value isn’t OK, that means you have to execute the REPAIR
TABLE command.
To check the table outside the mysql application tool, use the myisamchk util-
ity. For example:
myisamchk acc_acc.myi
Database Administration
296
Figure 13.3 Executing a check on a table.
Figure 13.4 shows the output generated by myisamchk when executed against
the acc_acc table.
Maintaining Your Tables
297
Figure 13.4 An example using myisamchk.
The utility performs the same basic check as the CHECK TABLE command, but
from a command-line starting point. There are numerous options for the utility,
which you can find in the MySQL manual.
Repairing Tables
If either of the table-checking mechanisms suggest that there is a problem with
one of your MyISAM tables, you must use the REPAIR TABLE to bring the table
into consistency. If the repairs need to be made from the command line or in a
batch situation, you can use the myisamchk application. Figure 13.5 shows an
example of running the application using the –r flag.
Figure 13.5 Using myisamchk to repair a table.
It is also possible to repair the table using the REPAIR TABLE command. Fig-
ure 13.6 shows an example of using the command along with the EXTENDED
options. There is a QUICK repair option as well.
Database Administration
298
Figure 13.6 Using the REPAIR TABLE command.
Backing Up and Restoring Your Database
Once a database has been put into use, it is always a good idea to make back-
ups on a prepared schedule. The MySQL database server holds all of the data in
a series of files located on a local or network driver. Figure 13.7 shows the files
used to contain the acc_acc, acc_add, and acc_cert tables we’ve used through-
out the book.
Figure 13.7 The acc_* table data files.
As you can see in the figure, the data files are located in the data directory
under a subdirectory called accounts, which is the database where the tables
are defined. All three of these tables are MyISAM tables, and as such, three files
are defined per table. Other table types store data in other directories and files,
as we discuss briefly in a later section.
From what we see in the figure and know about MySQL, the easiest way to back
up a database that uses MyISAM tables is to follow these steps:
1. Stop the server.
2. Copy the files to another medium.
3. Restart the database.
If you don’t have the luxury of stopping the database, you have to do a couple
of extra steps. The most important thing is to make sure that no writes occur to
the database tables you are backing up. Here are the steps to follow when you
cannot shut down the database:
1. Lock the tables with a read lock using the command
mysql>LOCK TABLES <tables to backup> READ.
2. Flush any pending updates using the command
mysql> FLUSH TABLES.
3. Back up the table using only one of the following methods:
Copy the files manually.
Use the command mysql> SELECT * INTO OUTFILE “filename”
FROM <table>.
Backing Up and Restoring Your Database
299
Use the command mysql> BACKUP TABLE <table> TO <path>.
Use the command mysqldump opt <database> > <file>.
Use the command mysqlhotcopy <database> <path>.
Release the table locks using the command – mysql>UNLOCK TABLES;.
Let’s look at what these steps are accomplishing. First, we need to keep in mind
that our database server is still executing and that both reads and updates could
be occurring. We need to make sure that no write occurs to the tables once we
start to copy the data. We accomplish this by issuing the LOCK TABLES com-
mand. For example, let’s lock the acc_acc table using the following command,
which won’t allow any updates to occur:
mysql> LOCK TABLES acc_acc READ;
Next, we need to flush all of the caches associated with the table so that any
pending actions are taken care of:
mysql> FLUSH TABLES acc_acc;
The select table is now ready to be backed up, and as shown in step 3, there are
quite a few options available. Let’s discuss each of them in order.
The first backup option is to copy the files manually, which is the easiest of the
options. With this option and MyISAM files, you just copy all of the files associ-
ated with the table. The second option is to issue the command SELECT * INTO
OUTFILE “filename” FROM <table>. With this option, you create a file with all
of the data from the table arranged in a grid format. Typically, you use this
option when transferring table data from the database to another application
like Microsoft Excel; it isn’t the best backup option.
The third choice, the BACKUP TABLE command, works only with MyISAM
tables. The command copies the .frm and .myd files to the specified path. The
index file(s) won’t be copied since you can recover them from the data files.
The command is designed to move the least amount of data necessary to ensure
complete backup of data.
The fourth option, the command mysqldump opt <database> > <file>, backs
up an entire database to a specified file. The file will not only include data, but
also the SQL commands necessary to reproduce the data on another MySQL
server or even another database system entirely. Figure 13.8 shows an example
of using mysqldump.
The last option is to use the command mysqlhotcopy <database> <path>. The
mysqlhotcopy command makes a very quick backup of the specified database
using a Perl script, and you must execute it from the same machine as the
database.
Database Administration
300
Figure 13.8 Using mysqldump.
Restoring Data
We hope you never need to use a database backup, but there may be times
when data is corrupted. In these cases, you have to restore your data. We have
seen several ways to back up a MySQL database. There are basically three ways
to recover the backed-up data:
1. Copy the files.
2. Use the mysql application.
3. Use the RESTORE TABLE command.
If you used one of the backup options where the database files were just copied
to another location, you can restore your data by stopping the database, copy-
ing the files into the correct data directory, and restarting the server.
If you saved your data using the mysqldump command, you can “replay” the
SQL commands in the backup files into the current mysql server with the
command
mysql database < <file>
Backing Up and Restoring Your Database
301
Before using this command, though, rename the current database to a backup
name and then import the old data into the server.
You can use the RESTORE TABLE command if you used the BACKUP TABLE
command to back up your data. The format of the command is
RESTORE TABLE <database> FROM <path>
If you don’t rename the database table to be written, you’ll get an error.
InnoDB Table Types
Although the MyISAM table type is the most commonly used type in MySQL, we
need to cover two others in our backup discussion: InnoDB and BDB. First, let’s
look at the InnoDB table type. There are two possible ways to back up the Inn-
oDB tables: performing a binary backup or using a tool called InnoDB Hot
Backup.
In the binary backup, it is assumed you can shut down the database server. Fol-
low these steps:
1. Shut down MySQL.
2. Copy the InnoDB files to an appropriate backup medium.
All data files are located in the /idbata directory.
Log files are typically located in /mysql/data – ib_logfile_x.
3. Copy the current my.cnf file to the backup medium.
4. Use mysqldump to periodically create readable versions of the database
data.
If you don’t have the option of shutting down your database server to make the
backups of the InnoDB tables, you can use a tool called InnoDB Hot Backup to
do the work. The tool is available at www.innodb.com/hotbackup.html.
The Hot Backup tool is designed to make a copy of your InnoDB tables without
locking the database or causing any other type of interrupt to its normal opera-
tion. In other words, you get a snapshot of the data in your tables at a moment
in time. Of course, any additional updates to the table after the snapshot won’t
be part of the backup. You can request a 30-day evaluation of InnoDB Hot
Backup at the URL we’ve provided or purchase a license.
BDB Table Types
The other transaction table type used in MySQL is BDB, and it provides an alter-
native to InnoDB. The best way to make a backup of BDB tables is to use a
binary process:
Database Administration
302
1. Stop the MySQL database server.
2. Copy all files with the <table>.db name.
3. Copy all log files with the name log.dddddd located in the data directory of
MySQL—typically <install dir>/mysql/data.
What’s Next
This chapter has provided a glimpse into some of the functions that a developer
might need to accomplish while using a MySQL database as a back-end storage
device for Java. In the next chapter, we look at some of the most popular
optimization techniques to get the most from your MySQL database as well as
Connector/J and Java.
What’s Next
303
D
uring the development of an application that spends a good part of its
execution accessing a database, you must create a balance to achieve
the optimal working environment. In this chapter, we look at some of
the performance numbers associated with using Connector/J versions 3.0 and
2.1, how to tune MySQL for performance, and hints for getting the most out of
JDBC.
Connector/J 3.0 Performance
From an overall performance perspective, we want to determine how well the
driver (both 3.0 and 2.1) can insert new rows into the database, select those
same rows, and update one of the columns in each row. The code in Listing 14.1
does the performance work. The test is against a table defined using the fol-
lowing create table command:
mysql> create table product(id int auto_increment primary key,
string varchar(32),
test double,
supplier varchar(128),
ts timestamp,
value int);
Performance and Tuning
CHAPTER
14
305
Performance and Tuning
306
import java.sql.*;
import java.util.Date;
import java.text.DateFormat;
public class Performance{
Connection connection;
public Performance() {
try {
Class.forName("com.mysql.jdbc.Driver").newInstance();
} catch (Exception e) {
System.err.println("unable to load driver");
}
try {
connection = DriverManager.getConnection(
"jdbc:mysql://192.168.1.25/products?user=spider&password=spider");
}
catch(SQLException e) {
System.out.println("SQLException: " + e.getMessage());
System.out.println("SQLState: " + e.getSQLState());
System.out.println("VendorError: " +
e.getErrorCode());
}
}
public void run() {
long startTime;
try {
PreparedStatement ps = connection.prepareStatement(
"INSERT INTO product VALUES(null, 'title', 5.54,
'supplier', null, ?)");
startTime = new Date().getTime();
for (int i=0;i<1000;i++) {
ps.setInt(1, i);
ps.executeUpdate();
}
System.out.println("INSERT = " + ((new Date().getTime())
- startTime));
Statement statement = connection.createStatement();
startTime = new Date().getTime();
ResultSet rs = statement.executeQuery("SELECT * FROM product");
while (rs.next()) {
}
rs.close();
statement.close();
System.out.println("SELECT = " + ((new Date().getTime())
Listing 14.1 Performance example code. (continues)
Connector/J 3.0 Performance
307
- startTime));
ps = connection.prepareStatement(
"UPDATE product SET inventory=10 WHERE inventory = ?");
startTime = new Date().getTime();
for (int i=0;i<1000;i++) {
ps.setInt(1, i);
ps.executeUpdate();
}
System.out.println("UPDATE = " + ((new Date().getTime())
- startTime));
connection.close();
} catch(SQLException e) { }
}
public static void main(String[] args) {
Performance test = new Performance();
test.run();
}
}
Listing 14.1 Performance example code. (continued)
We executed the code in Listing 14.1 against a MySQL 3.23-52-NT database run-
ning on a 1.4GHz Pentium 4 with 512MB of RAM. We executed the client code
on the same machine to eliminate any substantial network traffic. When we
used the Connector/J 3.01 beta, it took
■■
734 milliseconds to insert 1000 rows
■■
20 milliseconds to retrieve 1000 rows
■■
13,063 milliseconds (13.063 seconds) to update 1000 rows
When we ran MySQL 4.0.4 on a P166 with 256MB of RAM with the client running
on a separate machine over a 100MB LAN, it took
■■
741 milliseconds to insert 1000 rows
■■
50 milliseconds to retrieve 1000 rows
■■
12,358 milliseconds (12.358 seconds) to update 1000 rows
Switching to Connector/J 2.1 doesn’t change the numbers too much. When we
used the 1.4GHz machine, it took
■■
726 milliseconds to insert 1000 rows
■■
22 milliseconds to retrieve 1000 rows
■■
12,645 milliseconds (12.645 seconds) to update 1000 rows
On the P166, the numbers are
■■
761 milliseconds to insert 1000 rows
■■
40 milliseconds to retrieve 1000 rows
■■
12,448 milliseconds (12.448 seconds) to update 1000 rows
Database Tuning
If a system appears to be running slow, the performance of the database should
be checked to ensure it is running at an optimal level for the machine it is exe-
cuting on. In this section we discuss various server options for tuning the data-
base, using RAID, adding indexes, and examining the options from the MySQL
Query Optimizer.
Server Options
When installing MySQL for the first time, you can turn to several configuration
file examples supplied in the base directory of the install on a Windows
machine. One of these configurations is supposed to be copied to the root
directory. Although the Unix version does not supply example configuration
files, it’s worth looking at some of the server parameters set up in these files to
see how a small system is configured versus a large system. Table 14.1 shows
the various parameters and their values based on intended server size.
Table 14.1 Server Configuration Options
SERVER KEY_ MAX_ THREAD_ TABLE_ SORT_ NET_ THREAD_
SIZE BUFFER_ ALLOWED_ STACK CACHE BUFFER BUFFER_ CACHE_
SIZE PACKET LENGTH SIZE
Small 16K 1MB 64K 4 64K 2K NA
Medium 16MB 1MB NA 64 512K 8MB
Large 256MB 1MB 256 NA 1MB 64MB 8
Huge 384MB 1MB 512 NA 2MB 128MB 8
As you can see, some of the server parameters change quite drastically. Here
are the explanations for each of the parameters:
key_buffer_size—The total memory used for index blocks. This is a
shared amount and should be roughly one-fourth of the total memory in the
system.
max_allowed_packet—The total size of a message from a client. Packets
bigger than this value throw an exception. The value should be as big as the
Performance and Tuning
308
largest amount of data to be passed to the server. This is important if you
are using BLOBs since their data can be quite large.
thread_stack—The size of the stack associated with each server thread.
table_cache—The total number of opened tables allowed on the system.
sort_buffer—The size of the sort buffer opened by a thread when the user
uses the ORDER BY or GROUP BY clause.
net_buffer_length—The initial length of the buffer where queries will be
initially received. This value will grow to max_allowed_packet as needed.
thread_cache_size—The size of the thread cache when server threads are
removed to handle a client’s request.
Another server parameter that you might want to consider increasing is
read_buffer_size. This parameter indicates the size of a buffer opened by a
server thread when a query requires a table scan to be performed instead of
using an index.
Using RAID
While the server needs memory to perform its various operations and you can
configure the server parameters to balance the machine’s memory against the
needs of the application, the system disks play a vital role in performance.
At a minimum, the disk hardware used to store the database’s data should be
the fastest possible. This means a high RPM value and a low disk seek. The dif-
ference between an 8-millisecond seek and a 10-millisecond seek can be enor-
mous when multiplied over thousands of queries. To further help with the seek
issue, we can take advantage of disk stripping and gain some data redundancy
at the same time.
Using RAID level 1, we can instruct the server machine’s hardware to spread a
disk volume across N number of drives. When we do this, seeks to the drive to
obtain the data saved in MySQL’s table files won’t always have to be done
against a single drive—which means waiting on the read head to seek to the
proper disk location. Instead, data will be read from multiple drives, which
results in a greater average seek time across all drives.
Optimizing Tables
When you delete rows from a database table, the database server doesn’t actu-
ally remove the rows, but instead keeps a running list of rows that are currently
marked as deleted. As new records are inserted into the table, the deleted rows
are reused. If you delete rows that have BLOBs or variable-length data in
them, it is a good idea to execute the OPTIMIZE TABLE <table> command
Database Tuning
309