snort 2.1 intrusion detection second edition phần 3 potx
Bạn đang xem bản rút gọn của tài liệu. Xem và tải ngay bản đầy đủ của tài liệu tại đây (2.09 MB, 76 trang )
295_Snort2e_03.qxd 5/5/04 2:55 PM Page 122
122 Chapter 3 • Installing Snort
7. At the command prompt, type ./configure and press Enter.This will
run the configure script for libpcap (see Figure 3.5).
Figure 3.5 Running the configure Script
8. When the configure script has completed its operation, you should be
returned to a prompt. Make sure you have no errors on screen.
Everything should look okay if you installed your development tools
from earlier in the chapter. At the prompt, type make and press Enter.
9. The make command will also bring you back out to a prompt when it
has completed its work. Again, you need to check the output that make
has displayed on screen to verify that the operation was trouble-free. At
the prompt, type make install and press Enter.
10. After make finishes the installation of the software, you will be returned
to the command prompt—and with luck, free of error.
Installing libpcap from RPM
You can also install libpcap from an RPM package if your distribution supports
it. At the time of writing, www.rpmfind.net returned 63 results (spanning 11
Linux distributions including SUSE) when presented with a query for libpcap.
Frankly, we believe that this is the best place to find custom-compiled RPMs for
www.syngress.com
Simpo PDF Merge and Split Unregistered Version -
295_Snort2e_03.qxd 5/5/04 2:55 PM Page 123
Installing Snort • Chapter 3 123
your distribution of choice. We have included RPMs for the following distribu-
tions on the accompanying CD-ROM.They are located in the /Snort-
2.1.1/Linux/pcap/rpms directory.
■
Conectiva Version 6.2 (RPM and SRPM)
■
Mandrake Version 6.2 (RPM), version 7.1 (RPM and SRPM)
■
Red Hat (7.2, 7.3, 8.0) Version 6.2 (RPM only)
■
SuSE Linux Version 7.1 (RPM only. Version 9.1 comes with the
0.8.1 RPM on CD.)
The procedures involved in installation via RPM are, more often than not,
much easier than an installation that uses source code—if there are no depen-
dency problems.The RPM system, while an excellent package management tool,
is fraught with problems regarding dependencies. It understands and reports what
the specific package requires to install, but is not yet capable of acquiring and
installing the packages necessary to fulfill its requirements.
If you are not familiar with the term, dependencies are packages and/or
libraries required by other packages.The Linux operating system is built on
dependencies, which you can visualize as an upside-down tree structure. At the
top of the tree are your basic user-installed programs, such as Snort. Snort
depends on libpcap to operate, and libpcap requires other libraries to function.
Installing libpcre
The next package that will need to be installed on a SUSE Linux system is the
PCRE (www.pcre.org) library package (from the developers site: “The PCRE
library is a set of functions that implement regular expression pattern matching
using the same syntax and semantics as Perl 5”). Because of recent enhancements
to the Snort rule language, Snort requires it to function. In fact, Snort won’t
compile without it. For a detailed discussion of the benefits of the PCRE func-
tions and the Snort rule language in general, see Chapter 5, “Playing by the
Rules.” Depending on your setup, you might already have this installed.To install
it on SUSE Linux, perform the following:
1. Download the latest PCRE package from
sourceforge/p/pc/pcre/ (the Windows port can be found at
and extract it to
your home directory.The current version as of the writing of this book
is 4.3.This will create a directory called pcre-4.3.
www.syngress.com
Simpo PDF Merge and Split Unregistered Version -
295_Snort2e_03.qxd 5/5/04 2:55 PM Page 124
124 Chapter 3 • Installing Snort
2. Change directories into it and issue the following commands to build
the software:
./configure
make
make install
Now you are ready to continue with the rest of the installation.
Installing MySQL
Snort 2.1.1 can be used in conjunction with a number of different database
packages; as with choice of OS, choice of database is highly personal. In this case,
we will use MySQL as the example although it is equally easy to make Snort
work with PostgreSQL, Oracle, or MS SQL Server.
OINK!
There are a number of reasons not to place your database directly on
the IDS sensor itself. Some of the most important ones are speed (run-
ning the database may take precious resources from the IDS) and secu-
rity. We strongly recommend that you use Barnyard to take the Snort
logs and load them into a database. For more on Barnyard, see Chapter
11, “Mucking Around with Barnyard.”
First, you will need to make sure that MySQL is not already installed on your
system. From the command line, enter the following command:
rpm -qa | grep MySQL
That command should return you to an empty prompt. If it doesn’t, you can
skip the installation steps that follow—you already have it installed.
Installing from RPM
SUSE Linux 9.1 comes with MySQL v4.0.18, and it can be easily loaded from
the YaST Install and Remove Software application.To install MySQL server, (from
the GUI, simply launch the K menu and go launch SYSTEM > YAST >
INSTALL AND REMOVE SOFTWARE) launch /sbin/yast from the com-
mand line (see Figure 3.6).
www.syngress.com
Simpo PDF Merge and Split Unregistered Version -
295_Snort2e_03.qxd 5/5/04 2:55 PM Page 125
Installing Snort • Chapter 3 125
Figure 3.6 Search for MySQL
1. When the program launches, tab over the Install and Remove
Software, and press Enter.
2. Highlight the Filters button and press the down arrow until Search is
selected. Press Enter.Type mysql in the text box, tab down to the OK
button, and press Enter (see Figure 3.7).
3. In the next screen, arrow down to highlight mysql, and press either the
Space bar or the Plus (+) key on it. If you’ve done this correctly, there
will be a plus sign next to the entry. Other dependencies will also be
selected by the system automatically (in most cases, mysql-client).
4. Tab down to the Accept button and press Enter.
5. The system will prompt you to accept the changes.Tab down to OK
and press Enter.
6. SUSE will then ask you to insert a CD or multiple CDs depending on
your setup and version. SUSE Pro 9.1 will only ask for CD 3. Insert the
required media, tab down to the OK button, and press Enter.
7. The system will continue the installation as requested.There will be no
more prompts and you will be returned back to the YaST main screen
when it’s done.
www.syngress.com
Simpo PDF Merge and Split Unregistered Version -
295_Snort2e_03.qxd 5/5/04 2:55 PM Page 126
126 Chapter 3 • Installing Snort
8. Tab down to the Quit button and press Enter.
Figure 3.7 Install MySQL
Installing from Source
First, we need to download the MySQL archive (which can be found at
www.mysql.com/downloads/mysql-4.0.html).The current stable version as of
the writing of this book is 4.0.18.The only package you should have to down-
load is the standard package. Download it to a place that is easily remembered,
such as your home directory. In the case of this documentation, we will assume
this location is /root.The first step after downloading it will be to extract it.
Enter the following line at the command prompt:
tar zxvf /root/mysql-standard-4.0.18-pc-linux-i686.tar.gz
This will extract the MySQL source code into the /root directory.The next
step will be to build the package and install it to the system. Enter the following
at the prompt:
./configure –prefix=/usr/local/mysql –localstatedir=/usr/local/mysql/data
–enable-large-files-without-debug –with-mysqld-user=mysql –disable-
maintainer-mode
www.syngress.com
Simpo PDF Merge and Split Unregistered Version -
295_Snort2e_03.qxd 5/5/04 2:55 PM Page 127
Installing Snort • Chapter 3 127
If all goes well, this command will complete without error.The next thing to
do is build and install it.To do this, enter the following:
make && make install
Your software should now be installed successfully. Now you need to create
the mysql group by entering this command at the prompt:
/usr/sbin/groupadd mysql
Now create the mysql user (who belongs to the group we just created) to
run the service:
/usr/sbin/useradd -g mysql mysql
The next thing we will do is install the database files and adjust file permis-
sions. (Note: Each of the following lines need to be entered individually.)
./scripts/mysql_install_db
chown root:mysql /usr/local/mysql -R
chown mysql:mysql /usr/local/mysql/data -R
Next, we need to edit /etc/ld.so.conf and add the following:
/usr/local/mysql/lib/mysql
The last thing that needs to be done is to set the root password for MySQL
(the YOUR_PASSWORD_HERE string is a placeholder here and should be
changed to the password you want to use):
/usr/local/mysql/bin/mysqladmin -u root password YOUR_PASSWORD_HERE
Installing Snort
Now we can get into the actual installation of Snort. So far, we have covered the
basics of Linux package management, including RPM installs, source compila-
tion, and installing libpcap, so this next section should be fairly easy for us to get
through.The installation of Snort is painless, so we can save all of our energy for
the setup, configuration, and rules management.
First, you need to get Snort. Whether you choose to get it from the Web site
at www.snort.org or on the accompanying CD-ROM is entirely up to you.The
version on the CD-ROM is 2.1.1, so we will use it in our example install.This is
the most current stable version available at press time. Please note that we
strongly recommend going to www.snort.org and downloading the newest stable
www.syngress.com
Simpo PDF Merge and Split Unregistered Version -
295_Snort2e_03.qxd 5/5/04 2:55 PM Page 128
128 Chapter 3 • Installing Snort
release, as you will benefit from new functionality, bug fixes, stability, and speed
enhancements.This software is constantly changing, growing, and getting better
every day.
A Brief Word about Sentinix GNU/Linux
It was not until recently that we came across a wonderful Linux distribution
called SENTINIX. What is it? The description from their Web site (www.sen-
tinix.org) sums it up fairly well:
“SENTINIX is a GNU/Linux distribution designed for monitoring,
intrusion detection, penetration testing, auditing,
statistics/graphing, and anti-spam. It’s completely free; free to use,
free to modify, and free to distribute. SENTINIX includes the fol-
lowing software, installed and preconfigured; Nagios, Nagat, Snort,
SnortCenter, ACID, Cacti, RRDTool, Nessus, Postfix, MailScanner,
SpamAssassin, openMosix, MySQL, Apache, PHP, Perl, Python, and
lots more.”
With this Linux distribution, other than the obvious abundance of security
and scanning software, was the Web-based configuration. Basically, you can build
the server, load the operating system, tuck it away in a rack somewhere, and sit at
your desk to configure it through a Web browser.The developers have done an
excellent job making Snort friendlier to use via the SnortCenter Web interface
(see Figure 3.8).This is well worth a look if you are serious about intrusion
detection and need the convenience of a Web-based console.
Figure 3.8 SENTINIX Snort Console
www.syngress.com
Simpo PDF Merge and Split Unregistered Version -
295_Snort2e_03.qxd 5/5/04 2:55 PM Page 129
Installing Snort • Chapter 3 129
OINK!
All of the components of SENTINIX Linux can be downloaded individually
from the Internet free of charge, so if you don’t want the entire distribu-
tion you can simply download and install the packages you want on an
existing Linux or Windows installation. The distribution is built entirely
from open-source software, so it is completely legal and recommended.
The installation was devoid of a GUI, but it was so simple almost anyone
with a bit of Linux experience wouldn’t have any problems understanding how
to get everything running.The configuration of all the scanners (including Snort)
have already been done for you—all you have to do is power it on.This is not to
say that you cannot go into the system via a Web browser and configure your
own rules, and so forth this is very easy to do.The software will also generate
reports, issue alerts, and generally make your IDS life a little easier.You have to
admit, we can all use a little lift from time to time, especially when it comes to
working with computer systems.
Installing Snort from Source
There is something to be said about installing software from source code. In our
opinion, it is the easiest and best way to install a properly functioning software
package. In this section, we will be installing the Snort 2.1.1 package from a
source tarball located on the accompanying CD-ROM.To install Snort, simply
follow these simple steps:
1. As root, browse to the /Snort-2.1.1/Linux/src folder located in the
Chapter 3 directory (03) on the CD-ROM.
2. Copy the tarball to the /tmp directory by typing cp snort-
2.1.1.tar.gz /tmp at the command line.
3. Change directories to /tmp by typing cd /tmp at the command line.
4. Extract the tar archive by issuing the command tar –zxvf snort-
2.1.1.tar.gz.
5. Change directories into the newly created Snort directory by typing cd
snort-2.1.1.
6. At the command line, type ./configure to configure the package.You
should see text start to scroll by (similar to the example in Figure 3.9).
www.syngress.com
Simpo PDF Merge and Split Unregistered Version -
295_Snort2e_03.qxd 5/5/04 2:55 PM Page 130
130 Chapter 3 • Installing Snort
Figure 3.9 Running the Snort configure Script
7. Next, type make at the command line.This will create the makefile.
OINK
!
This might take some time depending on the speed of the target
machine.
8. As the final step in the build process, type make install at the com-
mand prompt.This action will deliver the package and its files to where
they belong in the system.The Snort install is now officially complete.
We can now move on to basic customization.
OINK!
This must be done as root, or Snort won’t be able to install properly.
www.syngress.com
Simpo PDF Merge and Split Unregistered Version -
295_Snort2e_03.qxd 5/5/04 2:55 PM Page 131
Installing Snort • Chapter 3 131
Enabling Features via configure
During the build process (more specifically, during the configure script portion),
we can pass options to the installer to customize it to whatever specific situation
or needs we might have.These were harvested from the /docs/INSTALL file in
the Snort 2.1.1 tarball (which is on the accompanying CD-ROM, so if you ever
need to reference them, you can find them there).
■
enable-debug Enable debugging options (bug reports and developers
only).
■
with-snmp Enable SNMP alerting code.
■
enable-smbalerts Enable the SMB alerting code, which is somewhat
unsafe because it executes a popen() call from within the program (which
runs at root privs).You’ve been warned, so use it with caution!
■
enable-flexresp Enable the “Flexible Response” code, which allows
you to cancel hostile connections on IP-level when a rule matches.
When you enable this feature, you also need the libnet-library that can
be found at www.packetfactory.net/libnet. See README.FLEXRESP
for details.This function is in stable release 1.1.2.1 as this book goes to
press.
■
with-mysql=DIR Support for MySQL; turn this on if you want to
use ACID with MySQL.
■
with-odbc=DIR Support for ODBC databases; turn this on if you
want to use ACID with a nonlisted DB.
■
with-postgresql=DIR Support for PostgreSQL databases; turn this on
if you want to use ACID with PostgreSQL.
■
with-oracle=DIR Support for Oracle databases; turn this on if you
want to use ACID with Oracle.
■
with-openssl=DIR Support for OpenSSL (used by the XML output
plug-in).
■
with-libpq-includes=DIR Set the include directories for PostgresSQL
database support to DIR.
■
with-libpq-libraries=DIR Set the library directories for PostgresSQL
database support to DIR. Setting both of these values enables the
Postgres output plug-in module.
www.syngress.com
Simpo PDF Merge and Split Unregistered Version -
295_Snort2e_03.qxd 5/5/04 2:55 PM Page 132
132 Chapter 3 • Installing Snort
■
with-libpcap-includes=DIR If the configuration script can’t find the
libpcap include files on its own, the path can be set manually with this
switch.
■
with-libpcap-libraries=DIR If the configuration script can’t find the
libpcap library files on its own, the path can be set manually with this
switch.
Installing Snort from RPM
Depending on your distribution and release number, there might not be RPMs
available. In most cases, you can probably find contributed source RPMs from a
Web site such as www.rpmfind.net, and then you can build your own. We rec-
ommend building your own because all systems are inherently different and have
their own file system structure and environments. We will cover installation via
RPM and source RPM in this section.This should seem pretty easy to you in
comparison to installation by tar archives.
Let’s start with the RPM installation.The installation is simple. All you have
to do is browse to the /Snort-2.1.1/Linux/RPM folder on the accompanying
CD-ROM and do one of two things:
■
In console mode At a console prompt, just enter the command rpm
–Uvh snort-2.1.1-snort.i386.rpm.This will complete the installation
routine for you. Note that we used the –U (upgrade) option versus –i
(install)—it will install with either. We are always concerned that if we
use –i, the installer will not upgrade files properly (if there are any files
to upgrade to newer versions), but if we use the –U flag, it will do a
more thorough job of installing the software. What we’re trying to say is
that you can install the software simply by typing rpm –i snort-2.1.1-
1snort.i386.rpm.
■
Inside X Windows If you are using KDE, GNOME, or one of the
many X Windows systems out there, this set of instructions is for you.
Inside the /Snort-2.1.1/Linux/RPM folder on the accompanying CD-
ROM, double-click the snort-2.1.1-1snort.i386.rpm file. Under SUSE
Linux, konqueror will load an HTML document with the package name,
description, and an option to install via YaST. All you have to do is click
Install package with YaST and the YaST will launch. If you are not
logged in as root, you will be prompted for the root password. Enter it
www.syngress.com
Simpo PDF Merge and Split Unregistered Version -
295_Snort2e_03.qxd 5/5/04 2:55 PM Page 133
Installing Snort • Chapter 3 133
and click OK.YaST will install the package for you and silently exit.
Depending on your system setup, you might be promoted to insert CDs
to satisfy any dependencies. As stated earlier, depending on your distribu-
tion, instructions might vary; so make sure to consult the documentation
or man files that came with your distribution. Most of the RPM-based
distributions are not much different from what we have witnessed here.
Another point that is distribution dependent is that you might not get a
confirmation that the package was successfully installed onto the system.
In true UNIX/Linux fashion, some distributions do not waste time dis-
playing unnecessary information to the screen.The only time you might
ever hear Linux speak is when something went dreadfully wrong (and we
all hope that day never comes).
OINK!
SUSE Linux 9.1 comes with Snort 2.1.1 on CD 5. It is obviously a “pre-
compiled by SUSE” version, so it is completely optional to use as your
installation method. The Snort log analyzer 5n0r7 is also included in this
package.
Now we will look at the source RPM (or SRPM) as a means of a more solid
installation.This is one of the more preferable methods used to install packages if
you use RPM-based distributions such as SUSE Linux or Red Hat Linux, and
the SRPMs are readily available to you. Usually, sites such as www.freshrpms.net
and www.rpmfind.net will have these available for most packages and almost all
RPM-based distros.
Recompiling a source RPM is not as daunting as it might sound. RPM takes
care of all the minute details involved in a recompile and rebuild. Let’s start with
the SRPM located in the /Snort-2.1.1/Linux/srpm folder on the accompa-
nying CD-ROM. It is the most current version of Snort and is ready for
rebuilding into your system. Depending on the version of RPM you are using,
the syntax can vary slightly.The first example we will give you will run on RPM
version 4.1 or higher (SUSE Linux 9.0 and newer meet this requirement). At a
console prompt, all you have to do is navigate to the /Snort-
2.1.1/Linux/srpm folder and enter rpmbuild rebuild snort-2.1.1-
1snort.src.rpm.This will prompt RPM to rebuild the file into a regular RPM
specifically designed for your system.
www.syngress.com
Simpo PDF Merge and Split Unregistered Version -
295_Snort2e_03.qxd 5/5/04 2:55 PM Page 134
134 Chapter 3 • Installing Snort
The second example is for versions earlier than 4.1. For these systems, just
enter rpm rebuild snort-2.1.1-1snort.src.rpm.This command will do
exactly the same thing as in the previous example, but in a slightly different
syntax. Both versions will place the completed RPM package in a subfolder
under the /usr/src/ directory. On most SUSE Linux systems, the completed
builds are located under /usr/src/packages/RPMS/i586. (Depending on
your package’s architecture, the directory can vary; for example, i386, i486, and so
on. If you don’t know which directory the finished package is in, simple enter
the /usr/src/packages/RPMS directory, issue a find -name *.rpm, and
Linux will tell you exactly where your package is.This will save you from having
to dig through every directory to find it.)
OINK!
The only drawback to building a package from an SRPM is that all of the
package’s dependencies must be met, even though you are not actually
installing the program. In the case of Snort, you must have MySQL,
PostgreSQL, and UCD-SNMP installed (including devels and libraries). The
reason for this is simple: with Snort, the developers have coded the soft-
ware to support a variety of databases. When you attempt to rebuild the
SRPM, it looks for all of the various dependencies required for all
database systems it was built to run with. This is true even if you don’t
ever intend to use all of the options. The fact of the matter is that they
are present and must be rebuilt into the final package for it to function
properly. If you do not satisfy all of the program’s dependencies, the
rebuild will fail. One good thing is that it will explain what components
it is missing to allow you to install them and try the rebuild again.
Installing Snort Using apt
For those of you who might be running Debian (or one of its many variants
such as Libranet, Knoppix, Mepis, and so forth), this section is for you. If you
don’t have the time or ambition to install Snort from source, Debian has the apt-
get package management system we mentioned earlier.The main advantages to
apt-get are the speed at which it installs and the huge software arsenal you have
at your disposal. Debian has 8000+ applications available upon request in its
online repositories.This is a staggering amount of resources at your disposal (see
Figure 3.10).
www.syngress.com
Simpo PDF Merge and Split Unregistered Version -
295_Snort2e_03.qxd 5/5/04 2:55 PM Page 135
Installing Snort • Chapter 3 135
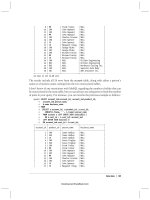
To begin the installation, log in as root and enter the following command:
apt-get install snort
The output will look something like this:
Reading Package Lists Done
Building Dependency Tree Done
The following extra packages will be installed:
snort-common snort-rules-default
Recommended packages:
snort-doc
The following NEW packages will be installed:
snort snort-common snort-rules-default
0 upgraded, 3 newly installed, 0 to remove and 0 not upgraded.
424 not fully installed or removed.
Need to get 434kB of archives.
After unpacking 1610kB of additional disk space will be used.
Do you want to continue? [Y/n]
Figure 3.10 Using apt-get to Install Snort
What has happened up until this point is that apt searched through its reposi-
tories online for the package you requested, found everything it depends on to
run, and presented you with the changes that need to occur to properly install
Snort IDS. If you accept the changes, you only need to press Y at the prompt.
The next steps involve answering a few questions from the installer. No need
to worry, they are pretty basic. We will walk through them one by one to make
sure you have everything working correctly the first time.
www.syngress.com
Simpo PDF Merge and Split Unregistered Version -
295_Snort2e_03.qxd 5/5/04 2:55 PM Page 136
136 Chapter 3 • Installing Snort
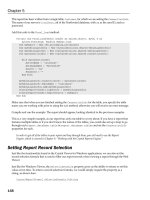
As you can see in Figure 3.11, the first prompt is asking which interface, or
network card, Snort should listen on. Generally, this will most likely be eth0,
which is the first interface on a Linux system. In some cases, as in a multihomed
machine (a computer with more than one network interface) for example, cir-
cumstances might deem it necessary to listen on eth1 or higher.This would be
the case if the machine was on two network segments and you needed to listen
on the segment attached to eth1. When you have entered the proper device
name, tab down to OK and press Enter.
Figure 3.11 apt Snort Install—Choosing the Interface
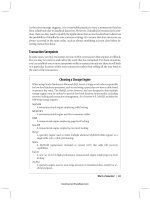
The next prompt you will see concerns what Snort will consider the local
network, or subnet. Enter it and choose OK to continue. Please note that that
entry is in the CIDR (Classless Inter-Domain Routing) format (see Figure 3.12).
Figure 3.12 Choosing the Network
www.syngress.com
Simpo PDF Merge and Split Unregistered Version -
295_Snort2e_03.qxd 5/5/04 2:55 PM Page 137
Installing Snort • Chapter 3 137
The next prompt asks you what account should receive the daily statistics
mailings. In most scenarios, this account will most likely be root, but it can be
anyone you choose (se Figure 3.13).
Figure 3.13 Whom to Alert
When this last question has been answered, the installation will continue.
When it is complete (and providing there were no errors), you should be pre-
sented with the following output:
Setting up snort-common (2.0.2-2)
Setting up python2.3-docutils (0.3+cvs20030901-2)
Setting up snort-rules-default (2.0.2-2)
Setting up python-docutils (0.3+cvs20030901-2)
Setting up snort (2.0.2-2)
Stopping Network Intrusion Detection System: snort.
Starting Network Intrusion Detection System: snort.
Localhost:~#
At this stage, Snort is running on your system, providing no errors were
encountered.You can easily run ps -A to see all of your processes running on
the system. Snort should be near the bottom of the list, as it is organized by PID
(Process ID) oldest to newest.
www.syngress.com
Simpo PDF Merge and Split Unregistered Version -
295_Snort2e_03.qxd 5/5/04 2:55 PM Page 138
138 Chapter 3 • Installing Snort
Configuring Snort IDS
Next, we will take a brief look at Snort configuration options. We already
touched on build time configure options in the Installing Snort from Source section
earlier, but we need to take a moment to look at the Snort configuration file.
Customizing Your
Installation: Editing the snort.conf File
The first order of business after completing the Snort install is to customize it to
your needs. We are going to begin with the snort.conf file located in the
/etc/snort directory.This file contains the configuration settings that Snort will
use every time it is invoked.This configuration file is lengthy, but the sample file
that the developers provided us is complete with basic instructions on syntax and
use. Although it is thorough in its descriptions, we would still like to cover a few
basic settings that will allow Snort to function properly.
First, we will need to change the var HOME_NET variable in the snort.conf
file.This variable signifies the internal network address of your LAN. In most
textbook cases, this value will be an entire subnet or list of subnets, but it can
also be in the form of a single IP address. In this example, we are going to use
the subnet of our internal network card. In this case, it will be 192.168.0.0/24,
which means that the address space of 192.168.0.–192.168.0.254 will be repre-
sented, using a subnet mask of 255.255.255.0 (see Figure 3.14).
Figure 3.14 Editing the snort.conf File in gedit
www.syngress.com
Simpo PDF Merge and Split Unregistered Version -
295_Snort2e_03.qxd 5/5/04 2:55 PM Page 139
Installing Snort • Chapter 3 139
The next variable we need to look at is var EXTERNAL_NET.You can set
this to whatever subnet your external network adapter is answering requests (or
in this case, listening) on. In this example, we will use var EXTERNAL_NET
any.This tells Snort to listen for all addresses on the external network. In our
opinion, this value should be left at the default state of any.
OINK!
If you aren’t familiar with subnet masks, we strongly recommend that
you read any basic text on TCP/IP networking. Having said that, the most
common netmasks are /32 or /24. /32 is shorthand for the netmask
255.255.255.255 and specifies a single IP address. /24 is shorthand for
the netmask 255.255.255.0 and specifies a full subnet (256 IP
addresses).
If you scroll down further into the config file, you will see a section dedi-
cated to server-specific variables.These variables will look similar to var
HTTP_PORTS 80 or var ORACLE_PORTS 1521.These variables (or vars)
specify specific ports on which Snort should watch for attacks.The only down-
side to the current implementation is that you either have to list ports in succes-
sion (for example, 80:82, which means 80 through 82 inclusive) or on separate
lines. Work is underway to add support for port lists.
Other areas of initial interest should include the preprocessors, output plug-
in, and ruleset sections. Preprocesses are the filters that Snort puts the incoming
data stream through before it actually processes the data. In the example
snort.conf file, notice that IP defragmentation is turned on.This helps to detect
fragmentation and denial-of-service (DoS) attacks.You can also enable other pre-
processors in this section to fit your particular scenario. We cover the preproces-
sors in depth in Chapter 6, “Preprocessors.”
The output plug-ins section defines whether Snort will use various logging
and alert features, and tells it what format to use to dump the data. Output plug-
ins are covered in Chapter 7, “Implementing Snort Output Plug-ins.”The ruleset
section defines what the system will consider “suspicious” activity. Based on this
alone, you should visit www.snort.org frequently to download the latest rulesets to
ensure that your IDS is doing the job you want it to do—without an up-to-date
ruleset, you machine will be nothing more than an expensive paperweight. It is
also a good practice to comment out rules that do not apply to your organiza-
www.syngress.com
Simpo PDF Merge and Split Unregistered Version -
295_Snort2e_03.qxd 5/5/04 2:55 PM Page 140
140 Chapter 3 • Installing Snort
tion and/or needs. Unnecessary and extra rules can lead to false positive alerts
from the system.Techniques for managing the rules (automating updates, han-
dling customized rules, and so forth) are covered in Chapter 9, “Keeping
Everything Up to Date.”
Also make note that you can alter the path to your rulesets here as well, by
changing the include $RULE_PATH/rule.rules line to reflect the location of your
updated rules.
The final step in this section is to verify that Snort will actually run without
error.To accomplish this, we will run Snort with a generic configuration/ruleset
and no options.To do this, open a terminal window, type snort –v, and verify
that the program loads without error.You will see a screen similar to the one in
Figure 3.15. All we are doing here is running Snort in verbose mode (hence the
–v flag). Since everything looks good, let’s move on to the next section.
Figure 3.15 Running Snort with the Verbose Option Enabled
Installation on the MS Windows Platform
All you Microsoft users were probably wondering when we were going to get to
the section designated for you. Well, we are here. Sorry for the delay. Please keep
in mind that we have not pushed the Microsoft portion to the end for any
reason other than for the simple fact that it is an easier task installing on this
system than on its Linux counterparts.This is going to be much shorter in terms
of installation steps. Configuration should be a breeze as well. As a personal
www.syngress.com
Simpo PDF Merge and Split Unregistered Version -
295_Snort2e_03.qxd 5/5/04 2:55 PM Page 141
Installing Snort • Chapter 3 141
opinion, we always recommend installing on Linux (rather than Windows) if you
have the resources to do so—for reasons of stability and pure speed. Linux is also
far superior at performing network-related tasks.
Let’s get started with the installation. First, we’ll need to install the packet
capture library for Windows, WinPcap, which is on the accompanying CD-
ROM.You can find it under the Snort-2.1.1/Win32/winpcap3.0 directory, or
you can also install it from the GUI that is included on the CD-ROM.The
installation is very simple and should go smoothly. Here is how to install
WinPcap manually by browsing the CD-ROM:
1. Browse to the Snort-2.1.1/Win32/winpcap3.0 folder on the
CD-ROM.
2. Double-click WinPcap.exe to launch the installer.
3. The installer will present you with a Welcome dialog as in Figure 3.16.
Click Next.
Figure 3.16 The Snort Installer Welcome Screen
4. The next dialog is a simple notification that lets you know that the
installation completed successfully (see Figure 3.17). Click OK.
www.syngress.com
Simpo PDF Merge and Split Unregistered Version -
295_Snort2e_03.qxd 5/5/04 2:55 PM Page 142
142 Chapter 3 • Installing Snort
Figure 3.17 Confirming a Successful WinPcap Installation
5. The next screen is another confirmation that the installation finished on
your computer (see Figure 3.18). Click Finish.
Figure 3.18 Completing the WinPcap Install
Congratulations! The WinPcap installation was a success. Although not noted
during the installation, we recommend rebooting the machine for any changes to
take effect, as Windows always seems to need a little extra coaxing. If you ever
need to uninstall WinPcap, it places an entry in the Add/Remove Programs applet
in the Windows Control Panel. Simply remove it from there if something goes
wrong.
The latest version of Snort (as of press time) is included on the accompa-
nying CD-ROM.You are also encouraged to visit www.snort.org to download
the latest and greatest version. For this exercise, we will be installing from the
CD-ROM.
www.syngress.com
Simpo PDF Merge and Split Unregistered Version -
295_Snort2e_03.qxd 5/5/04 2:55 PM Page 143
Installing Snort • Chapter 3 143
1. To begin, navigate to the Snort-2.1.1/Win32 folder on your CD-
ROM and double-click the
Snort-2.1.1.exe file.This will start the
installer. Optionally, you can also start the installer through the graphical
interface we have provided (this will start automatically when the CD-
ROM is inserted into the drive).
2. Once the installer launches, you will be presented with the GNU
General Public License (GPL). We strongly recommend reading this in
its entirety if you have the patience and the time. It is a wonderful piece
of literature and has remained unchanged since its inception in 1991.
This is the license under which most open-source software is dis-
tributed, including Linux. When you have finished reading the license,
click I Accept (see Figure 3.19).
Figure 3.19 The GNU GPL Agreement for Snort
3. The next screen to appear is the Installation Options dialog (see Figure
3.20). Here, you will be able to select optional components to fit your
unique situation. As the software states, if you choose the SQL option,
make sure that the SQL client software is already installed on the target
machine. Click Next when you are ready to continue.
www.syngress.com
Simpo PDF Merge and Split Unregistered Version -
295_Snort2e_03.qxd 5/5/04 2:55 PM Page 144
144 Chapter 3 • Installing Snort
Figure 3.20 Snort 2.1 Installation Options Window
4. Next, you are presented with the screen shown in Figure 3.21.This
window presents you with a list of components to install. Again, you can
choose what you would like to install here to fit your needs. Please note
that it is important to make sure Snort is one of your choices—it might
make for an interesting installation without it.Your component options
are as follows:
■
Snort Installs Snort, configuration files, and rules.
■
Documentation Installs the Snort documentation.
■
Contrib Copies additional user-contributed add-on modules and
tools.
5. Click Next when you are satisfied with your choices.
www.syngress.com
Simpo PDF Merge and Split Unregistered Version -
295_Snort2e_03.qxd 5/5/04 2:55 PM Page 145
Installing Snort • Chapter 3 145
Figure 3.21 Choosing Components for Your Snort Install
6. Next, you are prompted with an installation location (see Figure 3.22).
The default is fine unless you’re feeling creative. Click Install.
Figure 3.22 Installation Location Window
7. The installer will start copying files to your hard drive. It doesn’t take
long, so don’t go anywhere. When it is complete, you will be presented
with a screen like the one shown in Figure 3.23.
www.syngress.com
Simpo PDF Merge and Split Unregistered Version -
295_Snort2e_03.qxd 5/5/04 2:55 PM Page 146
146 Chapter 3 • Installing Snort
Figure 3.23 Your Snort Installation Is Now Complete
8. The installation is now complete. Just click OK and Close and consider
Snort ready to use! Optionally, you can click Show Details to view the
output of the installer (see Figure 3.24).This is especially helpful if some-
thing goes wrong. Common failures on Windows include WinPCap
upgrades (old versions should be removed completely and then upgraded
to the newest release; never simply upgrade, because it will break), and
dependency failures such as MySQL database support.The most effective
means to ensure a glitch-free install is to make sure your operating system
is completely up to date and working solidly before installing Snort and its
dependencies/requirements. Although this may seem like common sense,
it can and has been overlooked by many.
Figure 3.24 Installation Complete Screen with the Show Details
Option Activated
www.syngress.com
Simpo PDF Merge and Split Unregistered Version -