Intermediate System Administration for the Solaris 10 Student Guide phần 9 pps
Bạn đang xem bản rút gọn của tài liệu. Xem và tải ngay bản đầy đủ của tài liệu tại đây (520.99 KB, 73 trang )
Starting and Stopping the LP Print Service
Configuring and Using Printer Services 12-33
Copyright 2005 Sun Microsystems, Inc. All Rights Reserved. Sun Services, Revision A.1
Starting and Stopping the LP Print Service
The LP print service is started by the lpsched daemon and is shut down
by the lpshut command.
Starting the LP Print Service
The lpsched daemon starts or restarts the LP print service. Printers that
are restarted with a lpsched command from the command line, reprint,
in their entirety, the print requests stopped by the lpshut command.
The following is an example of starting the lpsched daemon from the
command line:
# svcadm enable application/print/server
Stopping the LP Print Service
When the command to disable the print service is invoked, any printers
that are currently printing, stop printing.
The lp print service can be disabled. This method should be used to stop
the print server service.
# svcadm disable print/server
# svcs -a | grep print
disabled 19:12:16 svc:/application/print/server:default
online 16:59:49 svc:/application/print/cleanup:default
online 19:01:10 svc:/application/print/rfc1179:default
offline 19:12:16 svc:/application/print/ipp-listener:default
Specifying a Destination Printer
12-34 Intermediate System Administration for the Solaris™ 10 Operating System
Copyright 2005 Sun Microsystems, Inc. All Rights Reserved. Sun Services, Revision A.1
Specifying a Destination Printer
In the Solaris OS, users submit print requests by using the lp command or
the lpr command.
Note – The Solaris OS LP print service accepts both the SVID
/usr/bin/lp command and the BSD /usr/ucb/lpr command to submit
print requests.
Using the lp Command
The lp command is located in the /usr/bin directory. The lp command
submits a print job to the default printer or to another printer by
specifying the printer name. Perform one of the following commands:
$ /usr/bin/lp
filename
$ /usr/bin/lp -d
printername filename
Using the lpr Command
The lpr command is located in the /usr/ucb directory. The lpr
command functions in the same manner as the lp command. It submits a
print job to the default printer or to another printer.
$ /usr/ucb/lpr
filename
$ /usr/ucb/lpr -P
printername filename
The preceding examples of the print commands demonstrate the atomic
style. You can also use the Portable Open Systems Interface (POSIX) style
to specify a destination printer.
To submit a print request that uses the POSIX style, include the print
command and an option, followed by the printer server name, a colon,
and the printer name as configured on the print server.
The full command-line entry is as follows:
$ /usr/bin/lp -d
hostname:printername filename
$ /usr/ucb/lpr -P
hostname:printername filename
Using the LP Print Service
Configuring and Using Printer Services 12-35
Copyright 2005 Sun Microsystems, Inc. All Rights Reserved. Sun Services, Revision A.1
Using the LP Print Service
The LP print service is a set of software commands, utilities, and filters
that allow users to print files and the root user to set up and manage the
print operations.
Table 12-5 lists some of the more commonly used print service
administration commands.
Note – You must be the root user to use these commands.
Accepting Print Jobs
As the root user, you use the accept command on the print server to
permit print requests to be queued on the specified printers.
Using the accept Command
You use the accept command to allow queuing of print requests for the
named destinations. A destination specifies the name of a printer or
printer class.
The format for the command is:
# /usr/sbin/accept
destination(s)
Table 12-5 LP Print Service Administration Commands
Command Name Description
accept Permits print requests to be queued for the
specific printers
reject Prevents print requests from being queued
for the specific printers
enable Activates the specified printers
disable Deactivates the specified printers
lpmove Moves print requests from one printer
destination to another
Using the LP Print Service
12-36 Intermediate System Administration for the Solaris™ 10 Operating System
Copyright 2005 Sun Microsystems, Inc. All Rights Reserved. Sun Services, Revision A.1
In the following example, the root user has enabled the queuing of print
requests on printerD.
# accept printerD
destination "printerD" now accepting requests
Rejecting Print Jobs
As the root user, you use the reject command on the print server to
prevent print requests from queuing on the specified printers.
Using the reject Command
You use the reject command to prevent print requests from queuing and
stop users from submitting requests to the printer queues.
The format for the command is:
# /usr/sbin/reject
-r “reason" destination(s)
The following example shows how to use the option -r “
reason”
to
enter an explanation for the rejection of print requests for a printer. A user
can see that text by issuing the lpstat -a or lpstat -t command.
# reject -r "Replacing Toner Cartridge" printerD
destination “printerD” will no longer accept requests
Enabling Printers
On the print server, as the root user, you can use the enable command to
activate the specified printers.
Using the enable Command
The enable command activates the printers, which enables the printing of
requests submitted to the print queues.
The format for the command is:
# /usr/bin/enable
destination(s)
The following example shows how to enable printerD.
# enable printerD
printer “printerD” now enabled
Using the LP Print Service
Configuring and Using Printer Services 12-37
Copyright 2005 Sun Microsystems, Inc. All Rights Reserved. Sun Services, Revision A.1
Disabling Printers
On the print server, as the root user, you can use the disable command
to deactivate the specified printers.
Using the disable Command
The disable command deactivates printers, which disables them from
printing print requests waiting in the print queues.
By default, any requests currently printing on the printer when the
disable command is issued are reprinted in their entirety when the
printer is enabled again.
The format for the command is:
# /usr/bin/disable -c | -W -r
“reason” destination
Table 12-6 shows the options for the disable command:.
The following example shows how to use the disable command with
options.
# disable -W -r “Printer down for maintenance” printerD
printer “printerD” now disabled
Table 12-6 Options for the disable Command
Option Definition
-c Cancels the current job and disables the
printer. The current job is not printed later.
-W Waits until the current job is finished before
disabling the printer.
-r Assigns a reason for the disabling of the
printer.
Using the LP Print Service
12-38 Intermediate System Administration for the Solaris™ 10 Operating System
Copyright 2005 Sun Microsystems, Inc. All Rights Reserved. Sun Services, Revision A.1
Moving Print Jobs
You use the lpmove command to move one or all print requests from one
printer destination to another printer destination.
Using the lpmove Command
The format for the lpmove command is:
# /usr/sbin/lpmove
source_destination target_destination
To move one or all print requests by using the lpmove command,
complete the following steps.
1. Become the root user on the print server.
2. Use the reject command to prevent any further print requests from
being sent to the print queue. This step notifies users that the printer
is not accepting requests.
# reject -r “PrinterC is down for repairs” printerC
destination “printerC” will no longer accept requests
3. Use the lpstat command to display the print queue to see how
many print requests are to be moved. This step is needed to identify
print request identification numbers (IDs) only if selected print
requests are going to be moved to another printer.
# lpstat -o
printerC-29 sys41!user1 61426 Jan 07 12:30
printerC-30 sys41!user1 9560 Jan 07 12:30
printerC-31 sys42!user2 845 Jan 07 12:30
printerC-32 sys42!user2 845 Jan 07 12:30
printerC-33 sys42!user2 845 Jan 07 12:30
4. Use the lpstat command to verify that the destination printer is
accepting print requests.
# lpstat -a printerA
printer printerA accepting requests since Tue Jan 1
Using the LP Print Service
Configuring and Using Printer Services 12-39
Copyright 2005 Sun Microsystems, Inc. All Rights Reserved. Sun Services, Revision A.1
5. Move the print requests.
a. For example, to move all print requests from printerC over to
printerA, perform the following command:
# lpmove printerC printerA
move in progress
total of 5 requests moved from printerC to printerA
b. For example, to move one or more individual print requests
from printerC to printerA, perform the following command:
# lpmove printerC-32 printerC-33 printerA
total of 2 requests moved to printerA
6. If all print requests were moved from printerC, in step 5a,
printerC has a reject automatically applied to it. When
printerC is available again, use the accept command to allow print
jobs to queue to printerC.
# accept printerC
destination “printerC” now accepting requests
Performing the Exercises
12-40 Intermediate System Administration for the Solaris™ 10 Operating System
Copyright 2005 Sun Microsystems, Inc. All Rights Reserved. Sun Services, Revision A.1
Performing the Exercises
You have the option to complete any one of three versions of a lab. To
decide which to choose, consult the following descriptions of the levels:
● Level 1 – This version of the lab provides the least amount of
guidance. Each bulleted paragraph provides a task description, but
you must determine your own way of accomplishing each task.
● Level 2 – This version of the lab provides more guidance. Although
each step describes what you should do, you must determine the
commands (and options) to input.
● Level 3 – This version of the lab is the easiest to accomplish because
each step provides exactly what you should input to the system. This
level also includes the task solutions for all three levels.
Exercise: Using the LP Print Service (Level 1)
Configuring and Using Printer Services 12-41
Copyright 2005 Sun Microsystems, Inc. All Rights Reserved. Sun Services, Revision A.1
Exercise: Using the LP Print Service (Level 1)
In this exercise, you use the Solaris OS print manager to set up a print
spooler that sends output to a local terminal window, adds access to a
remote printer, and uses print management commands.
Preparation
The host name and IP address of the system that controls the printer you
want to access must exist in the /etc/inet/hosts file. Refer to the lecture
notes as necessary to perform the tasks listed.
Remote Lab Data Center (RLDC)
In addition to being able to use local classroom equipment, this lab has
also been designed to use equipment located in a remote lab data center.
Directions for accessing and using this resource can be found at:
/>Ask your instructor for the particular SSH (Secure Shell) configuration file
you should use to access the appropriate remote equipment for this
exercise.
Tasks
Complete the following tasks:
● Open two terminal windows. Record the pseudo-terminal device
used by one of them. In the other window, run the Solaris OS print
manager, and define a local Lexmark printer that uses the first
window’s terminal as its output device. Test the new printer.
(Steps 1–7 in the Level 2 lab)
● Use the Solaris OS print manager to gain access to a printer defined
on another system. Test the remote printer.
(Steps 9–13 in the Level 2 lab)
● Manipulate your Lexmark printer to:
● Disable printer output
● Queue four files for printing
Exercise: Using the LP Print Service (Level 1)
12-42 Intermediate System Administration for the Solaris™ 10 Operating System
Copyright 2005 Sun Microsystems, Inc. All Rights Reserved. Sun Services, Revision A.1
● List all print jobs
● Cancel two jobs by listing their request IDs
● Cancel the remaining jobs by using their associated user names
● Enable printing again
● Reject print requests and supply a reason
● View the reason
● Accept print requests on the default printer
(Steps 14–24 in the Level 2 lab)
● Remove both printers
Exercise: Using the LP Print Service (Level 2)
Configuring and Using Printer Services 12-43
Copyright 2005 Sun Microsystems, Inc. All Rights Reserved. Sun Services, Revision A.1
Exercise: Using the LP Print Service (Level 2)
In this exercise, you use the Solaris OS print manager to set up a print
spooler that sends output to a local terminal window, adds access to a
remote printer, and uses print management commands.
Preparation
The host name and IP address of the system that controls the printer you
want to access must exist in the /etc/inet/hosts file. Refer to the lecture
notes as necessary to perform the tasks listed.
Remote Lab Data Center (RLDC)
In addition to being able to use local classroom equipment, this lab has
also been designed to use equipment located in a remote lab data center.
Directions for accessing and using this resource can be found at:
/>Ask your instructor for the particular SSH (Secure Shell) configuration file
you should use to access the appropriate remote equipment for this
exercise.
Task Summary
In this exercise, you accomplish the following:
● Open two terminal windows. Record the pseudo-terminal device
used by one of them. In the other window, run the Solaris OS print
manager, and define a local Lexmark printer that uses the first
window’s terminal as its output device. Test the new printer.
● Use the Solaris OS print manager to gain access to a printer defined
on another system. Test the remote printer.
● Use the following commands to manipulate your Lexmark printer:
● enable
● disable
● lp
● lpstat
Exercise: Using the LP Print Service (Level 2)
12-44 Intermediate System Administration for the Solaris™ 10 Operating System
Copyright 2005 Sun Microsystems, Inc. All Rights Reserved. Sun Services, Revision A.1
● accept
● reject
● cancel
● Manipulate your Lexmark printer to:
● Disable printer output
● Queue four files for printing
● List all print jobs
● Cancel two jobs by listing their request IDs
● Cancel the remaining jobs by using their associated user names
● Enable printing again
● Reject print requests and supply a reason
● View the reason
● Accept print requests on the default printer
● Remove both printers
Tasks
Complete the following steps:
1. Log in as the root user, and open two terminal windows. In one of
the windows, use the tty command to identify the pseudo terminal
device that it uses. Use this device name as the port for the new
printer. For example, the device name in the following output is
/dev/pts/5:
# tty
/dev/pts/5
Device name:
2. In the other terminal window, run the Solaris OS print manager.
3. In the Select Naming Service panel, verify that files is selected,
and click OK. From the print manager menu, select the Show
Command Line Console option. Position the Command Line
Console in a convenient location.
4. From the Printer menu, select the New Attached Printer option.
Exercise: Using the LP Print Service (Level 2)
Configuring and Using Printer Services 12-45
Copyright 2005 Sun Microsystems, Inc. All Rights Reserved. Sun Services, Revision A.1
5. Fill in the fields according to Table 12-7. To name your printer, use a
name different from that of your system.
6. Click OK when you are finished. Notice the command-line entries
that appear in the console window.
7. Test your printer configuration by printing the /etc/inet/hosts
file to the default printer. Observe the output on the other terminal
window.
You should see the contents of the /etc/inet/hosts file converted
to the format a Lexmark Optra E310 would expect, scrolling through
the other window.
8. From the Printer menu, select the Add Access to Printer option.
Table 12-7 Configuration Fields
Field Selection or Entry
Printer name
Your choice.
Description
Your choice.
Printer Port
Select the Other option. Enter the device name of
the terminal window found in Step 1.
Printer Make
Lexmark.
Printer Model
Lexmark Optra E310.
Printer Driver
Foomatic/Postscript (recommended).
Fault Notification
Write to superuser.
Default Printer
Select the box.
Always Print Banner
Do not select the box.
User Access List
No change.
Exercise: Using the LP Print Service (Level 2)
12-46 Intermediate System Administration for the Solaris™ 10 Operating System
Copyright 2005 Sun Microsystems, Inc. All Rights Reserved. Sun Services, Revision A.1
9. Fill in the fields according to Table 12-8.
10. Click OK when you are finished.
Notice the command-line entries that appear in the console window.
11. Test your new configuration by printing the /etc/inet/hosts file to
the remote printer. Observe the output on the other system.
You should see the contents of the /etc/inet/hosts file converted
to the format a Lexmark Optra E310 would expect, scroll through the
window on the other system
12. In an available terminal window, use the lpstat command to
display the current status information of the printers on your system.
13. Disable print output for your default printer.
14. Send the following four files to your default printer:
/etc/inet/hosts, /etc/inittab, /etc/dfs/dfstab, and
/etc/skel/local.profile.
15. Check the print queue to find the request ID for each job.
The four print jobs should be listed with sequential numbers.
16. Use the request IDs to cancel two of the requests. Verify the result.
Use the following syntax to cancel the requests:
# cancel
printername1
-
# printername1
-
#
Two of the print jobs should be gone.
17. Cancel the other two jobs by indicating the user who sent them.
Verify the result.
18. Enable printing for your default printer. Use the following syntax:
# enable
printername1
Table 12-8 Configuration Fields
Field Selection or Entry
Printer name Enter the name of a printer on another system.
Printer server Enter the name of the system on which the
preceding printer is defined. Ensure this system
name and IP address are in your /etc/inet/hosts
file.
Description Your choice.
Default printer Do not select the box.
Exercise: Using the LP Print Service (Level 2)
Configuring and Using Printer Services 12-47
Copyright 2005 Sun Microsystems, Inc. All Rights Reserved. Sun Services, Revision A.1
19. Set your default printer to reject requests and display a reason for
doing so. For example:
# reject -r “Printer is down for maintenance”
printername1
20. Attempt to send a job to the default printer. Observe the messages
displayed.
# lp /etc/inet/hosts
Your message should say
printername1
: Requests are not
being accepted.
21. Use the lpstat command to display the reason that the printer is
not accepting requests. Use the following syntax:
# lpstat -a
printername1
Your message should say
printername1: your reason from
step 20
.
22. Set your default printer to accept requests again.
# accept
printername1
23. Test your printer configuration by printing the /etc/inet/hosts
file to the default printer. Observe the output on the other terminal
window.
# lp /etc/inet/hosts
You should see the contents of the /etc/inet/hosts file converted
to the format a Lexmark Optra E310 would expect, scrolling through
the other window.
24. Before removing the printers, prevent any further print requests
from being queued:
# reject -r “removing printer”
printername1
# reject -r “removing printer”
printername2
25. Remove both printers.
# lpadmin -x printername1
# lpadmin -x printername2
Exercise: Using the LP Print Service (Level 3)
12-48 Intermediate System Administration for the Solaris™ 10 Operating System
Copyright 2005 Sun Microsystems, Inc. All Rights Reserved. Sun Services, Revision A.1
Exercise: Using the LP Print Service (Level 3)
In this exercise, you use the Solaris OS print manager to set up a print
spooler that sends output to a local terminal window, adds access to a
remote printer, and uses print management commands.
Preparation
The host name and IP address of the system that controls the printer you
want to access must exist in the /etc/inet/hosts file. Refer to the lecture
notes as necessary to perform the tasks listed.
Remote Lab Data Center (RLDC)
In addition to being able to use local classroom equipment, this lab has
also been designed to use equipment located in a remote lab data center.
Directions for accessing and using this resource can be found at:
/>Ask your instructor for the particular SSH (Secure Shell) configuration file
you should use to access the appropriate remote equipment for this
exercise.
Task Summary
In this exercise, you accomplish the following:
● Open two terminal windows. Record the pseudo-terminal device
used by one of them. In the other window, run the Solaris OS print
manager, and define a local Lexmark printer that uses the first
window’s terminal as its output device. Test the new printer.
● Use the Solaris OS print manager to gain access to a printer defined
on another system. Test the remote printer.
● Use the following commands to manipulate your Lexmark printer:
● enable
● disable
● lp
● lpstat
Exercise: Using the LP Print Service (Level 3)
Configuring and Using Printer Services 12-49
Copyright 2005 Sun Microsystems, Inc. All Rights Reserved. Sun Services, Revision A.1
● accept
● reject
● cancel
● Manipulate your Lexmark printer to:
● Disable printer output
● Queue four files for printing
● List all print jobs
● Cancel two jobs by listing their request IDs
● Cancel the remaining jobs by using their associated user names
● Enable printing again
● Reject print requests and supply a reason
● View the reason
● Accept print requests
● Remove the printers
Tasks and Solutions
Complete the following steps:
1. Log in as the root user and open two terminal windows. In one of
the windows, use the tty command to identify the pseudo-terminal
device it uses. Use this device name as the port for the new printer.
For example, the device name in the following output is
/dev/pts/5:
# tty
/dev/pts/5
Device name: Your device name varies.
2. In the other terminal window, run the Solaris OS print manager.
# /usr/sbin/printmgr &
3. In the Select Naming Service panel, verify that files is selected,
and click OK. From the print manager menu, select the Show
Command Line Console option. Position the Command Line
Console in a convenient location.
4. From the Printer menu, select the New Attached Printer option.
5. Fill in the fields according to Table 12-7 on page 12-45. To name your
printer, use a name different from that of your system.
Exercise: Using the LP Print Service (Level 3)
12-50 Intermediate System Administration for the Solaris™ 10 Operating System
Copyright 2005 Sun Microsystems, Inc. All Rights Reserved. Sun Services, Revision A.1
6. Click OK when you are finished. Notice the command-line entries
that appear on the console window.
7. Test your printer configuration by printing the /etc/inet/hosts
file to the default printer. Observe the output on the other terminal
window.
# lp /etc/inet/hosts
You should see the contents of the /etc/inet/hosts file converted
to the format a Lexmark Optra E310 would expect, scroll through the
other window.
8. From the Printer menu, select the Add Access to Printer option.
9. Fill in the fields according to Table 12-8 on page 12-46.
10. Click OK when you are finished.
Notice the command-line entries that appear in the console window.
11. Test your new configuration by printing the /etc/inet/hosts file to
the remote printer. Observe the output on the other system.
# lp -d
printername2
/etc/inet/hosts
You should see the contents of the /etc/inet/hosts file converted
to the format a Lexmark Optra E310 would expect, scrolling through
the other window.
12. In an available terminal window, use the lpstat command to
display the current status information of the printers on your system.
# lpstat -t
13. Disable print output for your default printer.
# disable
printername1
14. Send the following four files to your default printer:
/etc/inet/hosts, /etc/inittab, /etc/dfs/dfstab, and
/etc/skel/local.profile.
# lp /etc/inet/hosts
# lp /etc/inittab
# lp /etc/dfs/dfstab
# lp /etc/skel/local.profile
15. Check the print queue to find the request ID for each job.
# lpstat -o
The four print jobs should be listed with sequential numbers.
Exercise: Using the LP Print Service (Level 3)
Configuring and Using Printer Services 12-51
Copyright 2005 Sun Microsystems, Inc. All Rights Reserved. Sun Services, Revision A.1
16. Use the request IDs to cancel two of the requests. Verify the result.
Use the following syntax to cancel the requests:
# cancel
printername1
-
# printername1
-
#
# lpstat -o
Two of the print jobs should be gone.
17. Cancel the other two jobs by indicating the user who sent them.
Verify the result. For example:
# cancel -u root
# lpstat -o
18. Enable printing for your default printer.
# enable
printername1
19. Set your default printer to reject requests, and display a reason for
doing so. For example:
# reject -r “Printer is down for maintenance”
printername1
20. Attempt to send a job to the default printer. Observe the messages
displayed.
# lp /etc/inet/hosts
Your message should say
printername1
: Requests are not
being accepted.
21. Use the lpstat command to display the reason that the printer is
not accepting requests. Use the following syntax:
# lpstat -a
printername1
Your message should say
printername1: your reason from
step 20
.
22. Set your default printer to again accept requests.
# accept
printername1
23. Test your printer configuration by printing the /etc/inet/hosts
file to the default printer. Observe the output on the other terminal
window.
# lp /etc/inet/hosts
You should see the contents of the /etc/inet/hosts file converted
to the format a Lexmark Optra E310 would expect, scrolling through
the other window.
Exercise: Using the LP Print Service (Level 3)
12-52 Intermediate System Administration for the Solaris™ 10 Operating System
Copyright 2005 Sun Microsystems, Inc. All Rights Reserved. Sun Services, Revision A.1
24. Before removing the printers, prevent any further print requests
from being queued:
# reject -r “removing printer”
printername1
destination “printername1” will no longer accept requests
# reject -r “removing printer”
printername2
destination “printername2” will no longer accept requests
25. Remove both printers.
# lpadmin -x printername1
# lpadmin -x printername2
Exercise Summary
Configuring and Using Printer Services 12-53
Copyright 2005 Sun Microsystems, Inc. All Rights Reserved. Sun Services, Revision A.1
Exercise Summary
?
!
Discussion – Take a few minutes to discuss what experiences, issues, or
discoveries you had during the lab exercise.
● Experiences
● Interpretations
● Conclusions
● Applications
Copyright 2005 Sun Microsystems, Inc. All Rights Reserved. Sun Services, Revision A.1
Module 13
ControllingSystemProcesses
Objectives
Upon completion of this module, you should be able to:
● View system processes
● Kill frozen processes
● Schedule an automatic one-time execution of a command
● Schedule an automatic recurring execution of a command
The course map in Figure 13-1 shows how this module fits into the
current instructional goal.
Figure 13-1 Course Map
Viewing System Processes
13-2 Intermediate System Administration for the Solaris™ 10 Operating System
Copyright 2005 Sun Microsystems, Inc. All Rights Reserved. Sun Services, Revision A.1
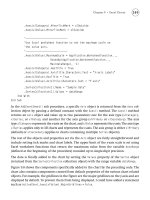
Viewing System Processes
A process is any program that is running on the system. All processes are
assigned a unique process identification (PID) number, which is used by
the kernel to track and manage the process. The PID numbers are used
by the root and regular users to identify and control their processes.
Using the CDE Process Manager
The Solaris OS Common Desktop Environment (CDE) provides a Process
Manager to monitor and control processes that are running on the local
system.
To start the Process Manager, click the Find Process control on the Tools
subpanel of the Front Panel. Figure 13-2 shows the Tools menu.
Figure 13-2 Tools Menu
You can also start the CDE Process Manager from the command line by
typing the following:
# /usr/dt/bin/sdtprocess &
Viewing System Processes
Controlling System Processes 13-3
Copyright 2005 Sun Microsystems, Inc. All Rights Reserved. Sun Services, Revision A.1
Figure 13-3 shows the window that appears.
Figure 13-3 CDE Process Manager Window
The Process Manager can sort processes alphabetically (Name) or
numerically (ID), depending on the column that is selected.
You can initiate a search by typing text into the Find field.
To terminate a process, highlight it and press Control-C, select the Kill
option from the Process menu, or select the kill option from the options
that are available when you press the right mouse button.