Intermediate System Administration for the Solaris 10 Student Guide phần 10 doc
Bạn đang xem bản rút gọn của tài liệu. Xem và tải ngay bản đầy đủ của tài liệu tại đây (254.13 KB, 65 trang )
Exercise: Backing Up a File System (Level 1)
14-16 Intermediate System Administration for the Solaris™ 10 Operating System
Copyright 2005 Sun Microsystems, Inc. All Rights Reserved. Sun Services, Revision A.1
● Use the ufsdump command to do an incremental backup of the
/export/home file system.
(Steps 7–9 in the Level 2 lab)
● Use the mt command to remove the tape from the tape drive.
● Review the /etc/dumpdates file.
(Steps 10–12 in the Level 2 lab)
Exercise: Backing Up a File System (Level 2)
Performing File System Backups 14-17
Copyright 2005 Sun Microsystems, Inc. All Rights Reserved. Sun Services, Revision A.1
Exercise: Backing Up a File System (Level 2)
In this exercise, you back up an available file system on your system.
Preparation
This exercise requires a system that is configured with a tape drive and a
file system that is available to unmount. This exercise assumes that the
/export/home file system exists on a separate partition from the / (root)
file system and can be unmounted. Identify the slice on which the
/export/home file system resides. Get a tape that is appropriate for your
system from the instructor.
Remote Lab Data Center (RLDC)
In addition to being able to use local classroom equipment, this lab has
also been designed to use equipment located in a remote lab data center.
Directions for accessing and using this resource can be found at:
/>Ask your instructor for the particular SSH (Secure Shell) configuration file
you should use to access the appropriate remote equipment for this
exercise.
In the RLDC environment, a tape should already be present in your tape
drive. Do not eject the tape with an mt command, or you cannot continue
with the lab.
Task Summary
In this exercise, you accomplish the following:
● Use the mt command to rewind the tape to the beginning.
● Use the ufsdump command to create a tape backup of the
/export/home file system.
● Add files and directories to the /export/home file system.
● Use the ufsdump command to do an incremental backup of the
/export/home file system.
● Use the mt command to remove the tape from the tape drive.
● Review the /etc/dumpdates file.
Exercise: Backing Up a File System (Level 2)
14-18 Intermediate System Administration for the Solaris™ 10 Operating System
Copyright 2005 Sun Microsystems, Inc. All Rights Reserved. Sun Services, Revision A.1
Tasks
Complete the following steps:
1. Unmount the /export/home file system. If your system reports that
the /export/home file system is busy, use the umount -f command.
2. Insert a tape into your tape drive.
3. Use the mt command to rewind the tape to the beginning.
4. Use the ufsdump command to create a backup for the /export/home
file system. Make sure that the /etc/dumpdates file is updated.
5. Mount the /export/home file system.
6. Copy the contents of the /etc/uucp directory to the /export/home
directory.
7. Unmount the /export/home file system.
8. Move the tape to the next tape record.
9. Use the ufsdump command to create an incremental backup for the
/export/home file system, using a non-rewinding device.
10. Rewind and eject the tape from the tape drive.
11. Set the tape aside for use with subsequent labs.
12. Review the contents of the /etc/dumpdates file.
13. Mount the /export/home file system.
Exercise: Backing Up a File System (Level 3)
Performing File System Backups 14-19
Copyright 2005 Sun Microsystems, Inc. All Rights Reserved. Sun Services, Revision A.1
Exercise: Backing Up a File System (Level 3)
In this exercise, you back up an available file system on your system.
Preparation
This exercise requires a system that is configured with a tape drive and
file system that is available to unmount. This exercise assumes that the
/export/home file system exists on a separate partition from the / (root)
file system and can be unmounted. Identify the slice on which the
/export/home file system resides. Get a tape that is appropriate for your
system from the instructor.
Remote Lab Data Center (RLDC)
In addition to being able to use local classroom equipment, this lab has
also been designed to use equipment located in a remote lab data center.
Directions for accessing and using this resource can be found at:
/>Ask your instructor for the particular SSH (Secure Shell) configuration file
you should use to access the appropriate remote equipment for this
exercise.
In the RLDC environment, a tape should already be present in your tape
drive. Do not eject the tape with an mt command, or you cannot continue
with the lab.
Task Summary
In this exercise, you accomplish the following:
● Use the mt command to rewind the tape to the beginning.
● Use the ufsdump command to create a tape backup of the
/export/home file system.
● Add files and directories to the /export/home file system.
● Use the ufsdump command to do an incremental backup of the
/export/home file system.
● Use the mt command to remove the tape from the tape drive.
● Review the /etc/dumpdates file.
Exercise: Backing Up a File System (Level 3)
14-20 Intermediate System Administration for the Solaris™ 10 Operating System
Copyright 2005 Sun Microsystems, Inc. All Rights Reserved. Sun Services, Revision A.1
Tasks and Solutions
Complete the following steps:
1. Unmount the /export/home file system. If your system reports that
the /export/home file system is busy, use the umount -f command.
# umount /export/home
2. Insert a tape into your tape drive.
3. Use the mt command to rewind the tape to the beginning.
# mt rewind
4. Use the ufsdump command to create a backup tape for the
/export/home file system, where c
#
t
#
d
#
s
#
represents. If you
cannot remember which device the/export/home file system was
mounted on, view the contents of the /etc/vfstab file with the
more command.
# ufsdump 0uf /dev/rmt/0 /dev/rdsk/c
#
t
#
d
#
s
#
You should see output similar to:
ufsdump 0uf /dev/rmt/0 /dev/rdsk/c0d0t0s7
DUMP: Writing 32 Kilobyte records
DUMP: Date of this level 0 dump: Mon Oct 11 12:30:44 2004
DUMP: Date of last level 0 dump: the epoch
DUMP: Dumping /dev/rdsk/c0t0d0s7 (sys43:/export/home) to /dev/rmt/0.
DUMP: Mapping (Pass I) [regular files]
DUMP: Mapping (Pass II) [directories]
DUMP: Estimated 1126 blocks (563KB).
DUMP: Dumping (Pass III) [directories]
DUMP: Dumping (Pass IV) [regular files]
DUMP: Tape rewinding
DUMP: 1086 blocks (543KB) on 1 volume at 1803 KB/sec
DUMP: DUMP IS DONE
DUMP: Level 0 dump on Mon Oct 11 12:44:12 2004
5. Mount the /export/home file system.
# mount /export/home
6. Copy the contents of the /etc/uucp directory to the /export/home
directory.
# cp -r /etc/uucp /export/home
7. Unmount the /export/home file system.
# umount /export/home
8. Move the tape to the next tape record.
# mt -f /dev/rmt/0n fsf 1
Exercise: Backing Up a File System (Level 3)
Performing File System Backups 14-21
Copyright 2005 Sun Microsystems, Inc. All Rights Reserved. Sun Services, Revision A.1
9. Use the ufsdump command to create an incremental backup for the
/export/home file system, using a non-rewinding device.
# ufsdump 1uf /dev/rmt/0n /dev/rdsk/c
#
t
#
d
#
s
#
You should see output similar to:
ufsdump 1uf /dev/rmt/0n /dev/rdsk/c0d0t0s7
DUMP: Writing 32 Kilobyte records
DUMP: Date of this level 0 dump: Mon Oct 11 13:13:03 2004
DUMP: Date of last level 0 dump: Mon Oct 11 12:30:44 2004
DUMP: Dumping /dev/rdsk/c0t0d0s7 (sys43:/export/home) to /dev/rmt/0.
DUMP: Mapping (Pass I) [regular files]
DUMP: Mapping (Pass II) [directories]
DUMP: Estimated 320 blocks (160KB).
DUMP: Dumping (Pass III) [directories]
DUMP: Dumping (Pass IV) [regular files]
DUMP: 318 blocks (159KB) on 1 volume at 691 KB/sec
DUMP: DUMP IS DONE
DUMP: Level 1 dump on Mon Oct 11 13:22:36 2004
10. Rewind and eject the tape from the tape drive.
# mt -f /dev/rmt/0 offline
11. Set the tape aside for use with subsequent labs.
12. Review the contents of the /etc/dumpdates file.
# more /etc/dumpdates
You should see one line showing information for the Level 0 dump and
another line for the Level 1 dump, for example:
/dev/rdsk/c0t0d0s7 0 Mon Oct 11 12:30:44 2004
/dev/rdsk/c0t0d0s7 1 Mon Oct 11 13:13:03 2004
13. Mount the /export/home file system.
# mount /export/home
Exercise Summary
14-22 Intermediate System Administration for the Solaris™ 10 Operating System
Copyright 2005 Sun Microsystems, Inc. All Rights Reserved. Sun Services, Revision A.1
Exercise Summary
?
!
Discussion – Take a few minutes to discuss what experiences, issues, or
discoveries you had during the lab exercise.
● Experiences
● Interpretations
● Conclusions
● Applications
15-1
Copyright 2005 Sun Microsystems, Inc. All Rights Reserved. Sun Services, Revision A.1
Module 15
PerformingFileSystemRestores
Objectives
Upon completion of this module, you should be able to restore ufs file
systems.
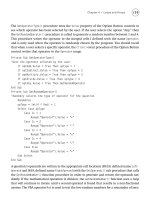
The following course map in Figure 15-1 shows how this module fits into
the current instructional goal.
Figure 15-1 Course Map
Performing
File System
Backups
Performing
File System
Restores
Backing Up
a Mounted
File System
With a
Snapshot
Performing System Backups and Restores
Restoring a ufs File System
15-2 Intermediate System Administration for the Solaris™ 10 Operating System
Copyright 2005 Sun Microsystems, Inc. All Rights Reserved. Sun Services, Revision A.1
Restoring a ufs File System
You restore a file system to rebuild a damaged file system, to reinstall or
upgrade the Solaris OS software, or to reorganize file systems on existing
or new disks.
Restoring a Regular File System
When you are restoring data to a system, consider the following
questions:
● Can the system boot on its own (regular file system restore)?
● Do you need to boot the system from CD-ROM, DVD, or network
(critical file system restore)?
● Do you need to boot the system from CD-ROM, DVD, or network
and repair the boot drive (special case recovery)?
To restore files or file systems, determine the following:
● The file system backup tapes that are needed
● The device name to which you will restore the file system
● The name of the temporary directory to which you will restore
individual files
● The type of backup device to be used (local or remote)
● The backup device name (local or remote)
To restore a regular file system, such as the /export/home or /opt file
system, back up to the disk, you use the ufsrestore command. The
ufsrestore command copies files to the disk, relative to the current
working directory, from backup tapes that were created by the ufsdump
command.
You can use the ufsrestore command to reload an entire file system
hierarchy from a Level 0 backup and related incremental backups. You
can also restore one or more single files from any backup tape.
The format for the ufsrestore command is:
ufsrestore
option(s) argument(s) filesystem
Restoring a ufs File System
Performing File System Restores 15-3
Copyright 2005 Sun Microsystems, Inc. All Rights Reserved. Sun Services, Revision A.1
Table 15-1 describes some options that you can use with the ufsrestore
command.
When you restore an entire file system from a backup tape, the system
creates a restoresymtable file. The ufsrestore command uses the
restoresymtable file for check-pointing or passing information between
incremental restores. You can remove the restoresymtable file when the
restore is complete.
Using the ufsrestore Command to Restore a Regular File
System
The following procedure demonstrates how to use the ufsrestore
command to restore the /opt file system on the c0t0d0s5 slice.
1. Create the new file system structure.
# newfs /dev/rdsk/c0t0d0s5
2. Mount the file system to the /opt directory, and change to that
directory.
# mount /dev/dsk/c0t0d0s5 /opt
# cd /opt
Table 15-1 Options for the ufsrestore Command
Option Description
t Lists the table of contents of the backup media.
r Restores the entire file system from the backup
media.
x
file1 file2
Restores only the files named on the command line.
i Invokes an interactive restore.
v Specifies verbose mode. This mode displays the
path names to the terminal screen as each file is
restored.
f
device
Specifies the tape device name. When not specified,
the /dev/rmt/0 device file is used.
Restoring a ufs File System
15-4 Intermediate System Administration for the Solaris™ 10 Operating System
Copyright 2005 Sun Microsystems, Inc. All Rights Reserved. Sun Services, Revision A.1
3. Restore the entire /opt file system from the backup tape.
# ufsrestore rf /dev/rmt/0
Note – Always restore a file system by starting with the Level 0 backup
tape, continuing with the next-lower-level tape, and continuing through
the highest-level tape.
4. Remove the restoresymtable file.
# rm restoresymtable
5. Unmount the new file system.
# cd /
# umount /opt
6. Use the fsck command to check the restored file system.
# fsck /dev/rdsk/c0t0d0s5
7. Perform a full backup of the file system.
# ufsdump 0uf /dev/rmt/0 /dev/rdsk/c0t0d0s5
Note – The system administrator should always back up the newly
created file system because the ufsrestore command repositions the files
and changes the inode allocation.
8. init 6
Restoring the /usr File System
To restore the /usr file system, boot from the Solaris 10 Software 1
CD-ROM or DVD, and then use the ufsrestore command to restore files
back to the /usr partition.
Note – If the / (root), /usr,or/var file systems are unusable because of
some type of corruption or damage, the system will not boot.
Restoring a ufs File System
Performing File System Restores 15-5
Copyright 2005 Sun Microsystems, Inc. All Rights Reserved. Sun Services, Revision A.1
Using the ufsrestore Command to Restore a Critical File
System
The following procedure demonstrates how to restore the /usr file system
on Slice 6 of the boot disk.
1. Insert the Solaris 10 Software 1 CD-ROM or DVD, and boot from it
with the single-user mode option.
ok boot cdrom -s
2. Create the new file system structure.
# newfs /dev/rdsk/c0t0d0s6
3. Mount the file system to the mount point /a, and change to that
directory.
# mount /dev/dsk/c0t0d0s6 /a
# cd /a
4. Restore the entire /usr file system from the backup tape.
# ufsrestore rf /dev/rmt/0
Note – Remember to restore a file system by starting with the Level 0
backup tape, continuing with the next-lower-level tape, and continuing
through the highest-level tape.
5. Remove the restoresymtable file.
# rm restoresymtable
6. Unmount the new file system.
# cd /
# umount /a
7. Use the fsck command to check the restored file system.
# fsck /dev/rdsk/c0t0d0s6
8. Perform a full backup of the file system.
# ufsdump 0uf /dev/rmt/0 /dev/rdsk/c0t0d0s6
9. Reboot the system.
# init 6
Restoring a ufs File System
15-6 Intermediate System Administration for the Solaris™ 10 Operating System
Copyright 2005 Sun Microsystems, Inc. All Rights Reserved. Sun Services, Revision A.1
Performing a Special Case Recovery of the / (root) File
System
You perform a special case recovery to recover the / (root) file system if
there is damage to the boot block.
To restore the / (root) file system, boot from the Solaris 10 Software 1
CD-ROM or DVD, and use the ufsrestore command.
The following procedure demonstrates how to restore the / (root) file
system on Slice 0 of the boot disk.
1. Insert the Solaris 10 Software 1 CD-ROM or DVD, and boot from it
with the single-user mode option.
ok boot cdrom -s
2. Create the new file system structure.
# newfs /dev/rdsk/c0t0d0s0
3. Mount the file system to the mount point /a and change to that
directory.
# mount /dev/dsk/c0t0d0s0 /a
# cd /a
4. Restore the / (root) file system from the backup tape.
# ufsrestore rf /dev/rmt/0
Note – Always restore a file system by starting with the Level 0 backup
tape, and continuing with the next-lower-level tape, and continuing
through the highest-level tape.
5. Remove the restoresymtable file.
# rm restoresymtable
6. Install the bootblk in Sectors 1 through 15 of the boot disk. To do
this, change to the directory that contains the bootblk, and enter the
installboot command.
# cd /usr/platform/`uname -m`/lib/fs/ufs
# installboot bootblk /dev/rdsk/c0t0d0s0
7. Unmount the new file system.
# cd /
# umount /a
Restoring a ufs File System
Performing File System Restores 15-7
Copyright 2005 Sun Microsystems, Inc. All Rights Reserved. Sun Services, Revision A.1
8. Use the fsck command to check the restored file system.
# fsck /dev/rdsk/c0t0d0s0
9. Perform a full backup of the file system.
# ufsdump 0uf /dev/rmt/0 /dev/rdsk/c0t0d0s0
10. Reboot the system.
# init 6
Invoking an Interactive Restore
The ufsrestore i command invokes an interactive interface. Through
the interface, you can browse the directory hierarchy of the backup tape
and select individual files to extract. The term volume is used by
ufsrestore and should be considered a single tape.
Using the ufsrestore i Command
The following procedure demonstrates how to use the ufsrestore i
command to extract individual files from a backup tape.
1. Become the root user, and change to the temporary directory that
you want to receive the extracted files.
# cd /export/home/tmp
2. Perform the ufsrestore i command.
# ufsrestore ivf /dev/rmt/0
Verify volume and initialize maps
Media block size is 64
Dump date: Mon Oct 11 12:30:44 2004
Dumped from: the epoch
Level 0 dump of /export/home on sys43:/dev/dsk/c0t0d0s7
Label: none
Extract directories from tape
Initialize symbol table.
3. Display the contents of the directory structure on the backup tape.
ufsrestore > ls
.:
2 *./ 13 directory1 15 directory3 11 file2
2 * / 14 directory2 10 file1 12 file3
Restoring a ufs File System
15-8 Intermediate System Administration for the Solaris™ 10 Operating System
Copyright 2005 Sun Microsystems, Inc. All Rights Reserved. Sun Services, Revision A.1
4. Change to the target directory on the backup tape.
ufsrestore > cd directory1
ufsrestore > ls
./directory1:
3904 ./ 2 * / 3905 file1 3906 file2 3907 file3
5. Add the files you want to restore to the extraction list.
ufsrestore > add file1 file2
Make node ./directory1
Files you want to restore are marked with an asterisk (*) for
extraction. If you extract a directory, all of the directory contents are
marked for extraction.
In this example, two files are marked for extraction. The ls
command displays an asterisk in front of the selected file names,
file1 and file2.
ufsrestore > ls
./directory1:
3904 *./ 2 * / 3905 *file1 3906 *file2 3907 file3
6. To delete a file from the extraction list, use the delete command.
ufsrestore > delete file1
The ls command displays the file1 file without an asterisk.
ufsrestore > ls
./directory1:
3904 *./ 2 * / 3905 file1 3906 *file2 3907 file3
7. To view the files and directories marked for extraction, use the
marked command.
ufsrestore > marked
./directory1:
3904 *./ 2 * / 3906 *file2
8. To restore the selected files from the backup tape, perform the
command:
ufsrestore > extract
Extract requested files
You have not read any volumes yet.
Unless you know which volume your file(s) are on you should start
with the last volume and work towards the first.
Specify next volume #: 1
Restoring a ufs File System
Performing File System Restores 15-9
Copyright 2005 Sun Microsystems, Inc. All Rights Reserved. Sun Services, Revision A.1
Note – The ufsrestore command has to find the selected files. If you
used more than one tape for the backup, first insert the tape with the
highest volume number and type the appropriate number at this point.
Then repeat, working towards Volume #1 until all files have been
restored.
extract file ./directory1/file2
Add links
Set directory mode, owner, and times.
set owner/mode for ‘.’? [yn] n
Note – Answering y sets ownership and permissions of the temporary
directory to those of the mount point on the tape.
9. To exit the interactive restore after the files are extracted, perform the
command:
ufsrestore> quit
10. Move the restored files to their original or permanent directory
location, and delete the files from the temporary directory.
# mv /export/home/tmp/directory1/file2 /export/home
# rm -r /export/home/tmp/directory1
Note – You can use the help command in an interactive restore to display
a list of available commands.
Performing an Incremental Restore
When performing incremental restores, start with the last volume and
work towards the first. The system uses information in the
restoresymtable file to restore incremental backups on top of the latest
full backup.
The following procedure demonstrates how to restore the /export/home
file system from incremental tapes.
Restoring a ufs File System
15-10 Intermediate System Administration for the Solaris™ 10 Operating System
Copyright 2005 Sun Microsystems, Inc. All Rights Reserved. Sun Services, Revision A.1
Note – This procedure makes use of the interactive restore to assist in
showing the concept of incremental restores. You would typically use a
command, such as ufsrestore rf, for restoring entire file systems.
1. View the contents of the /etc/dumpdates file for information about
the /export/home file system.
# more /etc/dumpdates |grep c0t0d0s7
/dev/rdsk/c0t0d0s7 0 Wed Apr 07 09:55:34 2004
/dev/rdsk/c0t0d0s7 1 Web Apr 07 09:57:30 2004
2. Create the new file system structure for the /export/home file
system.
# newfs /dev/rdsk/c0t0d0s7
3. Mount the file system and change to that directory.
# mount /dev/dsk/c0t0d0s7 /export/home
# cd /export/home
4. Insert the Level 0 backup tape.
5. Restore the /export/home file system from the backup tapes.
# ufsrestore rvf /dev/rmt/0
Verify volume and initialize maps
Media block size is 64
Dump date: Wed Apr 07 09:55:34 2004
Dumped from: the epoch
Level 0 dump of /export/home on sys41:/dev/dsk/c0t0d0s7
Label: none
Begin level 0 restore
Initialize symbol table.
Extract directories from tape
Calculate extraction list.
Make node ./directory1
Make node ./directory2
Make node ./directory3
Extract new leaves.
Check pointing the restore
extract file ./file1
extract file ./file2
extract file ./file3
Add links
Set directory mode, owner, and times.
Check the symbol table.
Check pointing the restore
#
Restoring a ufs File System
Performing File System Restores 15-11
Copyright 2005 Sun Microsystems, Inc. All Rights Reserved. Sun Services, Revision A.1
6. Load the next lower-level tape into the tape drive.
# ufsrestore rvf /dev/rmt/0
Verify volume and initialize maps
Media block size is 64
Dump date: Wed Apr 07 09:57:30 2004
Dumped from: Wed Apr 07 09:55:34 2004
Level 1 dump of /export/home on sys41:/dev/dsk/c0t0d0s7
Label: none
Begin incremental restore
Initialize symbol table.
Extract directories from tape
Mark entries to be removed.
Calculate node updates.
Make node ./directory4
Make node ./directory5
Make node ./directory6
Find unreferenced names.
Remove old nodes (directories).
Extract new leaves.
Check pointing the restore
extract file ./file4
extract file ./file5
extract file ./file6
Add links
Set directory mode, owner, and times.
Check the symbol table.
Check pointing the restore
#
Restoring a ufs File System
15-12 Intermediate System Administration for the Solaris™ 10 Operating System
Copyright 2005 Sun Microsystems, Inc. All Rights Reserved. Sun Services, Revision A.1
Alternative Steps
The following steps are an alternative to the previous Steps 5 and 6.
5. Restore the /export/home file system from the backup tapes. (This
example uses an interactive, verbose restore to provide more detailed
information.)
# ufsrestore ivf /dev/rmt/0
Verify volume and initialize maps
Media block size is 64
Dump date: Mon Oct 11 13:10:12 2004
Dumped from: the epoch
Level 0 dump of /export/home on sys41:/dev/dsk/c0t0d0s7
Label: none
Extract directories from tape
Initialize symbol table.
ufsrestore > ls
.:
2 *./ 8 directory2 5 file2
2 * / 9 directory3 6 file3
7 directory1 4 file1 3 lost+found/
The system lists files from the last Level 0 backup.
ufsrestore > add *
Warning: ./lost+found: File exists
ufsrestore > extract
Extract requested files
You have not read any volumes yet.
Unless you know which volume your file(s) are on you should start
with the last volume and work towards the first.
Specify next volume #: 1
extract file ./file1
extract file ./file2
extract file ./file3
extract file ./directory1
extract file ./directory2
extract file ./directory3
Add links
Set directory mode, owner, and times.
set owner/mode for ’.’? [yn] n
Directories already exist, set modes anyway? [yn] n
ufsrestore > q
#
Restoring a ufs File System
Performing File System Restores 15-13
Copyright 2005 Sun Microsystems, Inc. All Rights Reserved. Sun Services, Revision A.1
6. The information in the /etc/dumpdates file shows an incremental
backup that was taken after the Level 0 backup. Load the next tape
and perform the incremental restore.
# ufsrestore iv
Verify volume and initialize maps
Media block size is 64
Dump date: Wed Apr 07 09:57:30 2004
Dumped from: Wed Apr 07 09:55:34 2004
Level 1 dump of /export/home on sys41:/dev/dsk/c0t0d0s7
Label: none
Extract directories from tape
Initialize symbol table.
ufsrestore > ls
.:
2 *./ 13 directory4 15 directory6 11 file5
2 * / 14 directory5 10 file4 12 file6
ufsrestore > add *
ufsrestore > extract
Extract requested files
You have not read any volumes yet.
Unless you know which volume your file(s) are on you should start
with the last volume and work towards the first.
Specify next volume #: 1
extract file ./file4
extract file ./file5
extract file ./file6
extract file ./directory4
extract file ./directory5
extract file ./directory6
Add links
Set directory mode, owner, and times.
set owner/mode for ’.’? [yn] n
ufsrestore > q
#
Performing the Exercises
15-14 Intermediate System Administration for the Solaris™ 10 Operating System
Copyright 2005 Sun Microsystems, Inc. All Rights Reserved. Sun Services, Revision A.1
Performing the Exercises
You have the option to complete any one of three versions of a lab. To
decide which to choose, consult the following descriptions of the levels:
● Level 1 – This version of the lab provides the least amount of
guidance. Each bulleted paragraph provides a task description, but
you must determine your own way of accomplishing each task.
● Level 2 – This version of the lab provides more guidance. Although
each step describes what you should do, you must determine the
commands (and options) to input.
● Level 3 – This version of the lab is the easiest to accomplish because
each step provides exactly what you should input to the system. This
level also includes the task solutions for all three levels.
Exercise: Recovering Backup Files and File Systems (Level 1)
Performing File System Restores 15-15
Copyright 2005 Sun Microsystems, Inc. All Rights Reserved. Sun Services, Revision A.1
Exercise: Recovering Backup Files and File Systems
(Level 1)
In this exercise, you read the backup tape from the previous exercise. You
back up the / (root) file system, restore a single file from tape, and destroy
and restore the / (root) file system.
Preparation
This exercise requires a system that is configured with a tape drive and a
/ (root) file system that is separate from the /usr and /var file systems.
Identify the slice that holds the / (root) file system. From your instructor,
get a tape appropriate for your system.
Remote Lab Data Center (RLDC)
In addition to being able to use local classroom equipment, this lab has
also been designed to use equipment located in a remote lab data center.
Directions for accessing and using this resource can be found at:
/>Ask your instructor for the particular SSH (Secure Shell) configuration file
you should use to access the appropriate remote equipment for this
exercise.
In the RLDC environment, a tape should already be present in your tape
drive. Do not eject the tape with an mt command, or you cannot continue
with the lab.
Tasks
Complete the following:
● Read the contents of both ufsdump files on the backup tape written
in the previous exercise.
(Steps 1–3 in Task 1 of the Level 2 lab)
● Reboot the system to run level S. Use the ufsdump command to
create a backup tape of the / (root) file system on your system. Verify
that the tape contains valid data for this file system. Allow the
system to continue to boot to run level 3.
(Steps 1–5 in Task 2 of the Level 2 lab)
Exercise: Recovering Backup Files and File Systems (Level 1)
15-16 Intermediate System Administration for the Solaris™ 10 Operating System
Copyright 2005 Sun Microsystems, Inc. All Rights Reserved. Sun Services, Revision A.1
● Use the ufsrestore i command to restore the /etc/inet/hosts
file from tape, and place it below the /var/tmp directory.
(Steps 1–6 in Task 3 of the Level 2 lab)
● Remove the /kernel, /platform, and /devices directories
recursively. Abort the operating system, and attempt to boot the
system from disk. Record what happens. Boot the system from the
Solaris 10 Software 1 of 4 CD-ROM or DVD to run level S. Create a
new file system on the / (root) slice. Use the ufsrestore command
to reload the / (root) file system. Install a new boot block. Reboot the
system, and eject the CD-ROM/DVD.
(Steps 1–11 in Task 4 of the Level 2 lab)
Exercise: Recovering Backup Files and File Systems (Level 2)
Performing File System Restores 15-17
Copyright 2005 Sun Microsystems, Inc. All Rights Reserved. Sun Services, Revision A.1
Exercise: Recovering Backup Files and File Systems
(Level 2)
In this exercise, you read the backup tape from the previous exercise. You
back up the / (root) file system, restore a single file from tape, and destroy
and restore the / (root) file system.
Preparation
This exercise requires a system that is configured with a tape drive and a
/ (root) file system that is separate from the /usr and /var file systems.
Identify the slice that holds the / (root) file system. From the instructor,
get a tape appropriate for your system.
Remote Lab Data Center (RLDC)
In addition to being able to use local classroom equipment, this lab has
also been designed to use equipment located in a remote lab data center.
Directions for accessing and using this resource can be found at:
/>Ask your instructor for the particular SSH (Secure Shell) configuration file
you should use to access the appropriate remote equipment for this
exercise.
In the RLDC environment, a tape should already be present in your tape
drive. Do not eject the tape with an mt command, or you cannot continue
with the lab.
Task Summary
In this exercise, you accomplish the following:
● Read the contents of both ufsdump files on the backup tape written
in the previous exercise.
● Reboot the system to run level S. Use the ufsdump command to
create a backup tape of the / (root) file system on your system. Verify
that the tape contains valid data for this file system. Allow the
system to continue to boot to run level 3.
Exercise: Recovering Backup Files and File Systems (Level 2)
15-18 Intermediate System Administration for the Solaris™ 10 Operating System
Copyright 2005 Sun Microsystems, Inc. All Rights Reserved. Sun Services, Revision A.1
● Use the ufsrestore i command to restore the /etc/inet/hosts
file from tape, and place it below the /var/tmp directory.
● Remove the /kernel, /platform, and /devices directories
recursively. Abort the operating system, and attempt to boot the
system from disk. Record what happens. Boot the system from the
Solaris 10 OS Software 1 of 4 CD-ROM or DVD to run level S. Create
a new file system on the / (root) slice. Use the ufsrestore
command to reload the / (root) file system. Install a new boot block.
Reboot the system, and eject the CD-ROM/DVD.