how to do everything with microsoft office access 2003 phần 5 docx
Bạn đang xem bản rút gọn của tài liệu. Xem và tải ngay bản đầy đủ của tài liệu tại đây (2.14 MB, 56 trang )
9
4. Double-click the attached label that shows Textn and type Tota l C os t, where n is the
sequentially numbered label.
5. Repeat steps 1 through 4 to add another calculated field to show estimated work time
with the expression =[Completion Date]-[Start Date] and label it Work Time (days).
6. Switch to Form view to see the design with the new calculated fields.
You can see that although the two cost fields retain the currency format with the dollar sign
and two decimal places, the Total Cost field does not. A later section in this chapter, “Use
Property Sheets,” discusses how to correct this.
CHAPTER 9: Understand Form and Report Design Basics 201
HowTo-Tght (8) / How to Do Everything with Microsoft Office Access 2003 / Andersen / 222938-1 / Chapter 9
Dress Up with Lines and Rectangles
Although not essential, lines are useful in forms and reports to create a visual separation
between parts of the design. A heavy line can help focus attention on a specific area. You
can draw a line anywhere in a form or report section.
To draw a line, click the Line toolbox button and click where you want the line or drag
the pointer to draw the line. If you just click in the design, Access draws a solid horizontal
line 1 inch long and 1 point thick. When you drag to draw the line, you can drag it in any
direction and to any length. To make sure the line is horizontal or vertical when you draw it,
hold down
SHIFT while you draw.
Rectangles come in handy as boxes that group related data or as a means to emphasize
another control. For example, in a form you can draw a box around a set of command buttons
to set them off from the rest of the design.
To draw a rectangle, click the Rectangle toolbox button and draw the box in the design.
After drawing the line or rectangle, you can use the Formatting toolbar buttons to change the
line or border thickness, choose colors, and add a special effect. You also can use the property
sheet to change the line or rectangle border style; for example, to a dashed or dotted line.
If you draw a rectangle around other controls and add a background
color, you might obscure the other controls. To cure this, select the
rectangle and choose Format | Send To Back to place it behind the others.
P:\010Comp\HowTo8\938-1\ch09.vp
Thursday, August 07, 2003 7:11:51 PM
Color profile: Generic CMYK printer profile
Composite Default screen
Modify Controls
You can customize the controls you add to a form or report design to present information in just
the right way. Controls can be moved about in the design or resized, and any of the properties can
be changed to create the appropriate effect. To change any control, you first must select the control
to focus Access on the object with which you want to work.
Select Controls and Other Objects
There are many ways of selecting the form or report design, one of the design sections, or one
or more controls. The Object button on the Formatting toolbar displays a complete list of every
element of the design: the form (or report); each of its sections; and all the controls in the design,
including any added lines and text. The list is in alphabetical order. To select one of these, choose
from the list. You might need to scroll down the list to find the element you want to select.
Select the Form or a Form Section
Once the form or form section is selected, you can view and change any of the properties,
including the record source, in the form or report property sheet. You can select the form itself
in the following ways:
■ If the rulers are displayed, click the form selector (the small square in the upper-left
corner where the horizontal and vertical rulers meet)
■
Choose Edit | Select Form (or Report) or press CTRL-R
■
Click anywhere in the plain gray background, within the window, but outside the
form design
In addition to choosing from the Object list, you can do one of the following to select a form or
report section:
■
Click the section selector (the small box in the vertical ruler opposite the section bar)
■
Click in the section bar
■
Click anywhere in the gray background of the section
202 How to Do Everything with Microsoft Office Access 2003
HowTo-Tght (8) / How to Do Everything with Microsoft Office Access 2003 / Andersen / 222938-1 / Chapter 9
Form selector
Section selector
Section bar
P:\010Comp\HowTo8\938-1\ch09.vp
Thursday, August 07, 2003 7:11:52 PM
Color profile: Generic CMYK printer profile
Composite Default screen
9
When a section is selected, the section bar, the horizontal divider that contains the section title,
appears shaded.
Select Controls
That leaves the controls themselves. To select one control, you can simply click in the control or
choose the control name from the Object list on the Formatting toolbar. When you select a control,
a set of small dark squares called handles appear around the control. You use these handles to
move and resize the controls. The larger squares are the move handles and the smaller ones are
the sizing handles. You’ll learn more about moving and resizing later in this chapter.
If you want to make the same change to several controls at once, you can select more than
one of them in one of the following ways:
■ Hold down SHIFT as you click each control.
■
To select a column of controls, click the selection arrow in the horizontal ruler above
the controls.
■
To select a row of controls, click the selection arrow in the vertical ruler to the left of
the controls.
■
To select a block of controls, click the selection arrow in one of the rulers and drag
to draw a rectangle around the controls. This selects all the controls that are inside
or partially within the rectangle.
■
To select a block of controls within the design but not a complete column or row, click
in the design outside of any control and draw a rectangle around the controls.
■
To select all the controls in the design, choose Edit | Select All or press CTRL-A.
To remove the selection, click anywhere outside the selected objects. To remove only a few
controls from a group of selected controls, hold down
SHIFT and click each of the controls you
want to exclude.
A text box control is a special case because it contains two parts that can be treated together
or separately. The attached label usually is the field name, and the edit region displays the field
value. If you click the edit region to select a text box control, you can change the text box properties.
If you click the attached label, only the label is selected and you can change its properties.
You can tell by the size and number of handles that appear around the control whether you
have selected them both or only the label. Two text box controls are shown in the following
CHAPTER 9: Understand Form and Report Design Basics 203
HowTo-Tght (8) / How to Do Everything with Microsoft Office Access 2003 / Andersen / 222938-1 / Chapter 9
Move handles
Sizing handles
P:\010Comp\HowTo8\938-1\ch09.vp
Thursday, August 07, 2003 7:11:52 PM
Color profile: Generic CMYK printer profile
Composite Default screen
illustration; both the label and the edit region of the Labor Cost control are selected whereas only
the label of the Material Cost control is selected.
Once you have selected the controls you want to work with, you can move, resize, align, or
space them equally or change any of their properties.
Group Controls
If you have several controls that you want to look and behave alike, you can define them as
a single group and format them all at the same time. To create the control group, select all the
controls you want to include, including the labels for the text box controls, and choose Format |
Group. A frame appears around the set of controls but does not show up in Form view.
The new form shown in the following illustration contains the cost fields in a single group.
To remove the group designation, choose Format | Ungroup.
Move and Resize Controls
One reason to select a control is to change its size or move it to a different position in the design.
As mentioned earlier, when you select a control, handles appear around the control. These handles
are used to move and resize a control or a selected group of controls.
Move Controls
To move a control in the design, move the mouse pointer to the move handle (the larger square
in the upper-left corner of a selected control). When the pointer changes shape to an open hand,
click and drag the control to the desired position. You can drag it over other controls to place it
where you want it.
Again, the text box control is a special case because it has two move handles. If the pointer
shows as an open hand, the control and its label move together. If the mouse pointer changes to
a pointing hand instead of an open hand, you can move the edit region by itself.
When you move the mouse pointer to the move handle of the attached label, it always changes
to a pointing hand so you can move the label by itself. You can’t move both parts with the move
handle in the label unless you have also selected the label.
204 How to Do Everything with Microsoft Office Access 2003
HowTo-Tght (8) / How to Do Everything with Microsoft Office Access 2003 / Andersen / 222938-1 / Chapter 9
P:\010Comp\HowTo8\938-1\ch09.vp
Thursday, August 07, 2003 7:11:52 PM
Color profile: Generic CMYK printer profile
Composite Default screen
9
Dragging a control by its move handle can be inaccurate, so if you want to move a
control a smaller or more precise distance, hold down
CTRL and press the appropriate
arrow key. Each key press moves the control one-fourth of a grid unit in the direction of
the arrow. Holding down
CTRL while you drag a control temporarily turns off the Snap
To Grid feature.
If you have selected more than one control, you can drag any one of them and all will move
together.
Resize Controls
A selected control has seven sizing handles, one on each side and one at each corner (except the
move handle corner). Dragging one of the side handles changes the width or height whereas dragging
a corner handle can change both height and width at once.
If you have selected several controls, all will change size the same when you drag the sizing
handle of one of them.
If you need to make more precise adjustments in the size of the selected control, hold
down
SHIFT while you click the appropriate arrow key. Each keypress increases or
decreases the size of the control by one grid unit.
The Format and shortcut menus also have options that help you size one control or a group
of controls so that they match in length or width. First select the controls you want to resize,
then choose Format | Size or right-click and point to Size in the shortcut menu.
The first command, To Fit, resizes a control to fit its contents. For example, if you have
drawn a long label control and entered short text, choose the To Fit command to reduce the size
of the control to fit the entered text. The second command, To Grid, automatically adjusts the
size of the control so that all four corners fall on the nearest grid points.
Double-clicking one of the sizing handles automatically resizes the control to fit the
contents.
The remaining four commands adjust the size of each control in a group of controls relative
to the tallest, the shortest, the widest, or the narrowest of the group.
CHAPTER 9: Understand Form and Report Design Basics 205
HowTo-Tght (8) / How to Do Everything with Microsoft Office Access 2003 / Andersen / 222938-1 / Chapter 9
P:\010Comp\HowTo8\938-1\ch09.vp
Thursday, August 07, 2003 7:11:53 PM
Color profile: Generic CMYK printer profile
Composite Default screen
Align and Space Controls
Lining up the controls in a form gives the form or report a professional look. To align a group
of controls, select them first, then choose Format | Align or right-click and point to Align in the
shortcut menu.
The last command in the Align menu, To Grid, places the upper-left corner of all the selected
controls on a grid mark. If you have Snap To Grid checked, this is automatically done.
When aligning controls, be sure to select only those in the same row or same column.
If you have controls in the group from a different area of the form, they will be aligned
with the rest, creating a confused appearance.
When you have a row or column of controls that you want uniformly spaced across or down
the form or report, you can use the Horizontal Spacing or Vertical Spacing commands in the Format
menu. These commands also are used to increase or decrease the spaces evenly between the controls.
Each time you choose Increase or Decrease, the spacing is changed by one grid interval.
Use Property Sheets
Properties establish the characteristics of form and report design elements. Everything in a form
or report design has propertiescontrols, sections, and even the form or report itself. Control
properties set the structure, appearance, and behavior of the controls. Properties also can determine
the characteristics of the text and data contained in a control.
Property sheets contain lists of all the properties that pertain to the selected control or group
of controls. To open a property sheet for a control, do one of the following:
■
Double-click the control
■
Select the control and choose View | Properties
■
Select the control and click Properties on the toolbar
■
Select the control and press ALT-ENTER
■
Right-click the control and choose Properties from the shortcut menu
206 How to Do Everything with Microsoft Office Access 2003
HowTo-Tght (8) / How to Do Everything with Microsoft Office Access 2003 / Andersen / 222938-1 / Chapter 9
P:\010Comp\HowTo8\938-1\ch09.vp
Thursday, August 07, 2003 7:11:54 PM
Color profile: Generic CMYK printer profile
Composite Default screen
9
CHAPTER 9: Understand Form and Report Design Basics 207
HowTo-Tght (8) / How to Do Everything with Microsoft Office Access 2003 / Andersen / 222938-1 / Chapter 9
The list of properties will depend on the current selection. The All tab of the property sheet
for the Workorder Number text box control lists all the control’s properties. As you can tell by
the scroll bar, there are more properties in the list. The properties are grouped in the sheet by type:
Format, Data, Event, Other, and All. Click on the tab that will show the properties you want to
change, or stay with All to see the entire list.
To change a property, click the property in the list, then do one of the following:
■
Type the desired setting in the property box
■
If an arrow appears in the property box, select the desired setting from the list
■
If a Build button (…) appears, click it to display a builder or a dialog box with
a choice of builders, depending on the type of control
When you click a property in the property sheet, you can see a description of the property in
the status bar. If you need more information about the property or how to use it, press
F1.
The calculated field, Total Cost, which we added to the Workorders data entry form earlier,
needs to show currency symbols. To set the format property:
1. In the form Design window, double-click the edit region of the Total Cost text box control.
2. Click the arrow in the Format property box and choose Currency from the list.
P:\010Comp\HowTo8\938-1\ch09.vp
Thursday, August 07, 2003 7:11:54 PM
Color profile: Generic CMYK printer profile
Composite Default screen
To apply the same property settings to a group of controls of the same type, select them all,
then open the property sheet. Only those properties common to all members of the group are
visible in the sheet.
Once you open a property sheet, it remains on the screen until you close it. To set properties
of a different object in the design, select the object from the drop-down list at the top of the
property sheet or select the control in the design.
Assign a Default Value
When you assign a default value to a bound control in a form or report design, the value you
enter overrides any default value set in the underlying table design. The default value you assign
is stored in the field when a new record is entered in the form unless you enter a different one.
For example, if you are entering new bid data and one of the fields in the form is the date, you
can assign the current date as the default value. This automatically stores the current system date
in the new record. To assign the current date as the default value, type =Date() in the control’s
Default Value property box.
Change Default Control Properties
Access provides a default set of properties for each type of control. The set specifies the general
appearance and behavior of that type of control. For example, the default properties for a text box
control determine the font size and alignment of text within the attached label. Another default
text box property automatically includes the field name as an attached label. This set of properties
is called the default control style for that control type.
If you think you will want different default control styles, you can save time by making
the changes before starting to create the form.
If you find that you are making the same changes to most of the controls of a certain type,
you can change the default property setting. For example, if you usually want a larger font size
in your text boxes, change the Font Size from the default size of 8 to a larger size. Or, if you
don’t want the attached labels for every text box, change the Auto Label property on the Format
tab to No.
When you change a default setting to the one you use most, you save space. Access
doesn’t need to store both the default and the custom settings.
To change a default property setting:
1. Click the tool in the toolbox for the desired control type.
2. Click Properties on the toolbar. The property sheet for that control type opens, but the
title bar indicates that these are the default settings instead of the settings for a particular
control in the design.
208 How to Do Everything with Microsoft Office Access 2003
HowTo-Tght (8) / How to Do Everything with Microsoft Office Access 2003 / Andersen / 222938-1 / Chapter 9
P:\010Comp\HowTo8\938-1\ch09.vp
Thursday, August 07, 2003 7:11:55 PM
Color profile: Generic CMYK printer profile
Composite Default screen
9
3. Change the setting in the default property sheet.
If you have already made changes to a control and like what you see, there is a quick way to
copy the changes to the control type’s default style. Any new controls now will use the properties
from the existing control as a default control style. Select the control that has the characteristics
you want as defaults for subsequent controls, then choose Format | Set Control Defaults.
Use the Formatting Toolbar
The Formatting toolbar is a quick way to change the appearance of the text in selected controls.
The toolbar is optional when you are designing a form or report. To see the Formatting toolbar,
choose View | Toolbars and check Formatting (Form/Report). You also can right-click in any
menu bar or toolbar and choose Formatting (Form/Report) from the shortcut menu.
The Formatting toolbar has, in addition to the Object button we’ve already discussed, eight
buttons for formatting text in the design. These eight buttons change the font name, size, and
style and align the text within the control boundaries. The last five buttons give you a quick way
to change the color and style of many elements in the design.
The three color buttons each display a color palette you can use to change the color of the
background, the font, or the border of a control. The fourth button changes the thickness of
the selected control’s border and the last button adds special effects to a control or an entire
section such as raised, sunken, shadowed, etched, chiseled, and flat effects.
If you want to apply the same formatting property changes to a group of similar
controls, select them all, then change the common property.
Format Conditionally
Conditional formatting was introduced in Access 2000. You can use it with text boxes and combo
boxes to specify a default format for the control and up to three additional formats to be applied
under special conditions: the current value of the field, when the field gets focus, or when an
expression evaluates to True. The expression can refer to the values in other fields in the same
CHAPTER 9: Understand Form and Report Design Basics 209
HowTo-Tght (8) / How to Do Everything with Microsoft Office Access 2003 / Andersen / 222938-1 / Chapter 9
P:\010Comp\HowTo8\938-1\ch09.vp
Thursday, August 07, 2003 7:11:55 PM
Color profile: Generic CMYK printer profile
Composite Default screen
210 How to Do Everything with Microsoft Office Access 2003
HowTo-Tght (8) / How to Do Everything with Microsoft Office Access 2003 / Andersen / 222938-1 / Chapter 9
record. For example, if the date in a field is more than 30 days ago, display the value in this field
underlined and in red on a light green background.
To activate conditional formatting, select the control you want to apply it to and choose
Format | Conditional Formatting. The Conditional Formatting dialog box shows two areas: one
for setting the default format and one for specifying a conditional format to be applied under
specific conditions.
The formatting choices include bold, italic, and underline as well as text and background
colors. The button on the right end of the condition box enables or disables the control. When
a control is enabled, you can reach it by pressing
TAB. If it is disabled, it is skipped in the tab
order. The box in the middle displays an example of how the chosen formatting will look.
To set conditional formatting, set the default format, then move to Condition 1. In the first
box, you have a choice of conditions:
■
Field Value Is Defines the value or range of values for which to apply the format
settings
■
Expression Is Applies the formatting if the expression you enter evaluates to True
■
Field Has Focus Applies the formatting to the field as soon as it gets focus
Depending on which selection you make in the first condition box, other specifications can
be made in the other boxes. If you choose Field Value Is in the first box, you have a choice of
several comparison operators.
If you choose Expression Is, you have only one box in which to enter the expression. Field
Has Focus requires no additional criteria.
P:\010Comp\HowTo8\938-1\ch09.vp
Thursday, August 07, 2003 7:11:55 PM
Color profile: Generic CMYK printer profile
Composite Default screen
9
CHAPTER 9: Understand Form and Report Design Basics 211
HowTo-Tght (8) / How to Do Everything with Microsoft Office Access 2003 / Andersen / 222938-1 / Chapter 9
After defining the condition, use the formatting buttons to set the format you want to apply if
the condition is met. Choose Add to add another condition. You can specify up to three conditional
formatting scenarios for each text box or combo box control. The conditions are ranked with the
first one taking precedence. If the first condition is not met, the second is evaluated, and so on.
Figure 9-6 shows the Conditional Formatting dialog box with settings for the Total Cost text box
control. The three conditions are
■
If the Total Cost exceeds $5,000
■
If the Total Cost is less than $1,000
■
If the Labor Cost is greater than the Material Cost
If you want to remove a condition, choose Format | Conditional Formatting again and click
Delete in the dialog box. The Delete Conditional Format dialog box opens. In this dialog box,
you can check the conditions you want to delete. Then click OK.
FIGURE 9-6 Conditionally formatting a text box
P:\010Comp\HowTo8\938-1\ch09.vp
Thursday, August 07, 2003 7:11:56 PM
Color profile: Generic CMYK printer profile
Composite Default screen
212 How to Do Everything with Microsoft Office Access 2003
HowTo-Tght (8) / How to Do Everything with Microsoft Office Access 2003 / Andersen / 222938-1 / Chapter 9
Change a Control Type
When you change your mind about what type of control you want in the form or report, Access
lets you change the control type dynamically. Not all types can be converted and you are limited
to the types you can convert to, depending on the original control type.
To change a control type, click the control you want to change and choose Format | Change To.
You can also right-click the control and point to Change To in the shortcut menu. A list appears
displaying the list of controls to which the selected control can be changed. Click on the new type
of control. If a control type is dimmed in the list, you cannot change the selected control to that
type. Table 9-1 describes the types of conversions permitted by Access.
When you change to another type of control, the applicable properties are copied from the
original control to the new control. If the original control has property settings that don’t exist
for the new control, they are ignored. If the new control has properties that were not used in the
original control, Access assigns the default settings for the new control.
Delete Controls
To delete a control, select the control and press DEL or choose Edit | Delete. If you change your
mind, you can restore the control by clicking Undo on the toolbar (or choosing Edit | Undo).
You can delete more than one control by selecting them all, then pressing
DEL. With the Office
2003 stacked Undo/Redo, you don’t have to act immediately to reverse an action. You can select
the action from the Undo drop-down list.
Original Control Permitted Conversions
Label Text box
Text box Label, list box, combo box
List box Text box, combo box
Combo box Text box, list box
Check box Toggle button, option button
Toggle button Check box, option button
Option button Check box, toggle button
TABLE 9-1 Permitted Control Conversions
P:\010Comp\HowTo8\938-1\ch09.vp
Thursday, August 07, 2003 7:11:56 PM
Color profile: Generic CMYK printer profile
Composite Default screen
9
CHAPTER 9: Understand Form and Report Design Basics 213
HowTo-Tght (8) / How to Do Everything with Microsoft Office Access 2003 / Andersen / 222938-1 / Chapter 9
Modify Form or Report Properties
Forms and reports have many properties in common such as Record Source, Filter, Order By,
Width, and several event properties. Each of these can be changed in the object’s property sheet;
some can also be changed in Design view.
Change the Record Source
When you have created a useful form or report design using one set of data, you can easily reuse
the design with other data by changing the Record Source property to the new data. To change
a form or report record source:
1. Click the form or report selector, then click Properties.
2. Click the Data tab and click the down arrow in the Record Source property.
3. Choose the new record source from the drop-down list of all tables and queries in the
current database.
You can also click the Build button to the right of the Record Source property box to start the
Query Builder where you can create a new query to use as the record source.
When you change the record source, some of the bound text boxes no longer represent fields
in the underlying record source. You will immediately see a marker in the upper-left corner of
the text box edit region and a tag next to it because no field exists in the new record source with
that name.
P:\010Comp\HowTo8\938-1\ch09.vp
Thursday, August 07, 2003 7:11:56 PM
Color profile: Generic CMYK printer profile
Composite Default screen
When you rest the pointer on the tag, you can see the reason for the marker. To see how
to fix it, click the tag and choose from the drop-down list. This is a big improvement over earlier
versions of Access that simply displayed #Name? or #Error? with no clue as to what was wrong.
Apply Filters and Sort Orders
When you create a form or report based on a table or query with a filter or a specified sort order,
both are included in the object’s properties. The sort order is automatically applied but the filter
may or may not be, depending on how you created the form or report:
■
If you created the form or report from a table not open in Datasheet view, the filter and
sort order are inherited but not applied. You must apply them when you need them.
■
If you created the form or report from a table that is open in Datasheet view and contains
filtered data, the filter is applied every time you open the report but only the first time
you view the form in Form view. After you save and close the form, the next time you
open the form, you will have to apply the filter yourself by clicking Apply Filter.
Use AutoFormat
Access has provided several attractive formats for forms and reports that add style to the design.
To apply the style to a form or report under construction or already completed:
1. Open the object in Design view and click the form or report selector.
2. Click the AutoFormat button or choose Format | AutoFormat.
The report AutoFormat list of styles is different. The Options button has been clicked in the
illustration to show that you can apply the font, color, and border attributes selectively.
214 How to Do Everything with Microsoft Office Access 2003
HowTo-Tght (8) / How to Do Everything with Microsoft Office Access 2003 / Andersen / 222938-1 / Chapter 9
P:\010Comp\HowTo8\938-1\ch09.vp
Thursday, August 07, 2003 7:11:56 PM
Color profile: Generic CMYK printer profile
Composite Default screen
9
If you click Customize, you open another dialog box where you can create a new
AutoFormat based on the form design you are working on, modify the selected AutoFormat
in the AutoFormat dialog box with attributes in the current form design, or delete the selected
AutoFormat completely. This last option is handy if you create a custom AutoFormat and then
decide it is no longer useful.
If you want to apply AutoFormat to just one section in the form or report design,
click the section selector before opening the AutoFormat dialog box. You can also
use AutoFormat for a single control.
Add a Background Picture
Adding a picture in the background of a form or report is a little different from adding one as a
control. A background picture is a property of the form or report and is found on the Format tab
of the form or report property sheet. To add a background picture:
1. Select the form or report with one of the following methods:
■
Click the form selector
■
Choose Edit | Select Form (or Report)
■
Choose Form or Report from the Object list on the Formatting toolbar
2. Open the property sheet and click in the Picture property box on the Format tab.
3. Click the Build button, select the picture you want from the Insert Picture dialog box,
then click OK.
Figure 9-7 shows the title page of a report with a picture of Home Tech Repair equipment in
the background.
CHAPTER 9: Understand Form and Report Design Basics 215
HowTo-Tght (8) / How to Do Everything with Microsoft Office Access 2003 / Andersen / 222938-1 / Chapter 9
P:\010Comp\HowTo8\938-1\ch09.vp
Thursday, August 07, 2003 7:11:57 PM
Color profile: Generic CMYK printer profile
Composite Default screen
In some designs, you might want to overlap controls with one in the foreground and the other
behind. The Format | Bring To Front and Format | Send To Back commands determine which of
the controls is in the foreground.
216 How to Do Everything with Microsoft Office Access 2003
HowTo-Tght (8) / How to Do Everything with Microsoft Office Access 2003 / Andersen / 222938-1 / Chapter 9
FIGURE 9-7 A report showing a background picture
P:\010Comp\HowTo8\938-1\ch09.vp
Thursday, August 07, 2003 7:11:57 PM
Color profile: Generic CMYK printer profile
Composite Default screen
HowTo-Tght (8) / How to Do Everything with Microsoft Office Access 2003 / Andersen / 222938-1 / Chapter 10
blind folio 217
Chapter 10
Create Custom
Forms and
Subforms
P:\010Comp\HowTo8\938-1\ch10.vp
Friday, August 08, 2003 8:55:28 AM
Color profile: Generic CMYK printer profile
Composite Default screen
How to…
■
Create a new form design
■
Modify the form
■
Use the form for data entry
■
Create a multiple-page form
■
Add calculated and special fields
■
Create a hierarchical form
■
Add custom user guidance
■
Control data entry
Create a New Form Design
Access forms usually are used for viewing and entering data. It is important to design a form
that will make data entry as foolproof as possible and present the data so that it is easily
understood. For example, arrange the data in a logical sequence in the form or group related
information together on the screen.
Although the Access Form Wizard will do most of the work for you, it does only what
you ask; so it pays to plan ahead. Design the form on paper before invoking the wizard. If
a manual data entry form has already proved efficient, the design can be repeated in an
Access form.
218 How to Do Everything with Microsoft Office Access 2003
HowTo-Tght (8) / How to Do Everything with Microsoft Office Access 2003 / Andersen / 222938-1 / Chapter 10
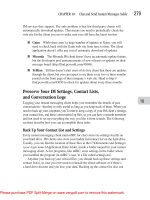
FIGURE 10-1 Choosing from the New Form dialog box
P:\010Comp\HowTo8\938-1\ch10.vp
Friday, August 08, 2003 8:55:28 AM
Color profile: Generic CMYK printer profile
Composite Default screen
10
To start a new form, open the New Form dialog box (see Figure 10-1) using one of the
following techniques:
■
If you want to base the form on a single table, select the table or query name in the
Tables or Queries page of the Database window and click the New Object toolbar
button, then choose Form from the list.
■
To start a new form with a table or query open in Datasheet or Design view, click the
drop-down arrow next to the New Object toolbar button and choose Form from the menu.
If you create a new form while the table or query is open in Design view, you will not
be able to see the form in Form view until you close the underlying table or query.
■
In the Database window, click the Forms button in the Objects bar and choose New.
■
Click anywhere in the Database window and choose Insert | Form.
If you select a table or query name before opening the dialog box, that name is displayed in
the dialog box. If not, you can choose one from the drop-down list or wait and choose one in the
wizard’s first dialog box. Choose the type of form you want to create or one of the wizards and
click OK.
You also can start a new form by double-clicking one of the shortcut items in the Forms page:
■
Create form in Design view
■
Create form by using wizard
CHAPTER 10: Create Custom Forms and Subforms 219
HowTo-Tght (8) / How to Do Everything with Microsoft Office Access 2003 / Andersen / 222938-1 / Chapter 10
P:\010Comp\HowTo8\938-1\ch10.vp
Friday, August 08, 2003 8:55:29 AM
Color profile: Generic CMYK printer profile
Composite Default screen
Use the Form Wizard
When you choose Form Wizard from the New Form dialog box or double-click the shortcut item,
the first wizard dialog box opens where you choose the fields to add to the form. If you haven’t
selected a table or query, you can do that here too.
To start a new form design based on the Current Workorders query:
1. Select the Current Workorders query in the Queries page of the Database window, then
click the New Object button and choose Form (not AutoForm).
2. Double-click Form Wizard in the New Form dialog box or select Form Wizard and click
OK. The first Form Wizard dialog box opens (see Figure 10-2).
The Current Workorders query name shows in the Tables/Queries box and the Available
Fields list shows all the fields in the query, including the calculated fields. The fields appear in
the same order as in the query design grid. You can place any or all of the fields in the form
design in the desired order. Add them one at a time in the sequence you want them to appear
in the form.
To continue with the Current Workorders form:
1. Click the double right chevrons (>>) to add all the fields from the Current Workorders
query to the Selected Fields list.
2. Click Next. The Form Wizard’s second dialog box opens.
220 How to Do Everything with Microsoft Office Access 2003
HowTo-Tght (8) / How to Do Everything with Microsoft Office Access 2003 / Andersen / 222938-1 / Chapter 10
FIGURE 10-2 Choosing fields for the form
Add selected field
Add all fields
Remove all fields
Remove selected field
P:\010Comp\HowTo8\938-1\ch10.vp
Friday, August 08, 2003 8:55:29 AM
Color profile: Generic CMYK printer profile
Composite Default screen
10
If the fields in the Available Fields list are not in the order you want to see in the form,
choose the fields one at a time in the order you want them to appear. To insert a field
name into the Selected Fields list, select the field name above where you want the new
one, select the field from the Available Fields list, and click the right chevron. By
selecting the fields in the right order in the Form Wizard dialog box, you avoid moving
the controls around in the form design.
If you select fields from more than one table or query, the Form Wizard will create a main
form with one or more subforms. The “Create a Hierarchical Form” section discusses this subject
in more detail.
The second Form Wizard dialog box offers a choice of six form layouts: Columnar, Tabular,
Datasheet, Justified, PivotTable, and PivotChart (see Figure 10-3).
For the Current Workorders form, select the Columnar layout and click Next.
The next dialog box shows a list of ten styles from which to choose. These are the same
styles you see when you click the AutoFormat toolbar button, as shown in the previous chapter.
Choose a style and click Next to reach the final Form Wizard dialog box, where you name the
form and decide whether to view the data in the new form or go directly to the Design view to
modify the design.
After entering the form name, click Finish to save and open the form. Once the wizard is
finished, you can go about customizing the form for your special needs.
Create a Form Without the Wizard
You don’t need the help of a wizard to create your form. You can start a new form by one of the
following methods:
■
Double-click Create A Form In Design View in the Database window
■
Choose Design View in the New Form dialog box
CHAPTER 10: Create Custom Forms and Subforms 221
HowTo-Tght (8) / How to Do Everything with Microsoft Office Access 2003 / Andersen / 222938-1 / Chapter 10
P:\010Comp\HowTo8\938-1\ch10.vp
Friday, August 08, 2003 8:55:29 AM
Color profile: Generic CMYK printer profile
Composite Default screen
When you start a new custom form without the help of the Form Wizard or one of the
AutoForm templates, you begin with an empty Design view window. If you have chosen a table
or query in the New Form dialog box to use as the basis for the form, you can display the field
list and drag the fields into the form design. If you have not already chosen the basis for the
form, you can define it in Design view by selecting the table or query from the form’s Record
Source property list; then you can add other controls and set properties as before.
Modify the Form Design
Although the Form Wizard does a good job of creating a form, there are a lot of things you can
do to improve the result. For example, you can
■
Add a form header with a title
■
Resize the form to fit the window or the window to fit the form
■
Add special controls such as the current date, a calendar, or an AutoDialer
■
Change the text of attached labels
■
Add lines and rectangles for emphasis
■
Change the progression of the cursor through the controls when TAB is pressed
(the tab order)
222 How to Do Everything with Microsoft Office Access 2003
HowTo-Tght (8) / How to Do Everything with Microsoft Office Access 2003 / Andersen / 222938-1 / Chapter 10
FIGURE 10-3 Choose the form layout
P:\010Comp\HowTo8\938-1\ch10.vp
Friday, August 08, 2003 8:55:29 AM
Color profile: Generic CMYK printer profile
Composite Default screen
10
Add Form Header and Footer Sections
By default, a form created by the wizard from a single table or query has a detail section and
form header and footer sections in which the user can specify information that will appear at the
top and bottom of the form. This information remains on the screen as you scroll through records
in the detail section. You also can add page header and footer sections to hold information such
as a title, graphics, or column headings. Page sections appear only when you preview or print the
form, not in Form view.
The thin form header section appears above the detail section. If you scroll down the form
design, you will also see the footer section. Both sections are shrunken but appear in the form
design. To increase the size of the form header section, move the mouse pointer to the detail
section bar; when the pointer changes to a black plus sign with up and down arrows, click and
drag the bar down.
To add a title to the form:
1. Open the toolbox and click the Label control button, then draw a frame in the form
header section.
2. Type Current Workorders in the new label.
3. Click outside the label control, then click it again to select it.
4. Using the Formatting toolbar, change the font size to 18 and make it bold and centered.
5. Right-click the label and choose Size | To Fit from the shortcut menu or choose Format |
Size | To Fit. The label box frame shrinks to the size of the text in it.
Figure 10-4 shows the Current Workorders form design with a title in the new header section.
When you click View | Form Header/Footer, both sections are added to the form design.
If you have no information to put in the footer and don’t want the section to take up
room in the form, you can drag the bottom form border up to reduce the footer section
space to zero.
All the sections in a form have the same properties. Double-click one of the section selectors
to open the property sheet for the section. Form sections have fewer properties than the form itself.
Most of the section properties apply to formatting.
For example, the Can Shrink and Can Grow properties resize the section to fit the data in it.
The Force New Page property can start printing the form section on a new page rather than on
the current page, before or after printing the current section.
Place and Customize Data-Related Controls
In the last chapter, you saw how to add bound text box controls to a form design by dragging the
field names from the field list. In addition to the text box controls in which you enter and edit
data, list and combo boxes enable you to choose from a list of values.
CHAPTER 10: Create Custom Forms and Subforms 223
HowTo-Tght (8) / How to Do Everything with Microsoft Office Access 2003 / Andersen / 222938-1 / Chapter 10
P:\010Comp\HowTo8\938-1\ch10.vp
Friday, August 08, 2003 8:55:30 AM
Color profile: Generic CMYK printer profile
Composite Default screen
List boxes limit your choice to values in the list but combo boxes usually let you type entries
and choose from the list. Either of these can be bound or unbound. If the control is bound, the
selected or entered value is stored in the field to which it is bound. If it is unbound, the value is
not stored in a table but can be used by another control or as a search criterion.
Add New Text Box Controls
The Current Workorders query does not have all the fields we would like to see in the Current
Workorders form. To add more bound text box controls, change the query that is the form’s
Record Source property and include the additional fields. If you are using a table as the record
source, you may need to create a query that includes the fields from the original table plus the
additional fields from related tables.
To add more fields from the related tables that are used in the query, open the form in Design
view and do the following:
1. If the property sheet is already visible, click the form selector or select Form from the
drop-down list. If not, click the form selector, and then click the Properties button.
2. Click in the Record Source property box on the Data tab, and then click the Build button.
This starts the Query Builder, which looks much like the query design grid except that
the words “Query Builder” appear in the title bar.
224 How to Do Everything with Microsoft Office Access 2003
HowTo-Tght (8) / How to Do Everything with Microsoft Office Access 2003 / Andersen / 222938-1 / Chapter 10
FIGURE 10-4 Adding a title to the form header section
P:\010Comp\HowTo8\938-1\ch10.vp
Friday, August 08, 2003 8:55:30 AM
Color profile: Generic CMYK printer profile
Composite Default screen
10
CHAPTER 10: Create Custom Forms and Subforms 225
HowTo-Tght (8) / How to Do Everything with Microsoft Office Access 2003 / Andersen / 222938-1 / Chapter 10
3. Hold down CTRL while you select the City and State fields in the Bid Data field list and
drag the group to the grid. The position in the grid is unimportant right now.
4. Click Save, then click the Close button to return to the form design.
The additional fields now are available to the form and the field list is displayed. Follow the
next steps to complete the addition of the City and State fields:
1. Select Bid Number in the field list and drag it to the 4-inch mark on the horizontal ruler
in line with the Workorder Number field.
2. Select the City field in the field list and drag it to a position in the design below the Bid
Number field, and then drag the State field next to the City field.
3. Resize the City and State labels to fit the text, then resize the State text box because it
will contain only two characters. Move the State text box next to its attached label.
4. To make the three address fields the same height, click in the vertical ruler level with the
row of text boxes to select all three and choose Format | Size | To Tallest.
5. Align the boxes by choosing Format | Align | Top while they are still selected.
You can also add a line to separate the material and labor cost from the calculated fields that
show the total and extended costs. First, move the two calculated fields down a little to make
P:\010Comp\HowTo8\938-1\ch10.vp
Friday, August 08, 2003 8:55:31 AM
Color profile: Generic CMYK printer profile
Composite Default screen