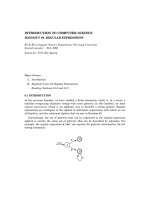
Introduction to Character Animation phần 8 pot
Bạn đang xem bản rút gọn của tài liệu. Xem và tải ngay bản đầy đủ của tài liệu tại đây (405.63 KB, 18 trang )
The armature now acts normally.
Do the same thing for the other leg:
Select knee.r, then shift-select upper_leg.r.
Add an IK constraint with Ctrl I.
Change the ChainLen to 1.
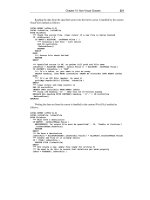
Test out the new knee bones by moving the spine1 bone around,
especially down and back. Much better!
Eye tracking
While we could rotate the eyes individually when animating, it will be a lot easier to have them track an object. It's
p
ossible to have the eyes track any object, but it will be easier to animate if we make that object a bone in the existing
armature.
The armature now acts normally.
Knees now behave properly when spine1 is
moved down and back.
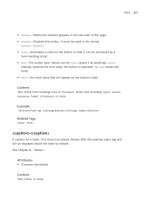
In Pose mode, clear the rotation and location of all bones.
Switch to the armature's Edit mode.
Select the head bone.
Duplicate it with Shift D , and move it in front of the head.
Name the bone eyes or something meaningful.
Make eyes a child of master. Note we didn't have to disconnect the
bone this time, a bone is automatically disconnected when it's
duplicated from an existing bone.
Move the bottom (the root) of the bone to eye level. The root of the
bone is where the eyes will point to (by the way, you could switch
to Octahedron draw type for the bones to better see where the root
is).
Press TAB to switch to Pose mode (which is a substitute for
Object mode) and select the character's left eye. It may take a
couple of attempts to select the eye instead of the body. You can
always switch to Layer 2 (with
2 , to see just the eyes), select the
eye, then return to view all layers (
` ). The eye mesh is in Object
mode.
Switch to the Object buttons in the Button window ( F7 ). There is
a Constraints panel here, just like there was for the armature in
Pose mode.
In the Constraints panel, add a Track To constraint.
We want to tell this constraint that we want it to point the eye at the eyes bone in the armature. We'll also have to tell it
which axis of the eye should be considered "up", and which axis should point toward the eyes bone. To figure this out, we
need to remind ourselves of rotation of the eyes.
In the Draw panel under the Object buttons, make sure Axis is selected.
The eyes bone.
Adjusted eyes bone.
A Track To constraint added to the character's
left eye in Object mode.
I had to switch to wireframe mode and just view Layer 2 to see the
axes, and even then it was a little tough to see. Here, the Z axis is
pointing up, the X axis is pointing to the right, and the Y axis is
pointing back. In this case, I want to tell the Track To constraint
that Z is up. The axis arrows point in a positive direction, and the Y
axis is pointing back, so I want negative Y to point toward the eyes
bone.
Armed with the knowledge of which axis you want up and which
you want to track with, view all layers and switch back to shaded
mode (
Z).
In the OB: text box of the eye's Track To constraint, make the
target object "Armature".
Make the target bone "eyes" or whatever you have named the eyes
bone (in the BO: text box that appears).
Select "-Y" in the To: buttons. This is the axis we want to point to
the eyes bone.
Select "Z" in the Up: buttons. This tells the constraint which
direction to point up.
Do the same thing to the other eye:
Select the other eye.
Double check the axes and the direction you want it to point (both eyes should be the same, otherwise go back and
check out the instructions on rotating the eye).
Add a Track To constraint.
Make the target "Armature" and the "eyes" bone.
Select the To: and Up: axes as appropriate (I used -Y as the To: and Z as the Up).
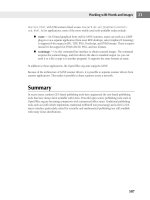
Select the armature in Pose mode and move the eyes bone around.
The eyes should track the bone!
Checking the axes of the eye.
Settings for the Track To constraint.
The eyes keep focused on the eyes bone.
Tips for using the rig
A note on Auto IK: While it can be very useful for broadly
positioning the arms, for the most part, you'll want to leave Auto
IK off.
If you have Auto IK on, the eyes, knee bones, and leg bones
won't work.
Some tips for each bone, starting from the top:
head: use trackball rotation (
R-R ) to swivel the head around.
eyes: move this bone around to control what the eyes are looking at. Move
this bone farther away from the face to correct cross-eyes.
Rotate the head bone.
Point the eyes with the eyes bone.
neck and spine bones (except spine1): Rotate individually for subtle
bending of the body, or use Auto IK on the head bone for extreme
bending of the spine.
arm bones: Turn on Auto IK and move the finger2 bones for broad sweeping motions of the arms.
Rotate the spine bones individually.
Move with Auto IK on finger2 bones . . .
. . . for broad motions.
For more control, turn off Auto IK and rotate the bones in the arm
individually. This is the only way to get sharp angles in the arm
joints. Don't forget to turn off Auto IK when you're done with it.
master: move and rotate this bone to manipulate the entire armature. For example, using the master bone is the only
way to get the whole character off the ground in a jump.
spine1: Move this bone to move the entire upper body while the feet stay put. Very useful for walkcycles.
knee: these bones are not used very often and are primarily used to keep the IK constraints on the legs under
control. But when you need to point the knees in a direction, use these bones.
Turn off Auto IK and rotate individual bones
for sharper angles.
Move the spine1 bone . . .
. . . to move the upper body while the feet stay
put.
upper_leg and lower_leg: leave these bones alone. The leg bones and IK constraints do all the work.
leg: These are the most versatile bones. Move the leg bones to
move the entire leg. Be careful: with this simple of a foot rig, you
run the risk of stretching the feet away from the legs.
Move the knee bones . . .
. . . to point the knees.
Move the leg bones to move the entire leg.
Rotate the leg bone to rotate the entire foot.
foot: leave this bone alone, it is rotated by rotating the leg bone.
toe: Rotate these bones to bend at the toe.
N
ext: Setting up for animation
Previous: Lower body: armature and weight painting
Back to Index
Retrieved from
" />This page was last modified 17:51, 27 July 2006.
Rotate the leg bones to rotate the foot.
Rotate the toe bones to bend the foot at the toe.
BSoD/Introduction to Character Animation/Setting up
From BlenderWiki
< BSoD | Introduction to Character Animation
N
ow we'll use some of Blender's animation tools to create a simple action: a wave of the arm. This will be a very simple
action that can be blended in with the walkcycle we'll create later.
Contents
1 Setting up the workspace
2 Animating a "wave" with the Action Editor
2.1 Moving to a different frame
2.2 Finishing the wave
Setting up the workspace
Up until now, we've been using primarily the 3D Window and the Buttons window. That's all we've really needed so far.
N
ow, we're going to use some more window types while simultaneously viewing the 3D Window and Buttons window.
The default workspace we've been using so far looks like this.
Default workspace.
Click RMB on the thin dark border between the 3D Window and
the Buttons window. Choose Split Area.
A vertical line will appear, this will be the dividing line for the new
window. Move it where you'd like.
A new 3D Window was created. You can grab the border to resize
the window.
Change this window to the Action Editor by choosing
Action Editor in the Window Type menu in the header of the new
window.
Splitting the 3D Window.
Change the new window to the Action Editor.
The Action Editor is where we will create individual actions: blinking the
eyes, nodding the head, a walkcycle, and so on. Later we will mix the
actions in another window.
Split the buttons window into a timeline:
Use
RMB on the right or left edge of the Buttons window and
Split Area.
Split the Buttons window and change the new window to a
Timeline window.
Animating a "wave" with the Action Editor
We'll start out with a simple action to demonstrate the animation tools: a quick wave. Later, we'll mix this action with a
walkcycle.
Pose the arm. I started by enabling Auto IK to get the arm roughly
in place, then turned off Auto IK and individually rotated the arm
bones.
With the bones in position, we can add keys. A key describes the orientation of a bone: it's location, rotation, and size.
Modified screen, with the Action Editor on the
right.
The new window setup.
Position the arm.
Generally speaking, you only want to add keys for bones that actually did anything. In other words, we don't want to add
any keys for the master bone or the leg bones because we didn't move them.
Select the bones that you moved for this pose - in my case, it was all the arm
bones (from upper_arm.l down to finger2.l).
Insert a LocRot (location and rotation key) for the selected bones with
I>>LocRot.
Take a look at the Action Window. It has several rows, or channels, and
each has a name that corresponds to a bone in the selected armature. Each
channel is connected to the bone it is named after. When you select a bone,
the corresponding channel is selected, and when you select a channel, the
corresponding bone will be selected. In this image, the lower_arm.l channel
is selected.
Also, note that some yellow diamonds popped up. These are the keys. They
are lined up along the green line, which indicates what frame of the
animation we're on. Currently we're on frame 1, and the keys were all added
on frame 1.
Moving to a different frame
There are several ways to change which frame we're on in Blender, and which way you use depends on what window you
happen to be closest to or if your hand happens to be on the keyboard. We can change frames by:
using
LMB on the green line, either in the Action Editor or in the Timeline.
using the arrow keys:
Right Arrow moves ahead one frame.
Left Arrow moves back one frame.
Up Arrow moves ahead 10 frames.
Down Arrow moves back 10 frames.
Clicking on the frame counter in the header of the Timeline or Buttons window to move by the number by single
frames, or drag the button to change the number quickly.
There are several indicators as to which frame we are currently on. The frame number is shows in:
Add keys for Location and
Rotation (choose LocRot from the
menu).
New keys for the bones in this pose.
Finishing the wave
Using any of the above methods, move to frame 5.
We've already inserted keys with I . When working on an animation, it
can get tedious to select each bone and add a key. Instead, we can have
Blender automatically insert a keyframe whenever we move, rotate, or
scale a bone.
To enable auto keyframing, click the "Record" button in the
Timeline window. Blender will automatically insert a keyframe any
time we move or rotate a bone. In other words, we won't have to
remember which bones we moved and to insert keys for them.
To see how this works, rotate the lower_arm.l bone outward to wave the arm.
After rotating the bone, look back at the Action Editor, and note the
following:
The keys were automatically inserted for the arm bones that were
moved, in this case, only the lower_arm.l bone.
No key was inserted for the other arm bones, since they weren't
moved in this frame.
The old keys are deselected (white) and the new keys are now
selected (yellow). Note that the keys from frame 1 are still selected
since they didn't have any new keys added.
Important: Bones remain where they were until you tell them otherwise. Since we did not set another key for the hand.l
bone in frame 5, it will stay in the same position as it was in frame 1.
The header of the
Timeline window . . .
. . . the green line
in the Timeline
or Action Editor
. . .
. . . and the number in parentheses
in the lower left of the 3D
Window.
The "Record" button in the Timeline
automatically inserts keys when you move or
rotate a bone.
Pose at frame 1. Pose at frame 5.
New keys for the 5th frame.
Move the frame slider (the vertical green line) to frame 1 and back again to frame 5 to view the motion.
Now move to frame 9.
In the Action Editor, some familiar selection commands work:
A to select/deselect all keys.
RMB to select a key
Shift RMB to add a key to the selection.
B to bounding-box select.
We're going to duplicate the keys from frame 1 and move the duplicates to frame 10. If you need to see the keys a little
better, you can zoom and pan in the Action Editor:
Zoom in on the keys in the Action Editor with
MW .
Pan the Action Editor view with MMB so the keys come into view.
N
ow let's duplicate the keys in frame 1 and move them to frame 9, so the Wave action starts and ends in the same
p
osition.
Deselect all keys with
A.
Bounding-box select all the keys in frame 1 ( B , draw a rectangle around the keys with LMB .
Duplicate the selected keys with Shift D.
This should seem familiar - we've automatically entered grab mode after duplicating! Move the duplicated keys to
frame 9. Don't worry if it's not exact.
Snap the selected keys to the closest frame
with
Shift S . Now the keys are exactly
on frame 9.
Move the frame slider back and forth from
frame 1 to 9 to see the animation.
At the bottom of the Action Editor is a text box labeled "AC:". Name
the action something meaningful here.
Summary: We split the interface into an Action Editor and a
Snap the new duplicated keys to the closest frame.
Name the action.
Timeline window so we can access some animation tools. We
created an action (a quick wave) by moving the bones and
inserting keyframes in the Action Editor.
N
ext: Animating a walkcycle
Previous: Final rig adjustments
Back to Index
Retrieved from " />This page was last modified 19:48, 13 August 2006.
BSoD/Introduction to Character Animation/2-second
animation
From BlenderWiki
< BSoD | Introduction to Character Animation
Contents
1 Creating a walkcycle
2 Contact pose
3 Flipping the pose
4 Recoil pose
5 Passing pose
6 High point
7 Viewing the animation
8 Tweaking the walkcycle
Creating a walkcycle
Click the small arrows right next to the action name, and choose
Add New.
Rename the new action "walkcycle" or something similar (can you
guess what we're doing next?)
Delete all keys with A-A-X . Creating a new action makes a copy of
the previously selected action, so these keys are just copies.
You can verify that the "Wave" action is still there by selecting it in the
dropdown menu in at the bottom of the Action Editor.
Note: Two important notes on Actions:
Each Object can have many different Actions, but only
one active Action, which is displayed in the Action
Editor.
This active Action is the one which will receive any new
keys you insert, and whose keys you can directly edit.
Move the frame slider to frame 1.
Clear the location and rotation of all bones in the armature with A-A-Alt R-Alt G . Notice that even though
the "Record" button is still pressed, keys were NOT added when we cleared rotation and location. The automatic
key insertion does not recognize clearing location or rotation as an actual movement (this is a good thing, but it's
important to remember).
Add a new action.
Contact pose
In a walkcycle, the contact pose is the point when the leading leg just touches the ground in front of the character. It's
generally the first pose to animate in a walkcycle.
Note: It's impractical for me to take screenshots for each bone
movement I make. I'll walk through the first pose (the contact
pose), and from then on I'll provide screenshots of front, side,
top, and oblique views of each major pose.
In the 3D Window, switch to Side view in Ortho mode (
NumPad 3 and NumPad 5).
Make sure Auto IK is off, otherwise the IK Solvers won't work for the legs.
Move spine1 down a little bit in the Z axis to let the legs bend.
Select leg.l. You may have to move the view to see it before returning to
side view. Alternatively, you can select the leg.l channel in the Action
Editor to select the bone.
Move leg.l back and up.
Move spine1 down in Z.
Move leg.l up and back.
Rotate leg.l . . .
. . . and rotate toe.l to bend the foot at the toe.
Grab and rotate the leg.r bone in front of the body.
Now pose the arms. I prefer to turn on Auto IK to get the general shape of the arms, then turn it off as soon as I'm
done. You may have to move the view around to get the arms to move and bend in the direction you want. Keep in
mind that the legs and arms move opposite: right leg forward means right arm back. Here are front, side, and top
views after I posed the arms:
Rotate leg.l.
Rotate toe.l.
Move and rotate leg.r.