Beginning SQL Server 2005 for Developers From Novice to Professional phần 3 pot
Bạn đang xem bản rút gọn của tài liệu. Xem và tải ngay bản đầy đủ của tài liệu tại đây (3 MB, 53 trang )
CHAPTER 3 ■ DATABASE DESIGN AND CREATION
83
• Auto Shrink: Database and transaction logs grow in size not only with increased data input, but also
through other actions, which we’ll discuss in more detail in Chapter 7. You can shrink the size of the
log file through certain actions, some of which can be instigated by T-SQL and some as a by-product
of actions being performed.
• Auto Update Statistics: This is a more common option to have set to True, even on production servers,
although there is still a performance degradation. This option will update statistics as data is inserted,
modified, or deleted for tables for use in indexes, and it will also update statistics for columns within
a table. We’ll discuss indexes further in Chapter 6.
6. Click the OK button at the bottom of the screen to create the database.
SQL Server will now perform several actions. First, it checks whether the database already exists and, if so, you will
have to choose another name. Once the database name is validated, SQL Server does a security check to make sure
that the user has permission to create the database. This is not a concern here, since by following this book, you will
always be logged on to SQL Server with the proper permissions. Now that you have security clearance, the data files
are created and placed on the hard drive. Providing there is enough space, these files will be successfully created,
and it is not until this point that SQL Server is updated with the new database details in the internal system tables.
Once this is done, the database is ready for use. As you can see, this whole process is relatively straightforward,
and simple to complete. Congratulations!
■Tip You need not create the database at this point if you don’t want to. There are several other options
available to you to save the underlying T-SQL to a file, to the clipboard, or to the Query window. The first two
options are very useful as methods of storing actions you’re creating to keep in your source code repository,
such as Visual SourceSafe. The third option is ideal if you wish to add more options to your database than you
have defined within the wizard set up. All of the options enable you to see the underlying code and understand
what is required to create a database. We’ll look at the code in a moment.
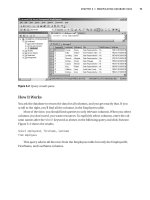
When you return to Object Explorer in SQL Server Management Studio and refresh the
contents, you will see the new database listed, as shown in Figure 3-12.
Figure 3-12. The new database within Object Explorer
Dewson_5882C03.fm Page 83 Monday, January 9, 2006 3:24 PM
84
CHAPTER 3
■ DATABASE DESIGN AND CREATION
SQL Server Management Studio is simply a GUI front end to running T-SQL scripts in the
background. As we progress through the book, you’ll see the T-SQL generated for each object
type we’re using, as well as create the objects graphically, as you’ve just seen. There are two
methods you can use to get the script for this database:
• Notice that at the top of the database wizard screen is a button that generates the script.
After you click this button, you can indicate where you would like the script sent to.
• Once the database has been created, you can right-mouse-click and, as shown in
Figure 3-13, have the details sent to one of three locations.
Figure 3-13. Scripting the database from SSMS
Whichever method you choose to use, the script will be the same, with the exception of a
comment line when you create the script in the second option. The script for generating the
database from this option is listed here so we can go through what is happening.
First of all, SQL Server points itself to a known database, as shown in the following snippet.
master has to exist; otherwise, SQL Server will not work. The USE statement, which instructs
SQL Server to alter its connection to default to the database after the USE statement, points
further statements to the master database.
USE [master]
GO
Next, the script builds up the CREATE DATABASE T-SQL statement built on the options
selected. (We’ll walk through the CREATE DATABASE syntax that could be used in the “Creating a
Database in a Query Pane” section, as this statement doesn’t cover all the possibilities.) Notice
in the code that follows that the name of the database is surrounded by square brackets: [].
SQL Server does this as a way of defining that the information between the square brackets is
to be used similarly to a literal and not as a variable. Also it defines that the information is to be
treated as one unit. To clarify, if we want to name the database Apress Financial (i.e., with a
space between “Apress” and “Financial”), then we need to have a method of knowing where
the name of the database starts and ends. This is where the identifier brackets come in to play.
Dewson_5882C03.fm Page 84 Monday, January 9, 2006 3:24 PM
CHAPTER 3 ■ DATABASE DESIGN AND CREATION
85
■Note Recall the Quoted Identifier option that we encountered in Chapter 2, with the T-SQL command SET
QUOTED_IDENTIFIER ON/OFF. Instead of using the square brackets, you can define identifiers by surrounding
them with double quotation marks using this command. Therefore, anything that has double quotation marks
around it is seen as an identifier rather than a literal, if this option is set to ON. To get around this requirement,
you can use single quotation marks, as shown in the example, but then if you do have to enter a single quote
mark—as in the word “don’t”—you would have to use another single quotation mark. So as you can see, this
situation can get a bit messy. I prefer to have QUOTED_IDENTIFIER set to OFF, to reduce confusion.
/****** Object: Database [ApressFinancial]
Script Date: 05/29/2005 14:14:35 ******/
CREATE DATABASE [ApressFinancial] ON PRIMARY
( NAME = N'ApressFinancial', FILENAME = N'C:\Program Files\Microsoft SQL
Server\MSSQL.1\MSSQL\DATA\ApressFinancial.mdf' , SIZE = 3072KB , MAXSIZE =
UNLIMITED, FILEGROWTH = 1024KB )
LOG ON
( NAME = N'ApressFinancial_log', FILENAME = N'C:\Program Files\Microsoft SQL
Server\MSSQL.1\MSSQL\DATA\ApressFinancial_log.ldf' , SIZE = 1024KB , MAXSIZE =
2048GB , FILEGROWTH = 10%)
COLLATE SQL_Latin1_General_CP1_CI_AS
GO
Have you noticed that every so often there is a GO command statement? This signals to SQL
Server—or any other SQL Server utility—that this is the end of a batch of T-SQL statements,
and the utility should send the batch of statements to SQL Server. Certain statements need to
be in their own batch and cannot be combined with other statements in the same batch. To
clarify, a GO statement determines that you have come to the end of a batch of statements and that
SQL Server should process these statements before moving on to the next batch of statements.
■Note GO statements are used only in ad hoc T-SQL, which is what I’m demonstrating here. Later in the
book, you’ll build T-SQL into programs called stored procedures. GO statements are not used in stored
procedures.
Next, we define the new database’s compatibility level. This statement defines that the
database’s base level is SQL Server 2005. It is possible to define SQL Server to an earlier level, as far
back as SQL Server version 6.0, by changing the version number in the parameter @new_cmptlevel.
You’ll learn more about this code in Chapter 10.
EXEC dbo.sp_dbcmptlevel @dbname=N'ApressFinancial', @new_cmptlevel=90
GO
Dewson_5882C03.fm Page 85 Monday, January 9, 2006 3:24 PM
86
CHAPTER 3
■ DATABASE DESIGN AND CREATION
We then can define the remaining database options. The statements have a GO statement
separating them, but in this scenario, the GO statements are superfluous. So why are they included?
When SQL Server is preparing the wizard, it is safer for it to place GO statements after each state-
ment, as it then doesn’t have to predict what the next statement is, and therefore whether the
end of the batch of transactions has to be defined.
It is possible to set up a database to allow searching of values within columns of your
tables. This is a great utility, if you need it, but it does have a processing overhead when
working with your data.
EXEC [ApressFinancial].[dbo].[sp_fulltext_database] @action = 'enable'
GO
There will be times when columns have no data in them. This is known as a special value
of NULL. The ANSI standard states that if you are comparing two columns that have this special
NULL value in them, then the comparison will fail. This is different from columns that do have
data in them. Setting this value to OFF alters the standard, so when you do compare two NULL
values, the comparison will pass.
ALTER DATABASE [ApressFinancial] SET ANSI_NULLS OFF
GO
Still with NULL values, setting ANSI_NULL_DEFAULT to OFF means that a column’s default
value is NOT NULL. We look at NULL values in Chapter 5 during our table creation discussion.
ALTER DATABASE [ApressFinancial] SET ANSI_NULL_DEFAULT OFF
GO
There are columns of characters than can store variable-length data. We’ll come across
these when we build our table in Chapter 5. If set to ON, this option makes every column of data
contain the maximum number of characters, whether you sent through just one character or
many more. It is common to have this set to OFF.
ALTER DATABASE [ApressFinancial] SET ANSI_PADDING OFF
GO
If an ANSI standard warning or error occurs, such as divide by zero, then switching the
ANSI_WARNINGS setting to OFF will suppress these. A value of NULL will be returned in any columns
that have the error.
ALTER DATABASE [ApressFinancial] SET ANSI_WARNINGS OFF
GO
If the ANSI_WARNINGS setting was ON, and you performed a divide by zero, the query would
terminate. To change this, we tell SQL Server not to abort when there’s an arithmetic error:
ALTER DATABASE [ApressFinancial] SET ARITHABORT OFF
GO
Dewson_5882C03.fm Page 86 Monday, January 9, 2006 3:24 PM
CHAPTER 3 ■ DATABASE DESIGN AND CREATION
87
If you have a database that is only “active” when users are logged in, then switching the
AUTO_CLOSE setting to ON would close down the database. This is unusual, as databases tend to
stay active 24/7, but closing unwanted databases frees up resources for other databases on the
server to use if required. One example of when to switch this setting ON is for a database used
for analyzing data by users through the day (e.g., one in an actuarial department, where death
rates would be analyzed).
ALTER DATABASE [ApressFinancial] SET AUTO_CLOSE OFF
GO
SQL Server uses statistics when returning data. If it finds that statistics are missing when
running a query, having the following option ON will create these statistics.
ALTER DATABASE [ApressFinancial] SET AUTO_CREATE_STATISTICS ON
GO
If the volume of data within your database reduces (e.g., if you have a daily or weekly
archive process), you can reduce the size of the database automatically by setting the following
option ON. It is standard to have the option OFF because the database size will simply increase
as data is re-added. It would be switched ON only if a reduction in the database is required—due
to disk space requirements, for example—but it is never a good idea for this option to kick in
when the database is in use, so really it is best to keep it off.
ALTER DATABASE [ApressFinancial] SET AUTO_SHRINK OFF
GO
When data is added or modified to SQL Server, statistics are created that are then used
when querying the data. These statistics can be updated with every modification, or they can
be completed via a T-SQL set of code at set times. There is a performance reduction as data is
inserted, modified, or deleted, but this performance is gained back when you want to return
data. Your application being a pure insertion, pure query, or a mix determines whether you’ll
want this option on. If you have a pure insertion application, you probably want this option
switched off, for example, but this is an optimization decision.
ALTER DATABASE [ApressFinancial] SET AUTO_UPDATE_STATISTICS ON
GO
A cursor is a special type of data repository that exists only while the cursor is defined. It’s
a temporary memory resident table, in essence. A cursor can exist for the lifetime of a program
but, if you switch the following setting to ON, when a batch of data is committed or rolled back
during a transaction, the cursor will be closed.
ALTER DATABASE [ApressFinancial] SET CURSOR_CLOSE_ON_COMMIT OFF
GO
A cursor can either exist locally or globally. This means that if GLOBAL is selected for this
option, then any cursor created in a program is available to any subprogram that is called.
LOCAL, the other option, indicates that the cursor exists only within that program that created it.
Dewson_5882C03.fm Page 87 Monday, January 9, 2006 3:24 PM
88
CHAPTER 3
■ DATABASE DESIGN AND CREATION
ALTER DATABASE [ApressFinancial] SET CURSOR_DEFAULT GLOBAL
GO
If you’re concatenating character fields and if the following option is ON, then if any of the
columns has a NULL value, the result is a NULL.
ALTER DATABASE [ApressFinancial] SET CONCAT_NULL_YIELDS_NULL OFF
GO
When you’re working with some numeric data types, it is possible to lose precision of the
numerics. This can occur when you move a floating-point value to a specific numeric decimal
point location, and the value you’re passing has too many significant digits. If the following
option is set to ON, then an error is generated. OFF means the value is truncated.
ALTER DATABASE [ApressFinancial] SET NUMERIC_ROUNDABORT OFF
GO
As mentioned earlier, when you’re defining database names, if there is a space in the name
or the name is a reserved word, it is possible to tell SQL Server to ignore that fact and treat the
contents of the squared brackets as a literal. You are using quoted identifiers when you use the
double quotation mark instead of square brackets. We’ll delve into this further when inserting
data in Chapter 8, as there are a number of details to discuss with this option.
ALTER DATABASE [ApressFinancial] SET QUOTED_IDENTIFIER OFF
GO
The following option relates to a special type of program called a trigger. A trigger can run
when data is modified, and one trigger can call another trigger. A setting of OFF means that this
cannot take place.
ALTER DATABASE [ApressFinancial] SET RECURSIVE_TRIGGERS OFF
GO
I mentioned statistics earlier with another option and how they can be updated as data is
modified. The following option is similar to AUTO_UPDATE_STATISTICS. If this option is set to ON,
the query that triggers an update of the statistics will not wait for the statistics to be created.
The statistics update will start, but it will do so in the background asynchronously.
ALTER DATABASE [ApressFinancial] SET AUTO_UPDATE_STATISTICS_ASYNC OFF
GO
This option governs whether there is a relationship between datetime columns in related
tables:
ALTER DATABASE [ApressFinancial] SET DATE_CORRELATION_OPTIMIZATION OFF
GO
Dewson_5882C03.fm Page 88 Monday, January 9, 2006 3:24 PM
CHAPTER 3 ■ DATABASE DESIGN AND CREATION
89
The following option defines how the filegroups are set: READ_WRITE or READ_ONLY. The use
of READ_ONLY is ideal where you have a backup database that users can use to inspect data. The
database is an exact mirror of a production database, for example, so it has the security on it set
to allow updates to it, but by setting this option to READ_ONLY you can be sure that no updates
can occur.
ALTER DATABASE [ApressFinancial] SET READ_WRITE
GO
The next option determines how your data can be recovered when a failure such as a
power outage happens. In other words, the following option defines the recovery model, as
discussed earlier. We’ll look at this in more detail when we discuss database maintenance in
Chapter 7.
ALTER DATABASE [ApressFinancial] SET RECOVERY FULL
GO
The following option defines the user access to the database. MULTI_USER is the norm
and allows more than one user into the database. The other settings are SINGLE_USER and
RESTRICTED_USER, where only people who have powerful privileges can connect. You would set
your database to RESTRICTED_USER after a media or power failure, for example, when a database
administrator needs to connect to the database to ensure everything is OK.
ALTER DATABASE [ApressFinancial] SET MULTI_USER
GO
When you have an I/O error (e.g., a hard drive might be on its way to breaking down), then
this option will report an error if checksums don’t match:
ALTER DATABASE [ApressFinancial] SET PAGE_VERIFY CHECKSUM
GO
Finally, the following line is used for controlling whether permissions checks are required
when referring to objects in another database:
ALTER DATABASE [ApressFinancial] SET DB_CHAINING OFF
Dropping the Database in SQL Server Management Studio
To follow the next section properly and build the database using code, it is necessary to remove
the database just created. It is also handy to know how to do this anyway, for those times when
you have made an error or when you wish to remove a database that is no longer in use. Deleting
a database is also known as dropping a database.
Dewson_5882C03.fm Page 89 Monday, January 9, 2006 3:24 PM
90
CHAPTER 3
■ DATABASE DESIGN AND CREATION
Try It Out: Dropping a Database in SQL Server Management Studio
1. If SQL Server Management Studio is not started, then start it up now and expand the nodes until you see
the database ApressFinancial.
2. Right-click ApressFinancial to bring up the context menu.
3. Click the Delete option, as shown in Figure 3-14.
Figure 3-14. Deleting a database within SSMS
4. The dialog shown in Figure 3-15 will display. Select Close Existing Connections and then click OK.
Figure 3-15. Selecting to delete a database in the Delete Object dialog
The first check box, Delete Backup and Restore History Information for Databases, gives you the option of keeping
or removing the history information that was generated when completing backups or restores. If you want to keep
this information for audit purposes, then uncheck the box.
The second check box is very important. If there is a program running against a database, or if you have any design
windows or query panes open and pointing to the database you want to delete, then this option will close those con-
nections. If you are deleting a database, then there really should be no connections there. This is a good check and
Dewson_5882C03.fm Page 90 Monday, January 9, 2006 3:24 PM
CHAPTER 3 ■ DATABASE DESIGN AND CREATION
91
will prevent accidents from happening, and it also allows any rogue databases to be removed without having to
track down who is connected to them.
5. Click OK. The database is now permanently removed.
When you click the OK button, SQL Server actually performs several actions. First, a command is sent to SQL Server
informing it of the name of the database to remove. SQL Server then checks that nobody is currently connected to
that database. If someone is connected, through either SQL Server Query Editor or a data access method like
ADO.NET, then SQL Server will refuse the deletion. Only if you select Close Existing Connections will this process be
overridden
For SQL Server to refuse the deletion, it does not matter if anyone connected to the database is actually doing any-
thing; all that is important is the existence of the connection. For example, if you selected ApressFinancial in
Query Editor, and then returned to SQL Server Management Studio and tried to drop the database, you would see the
error shown in Figure 3-16.
Figure 3-16. Failed database deletion
■Tip Errors like the one shown in Figure 3-16 provide hyperlinks to documentation that can give you further help.
Once SQL Server has checked that nobody is connected to the database, it then checks that you have permission
to remove the database. SQL Server will allow you to delete the database if it was your user ID that created it, in
which case you own this database and SQL Server allows you do what you want with it. However, you are not alone
in owning the database.
If you recall from Chapter 1, there was mention of the sa account when installing SQL Server. Since it is the most
powerful ID and has control over everything within SQL Server, there were warnings about leaving the sa account
without any password and also about using the sa account as any sort of login ID in general. This section also mentioned
that the sa account was in fact a member of the sysadmin server role. A role is a way of grouping together similar
users who need similar access to sets of data. Anyone in the sysadmin role has full administrative privileges—and
this includes rights to remove any database on the server.
So whether you are logged in as yourself or as sysadmin, take care when using SQL Server Management Studio
to drop a database.
Dewson_5882C03.fm Page 91 Monday, January 9, 2006 3:24 PM
92
CHAPTER 3
■ DATABASE DESIGN AND CREATION
Creating a Database in a Query Pane
To use the second method of creating databases, you first need to drop the ApressFinancial
database as described in the previous section.
Try It Out: Creating a Database in a Query Pane
1. From the standard toolbar of SQL Server Management Studio, select New Query.
2. In the query pane, enter the following T-SQL script:
CREATE DATABASE ApressFinancial ON PRIMARY
( NAME = N'ApressFinancial',
FILENAME = N'C:\Program Files\Microsoft SQL
Server\MSSQL.1\MSSQL\DATA\ApressFinancial.mdf' , SIZE = 3072KB ,
MAXSIZE = UNLIMITED, FILEGROWTH = 1024KB )
LOG ON
( NAME = N'ApressFinancial_log',
FILENAME = N'C:\Program Files\Microsoft SQL
Server\MSSQL.1\MSSQL\DATA\ApressFinancial_log.ldf' ,
SIZE = 1024KB , MAXSIZE = 2048GB , FILEGROWTH = 10%)
COLLATE SQL_Latin1_General_CP1_CI_AS
GO
3. Execute this code by pressing F5 or Ctrl+E, or by clicking the Execute Query toolbar button.
4. Once the code is executed, you should see the following result:
Command(s) completed successfully.
How It Works: Creating a Database in Query Editor
The main focus of this section of the chapter is the code listed in the previous exercise: the CREATE DATABASE
command.
When placing code in the Query Editor, you’re building up a set of instructions for SQL Server to act on. As you
progress through the book, you will encounter many commands that you can place in Query Editor, all of which build
up to provide powerful and useful utilities or methods for working with data. An in-depth discussion of Query Editor
took place in Chapter 2, so if you need to refresh your memory, take a quick look back at the material covered in
that chapter.
Before we actually looking at the code itself, we need to inspect the syntax of the CREATE DATABASE command:
Dewson_5882C03.fm Page 92 Monday, January 9, 2006 3:24 PM
CHAPTER 3 ■ DATABASE DESIGN AND CREATION
93
CREATE DATABASE <database name>
[ON
( [ NAME = logical_name, ]
FILENAME = physical_file_name
[, FILESIZE = size ]
[, MAXSIZE = maxsize ]
[, FILEGROWTH = growth_increment] ) ]
[LOG ON
( [ NAME = logical_name, ]
FILENAME = physical_file_name
[, FILESIZE = size ]
[, MAXSIZE = maxsize ]
[, FILEGROWTH = growth_increment] ) ]
[COLLATE collation_name ]
The parameters are as follows:
• database name: The name of the database that the CREATE DATABASE command will create
within SQL Server.
• ON: The use of the ON keyword informs SQL Server that the command will specifically mention where
the data files are to be placed, as well as their name, size, and file growth. With the ON keyword
comes a further list of comma-separated options:
• NAME: The logical name of the data file that will be used as the reference within SQL Server.
• FILENAME: The physical file name and full path where the data file will reside.
• SIZE: The initial size, in megabytes by default, of the data file specified. This parameter is optional,
and if omitted it will take the size defined in the model database. You can suffix the size with KB, MB,
GB, or TB (terabytes).
• FILEGROWTH: The amount that the data file will grow each time it fills up. You can specify either a
value that indicates by how many megabytes the data file will grow or a percentage, as discussed
earlier when we created a database with SQL Server Management Studio.
• LOG ON: The use of the LOG ON keyword informs SQL Server that the command will specifically
mention where the log files will be placed, and their name, size, and file growth:
• NAME: The name of the log file that will be used as the reference within SQL Server.
• FILENAME: The physical file name and full path to where the log file will reside. You must include the
suffix .LDF. This could be a different name from the FILENAME specified earlier.
• SIZE: The initial size, in megabytes by default, of the log file specified. This parameter is optional, and
if omitted it will take the size defined in the model database. You can suffix the size with KB, MB, GB,
or TB.
• FILEGROWTH: The amount by which the log file will grow each time the data file fills up, which has
the same values as for the data file’s FILEGROWTH.
• COLLATE: The collation used for the database. Collation was discussed earlier in the chapter when
we created a database with SQL Server Management Studio.
Dewson_5882C03.fm Page 93 Monday, January 9, 2006 3:24 PM
94
CHAPTER 3
■ DATABASE DESIGN AND CREATION
It's now time to inspect the code entered into Query Analyzer that will create the ApressFinancial database.
Commencing with CREATE DATABASE, you are informing SQL Server that the following statements are all param-
eters to be considered for building a new database within SQL Server. Some of the parameters are optional, and SQL
Server will include default values when these parameters are not entered. But how does SQL Server know what
values to supply? Recall that at the start of this chapter we discussed the built-in SQL Server databases, specifically
the model database. SQL Server takes the default options for parameters from this database unless they are oth-
erwise specified. Thus, it is important to consider carefully any modifications to the model database.
The database name is obviously essential, and in this case, ApressFinancial is the chosen name.
The ON parameter provides SQL Server with specifics about the data files to be created, rather than taking the
defaults. Admittedly in this instance, there is no need to specify these details, as by taking the defaults, SQL Server
would supply the parameters as listed anyway.
This can also be said for the next set of parameters, which deal with the Transaction Log found with LOG ON. In this
instance, there is no need to supply these parameters, as again the listed amounts are the SQL Server defaults.
Finally, the collation sequence we specify is actually the default for the server.
Taking all this on board, the command could actually be entered as follows, which would then take all the default
settings from SQL Server to build the database:
CREATE DATABASE ApressFinancial
We can then set the database options as outlined during the discussion of the script earlier in the chapter.
Similarly, if we want to delete the database using T-SQL code, it’s a simple case of ensuring that we are not
connected within that particular query pane to ApressFinancial via the USE command. Then we use the
command DROP followed by the object we want to drop, or delete, and then the name of the object.
USE Master
GO
DROP DATABASE ApressFinancial
Summary
In this chapter we looked at designing and building our example database. The steps covered
are very important on the development front. The database itself requires careful thought
regarding some of the initial settings, but as time moves on and you have a better idea about
the volume of data and how people will use the data, you may find you need to alter some of
these options. As you move to user acceptance testing, keep an eye on the statistic options
mentioned here.
In the next chapter, we’ll start adding some meat to the bones of our example database by
creating tables to hold data.
Dewson_5882C03.fm Page 94 Monday, January 9, 2006 3:24 PM
95
■ ■ ■
CHAPTER 4
Security
Security is important—more so, in fact, than design, creation, and performance. If your database
had no security measures in place, absolutely anyone could come along and steal or corrupt
the data, causing havoc to you and your company. And not just in one database, but on every
database in every server.
Security can be enforced in many ways on a SQL Server: by Windows itself through
Windows authentication; by restricting users’ access to sensitive data through views; or by
specifically creating users, logins, and roles that have explicit levels of access.
This chapter covers some parts of security, although it is impossible to talk about every
area of security, mainly because we haven’t seen much of SQL Server’s contents yet! In Chapter 1
we looked at the difference between Windows authentication and SQL Server authentication,
so already you know your options with regard to the type of security you might wish to use.
So what is next?
First of all, you need to understand what users, roles, and logins are.
Logins
The only way anyone can connect to SQL Server is via a login. As discussed in Chapter 1, this
doesn’t necessarily mean that every user has to have a specific login within SQL Server itself.
With Windows authentication, if a user belongs to a specific Windows group, just by belonging
to that group, providing that group is contained within SQL Server, the account will have
access to SQL Server.
When a database is created, initially only the database owner has any rights to complete
any task on that database, whether that be to add a table, insert any data, or view any data. This
was the case when we first created our ApressFinancial database in Chapter 3. It is only when
the database owner grants permissions to other users that they gain extra access to complete
tasks.
It is common practice to create a Windows group and place Windows user accounts into
that group. This is how we wish to work with our ApressFinancial system, and so we will create
some Windows groups for it. We will group logins depending on which department we are
dealing with and what we want to allow each group to do. We will allow some groups to add
new financial products, other groups to add customers, and, finally, a group set up for batch
processes to add interest and financial transactions. We will create a few of these groups so that
later in the book we can see security in action.
Dewson_5882C04.fm Page 95 Monday, January 2, 2006 3:16 PM
96
CHAPTER 4
■ SECURITY
In Chapter 1, I mentioned that you should log in as an administrator account to install SQL
Server. This would mean that you are in the BUILTIN/Administrators group, which is a group
defined for the local computer that contains Windows users accounts with administrator
rights. We can therefore already connect to SQL Server with this login, which includes VMcGlynn.
AJMason could not log in, though. However, by adding this account to a group we will be
creating, and then adding that group to SQL Server, we will see how they both can.
■Note The process we are about to go through would be the same if we were adding a single user.
Try It Out: Creating a Group
1. Navigate to your Control Panel, then select Administrative Tools ➤ Computer Management.
2. This brings up a screen that shows different aspects of your computer management. We are interested
in selecting Local Users and Groups ➤ Groups. When you do so, you will see that there are already
several groups within your computer, as shown in Figure 4-1, as well as a large number of groups
already defined for the use of SQL Server. These groups differ from groups that we will be defining for
accessing the data.
Figure 4-1. List of groups on the computer
3. AJMason is a product controller and can add new corporate financial products. Right-click Groups and
select New Group. This will bring up the New Group screen, as shown in Figure 4-2, where we can add
our grouping for our product controllers. Apress_Product_Controllers is the group we’ll use in
this chapter.
Dewson_5882C04.fm Page 96 Monday, January 2, 2006 3:16 PM
CHAPTER 4 ■ SECURITY
97
Figure 4-2. Adding the first group for our application
4. By clicking Add, we can then add all the Windows user accounts that we wish to be part of this group.
We can either type AJMason or click Advanced, which brings up a selection dialog box. Clicking the
Check Names button adds the user to the group.
If AJMason was on your company network, you would have to prefix the name with the domain name. For example,
if you had a network domain called Apress and AJMason was on that domain (as opposed to your local computer
and therefore your local domain as is the case for our example), then you would type Apress\AJMason. Figure 4-3 shows
AJMason is on the XP-PRO local domain.
Figure 4-3. AJMason found, ready to add to our group
Dewson_5882C04.fm Page 97 Monday, January 2, 2006 3:16 PM
98
CHAPTER 4
■ SECURITY
5. Click OK and then click the Create button on the New Group screen. Once you have created the group,
you should close the New Group dialog box, as we don’t want to create any more groups at the moment.
This brings us back to the Computer Management dialog box, where we see our new group added, as
shown in Figure 4-4.
Figure 4-4. New group added
6. We now need to add this group to SQL Server. Open SQL Server Management Studio and navigate to
Security/Logins within the Object Explorer. Once there, click New Login, which will bring up the dialog
box shown in Figure 4-5.
7. Click Search to display the Select User or Group dialog box where we will begin our search for our group,
as shown in Figure 4-6. This is very similar to the previous search box we saw but has been defined to
search for a user or built-in security principal. However, by default, the search will not search for groups.
You need to click Object Types and ensure the Groups option is checked on the screen that comes up.
Dewson_5882C04.fm Page 98 Monday, January 2, 2006 3:16 PM
CHAPTER 4 ■ SECURITY
99
Figure 4-5. Creating a new login
Figure 4-6. Searching for groups
8. This will allow you to click Advanced, which will then let you complete the search for the group you
want. Highlight this group, Apress_Product_Controllers in this case, as shown in Figure 4-7, and
click OK.
Dewson_5882C04.fm Page 99 Monday, January 2, 2006 3:16 PM
100
CHAPTER 4
■ SECURITY
Figure 4-7. Finding the Apress_Product_Controllers group
9. This brings us back to the Select User or Group dialog box where we will see our group has been added,
as shown in Figure 4-8. We can then click OK.
Figure 4-8. Group found, ready for adding
Dewson_5882C04.fm Page 100 Monday, January 2, 2006 3:16 PM
CHAPTER 4 ■ SECURITY
101
■Note We are now back at the new login screen where the group will be populated. If we clicked OK at this
point, this would only allow the group to connect to SQL Server and nothing else. Members of this group would
therefore not be able to do anything.
10. So we need to give this group access to the databases we wish to allow them to use. It is vital that you only
allow users or groups of users access to the resources they need and don’t use the “allow everything, it’s
easier” approach that I have seen on my travels. We only want our users to see the ApressFinancial
database, so we select that database on the Users mapped to this login section of the screen shown in
Figure 4-9. For the moment, click the Script button. (When you select this option, it doesn’t matter which
of the three options you choose when selecting where to put the T-SQL.) We will come back to logins in
the next section when we examine roles.
Figure 4-9. Giving a login access to a database
11. The SQL generated from Figure 4-9 follows. We will look at it in more detail in a moment when we
examine more closely adding a login.
Dewson_5882C04.fm Page 101 Monday, January 2, 2006 3:16 PM
102
CHAPTER 4
■ SECURITY
USE [master]
GO
CREATE LOGIN [XP-PRO\Apress_Product_Controllers]
FROM WINDOWS WITH DEFAULT_DATABASE=[master]
GO
USE [ApressFinancial]
GO
CREATE USER [XP-PRO\Apress_Product_Controllers]
FOR LOGIN [XP-PRO\Apress_Product_Controllers]
GO
12. Going back to SQL Server Management Studio, you can see in Figure 4-10 that we have moved to the
Status page. Here we can grant or deny access to SQL Server for a Windows account, SQL Server login,
or in our case Windows group. The second set of options is for enabling or disabling SQL Server logins.
The final set of options, specific to SQL Server authentication, allows an account to be unlocked after it
has been locked out.
Figure 4-10. Login status
13. We can now click OK to add the group. This will complete the addition to SQL Server.
Dewson_5882C04.fm Page 102 Monday, January 2, 2006 3:16 PM
CHAPTER 4 ■ SECURITY
103
Now that we have created the new group and placed it within SQL Server, we could now
switch the user account to AJMason and successfully connect. However, as AJMason, we would
only be able to explore the ApressFinancial database we created in Chapter 3.
As I mentioned at the start of this discussion, the process would be the same if you wished
to add a single user.
For SQL Server authentication, each user needs to be added separately. The process is very
similar to that for adding users with Windows authentication, but you must specify a password
expiration and enforce password complexity. This will force the Windows password policies
for expiration and complexity that exist on this account to apply to this login’s password.
So now that we have added a login graphically, the same can be achieved via a query pane
using T-SQL code. We saw the code generated previously, and we will use it as the basis of our
next login creation. This is a very straightforward process, so let’s take a look at it next.
Try It Out: Programmatically Working with a Login
1. From SQL Server, select New Query ➤ Database Engine Query. This should bring up an empty query
pane similar to the one we saw in Chapter 2.
2. We want to add a second login group. We have available two different methods, and which one we use
depends on whether we are going to use Windows authentication or SQL Server authentication. Our first
example takes a look at the Windows authentication method. Locate the code from Steps 10 and 11 in
the previous “Try It Out: Creating a Group” section (it is repeated below for ease of reference).
CREATE LOGIN [XP-PRO\Apress_Product_Controllers]
FROM WINDOWS
WITH DEFAULT_DATABASE=[master],
DEFAULT_LANGUAGE=[us_english]
GO
USE [ApressFinancial]
GO
CREATE USER [XP-PRO\Apress_Product_Controllers]
FOR LOGIN [XP-PRO\Apress_Product_Controllers]
GO
3. We can now alter this to create a group that will be defined for users wishing to view customers and their
information, probably used in call centers, for example, for the Corporate edition of our software. Also, this
time we are going to set the database that will be connected to by default, to our ApressFinancial
database. Before entering the following code, we will of course need to add the new group,
Apress_Client_Information, within our Computer Management icon found in the Administrative
tools of the Control Panel first (see the “Try It Out: Creating a Group” section earlier for more on this).
Once you’ve done this, enter the following code in a new Query Editor window. (Don’t execute it yet.)
CREATE LOGIN [XP-PRO\Apress_Client_Information]
FROM WINDOWS
WITH DEFAULT_DATABASE=[ApressFinancial],
DEFAULT_LANGUAGE=[us_english]
GO
Dewson_5882C04.fm Page 103 Monday, January 2, 2006 3:16 PM
104
CHAPTER 4
■ SECURITY
The format of this syntax is straightforward. In this case, CREATE LOGIN instructs SQL Server that you want to
create a new login called XP-PRO\Apress_Client_Information, where XP-PRO is the name of the network
domain in which the Apress_Client_Information group can be found. You should change the prefix to match
your own setup. Here the definition appears surrounded with optional square brackets in case of spaces in the name.
Next the keywords FROM WINDOWS inform SQL Server that you are creating a login with Windows authentication.
After that you define the name of the database that the login will connect to when a connection is made using WITH
DEFAULT_DATABASE. Finally, the second option specifies the default language the connection will use, although it
is possible at any time to alter the language using the Set Language option. This will allow this group to connect to
SQL Server.
4. Once you have placed the code in your query pane, you can execute it by pressing either Ctrl+E or F5,
or clicking the Execute button on the toolbar. Once it finishes executing, you should see the new login in
the Security node within the Object Explorer on the left, as shown in Figure 4-11. If you right-click the
new login and select Properties, you will see the same screen and details as we saw when we created
the login graphically.
Figure 4-11. Both logins created
5. We can then give the login access to SQL Server or disable it by using the ALTER LOGIN command.
It is also possible to alter the login’s default database. In our graphical example, if you check back to
Figure 4-5, you will see that the default database was called master. It would be better for the login to
connect to the correct database. The following code informs SQL Server that it should connect our login
to the ApressFinancial database by default, rather than the master database as defined previously.
Remember to change the prefix as appropriate.
ALTER LOGIN [XP-PRO\Apress_Product_Controllers]
WITH DEFAULT_DATABASE=ApressFinancial
6. The final piece in the jigsaw is to grant the Windows account access to the database, which will then
allow the login to use the ApressFinancial database. To do this, we need to switch from the master
database to the ApressFinancial database with the USE keyword followed by the name of the database.
Using CREATE USER, we can then specify the name of the user we want in our database. The standard procedure
is to use the same name as the login, which makes life so much easier when maintaining the system in general.
We then use FOR LOGIN to define which server login we want to map to this database user.
USE ApressFinancial
GO
CREATE USER [XP-PRO\Apress_Client_Information]
FOR LOGIN [XP-PRO\Apress_Client_Information]
GO
Dewson_5882C04.fm Page 104 Monday, January 2, 2006 3:16 PM
CHAPTER 4 ■ SECURITY
105
Server Logins and Database Users
As you now know, there are two steps to complete, whether you want to create a SQL Server
authentication–based login or a Windows authentication–based login. The first is a server
login, which was the first part of creating a login that we went through. A server login is one
that, when used, can connect only to the server itself. It cannot use any of the user databases
within SQL Server. The second step was creating the database user; in the graphical section
that we looked at first, this is when we selected the databases we wanted to use.
Within SQL Server, permissions can be granted at multiple levels, including the server and
database level. Examples of server-level permissions include creating new logins or managing
server properties. Examples of database permissions include being able to read data from a
table or being able to create new tables. One server login can be associated with multiple users
in different databases. Generally, when using Windows authentication, a database username is
the same as the login name, but this does not have to be the case. It does, however, simplify
administration. In this book, we will mostly be dealing with database-level permissions, but we
will briefly examine server roles in the following section.
Roles
Three different types of roles exist within SQL Server: fixed server roles, database roles (which
refers to the general roles included during installation of SQL Server; component-specific roles
such as those for Reporting Services that are added when the component is installed; and user-
defined roles), and application roles.
Fixed Server Roles
Within SQL Server, specific predefined roles are set up to allow certain tasks and to restrict
other tasks. Someone with the right permissions, such as a system administrator, can assign
these roles to any user ID or group of user IDs within SQL Server.
If you look at the Server Roles node in the Object Explorer, you will see a list of roles as
shown in Figure 4-12. But what do they mean? You get a little hint if you move to the Server
Roles node within SQL Server Management Studio.
Figure 4-12. Fixed server roles
■Note It is not possible to create your own server role.
Dewson_5882C04.fm Page 105 Monday, January 2, 2006 3:16 PM
106
CHAPTER 4
■ SECURITY
These roles, available for anyone to use across the server, can perform the following tasks:
• bulkadmin: Run BULK INSERT statements.
• dbcreator: Create, alter, or drop databases as well as restore them.
• diskadmin: Administer disk files.
• processadmin: Kill a login running T-SQL code.
• securityadmin: Manage logins including passwords for SQL logins and login
permissions.
• serveradmin: Administrate the server and carry out tasks such as changing options and
even starting and shutting down the server.
• setupadmin: Work with more than one server with which they are linked and manage the
linked server definitions.
• sysadmin: Perform any activity.
Server roles are static objects. They contain groups of actions that operate at the server
level rather than at the database level. When creating a new login, you could assign these server
roles to it if you wanted the login to carry out server actions as well as any database-related
actions, if required.
If your Windows account belongs to the BUILTIN/Administrators group, then it automati-
cally belongs to the sysadmin server role. You can check this yourself by highlighting the
sysadmin server role, right-clicking it, and selecting Properties to bring up the dialog box shown
in Figure 4-13. You should see BUILTIN/Administrators listed. As more logins are created, they
can be added to this role via the Add button.
Although we are not going to alter this for our example database, having Windows XP
administrators automatically being administrators for SQL Server can be a bit of a security
issue. Many companies batten down their computers so that no user is an administrator of his
or her local machine. By doing this, they stop people adding their own software, shareware,
games, or whatever to a machine that is administrated and looked after by a support team.
This helps keep the machine stable, and throughout your organization everyone will know
that a piece of software developed on one machine will work on any other. Therefore, users
won’t have administrator rights on their XP machine and won’t have those rights in SQL Server.
This is not the case in all organizations. By leaving the Administrators group in the sysadmin
role, everyone who has administrator rights on their PC will have system administrator rights
within SQL Server. As the owner of the database, you have now lost control of the security and
development of your SQL Server database.
■Note Because this book assumes that we’re using either a standalone PC or a secure set of users, it is
safe to keep the Administrators group. However, you will find that this group is usually removed from
database setups to keep the security of the database intact. However, it is worth keeping in mind that before
removing the login, or removing it from the sysadmin role, that you should set up a new group or user as a
system administrator to prevent locking yourself out.
Dewson_5882C04.fm Page 106 Monday, January 2, 2006 3:16 PM
CHAPTER 4 ■ SECURITY
107
Figure 4-13. Members of the sysadmin role
Database Roles
Database roles deal with actions that are performed at the database level. Actions within SQL
Server can be grouped into different types of actions.
Following are the existing database roles installed with SQL Server and what they can or
cannot do:
• dbo/db_owner: Specifies the owner of the database
• db_accessadmin: Can manage access to a database for logins
• db_backupoperator: Can back up the database
• db_datareader: Can read data from all user-defined tables
• db_datawriter: Can perform any write actions to user tables
• db_ddladmin: Can perform Data Definition Language (DDL) actions like creation of
tables
• db_denydatareader: Cannot read data from user tables
Dewson_5882C04.fm Page 107 Monday, January 2, 2006 3:16 PM