excel 2002 power programming with vba phần 6 pps
Bạn đang xem bản rút gọn của tài liệu. Xem và tải ngay bản đầy đủ của tài liệu tại đây (980.09 KB, 99 trang )
456
Part IV ✦ Working with UserForms
Figure 15-8: This modeless dialog box remains visible while the user
continues working.
Refer to Chapter 18 for additional information about events.
The event-handler procedures follow:
Private Sub Workbook_SheetSelectionChange _
(ByVal Sh As Object, ByVal Target As Range)
Call UpdateBox
End Sub
Private Sub Workbook_SheetActivate(ByVal Sh As Object)
Call UpdateBox
End Sub
These procedures call the UpdateBox procedure, which follows:
Sub UpdateBox()
With UserForm1
‘ Make sure a worksheet is active
If TypeName(ActiveSheet) <> “Worksheet” Then
.lblFormula.Caption = “N/A”
.lblNumFormat.Caption = “N/A”
.lblLocked.Caption = “N/A”
Exit Sub
End If
Cross-
Reference
4799-2 ch15.F 6/11/01 9:38 AM Page 456
458
Part IV ✦ Working with UserForms
Figure 15-9 shows a much more sophisticated version of this example (it’s also
on the CD-ROM). This version displays quite a bit of additional information about
the selected cell. Long-time Excel users may notice the similarity with the Info
window — a feature that was removed from Excel several years ago. The code is
too lengthy to display here, but you can view the well-commented code in the
example workbook.
Figure 15-9: This UserForm displays information
about the active cell.
Multiple Buttons, One Event-Handler
Every CommandButton on a UserForm must have its own procedure to handle its
Click event. For example, if you have two CommandButtons, you’ll need at least
two event-handler procedures:
Private Sub CommandButton1_Click()
‘ Code goes here
End Sub
Private Sub CommandButton2_Click()
‘ Code goes here
End Sub
In other words, you cannot assign a macro to execute when any CommandButton is
clicked. Each
Click event-handler is “hard-wired” to its CommandButton. You can,
however, have each event-handler call another all-inclusive macro in the event-
handler procedures, but you’ll need to pass an argument to indicate which
button was clicked. In the following examples, clicking either
CommandButton1
or CommandButton2 both execute the ButtonClick procedure, and the single
argument tells the
ButtonClick procedure which button was clicked.
4799-2 ch15.F 6/11/01 9:38 AM Page 458
459
Chapter 15 ✦ Advanced UserForm Techniques
Private Sub CommandButton1_Click()
Call ButtonClick(1)
End Sub
Private Sub CommandButton2_Click()
Call ButtonClick(2)
End Sub
If your UserForm has many CommandButtons, setting up all of these event-handlers
can get tedious. You might prefer to have a single procedure that could determine
which button was clicked, and take the appropriate action.
This section describes a way around this limitation by using a Class Module to
define a new class.
This example is available on the companion CD-ROM.
Procedure
The following steps describe how to re-create the example workbook:
1. Create your UserForm as usual, and add several CommandButtons (the exam-
ple on the CD contains 16 CommandButttons).This example assumes the form
is named UserForm1.
2. Insert a class module into your project (use Insert ➪ Class Module), give it the
name BtnClass, and. enter the following code. You will need to customize the
ButtonGroup_Click procedure.
Public WithEvents ButtonGroup As MsForms.CommandButton
Private Sub ButtonGroup_Click()
Msg = “You clicked “ & ButtonGroup.Name & vbCrLf _
& vbCrLf
Msg = Msg & “Caption: “ & ButtonGroup.Caption _
& vbCrLf
Msg = Msg & “Left Position: “ & ButtonGroup.Left _
& vbCrLf
Msg = Msg & “Top Position: “ & ButtonGroup.Top
MsgBox Msg, vbInformation, ButtonGroup.Name
End Sub
3. Insert a normal VBA module and enter the following code. This routine simply
displays the UserForm:
Sub ShowDialog()
UserForm1.Show
End Sub
On the
CD-ROM
4799-2 ch15.F 6/11/01 9:38 AM Page 459
460
Part IV ✦ Working with UserForms
4. In the code module for the UserForm, enter the code in Listing 15-4. This pro-
cedure is kicked off by the UserForm’s
Initialize event. Notice that the
code excludes a button named
OKButton from the “button group.” Therefore,
clicking the OKButton does not execute the
ButtonGroup_Click procedure.
Listing 15-4: Establishing the Buttons() object array
Dim Buttons() As New BtnClass
Private Sub UserForm_Initialize()
Dim ButtonCount As Integer
Dim ctl As Control
‘ Create the Button objects
ButtonCount = 0
For Each ctl In UserForm1.Controls
If TypeName(ctl) = “CommandButton” Then
If ctl.Name <> “OKButton” Then ‘Skip the OKButton
ButtonCount = ButtonCount + 1
ReDim Preserve Buttons(1 To ButtonCount)
Set Buttons(ButtonCount).ButtonGroup = ctl
End If
End If
Next ctl
End Sub
After performing these steps, you can execute the ShowDialog procedure to dis-
play the UserForm. Clicking any of the CommandButtons (except the OKButton)
executes the
ButtonGroup_Click procedure. Figure 15-10 shows an example of
the message displayed when a button is clicked.
Figure 15-10: The ButtonGroup_Click procedure describes
the button that was clicked.
4799-2 ch15.F 6/11/01 9:38 AM Page 460
461
Chapter 15 ✦ Advanced UserForm Techniques
Adapting this technique
You can adapt this technique to work with other types of controls. You’ll need to
change the type name in the
Public WithEvents declaration. For example, if you
have OptionButtons instead of CommandButtons, use a declaration statement like
this:
Public WithEvents ButtonGroup As MsForms.OptionButton
A Color Picker Dialog
This example is similar to the example in the previous section, but a bit more com-
plex. The example workbook demonstrates a technique to display a UserForm that
allows the user to select a color from the Workbook’s color palette (which consists
of 56 colors).
The example is actually a function (named
GetAColor) that displays a UserForm
and returns a color value.
This example is available on the companion CD-ROM.
The GetAColor function follows:
Public ColorValue As Variant
Dim Buttons(1 To 56) As New ColorButtonClass
Function GetAColor() As Variant
‘ Displays a UserForm and returns a
‘ color value - or False if no color is selected
Dim ctl As Control
Dim ButtonCount As Integer
ButtonCount = 0
For Each ctl In UserForm1.Controls
‘ The 56 color buttons have their ‘
‘ Tag property set to “ColorButton”
If ctl.Tag = “ColorButton” Then
ButtonCount = ButtonCount + 1
Set Buttons(ButtonCount).ColorButton = ctl
‘ Get colors from the active workbook’s palette
Buttons(ButtonCount).ColorButton.BackColor = _
ActiveWorkbook.Colors(ButtonCount)
End If
Next ctl
UserForm1.Show
GetAColor = ColorValue
End Function
On the
CD-ROM
4799-2 ch15.F 6/11/01 9:38 AM Page 461
462
Part IV ✦ Working with UserForms
The UserForm contains 56 CommandButton controls, which are colored using the
colors in the active workbook’s palette.
You can access the
GetAColor function with a statement such as the following:
UserColor = GetAColor()
Executing this statement displays the UserForm and assigns a color value to the
UserColor variable. The color corresponds to the color selected by the user.
Figure 15-11 shows the UserForm (it looks better in color), which contains 56
CommandButton controls. The
BackColor property of each button corresponds
to one of the colors in the workbook’s color palette. Clicking a button unloads the
UserForm and provides a value for the function to return.
Figure 15-11: This dialog box lets the user select a color
by clicking a button.
The example file on the accompanying CD-ROM contains the following:
✦ A UserForm (UserForm1) that contains a dialog box with 56 CommandButtons
(plus a few other accoutrements).
✦ A class module (
ColorButtonClass) that defines a ColorButton class.
✦ A VBA module (
Module1) that contains a Function procedure (GetAColor).
✦ Two examples that demonstrate the
GetAColor Function procedure.
The
GetAColor procedure sets up the UserForm and displays it. It later returns the
color value of the selected button. If the user clicks Cancel,
GetAColor returns
False. As the user moves the mouse pointer over the color buttons, the Color
Sample image displays the color.
The code behind this UserForm is rather lengthy, so it’s not listed here. You can,
however, open the workbook from the CD-ROM and examine the code.
4799-2 ch15.F 6/11/01 9:38 AM Page 462
463
Chapter 15 ✦ Advanced UserForm Techniques
Displaying a Chart in a UserForm
With Excel 5 or Excel 95, it was very easy to display a “live” chart in a custom dialog
box (using a dialog sheet): Just copy a chart and paste it into your dialog sheet.
Oddly, there is no direct way to display a chart in a UserForm. You can, of course,
copy the chart and paste it to the
Picture property of an Image control, but this
creates a static image of the chart and will not display any changes to the chart.
Although UserForms are vastly superior to the old dialog sheets, this is one area
that Microsoft seems to have overlooked.
You can still use dialog sheets in Excel 97 or later. Therefore, you are certainly free
to use a dialog sheet to display a live chart in a dialog box.
This section describes two methods to display a chart in a UserForm.
Method 1: Save the chart as a file
Just because Microsoft doesn’t allow a live chart to be displayed in a UserForm,
doesn’t mean it can’t be done! Figure 15-12 shows a UserForm with a chart dis-
played in an Image object. The chart actually resides on a worksheet, and the
UserForm always displays the current chart. This technique works by copying the
chart to a temporary graphics file, then setting the Image control’s
Picture prop-
erty to the temporary file.
Figure 15-12: With a bit of trickery, a UserForm
can display “live” charts.
General steps
To display a chart in a UserForm, follow these general steps:
1. Create your chart or charts as usual.
2. Insert a UserForm and then add an Image control.
Note
4799-2 ch15.F 6/11/01 9:38 AM Page 463
464
Part IV ✦ Working with UserForms
3. Write VBA code to save the chart as a GIF file, and then set the Image control’s
Picture property to the GIF file. You need to use VBA’s LoadPicture function
to do this.
4. Add other bells and whistles as desired. For example, the UserForm in the
demo file contains controls that let you change the chart type. Alternatively,
you could write code to display multiple charts.
Saving a chart as a GIF file
The following code demonstrates how to create a GIF file (named temp.gif) from a
chart (in this case, the first chart object on the sheet named Data):
Set CurrentChart = Sheets(“Data”).ChartObjects(1).Chart
Fname = ThisWorkbook.Path & “\temp.gif”
CurrentChart.Export FileName:=Fname, FilterName:=”GIF”
When this code is executed, you’ll see a pop-up window that displays the progress.
In response to a common question, I’m not aware of any way to suppress this
progress display.
Changing the Image control’s Picture property
If the Image control on the UserForm is named Image1, the following statement
loads the image (represented by the
Fname variable) into the Image control:
Image1.Picture = LoadPicture(Fname)
This technique works fine, but you may notice a slight delay as the chart is saved
and then retrieved. On a fast system, however, this delay is barely noticeable.
Method 2: Use the OWC ChartSpace control
As I mentioned in Chapter 13, a UserForm may contain other controls that aren’t
normally included in the Toolbox. Microsoft includes the “Office Web Components”
(OWC) with Office 2002, and you can use the Web Component controls in your
UserForms. Figure 15-13 shows an example of a UserForm that contains a
ChartSpace control.
This technique does not allow you to display an existing Excel chart on a
UserForm. Rather, you must write code that creates the chart in the ChartSpace
control.
Making the ChartSpace control available
The first step is to add the ChartSpace control to your Toolbox. Right-click the tool-
box to display the Additional Controls dialog box. Scroll down the list and place a
check mark next to Microsoft Office Chart 10.0 (if you’re using Excel 2000, the item
will be named Microsoft Office Chart 9.0). Click OK, and your Toolbox will have a
new icon.
Note
Note
4799-2 ch15.F 6/11/01 9:38 AM Page 464
465
Chapter 15 ✦ Advanced UserForm Techniques
Figure 15-13: This UserForm contains a Spreadsheet control.
Adding the ChartSpace control to a UserForm
Adding a ChartSpace control to your UserForm works just like any of the standard
controls. When the control is added, you won’t see a chart displayed. It is, after all,
just a chart space control. You’ll need to write code that creates the actual chart.
Creating the chart
The following code, which is located in the UserForm code module, creates a chart
using data stored on a worksheet. The category labels are in A2:A13, and the chart
data is in B2:B13. It assumes that the
ChartSpace object is named ChartSpace1.
Sub CreateChart()
Dim Chart1 As ChChart ‘WCChart
Dim Series1 As ChSeries ‘WCSeries
Dim r As Integer
Dim XValues(1 To 12)
Dim DataValues(1 To 12)
‘ Add a chart to the ChartSpace
Set Chart1 = ChartSpace1.Charts.Add
‘ Give it a title
With Chart1
.HasTitle = True
.Title.Caption = Range(“B1”)
End With
4799-2 ch15.F 6/11/01 9:38 AM Page 465
466
Part IV ✦ Working with UserForms
For r = 2 To 13
XValues(r - 1) = Cells(r, 1)
DataValues(r - 1) = Cells(r, 2)
Next r
‘ Create a chart series
Set Series1 = Chart1.SeriesCollection.Add
‘ Specify chart type and data
With Series1
.Type = chChartTypeColumnClustered
.SetData chDimCategories, chDataLiteral, XValues
.SetData chDimValues, chDataLiteral, DataValues
End With
End Sub
The code starts with variable declaration. If you’re using Excel 2000, note that the
objects have a different type name. For example, the chart object is of type
WCChart (not chChart). Similarly, the chart series object is of type WCSeries (not
chSeries). Two arrays are declared: one to hold the category labels (XValues), and
one to hold the data (DataValues).
The
Set statement creates a Chart object within the ChartSpace. This Chart object
is named Chart1. The next block of statements sets the chart’s title, using the label
in cell B1. A For-Next loop reads the worksheet data into the arrays.
The next
Set statement adds a series to the chart, and the Series object is named
Series1. The
With-End With block of code specifies the chart type (a standard
column chart), and specifies the data for the series.
You’ll find documentation for the OWC objects on your hard drive. These help files
are installed when the OWC is installed. Or, you can use the Object Browser to learn
more about the properties and methods of these controls.
It’s important to understand that the object model for creating a chart in the OWC
does not correspond to the object model for creating a chart in Excel. Chapter 18
explains how to use VBA to manipulate “real” Excel charts.
Figure 15-14 shows a slightly more sophisticated version of this example. In this
case, the user can choose which data will appear in the chart; this version also
includes an option to export the chart as a GIF file.
This application is available on the companion CD-ROM. You’ll find two versions
on the CD: one for Excel 2000 (using OWC 9.0), and one for Excel 2002 (using
OWC 10.0).
On the
CD-ROM
Note
4799-2 ch15.F 6/11/01 9:38 AM Page 466
467
Chapter 15 ✦ Advanced UserForm Techniques
Figure 15-14: This UserForm contains a ChartSpace control (part of the Office Web
Components).
Displaying a Spreadsheet in a UserForm
Not content to simply display a chart in a UserForm? How about an entire spread-
sheet?
Using the Office Web Components
The Office Web Components were designed to create interactive Web pages. The compo-
nents include a Spreadsheet, a Chart, and a Pivot Table. When you create an application
that uses the OWC, anyone who uses your application must have the OWC installed on his
or her computer.
The OWC is included with Microsoft Office 2000 and Microsoft Office 2002. Installation is
not automatic. In other words, you can’t assume that all Microsoft Office 2000 users have
the OWC installed on their system (they may have chosen not to install it). To confuse mat-
ters even more, the Small Business Edition of Microsoft Office 2000 does not even include
the OWC.
Therefore, you should use caution before deciding to include any OWC controls in your
Excel application. If your application will have general distribution, you’ll probably want to
avoid using the OWC.
4799-2 ch15.F 6/11/01 9:38 AM Page 467
468
Part IV ✦ Working with UserForms
Figure 15-15 shows an example of a UserForm that contains a Microsoft Office
Spreadsheet 10.0 control. This control can contain an entire interactive spread-
sheet, complete with formulas and formatting. In fact, this Spreadsheet control
has a significant advantage over a standard Excel sheet: Its dimensions are 18,278
columns by 262,144 rows. This is nearly 300 times as many cells as a standard
Excel worksheet!
Figure 15-15: This UserForm contains a Spreadsheet control.
Making the Spreadsheet control available
First, you’ll need to add the Spreadsheet control to your Toolbox. Right-click the
toolbox to display the Additional Controls dialog box. Scroll down the list and place
a check mark next to Microsoft Office Spreadsheet 10.0 (if you’re using Excel 2000,
the item will be named Microsoft Office Spreadsheet 9.0). Click OK to add the new
icon to your Toolbox.
Adding the Spreadsheet control to a UserForm
Adding a Spreadsheet control to your UserForm works just like any of the standard
controls. When the control is added to the UserForm, you’ll see a three-sheet
spreadsheet. As you’ll see, this spreadsheet can be customized quite a bit.
A simple example
This example uses a Spreadsheet control to create a simple loan payment calculator
in a UserForm. The finished product is shown in Figure 15-16. The user can enter
loan information into column B, and the monthly payment is calculated (using a
formula) and displayed in the bottom right cell.
4799-2 ch15.F 6/11/01 9:38 AM Page 468
469
Chapter 15 ✦ Advanced UserForm Techniques
This example is primarily for illustration only. Using a Spreadsheet control is
overkill. It is much more efficient to use EditBox controls to get the information,
and calculate the loan payment using VBA code.
Figure 15-16: This UserForm uses
a Spreadsheet control for a simple
loan payment calculator.
To create this UserForm, start with a new workbook and follow the steps presented
next. Make sure you’ve added the Spreadsheet control to your Toolbox.
1. Insert a new UserForm, and add a Spreadsheet control. Don’t change its
default name (Spreadsheet1).
By default, the spreadsheet displays with a toolbar, row and column headings,
scroll bars, and a sheet selector tab. To keep the interface as clean as possi-
ble, we’ll get rid of these items later.
2. Select any cell in the Spreadsheet control, then right-click and choose
Commands and Options from the shortcut menu.
You’ll see the tabbed dialog box shown in Figure 15-17.
3. Click the Workbook tab and delete Sheet2 and Sheet3. Then remove the check
marks from Horizontal scrollbar, Vertical scrollbar, Sheet selector, and
Toolbar.
4. In column A, enter the text shown in Figure 15-16. Then adjust the width of
column A so it’s wide enough to handle the text.
5. Enter some number into B1:B3. Then enter the following formula into cell B5:
=PMT(B2/12,B3,-B1)
6. Select B1:B3, and click the Format tab in the Commands and Options dialog
box. Click the “key” icon to unlock the selected cells (the other cells will
remain locked, which is the default).
7. Click the Sheet tab in the Commands and Options dialog box. In the Viewable
range box, enter A1:B5.
This essentially hides all of the unused rows and columns.
Note
4799-2 ch15.F 6/11/01 9:38 AM Page 469
470
Part IV ✦ Working with UserForms
8. Next, remove the check mark from the check boxes labeled Row headers and
Column headers.
9. Finally, add two CommandButton controls. One, named CancelButton, will be
the Cancel button. The other (named PasteButton) will execute code that
pastes the calculated result to the active cell in the Excel worksheet.
Figure 15-17: Use this dialog box to customize
the Spreadsheet control.
Now it’s time to add some VBA code. In the preceding steps, the three input cells
were unlocked. Locking cells, however, has no effect unless the sheet is protected
(just like Excel). Therefore, we’ll add some code to protect the sheet when the
UserForm is initialized. You could protect the sheet at design time (using the
Commands and Options dialog box), but that makes it impossible to edit the
sheet — and it’s easy to forget to protect it again after you make changes. Protecting
the sheet at runtime ensures that the sheet will be protected and the user can only
change the input cells.
The simple code that follows does the job:
Private Sub UserForm_Initialize()
Spreadsheet1.ActiveSheet.Protect
End Sub
The UserForm button labeled Paste Payment, when clicked, executes the following
code:
Private Sub PasteButton_Click()
ActiveCell.Value = Spreadsheet1.Range(“B5”)
Unload Me
End Sub
4799-2 ch15.F 6/11/01 9:38 AM Page 470
471
Chapter 15 ✦ Advanced UserForm Techniques
This procedure simply puts the contents of cell B5 (from the Spreadsheet control)
into the active cell on the Excel worksheet, and then unloads the UserForm.
Finally, we’ll need an event-handler procedure for the Cancel button:
Private Sub CancelButton_Click()
Unload Me
End Sub
I really can’t think of too many good reasons to use a Spreadsheet control in a
UserForm. However, it’s nice to know that this feature is available should you
need it.
An Enhanced Data Form
Next, here is one of the more complex UserForms you’ll encounter. I designed it as a
replacement for Excel’s Data Form, shown in Figure 15-18. You’ll recall this is the
dialog box that appears when you select Data ➪ Form.
Figure 15-18: Excel’s Data Form
Like Excel’s Data Form, my Enhanced Data Form works with a list in a worksheet.
But as you can see in Figure 15-19, it has a dramatically different appearance and
offers several advantages.
4799-2 ch15.F 6/11/01 9:38 AM Page 471
472
Part IV ✦ Working with UserForms
Figure 15-19: The author’s Enhanced Data Form
Description
The Enhanced Data Form features the following enhancements:
✦ It handles any number of records and fields. Excel’s Data Form is limited to 32
fields.
✦ The dialog box is always the same size, with scrollable fields. Excel’s Data
Form’s dialog isn’t scrollable, and can take up the entire screen!
✦ The record displayed in the dialog is always visible on-screen, and is high-
lighted so you know exactly where you are. Excel’s Data Form doesn’t scroll
the screen for you, and does not highlight the current record.
✦ At startup, the dialog box always displays the record at the active cell. Excel’s
Data Form always starts with the first record in the database.
✦ When you close the dialog, the current record is selected for you. Excel’s Data
Form doesn’t change your selection when you exit.
✦ It lets you insert a new record at any position in the database. Excel’s Data
Form adds new records only at the end of the database.
✦ It includes an Undo button for Data Entry, Insert Record, Delete Record, and
New Record. Excel’s Data Form includes only a Restore button.
✦ Search criteria are stored in a separate panel, so you always know exactly
what you’re searching for. The search criteria are not always apparent in
Excel’s Data Form.
✦ Supports approximate matches while searching (*, ?, and #). Excel’s Data
Form does not.
✦ The complete VBA source code is available, so you can customize it to your
needs. Data Form is not written in VBA and cannot be customized.
4799-2 ch15.F 6/11/01 9:38 AM Page 472
473
Chapter 15 ✦ Advanced UserForm Techniques
The Enhanced Data Form is a commercial product (sort of). It can be used and dis-
tributed freely, but access to the complete VBA source is available only for a mod-
est fee.
Installing the add-in
To try out the Enhanced Data Form, install the add-in:
1. Copy the dataform.xla file from the CD-ROM to a directory on your hard drive.
2. In Excel, select Tools ➪ Add-Ins.
3. In the Add-Ins dialog box, click Browse and locate the dataform.xla in the
directory from Step 1.
Using the Enhanced Data Form
When the Enhanced Data Form add-in is installed, a new menu command is avail-
able: Data ➪ JWalk Enhanced Data Form. You can use the Enhanced Data Form to
work with any worksheet database.
Summary
This chapter provides several more advanced examples of UserForms. Studying the
code provided will help you become a master of UserForms.
This chapter concludes Part IV. Subsequent chapters include additional UserForm
examples.
✦✦✦
Note
4799-2 ch15.F 6/11/01 9:38 AM Page 473
4799-2 ch15.F 6/11/01 9:38 AM Page 474
Advanced
Programming
Techniques
T
he six chapters in this part cover additional topics that
are often considered advanced. The first three chapters
discuss how to develop utilities and how to use VBA to work
with pivot tables and charts. Chapter 19 covers the topic of
event-handling, which enables you to execute procedures
automatically when certain events occur. Chapter 20
describes how to work with other applications, and Chapter
21 discusses the topic of add-ins.
✦✦✦✦
In This Part
Chapter 16
Developing Excel
Utilities with VBA
Chapter 17
Working with Pivot
Tables
Chapter 18
Working with Charts
Chapter 19
Understanding
Excel’s Events
Chapter 20
Interacting with Other
Applications
Chapter 21
Creating and Using
Add-Ins
✦✦✦✦
PART
V
V
4799-2 PO5.F 6/11/01 9:38 AM Page 475
4799-2 PO5.F 6/11/01 9:38 AM Page 476
Developing
Excel Utilities
with VBA
T
his chapter is about Excel utilities. A utility, in general, is
something that enhances software, adding useful fea-
tures or making existing features more accessible. As you’ll
see, creating utilities for Excel is an excellent way to make a
great product even better.
About Excel Utilities
A utility isn’t an end product, such as a quarterly report.
Rather, it’s a tool that helps you produce an end product
(such as a quarterly report). An Excel utility is (almost
always) an add-in that enhances Excel with new features or
capabilities.
Excel is an extraordinary program that gets new features
with every release. But as good as Excel is, many users soon
develop a wish list of features that they would like to see
added to the software. For example, some users who turn off
the grid-line display want a feature that toggles this attribute
so that they don’t have to go through the tedious Tools ➪
Options command. Users who work with dates might want a
pop-up calendar feature to facilitate entering dates into cells.
And some users desire an easier way to export a range of data
to a separate file.
Utilities don’t need to be complicated. Some of the most use-
ful ones are actually very simple. For example, the following
VBA procedure is a utility that toggles the grid-line display in
the active window:
16
16
CHAPTER
✦✦✦✦
In This Chapter
About Excel utilities
and utilities in
general
Why use VBA to
develop utilities
What you need to
know to develop
good utilities
Step-by-step details
for developing a
useful Excel utility to
manipulate text in
cells
Where to go for
more Excel utilities
✦✦✦✦
4799-2 ch16.F 6/11/01 9:39 AM Page 477
478
Part V ✦ Advanced Programming Techniques
Sub ToggleGridDisplay()
ActiveWindow.DisplayGridlines = _
Not ActiveWindow.DisplayGridlines
End Sub
You can store this macro in your Personal Macro Workbook so that it’s always avail-
able. For quicker access, you can assign the macro to a toolbar button, a new menu
item, a right-click shortcut menu, or a keystroke combination.
Several of the examples in Part IV are actually utilities, or easily can be turned into
utilities.
Using VBA to Develop Utilities
When I received the beta version of Excel 5, I was blown away by VBA’s potential.
VBA was light-years ahead of Excel’s powerful XLM macro language, and it made
Excel the clear leader among spreadsheets in terms of programming.
In an effort to learn VBA, I wrote a collection of Excel utilities using only VBA. I fig-
ured that I would learn the language more quickly if I gave myself a tangible goal.
The result was a product I call the Power Utility Pak for Excel, which is available to
you at no charge as a benefit of buying this book. Use the coupon in the back of the
book to order your copy.
I learned several things from my initial efforts on this project:
✦ VBA can be difficult to grasp at first, but it becomes easier with practice.
✦ Experimentation is the key to mastering VBA. Every project usually involves
dozens of small coding experiments that eventually lead to a finished product.
✦ VBA enables you to extend Excel in a way that is entirely consistent with
Excel’s look and feel, including menus, toolbars, and dialog boxes.
✦ Excel can do almost anything. When you reach a dead end, chances are
there’s another path that leads to a solution.
Few other software packages include such an extensive set of tools that enable the
end user to extend the software.
What Makes a Good Utility?
An Excel utility, of course, should ultimately make your job easier or more efficient.
But if you’re developing utilities for other users, what makes an Excel utility valu-
able? I’ve put together a list of elements that are common to good utilities:
Cross-
Reference
4799-2 ch16.F 6/11/01 9:39 AM Page 478
479
Chapter 16 ✦ Developing Excel Utilities with VBA
✦ It adds something to Excel. This may be a new feature, a way to combine exist-
ing features, or just a way to make an existing feature easier to use.
✦ It’s general in nature. Ideally, a utility should be useful under a wide variety of
conditions. Of course, it’s more difficult to write a general-purpose utility than
it is to write one that works in a highly defined environment.
✦ It’s flexible. The best utilities provide many options to handle various
situations.
✦ It looks, works, and feels like an Excel command. Although it’s tempting to add
your own special touch to utilities, other users will find them easier to use if
they look and act like familiar Excel commands.
✦ It provides help for the user when needed. In other words, it requires documen-
tation that’s thorough and accessible.
✦ It traps errors. An end user should never see a VBA error message. Any error
messages that appear should be ones that you write.
✦ Its effects are undoable. Users who don’t like the result caused by your utility
should be able to reverse their path.
Text Tools: The Anatomy of a Utility
In this section, I describe an Excel utility that I developed (and is part of my Power
Utility Pak). The Text Tools utility enables the user to manipulate text in a selected
range of cells. Specifically, this utility enables the user to do the following:
✦ Change the case of the text (uppercase, lowercase, or proper case)
✦ Add characters to the beginning or the end, or at a specific character position
✦ Remove characters from the beginning or the end, or from a specific position
within the string
✦ Remove excess spaces (or all spaces)
Background
Excel has many text functions that can manipulate text strings in useful ways. For
example, you can uppercase the text in a cell, delete characters from text, remove
spaces, and so on. But to perform any of these operations, you have to write formu-
las, copy them, convert the formulas to values, and paste the values over the origi-
nal text. In other words, Excel doesn’t make it particularly easy to modify text.
Wouldn’t it be nice if Excel had some text manipulation tools that didn’t require
formulas?
4799-2 ch16.F 6/11/01 9:39 AM Page 479
480
Part V ✦ Advanced Programming Techniques
By the way, many good utility ideas come from statements that begin, “Wouldn’t it
be nice if . . .”
Project goals for Text Tools
The first step in designing a utility is to envision exactly how you want the utility to
work. Here’s my original plan, stated in the form of ten goals:
✦ It will have the same look and feel of other Excel commands. In other words, it
will have a dialog box that looks like Excel’s dialog boxes.
✦ It will be accessible from the Tools menu.
✦ It will operate with the current selection of cells (including multiple selections),
and it will enable the user to modify the range selection while the dialog box is
displayed.
✦ Its main features will consist of tools to change the case of text, add new text
to the strings, delete a fixed number of characters from the text, and remove
spaces from the text in each cell.
✦ It also will enable the user to display key statistics about selected cells.
✦ It will enable the user to request the preceding types of changes to nontext
cells as well as to text cells.
✦ It will have no effect on cells that contain formulas.
✦ It will be fast and efficient. For example, if the user selects an entire range, the
utility should ignore the empty cells in the column.
✦ It will enable the user to undo the changes.
✦ It will have online help available.
How it works
When the Text Tools workbook opens, it creates a new menu item on the Tools
menu: Text Tools. Selecting this item executes the
StartTextTools procedure,
which checks to make sure that Excel is in the proper context (a worksheet is
active and it is not protected) and then displays the main Text Tools dialog box.
The user can specify various modifications and click the Apply button to perform
them. The changes are visible in the worksheet, and the dialog box remains dis-
played. Each operation can be undone, or the user can perform additional text
modifications. Clicking the Help button displays a help dialog box, and clicking the
Exit button dismisses the dialog box.
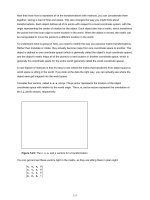
Figure 16-1 shows an example of the Text Tools utility in use.
4799-2 ch16.F 6/11/01 9:39 AM Page 480