Wireless Network Hacks & Mods for Dummies phần 8 pptx
Bạn đang xem bản rút gọn của tài liệu. Xem và tải ngay bản đầy đủ của tài liệu tại đây (893.89 KB, 38 trang )
How to Get the Music
We’ve already mentioned that most music that people buy these days is
already digital — simply because the dominant form of physical music distri-
bution is the CD. But CDs need some work before they’re ready to be part of
a wireless music distribution system — the songs on them need to be ripped
(or encoded) to an appropriate format before you use them in your network.
Of course, not all music needs such a step. Unless you’ve had your head
under a big music-blocking rock for the past few years, you’ve probably
heard of Napster (or of LimeWire, or Kazaa, or any of the other dozen or so
peer-to-peer file sharing programs) and you’re probably aware of the online
MP3 phenomenon. You’re probably also familiar with the move of radio sta-
tions to the Internet — both established big-transmitter-owning brick-and-
mortar broadcasters and small do-it-yourself Internet-only broadcasters.
They provide even more digital music for your wireless network!
In this section, we discuss these three primary ways of getting digital music
into your network: growing your own (from CDs), acquiring (legally!) digital
music files online, and tuning into Internet radio.
Ripping your own
If you’re like us (old? spendthrifts? music lovers?), you’ve probably got a ton
of CDs lying around your house. Actually, if you’re like us, you also have tons
of LP records too, but that’s a different story entirely. (Check out the sidebar
“Got vinyl? No problem!” for more on this.)
If you own CDs, creating digital music for your network is a snap. Simply use
a digital music/media player software application to rip those CDs into com-
pressed digital music files on your PC. Dozens and maybe even hundreds of
these programs are available. A few of the most popular (and most capable)
include
ߜ Windows Media Player: Found at
www.windowsmedia.com and already
installed on most Windows XP (and 2000, ME, and even Windows 98
PCs), Windows Media Player (version 10 is current as we write) is simply
Microsoft’s media platform. It supports all sorts of media — both audio
and video — and isn’t just a player, but is also a library management tool
that helps you organize and display all the media on your PC. Windows
Media player, by default, rips music CDs in the WMA format, but the
player can support additional formats (like MP3) by using additional
software modules. Check out the aforementioned site for more info.
249
Chapter 13: Building a Wireless Audio Network
20_595830_ch13.qxd 8/26/05 8:05 PM Page 249
ߜ iTunes: Apple’s music player is designed to work with the insanely pop-
ular iPod digital music player, but it can be an excellent music encoder/
player and library manager all on its own. iTunes supports the AAC and
Apple Lossless codecs, as well as MP3 files, and can be extended to sup-
port other formats (recall the iTunes-LAME software mentioned earlier in
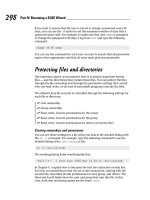
the chapter). The really cool thing about iTunes (shown below in Figure
13-2) is that it provides you with access to the iTunes Music Store — the
most popular online digital music store. (We talk more about these stores
in the next section.) It’s also the only program (and store) designed to
work expressly with the iPod. Find iTunes (for Windows 2000/XP and Mac
OS 9.X) at
www.apple.com/itunes.
iTunes does not support the WMA file format at this time. You can con-
vert your WMA files to the AAC format to use them with iTunes, but only
if the files are not copy-protected. If you poke around inside the “pack-
age” of the iTunes application (right-click the iTunes application icon
and select View Package), you notice “placeholder” icons for WMA, Ogg
Vorbis, and other codecs. Don’t be surprised to see more support for
these formats in the future.
ߜ RealPlayer: Real Networks is probably the leading nonoperating system
vendor of media player software (meaning not Apple or Microsoft). The
RealPlayer software (
www.real.com) is a free encoder/player/library
management software program that supports just about every digital
music format, for playback, anyway. (For encoding or ripping your own
discs, you have to pay for the RealPlayer Plus version to get support for
some encoding formats.) The coolest thing about Real Networks and
RealPlayer is its support of the company’s Rhapsody Music Service
(check out the discussion below in the section called “Getting your radio
from the Internet”).
ߜ Winamp: The granddaddy of media player/encoder programs is
Nullsoft’s Winamp (www.winamp.com). Nullsoft offers a free version of
this program that offers player and library management only, and a Pro
version for $14.95 that includes an MP3 encoder. Winamp isn’t quite as
fancy as some of the other programs, but it works very effectively and
supports just about any kind of file type.
We don’t really have any favorites amongst these (and the many, many other
media player/encoder) programs. We think that what you use is often very
much a situational decision. Do you use an iPod or maybe Apple’s AirPort
Express and AirTunes? Well, you have to use iTunes. Do you have a Windows
XP Media Center Edition PC, or just love everything that Bill Gates has ever
done? Go for Windows Media Player. Or, go for broke and find some open
source Ogg Vorbis player that 99.99 percent of the world has never heard of!
Media players are a pretty mature bit of software these days. They all basi-
cally work well. In the end, it comes down to what features you want and
what works with the rest of your wireless and music equipment. Some wire-
less media adapter devices include their own proprietary software (usually
based on Windows Media Player) and don’t offer you any other choices.
250
Part IV: Cool Wireless Toys
20_595830_ch13.qxd 8/26/05 8:05 PM Page 250
Buying your music online
You don’t have to rip your own music from CDs (or records and tapes). You
can just skip the whole physical media thing and get digital music files from
the Internet. Earlier in the chapter, we mention Napster (the original Napster
that is — the file sharing program) and its many successors. Many people
(every college student we know, for example) obtain and share music with
these programs. The problem is, most of these people, for better or worse,
are breaking the law by downloading copyrighted material without paying
for it.
Peer-to-peer file sharing programs have many legitimate uses, and plenty
of music out there is legal to download and share. But be careful: Cadres of
record industry lawyers are running around suing the pants off of music
downloaders. Be careful and be legal!
Fortunately, there are an increasing number of legal, legitimate, and actually
pretty cool online music stores that let you download music for a price, while
ensuring that the musicians actually get paid. (We know some musicians, and
they deserve to get paid too!)
Figure 13-2:
Got iTunes?
You should!
251
Chapter 13: Building a Wireless Audio Network
20_595830_ch13.qxd 8/26/05 8:05 PM Page 251
There are two primary types of online music stores:
ߜ Download stores: Some music stores, like the iTunes Music Store, let
you purchase and download individual songs or whole albums — for
about a buck a song or ten bucks an album. You download ’em, you own
’em, and, within some limits, you can do what you want with ’em (for
example, burn a CD, copy to portable music players, and so on).
ߜ The celestial jukebox: Other music stores let you access any of the
music within the store’s catalog (often a million or more songs) to play
with an approved device (like your PC with the music store’s software)
252
Part IV: Cool Wireless Toys
Got vinyl? No problem!
Got a ton of old vinyl in your collection that you
want to put on your wireless music distribution
network? This is a vexing problem for some
folks: You can’t just plug a record player into
your PC and start creating digital music.
Instead, you need to deal with something known
as the RIAA equalization curve — which is basi-
cally a special set of equalizer settings (adjust-
ing the volume or intensity of an analog music
signal differently at different frequencies) that
makes the music coming off a vinyl record
sound “right” when it comes out of a stereo. If
you plug a record player into a receiver or
amplifier in your home audio or theater system,
you use a special set of inputs labeled phono
that run through some circuitry that accounts
for the RIAA equalization curve.
If you look at your turntable, you also notice that
in addition to the standard pair of left and right
stereo audio cables (the RCA plugs), your
turntable has an additional ground wire
attached. This wire connects to a special
grounding terminal on a receiver or amplifier
and is designed to eliminate an audible hum that
often gets picked up and played along with the
music.
PC and Mac audio inputs don’t have this equal-
ization nor this ground wire built in, so you need
some special software and hardware to make
the turntable connection.
One inexpensive solution is from Griffin Tech-
nology (
www.griffintechnology.com).
Griffin offers a special Turntable Connection
Cable for less than $13 that plugs into a miniplug
audio input on your PC (or to one of Griffin’s iMic
USB audio interface boxes, which runs $39.99).
Add to the mix some free Macintosh OS X soft-
ware called Final Vinyl (available on the Griffin
site) and you’re ready to go to town.
If you’ve got a PC, you might consider a solution
like the XPsound XP201 Audio Interface (www.
xpsound.com/xp201.htm
). Listed at $99.99,
this box does it all — connecting both vinyl and
standard line level audio sources (like cassettes
or the audio output from other devices like
VCRs) — and also includes software (Diamond
Cut 32) that allows you to apply RIAA equaliza-
tion and also edit your vinyl music.
After you’ve got a solution like one of these in
place, you can use your operating system’s
built-in sound recording software (like Sound
Recorder on Windows XP) to create an uncom-
pressed digital audio file (.wav) of your discs,
and then run them through your favorite
encoder to rip a compressed version for your
network. Alternatively, or you can get some
third-party software (like Blaze Audio’s Rip-Edit-
Burn —
www.blazeaudio.com) that does it
all in one fell swoop!
20_595830_ch13.qxd 8/26/05 8:05 PM Page 252
any time you want, all for a monthly fee. It’s like paying a flat rate to be
able to punch the buttons on the biggest jukebox ever — and no one
else gets a turn! You can’t, however, “keep” the songs; you just get to
access them on demand. Rhapsody and Yahoo! Music are examples of
this kind of store.
A few stores combine these approaches. In other words, you get the “celestial
jukebox” access for a certain monthly fee, and then can download and “keep”
music for an additional a la carte fee.
Some of the most popular music stores include the following:
ߜ Apple iTunes Music Store: The most popular music store around is the
Apple iTunes Music Store (ITMS). For $.99 a song (or $9.99 for most
albums), you can download 128 Kbps AAC versions of just about any
song. The ITMS has no “jukebox” element, just downloads, but the store
is very slickly incorporated into iTunes (there’s nothing else to down-
load) and is the solution for iPod users.
ߜ Rhapsody: The originator of the “celestial jukebox” is Rhapsody, now
part of Real Network. This service offers access to millions of songs,
with different service levels (it’s about $8.33 a month for full access to
the million songs). Rhapsody also offers downloadable music and sup-
ports some portable media players. Find out more or download the
player at
www.rhapsody.com.
ߜ Napster: The new Napster isn’t a file sharing service. After Napster got
bankrupted by the record industry, the name was bought up and applied
to a music service. Napster (
www.napster.com) is a combination of a
“celestial jukebox” and download service and costs $8.95 a month for
the service (plus $.99 a piece for downloads).
ߜ eMusic: eMusic (
www.emusic.com) is a traditional (if we can use that
word to describe digital music) download service aimed at the indepen-
dent music market. (Want to find that Pavement remaster? Go on eMusic!)
There are different tiers of service, offering varying numbers of monthly
MP3 downloads. One cool thing about eMusic is that the music is often
of higher quality than most other download sites (higher bit rates, VBR
encoding) and has no copy protection (so you can burn as many CDs or
make as many copies as you’d like).
ߜ Yahoo! Music: The new entrant to this market is Yahoo!’s music service,
Yahoo! Music (or simply Y! Music) (). Yahoo’s
service is still in beta as we write in mid-2005, but it should be great
competition to some of the other services out there like Rhapsody. Y!
Music offers that same celestial jukebox model, with access to more
than a million songs for only $4.99 a month. We haven’t had a chance to
test this one out, but it’s worth watching!
253
Chapter 13: Building a Wireless Audio Network
20_595830_ch13.qxd 8/26/05 8:05 PM Page 253
Each of these online music stores offers pros and cons. We’re particularly
partial to iTunes Music Store (we have iPods) and eMusic. We love that we
can find some really awesome independent music on eMusic and that the
files are not heavily copy-protected, so we can do with them as we please —
within the law. Finally, the “any music at any time for a fixed rate” approach
of Rhapsody just blows us away.
In the end, however, they all work well. Just as with media player/encoder
software, what’s really important is what works with your whole network. If
you have an Apple AirPort Express, use iTunes Music Store. If you want to
use Rhapsody, use a media adapter (like NETGEAR’s adapters, discussed in
the next section) that supports that service.
254
Part IV: Cool Wireless Toys
High resolution audio and your network
Back in the 1980s, when CDs were brand-
spankin’ new, marketing folks hyped them as
“Perfect sound, forever.” The forever part
(meaning that a CD wouldn’t wear out with
repeated playings, as did LP records and cas-
sette tapes) pretty much came true. (Okay, some
CDs do have problems with internal oxidation
that renders them unplayable over time, but
we’ve never personally experienced that prob-
lem, even with CDs we’ve owned for nearly 20
years.) But the perfect sound part? Eh . . . not so
true. CDs can sound very good — exceptional
in fact — but there’s long been a core group of
listeners who felt that that CD sound was harsh
and “missing something” compared to the best
of analog recording mechanisms.
So, in response to this “market need” — or, as
some would argue, a cynical marketing ploy to
get you to buy the same album for the third or
fourth time (LP, cassette, CD, and now again) —
the record companies and consumer electron-
ics manufacturers have come up with
some new digital audio disc formats — the
SACD (Super Audio CD) and the DVD-A (DVD-
Audio) — that use larger samples and higher
sampling rates to create better-sounding digital
audio.
We’ve spent some time listening to both formats
and they both really do sound great. But — and
this is a big “but” — both formats have very
strong copy protection systems that effectively
keep you from creating your own digital
MP3/WMA/Ogg Vorbis/AAC music files from
these discs. Yeah, it’s perfectly legal for you to
do so, but the record companies have decided
they’d rather try to make you buy a fifth copy
specifically for your PC or digital music player.
Some folks might have some workarounds to
this issue, but keep in mind that they might not
be legal to use (we leave you to make your own
decisions). One option that is legal and also
practical is to look for hybrid discs. These are
most common with SACDs, and consist of a
single disc that has both SACD and DVD on sep-
arate layers on the disc. With one of these
discs, you can enjoy the highest quality play-
back when the disc is physically in your SACD
player, and still have a CD version to play in the
car or (more importantly) rip onto your hard
drive for your wireless digital music distribution
system. Hybrid DVD-A discs (both formats on a
single disc) are also beginning to appear and
should offer the same convenience.
20_595830_ch13.qxd 8/26/05 8:05 PM Page 254
Getting your radio from the Internet
You don’t have to pay to get music from the Internet — plenty of Internet radio
stations out there broadcast free streams of music for your listening pleasure.
Internet radio stations fall into two categories: Internet-only stations (our
favorite is Radio Paradise —
www.radioparadise.com) and traditional
broadcasters who simulcast online.
You can find online radio stations by simply doing an Internet search on
Google, Yahoo!, or your favorite search engine. You can also look online at
some Internet radio hosting or search sites like the following:
ߜ SHOUTcast:
www.shoutcast.com
ߜ Live365: www.live365.com
ߜ Radio-Locator: www.radio-locator.com
Any of the media player programs we discuss earlier in this section (like iTunes
and Windows Media Player), and most of the software for online music ser-
vices (like Rhapsody and Y! Music), also offer online radio guides and services,
either for free or for a small monthly fee.
At the risk of sounding like a broken MP3 here, we say it again: Match service
to hardware to software to make Internet radio work over your wireless net-
work. If you want to listen to Internet radio that uses MP3 encoding, make sure
all of your wireless gear supports MP3. Or if you want to listen to Rhapsody’s
Internet Radio, make sure your media adapter supports Rhapsody.
Getting the Music Around Your Network
Now that you know where digital music comes from and how to get it into
your house and onto your computers, you’re ready to extend it across your
wireless network and around your home (or office).
There’s one really simple (but not inexpensive) way of doing this: simply put
a wirelessly-enabled PC near where you want to listen to music. Use the PC’s
speakers or connect its audio outputs to a stereo or other device.
This approach works, but it isn’t particularly elegant: Unless your PC is a
Media Center Edition PC or a home theater PC that includes a remote control,
you must use a mouse and keyboard to control your music playback.
255
Chapter 13: Building a Wireless Audio Network
20_595830_ch13.qxd 8/26/05 8:05 PM Page 255
A better approach, in our opinion, is to use a wireless media adapter product.
These devices are simply small, Wi-Fi–enabled audio components that include
a Wi-Fi radio, specialized DSP chips that can decode a variety of digital music
formats, connectors for hooking into a home theater or stereo system, and,
finally, an interface that glues it all together. The media adapter is simply a
remote extension to your PC’s music library, providing access to digital music
files in remote locations.
If your media adapter is near a TV, look for one that’s got a video connector
and an onscreen display that lets you use the TV to browse through your
PC’s music collection. This is a heck of a lot more efficient than using a small
LCD display, especially when you’re comfortably parked on the couch.
The most important thing to look for in a media adapter is support for your
favored digital music file formats. If all of your music is encoded in AAC format,
the best MP3-only media adapter in the world won’t be worth a hill of beans
to you.
If you’re a subscriber to an online music service like Rhapsody or Y! Music,
you need to worry not only about file formats but also DRM (digital rights
management). DRM is the software that protects the music on these services
from unauthorized copying — and which authorizes you to listen to the music
you pay for. With these services, you can only use a media extender that has
been specifically designed and authorized to support the service’s DRM. For
example, the NETGEAR MP101 Media player supports Rhapsody’s service (it
says so right on the box) — but the Slim Devices Squeezebox 2 (which we
love) doesn’t. So if you’re a Rhapsody nut, you’ve got a simple decision to
make. If you want to extend a music service’s files around your home wire-
lessly, double-check compatibility before you buy any media adapter.
Dozens of media adapters are on the market (we list a bunch of them on our
Web site:
www.digitaldummies.com). A few that we find interesting include
the following:
ߜ NETGEAR MP101: NETGEAR’s digital audio media adapter (
www.
netgear.com/products/details/MP101.php
) supports Rhapsody’s
music service (in fact, it comes with a 30-day trial). That alone makes
it worth checking out in our opinion: We’re big fans of Rhapsody. The
player works on 802.11b or g networks (the unit itself is 802.11b) and
supports both MP3 and WMA music files (including VBR MP3 files
and bit rates of up to 320 Kbps on MP3s and 192 Kbps for WMA files).
It also comes with a remote control and a bright four-line LCD display
(to tell you what you’re listening to). What’s missing is support for WPA
encryption (see the Warning at the end of this section for more on this).
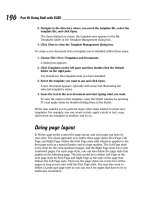
Figure 13-3 shows the MP101.
ߜ Squeezebox2: Slim Devices makes what may be our favorite media
adapter: the Squeezebox2. This is a truly “high end” appliance with all
of the buzzwords supported: 802.11g, WPA, lossless codecs (this unit
256
Part IV: Cool Wireless Toys
20_595830_ch13.qxd 8/26/05 8:05 PM Page 256
supports Apple Lossless, WMA Lossless, and FLAC), and even fancy
audiophile features like Burr Brown DACs (digital-to-analog converters)
and digital audio connections (for hooking up to a home theater
receiver). The price is a bit higher than some competitors ($249 at
www.slimdevices.com/), but you get a lot for your money. Our only
real complaint is that the Squeezebox2 doesn’t support a lot of the big-
name online music stores like ITMS, Rhapsody, and the like.
ߜ Apple AirPort Express: The smallest and least fancy of the media
adapters is Apple’s AirPort Express. This is a funky little multipurpose
device that’s part media adapter, part travel router, and part print server.
Oh yeah, and it can also be used as a Wi-Fi repeater to extend your net-
work’s reach using the WDS system. It’s the size of most people’s power
adapters (the whole thing plugs into the wall like a “wall wart”). All for
$129! Most importantly, the AirPort Express is the only media adapter
that can play music purchased from the Apple iTunes Music Store.
The big drawback of the AirPort Express is that it is a much simpler
device than most other media adapters. It’s got no remote control, no
LCD, no onscreen display — no interface at all, for that matter. You use
iTunes on your remote Mac or PC to control your music. We expect that
Apple will launch some kind of remote or even a tablet-like device for
controlling devices like the AirPort Express, but right now, you’ve got to
walk back to your computer, which defeats the purpose for many folks.
You can buy a remote control from Keyspan (
www.keyspan.com) called the
Express Remote ($59.99) that lets you control iTunes on a remote PC or Mac.
This doesn’t solve the “no display” problem, but does make the AirPort
Express a lot easier to handle.
Figure 13-3:
Listen to
Rhapsody
wirelessly
with the
MP101.
257
Chapter 13: Building a Wireless Audio Network
20_595830_ch13.qxd 8/26/05 8:05 PM Page 257
Most media adapters (we mention two all-too-rare exceptions above — the
Squeezebox2 and the AirPort Express) support only WEP encryption. This is
a real problem if you use WPA in your network. If you are stuck with WEP for
your music device, you have two choices: You can degrade your entire net-
work to WEP (because you can’t mix and match WPA and WEP), or you can
use a second access point on a nonblocking channel (for example, use
Channel 6 if your main AP is on Channel 1 or 11) just for your music and
other WEP-only devices, like many print servers.
Moving off the PC
Media adapters are a handy way to extend your PC’s music collection to
another location in your home or office. You may wish, however, to move
your digital music off of the PC entirely and put it onto a stand-alone music
server system. These devices include all of the computing horsepower and
storage space that your PC normally brings to the table — using specialized
systems optimized for music.
The biggest advantage of using a music server system is that you don’t need
a PC running at all times to have wireless digital music. So if you have laptops
only, for example, you don’t have to leave one of them running and plugged
in at all times if you want to listen to music. And you don’t have to worry
about rebooting the “music PC” every day or few days — most music server
systems run a version of Linux that’s pretty much bulletproof and can go
weeks, months, or longer without a reboot!
258
Part IV: Cool Wireless Toys
Go wireless the old-fashioned way
Why not just skip all of this fancy Wi-Fi stuff and
just send audio to your FM radio? That’s what
you can do with the Griffin RocketFM (
www.
griffintechnology.com/products/
rocketfm/index.php
).
For $39, the RocketFM connects to a powered
USB port of your desktop or laptop computer
(Mac or Windows) and includes software that
controls the system. Conceptually, the RocketFM
is a computer version of the iTrip radio devices
that Griffin has been selling for years for iPod
users — converting computer or iPod audio to
a short-range FM radio transmission that you
can pick up with any FM radio.
Like an iTrip, the RocketFM is software-controlled,
which means you use the software on your PC
to adjust the transmit frequency to an open
frequency in your area (in other words, a fre-
quency without any nearby stations). Simply
tune the RocketFM to an open frequency, tune
your radio to the same frequency, and play
away!
20_595830_ch13.qxd 8/26/05 8:05 PM Page 258
A lot of music servers are on the market, but many of them are not configured
for wireless use. Instead, they are designed to sit right next to the stereo or
home theater system, holding all the music locally and connecting via short
lengths of standard audio cables. Or they can be networked, but they connect
via Ethernet cables and don’t have built-in wireless capabilities.
If you’ve got a wired Ethernet music server that you want to get on your net-
work, you can always use a Wi-Fi to Ethernet bridge.
What we’re focused on in this section is music servers that are inherently
wireless — that have Wi-Fi or another wireless networking technology built-in.
One of our favorite digital music systems — this is a real technogeek fetish
item — is the Sonos Music System (
www.sonos.com, about $1,100 for a two-
room system). This slick-looking (and slickly designed) system was debuted
in late 2004 to a flurry (and we mean a flurry) of glowing press reviews, online
buzz, and general lust.
ߜ The Sonos Zone Player: This is the heart of the system, with all of the
audio analog-to-digital and digital-to-analog converters to handle the
audio signals, the wireless networking gear (based on the 802.11g stan-
dard, but with a twist, which we describe in a minute), and all of the
inputs and outputs you’d expect in an audio system. The Zone Player
has some extras too, like a built-in audio amplifier so you can hook
speakers directly to the system, and even a four-port Ethernet switch so
you can use the Zone Player to hook up computers and other Ethernet-
enabled devices.
The Zone Player supports a wide range of digital music file types, includ-
ing the major lossless formats. Figure 13-4 shows the Zone Player.
ߜ The Sonos Controller: The controller is the brains of the system: a
handheld, wireless pad with a built-in LCD screen and an interface that
gives its props to the interface king, the iPod. The screen and touchpad
of the controller let you control your system — both in terms of day-to-
day operation and also for configuring and customizing your system.
ߜ The Sonos Loudspeaker: The folks at Sonos don’t want to leave you
hanging when it comes to setting up a system, so they also offer a slick-
looking pair of speakers that match up well with the Zone Player and
come in the box with all the wires you need to hook things up. (That’s a
nice touch, believe us — we wrote Home Theater For Dummies and we’ve
dealt with cable envy before!)
There’s a not-so-optional component that we didn’t list above because it
doesn’t come from Sonos: a computer or NAS (network attached storage)
device to hold all of your digital music files. The Sonos Zone Players them-
selves don’t have hard drives to hold all of your music. Instead, they access
the music stored elsewhere.
259
Chapter 13: Building a Wireless Audio Network
20_595830_ch13.qxd 8/26/05 8:05 PM Page 259
You can use the Sonos system with the music files on a PC or Macintosh
instead of using NAS. We prefer the NAS approach, but you can always start
off using a PC or Mac and then add in a NAS box later as you grow your net-
work. We prefer the NAS for a couple of reasons:
ߜ It “offloads” your music file storage from your PC. NAS devices are pretty
much “set it and forget it” devices; they won’t need as much maintenance
or rebooting as a PC, and crash less often too.
ߜ Having a NAS device on your network opens up all sorts of other possi-
bilities, like using it as a shared photo file server, or as a backup server
for all the PCs on your network.
Our advice for something like the Sonos system is to save a few bucks and
buy a wired Ethernet NAS device to connect to your Sonos. Using a wireless
NAS device with your Sonos Zone Player offers no real advantage, and you
can save some money by going wired here. Just connect the wired NAS unit
to your main router’s switch ports or directly to one of your Zone Players.
The really cool thing about the Sonos system is how it departs a bit from a
standard 802.11 network when you have more than one Sonos Zone Player.
Sonos has fiddled a bit with its wireless networking system to provide a mesh
network (sort of like WDS, but more sophisticated) that connects each Zone
Player to the network. The Zone Players talk to each other and extend the
network so that if Zone Player 3 is out of range of Zone Player 1, the signal
can be routed through Zone Player 2.
There’s more to it than just mesh, however: Sonos’s “secret sauce” is soft-
ware that provides synchronization across this mesh network so that if
you’re playing the same music on two different Zone Players at the same
time, the sound is perfectly synchronized. And you don’t have to play the
same thing either — you can play different music on each Zone Player.
Figure 13-4:
The Sonos
Music
System is
hot stuff!
260
Part IV: Cool Wireless Toys
20_595830_ch13.qxd 8/26/05 8:05 PM Page 260
Even though Sonos deviates from the 802.11g standard with this mesh net-
working, it does use standard 802.11g radios and channels. Part of the Sonos
setup system is an option to select your channel, so you can configure your
Sonos to be on a different, noninterfering channel from your 802.11g or b
computer network.
Another popular wireless music server comes from Yamaha, the huge musi-
cal instrument and consumer electronics maker. Yamaha has its own 802.11-
based system called the MusicCAST. MusicCAST is not a peer, mesh-based
system like Sonos. Instead, it includes a centralized server (the MCX-1000)
and client hardware (MCX-A10) devices. One server can support five wireless
MCX-A10 clients plus two more wired clients. You can find out more about
the MusicCAST system at
www.yamaha.com/yec/products/musiccast/
index.htm
. Figure 13-5 shows the MusicCAST system.
MusicCAST is different than some other systems in that it is relatively closed.
It supports MP3 only and isn’t designed to work with any music services. The
server has a built-in CD player/burner and can both import music from your
CDs and create new CDs from your music collection on the server’s internal
hard drive.
261
Chapter 13: Building a Wireless Audio Network
Getting (Blue)toothy
Wi-Fi isn’t the only game in town when it comes
to getting your audio on a wireless network.
Some Bluetooth systems out there are also
designed to provide music distribution without
wires.
Bluetooth is a PAN (personal area networking)
technology with a considerably shorter range
than Wi-Fi (most Bluetooth equipment can the-
oretically reach only 30 yards at most, and
effectively much less). So Bluetooth is not typi-
cally used for whole-home wireless music
distribution. Instead, you can find Bluetooth
being used for music as it is for many other
applications — as a replacement for local inter-
connection cables.
An example is the Bluetake Hi-Phono BT460EX
system. This system (
www.bluetake.com/
products/BT460EX.htm
) is specifically
designed to allow you to skip the wires when
hooking remote speakers up to an audio system.
Simply connect the outputs of the audio source
to the transceiver and the speakers to the
amplifier and receiver devices. Pair them
together (press a button on both the transceiver
and receiver units at the same time) and you’ve
got a connection.
We expect to see a lot more Bluetooth in appli-
cations like this, particularly for home theater
applications. (It’s a really big pain in the rear to
get those back speakers wired up in a surround
sound system.)
20_595830_ch13.qxd 8/26/05 8:05 PM Page 261
Wi-Fi and Audio: Network Impacts
Theoretically, any Wi-Fi network — 802.11b and up — can support audio dis-
tribution. Even lossless compression methods use up less than a megabit per
second of bandwidth, whereas the throughput of even 802.11b is several
times higher than that.
That’s not to say that some things can’t make a difference in your musical
performance. Here are some suggestions:
ߜ Go with a faster standard: 802.11b should support music streams, but it
doesn’t always do so without breakups and other issues. If you can find
equipment that supports 802.11g (some media adapters now do, but
not all of them), go for it. 802.11a can also be a good choice for media
adapters, but it’s pretty rare to find such devices.
ߜ Boost your signal: If your network isn’t operating at its highest possible
speed due to poor signal strength, consider finding a way to boost the
signal. Some choices include
• Use an external antenna on your media adapter. Many media
adapters let you upgrade to an antenna that’s directional or has
more gain. You can also consider adding a higher gain antenna to
your AP.
Figure 13-5:
Yamaha’s
MusicCAST.
262
Part IV: Cool Wireless Toys
20_595830_ch13.qxd 8/26/05 8:05 PM Page 262
• Add a booster to your AP. Some APs accept a signal booster that
can bump up the power output to increase signal level at your
media adapter.
• Try MIMO. Although MIMO (Multiple Input/Multiple Output) and
Pre-N routers need matching radio systems on the far end for their
full performance boost, many also offer improved performance for
any client on the network (like your media adapter).
We talk about all of these techniques in Chapter 7.
ߜ Use a second network: If your performance issues are caused by con-
gestion on your Wi-Fi network (maybe you’ve just got too much traffic to
provide adequate bandwidth and low delays for music streams), add a
second network. We’re big proponents of adding a second network dedi-
cated to things like media adapters if your home needs it. You can pick
up an 802.11g or an AP for $40 or less and connect it to a switch port on
your main router. Use a different, noninterfering channel and set up a
network only for functions like music distribution. This may not be an
elegant solution, but until there’s a QoS mechanism in Wi-Fi networks,
it’s a cheap and functional one.
Getting into Video
Although most media adapters support only music files, a growing number
add in support for video files. These devices add in additional hardware
(video decoding hardware) and software (enhanced codec support) to sup-
port the display of video files and still picture images on a remote TV.
263
Chapter 13: Building a Wireless Audio Network
Whither WMM?
A new Wi-Fi Alliance standard known as WMM
(Wireless Multimedia) is coming on the scene.
WMM is a subset of the forthcoming 802.11e
standard, which defines QoS (Quality of
Service) mechanisms for Wi-Fi networks. Plain
Jane Wi-Fi is based upon Ethernet — which
means that there’s not really any mechanism to
give priority to one type of traffic over another.
WMM (and eventually 802.11e) provides that
mechanism and allows delay-sensitive traffic
like music streams to go first on the network,
ahead of things like e-mail checks.
A lot of access points and a few network
adapters on the market today support WMM.
Unfortunately, as we write, no media adapters
yet support this standard. Keep an eye on the
Wi-Fi Alliance Web site (
www.wi-fi.org) to
see when gear hits the market. Keep in mind
that everything in the audio chain — the AP, the
media adapter, the network adapter on a source
PC — must be WMM-certified for the system to
provide any benefit.
20_595830_ch13.qxd 8/26/05 8:05 PM Page 263
Here are a few important codecs to look for in a video-enabled media player:
ߜ MPEG-2: This is the standard MPEG codec used for things like DVDs and
digital cable. Most video files found on the Internet (those with an .mpg
file extension) are encoded with MPEG-2.
ߜ MPEG-4: A new codec (part of some forthcoming HDTV DVD systems),
MPEG-4 is a more efficient codec than MPEG-2, using less bits for the
same picture quality.
ߜ DivX: A popular codec for Internet distribution. More information can be
found on the DivX site (
www.divx.com).
ߜ WMV: Windows Media Video, WMV, is the video equivalent of the WMA
files Windows Media Player uses for audio.
Media players that support video come in two main forms:
ߜ Stand-alone media adapters: These devices, like D-Link’s MediaLounge
(go to
www.dlink.com/products/category.asp and click on the
Multimedia category to find) and NETGEAR’s MP115 (
www.netgear.
com/products/details/MP115.php
), are simple single-purpose com-
ponents that add some video support to the functionality found in
audio-only media adapters.
ߜ “Connected” DVD players: These products, like D-Link’s MediaLounge
with DVD or Buffalo Technology’s Wireless Media Player with Progressive
Scan DVD (
www.buffalotech.com/products/product-detail.php?
productid=96&categoryid=18
), combine a DVD player with the media
adapter functionality. This approach can save space and also save you
some money if you are in the market for a new DVD player.
You can also find a few flat panel TVs (like Philips’ Streamium TV —
www.streamium.com/products/streamiumtv/) that have built-in Wi-Fi and
media adapter functions. This is a category that we expect to see grow over
time, particularly with smaller flat panels that fit in the kitchen, den, or bed-
room, away from source devices like DVD players and home theaters.
We give relatively little attention to the video side of wireless media adapters
because we think it’s a product set that’s not really ready for prime time yet. A
lot of work is yet to be done in the areas of QoS and video content provisioning
before we spend too much of our own money on a video media adapter. But if
you have a specific need and a source of Internet video that you want to dis-
play on a remote TV, by all means, check out a video media adapter.
264
Part IV: Cool Wireless Toys
20_595830_ch13.qxd 8/26/05 8:05 PM Page 264
Chapter 14
Wirelessly Securing, Monitoring,
and Automating Your Home
In This Chapter
ᮣ Understanding network cameras
ᮣ Picking the right camera for your needs
ᮣ Installing your camera on your wireless network
ᮣ Checking in on your home from the road
ᮣ Securing and automating your home with wireless
W
ireless has played a huge role in cutting the costs of deploying state-
of-the-art security, monitoring, and automation technologies in pri-
vate homes. If you can avoid snaking wires in existing walls and structures,
everyone is better off. Wireless has also opened up a whole new world to do-
it-yourselfers; before wireless technologies became mature, not many people
would try to install their own alarm systems and home automation from
scratch simply because of the difficulty of running all that wiring. But with
wireless technology, installation is almost “Take it out of the box and turn it
on” simple.
However, those in the security, monitoring, and home automation space have
not yet been fully assimilated by the wireless Borg that is Wi-Fi. Most of those
systems are still powered by proprietary wireless technologies. Of the parts
of these systems, only the network-based cameras have really found their
way into the 802.11 mainstream.
This chapter focuses mostly on the network cameras for this reason. We dis-
cuss proprietary security, monitoring, and home automation devices towards
the end of the chapter, but our focus initially is on network camera technolo-
gies, key decision points about what to buy and how much, and how to link it
with your Wi-Fi backbone. We firmly believe that over the next few years,
devices in the home will move towards both Wi-Fi and Bluetooth for these
applications, so that’s why we continually stress the importance of sharing
these standardized wireless networks in your home.
21_595830_ch14.qxd 8/26/05 7:59 PM Page 265
Introducing the Network Camera
Security and surveillance have really become part of the mainstream these
days. We see camera footage from car washes, malls, traffic intersections,
and so on as part of reported news every day on TV. What’s changed on the
consumer end of the equation is that previously expensive security cameras
are now extremely affordable, and wireless connectivity makes it possible to
put cameras anywhere you want.
Every home should have a wireless camera in it. Case closed. If you’d like, we
can go into all the bad things that can happen, from someone breaking into
your house to your child disappearing, but we won’t. It’s a real downer, and
we like to be positive! So read about network cameras and install one. You
can get some peace of mind and be able to rewind that camera to prove to
your spouse that you really did take out the trash last Thursday before leav-
ing for work! Now that’s a winning idea in any household.
You’ve heard of Web cameras — cameras that enable you to send images of
yourself over the Internet. These cameras have to be attached to a computer
to operate. A network camera, as we discuss in this chapter, does not need a
computer to send images directly over the Internet or to other devices —
network cameras are network-enabled on their own and can act as full peers
on an IP network.
Applications with your network camera
You are probably aware of closed-circuit television (CCTV). Almost any movie
that involves breaking into some totally secure, not-even-Batman-could-get-in-
here facility features a scene of guards asleep in a guard room with lots of
televisions showing camera shots of hallways, loading docks, and of course,
any would-be thieves.
Those cameras historically have been linked to a physically-private commu-
nications network (“closed-circuit” as opposed to “broadcast”) viewable by
only those on the network.
The Internet has made the concept of a closed network less of a physical defini-
tion and more of a logical one — you can create a closed network with secure
passwords and other network checks to ensure that only you have access to
the images. So-called network cameras can be attached to your home’s wired or
wireless network and send images to any device running a display program, to
any media storage device, or, with Web-enabled versions, to any browser.
A network camera is fairly easy to define — it’s a camera that can be
attached to a network. Having said this, the network camera can play a lot
266
Part IV: Cool Wireless Toys
21_595830_ch14.qxd 8/26/05 7:59 PM Page 266
of different roles on a network, and as such, you encounter them in all sorts
of applications:
ߜ Home monitoring: Network cameras are part of home monitoring kits
that also include the ability to detect temperature drops and water in
the basement.
ߜ Home security: Network cameras are part of home security kits that pro-
vide the ability to detect doors opening, windows breaking, and motion.
ߜ Home automation/control: Network cameras are part of home automa-
tion kits that allow you to see who is at your front door to let them in
when you are away from home, or to check on the baby in the nursery.
That a network camera can play any of these roles shows you how fundamen-
tal a piece of your home wireless network a camera can be. Your camera can
play several roles at once, just like your computer can be used to order prod-
ucts from Amazon.com or to write a book.
All sorts of surveillance cameras are for sale. Many of these are part of the
age-old security and surveillance industry and are not network cameras —
they are merely cameras that can be connected to units that can then make
them accessible to the Internet. A network camera has either a wireless IP or
a wired Ethernet connection to the network. Don’t be fooled by cameras that
are merely Internet accessible but require a bunch of extra hardware or com-
puters to make that work. A true network camera is fully self-contained.
Evaluating network cameras
Of the major consumer wireless vendors, D-Link has the largest selection of
network-cameras. At the time of this writing, Linksys (
www.linksys.com)
had just one camera, Netgear (
www.netgear.com) had none, but D-Link
(
www.dlink.com) had almost 20 products, most under its Securicam product
line. So if you are shopping for a network camera, D-Link is your first stop.
D-Link and others refer to network cameras as Internet cameras, to under-
score their accessibility by anyone on the Internet. For our purposes here,
network cameras and Internet cameras are one and the same.
Today’s network cameras reflect a growing trend towards increasingly smart
cameras. Earlier surveillance cameras and CCTV systems store their images
to special VCRs or processing units that would digitize, compress, and store
images. Image recording could be turned on and off based on triggers sent by
sensors (such as motion detectors) attached to the recording unit. As hard
disk systems popularized by TiVo hit the stores, these surveillance VCRs
grew into DVRs as well.
267
Chapter 14: Wirelessly Securing, Monitoring, and Automating Your Home
21_595830_ch14.qxd 8/26/05 7:59 PM Page 267
The network camera is a step beyond this — driven by the increasing sophis-
tication of processing capability in the cameras themselves. The typical net-
work camera is a very self-contained unit, having its own built-in Web server
and network connectivity. Digitization functions previously centralized in the
VCR/DVR/control unit have now moved to these “smart” cameras, and com-
pression is now done in the camera. Adjunct items like motion detectors and
audio recording microphones are likewise built into the camera itself.
The rest is handled by software that is located elsewhere, on a remote system.
Network-enabled cameras all have some sort of management software that
helps you configure options, establish access rights, reposition the camera,
determine motion detector alerts, and so on. More advanced software enables
you to do this for multiple cameras from one piece of software, enabling you
to create tiled or sequential views of each of the cameras in your system. All
of this comes over your home’s LAN. Add in stackable network storage units
(some of these are even wireless, we discuss them in Chapter 16), and you’ve
got a very scalable model for multicamera surveillance of your property.
Buying a network camera brings in a whole host of new acronyms and fea-
tures that you don’t normally find on other wireless devices. Terms like pan
and tilt are gibberish to those used to looking at wireless access points,
routers, and A/V units.
We’ve got you covered! Here’s a handy list of the key things to look for when
buying a wireless camera:
ߜ Speed of connection: For wireless, the cameras available are almost all
exclusively 802.11b or g. You just have to decide between fast and faster.
You know our stance on this one: Go for the gusto with 802.11g!
ߜ Motorized pan/tilt/zoom: This is one of those “You’re going to pay more
for it” features that you ought to just splurge for because not having it
is noticeably . . . well . . . less cool. The ability to remotely move your
camera around (pan) and zoom in on different areas is not only cool and
fun, but incredibly practical too. Nothing’s worse than trying to view
your camera image only to find that someone accidentally moved it
while dusting. Argh.
You’ll find two types of zoom — optical and digital. Optical zoom actually
moves the lens back and forth to zoom in and out. Digital zoom approxi-
mates this by blowing up the image based on the pixels it has available. So
where digital zoom can get fuzzy the closer you get, a good auto-focus/
auto-iris optical zoom lens allows you to see with really good detail. Also,
when evaluating pan and tilt, look at the degree of motion quoted. It looks
something like this: Pan 270° ± 135° Tilt: 90° ± 45°. This tells you the range
of left/right, up/down motion of the camera. Obviously, the greater the
range of motion, the better.
268
Part IV: Cool Wireless Toys
21_595830_ch14.qxd 8/26/05 7:59 PM Page 268
ߜ User-selectable compression codec: Most cameras support MPEG or
MPEG-4, depending on whether you want clearer images (MPEG) or
smaller file sizes (MPEG-4). If you are just checking in on the baby,
MPEG-4 is great because the smaller file sizes move faster over your
broadband connections. If you want to read license plates in your drive-
way, MPEG may be the better way to go, recognizing that it will take
longer to download the files to view.
ߜ Frame rate and resolution: Video quality is determined (in large mea-
sure) by two things. First is frame rate, measured in frames per second
(fps). A rate of 30 fps is required to mimic full motion; 10 fps is a little
jerky but viewable. You’ll often see frame rates quoted alongside the
second element, image resolution. For example, you’ll see video quality
described by metrics like “Up to 30 fps at 352x240, up to 10 fps at
704x480,” where 352x240 represents the number of horizontal and verti-
cal pixels in the image. Maximize your frame rate and resolution sizes as
much as possible.
ߜ Motion detection: No one has an infinite supply of video storage space,
so if you are using this to monitor your home when away, for instance,
a motion detector ensures that you only capture action when it’s hap-
pening. Make sure the system has alerts to your e-mail or cellphone
messaging.
ߜ Security: You don’t want someone snooping in on your camera. Make
sure your camera has WEP on board.
If you can find a camera that supports WPA (or even better, WPA-2),
go for it! These systems offer a big leap in security, as we discuss in
Chapter 9. One model (or set of models) that we know supports WPA is
D-Link’s DCS-6600 series.
ߜ UPnP: UPnP is short for Universal Plug’n’Play, which is a networking
architecture that provides compatibility among networking equipment,
software, and peripherals. A UPnP-enabled network camera is easier to
configure if your operating system is UPnP-enabled, which Windows XP
is by default. Look for equipment that has UPnP support: It’ll save you a
lot of hassle.
ߜ Compatibility: Although a network camera can operate on any network,
not all software supports all browsers, so check the fine print. For
instance, at the time of this writing, the Linksys camera doesn’t work
with Internet Explorer on Macs or with Mozilla Firefox on any computer.
ߜ Detachable antenna: You want to maintain the option of adding a larger
antenna if you need to put your video camera far away from your wire-
less network. A nice directional antenna helps here, but only if you have
a means to attach it to your camera.
269
Chapter 14: Wirelessly Securing, Monitoring, and Automating Your Home
21_595830_ch14.qxd 8/26/05 7:59 PM Page 269
ߜ Simultaneous cameras: Some systems allow you to have more than one
camera active at one time. The D-Link IP surveillance software provided
with the DCS-6620G Internet camera allows you to monitor and manage
up to 16 cameras. You can set recording schedules, configure motion
detection settings, and change settings to multiple cameras from one
software interface.
ߜ Simultaneous viewers: Some systems have limits on the number of
viewers who can be looking at your images at one time. Limits of ten
simultaneous viewers are common on most network camera units.
ߜ Two-way audio: Not everyone uses two-way audio — the one-way audio
supported by most built-in camera microphones is sufficient — but
some cameras allow you to hook up external speakers via 2.5 mm mini-
plug connectors so that you can talk back to those you can see. “Smile,
you’re on Internet camera!”
ߜ IP address display: Linksys has pioneered the display of the IP address
of the unit on an LCD screen on the face of the camera. Way cool! We
wish that all devices had this; it’s so helpful in connecting to devices.
We hope other vendors follow suit and put similar displays on their
networked units.
For the most part, your network cameras interface with your existing wire-
less network infrastructure — you won’t need to add a new base station or
special video router to your network to make this work. However, Panasonic
has designed an integrated 802.11b/g access point, broadband router, and
camera management software into one bundled package, the BB-HGW700
Camera Management System with Wireless Concourse Home Gateway Router
(
www.panasonic.com, $499).
We don’t recommend buying into this bundled approach. Your access point
coordinates far more than just cameras, and we prefer the “best of breed”
approach, rather than just choosing a product because it was all bundled
together. Some of these bundled systems still use 802.11b, while 802.11g
cameras are available, and soon we bet 802.11n cameras will arrive on the
market. You can manage most of this with software on a PC; you don’t need
a hardware device for that.
We do, however, provide a partial exception to the rule we just stated. If your
primary wireless network uses WPA (which we recommend) and you choose
cameras that support only WEP, you may consider picking up an inexpensive
AP (or using an older one that might otherwise be retired to the old electron-
ics graveyard in the “junk closet”) and using it as the AP for your camera net-
work. Just set this network on a different, nonblocking channel. Use WEP for
the cams and use WPA for your important (and private) data on your PC
network.
270
Part IV: Cool Wireless Toys
21_595830_ch14.qxd 8/26/05 7:59 PM Page 270
Installing Your Network Camera
Adding a network camera to your home network used to be a really complex
operation that involved special settings throughout your network. It’s gotten
a lot easier to install a network camera, but you still need to fiddle with your
router to make it work outside your home.
When installing your home network camera, here are some things to keep in
mind when deciding on camera placement and its resulting field of view —
that is, the view the camera sees:
ߜ Height matters. In general, you want to mount your camera as high as
possible, preferably above 6 feet, 6 inches. This improves your wireless
performance because it has less mass to travel through, on average, to
get to its receiving unit. If your camera has a motion-detection feature, a
high mounting position increases its range of motion detection. Finally,
it typically brings in a broader background, which generally provides
better backlighting for what you are filming in the foreground.
ߜ Light matters. Your image is highly affected by the lighting in the area.
You want a well-lit field of view, but you don’t want the camera pointed
at the sun under any circumstances. (This ruins the camera.) Watch out
for a field of view that has high contrast — that is, where a portion of the
field is dark and a portion is light. This often happens in areas with a lot
of shade or with roof overhangs. Your camera washes out the well-lit
area trying to make the darker area more viewable; the result is simply
a bad picture.
ߜ Mass matters. Think about what is between your camera and its
receiving base unit. Microwave ovens — which operate in the 2.4GHz
frequency — affect transmission signals when turned on for cooking, so
try not to have one in between your sending and receiving units. Other
masses (even people!) affects signals, so lots of people in a particular
area, like a lobby or elevator waiting area, degrade the signal too. In gen-
eral, lots of walls and building materials between the two units also
degrade the signal.
ߜ Positioning matters. If you have a motion detector in the camera, you
want to anticipate the angle of motion in your field of view. You want
as much motion across the field of view as possible; motions directly
towards and away from the camera are less desirable.
ߜ Antennas matter. If your camera has a detachable antenna, remember
that you can install a higher grade antenna if you have issues. Keep your
antenna in a vertical position for best results.
The general installation process for a network camera is much like setting up
any wireless device on your network. You start with a wired connection to
the camera, install the software that comes with the camera, configure set-
tings like SSID, name of the unit, DHCP, or static IP address, and so on. Then
271
Chapter 14: Wirelessly Securing, Monitoring, and Automating Your Home
21_595830_ch14.qxd 8/26/05 7:59 PM Page 271
the software configures the camera, and you’re ready to detach it from your
wired connection and start viewing images. Customize a few more settings in
your software and then you can access it from the Internet too. Add on some
audio speakers, set your motion detector options, and you have a really
souped-up system that you can access from anywhere on the planet. Isn’t
life grand?
Getting your camera on the wireless LAN
In this section, we walk through the installation process for a D-Link DCS-
5300G. The 5300G is an 802.11g network camera with pan, tilt, and 4x digital
zoom features. The DCS-5300G has an internal microphone; however, you also
have the option of using an external microphone by plugging it into the micro-
phone port on the rear of the camera base. It also has a terminal block with
two pairs of connectors situated on the back panel — these are called I/O con-
nectors because, not surprisingly, one pair is for input and the other is for
output. The I/O connectors provide a physical interface through which you
can send and receive digital signals to and from a variety of external alarm
devices. All in all, it’s a very nicely designed device that is a great example of
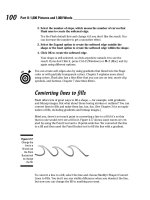
all the things you would want to do with a network camera. Figure 14-1 shows
the DCS-5300G.
Figure 14-1:
Watch your
home from
anywhere
with the
DCS-5300G.
272
Part IV: Cool Wireless Toys
21_595830_ch14.qxd 8/26/05 7:59 PM Page 272
Here’s how to get your DCS-5300G up and operational:
1. Remove the unit from its box and assemble it by attaching the anten-
nas, base, and power cable.
2. Load the CD into your PC. The Installation Wizard starts.
If it does not start automatically, launch Windows Explorer, navigate to
the CD drive, and launch autorun.exe on the CD.
3. Select Install Software on the main menu and then select Installation
Wizard on the next menu. Click through each step of the installation
process until it is finished.
4. Click on the Installation Wizard icon on your desktop to launch that
program.
The opening screen shows a fair amount of information that reflects the
status of your camera. You see the MAC address and IP address that
have been assigned to your camera by your router’s DHCP service. (See
Chapter 3 for info on DHCP.) A Yes in the Assigned column indicates that
your camera has successfully found your router and established its
presence on your wireless network.
If you do not see a Yes in the Assigned column, you may need to perform
a hardware reset of the camera. Gently insert a straightened-out paper
clip into the reset hole on the back of the camera. Watch the LED on the
front of the camera — it will begin blinking red and green. Wait until it
stops blinking, and then continue to hold in the reset button until a
second cycle of blinking red and green lights indicates a second reset
cycle has completed. This should take about 5–7 seconds.
If you have bought a lot of wireless gear in the past, you probably recall
the headaches of configuring your new wireless device — namely, trying
to get the IP address range to match your existing network (for example,
getting a camera with a default IP address of 192.168.1.xxx on a network
that’s in the range 192.168.0.xxx). The great news is that D-Link has
resolved all of those headaches, and the network configuration is self-
discovering, as noted above. The bad news is that not all vendors have
been as smart and some still drag you through those hassles. Some ven-
dors ask you to connect your camera to your PC with a wired Ethernet
cable and then go through a configuration process in a connected fash-
ion first. So read your quick-start guide and see which process applies to
you. Personally, we found the D-Link setup so easy, we feel it’s a great
reason to forego other options just to avoid all those hassles.
5. Select the check box next to your device, and then click Link to
Selected Device(s).
The software automatically launches a browser showing the images
being captured live by your camera. Wow, it’s that simple to set up!
273
Chapter 14: Wirelessly Securing, Monitoring, and Automating Your Home
21_595830_ch14.qxd 8/26/05 7:59 PM Page 273