how to cheat at securing a wireless network phần 3 pptx
Bạn đang xem bản rút gọn của tài liệu. Xem và tải ngay bản đầy đủ của tài liệu tại đây (1.32 MB, 47 trang )
Figure 2.78 Creating the WPA Connection to the Access Point
Figure 2.79 The WPA Connection Is Made
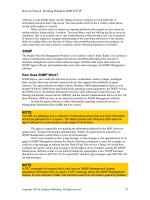
At this point, you are running in a debug mode to ensure that everything is cor-
rect. Kill this connection with the ctrl + c command. Rerun the same command
with the –B option instead of –d to run wpa_supplicant in daemon mode, which will
show you no debug output and allows you to run additional commands from the
www.syngress.com
70 Chapter 2 • Wireless Security
command prompt (see Figure 2.80).You will need to set a static IP for the network
you are connected to using the ifconfig command, or issue the dhcpcd or dhclient com-
mands on the wlan0 interface to get a DHCP address and make the connection.
Figure 2.80 Daemon Mode and Obtaining an IP Address
Notes from the Underground…
Enabling Security Features on the Xbox
Many Xbox owners like to take advantage of the Xbox Live feature. Xbox Live
allows gamers to connect their Xboxes to the Internet and play selected games
against online opponents. Since the Xbox is often connected to a TV that isn’t
necessarily in the same room with most of the household computer equipment,
wireless networking is a natural choice for this connection.
Several available wireless bridges (such as the Linksys WET 11 Wireless
Ethernet Bridge) will connect the Xbox to a home network. These devices must
be configured to use the wireless network’s security features.
First, log in to the WET 11. By default, the WET 11 is configured to use the
IP address 192.168.1.251 (see Figure 2.81).
www.syngress.com
Wireless Security • Chapter 2 71
Continued
Figure 2.81 The Linksys WET 11 Initial Setup Screen
Enter the SSID for your wireless network in the SSID text box, and then
select the Enable radio button next to WEP (see Figure 2.82).
Click the WEP Settings button to open the Shared Keys window (see Figure
2.83). Select 128 bit 26 hex digits from the drop-down box, and then enter the
WEP keys that your wireless network uses. The WEP keys can be entered in either
of two ways:
■
Generate the keys using the same passphrase used to generate the
keys on your access point.
■
Manually enter the WEP keys that your access point uses.
Next, click the Apply button on the Shared Keys window and the initial
setup screen to save your settings. Finally, add the MAC address of your WET 11
to your allowed MAC address list on your access point.
www.syngress.com
72 Chapter 2 • Wireless Security
Continued
Figure 2.82 Set the SSID and Enable WEP
Figure 2.83 Enter the WEP Keys
www.syngress.com
Wireless Security • Chapter 2 73
Understanding and Configuring
802.1X RADIUS Authentication
To provide better security for wireless LANs and in particular to improve the secu-
rity of WEP, a number of existing technologies used on wired networks were
adapted for this purpose, including:
■
Remote Authentication and Dial-In User Service (RADIUS)
Provides for centralized authentication and accounting.
■
802.1X Provides a method of port-based authentication to local area net-
work (LAN) ports in a switched network environment.
These two services are used in combination with other security mechanisms,
such as those provided by the Extensible Authentication Protocol (EAP), to further
enhance the protection of wireless networks. Like MAC filtering, 802.1X is imple-
mented at Layer 2 of the Open System Interconnection (OSI) model: It will prevent
communication on the network using higher layers of the OSI model if authentica-
tion fails at the MAC layer. However, unlike MAC filtering, 802.1X is very secure,
since it relies on mechanisms that are much harder to compromise than MAC
address filters, which can be easily compromised through spoofed MAC addresses.
Although a number of vendors implement their own RADIUS servers, security
mechanisms, and protocols for securing networks through 802.1X, such as Cisco’s
LEAP and Funk Software’s EAP-TTLS, this section focuses on implementing
802.1X on a Microsoft network using Internet Authentication Services (IAS) and
Microsoft’s Certificate Services. Keep in mind, however, that wireless security stan-
dards are a moving target, and standards other than those discussed here, such as the
PEAP, are being developed and might be available by the time this book is published
or in the near future.
Microsoft RADIUS Servers
Microsoft’s IAS provides a standards-based RADIUS server and can be installed as an
optional component on Microsoft Windows 2000 and Net servers. Originally
designed to provide a means to centralize the authentication, authorization, and
accounting for dial-in users, RADIUS servers are now used to provide these services
for other types of network access, including virtual private networks (VPNs), port-
based authentication on switches, and, it’s important to note, wireless network access.
IAS can be deployed within Active Directory to use the Active Directory database to
centrally manage the login process for users connecting over a variety of network
www.syngress.com
74 Chapter 2 • Wireless Security
types. Moreover, multiple RADIUS servers can be installed and configured so that
secondary RADIUS servers will automatically be used in case the primary RADIUS
server fails, thus providing fault tolerance for the RADIUS infrastructure. Although
RADIUS is not required to support the 802.1X standard, it is a preferred method
for providing the authentication and authorization of users and devices attempting
to connect to devices that use 802.1X for access control.
The 802.1X Standard
The 802.1X standard was developed to provide a means of restricting port-based
Ethernet network access to valid users and devices. When a computer attempts to
connect to a port on a network device, such as switch, it must be successfully
authenticated before it can communicate on the network using the port. In other
words, communication on the network is impossible without an initial successful
authentication.
802.1X Authentication Ports
Two types of ports are defined for 802.1X authentication: authenticator or suppli-
cant.The supplicant is the port requesting network access.The authenticator is the port
that allows or denies access for network access. However, the authenticator does not
perform the actual authentication of the supplicant requesting access.The authenti-
cation of the supplicant is performed by a separate authentication service, located on
a separate server or built into the device itself, on behalf of the authenticator. If the
authenticating server successfully authenticates the supplicant, it will communicate
the fact to the authenticator, which will subsequently allow access.
An 802.1X-compliant device has two logical ports associated with the physical
port: an uncontrolled port and a controlled port. Because the supplicant must ini-
tially communicate with the authenticator to make an authentication request, an
802.1X-compliant device will make use of a logical uncontrolled port over which this
request can be made. Using the uncontrolled port, the authenticator will forward the
authentication request to the authentication service. If the request is successful, the
authenticator will allow communication on the LAN via the logical controlled port.
The Extensible Authentication Protocol (EAP)
EAP is used to pass authentication requests between the supplicant and a RADIUS
server via the authenticator. EAP provides a way to use different authentication types
in addition to the standard authentication mechanisms provided by the Point-to-
Point Protocol (PPP). Using EAP, stronger authentication types can be implemented
www.syngress.com
Wireless Security • Chapter 2 75
within PPP, such as those that use public keys in conjunction with smart cards. In
Windows, there is support for two EAP types:
■
EAP MD-5 CHAP This allows for authentication based on a user-
name/password combination. A number of disadvantages are associated
with using EAP MD-5 CHAP. First, even though it uses one-way hashes in
combination with a challenge/response mechanism, critical information is
still sent in the clear, making it vulnerable to compromise. Second, it does
not provide mutual authentication between the client and the server; the
server merely authenticates the client.Third, it does not provide a mecha-
nism for establishing a secure channel between the client and the server.
■
EAP-TLS This is a security mechanism based on X.509 digital certificates
that is more secure than EAP MD-5 CHAP.The certificates can be stored
in the Registry or on devices such as smart cards. When EAP-TLS authen-
tication is used, both the client and the server validate one another by
exchanging X.509 certificates as part of the authentication process.
Additionally, EAP-TLS provides a secure mechanism for the exchange of
keys to establish an encrypted channel. Although the use of EAP-TLS is
more difficult to configure in that it requires the implementation of a
public key infrastructure (PKI)—not a trivial undertaking—EAP-TLS is
recommended for wireless 802.1X authentication.
In a paper published in February 2002 by William A.Arbaugh and Arunesh
Mishra, An Initial Security Analysis of the IEEE 802.1x Standard, the authors discuss
how one-way authentication and other weaknesses made 802.1X vulnerable to man-
in-the-middle and session-hijacking attacks.Therefore, although it might be possible
to use EAP MD-5 CHAP for 802.1X wireless authentication on Windows XP (pre
SP1), it is not recommended. EAP-TLS protects against the types of attacks
described by this paper.
The 802.1X Authentication Process
For 802.1X authentication to work on a wireless network, the AP must be able to
securely identify traffic from a particular wireless client.This identification is accom-
plished using authentication keys that are sent to the AP and the wireless client from
the RADIUS server. When a wireless client (802.1X supplicant) comes within range
of the AP (802.1X authenticator), the following simplified process occurs:
1. The AP point issues a challenge to the wireless client.
2. The wireless client responds with its identity.
www.syngress.com
76 Chapter 2 • Wireless Security
3. The AP forwards the identity to the RADIUS server using the uncon-
trolled port.
4. The RADIUS server sends a request to the wireless station via the AP,
specifying the authentication mechanism to be used (for example, EAP-
TLS).
5. The wireless station responds to the RADIUS server with its credentials via
the AP.
6. The RADIUS server sends an encrypted authentication key to the AP if
the credentials are acceptable.
7. The AP generates a multicast/global authentication key encrypted with a
per-station unicast session key and transmits it to the wireless station.
Figure 2.84 shows a simplified version of the 802.1X authentication process
using EAP-TLS.
Figure 2.84 The 802.1X Authentication Process Using EAP-TLS
When the authentication process successfully completes, the wireless station is
allowed access to the controlled port of the AP and communication on the network
can occur. Note that much of the security negotiation in the preceding steps occurs
on the 802.1X uncontrolled port, which is only used so that the AP can forward
traffic associated with the security negotiation between the client and the RADIUS
www.syngress.com
Wireless Security • Chapter 2 77
server. EAP-TLS is required for the process to take place. EAP-TLS, unlike EAP
MD-5 CHAP, provides a mechanism to allow the secure transmission of the authen-
tication keys from the RADIUS server to the client.
Advantages of EAP-TLS
There are a number of significant advantages to using EAP-TLS authentication in
conjunction with 802.1X:
■
The use of X.509 digital certificates for authentication and key exchange is
very secure.
■
EAP-TLS provides a means to generate and use dynamic one-time-per-
user, session-based WEP keys on the wireless network.
■
Neither the user nor the administrator knows the WEP keys that are in use.
For these reasons, using EAP-TLS for 802.1X authentication removes much of
the vulnerability associated with using WEP and provides a high degree of assurance.
In the following section, we will look at how to configure 802.1X using EAP-
TLS authentication on a Microsoft-based wireless network. If you are using other
operating systems and software, the same general principles will apply. However, you
might have additional configuration steps to perform, such as the installation of
802.1X supplicant software on the client. Windows XP provides this software within
the operating system.
Configuring 802.1X Using
EAP-TLS on a Microsoft Network
Before you can configure 802.1X authentication on a wireless network, you must
satisfy a number of prerequisites. At a minimum, you need the following:
■
An AP that supports 802.1X authentication You probably won’t find
these devices at your local computer hardware store.They are designed for
enterprise-class wireless network infrastructures and are typically higher
priced. Note that some devices will allow the use of IPSec between the AP
and the wired network.
■
Client software and hardware that supports 802.1X and EAP-TLS
authentication and the use of dynamic WEP keys Fortunately, just
about any wireless adapter that allows the use of the Windows XP wireless
interface will work. However, older wireless network adapters that use their
own client software might not work.
www.syngress.com
78 Chapter 2 • Wireless Security
■
IAS installed on a Windows 2000 server This provides a primary
RADIUS server and, optionally, is installed on other servers to provide sec-
ondary RADIUS servers for fault tolerance.
■
Active Directory
■
A PKI using a Microsoft stand-alone or Enterprise Certificate
server to support the use of X.509 digital certificates for EAP-TLS
More certificate servers can be deployed in the PKI for additional security.
An Enterprise Certificate server can ease the burden of certificate deploy-
ment to clients and the RADIUS server through auto-enrollment of client
computers that are members of the Windows 2000 domain.
■
The most recent service packs and patches installed on the
Windows 2000 servers and Windows XP wireless clients
After you configure a PKI and install IAS on your Windows 2000 network,
there are four general steps to configure 802.1X authentication on your wireless
network:
1. Install X.509 digital certificates on the wireless client and IAS servers.
2. Configure IAS logging and policies for 802.1X authentication.
3. Configure the wireless AP for 802.1X authentication.
4. Configure the properties of the client wireless network interface for
dynamic WEP key exchange.
Configuring Certificate Services and Installing
Certificates on the IAS Server and Wireless Client
After you deploy Active Directory, the first step in implementing 802.1X is to
deploy the PKI and install the appropriate X.509 certificates.You will have to install
(at a minimum) a single certificate server, either a standalone or enterprise certificate
server, to issue certificates. What distinguishes a standalone from an enterprise certifi-
cate server is whether it will depend on, and be integrated with, Active Directory. A
standalone CA does not require Active Directory.This certificate server can be a root
CA or a subordinate CA, which ultimately receives its authorization to issue certifi-
cates from a root CA higher in the hierarchy, either directly or indirectly through
intermediate CAs, according to a certification path.
The root CA can be a public or commercially available CA that issues an autho-
rization to a subordinate CA, or it can be one deployed on the Windows 2000
www.syngress.com
Wireless Security • Chapter 2 79
network. In enterprise networks that require a high degree of security, it is not recom-
mended that you use the root CA to issue client certificates; for this purpose, you
should use a subordinate CA authorized by the root CA. In very high-security envi-
ronments, you should use intermediate CAs to authorize the CA that issues client cer-
tificates. Furthermore, you should secure the hardware and software of the root and
intermediate CAs as much as possible, take them offline, and place them in a secure
location.You would then bring the root and intermediate CAs online only when you
need to perform tasks related to the management of your PKI.
In deploying your PKI, keep in mind that client workstations and the IAS
servers need to be able to consult a certificate revocation list (CRL) to verify and vali-
date certificates, especially certificates that have become compromised before their
expiration date and have been added to a CRL. If a CRL is not available, authoriza-
tion will fail. Consequently, a primary design consideration for your PKI is to ensure
that the CRLs are highly available. Normally, the CRL is stored on the CA; how-
ever, additional distribution points for the CRL can be created to ensure a high
degree of availability.The CA maintains a list of these locations and distributes the
list in a field of the client certificate.
NOTE
It is beyond the scope of this chapter to discuss the implementation
details of a PKI. For more information, please see the various documents
available on the Microsoft Web site, in particular at
www.microsoft.com/windows2000/technologies/security/default.asp,
www.microsoft.com/windows2000/techinfo/howitworks/security/pki-
intro.asp, and www.microsoft.com/windows2000/techinfo/
planning/security/pki.asp.
Whether you decide to implement a stand-alone or an enterprise CA to issue
certificates, you will need to issue three certificates: for both the computer and the
user account on the wireless client as well as the RADIUS server. A certificate is
required in all these places because mutual authentication has to take place.The
computer certificate provides initial access of the computer to the network, and the
user certificate provides wireless access after the user logs in.The RADIUS server
will authenticate the client based on the wireless client’s computer and user certifi-
cates, and the wireless client will authenticate the RADIUS server based on the
server’s certificate.
www.syngress.com
80 Chapter 2 • Wireless Security
The certificates on the wireless client and the RADIUS server do not have to
be issued by the same CA. However, both the client and the server have to trust
each other’s certificates. Within each certificate is information about the certificate
path leading up to the root CA. If both the wireless client and the RADIUS
server trust the root CA in each other’s certificates, mutual authentication can suc-
cessfully take place. If you are using a standalone CA that is not in the list of
Trusted Root Certification Authorities, you will have to add it to the list.You can
do this through a Group Policy Object, or you can do it manually. For information
on how to add CAs to the Trusted Root Certification Authorities container, please
see Windows 2000 and Windows XP help files.The container listing these trusted
root certificates can be viewed in the Certificates snap-in of the MMC console, as
shown in Figure 2.85.
Figure 2.85 Certificate Snap-In Showing Trusted Root Certification
Authorities
Using an enterprise CA will simplify many of the certificate-related tasks that
you have to perform. An enterprise CA is automatically listed in the Trusted Root
Certification Authorities container. Furthermore, you can use auto-enrollment to
issue computer certificates to the wireless client and the IAS server without any
intervention on the part of the user. Using an enterprise CA and configuring auto-
enrollment of computer certificates should be considered a best practice.
www.syngress.com
Wireless Security • Chapter 2 81
If you put an enterprise CA into place, you will have to configure an Active
Directory Group Policy to issue computer certificates automatically.You should use
the Default Domain Policy for the domain in which your CA is located.To con-
figure the Group Policy for auto-enrollment of computer certificates, do the fol-
lowing:
1. Access the Properties of the Group Policy object for the domain to which
the enterprise CA belongs using Active Directory Users and
Computers, and click Edit.
2. Navigate to Computer Settings | Windows Settings | Security
Settings | Public Key Policies | Automatic Certificate Request
Settings.
3. Right-click the Automatic Certificate Request Settings, click New,
and then click Automatic Certificate Request, as shown in Figure 2.86.
Figure 2.86 Configuring a Domain Group Policy for Auto-Enrollment of
Computer Certificates
4. Click Next when the wizard appears. Click Computer in the Certificate
Templates, as shown in Figure 2.87, and then click Next.
www.syngress.com
82 Chapter 2 • Wireless Security
Figure 2.87 Choosing a Computer Certificate Template for Auto-Enrollment
5. Click the enterprise CA, click Next, and then click Finish.
After you have configured a Group Policy for auto-enrollment of computer cer-
tificates, you can force a refresh of the Group Policy so that it will take effect imme-
diately, rather than waiting for the next polling interval for Group Policy Changes,
which could take as long as 90 minutes.To force Group Policy to take effect imme-
diately on a Windows XP computer, type the command gpupdate /target:
computer.
NOTE
On a Windows 2000 client, Group Policy update is forced using the
secedit/refreshpolicy command.
Once you have forced a refresh of Group Policy, you can confirm whether the
computer certificate is successfully installed.To confirm the installation of the com-
puter certificate:
1. Type the command mmc and click OK from Start | Run.
2. Click File in the MMC console menu, and then click Add/Remove
Snap-in.
www.syngress.com
Wireless Security • Chapter 2 83
3. Click Add in the Add/Remove Snap-in dialog box.Then select
Certificates from the list of snap-ins and click Add.You will be prompted
to choose which certificate store the snap-in will be used to manage.
4. Select computer account when prompted about what certificate the
snap-in will be used to manage, and then click Next.You will then be
prompted to select the computer the snap-in will manage.
5. Select Local computer (the computer this console is running on)
and click Finish.Then click Close and click OK to close the remaining
dialog boxes.
6. Navigate to the Console Root | Certificates (Local Computer) |
Personal | Certificates container.The certificate should be installed
there.
The next step is to install a user certificate on the client workstation and then
map the certificate to a user account.There are a number of ways to install a user
certificate: through Web enrollment, by requesting the certificate using the
Certificates snap-in, by using a CAPICOM script (which can be executed as a login
script to facilitate deployment), or by importing a certificate file.
The following steps demonstrate how to request the certificate using the
Certificates snap-in:
1. Open an MMC console for Certificates–Current User. (To load this
snap-in, follow the steps in the preceding procedure; however, at Step 5,
select My user account.)
2. Navigate to Certificates | Personal and click the container with the
alternate mouse button. Highlight All Tasks and then click Request New
Certificate, as shown in Figure 2.88.The Certificate Request Wizard
appears.
3. Click Next on the Certificate Request Wizard welcome page.
4. Select User and click Next on the Certificate Types, as shown in Figure
2.89.You can also select the Advanced check box. Doing so will allow you
to select from a number of different cryptographic service providers
(CSPs), to choose a key length, to mark the private key as exportable (the
option might not be available for selection), and to enable strong private
key protection.The latter option will cause you to be prompted for a pass-
word every time the private key is accessed.
www.syngress.com
84 Chapter 2 • Wireless Security
Figure 2.88 Requesting a User Certificate
Figure 2.89 Choosing a Certificate Type
5. Type in a friendly name of your choosing and a description, and then click
Next.
6. Review your settings and click Finish.
www.syngress.com
Wireless Security • Chapter 2 85
You now should have a user certificate stored on the computer used for wireless
access. However, this user certificate will not be usable for 802.1X authentication
unless it is mapped to a user account in Active Directory. By default, the certificate
should be mapped to the user account.You can verify whether it has been mapped
by viewing the Properties of the user account in Active Directory Users and
Computers.The certificates that are mapped to the user account can be viewed in
the Published Certificates tab of the Properties of the user account object.
After you configure certificate services and install computer and user certificates
on the wireless client and a computer certificate on the RADIUS server, you must
configure the RADIUS server for 802.1X authentication.
Configuring IAS Server for 802.1X Authentication
If you have configured RRAS for dial-in or VPN access, you will be comfortable
with the IAS Server interface. It uses the same interfaces as RRAS for configuring
dial-in conditions and policies.You can use IAS to centralize dial-in access policies
for your entire network, rather than have dial-in access policies defined on each
RRAS server. A primary advantage of doing this is easier administration and central-
ized logging of dial-in access.
Installing an IAS server also provides a standards-based RADIUS server that is
required for 802.1X authentication.As with configuring RRAS, you will need to
add and configure a Remote Access Policy to grant access. A Remote Access Policy
grants or denies access to remote users and devices based on matching conditions
and a profile. For access to be granted, the conditions you define have to match. For
example, the dial-in user might have to belong to the appropriate group or connect
during an allowable period.The profile in the Remote Access Policy defines such
things as the authentication type and the encryption type used for the remote access.
If the remote client is not capable of using the authentication methods and encryp-
tion strength defined in the profile, access is denied.
For 802.1X authentication, you will have to configure a Remote Access Policy
that contains conditions specific to 802.1X wireless authentication and a Profile that
requires the use of the Extensible Authentication Protocol (EAP) and strong encryp-
tion. After configuring the Remote Access Policy, you will have to configure the IAS
server to act as a RADIUS server for the wireless AP, which is the RADIUS client.
Before installing and configuring the IAS server on your Windows 2000 or
.NET/2003 network, you should consider whether you are installing it on a domain
controller or member server (in the same or in a different domain). If you install it
on a domain controller, the IAS server will be able to read the account properties in
Active Directory. However, if you install IAS on a member server, you will have to
www.syngress.com
86 Chapter 2 • Wireless Security
perform an additional step to register the IAS server, which will give it access to
Active Directory accounts.
There are a number of ways you can register the IAS server:
■
The IAS snap-in
■
The Active Directory Users and Computers admin tool
■
The netsh command
NOTE
Perhaps the simplest way to register the IAS server is through the netsh
command. To do this, log on to the IAS server, open a command
prompt, and type the command netsh ras add registeredserver. If the
IAS server is in a different domain, you will have to add arguments to
this command. For more information on registering IAS servers, see
Windows Help.
Once you have installed and, if necessary, registered the IAS server(s), you can
configure the Remote Access Policy. Before configuring a Remote Access Policy,
make sure that you apply the latest service pack and confirm that the IAS server has
an X.509 computer certificate. In addition, you should create an Active Directory
Global or Universal Group that contains your wireless users as members.
The Remote Access Policy will need to contain a condition for NAS-Port-Type
that contains values for Wireless-Other and Wireless-IEEE802.11 (these two
values are used as logical OR for this condition) and a condition for Windows-
Groups=[the group created for wireless users]. Both conditions have to match (log-
ical AND) for access to be granted by the policy.
The Profile of the Remote Access Policy will need to be configured to use the
Extensible Authentication Protocol and the Smart Card or Other Certificate EAP
type. Encryption in the Profile should be configured to force the strongest level of
encryption, if supported by the AP. Depending on the AP you are using, you might
have to configure vendor-specific attributes (VSA) in the Advanced tab of the
Profile. If you have to configure a VSA, you will need to contact the vendor of the
AP to find out the value that should be used, if you can’t find it in the
documentation.
www.syngress.com
Wireless Security • Chapter 2 87
To configure the conditions for a Remote Access Policy on the IAS server:
1. Select Internet Authentication Services and open the IAS console from
Start | Programs | Administrative Tools.
2. Right-click Remote Access Policies, and from the subsequent context
menu, click New Remote Access Policy.
3. Enter a friendly name for the policy and click Next.
4. Click Add in the Add Remote Access Policy Conditions dialog box.
Then select NAS-Port-Type in the Select Attribute dialog box and
click Add, as shown in Figure 2.90.
Figure 2.90 Adding a NAS-Port-Type Condition to Remote Access Policy
5. Select Wireless-IEEE 802.11 and Wireless–Other from the left-hand
window in the NAS-Port-Type dialog box, and click Add>> to move
them to the Selected Types window, as shown in Figure 2.91. Click OK.
6. Add a condition for Windows-Groups that contains the group you cre-
ated for wireless users after configuring the NAS-Port-Type conditions.
Then click Next.
7. Click the radio button to Grant remote access permission if user
matches conditions in the subsequent Permissions page for the new
policy.The next step is to configure the Profile to support EAP-TLS and
force the strongest level of encryption (128 bit).
www.syngress.com
88 Chapter 2 • Wireless Security
Figure 2.91 Adding Wireless NAS-Port-Type Conditions
8. Click Edit Profile and click the Authentication tab.
9. Confirm that the check box for Extensible Authentication Protocol is
selected and that Smart Card or Other Certificate is listed as the EAP
type in the drop-down box. Clear all the other check boxes and click
Configure.
10. Select the computer certificate you installed for use by the IAS server, and
click OK.The resulting Authentication tab should look like the one in
Figure 2.92.
Figure 2.92 Configuring the Dial-In Profile for 802.1X Authentication
Wireless Security • Chapter 2 89
www.syngress.com
11. Force the strongest level of encryption by clicking the Encryption tab and
then clearing all the check boxes except the one for Strongest.
12. Save the policy by clicking OK and then Finish. Make sure that the policy
you created is higher in the list than the default Remote Access Policy.
You can delete the default policy if you like. Finally, you need to configure
the IAS server for RADIUS authentication.To do this, you need to add a
configuration for the RADIUS client—in this case, the AP—to the IAS
server:
13. Right-click the Clients folder in the IAS console, and click New Client
from the context menu.
14. Supply a friendly name for the configuration and click Next.The screen
shown in Figure 2.93 appears.
Figure 2.93 Adding a RADIUS Client
15. Configure the screen with the Client address (IP or DNS) of the wire-
less AP, and click the check box indicating that the Client must always
send the signature attribute in the request. For the Shared secret,
add an alphanumeric password that is at least 22 characters long for higher
security.
16. Click Finish.
www.syngress.com
90 Chapter 2 • Wireless Security
You can change the port numbers for RADIUS accounting and authentication
by obtaining the properties of the Internet Authentication Service container in the
IAS console.You can also use these property pages to log successful and unsuccessful
authentication attempts and to register the server in Active Directory.
After installing certificates on the wireless client and IAS server and configuring
the IAS server for 802.1X authentication, you will need to configure the AP and the
wireless client.The following section shows the typical steps to complete the config-
uration of your wireless network for 802.1X authentication.
Configuring an Access
Point for 802.1X Authentication
Generally, only enterprise-class APs support 802.1X authentication; this is not a fea-
ture found in devices intended for the SOHO market. Enterprise-class APs are not
likely to be found in your local computer store. If you want an AP that supports
802.1X, you should consult the wireless vendors’ Web sites for information on the
features supported by the APs they manufacture. Vendors that manufacture 802.1X-
capable devices include 3Com, Agere, Cisco, and others.The price for devices that
support 802.1X authentication usually start at $500 (USD) and can cost considerably
more, depending on the vendor and the other features supported by the AP. If you
already own an enterprise-class AP, such as an ORiNOCO Access Point 500 or
Access Point 1000, 802.1X authentication might not be supported in the original
firmware but can be added through a firmware update.
Regardless of the device you purchase, an 802.1X-capable AP will be configured
similarly.This section describes the typical configuration of 802.1X authentication
on an ORiNOCO Access Point 500 with the most recent firmware update applied
to it.
NOTE
For more information about the ORiNOCO device, see www.
orinocowireless.com.
The configuration of the AP is straightforward and simple (see Figure 2.94).You
will need to configure the following:
■
An encryption key length This can be either 64 or 128 bits (or higher
if your hardware and software support longer lengths).
www.syngress.com
Wireless Security • Chapter 2 91
■
An encryption key lifetime When you implement 802.1X using EAP-
TLS, WEP encryption keys are dynamically generated at intervals you
specify. For higher-security environments, the encryption key lifetime
should be set to 10 minutes or less.
■
An authorization lifetime This is the interval at which the client and
server will reauthenticate with one another.This interval should be longer
than the interval for the encryption key lifetime but still relatively short in
a high-security environment.A primary advantage here is that if a device is
stolen, the certificates it uses can be immediately revoked.The next time it
tries to authenticate, the CRL will be checked and authentication will fail.
■
An authorization password This is the shared-secret password you con-
figured for RADIUS client authentication on the IAS server.This password
is used to establish communication between the AP and the RADIUS
server.Thus, it needs to be protected by being long and complex.This pass-
word should be at least 22 characters long and use mixed case, numbers,
letters, and other characters.You might want to consider using a random
string generation program to create this password for you.
■
An IP address of a primary and, if configured for fault tolerance,
a secondary RADIUS server If the AP is in a DMZ and the RADIUS
server is behind a firewall, this IP address can be the external IP address of
the firewall.
■
A UDP port used for RADIUS authentication The default port for
RADIUS is port 1645. However, you can change this port on the IAS
server and the AP for an additional degree of security.
Depending on your AP, you might have to go through additional configuration
steps. For example, you might have to enable the use of dynamic WEP keys. On the
AP 500, this configuration is automatically applied to the AP when you finish con-
figuring the 802.1X settings. Consult your AP’s documentation for specific informa-
tion on configuring it for 802.1X authentication.
www.syngress.com
92 Chapter 2 • Wireless Security
Figure 2.94 Configuring an ORiNOCO AP 500 for 802.1X Authentication
Configuring the Wireless Interface
on Windows XP for 802.1X Authentication
If you have been following the preceding steps in the same order for configuring
802.1X authentication, the final step is to configure the properties of the wireless
interface in Windows XP.You will have to ensure that the properties for EAP-TLS
authentication and dynamic WEP are configured.To do this, perform the following
steps:
1. Obtain the Properties of the wireless interface and click the
Authentication tab.
2. Ensure that the check box for Enable access control for IEEE 802.1X
is checked and that Smart Card or other Certificate is selected as the
EAP type, as shown in Figure 2.95.
www.syngress.com
Wireless Security • Chapter 2 93
Figure 2.95 Authentication Properties for Wireless Client
3. Click Properties to view the Smart Card or other Certificate
Properties window. Ensure that the check box for Validate server cer-
tificate is checked, as shown in Figure 2.96.
Figure 2.96 Configure Smart Card or Other Certificate Properties
www.syngress.com
94 Chapter 2 • Wireless Security