RedHat inc red hat 6 2 getting started guide jan 2000 ISBN 1585690767 pdf
Bạn đang xem bản rút gọn của tài liệu. Xem và tải ngay bản đầy đủ của tài liệu tại đây (3.25 MB, 362 trang )
Red Hat Linux 6.2
The Official Red Hat Linux Getting Started
Guide
ISBN: 1-58569-076-7
Red Hat, Inc.
2600 Meridian Parkway Durham NC 27709 US 919-547-0012 1-888-733-4281 919-547-0024
13588 Research Triangle Park NC 27713
© 2000 Red Hat, Inc.
GSG(EN)-6.2-Print-RHI (02/00)
Red Hat is a registered trademark and the Red Hat Shadow Man logo, RPM, the RPM logo, and Glint
are trademarks of Red Hat, Inc.
Linux is a registered trademark of Linus Torvalds.
Motif and UNIX are registered trademarks of The Open Group.
Alpha is a trademark of Digital Equipment Corporation.
SPARC is a registered trademark of SPARC International, Inc. Products bearing the SPARC trademark
are based on an architecture developed by Sun Microsystems, Inc.
Netscape is a registered trademark of Netscape Communications Corporation in the United States and
other countries.
TrueType is a registered trademark of Apple Computer, Inc.
Windows is a registered trademark of Microsoft Corporation.
All other trademarks and copyrights referred to are the property of their respective owners.
Copyright © 2000 by Red Hat, Inc. This material may be distributed only subject to the terms and conditions set forth in the Open Publication License, V0.4 or later (the latest version is presently available
at />Distribution of substantively modified versions of this document is prohibited without the explicit permission of the copyright holder.
Distribution of the work or derivative of the work in any standard (paper) book form for commercial
purposes is prohibited unless prior permission is obtained from the copyright holder.
Printed in Canada, Ireland, and Japan
ii
Contents
Red Hat Linux 6.2
Introduction . .. ... ... .. ... .. ... ... .. ... ... .. ... .. ... ... .. ... .. ... ... .. ... ... .. ... .. ... ... .. ... .
Who Should Read This Book?. ... ... .. ... .. ... ... .. ... .. ... ... .. ... ... .. ... .. ... ... .. ... .
A Peek Inside .. ... .. ... .. ... ... .. ... ... .. ... .. ... ... .. ... .. ... ... .. ... ... .. ... .. ... ... .. ... .
A Note About Environments .. ... ... .. ... .. ... ... .. ... .. ... ... .. ... ... .. ... .. ... ... .. ... .
Work With Your User Account . ... ... .. ... .. ... ... .. ... .. ... ... .. ... ... .. ... .. ... ... .. ... .
Where to Find More Info... ... .. ... ... .. ... .. ... ... .. ... .. ... ... .. ... ... .. ... .. ... ... .. ... .
More to Come . ... .. ... .. ... ... .. ... ... .. ... .. ... ... .. ... .. ... ... .. ... ... .. ... .. ... ... .. ... .
Sign Up for Support. .. .. ... ... .. ... ... .. ... .. ... ... .. ... .. ... ... .. ... ... .. ... .. ... ... .. ... .
ix
ix
xi
xi
xiii
xiv
xv
xv
Part I The Basics ... .. ... ... .. ... ... .. ... .. ... ... .. ... .. ... ... .. ... ... .. ... .. ... ... .. ... .
17
Chapter 1
1.1
Chapter 2
2.1
2.2
2.3
2.4
2.5
2.6
2.7
2.8
Chapter 3
3.1
3.2
3.3
3.4
Getting Started .. .. ... .. ... ... .. ... .. ... ... .. ... ... .. ... .. ... ... .. ... . 19
Log In, Please.. ... ... .. ... ... .. ... .. ... ... .. ... .. ... ... .. ... ... .. ... .. ... ... .. ... . 19
GNOME in 60 Seconds (or so) . .. .. ... ... .. ... .. ... ... .. ... .
An Overview . .. ... ... .. ... ... .. ... .. ... ... .. ... .. ... ... .. ... ... .. ... .. ... ... .. ... .
The Desktop . .. ... ... .. ... ... .. ... .. ... ... .. ... .. ... ... .. ... ... .. ... .. ... ... .. ... .
Folders... .. ... .. ... ... .. ... ... .. ... .. ... ... .. ... .. ... ... .. ... ... .. ... .. ... ... .. ... .
The Panel .. ... .. ... ... .. ... ... .. ... .. ... ... .. ... .. ... ... .. ... ... .. ... .. ... ... .. ... .
Main Menu Button .... .. ... ... .. ... .. ... ... .. ... .. ... ... .. ... ... .. ... .. ... ... .. ... .
Finding Help.. .. ... ... .. ... ... .. ... .. ... ... .. ... .. ... ... .. ... ... .. ... .. ... ... .. ... .
Multiple Desktops. ... .. ... ... .. ... .. ... ... .. ... .. ... ... .. ... ... .. ... .. ... ... .. ... .
Switching Environments . ... .. ... .. ... ... .. ... .. ... ... .. ... ... .. ... .. ... ... .. ... .
31
31
33
35
37
39
41
42
43
KDE in 60 Seconds (or so) ... ... ... .. ... ... .. ... .. ... ... .. ... .
An Overview . .. ... ... .. ... ... .. ... .. ... ... .. ... .. ... ... .. ... ... .. ... .. ... ... .. ... .
The Desktop . .. ... ... .. ... ... .. ... .. ... ... .. ... .. ... ... .. ... ... .. ... .. ... ... .. ... .
Folders... .. ... .. ... ... .. ... ... .. ... .. ... ... .. ... .. ... ... .. ... ... .. ... .. ... ... .. ... .
The Panel .. ... .. ... ... .. ... ... .. ... .. ... ... .. ... .. ... ... .. ... ... .. ... .. ... ... .. ... .
45
45
49
52
54
iii
3.5
3.6
3.7
3.8
Chapter 4
4.1
4.2
4.3
Chapter 5
5.1
5.2
Chapter 6
6.1
6.2
Chapter 7
7.1
7.2
7.3
7.4
Chapter 8
8.1
8.2
The Main Menu K Icon. ... ... .. ... .. ... ... .. ... .. ... ... .. ... ... .. ... .. ... ... .. ... .
The Taskbar .. .. ... ... .. ... ... .. ... .. ... ... .. ... .. ... ... .. ... ... .. ... .. ... ... .. ... .
Finding Help.. .. ... ... .. ... ... .. ... .. ... ... .. ... .. ... ... .. ... ... .. ... .. ... ... .. ... .
Switching Environments . ... .. ... .. ... ... .. ... .. ... ... .. ... ... .. ... .. ... ... .. ... .
58
59
60
63
Logging Out and Shutting Down. ... ... .. ... .. ... ... .. ... .
Quitting from GNOME. ... ... .. ... .. ... ... .. ... .. ... ... .. ... ... .. ... .. ... ... .. ... .
Quitting from KDE ... .. ... ... .. ... .. ... ... .. ... .. ... ... .. ... ... .. ... .. ... ... .. ... .
Shutting Down at the Shell Prompt .. ... .. ... .. ... ... .. ... ... .. ... .. ... ... .. ... .
65
65
68
69
Setting Up Your Printer .. .. ... .. ... ... .. ... ... .. ... .. ... ... .. ... .
71
Using Printtool .. ... ... .. ... ... .. ... .. ... ... .. ... .. ... ... .. ... ... .. ... .. ... ... .. ... . 72
Printing Utilities in KDE and GNOME .. .. ... .. ... ... .. ... ... .. ... .. ... ... .. ... . 82
Getting Online . ... .. ... .. ... ... .. ... .. ... ... .. ... ... .. ... .. ... ... .. ... . 91
Using RP3 to Connect . ... ... .. ... .. ... ... .. ... .. ... ... .. ... ... .. ... .. ... ... .. ... . 92
Connecting with Kppp . ... ... .. ... .. ... ... .. ... .. ... ... .. ... ... .. ... .. ... ... .. ... . 108
The Web, E-Mail and News in GNOME and KDE
Using Navigator in GNOME and KDE ... .. ... .. ... ... .. ... ... .. ... .. ... ... .. ... .
E-Mail and News Settings for Messenger . ... .. ... ... .. ... ... .. ... .. ... ... .. ... .
Reading and Composing Mail in Messenger .. ... ... .. ... ... .. ... .. ... ... .. ... .
Using Messenger to Read News . .. ... ... .. ... .. ... ... .. ... ... .. ... .. ... ... .. ... .
Customizing Your Desktop in GNOME and KDE 161
Customizing with the GNOME Control Center .. ... ... .. ... ... .. ... .. ... ... .. ... . 161
Customizing with the KDE Control Center . ... .. ... ... .. ... ... .. ... .. ... ... .. ... . 165
Part II Managing Files and Directories .. .. ... ... .. ... ... .. ... .. ... ... .. ... .
Chapter 9
9.1
129
130
138
147
155
169
File Managers in GNOME and KDE ... .. ... .. ... ... .. ... . 171
The GNOME File Manager . ... .. ... .. ... ... .. ... .. ... ... .. ... ... .. ... .. ... ... .. ... . 171
iv
9.2
The KDE File Manager .. ... ... .. ... .. ... ... .. ... .. ... ... .. ... ... .. ... .. ... ... .. ... . 182
Chapter 10 Using Gnome-RPM and RPM .. ... .. ... ... .. ... .. ... ... .. ... .
10.1
10.2
10.3
10.4
10.5
10.6
The benefits of RPM . .. ... ... .. ... .. ... ... .. ... .. ... ... .. ... ... .. ... .. ... ... .. ... .
Using Gnome-RPM ... .. ... ... .. ... .. ... ... .. ... .. ... ... .. ... ... .. ... .. ... ... .. ... .
Installing New Packages . ... .. ... .. ... ... .. ... .. ... ... .. ... ... .. ... .. ... ... .. ... .
Basic Configuration.. .. ... ... .. ... .. ... ... .. ... .. ... ... .. ... ... .. ... .. ... ... .. ... .
Package Manipulation.... ... .. ... .. ... ... .. ... .. ... ... .. ... ... .. ... .. ... ... .. ... .
RPM from the Shell Prompt ... ... .. ... ... .. ... .. ... ... .. ... ... .. ... .. ... ... .. ... .
191
191
192
195
197
202
206
Chapter 11 Working with Update Agent . ... ... .. ... ... .. ... .. ... ... .. ... .
11.1
11.2
11.3
215
Starting Update Agent .. ... ... .. ... .. ... ... .. ... .. ... ... .. ... ... .. ... .. ... ... .. ... . 215
Configuring Update Agent . ... .. ... .. ... ... .. ... .. ... ... .. ... ... .. ... .. ... ... .. ... . 216
Using Update Agent .. .. ... ... .. ... .. ... ... .. ... .. ... ... .. ... ... .. ... .. ... ... .. ... . 222
Part III The Shell Prompt .. ... ... .. ... .. ... ... .. ... .. ... ... .. ... ... .. ... .. ... ... .. ... .
227
Chapter 12 Shell Prompt Basics. ... ... .. ... .. ... ... .. ... ... .. ... .. ... ... .. ... .
12.1
12.2
12.3
229
Why Use a Shell Prompt? .. .. ... .. ... ... .. ... .. ... ... .. ... ... .. ... .. ... ... .. ... . 229
Pulling Yourself Up by the Boot . .. ... ... .. ... .. ... ... .. ... ... .. ... .. ... ... .. ... . 229
A Good "Man" Is Easy to Find .. .. ... ... .. ... .. ... ... .. ... ... .. ... .. ... ... .. ... . 233
Chapter 13 You Are Here ... ... .. ... .. ... ... .. ... .. ... ... .. ... ... .. ... .. ... ... .. ... .
13.1
13.2
13.3
13.4
13.5
13.6
13.7
13.8
13.9
13.10
Finding Yourself with pwd... .. ... .. ... ... .. ... .. ... ... .. ... ... .. ... .. ... ... .. ... .
Getting from Here to There: cd . .. ... ... .. ... .. ... ... .. ... ... .. ... .. ... ... .. ... .
Looking Around with ls ... ... .. ... .. ... ... .. ... .. ... ... .. ... ... .. ... .. ... ... .. ... .
A Larger Picture of the Filesystem. .. ... .. ... .. ... ... .. ... ... .. ... .. ... ... .. ... .
"Washing" the Window ... ... .. ... .. ... ... .. ... .. ... ... .. ... ... .. ... .. ... ... .. ... .
Using cat .. ... .. ... ... .. ... ... .. ... .. ... ... .. ... .. ... ... .. ... ... .. ... .. ... ... .. ... .
Using Redirection. ... .. ... ... .. ... .. ... ... .. ... .. ... ... .. ... ... .. ... .. ... ... .. ... .
Appending Standard Output.. ... .. ... ... .. ... .. ... ... .. ... ... .. ... .. ... ... .. ... .
Redirecting Standard Input . .. ... .. ... ... .. ... .. ... ... .. ... ... .. ... .. ... ... .. ... .
Pipes .. ... .. ... .. ... ... .. ... ... .. ... .. ... ... .. ... .. ... ... .. ... ... .. ... .. ... ... .. ... .
v
237
237
238
246
254
258
259
261
265
267
268
13.11
13.12
13.12
13.12
13.12
13.13
Stringing Commands Together.. .. ... ... .. ... .. ... ... .. ... ... .. ... .. ... ... .. ... .
Ownership and Permissions.. ... .. ... ... .. ... .. ... ... .. ... ... .. ... .. ... ... .. ... .
Identities . .. ... .. ... ... .. ... ... .. ... .. ... ... .. ... .. ... ... .. ... ... .. ... .. ... ... .. ... .
Permissions .. .. ... ... .. ... ... .. ... .. ... ... .. ... .. ... ... .. ... ... .. ... .. ... ... .. ... .
Actions ... .. ... .. ... ... .. ... ... .. ... .. ... ... .. ... .. ... ... .. ... ... .. ... .. ... ... .. ... .
Fun with Numbers in chmod.. ... .. ... ... .. ... .. ... ... .. ... ... .. ... .. ... ... .. ... .
270
270
276
276
276
279
Chapter 14 Working with Files and Directories ... .. ... .. ... ... .. ... .
Shell Collecting ... ... .. ... ... .. ... .. ... ... .. ... .. ... ... .. ... ... .. ... .. ... ... .. ... .
Locating Files and Directories... .. ... ... .. ... .. ... ... .. ... ... .. ... .. ... ... .. ... .
Command History and Tab Completion .. ... .. ... ... .. ... ... .. ... .. ... ... .. ... .
Identifying and Working with File Types .. ... .. ... ... .. ... ... .. ... .. ... ... .. ... .
Copying, Moving and Renaming Files and Directories . ... .. ... .. ... ... .. ... .
283
283
285
287
290
297
Part IV Q & A. . ... ... .. ... .. ... ... .. ... ... .. ... .. ... ... .. ... .. ... ... .. ... ... .. ... .. ... ... .. ... .
303
Chapter 15 Q & A: Quick Answers to Common Questions . .
305
305
305
308
309
310
311
313
315
316
317
318
318
319
321
325
326
14.1
14.2
14.3
14.4
14.5
15.1
15.2
15.3
15.4
15.5
15.6
15.7
15.8
15.9
15.10
15.11
15.12
15.13
15.14
15.15
15.16
Your First Login ... ... .. ... ... .. ... .. ... ... .. ... .. ... ... .. ... ... .. ... .. ... ... .. ... .
Using a Diskette .. ... .. ... ... .. ... .. ... ... .. ... .. ... ... .. ... ... .. ... .. ... ... .. ... .
Switching Environments . ... .. ... .. ... ... .. ... .. ... ... .. ... ... .. ... .. ... ... .. ... .
Shutting Down . ... ... .. ... ... .. ... .. ... ... .. ... .. ... ... .. ... ... .. ... .. ... ... .. ... .
Error Message While Installing an RPM . ... .. ... ... .. ... ... .. ... .. ... ... .. ... .
Starting Applications .. ... ... .. ... .. ... ... .. ... .. ... ... .. ... ... .. ... .. ... ... .. ... .
Accessing a Windows Partition . .. ... ... .. ... .. ... ... .. ... ... .. ... .. ... ... .. ... .
Find Some Commands Fast.. ... .. ... ... .. ... .. ... ... .. ... ... .. ... .. ... ... .. ... .
Keep ls Output from Scrolling ... .. ... ... .. ... .. ... ... .. ... ... .. ... .. ... ... .. ... .
Tips on Using Command History . ... ... .. ... .. ... ... .. ... ... .. ... .. ... ... .. ... .
Unable to Log In .. ... .. ... ... .. ... .. ... ... .. ... .. ... ... .. ... ... .. ... .. ... ... .. ... .
Starting "Services" .. .. ... ... .. ... .. ... ... .. ... .. ... ... .. ... ... .. ... .. ... ... .. ... .
Using All Available RAM . ... .. ... .. ... ... .. ... .. ... ... .. ... ... .. ... .. ... ... .. ... .
Configuring a Sound Card .. .. ... .. ... ... .. ... .. ... ... .. ... ... .. ... .. ... ... .. ... .
Removing Red Hat Linux ... .. ... .. ... ... .. ... .. ... ... .. ... ... .. ... .. ... ... .. ... .
Changing Login from Console to X at Startup. .. ... .. ... ... .. ... .. ... ... .. ... .
vi
Part V Appendixes .. .. ... ... .. ... ... .. ... .. ... ... .. ... .. ... ... .. ... ... .. ... .. ... ... .. ... .
329
Appendix A Glossary .. ... .. ... ... .. ... .. ... ... .. ... .. ... ... .. ... ... .. ... .. ... ... .. ... .
331
Appendix B A Brief History of Linux and Red Hat . ... .. ... ... .. ... .
B.1
347
What is Linux? . ... ... .. ... ... .. ... .. ... ... .. ... .. ... ... .. ... ... .. ... .. ... ... .. ... . 347
Appendix C DOS to Linux Cheat Sheet . .. ... ... .. ... ... .. ... .. ... ... .. ... .
C.1
C.2
351
DOS and Linux Commands .. ... .. ... ... .. ... .. ... ... .. ... ... .. ... .. ... ... .. ... . 351
Different Paths . ... ... .. ... ... .. ... .. ... ... .. ... .. ... ... .. ... ... .. ... .. ... ... .. ... . 353
vii
viii
Section 0.1:Who Should Read This Book?
Introduction
Welcome to the Official Red Hat Linux Getting Started Guide!
Just a few short years ago, a user who wanted to try out Linux had relatively few
choices in the distributions, or types of packaged Linux operating systems, which
were available. That’s all changed. Now, there are dozens of Linux distributions
from which you can choose.
But Red Hat Linux has remained a leading choice of Linux distributions for years.
Here at Red Hat, we believe we offer the best Linux distribution on the market. We
hope you’ll agree that the time and money you spent to install and work with Red Hat
Linux were well spent, indeed.
The Official Red Hat Linux Getting Started Guide is part of our effort to help you
become acquainted with your new Red Hat Linux system.
Who Should Read This Book?
If you count yourself among the many who are discovering Red Hat Linux for the
first time, this book is for you!
Inside, you’ll find valuable tips and tricks which can help you get acquainted with
your desktop environment. Concentrating on tasks in GNOME and KDE, you’ll see
how to navigate through your system, how to manage files and directories and how
to make some of the power of Red Hat Linux work for you.
If you’re most familiar with a Windows environment, you’ll find the DOS-to-Linux
commands in Appendix C, DOS to Linux Cheat Sheet (as well as the tips on the
enclosed "cheat sheet" in the boxed set of Red Hat Linux) to be useful guides, so you
can start looking around right away.
ix
x
Introduction
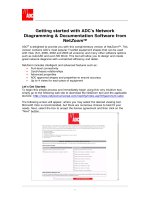
Figure 1 A GNOME Desktop
You’ll learn how to accomplish such basic first steps as connecting to the Internet,
configuring your e-mail client, adding a printer and more.
More advanced topics will cover how to work with Update Agent, so your system automatically stays current with critical software updates.
Is Red Hat Linux sharing your computer with Microsoft Windows? Turn to Chapter
15, Q & A: Quick Answers to Common Questions to find out how you can allow Red
Hat Linux to "see" into your other operating system, so you can perform certain tasks
without having to reboot into the other operating system.
You’ll even gain some experience at file management and system administration using the "shell prompt," the command-line interface.
In short, this guide picks up where the Official Red Hat Linux Installation Guide
leaves off: by giving you the confidence to work with your new operating system.
Section 0.3:A Note About Environments
A Peek Inside
This book is divided into several parts:
•
The Basics: When you’ve finished this section, you’ll start to feel comfortable
with your GNOME or KDE environment. You’ll take your first steps to becoming
productive (or just having fun and looking productive). You’ll find out how to get
online, set up an e-mail account and communicate with others using your Netscape
Web browser.
•
Managing Files and Directories: Beyond the basics; here, you’ll learn about the
GNOME and KDE file managers, working with running processes, locating files,
installing and removing applications, using Update Agent and other administrative
necessities.
•
The Shell Prompt: Just beneath your graphical environment, the real power of
your system awaits. You’ll get a taste of this power and learn how to put it to
work for you.
•
Q & A: When you care only for answers, turn to this chapter. Many of the
entries you’ll find here concern answers to some of the most common new user
questions, such as: how to access a floppy disk; what happens if you forget your
root password (you can create a new one); how to access files on a Windows
partition; and more.
•
Th Glossary: Here, you’ll find quick definitions to plenty of words and phrases
that can vex any new Linux user.
A Note About Environments
Your Red Hat Linux system is more than the graphical user interface, but it’s a fairly
safe bet that most new and intermediate users will choose to work within the graphical
environment, so we’ll spend most of the time demonstrating the techniques behind
accomplishing tasks in two popular environments: GNOME and KDE.
xi
xii
Introduction
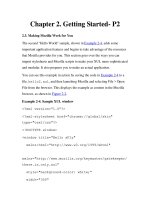
Figure 2 A KDE Desktop
Much of what you can accomplish from a graphical environment can also be performed from the shell prompt. In fact, many actions you can perform from the shell
prompt are faster than from the graphical environment.
In addition to the chapters covering tasks you can perform in KDE and GNOME,
you’ll find plenty of useful information within covering basic information from the
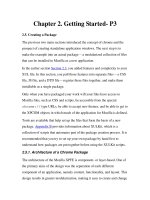
shell prompt (as shown in Figure 3, Using Pico at a Shell Prompt).
Section 0.4:Work With Your User Account
Figure 3 Using Pico at a Shell Prompt
You’ll also find useful tips, caution notices and related information inside.
And speaking of caution…
Work With Your User Account
Linux is a multi-tasking, multi-user operating system, so it can easily accommodate
many users’ needs. Even if your machine isn’t attached to a network, you can share
your machine with others -- each of whom will have their own settings.
Because of user accounts, Linux makes it easy to share your machine while preserving customized settings. Using accounts is convenient for users; it’s also secure,
because ordinary users don’t have permission to damage or delete sensitive system
data. Only one account, the root account can make changes to the system -- and to
others’ account information.
Using your system’s root account for everyday work can be dangerous, because you
can easily damage your system by accidentally deleting or modifying a sensitive file.
xiii
xiv
Introduction
Most tasks in the following chapters don’t require that you be logged in to your system’s root account. Instead, you can accomplish almost everything from your user
account -- so you won’t accidentally harm your system.
Figure 4 Log In To Your User Account
Unless you’re specifically told that you should be logged in as root, log in to your
user account to accomplish tasks in this manual -- without risking disaster.
Where to Find More Info
Plenty of websites offer valuable information on how to use a command, but you’ve
probably got quite a bit of documentation already on your system. In the following
chapters, you’ll learn:
•
How to read and print man pages and info pages. Man and info pages are system
documents which can help you understand what many commands are for and how
to use them.
•
How to use the GNOME and KDE help browsers.
•
Some useful online resources you should bookmark in your browser.
Section 0.7:Sign Up for Support
•
And in Appendix B, A Brief History of Linux and Red Hat, you’ll find a brief
history of Linux -- and Red Hat.
More to Come
As Linux evolves, so will the Official Red Hat Linux Getting Started Guide. In future
editions, expect to find more essential information to help you get the utmost from
your system.
And here’s how you can help…
Send In Your Feedback
If you’d like to make suggestions about the Official Red Hat Linux Getting Started
Guide -- from words to add in the Glossary to typos or subjects you’d like to see
covered -- please mention this guide’s identifier:
GSG(EN)-6.2-Print-RHI (02/00)
That way we’ll know exactly which version of the guide you have. Send your feedback to:
Sign Up for Support
If you have an official edition of Red Hat Linux 6.2, please remember to sign up for
the benefits you’re entitled to as a Red Hat customer.
You can receive any or all of the following benefits, depending upon the Official Red
Hat Linux product you purchased:
•
Official Red Hat support -- Get help with your installation questions from Red
Hat, Inc.’s support team.
•
Priority FTP access -- No more late-night visits to congested mirror sites. Owners of Red Hat Linux 6.2 receive free access to priority.redhat.com, Red Hat’s
preferred customer FTP service, offering high bandwidth connections day and
night.
xv
xvi
Introduction
•
Red Hat Update Agent -- Use Red Hat’s Update Agent to automatically retrieve and
install system and security updates as well as other packages.
•
Under the Brim: The Official Red Hat E-Newsletter -- Every month, get the latest
news and product information directly from Red Hat.
To sign up, go to You’ll find your Personal Product
ID on a red and white card in your Official Red Hat Linux box.
Good luck, and enjoy your new Red Hat Linux system!
The Red Hat Documentation Team
Part I
The Basics
Section 1.1:Log In, Please
1 Getting Started
Like many new users, learning how to work on your Red Hat Linux system can be
both exciting and a little unnerving. To begin your journey, you’ll have to log in.
When you log in, you’re basically "introducing yourself" to the system.
Linux is case sensitive
Like UNIX, Linux is case sensitive. That means that typing
root refers to a different account than Root, as far as Linux
is concerned -- the lowercase root is the name of the root
login, or system administrator.
When you installed Red Hat Linux, you had the opportunity to install the X Window
System -- also simply called X -- which is the graphical environment. You were also
asked whether you wanted to use a graphical screen, rather than a console to log in.
Although our emphasis throughout this book will be on navigation and productivity
using X, we’ll cover both the graphical and console methods of logging in and starting
the X Window System.
1.1 Log In, Please
Unlike some other operating systems, your Red Hat Linux system uses accounts to
manage privileges, maintain security and more. Not all accounts are created equal:
some have fewer rights to access files or services than others.
If you’ve already created a user account, you can skip ahead to Chapter 2, GNOME
in 60 Seconds (or so). If you created only the root account, read on to learn how to
set up a user account.
19
20
Chapter 1:Getting Started
Don’t "root" around
Because your Red Hat Linux system creates one account
(the root account) during installation, some new users are
tempted to use only this account for all their activities. This
is a bad idea; because the root account is allowed to do anything on the system, you can easily damage your system
by mistakenly deleting or modifying sensitive system files.
You may be tempted to forego creating and using a user account during or after installation, but you’re playing with
fire if you do.
1.1.1 Create a User Account
When you installed Red Hat Linux, you were asked to create a root password -that is, a password for the root account, the system administrator. At that time,
you were also able to create additional user accounts, which allow you to accomplish
most tasks, without potentially harming your system -- as would be the case if you
were to use your root account for everything.
If you didn’t create a user account during the installation, that’s your first task. Here’s
what you’ll do:
•
Log in from the console or from a graphical screen.
•
Open a terminal emulation window (also called an Xterm window or Xterm)
on the desktop.
•
Create a new user account.
•
Log out, then log in to the new account.
1.1.2 Logging In As Root
Regardless of whether you’ve chosen a graphical or console login screen, you’ll have
to supply a login account name and the password associated with that account.
From a console screen, for example, you’ll see something like:
Section 1.1:Log In, Please
Red Hat Linux release 6.2
Kernel 2.2.14-xx on an i686
localhost login:root
Password:yourrootpassword
Unless you’ve chosen to give your machine a name, as in a network setting, your
machine will probably be called localhost.
To log in to the root account, at the login and password prompts, type root and
the root password you chose when you installed Red Hat Linux.
Figure 1–1
The Graphical Login Screen
If you’re using the graphical login screen, similar to Figure 1–1, The Graphical Login
Screen, just type root in the box, press [Enter] and type in the password you created
for the root account.
If you still see your console screen (instead of the graphical desktop) you can start
the X Window System by typing startx as follows:
21
22
Chapter 1:Getting Started
[root@localhost /root]#startx
To change your login screen
To find out how you can change from a console to a graphical login screen see Section 15.16, Changing Login from
Console to X at Startup.
Once you start the X Window System, you’ll find a desktop similar to Figure 1–2, A
GNOME Desktop in GNOME or Figure 1–3, A KDE Desktop in KDE.
Figure 1–2 A GNOME Desktop
Section 1.1:Log In, Please
Figure 1–3
A KDE Desktop
1.1.3 Starting an Xterm
Both GNOME and KDE offer quick launch buttons on their panels to open an Xterm
window.
Figure 1–4
The GNOME Panel
On the GNOME Panel, the button which launches an Xterm appears near the center
and looks like:
You can also find launchers to Xterms from the GNOME menu, under Utilities. Items
which will open Xterms include GNOME terminal, Regular XTerm, and Color XTerm.
23
24
Chapter 1:Getting Started
Figure 1–5
The KDE Panel
Similar to GNOME, the KDE Panel prominently features a quick launch button for an
Xterm. The launcher looks like:
You can also find the launcher from the KDE main menu under Utilities=>Konsole.
Now, click on the Xterm button to open a window. You’ll see the shell prompt inside
the window, and will look like
[root@localhost /root]#
Type useradd, then a space and the name of the new user account (name the account
newuser, for example).
It may not appear that anything has happened, but you’ve just completed step one of
creating the new account. All that remains is for you to give this account a password.
Picking account names
Often, user accounts are just variations on the user’s name,
such as jsmith for John Smith. You can choose whichever
name you prefer, however, such as musicman or ElivsisKing.
Now, on the next line, type passwd, a space and type the name of the new account
for which you want to create the password (passwd newuser).
Section 1.1:Log In, Please
What is a secure password?
You can be fancy or plain when you pick a user account
name, but take precautions when you choose a password.
The password is the key to your account, so it should be
both unique and easy for you to remember. Your password
should be at least six characters (actually, it can be 256 characters long, though you probably don’t need that). You can
mix upper- and lowercase letters, as well as numbers and
characters. Avoid easy selections, such as qwerty or password. If you want to pick an easy-to-remember but somewhat unique password, consider a variation of a word, such
as a!rPl8nE for airplane. If you need more information
about passwords, see Chapter 12, Shell Prompt Basics.
Next, you’ll be asked to enter the password for the new user’s account -- the prompt
will state: New UNIX password. Enter a password that will be easy to remember
and secure.
Type the password again for confirmation, and you’ll see a message stating passwd:
all authentication tokens updated successfully, which means
that you’ve successfully created the new account.
25