Designing a Public Key Infrastructure
Bạn đang xem bản rút gọn của tài liệu. Xem và tải ngay bản đầy đủ của tài liệu tại đây (95.97 KB, 4 trang )
Designing a Public Key Infrastructure
Copyright 2002 Microsoft Corporation. All Rights Reserved.
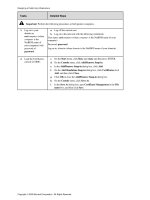
Tasks Detailed Steps
Important: Perform the following procedures at both partner computers.
1.
Log on to your
domain as
certcomputer (where
computer is the
NetBIOS name of
your computer) with
password of
password.
a.
Log off the current user.
b.
Log on to the network with the following credentials:
User name: certcomputer (where computer is the NetBIOS name of your
computer)
Password: password
Log on to: domain (where domain is the NetBIOS name of your domain).
2.
Load the Certificates
console in MMC.
c.
On the Start menu, click Run, type mmc and then press ENTER.
d.
On the Console menu, click Add/Remove Snap-in.
e.
In the Add/Remove Snap-in dialog box, click Add.
f.
On the Add Standalone Snap-in dialog box, click Certificates click
Add, and then click Close.
g.
Click OK to close the Add/Remove Snap-in dialog box.
h.
On the Console menu, click Save As.
i.
In the Save As dialog box, type Certificate Management in the File
name box, and then click Save.
Designing a Public Key Infrastructure
Copyright 2002 Microsoft Corporation. All Rights Reserved.
Tasks Detailed Steps
3.
Request a new certificate
named Web Client that uses
Microsoft Base
Cryptographic Provider v1.0
as the cryptographic service
provider and that uses the
CA from your domain as the
certification authority.
j.
In the console tree, expand Certificates – Current User, and then
select Personal.
k.
Right-click Personal, point to All Tasks, and then click Request New
Certificate.
l.
In the Certificate Request wizard, click Next.
m.
In the Certificate Template page, select Advanced options, and then
click Next.
n.
Accept the default (Microsoft Base Cryptographic Provider v1.0) on
the Cryptographic Service Provider page, and then click Next.
o.
In the Certification Authority page, click Browse.
p.
In the Select Certification Authority dialog box, select the CA from
your domain, and then click OK.
q.
In the Certification Authority page, verify the CA and computer
names, and then click Next.
r.
In the Certificate Friendly Name and Description page, in the
Friendly name box, type Web Client and then click Next.
s.
Click Finish.
4.
View and install the
certificate.
t.
In the Certificate Request Wizard dialog box, click View Certificate.
Can this certificate be used to authenticate with a Web-based application? Why or why not?
Yes. The certificate can be used to prove your identity to a remote computer. The certificate can also
be used to encrypt data on a disk and to protect e-mail messages.
4. (continued)
u.
Click OK to close the Certificate dialog box.
v.
In the Certificate Request Wizard dialog box, click Install
Certificate.
w.
Click OK.
Designing a Public Key Infrastructure
Copyright 2002 Microsoft Corporation. All Rights Reserved.
Tasks Detailed Steps
5.
Verify the installation of the
certificate.
x.
In the console tree, expand Personal, and then click Certificates.
y.
In the details pane, double-click the Certcomputer certificate.
z.
Click the Certification Path tab.
What is the certification path for the certificate?
EnterpriseCA =>Your Domain CA =>Web Client
5. (continued)
aa.
Click OK.
6.
Export the certcomputer
certificate by using Base-64
encoded binary X.509
format to a file named
c:\export.cer
bb.
In the details pane, right-click the certcomputer certificate, point to All
Tasks, and then click Export.
cc.
In the Certificate Export wizard, click Next.
dd.
In the Export Private Key page, click Next.
ee.
In the Export File Format page, select Base-64 encoded x.509
(.CER), and then click Next.
ff.
In the File to Export page, type c:\export and then click Next.
gg.
Click Finish.
hh.
In the Certificate Export Wizard message box, click OK to confirm
the export.
ii.
Close all windows and log off.
Designing a Public Key Infrastructure
Copyright 2002 Microsoft Corporation. All Rights Reserved.
Tasks Detailed Steps
Why was the Base-64 encoded binary x.509 certificate format selected?
Certificate mapping that uses an import file requires that the import file be a text-based (ASCII)
version of the certificate.
What security risk is involved with this step?
The certificate file must be securely transported to the Web server so that the certificate can be
mapped to a user account.