Beginning Microsoft SQL Server 2008 Administration
Bạn đang xem bản rút gọn của tài liệu. Xem và tải ngay bản đầy đủ của tài liệu tại đây (17.77 MB, 820 trang )
<span class='text_page_counter'>(1)</span><div class='page_container' data-page=1></div>
<span class='text_page_counter'>(2)</span><div class='page_container' data-page=2>
<i>Beginning</i>
Microsoft
<b>®</b>SQL Server
<b>®</b>2008 Administration
Professional Microsoft SQL Server 2008 Integration
Services
978-0-470-24795-2
This book shows developers how to master the 2008 release of SSIS, covering topics
including data warehousing with SSIS, new methods of managing the SSIS platform,
and improved techniques for ETL operations.
Professional SQL Server 2008 Reporting Services
978-0-470-24201-8
This book teaches solutions architects, designers, and developers how to use
Microsoft’s reporting platform to create reporting and business intelligence solutions.
Professional Microsoft SQL Server 2008 Analysis Services
978-0-470-24798-3
This shows readers how to build data warehouses and multidimensional databases,
query databases, and how to use Analysis Services and other components of SQL
Server to provide end-to-end solutions.
Professional Microsoft SQL Server 2008 Programming
978-0-470-25702-9
This updated new edition of Wrox’s best-selling SQL Server book has been expanded
to include coverage of SQL Server 2008’s new datatypes, new indexing structures,
manageability features, and advanced time-zone handling.
Professional Microsoft SQL Server 2008 Administration
978-0-470-24796-9
A how-to guide for experienced database administrators, this book is loaded with
unique tips, tricks, and workarounds for handling the most difficult SQL Server
administration issues. The authors discuss data capture, performance studio, Query
Governor, and new techniques for monitoring and policy management.
Beginning Microsoft SQL Server 2008 Programming
978-0-470-25701-2
This comprehensive introduction to SQL Server covers the fundamentals and moves on to discuss how to create and change tables, manage
keys, write scripts, work with stored procedures, and much more.
Beginning Microsoft SQL Server 2008 Administration
978-0-470-44091-9
This book teaches both novice and experienced database administrators how to leverage all of the features of SQL Server to deliver solid,
reliable performance. All features and techniques are illustrated with real-world examples and step-by-step instructions. With this book, you’ll
develop the skills required to successfully administer a SQL Server 2008 database, regardless of your experience level.
Beginning Database Design Solutions
978-0-470-38549-4
This introduces IT professionals—both DBAs and database developers—to database design. It explains what databases are, their goals,
and why proper design is necessary to achieve those goals. It tells how to decide what should be in a database to meet the application’s
requirements. It tells how to structure the database so the database performs well while minimizing the chance for error.
Enhance Your Knowledge
Advance Your Career
Get more out of
WROX.com
Programmer to Programmer
™
Interact
Take an active role online by participating in
our P2P forums
Wrox Online Library
Hundreds of our books are available online
through Books24x7.com
Wrox Blox
Download short informational pieces and
code to keep you up to date and out of
trouble!
Chapters on Demand
Purchase individual book chapters in pdf
format
Join the Community
Sign up for our free monthly newsletter at
newsletter.wrox.com
Browse
Ready for more Wrox? We have books and
e-books available on .NET, SQL Server, Java,
XML, Visual Basic, C#/ C++, and much more!
Contact Us.
We always like to get feedback from our readers. Have a book idea?
</div>
<span class='text_page_counter'>(3)</span><div class='page_container' data-page=3>
Beginning Microsoft
®SQL Server
®2008 Administration
Introduction
. . . .
xxviiChapter 1: Introducing SQL Server 2008
. . . .
1Chapter 2: Installing SQL Server 2008
. . . .
25Chapter 3: SQL Server 2008 Tools
. . . .
51Chapter 4: SQL Server 2008 Storage Architecture
. . . .
111Chapter 5: SQL Server 2008 Databases
. . . .
129Chapter 6: SQL Server 2008 Security
. . . .
201Chapter 7: Configuring SQL Server Network Communication
. . . .
261Chapter 8: Automating Administrative Tasks
. . . .
285Chapter 9: Disaster Prevention and Recovery
. . . .
363Chapter 10: Monitoring SQL Server
. . . .
401Chapter 11: Optimizing SQL Server
. . . .
473Chapter 12: SQL Server High Availability
. . . .
553Chapter 13: Introduction to Replication
. . . .
589Chapter 14: Introduction to the Common Language Runtime
. . . .
607Chapter 15: An Administrator’s Guide to Business Intelligence
. . . .
639Chapter 16: Introduction to SQL Server Integration Services
. . . .
645Chapter 17: Introduction to SQL Server Analysis Services
. . . .
677Chapter 18: Introduction to SQL Server Reporting Services
. . . .
707Chapter 19: Introduction to Service Broker
. . . .
733</div>
<span class='text_page_counter'>(4)</span><div class='page_container' data-page=4></div>
<span class='text_page_counter'>(5)</span><div class='page_container' data-page=5>
Beginning
</div>
<span class='text_page_counter'>(6)</span><div class='page_container' data-page=6></div>
<span class='text_page_counter'>(7)</span><div class='page_container' data-page=7>
Beginning
Microsoft
®SQL Server
®2008 Administration
Chris Leiter
Dan Wood
Albert Boettger
Michael Cierkowski
</div>
<span class='text_page_counter'>(8)</span><div class='page_container' data-page=8>
Beginning Microsoft
®SQL Server
®2008 Administration
Published by
<b>Wiley Publishing, Inc.</b>
10475 Crosspoint Boulevard
Indianapolis, IN 46256
www.wiley.com
Copyright©2009 by Wiley Publishing, Inc., Indianapolis, Indiana
Published simultaneously in Canada
ISBN: 978-0-470-44091-9
Manufactured in the United States of America
10 9 8 7 6 5 4 3 2 1
<b>Library of Congress Cataloging-in-Publication Data</b>
Beginning Microsoft SQL server 2008 administration / Chris Leiter ... [et al.].
p. cm.
Includes index.
ISBN 978-0-470-44091-9 (paper/website)
1. SQL server. 2. Database management. 3. Relational databases. I. Leiter,
Chris,
1975-QA76.9.D3B4465 2009
005.4’476--dc22
2009004135
No part of this publication may be reproduced, stored in a retrieval system or transmitted in any form or by any
means, electronic, mechanical, photocopying, recording, scanning or otherwise, except as permitted under Sections
107 or 108 of the 1976 United States Copyright Act, without either the prior written permission of the Publisher, or
authorization through payment of the appropriate per-copy fee to the Copyright Clearance Center, 222 Rosewood
Drive, Danvers, MA 01923, (978) 750-8400, fax (978) 646-8600. Requests to the Publisher for permission should be
addressed to the Permissions Department, John Wiley & Sons, Inc., 111 River Street, Hoboken, NJ 07030, (201)
748-6011, fax (201) 748-6008, or online at />
<b>Limit of Liability/Disclaimer of Warranty:</b>The publisher and the author make no representations or warranties
with respect to the accuracy or completeness of the contents of this work and specifically disclaim all warranties,
including without limitation warranties of fitness for a particular purpose. No warranty may be created or extended
by sales or promotional materials. The advice and strategies contained herein may not be suitable for every
situation. This work is sold with the understanding that the publisher is not engaged in rendering legal, accounting,
or other professional services. If professional assistance is required, the services of a competent professional person
should be sought. Neither the publisher nor the author shall be liable for damages arising herefrom. The fact that an
organization or Web site is referred to in this work as a citation and/or a potential source of further information
does not mean that the author or the publisher endorses the information the organization or Web site may provide
or recommendations it may make. Further, readers should be aware that Internet Web sites listed in this work may
have changed or disappeared between when this work was written and when it is read.
For general information on our other products and services please contact our Customer Care Department within the
United States at (877) 762-2974, outside the United States at (317) 572-3993 or fax (317) 572-4002.
</div>
<span class='text_page_counter'>(9)</span><div class='page_container' data-page=9>
<i>For my wife, Bridget Your patience, love, and support have made everything I have, and everything I am, possible.</i>
<i>Thanks for believing in me</i>
— Chris Leiter
<i>I dedicate my contribution of this book to my dad, Reginald Kaaikaula Wood, who lost his battle with cancer while</i>
<i>I was writing this book. He was a great encouragement and proud that his son was a published author even though</i>
<i>he said, ‘‘I don’t understand a darn word of it.’’ My dad left an amazing legacy and he will be missed.</i>
— Dan Wood
<i>I dedicate this book to my daughter, Rachel. Watching you grow and re-experiencing the beauty and wonder of the</i>
<i>world through your eyes, is and has been the greatest joy in my life. So few years to give you wings to fly.</i>
<i>I love you.</i>
— Albert Boettger
<i>I would like to dedicate this accomplishment to my daughter, Alina. You are the best thing that has ever happened</i>
<i>to me and I love you very much.</i>
</div>
<span class='text_page_counter'>(10)</span><div class='page_container' data-page=10></div>
<span class='text_page_counter'>(11)</span><div class='page_container' data-page=11>
About the Authors
<b>Chris Leiter</b>(Auburn, WA) is a Senior Consultant for Hitachi Consulting. His primary focus is Microsoft’s
Business Intelligence and Performance Management products. Chris has been a Microsoft Certified
Pro-fessional since 1997 and a Microsoft Certified Trainer since 2001. He currently holds the MCSE: Security,
MCITP: Database Administrator, and ITIL: Foundation certifications. Chris is also co-author of<i>Beginning</i>
<i>SQL Server 2005 Administration</i>by Dan Wood, Chris Leiter, and Paul Turley from Wrox Press 2006. When
not writing about or working with Microsoft SQL Server, he enjoys watching movies from his extensive
DVD collection with his wife, Bridget, and their cat, Cosmo. Chris contributed Chapters 1, 2, 3, 6, 7, 8, 12,
13, 15, 16, 17, and 19.
<b>Dan Wood</b>(Silverdale, WA) is the senior database administrator for Avalara, a sales tax compliance
company where he both administers and develops database solutions for several enterprise applications
that handle global address validation, tax rate calculation, and sales tax remittance for e-commerce and
ERP clients. He has been working with SQL Server as a DBA, consultant, and trainer since 1999. Dan
was a co-author on<i>Beginning Transact-SQL with SQL Server 2000 and 2005</i>by Paul Turley and Dan Wood
(2005) and<i>Beginning T-SQL with Microsoft SQL Server 2005 and 2008</i>by Paul Turley and Dan Wood (2008)
and the lead author of<i>Beginning SQL Server 2005 Administration</i>, all from WROX press. Dan contributed
Chapters 4 and 9.
<b>Albert Boettger</b>(Federal Way, WA) is the Senior Software Engineer and Database Administrator for
Sagem Morpho, Inc. Albert has more than 20 years of experience as a solution developer, database
archi-tect, and software engineer. Albert contributed Chapters 10 and 11.
</div>
<span class='text_page_counter'>(12)</span><div class='page_container' data-page=12></div>
<span class='text_page_counter'>(13)</span><div class='page_container' data-page=13>
Credits
<b>Executive Editor</b>
Bob Elliott
<b>Development Editor</b>
Maureen Spears
<b>Technical Editor</b>
Jim Adams
<b>Senior Production Editor</b>
Debra Banninger
<b>Copy Editor</b>
Cate Caffrey
<b>Editorial Manager</b>
Mary Beth Wakefield
<b>Production Manager</b>
Tim Tate
<b>Vice President and Executive</b>
<b>Group Publisher</b>
Richard Swadley
<b>Vice President and Executive</b>
<b>Publisher</b>
Barry Pruett
<b>Associate Publisher</b>
Jim Minatel
<b>Project Coordinator, Cover</b>
Lynsey Stanford
<b>Proofreader</b>
Nancy Carrasco
<b>Indexer</b>
</div>
<span class='text_page_counter'>(14)</span><div class='page_container' data-page=14></div>
<span class='text_page_counter'>(15)</span><div class='page_container' data-page=15>
Acknowledgments
First and foremost, I thank my wife, Bridget, for once again supporting and encouraging me through this
process. It’ll be nice to have our evenings back. Thanks also to Dan Wood, for letting me take the reins
on this one. I’m really glad that you were able to stay on as a Contributing Author. Michael Cierkowski
and Albert Boettger also deserve my gratitude for stepping up to the plate and co-authoring this book.
Both of you are absolutely brilliant, and I’m lucky to know you. I also thank Lance Baldwin, one of the
best people I’ve had the privilege of working for (twice!), and Paul Turley, who helped Dan and me
get introduced to Wiley. And speaking of Wiley, I must also thank Bob Elliott for his support on this
project and faith that I could pull it all together; Maureen Spears for having the patience of a saint; and
Jim Adams, who never let anything get by him (and provided a huge contribution to Chapter 17!). There
are several other people whom I would like to thank for helping me in one way or another during the
process of creating this book. They include (in no particular order) Jeff Sparks, for constantly feeding my
ego; Rick Kinglsan, for setting the bar and letting me raise it; D.J. Norton, for being as much of a gadget
geek as I am; Stephanie Gulick, for being so supportive; everyone at Hitachi Consulting; and, of course,
the Banz and Leiter families, who put up with me working through yet another holiday season.
<i>— Chris Leiter</i>
A great deal of thanks to Chris Leiter for taking over this book and being an outstanding Project Lead.
Special thanks to all the wonderful people at Wrox for their patience for missed deadlines and support
when my dad was ill. Lastly, but most importantly, my gratitude and undying love goes to my beautiful
wife, Sarah, who supported me through yet another book project and expressed her pride and love while
spending many nights and weekends without me. Thank you, my love.
<i>— Dan Wood</i>
A special thanks to Chris Leiter for convincing me to join the team and introducing me to Wiley
Publish-ing. You were right. Thank you to Jeff Sparks for being a friend and mentor, and for always pushing me
to explore and master new technologies. Your opinions and insights were invaluable. Thanks to
every-one at Wiley Publishing who helped to make this book a reality, and especially to Bob Elliot for all his
hard work. Thanks, Maureen, for keeping us all on schedule and answering all of our questions (kind of
like herding cats), and to Jim for his excellent technical editing. To my loving wife, Elise, and beautiful
daughter, Rachel, thank you for your love, patience, and understanding. You mean more to me than
words can convey.
<i>— Albert C. Boettger</i>
First, I thank both Dan and Chris for considering me for this project. It has been a wonderful experience
working with you, and I hope we can do it again sometime. I also thank everyone at Wrox for making the
entire process a fairly painless affair. And finally, I thank my wife, Stacy, for dealing with many nights
of neglect while I worked on my many projects. I love you more each and every day. A task that I didn’t
think was possible.
</div>
<span class='text_page_counter'>(16)</span><div class='page_container' data-page=16></div>
<span class='text_page_counter'>(17)</span><div class='page_container' data-page=17>
Contents
Introduction
xxvii
Chapter 1: Introducing SQL Server 2008
1
A Condensed History of SQL Server
1
In the Beginning 1
The Evolution of a Database 1
Microsoft Goes It Alone 2
BI for the Masses 2
2008<i>. . .</i>and Beyond! 3
What Is SQL Server 2008?
3
Database Engine 3
Integration Services 5
Analysis Services 5
Reporting Services 6
Service Broker 6
Data Tier Web Services 6
Replication Services 6
Multiple Instances 6
Database Mail 7
A Note about Notification Services 7
SQL Server 2008 Editions
7
SQL Server Compact 3.5 SP1 8
SQL Server 2008 Express Edition 9
SQL Server 2008 Web Edition 9
SQL Server 2008 Workgroup Edition 10
SQL Server 2008 Standard Edition 10
SQL Server 2008 Enterprise Edition 10
SQL Server 2008 Architecture
11
SQL Server 2008 Communication 11
SQL Server 2008 Services 13
SQL Server 2008 Database Objects
15
Server 15
Database 16
Schema 16
</div>
<span class='text_page_counter'>(18)</span><div class='page_container' data-page=18>
SQL Server 2008 Databases
18
System Databases 18
User Databases 20
Distribution Databases 20
SQL Server 2008 Database Storage
20
Data Files and Filegroups 21
Log Files 21
SQL Server Security
22
Windows Authentication Mode 22
SQL Server and Windows Authentication Mode (Mixed Mode) 22
Summary
23
Chapter 2: Installing SQL Server 2008
25
SQL Server Installation Planning
25
Hardware Considerations 26
Processor Considerations 27
Memory Considerations 27
Storage Considerations 28
Virtualization Considerations 32
Software Prerequisites 32
SQL Server Installation Center
34
Setup Support Rules (for Setup Support Files) 34
Setup Support Rules (for Installation) 36
Feature Selection 37
Installing to a Windows Cluster 45
Configuring the Virtual Server Name 46
Sample Databases 49
Installation Review
50
Summary
50
Chapter 3: SQL Server 2008 Tools
51
SQL Server Management Studio
52
Tool Windows 53
Toolbars 65
SQL Server Management Studio Configuration 82
Log File Viewer
90
SQL Server Business Intelligence Development Studio
91
SQL Server Profiler
93
</div>
<span class='text_page_counter'>(19)</span><div class='page_container' data-page=19>
Database Engine Tuning Advisor
97
General Tab 98
Tuning Options Tab 99
SQL Server Configuration Manager
100
Reporting Services Configuration Manager
100
Command-Line Tools
102
SQLCMD 102
Bulk Copy Program (BCP) 104
PowerShell 106
Summary
109
Chapter 4: SQL Server 2008 Storage Architecture
111
The Resource Database
112
The
sys
Schema 112SQL Server Database Physical Structure
113
Physical Storage Data Types 114
FILESTREAM Data 118
Other Data Types 119
SQL Server Database Files 119
Data Files 120
Transaction Log 123
Summary
127
Chapter 5: SQL Server 2008 Databases
129
System Databases
129
User Databases
129
Database Planning
129
Capacity Planning 130
Creating Databases
131
Getting Started 132
Creating a New Database 132
Schemas 152
Tables 155
Indexes 165
Enforcing Data Integrity 181
Database Diagrams
190
Views
191
System Views 191
Synonyms
192
</div>
<span class='text_page_counter'>(20)</span><div class='page_container' data-page=20>
Stored Procedures 193
Functions 193
Triggers 194
Assemblies 196
Types 196
Defaults 199
Rules 200
Summary
200
Chapter 6: SQL Server 2008 Security
201
SQL Server Authentication Modes
201
Changing the Authentication Mode from Management Studio 202
Using the
xp_instance_regwrite
Extended Stored Procedure 202Principals
204
Logins 205
Credentials 210
Server Roles 212
Database Users 214
Fixed Database Roles 219
Permissions
225
Server Permissions 229
Database Scope Permissions 235
Schema Scope Permissions 238
Using SQL Server Management Studio for Managing Permissions 240
SQL Server Encryption
243
Extensible Key Management (EKM) 246
Encryption Tools 246
Best Practices
257
Summary
259
Chapter 7: Configuring SQL Server Network Communication
261
SQL Server 2008 Network Protocols
261
Shared Memory 262
Named Pipes 262
TCP/IP 262
Virtual Interface Adapter (VIA) 264
SQL Native Client Configuration
264
SQL Server Endpoints
265
</div>
<span class='text_page_counter'>(21)</span><div class='page_container' data-page=21>
SOAP Endpoints 272
Service Broker Endpoints 278
Securing Endpoints 278
Summary
284
Chapter 8: Automating Administrative Tasks
285
Policy-Based Management
286
Targets 286
Facets 287
Conditions 287
Policies 288
Policy Categories 289
Effective Policies 289
Central Management Servers
292
Database Mail
294
How It Works 294
How to Configure Database Mail 295
Configuring Database Mail Options 300
Managing Profiles and Accounts 301
Guidelines for Deleting Mail Objects 309
Sending Mail 310
Managing Messages 314
Event Notifications
315
SQL Server Agent
316
Configuring the SQL Server Agent Service 316
SQL Server Agent Security 321
Creating Jobs 323
Creating Schedules 335
Creating Operators 342
Creating Alerts 345
Creating Proxies 353
Multi-Server Jobs 356
Maintenance Plans
358
Maintenance Plan Wizard 358
Maintenance Plan Designer 358
Best Practices
360
Summary
361
Chapter 9: Disaster Prevention and Recovery
363
</div>
<span class='text_page_counter'>(22)</span><div class='page_container' data-page=22>
Full Recovery Model 365
Bulk-Logged Recovery Model 366
Simple Recovery Model 366
SQL Server 2008 Database Backup
367
Backup Devices 367
SQL Server 2008 Backup Types
369
Full Backup 369
Differential Backup 370
File/Filegroup Backup 370
Transaction Log Backup 371
Partial Backup 371
Copy Only Backup 372
Backup Options
372
Backup Stripe 372
Mirrored Backup 372
Compressed Backup 373
WITH
Options 373Backup Strategies
375
Full Backup Only 375
Full Backup with Differential 376
Full Backup with Transaction Log 376
Full and Differential Backup with Transaction Log 377
File and Filegroup Backup 377
Filegroup with Differential 378
Partial Backup 378
Backup Summary 378
Restoring Databases
379
Restore Process 379
Delaying Recovery 380
<b>RESTORE</b>
Command
380
RESTORE DATABASE
database_name 381FROM
Options 382WITH
Clause 382Database Restore Preparation 385
Restoring User Databases 387
Recovering System Databases 393
Database Restore Summary 395
Database Snapshots
396
Database Snapshot Limitations 398
Disaster Recovery and Database Snapshots 398
</div>
<span class='text_page_counter'>(23)</span><div class='page_container' data-page=23>
Chapter 10: Monitoring SQL Server
401
Performance Monitoring
401
Performance Monitoring Strategy 402
Creating a Performance Baseline 403
Tools and Techniques for Monitoring
409
Log File Viewer 410
Activity Monitor 411
System Stored Procedures 413
Using Profiler 420
Monitoring Files 427
Auditing
430
SQL Server Audit 430
Login Auditing 438
C2 Audit Mode 440
Security Audit Event Category 441
SQL Trace 442
Tracking Changes
444
Change Data Capture 444
Change Tracking 452
Data Collection
455
Terminology 456
Architecture and Processing 456
Configuring Data Collection 458
Data Collector Types 461
Data Collection Sets 461
Error Handling 465
Reporting 466
Management Data Warehouse 466
Monitoring Database Modifications
468
Data Definition Language (DDL) Triggers 469
Summary
472
Chapter 11: Optimizing SQL Server
473
Hardware Optimization
474
CPU Selection 475
Hyperthreading 475
Memory 475
</div>
<span class='text_page_counter'>(24)</span><div class='page_container' data-page=24>
Design Considerations
478
Database Recovery Model 479
Designing Efficient Tables 480
Declarative Referential Integrity (DRI) 485
Constraints versus Triggers 488
Deciding What to Index 488
Indexed Views and Filtered Indexes 494
Minimizing Blocking 497
Hidden Dangers of Time-Outs 498
Query Optimization
499
Execution Plans 500
Updating Statistics 504
Managing Indexes 504
Query Optimizer Hints 510
Plan Guides 512
Database Engine Tuning Advisor 517
T-SQL Optimization Tips
526
Limiting Result Sets 527
ANSI-Style Join Syntax 530
Dealing with Null Values 531
Alternatives to Cursors 533
Merge Joins 534
Grouping Sets 536
Distinct Aggregation 537
How Many Records Are in That Table? 538
Temp Tables versus Table Variables 539
Resource Governor
540
Configuring the Resource Governor 541
Monitoring the Resource Governor 545
Summary
551
Chapter 12: SQL Server High Availability
553
Introduction to High Availability
553
Failover Clustering
554
Windows Clustering — A Quick Primer 555
Clustering Components 556
Active/Passive Clustering 556
Active/Active Clustering 557
Considering Clustering 558
Log Shipping
558
</div>
<span class='text_page_counter'>(25)</span><div class='page_container' data-page=25>
Configuring Log Shipping with Transact-SQL 563
Configuring Failover 571
Database Mirroring
572
Client Redirection 574
Database Mirroring Modes 574
Configuring Database Mirroring 576
Monitoring Database Mirroring 581
Managing Database Mirroring 584
Summary
587
Chapter 13: Introduction to Replication
589
Replication Overview
589
SQL Server Replication Agents
590
Snapshot Agent 591
Log Reader Agent 591
Distribution Agent 591
Merge Agent 591
Queue Reader Agent 591
SQL Server Replication Types
591
Distributed Transactions 592
Transactional Replication 593
Snapshot Replication 594
Merge Replication 594
Oracle Replication 595
SQL Server Replication Models
595
Single Publisher/Multiple Subscribers 595
Multiple Publishers/Single Subscriber 596
Multiple Publishers/Multiple Subscribers 596
Replication Tools
596
Filtering 596
Replicating Partitioned Tables and Indexes 598
New Publication Wizard 598
New Subscription Wizard 601
Replication Monitor 602
Summary
605
Chapter 14: Introduction to the Common Language Runtime
607
</div>
<span class='text_page_counter'>(26)</span><div class='page_container' data-page=26>
Assemblies 609
Namespaces 609
Classes 609
Methods 610
SQL Server CLR Objects
610
Enabling SQL CLR 611
Creating a SQL CLR Assembly 611
Adding an Assembly 617
Compatible Data Types 618
User-Defined Functions 619
Stored Procedures 621
Triggers 622
User-Defined Types 623
Aggregates 627
Deployment with Visual Studio
629
Programming Support
632
Threading 633
Impersonation 633
Security Options
633
.NET Security 634
Securing SQL CLR 634
SQL Server CLR Permission Sets 634
Summary
637
Chapter 15: An Administrator’s Guide to Business Intelligence
639
Understanding BI
639
Performance Management
640
Business Intelligence Components
640
Data Goes In, Data Comes Out 640
Analyze This! 641
Did You Get the Memo about Cover Pages? 642
Beyond SQL
642
The BI Side of SharePoint 642
ProClarity and PerformancePoint Server 643
So Many Tools, So Little Time
644
Summary
644
Chapter 16: Introduction to SQL Server Integration Services
645
About SSIS
645
</div>
<span class='text_page_counter'>(27)</span><div class='page_container' data-page=27>
Integration Services Run Time 648
Integration Services Data Flow 648
Importing and Exporting Data
649
Using the Import Wizard 649
Using the Export Wizard 656
Transforming Data with SSIS
658
Understanding the Development Environment 659
Package Elements 661
Creating a Simple Package 670
Summary
675
Chapter 17: Introduction to SQL Server Analysis Services
677
Understanding OLAP
677
OLAP Terminology 678
Working with SSAS
679
Creating the Project 679
Defining a Data Source 679
Creating the Data Source View 682
Defining Dimensions 684
Creating the Cube 684
Create Hierarchies 686
Deploying the Project 695
Managing SSAS
696
Browsing the Cube 697
SSAS Security 698
Advanced SSAS Concepts
702
MDX 703
Data Mining 704
Summary
705
Chapter 18: Introduction to SQL Server Reporting Services
707
SQL Server Reporting Services Overview
707
Components and Tools 708
Installation and Configuration
717
Hardware and Software Requirements 717
Security Considerations 718
Installation Mode 719
Multiple Instances and Versions 719
Creating Reports
720
</div>
<span class='text_page_counter'>(28)</span><div class='page_container' data-page=28>
Report Delivery
729
Caching 729
Snapshots 729
Subscriptions 730
Summary
731
Chapter 19: Introduction to Service Broker
733
Service-Oriented Architecture
733
Service Broker Overview
734
Service Broker Elements
734
Conversations 734
Contracts 737
Queues 737
Services 737
Routes 737
Security Considerations for Service Broker
738
Dialog Security 738
Transport Security 739
Creating a Sample Application
739
Creating and Preparing the Database 740
Creating the Service Broker Objects 741
Creating Objects for the
TicketInputService
744Creating Objects for the
TicketNotifyService
746Testing the Application 749
Managing Service Broker with SSMS
753
Summary
753
</div>
<span class='text_page_counter'>(29)</span><div class='page_container' data-page=29>
I n t r o d u c t i o n
Microsoft officially announced SQL Server 2008, codenamed<i>Katmai</i>, at the first Microsoft Business
Intel-ligence (BI) conference in May 2007. I suppose I had the same reaction as many others — ‘‘Already?’’
SQL Server 2005 had only been released a year and a half earlier, and I started to wonder if it was too
soon. I can’t tell you why I thought that. I also knew that it wasn’t unusual for Microsoft’s product teams
to start planning for the next version of a product by the time the current version had been released. I
knew that the time between the SQL Server 2000 and the SQL Server 2005 releases was<i>too</i>long. And I
knew that Microsoft was committed to more frequent and consistent release cycles of two to three years
for new versions of SQL Server.
I expected SQL Server 2008 to be more of a product refresh than a full new release. Most of the public
material available hinted at that. It was designed to build on the framework laid out by SQL Server 2005,
which offered two benefits. First, organizations that had already migrated to SQL Server 2005 would
find the transition to SQL Server 2008 to be easier than moving from SQL Server 2000, or other database
products. Additionally, Microsoft had solidified itself as a player in the BI market space by bundling
Analysis Services, Integration Services, and Reporting Services as part of the SQL platform.
What I didn’t expect was that some of the changes made were not incidental, but fairly significant. As
you’ll read in this book, Notification Services is gone, and Reporting Services no longer uses Internet
Information Services to publish access to the Report Server. Having decided to withhold judgment for
the time being, I have to admit I was concerned about how existing implementations of both these tools
would be affected.
As information about Katmai became available, I tried to absorb as much as I could. I read articles online
and in print magazines that outlined new features to make management of the system, and data, much
easier. One of the more compelling features for me was FILESTREAM, which allowed files to be stored
in an NTFS file system while still being maintained through SQL. I immediately saw how this feature
could be leveraged for a product that had been developed by my co-workers for receiving, archiving,
and forwarding Electronic Fingerprint Transmission records. Looking beyond that, I could envision how
other Microsoft products, like SharePoint, might eventually leverage FILESTREAM for storing extremely
large files that, if stored as BLOB data, would cause the database size to quickly become unwieldy and
difficult to manage.
</div>
<span class='text_page_counter'>(30)</span><div class='page_container' data-page=30>
CTP 6 was considered to be ‘‘feature complete,’’ which meant that changes from that point on were
likely to be cosmetic, or relatively insignificant. At this point, components such as Data Compression,
Policy-Based Management, and the Resource Governor had been through the ringer by beta testers and
application developers, and most were happy with what they saw.
SQL Server 2008 was officially released on August 6, 2008 (although MSDN and TechNet subscribers
had already been able to access it for a week). By this time, its features, tools, and components had gone
through rigorous internal certification processes as well as significant public beta testing through the
CTP availability. As I write this, it’s been just over five months since the release of SQL Server 2008. I,
and my associates, have had a chance to put SQL Server 2008 through its paces in both production and
test environments. While, admittedly, there have been some growing pains, I believe that SQL Server
2008 is a solid product. I have worked with a number of people who often state, ‘‘I won’t install Product
X until at least Service Pack 1!’’ Because SQL Server 2008 is built on a stable SQL Server 2005 platform
and improves upon it, I find it hard to justify a statement like that.
A common theme I reiterate with my clients, and also throughout this book, is that SQL Server is much
more than a relational database management system. While the heart of SQL Server is, and always will
be, the Database Engine, it’s the client features, the performance management tools, the data integrity
components, and the Business Intelligence solutions that make SQL Server an attractive solution to many
people — DBAs and business users alike.
If you’re reading this book, then chances are you’re responsible for managing a SQL Server 2008 system,
or you will be. Several years ago, when I worked for a training company in Seattle, I would find that
students would usually (although not always) fit into one of three categories. The most common was
IT administrators who have ‘‘inherited’’ a SQL Server. Typically, this would be a new server that was
required by a new application or service the business was implementing. These students would have a
good working knowledge of Windows system management, but were new to SQL. If you find that you
fit in this category, this book is for you.
Another type of student I frequently saw was the developer who was involved in a project that used a
SQL Server database for storing application data. These developers understood how the data needed to
be stored, but were responsible for configuring and managing the development and test environments.
Often, they would have limited (if any) knowledge of systems administration, but they knew what they
were trying to accomplish. If you’re one of these developers, this book is for you.
A third category of students I sometimes saw, although admittedly less frequently than the first two,
were experienced DBAs who were familiar with Oracle, or other database technology, who needed to
know how things worked in the Microsoft realm. Although there may be a difference in terminology or
implementation, for the most part, the core technology is pretty standard. If you have experience with
other database applications and are looking to get a better understanding of how Microsoft SQL Server
2008 can meet your needs, this book is for you.
</div>
<span class='text_page_counter'>(31)</span><div class='page_container' data-page=31>
transformations for data import, building distributed data solutions, and maintaining the security and
integrity of the database while enabling the integration of managed-code into the Database Engine.
In a nutshell, for many organizations, the database administrator has become the one-stop shop for all
things related to data storage. This makes the job of being a database administrator much more
compli-cated and difficult than in the past because of the scope and power of each subsequent release.
As a result of the database administrator’s increasingly broadening role in the enterprise, it is impossible
for one book to adequately cover every facet of this critical skill set. This book lays the foundation by
covering in detail the most common database administrative tasks. It will also introduce you to many
of the more advanced areas that enterprise database administrators need to be familiar with. Read these
pages carefully, and apply what you learn. From here, move on to more complex jobs and tasks. The
opportunities for talented and hard-working database administrators are virtually unlimited.
Who This Book Is For
I’ve already given you an outline of who might be reading the book. When Dan Wood and I originally
set out to write a book on SQL Server Administration, we knew our primary audience would be IT
professionals (both developers and administrators) who have found themselves responsible for the
man-agement and maintenance of a SQL Server database. You may have been responsible for another database
application, or even an earlier version of SQL, when you learned that SQL Server 2008 was now going to
be part of the business plan.
We wrote this book for you. You may be thinking, ‘‘I’m a senior DBA and this book’s title is<i>Beginning</i>
<i>Microsoft SQL Server 2008 Administration</i>. I am not a beginner.’’ I understand. However, we also wrote
this book for you. Although SQL Server 2008 is based on SQL Server 2005, there are some key differences
that are addressed in this book. SQL Server 2008 is also a dramatic departure from even earlier versions,
and, even if you are an expert on SQL Server 2000 or SQL Server 7, you will find a great deal of very
useful information in this book. Go ahead, flip through the pages, and check it out for yourself. I believe
you will find what you’re looking for.
A Note about This Second Edition
This book is technically a second edition of<i>Beginning SQL Server 2005 Administration</i>. If you’ve read
through our first book (and we thank you, by the way), you may already be familiar with some of the
concepts in this book. However, each chapter has been updated to accommodate new features and tools
that are in SQL Server 2008 that were not available in its predecessor.
Assumptions
</div>
<span class='text_page_counter'>(32)</span><div class='page_container' data-page=32>
in your environment. A basic knowledge of SQL will be invaluable in this case.<i>Beginning T-SQL with</i>
<i>Microsoft SQL Server 2005 and 2008</i>(Wiley, 2008) is a great resource if you need some help in this area.
What This Book Covers
As much as we would like to have included everything that any database administrator might need
for any given circumstance, there just isn’t enough time or paper to cover it all. We have made every
attempt to cover the main areas of SQL Server 2008 Administration. Inside this book, you will find
detailed information about how to maintain and manage your SQL Server 2008 installation. Most of
the day-to-day tasks of the DBA are described within the pages of this book. Installation, configuration,
backups, restores, security, availability, performance monitoring, and the tools to manage these areas are
all covered. Our intent, our goal, and our sincere desire are to provide you with the information necessary
to be a competent and successful database administrator.
With this edition, we were also able to add additional material that was not covered in the first edition.
This includes new chapters on SQL Server Analysis Services and SQL Server Reporting Services, the two
key offerings in the Microsoft SQL Server BI stack. There is also a new chapter on optimizing SQL Server
2008 that beginners and experienced DBAs alike will find useful.
How This Book Is Str uctured
When putting this book together, we made a conscious effort to cover the material in a logical and
sequen-tial order:
❑ The first four chapters (Chapters 1–4) cover the overall structure of SQL Server 2008, as well as
the installation process.
❑ Once that foundation is laid, we moved on to the administration process of building and
secur-ing databases in the next two chapters (Chapters 5 and 6).
❑ This is followed by seven chapters (Chapters 7–13) on specific administrative tasks and
high-availability solutions.
❑ The last six chapters (Chapters 14–19) are dedicated to introducing you to the SQL Server 2008
services, and features including the Common Language Runtime (CLR), SQL Server’s Business
Intelligence offerings, and the Service Broker.
As mentioned, we tried to follow a logical order in the structure of this book, but like most technical
books, it is not absolutely essential to read it in any particular order. However, if you are fairly new to
SQL Server, you may want to read through Chapter 1 first to get an overall picture of the product before
diving in to the remaining chapters.
What You Need to Use This Book
</div>
<span class='text_page_counter'>(33)</span><div class='page_container' data-page=33>
recommended. In order to duplicate the examples in Chapter 14, ‘‘Introduction to the Common Language
Runtime,’’ as well as the example on using SOAP endpoints in Chapter 7, you will also need to have
either Visual Basic 2008 or Visual C# 2008 installed (Visual Studio 2008 Professional is recommended).
Conventions
To help you get the most from the text and keep track of what’s happening, we’ve used a number of
conventions throughout the book.
Examples that you can download and try out for yourself generally appear in a box like this:
Try It Out
The ‘‘Try It Out’’ is an exercise you should work through, following the text in the book.
1.
They usually consist of a set of steps.2.
Each step has a number.3.
Follow the steps through with your copy of the database.<b>Boxes like this one hold important, not-to-be forgotten information that is directly</b>
<b>relevant to the surrounding text.</b>
<i>Tips, hints, tricks, and asides to the current discussion are offset and placed in italics like this.</i>
Styles in the text are presented as follows:
❑ We<i>highlight</i>new terms and important words when we introduce them.
❑ We show keyboard strokes like this:<i>[Ctrl]+A</i>.
❑ We show URLs and code within the text like so:persistence.properties.
❑ We present code in two different ways:
We use a monofont type with no highlighting for most code examples.
We use gray highlighting to emphasize code that’s particularly important in the
present context.
Source Code
As you work through the examples in this book, you may choose either to type in all the code manually or
to use the source code files that accompany the book. All of the source code used in this book is available
for download atwww.wrox.com<sub>. Once at the site, simply locate the book’s title (either by using the Search</sub>
</div>
<span class='text_page_counter'>(34)</span><div class='page_container' data-page=34>
<i>Because many books have similar titles, you may find it easiest to search by ISBN; this book’s ISBN is</i>
<i>978-0-470-44091-9.</i>
Once you download the code, just decompress it with your favorite compression tool. Alternatively, you
can go to the main Wrox code download page atwww.wrox.com/dynamic/books/download.aspxto see
the code available for this book and all other Wrox books.
Errata
We make every effort to ensure that there are no errors in the text or in the code. However, no one is
perfect, and mistakes do occur. If you find an error in one of our books, like a spelling mistake or faulty
piece of code, we would be very grateful for your feedback. By sending in errata, you may save another
reader hours of frustration, and at the same time you will be helping us provide even higher quality
information.
To find the errata page for this book, go towww.wrox.comand locate the title using the Search box or one
of the title lists. Then, on the Book Search Results page, click on the Errata link. On this page, you can
view all errata that have been submitted for this book and posted by Wrox editors.
<i>A complete book list including links to errata is also available at</i> www.wrox.com/
misc-pages/booklist.shtml<i>.</i>
If you don’t spot ‘‘your’’ error on the Errata page, click on the ‘‘Errata Form’’ link and complete the form
to send us the error you have found. We’ll check the information and, if appropriate, post a message to
the book’s Errata page and fix the problem in subsequent editions of the book.
<b>p2p.wrox.com</b>
For author and peer discussion, join the P2P forums atp2p.wrox.com. The forums are a web-based
system for you to post messages relating to Wrox books and related technologies and interact with other
readers and technology users. The forums offer a subscription feature to e-mail you topics of interest of
your choosing when new posts are made to the forums. Wrox authors, editors, other industry experts,
and your fellow readers are present on these forums.
At, you will find a number of different forums that will help you not only as you
read this book, but also as you develop your own applications. To join the forums, just follow these steps:
1.
Go top2p.wrox.comand click on the Register link.2.
Read the Terms of Use and click Agree.3.
Complete the required information to join as well as any optional information you wish toprovide and click Submit.
</div>
<span class='text_page_counter'>(35)</span><div class='page_container' data-page=35>
<i>You can read messages in the forums without joining P2P, but in order to post your own messages, you</i>
<i>must join.</i>
</div>
<span class='text_page_counter'>(36)</span><div class='page_container' data-page=36></div>
<span class='text_page_counter'>(37)</span><div class='page_container' data-page=37>
1
Introducing SQL Ser ver
2008
Before getting into the meat (or tofu, if you prefer) and potatoes of SQL Server 2008, it’s important
that you understand what exactly it is that you have on your plate. In this chapter, you will learn
about the history of SQL Server, the key components of SQL Server, and the different editions, or
<i>flavors</i>, of SQL Server. This chapter also covers architecture, database objects, database storage, and
server security from a very high level, with more detail to follow in subsequent chapters.
A Condensed Histor y of SQL Ser ver
Now that the world revolves around SQL Server (at least, it feels that way, doesn’t it?), it’s
inter-esting to trace Microsoft SQL Server 2008 back to its humble origins. While this is by no means a
comprehensive history of SQL, it does provide some insight into the evolution of the product, as
well as an idea of where it might be headed. And who knows? This bit of trivia may still show up
in<i>Trivial Pursuit: Geek Edition</i>for a yellow pie slice.
In the Beginning
Microsoft’s foray into the enterprise database space came in 1987 when it formed a partnership
with Sybase to market Sybase’s DataServer product on the Microsoft/IBM OS/2 platform. From
that partnership, SQL Server 1.0 emerged, which was essentially the UNIX version of Sybase’s
DataServer ported to OS/2.
The Evolution of a Database
After several years, the developers at Microsoft were allowed more and more access to the Sybase
source code for test and debugging purposes, but the core SQL Server application continued to be
a product of Sybase until SQL Server 4.2 was released for Windows NT in March 1992.
</div>
<span class='text_page_counter'>(38)</span><div class='page_container' data-page=38>
Microsoft. While SQL Server had been developed to run primarily on the OS/2 platform, the
release of Windows NT heralded in a new era. The developers at Microsoft essentially abandoned any
OS/2 development and focused on bringing a version of SQL Server to Windows NT.
Microsoft Goes It Alone
With the growing success of Sybase in the UNIX market and Microsoft in Windows, the two companies
found themselves competing for market share on a product essentially developed by Sybase. As a result,
in 1994, the two companies terminated their joint development agreement, and Sybase granted Microsoft
a limited license to use and modify Sybase technology exclusively for systems running on Windows.
A year later, in June 1995, Microsoft released the first version of SQL Server developed exclusively by
Microsoft developers — SQL Server 6.0 — but the core technology was still largely Sybase code-base.
Less than a year later, more changes were made, and Microsoft released SQL Server 6.5 in April 1996.
With SQL Server 6.5 complete, the developers on the SQL Server team were beginning work on a new
database system code-named<i>Sphinx</i>. The Sybase code-base was rewritten almost from scratch for Sphinx,
and only a handful of code remained to indicate SQL Server’s humble beginnings in OS/2.
In December 1998, Sphinx was officially released as SQL Server 7.0. The changes from SQL Server 6.5
were readily apparent from the first second a database administrator launched the new Enterprise
Man-ager. Finally, there was a robust and reliable database system that was easy to manage, easy to learn, and
still powerful enough for many businesses.
As SQL Server 7.0 was being released, the next version was already in development. It was code-named
<i>Shiloh</i>. Shiloh became SQL Server 2000 and was released in August 2000. The changes to the
underly-ing data engine were minimal, but many excitunderly-ing changes that affected SQL Server’s scalability issues
were added (such as indexed views and federated database servers), along with improvements like
cas-cading referential integrity. Microsoft’s enterprise database server was finally a true contender in the
marketplace.
Over the next few years, the SQL team was working on an even more powerful and exciting release
code-named<i>Yukon</i>, which is now SQL Server 2005. After more than five years in development, a product
that some were calling ‘‘Yukon the giant (Oracle) killer’’ was finally released.
BI for the Masses
While calling SQL Server 2005 an ‘‘Oracle killer’’ might have been a bit optimistic, no one can deny the
broad appeal of SQL Server 2005 as a great leap forward for Microsoft. Since its release, it has been the
core technology behind a great number of Microsoft products, including SharePoint, PerformancePoint,
and the System Center family of products. Many third-party vendors have also leveraged SQL for ERP
systems and other software products.
</div>
<span class='text_page_counter'>(39)</span><div class='page_container' data-page=39>
2008
<i><b>. . .</b></i>
and Beyond!
In August 2008, Microsoft SQL Server 2008 was released to manufacturing (RTM). While SQL Server 2008
isn’t as much of a paradigm shift from SQL Server 2005 as its predecessor was from SQL Server 2000, it
contains many improvements and new features that make it a compelling upgrade (which we will cover
throughout this book). SQL Server 2000 reached its end-of-life mainstream support in April 2008, which
should also help drive the adoption of SQL Server 2008.
Microsoft has invested heavily in SQL Server as a core technology and key platform, and there doesn’t
appear to be any slowdown in the near future. Rumors continue to persist that Microsoft Exchange and
Active Directory, as well as a new file system, will leverage SQL Server 2008’s Database Engine.
What Is SQL Ser ver 2008?
As you most likely know, SQL Server 2008 is primarily thought of as a<i>Relational Database Management</i>
<i>System</i>(<i>RDBMS</i>). It is certainly that, but it is also much more.
SQL Server 2008 can be more accurately described as an<i>Enterprise Data Platform</i>. It builds on many of the
features that had first been incorporated in SQL Server 2005, while also expanding its offerings to include
several improvements and additions. Primarily known for its traditional RDBMS role, SQL Server 2008
also provides rich reporting capabilities, powerful data analysis, and data mining. It also has features
that support asynchronous data applications, data-driven Event Notification, and more.
This book is primarily focused on the administration of the Database Engine. However, as mentioned,
SQL Server 2008 includes many more features than just the relational engine. In light of that, it is
impor-tant to start with some point of common reference. This section introduces the features of SQL Server
2008. It is not meant to be all-inclusive, but it will provide the context for the remainder of the book.
Database Engine
The Database Engine is the primary component of SQL Server 2008. It is the Online Transaction
Process-ing (OLTP) engine for SQL Server and has received further enhancements since SQL Server 2005. The
Database Engine is a high-performance component responsible for the efficient storage, retrieval, and
manipulation of relational and Extensible Markup Language (XML) formatted data.
SQL Server 2008’s Database Engine is highly optimized for transaction processing, but offers exceptional
performance in complex data retrieval operations. The Database Engine is also responsible for the
con-trolled access and modification of data through its security subsystem. The Relational Database Engine in
SQL Server 2008 has many improvements to support scalability, availability, security, and
programma-bility. The following list is by no means a comprehensive list, but just a short overview of what’s new in
SQL Server 2008:
❑ <b>Hot Add CPU</b>— If your hardware or software environment supports it, SQL Server 2008 will
allow you to dynamically add one or more CPUs to a running system. These CPUs can be
physi-cal, logiphysi-cal, or virtual.
</div>
<span class='text_page_counter'>(40)</span><div class='page_container' data-page=40>
❑ <b>SQL Server Extended Events</b>— SQL Server 2005 introduced the ability to associate SQL Profiler
traces with Windows Performance Log counters. This was extremely helpful in identifying
poorly performing queries or the lack of sufficient resources in the system to handle certain
events. SQL Server 2008 takes this a step further by introducing SQL Server Extended Events.
Extended events allow database administrators to get a better understanding of the system
behavior by correlating SQL Server data to the operating system or database applications. This
is handled by directing output from extended events to Event Tracing for Windows (ETW).
❑ <b>Resource Governor</b>— The Resource Governor is a new feature that allows administrators to
specify configuration options that limit the amount of CPU and memory available to incoming
requests. This can help prevent applications or queries from consuming 100 percent of the CPU
or all available memory. The Resource Governor uses configurable workload groups, which
define what the CPU and memory limits are for any session that is classified as being a
mem-ber of that group. Classification can be performed based on a nummem-ber of system functions or
user-defined functions.
❑ <b>Policy-Based Management</b>— SQL Server 2008 includes features that allow administrators
greater control over their server environments by enforcing behaviors or constraints through a
policy-based mechanism. In addition to using the included policies, administrators can create
their own policies to configure servers to meet compliance requirements and standardize
naming conventions, thereby simplifying administration.
❑ <b>Centralized Management</b>— Central Management servers are SQL Servers that can be
config-ured to manage multiple servers as part of a group. You can also execute queries against a SQL
Server group that can return results to either a combined set or a separate pane per server. A
Central Management server can also be used to enforce management policies against multiple
target servers simultaneously.
❑ <b>Query Editor IntelliSense</b>— SQL Server Management Studio now provides IntelliSense
func-tionality in the Query Editor. The IntelliSense funcfunc-tionality provides auto-completion ability,
error underlining, quick info help, syntax pair matching, and parameter help.
❑ <b>PowerShell Provider</b>— SQL Server 2008 includes new features that integrate with Windows
PowerShell to help administrators automate many SQL Server 2008 tasks.<i>PowerShell</i>is an
administrative command-line shell and scripting language that can make it easier to perform
many common tasks through automation. The PowerShell provider in SQL Server 2008 exposes
SQL Server Management Objects (SMO) in a structure similar to file system paths. SQL Server
PowerShell also includes several SQL Server cmdlets for running scripts and other common
tasks.
❑ <b>Compressed Indexes and Tables</b>— Compression is now supported for tables, indexes, and
indexed views on either rows or pages. Compression operations will have an effect on
perfor-mance. Because of this, row and page compression can be configured on a per-partition basis.
For example, you could choose to compress a Read Only partition, but leave a Write-intensive
partition uncompressed to minimize impact on the CPU.
</div>
<span class='text_page_counter'>(41)</span><div class='page_container' data-page=41>
❑ <b>Partition Switching</b>— Simply put, Partition Switching enables you to move data between
par-titions for a table or index. Data can be transferred between parpar-titions without disrupting the
integrity of the table or index.
❑ <b>Spatial Data Types</b>— Two new data types have been created for storing planar, or ‘‘flat-earth’’
data as well as ellipsoidal, or ‘‘round-earth’’ data. These data types are known as the geometry
data type and geography data type, respectively.
❑ MERGE<b>Statement</b>— Transact-SQL includes a newMERGEstatement that, based on the results of a
join with a source table, can performINSERT,UPDATE, orDELETEoperations against a target table.
For example, you can useMERGEto incrementally update a destination table by comparing the
differences from a source table.
Integration Services
SQL Server Integration Services (SSIS) is Microsoft’s enterprise class data Extract, Transform, and Load
(ETL) tool. SSIS was originally introduced in SQL Server 2005 as a significant re-design of SQL Server
2000’s Data Transformation Services (DTS). SSIS offers a much richer feature set and the ability to create
much more powerful and flexible data transformations than its predecessor, and this has been
fur-ther expanded in SQL Server 2008. As anofur-ther component in SQL Server’s BI stack, SSIS provides a
rich environment for moving and transforming data from a variety of source and destinations systems.
SSIS 2008 includes performance enhancements, new ADO.NET components, and a new script
environ-ment that integrates with Visual Studio Tools for Applications (VSTA). SSIS is covered in more detail in
Chapter 16.
<i>For a very thorough discussion of this feature of SQL Server 2008, read the book by Brian Knight, Erik</i>
<i>Veerman, Grant Dickinson, Douglas Hinson, and Darren Herbold,</i>Professional Microsoft SQL Server
2008 Integration Services (Wiley, 2008)<i>.</i>
Analysis Services
Analysis Services delivers Online Analytical Processing (OLAP) and Data Mining functionality for
Busi-ness Intelligence applications. As its name suggests, Analysis Services provides a very robust
environ-ment for the detailed analysis of data. It does this through user-created, multidimensional data structures
that contain de-normalized and aggregated data from diverse data sources (such as relational databases,
spreadsheets, flat files, and other multidimensional sources). Unlike the OLTP engine, which is
opti-mized for Write performance, the OLAP engine is optiopti-mized for Read performance, allowing queries
and reports to return results from millions of rows of data in a short period of time, with minimal (if any)
impact to the OLTP engine.
</div>
<span class='text_page_counter'>(42)</span><div class='page_container' data-page=42>
A more detailed introduction to SSAS and Data Mining is in Chapter 17.
Reporting Services
Reporting Services is a Web Service–based solution for designing, deploying, and managing flexible,
dynamic web-based reports, as well as traditional paper reports. These reports can contain information
from virtually any data source. Although Reporting Services is implemented as a Web Service, it does
not depend on Internet Information Services (IIS). In fact, in SQL Server 2008, IIS is no longer used to
manage SQL Server Reporting Services. SQL Server Reporting Services (SSRS) can publish reports to a
Virtual Directory hosted by the SQL Server itself, or to a SharePoint library. More information about
SSRS can be found in Chapter 18.
<i>For a detailed description of SQL Server 2008 Reporting Services and information about how to </i>
<i>imple-ment and extend SQL Server 2008 reports, check out an excellent book,</i>Professional Microsoft SQL
Server 2008 Reporting Services<i>(Wiley, 2008), by my friends and co-workers Paul Turley, Thiago</i>
<i>Silva, Bryan C. Smith, and Ken Withee.</i>
Service Broker
Service Broker provides the framework and services to enable the creation of asynchronous, loosely
coupled applications. Service Broker implements a Service Oriented Architecture (SOA) in the data tier.
It provides more controlled transaction-based communications than traditionally available in other SOA
implementations such as Microsoft Message Queuing (MSMQ), without some of the limitations that
MSMQ has (e.g., message size). Service Broker allows developers to create database applications that
focus on a particular task and allows the asynchronous communication with other applications that
perform related (yet disconnected) tasks. For more information, see Chapter 19.
Data Tier Web Services
SQL Server 2008 provides support for creating and publishing data tier objects via HTTP without the
use of an Internet Information Services (IIS) server. SQL Server 2008 registers itself with the HTTP.sys
listener, allowing it to respond to Web Services requests. Developers can take advantage of this by
cre-ating applications that interact with a database across the Internet or through a firewall by using a Web
Service. For more information, see Chapter 7.
Replication Services
SQL Server 2008 Replication Services provides the ability to automate and schedule the copying and
distribution of data and database objects from one database or server to another, while ensuring
data integrity and consistency. Replication has been enhanced in SQL Server 2008 to include a new
Peer-to-Peer Topology Wizard, which allows replication nodes to be managed using a topology viewer.
The process of adding and removing nodes has also been made easier in this version of SQL Server.
More detail about replication can be found in Chapter 13.
Multiple Instances
</div>
<span class='text_page_counter'>(43)</span><div class='page_container' data-page=43>
being installed, up to 50 instances can be installed. This feature allows for one high-performance server
to host multiple instances of the SQL Server services, each with its own configuration and databases.
Each instance can be managed and controlled separately with no dependency on each other.
Database Mail
In the past, SQL Server relied on a Messaging Application Programming Interface (MAPI) mail client
configured on the server to facilitate e-mail and pager notification for administrative and programmatic
purposes. What this essentially meant was that to fully utilize administrative notifications, the
adminis-trator needed to install Outlook (or some other MAPI-compliant client) on the server and then create a
mail profile for the service account to use.
Many organizations wanted to take advantage of the SQL Server Agent’s ability to send job and Event
Notification via e-mail but were unwilling to install unnecessary and potentially risky software on
pro-duction server assets. The Database Mail feature removes this requirement by supporting Simple Mail
Transfer Protocol (SMTP) for all mail traffic. In addition, multiple mail profiles can be created in the
database to support different database applications. Configuring Database Mail is covered in Chapter 8.
A Note about Notification Services
In our<i>Beginning SQL Server 2005 Administration</i>(Wiley, 2006) book, Notification Services was introduced.
If you are familiar with Notification Services and have used it with SQL Server 2000 or SQL Server 2005,
you might be dismayed (or overjoyed, depending on your experience) that SQL Server Notification
Services<i>is</i>no more. Most of the functionality of Notification Services has been absorbed into SQL Server
Reporting Services, eliminating the need for Notification Services in SQL Server 2008.
SQL Ser ver 2008 Editions
SQL Server 2008 comes in several different flavors, and each has its specific place in the data management
infrastructure with the probable exception of the Enterprise Evaluation Edition, which is only useful for
short-term evaluation of the product (180 days). At the top of the list is the Enterprise Edition, which
supports absolutely everything that SQL Server 2008 has to offer. On the other end of the spectrum is
the Express Edition, which offers very limited (but still exciting) features. Each edition, with the
excep-tion of the Compact Ediexcep-tion, has an x64 and x86 version. The Enterprise Ediexcep-tion (and consequently, the
Developer Edition) also supports IA64 environments.
The available editions are:
❑ Enterprise Edition
❑ Standard Edition
❑ Workgroup Edition
❑ Web Edition
❑ Express Edition
❑ Express Advanced Edition
❑ Developer Edition
</div>
<span class='text_page_counter'>(44)</span><div class='page_container' data-page=44>
The following table contrasts the major differences between the four main editions of SQL Server 2008.
The Developer Edition includes the same feature set as the Enterprise Edition but is not licensed for
production use.
<b>Feature</b> <b>Enterprise Edition</b> <b>Standard</b>
<b>Edition</b>
<b>Workgroup</b>
<b>Edition</b>
<b>Web</b>
<b>Edition</b>
Failover Clustering Yes (limited by OS) 2-node No No
Multi-Instance Support 50 16 16 16
Database Mirroring Yes Limited Witness Server
Role only
Witness
Server
Role only
Enhanced Availability
Features
Yes No No No
Table and Index Physical
Partitioning
Yes No No No
Policy-Based Management Yes Yes Yes Yes
T-SQL and MDX
IntelliSense
Yes Yes Yes No
Spatial and Location
Services
Yes Yes Yes Yes
Service Broker Yes Yes Yes Client only
Analysis Services Yes Limited No No
Data Mining Yes Limited No No
Reporting Services Yes Limited Limited Limited
Integration Services Yes Limited Very limited Very
limited
Replication Services Yes Limited Limited features
available to
Subscriber only
Limited
features
available to
Subscriber
only
<i>For a complete list of supported features, consult SQL Server 2008 Books Online under the topic </i>
<i>‘‘Fea-tures Supported by the Editions of SQL Server 2008.’’</i>
SQL Server Compact 3.5 SP1
</div>
<span class='text_page_counter'>(45)</span><div class='page_container' data-page=45>
Windows Embedded CE or Windows Mobile application, as well as supporting desktop applications
that require a much smaller feature set than offered in the Express Edition.
This ability creates a world of opportunity for collecting data in a remote scenario and synchronizing
that data with a land-based database. For example, consider an overnight delivery service that must
maintain a record of a delivery truck’s inventory, including packages delivered and picked up. The
truck inventory could be uploaded via replication to a mobile device, where a mobile application keeps
track of the deliveries and new packages picked up at delivery locations. Once the truck comes back to
the delivery center, the mobile device could be synchronized with the central database via replication
or data upload.
SQL Server 2008 Express Edition
Back in the old days, when I had to manage database systems (in the snow, uphill both ways), the
Microsoft Desktop Edition (MSDE) of SQL Server was the primary client-side Database Engine. It was
extremely limited and included almost no management tools (except for the command-line osql utility)
but had a compelling price — free. This has since been replaced with the SQL Server 2008 Express
Edi-tion. It’s still not as robust as the Standard or Enterprise Editions, but for its very low price (you can’t
beat free), it still contains a great deal of functionality.
What makes this edition compelling is that it is perfect for many organizations that are starting or running
small businesses. They have a genuine need for a centralized managed database but aren’t ready to
pay for a more scalable and robust solution. At the risk of offending my friends in the Open Source
community, many small businesses that are not in the tech industry often don’t have the benefit of having
tech-savvy personnel on staff. Viable Open Source solutions like MySQL running on Linux or Windows
is simply not appropriate when a Database Engine with an intuitive and free graphical management
tool exists.
One of the most exciting improvements to Microsoft’s free version of its database system is that it comes
with a graphical management environment, SQL Server Management Studio Basic. It also supports
databases up to 4 GB in size and contains much of the same functionality as the other editions. There
is even an ‘‘advanced’’ edition of SQL Server 2008 Express that includes full-text search and Reporting
Services (still free!).
SQL Express can be installed on any Microsoft desktop or server operating system from Windows 2000
and beyond, so a very small company can still leverage the database technology without making a large
investment. Once the company starts to grow, it will inevitably need to make the move to one of the more
robust editions, but the upgrade process from SQL Express to its bigger siblings is a piece of cake because
the data structures are nearly identical. Even larger organizations can take advantage of the SQL Server
Express Edition by using it for smaller, departmental or business unit installations.
SQL Server 2008 Web Edition
</div>
<span class='text_page_counter'>(46)</span><div class='page_container' data-page=46>
The Web Edition has some very specific licensing guidelines and requirements. For example, it is licensed
for public-facing web applications, sites, and services. It is not licensed for internal line-of-business
applications. Because it is designed around public consumption, Client Access Licenses (CALs) are not
applicable to the Web Edition.
<i>The Web Edition is only available to Select Licensing and Service Provider License Agreement </i>
<i>Cus-tomers. Contact your reseller or licensing representative to find out if the Web Edition is appropriate for</i>
<i>your scenario.</i>
SQL Server 2008 Workgroup Edition
The Workgroup Edition contains all the functionality of the SQL Server 2008 Express Edition and then
some. This edition is targeted to those small companies that have either outgrown the Express Edition
or needed a more flexible solution to begin with and yet do not need all the features of the Standard or
Enterprise Editions.
The Workgroup Edition is very flexible and contains many of the features of the more expensive editions.
What the Workgroup Edition doesn’t provide is support for more advanced Business Intelligence
appli-cations, because SQL Server Integration Services and Analysis Services are not included in this edition.
The Workgroup Edition also has a reduced feature set in regard to Reporting Services, but the Reporting
Services features supported should satisfy most small organizations.
Like the Express Edition, the Workgroup Edition can be installed on both desktop and server operating
systems, with the exception of Windows XP Home (which is not supported).
SQL Server 2008 Standard Edition
Most of the capabilities of SQL Server 2008 are supported in the Standard Edition, which makes it the
ideal data platform for many organizations. What the Standard Edition does not provide are many of
the features designed for the support of large enterprise databases. These features include many of the
high-availability and scalability enhancements, such as Partitioned Tables and Parallel index
opera-tions. It also lacks some of the more advanced features of the Analysis Services and Integration Services
engines.
SQL Server 2008 Enterprise Edition
The Enterprise Edition is the bee’s knees. Nothing is held back. Parallel operations, physical table
parti-tioning, complete business intelligence, and data-mining support — you name it, the Enterprise Edition
has it.
If you require an easy-to-implement-and-maintain platform that will allow you to dynamically add
memory and CPUs, Transparent Data Encryption, and parallel index operations, this release is for you.
It is also an appropriate solution if you require only advanced business analytics, and not necessarily the
millions of transactions per second that this edition offers.
</div>
<span class='text_page_counter'>(47)</span><div class='page_container' data-page=47>
enough to accommodate quick growth within the organization. The Enterprise Edition fully optimizes
Read-ahead execution and table scans, which results in a noticeable performance improvement.
<i>The difference in cost between the Standard Edition and the Enterprise Edition can be significant; </i>
<i>espe-cially to smaller organizations where budget constraints can limit their purchasing power. However,</i>
<i>be aware that some software may depend on certain features of the Enterprise Edition. A good example</i>
<i>of this is the Microsoft Office PerformancePoint Server 2007 Planning Server, which relies heavily on</i>
<i>proactive caching for Analysis Services cubes. This feature is only available in the Enterprise Edition of</i>
<i>SQL Server.</i>
SQL Ser ver 2008 Architecture
It is the job of SQL Server to efficiently store and manage related data in a transaction-intensive
envi-ronment. The actual theories and principles of a relational database are beyond the scope of this book,
and, hopefully, you already have some of that knowledge. What is pertinent to this book is the way SQL
Server manages the data and how it communicates with clients to expose the data. The following
discus-sion describes the communication architecture utilized by SQL Server 2008, the services SQL Server 2008
offers, and the types of databases used by SQL Server. This section also introduces at a high level how
those databases are stored and accessed, but you can find a detailed description of the SQL Server 2008
storage architecture in Chapter 4.
SQL Server 2008 Communication
To adequately plan for a SQL Server database application, it is important to understand how SQL Server
2008 communicates with clients. As mentioned previously, SQL Server 2008 is more than just a relational
database server. Because the SQL Server 2008 platform offers several different data services, it also must
provide different ways of accessing that data.
SQL Server 2008 ships with the ability to communicate over different protocols. By default, SQL Server
will accept network connections via TCP/IP. The local Shared Memory protocol is also enabled by
default to allow local connections without having to incur the overhead of a network protocol. A
more complete description of the protocols that can be leveraged by SQL Server 2008 is provided in
Chapter 7.
In addition to the TCP/IP, Named Pipes, and Shared Memory protocols, the Virtual Interface Adapter
(VIA) protocol is available for VIA Storage Area Network (SAN) implementations.
With the exception of HTTP endpoints, SQL Server uses a communication format called<i>Tabular Data</i>
<i>Stream</i>(TDS). The TDS packets utilized by SQL Server are encapsulated in the appropriate protocol
packets for network communication.
The task of wrapping the TDS packets is the responsibility of the SQL Server Network Interface (SNI)
protocol layer. The SNI replaces the Server Net-Libraries and the Microsoft Data Access Components
(MDAC) that were used in SQL Server 2000. SQL Server creates separate TDS endpoints for each network
protocol.
</div>
<span class='text_page_counter'>(48)</span><div class='page_container' data-page=48>
Tier Web services (see Chapter 7). By utilizing SQL Server Web services, connections can be made to SQL
Server via any client application that supports HTTP and Simple Object Access Protocol (SOAP).
Supported Languages
SQL Server 2008 supports the following five different languages to enable data manipulation, data
retrieval, administrative functions, and database configuration operations:
❑ <b>Transact-Structured Query Language (T-SQL)</b>— This is Microsoft’s procedural language
exten-sion to the Structured Query Language (SQL) standard established by the American National
Standards Institute (ANSI). T-SQL is entry-level compliant with the ANSI-99 standard. T-SQL
is the primary and most common method for manipulating data. For more information about
T-SQL, consult<i>Beginning T-SQL with Microsoft SQL Server 2005 and 2008</i>by Paul Turley and Dan
Wood (Wiley, 2008).
❑ <b>Extensible Markup Language (XML)</b>— This is fully supported in SQL Server 2008 as a data
type, as well as language extensions to XML that enable the retrieval and modification of data by
using XQuery syntax or native XML methods.
❑ <b>Multidimensional Expressions (MDX)</b>— This language is used to query against
multidimen-sional objects in SQL Server 2008 Analysis Services.
❑ <b>Data Mining Extensions (DMX)</b>— This is an extension of Transact-SQL that enables the
cre-ation of queries against a data-mining model implemented in SQL Server 2008 Analysis Services.
❑ <b>Extensible Markup Language for Analysis (XMLA)</b>— This can be used to both discover
meta-data from an instance of SQL Server 2008 Analysis Services and to execute commands against an
instance of SSAS. XMLA commands are generally limited to the creation or modification of SSAS
objects. Actual retrieval of SSAS data is done with MDX queries.
SQL Server Programming Object Models
Most of the administrative activity that must be done on SQL Server 2008 can be done using the provided
tools, but sometimes it may be necessary to build custom administrative tools, or to be able to
program-matically build and manipulate database objects. Three new object models have been created to support
this need:
❑ <b>SQL Management Objects (SMOs)</b>— SMOs enable developers to create custom applications
to manage and configure SQL Server 2008, SQL Server 2005, SQL Server 2000, or SQL Server 7.0
Database Engines. It is an extensive library that provides full support for virtually all aspects of
the relational store. The SMO library makes it possible to automate administrative tasks that an
administrator must perform through custom applications, or with command-line scripts using
the SMOscripterclass.
❑ <b>Replication Management Objects (RMOs)</b>— RMOs can be used along with SMOs to
imple-ment and automate all replication activity, or to build custom replication applications.
❑ <b>Analysis Management Objects (AMOs)</b>— AMOs, like SMOs and RMOs, represent a complete
library of programming objects. AMOs enable the creation of custom applications or automation
of Analysis Server management.
</div>
<span class='text_page_counter'>(49)</span><div class='page_container' data-page=49>
SQL Server 2008 Services
SQL Server runs as a service. In fact, it runs as several services if all the different features of the product
are installed. It is important to know what service is responsible for what part of the application so that
each service can be configured correctly, and so that unneeded services can be disabled to reduce the
overhead on the server and reduce the surface area of SQL Server. These services are identified by their
executable names.
MSSQLServer (SQL Server)
The MSSQLServer service is the Database Engine. To connect and transact against a SQL Server 2008
database, the MSSQLServer service must be running. Most of the functionality and storage features of
the Database Engine are controlled by this service.
The MSSQLServer service can be configured to run as the local system or as a domain user. If installed
on Windows Server 2003 or Windows Server 2008, it can also be configured to run under the Network
System account.
SQLServerAgent (SQL Server Agent)
The SQLServerAgent service is responsible for the execution of scheduled jobs such as backups,
import/export jobs, and Integration Services packages. If any scheduled tasks require network or file
system access, the SQLServerAgent service’s credentials are typically used.
The SQLServerAgent service is dependent on the MSSQLServer service. During installation, the option
is given to configure both services with the same credentials. Although this is by no means required,
it is common practice. A frequent problem encountered by database administrators is when a job that
executes perfectly during a manual invocation fails when run by the agent. Often, the reason for the
failure is because the account that is used when testing the job manually is the logged-in administrator,
but when the job is executed by the agent, the account the agent is running under does not have adequate
permissions.
MSSQLServerADHelper100 (SQL Server Active Directory Helper)
Microsoft SQL Server 2008 has the ability to publish itself and its features in Active Directory. This can
make it easier for Active Directory–aware services and applications to find the necessary SQL
compo-nents that they need. Typically, the MSSQLServer service and the SQLServerAgent service are configured
to run with a domain account that has local administrative rights on the server that SQL Server is installed
on. Although this configuration offers a great deal of flexibility to what the two services can do locally, it
doesn’t give them any permission to publish objects in Active Directory.
In order for the MSSQLServer service to register its respective instance of SQL Server, it must be either
running as the local system account (which significantly reduces the flexibility of the service) or be a
member of the domain admin group (which grants it way too much access, violating the principle of
least privilege).
</div>
<span class='text_page_counter'>(50)</span><div class='page_container' data-page=50>
Regardless of the number of installed instances, there is only one MSSQLServerADHelper service per
computer.
<i>The version information ‘‘100’’ is used to denote that this service is associated with SQL Server 2008, or</i>
<i>SQL Server 10.0.</i>
MSSQLServerOLAPService (SQL Server Analysis Services)
MSSQLServerOLAPService is the service that Analysis Services runs under. Analysis Services provides
the services and functionality to support all of SQL Server 2008’s OLAP needs, as well as the Data Mining
engine included with SQL Server 2008.
SQLBrowser (SQL Server Browser)
The SQLBrowser Service is used by SQL Server for named instance name resolution and server name
enumeration over TCP/IP and VIA networks.
The default instance of SQL Server is assigned the TCP Port 1433 by default to support client
communica-tion. However, because more than one application cannot share a port assignment, any named instances
are given a random port number when the service is started. This random port assignment makes it
diffi-cult for clients to connect to it, because the client applications don’t know what port the server is listening
on. To meet this need, the SQLBrowser Service was created.
On start-up, the SQLBrowser Service queries the registry to discover all the names and port numbers of
installed servers and reserves UDP Port 1434. It then listens on UDP Port 1434 for SQL Server Resolution
Protocol (SSRP) requests and responds to the requests with the list of instances and their respective port
assignments so that clients can connect without knowing the port number assignment. There are definite
security considerations to this arrangement, so it is very important that no unauthenticated traffic on UDP
Port 1434 be allowed on the network, because the service will respond to any request on that port. This
creates the potential of exposing more information about the server instances than some organizations
find acceptable.
If the SQLBrowser Service is disabled, it will be necessary to specify a static port number for all named
instances of the SQL Server Service and to configure all client applications that connect to those instances
with the appropriate connection information. For a full list of what features are affected by disabling the
SQLBrowser, consult SQL Server 2008 Books Online.
MSSQLFDLauncher (SQL Full-Text Filter Daemon Launcher)
The Microsoft Full-Text Daemon Launcher for SQL Server (MSSQLFDLauncher) is used to support
full-text indexing and full-text queries against text data stored in the database. The text data can be of
several different data types includingchar,nchar,varchar,nvarchar,text, andntext. In addition,
full-text indexes can be created on binary formatted text such as Microsoft Word documents.
The chief advantage of the MSSQLFDLauncher service and associated engine is that it allows much more
flexible and powerful searches against text data than the Transact-SQLLIKEcommand, which is limited
to exact match searches. The MSSQLFDLauncher engine can perform exact match, proximity, linguistic,
and inflectional searches. It will also exponentially outperform comparative Transact-SQLLIKE<sub>searches</sub>
against large (millions of rows) tables. For a more complete discussion on both the Transact-SQLLIKE
</div>
<span class='text_page_counter'>(51)</span><div class='page_container' data-page=51>
MSDTSServer100 (SQL Server Integration Services)
The MSDTSServer service provides management and storage support for SSIS. Although this service is
not required to create, store, and execute SSIS packages, it does allow for the monitoring of SSIS package
execution and displaying of a hierarchical view of SSIS packages and folders that are stored in different
physical locations.
ReportingServicesServer (SQL Server Reporting Services)
The ReportingServicesServer service is the process in which Reporting Services runs. The service is
acces-sible as a Web Service and provides for report rendering, creation, management, and deploying. For more
information on Reporting Services, see<i>Professional Microsoft SQL Server 2008 Reporting Services</i>.
SQLWriter (SQL Server VSS Writer)
The SQLWriter service allows for the volume backup of SQL Server data and log files while the SQL
Server service is still running. It does this through the Volume Shadow Copy Service (VSS). SQL Server
database backups are typically performed through SQL Server’s backup program or through third-party
applications that communicate with SQL Server’s backup program.
Normal file system backups of volumes containing SQL Server log or data files will typically fail to
properly back up those files, because as long as SQL Server is running, the files are open. The SQLWriter
service overcomes this limitation by allowing you to perform the backups of a snapshot copy of the files
with the VSS service. It is still recommended, however, to perform regular backups through SQL Server’s
backup program.
MSDTC (Distributed Transaction Coordinator)
The MSDTC service is used to manage transactions that span more than one instance of SQL Server or
an instance of SQL Server and another transaction-based system. It uses a protocol known as<i>two-phased</i>
<i>commit (2 PC)</i>to ensure that all transactions that span systems are committed on all participating systems.
SQL Ser ver 2008 Database Objects
SQL Server 2008 database objects exist within a defined scope and hierarchy. This hierarchy enables more
control over security permissions and organization of objects by similar function. SQL Server 2008 objects
are defined at the server, database, and schema levels.
Server
The server scope encompasses all the objects that exist on the instance of SQL Server, regardless of their
respective database or namespace. The database object resides within the server scope.
One of the more confusing terms when working with SQL Server 2008 is<i>server</i>. When you hear the term
<i>server</i>, you often think of that piece of hardware taking up space on a<i>server</i>rack in the<i>server</i>room. And
let’s not even get started on how virtualization mucks up the term. Where the confusion arises is that you
can install multiple instances of SQL Server on a single<i>server</i>(huh?).
</div>
<span class='text_page_counter'>(52)</span><div class='page_container' data-page=52>
What is left is the fact that, when it comes to SQL Server 2008 and you read ‘‘server,’’ it is important to
check the context to make sure that it means an instance of SQL Server 2008 or the physical computer
that SQL Server is installed on.
When it comes to the server scope and SQL Server 2008 database objects, the term<i>server</i>actually refers
to the SQL Server 2008<i>instance</i>. The default instance is actually SERVERNAME\MSSQLService.
How-ever, since it is the<i>default instance</i>, appending<i>MSSQLService</i>to the server name is unnecessary. For
example, we are using a server called<i>AUGHTEIGHT</i>that runs the Windows Server 2008 Operating
System while writing this book. The default instance of SQL Server is known simply as<i>AUGHTEIGHT</i>.
If you were to install a second instance, named<i>SECONDINSTANCE</i>, the SQL Server name would be
<i>AUGHTEIGHT\SECONDINSTANCE</i>. From a SQL Server point of view, each instance is considered a
separate ‘‘server.’’
Database
The database scope defines all the objects within a database catalog. Schemas exist in the database scope.
The ANSI synonym for<i>database</i>is<i>catalog</i>. When connecting to an instance of SQL Server 2008, it is
gener-ally desired to specify an Initial Catalog, or Initial Database. An instance of SQL Server 2008 can contain
many databases. It used to be common for a typical database application to be constrained within one
database that contained all the data objects required to provide the functionality for the application.
However, now it is not uncommon to see more and more applications requiring multiple databases to
manage different components of the application (this tends to increase the scalability of said application).
An example of this is SharePoint, which creates databases for managing the SharePoint environment
itself, as well as content databases for the various sites and site collections.
Schema
Each database can contain one or more schemas. A schema is a namespace for database objects. All data
objects in a SQL Server 2008 database reside in a specific schema.
SQL Server 2008 implements the ANSI schema object. A<i>database schema</i>is a defined namespace in which
database objects exist. It is also a fully configurable security scope. In previous releases of SQL Server,
the namespace was defined by the owner of an object, and it wasn’t uncommon to see everything in the
database in thedboschema. In SQL Server 2008, the ownership of an object is separated from an object’s
namespace. An individual user may be granted ownership of a schema, but the underlying objects belong
to the schema itself. This adds greater flexibility and control to the management and securing of database
objects. Permissions can be granted to a schema, and those permissions will be inherited by all the objects
defined in the schema.
Object Names
Every object in a SQL Server 2008 database is identified by a four-part, fully qualified name. This fully
qualified name takes the form ofserver.database.schema.object<sub>. However, when referring to objects,</sub>
</div>
<span class='text_page_counter'>(53)</span><div class='page_container' data-page=53>
Omitting the schema name will cause SQL Server to assume the namespace of the logged-in user. This
is where some confusion can be created. Unless explicitly assigned, new users are assigned the default
schema ofdbo. (See Chapter 6 for user and login management information.) As a result, all references to
database objects not explicitly qualified will be resolved to thedboschema.
For example, the user Fred logs in to the server AUGHTEIGHT, and his database context is set to
AdventureWorks2008. Because Fred was not assigned a user-defined schema, he exists in the default
dboschema. Fred wants to retrieve the contents of thePersontable, so he executes the following query:
SELECT * FROM Person;
Fred’s query will resolve toAUGHTEIGHT.AdventureWorks2008.dbo.Person. Unfortunately, that table
does not exist. The fully qualified name for the contact table isAUGHTEIGHT.AdventureWorks2008
.Person.Person. In order for Fred’s query to work, one of two things will have to happen. The query
will have to be rewritten to reference the appropriate schema scope, as in the following example:
SELECT * FROM Person.Person;
Or, Fred’s default schema can be changed to thePersonschema so that his query will be properly
resolved with the following command:
USE AdventureWorks2008;
GO
ALTER USER Fred WITH DEFAULT_SCHEMA=Person;
GO
Now, take a look at a different scenario. The user Fred is created and assigned the default schema of
Production. Fred wants to retrieve the contents of a table calleddbo.DatabaseLogso he executes the
following:
SELECT * FROM DatabaseLog;
SQL Server first resolves this query asAUGHTEIGHT.AdventureWorks2008.Person.DatabaseLog
because Fred’s default schema isPersonand he did not explicitly tell SQL Server what schema
to work with. Because the DatabaseLogtable does not exist in the Personschema, the initial
resolution fails, but SQL Server then falls back to thedboschema and resolves the name as
AUGHTEIGHT.AdventureWorks2008.dbo.DatabaseLog. The resolution succeeds, and Fred is able to
retrieve the data he wanted.
SQL Server will always search the assigned schema first, then thedboschema if the initial resolution fails.
Care must be taken when creating objects so that the proper namespace is referenced. It is completely
possible to create a table with the same name in two different schemas (e.g., adbo.HourlyWageand a
</div>
<span class='text_page_counter'>(54)</span><div class='page_container' data-page=54>
SQL Ser ver 2008 Databases
There are two types of databases in SQL Server: system databases and user databases. The<i>system databases</i>
are used to store system-wide data and metadata.<i>User databases</i>are created by users (sometimes
dur-ing the process of installdur-ing an application) who have the appropriate level of permissions to store
application data.
System Databases
The system databases are comprised ofmaster,model,msdb, andtempdbdatabases, as well as the hidden
resourcedatabase. If the server is configured to be a replication distributor, there will also be at least one
system distribution database that is named during the replication configuration process.
The
<b>master</b>
Database
Themasterdatabase is used to record all server-level objects in SQL Server 2008. This includes Server
Logon accounts, Linked Server definitions, and EndPoints. Themasterdatabase also records information
about all the other databases on the server (such as their file locations and names). SQL Server 2008 does
not store system information in themasterdatabase but, rather, in theResourcedatabase. However,
system information is logically presented as theSYSschema in themasterdatabase.
The
<b>model</b>
Database
Themodeldatabase is a template database. Whenever a new database is created (including the system
databasetempdb), a copy of themodeldatabase is created and renamed with the name of the database
being created. The advantage of this behavior is that objects can be placed in themodeldatabase prior
to the creation of any new database, and, when the database is created, the objects will appear in the
new database. For example, Transact-SQL does not contain aTrim<sub>function to truncate both leading</sub>
and trailing spaces from a string of characters. Transact-SQL offers anRTRIMfunction that truncates
trailing spaces and anLTRIM<sub>function that removes leading spaces. The code to successfully implement</sub>
a traditional trim operation thus becomes the following:
LTRIM(RTRIM(’character string’))
To make it easier to perform this task with the least amount of effort, a customTRIMfunction can be
added to themodeldatabase with the following code:
USE Model
GO
CREATE FUNCTION dbo.Trim (@String varchar(MAX))
RETURNS varchar(MAX)
AS
BEGIN
SELECT @String = LTRIM(RTRIM(@String))
RETURN @String
END
After creating this function in themodeldatabase, it will be propagated to all databases created and can
be used with the following simplified code:
</div>
<span class='text_page_counter'>(55)</span><div class='page_container' data-page=55>
Sure, it’s only a small savings, but the open and close parenthesis characters are often the source of
annoying syntax errors. By reducing the nested functions, the overall complexity of the function call is
also reduced.
Almost any database object can be added to themodeldatabase so that it will be available in
subse-quently created databases. This includes database users, roles, tables, stored procedures, functions, and
assemblies.
The
<b>msdb</b>
Database
Themsdbdatabase can be considered the SQL Server Agent’s database. That’s because the SQL Server
Agent uses themsdb<sub>database extensively for the storage of automated job definitions, job schedules,</sub>
operator definitions, and alert definitions. The SQL Server Agent is described in greater detail in
Chapter 8, but for now, just know that the Agent is responsible for almost all automated and scheduled
operations.
The SQL Server Agent is not the only service that makes extensive use of themsdbdatabase. Service
Broker, Database Mail, and Reporting Services also use themsdbdatabase for the storage of scheduling
information. In addition to automation and scheduling information, SQL Server Integration Services
(SSIS) can also use themsdbdatabase for the storage of SSIS packages.
The
<b>tempdb</b>
Database
Thetempdbdatabase is used by SQL Server to store data — yes, you guessed it, temporarily. Thetempdb
database is used extensively during SQL Server operations, so careful planning and evaluation of its size
and placement are critical to ensure efficient SQL Server database operations.
One of the primary functions of this database is to store temporary objects (such as temporary tables,
views, cursors, and table-valued variables) that are explicitly created by database programmers. In
addi-tion, thetempdbdatabase stores work tables containing intermediate results of a query prior to a sort
operation or other data manipulation. For example, if you wrote a query that returned 100,000 rows and
you wanted the results sorted by a date value in the results, SQL Server could send the unsorted results to
a temporary work table, where it would perform the sorting operation and then return the sorted results
to you. It is also used extensively to support connection options such asSNAPSHOT ISOLATION<sub>or Multiple</sub>
Active Result Sets (MARS). If online index operations are performed, thetempdbdatabase will hold the
index during the build or rebuild process.
Another important aspect to keep in mind about thetempdbdatabase is that all database users have
access to it and have the ability to create and populate temporary objects. This access can potentially
create locking and size limitation issues on SQL Server, so it is important to monitor thetempdbdatabase
just like any other database on SQL Server.
The
<b>resource</b>
Database
The last system database is theresourcedatabase. Theresourcedatabase is a Read Only database that
contains all system objects used by an instance of SQL Server. Theresourcedatabase is not accessible
during normal database operations. It is logically presented as theSYSschema in every database. It
contains no user data or metadata. Instead, it contains the structure and description of all system objects.
This design enables the fast application of service packs by replacing the existingresource<sub>database with</sub>
</div>
<span class='text_page_counter'>(56)</span><div class='page_container' data-page=56>
User Databases
User databases are simply that — databases created by users. They are created to store data used by
data applications and are the primary purpose of having a database server. Unlike previous versions,
SQL Server 2008 does not ship with any sample databases. Instead, sample databases are available from
Microsoft’s Open Source CodePlex site (www.codeplex.com). There you can search for the three sample
databases that are available at the time of this writing:AdventureWorks2008,AdventureWorksLT2008,
and AdventureWorksDW2008.
TheAdventureWorks2008database is an OLTP database used by the fictitious Adventure Works Cycles
Company, which sells mountain bikes and mountain-biking-related merchandise.
TheAdventureWorksLT2008 database is an OLTP database that is a subset of the larger
AdventureWorks2008database. It was scaled down to help those who are new to relational
databases.
TheAdventureWorksDW2008<sub>database is an OLAP database used for data analysis of historical Adventure</sub>
Works Cycles data.
Distribution Databases
One or more distribution databases can be configured to support replication. Some SQL Server
pro-fessionals describe the distribution databases as system databases, and yet others describe them as
user databases. I don’t think it makes much difference. What is important is what the database or
databases do.
A distribution database stores metadata and transactional history to support all types of
repli-cation on a SQL Server. Typically, one distribution database is created when configuring a SQL
Server as a replication Distributor. However, if needed, multiple distribution databases can be
configured.
A model distribution database is installed by default and is used in the creation of a distribution database
used in replication. It is installed in the same location as the rest of the system databases and is named
distmdl.mdf.
SQL Ser ver 2008 Database Storage
All system and user databases (including theresourcedatabase) are stored in files. There is always a
minimum of two files: one data file and one transaction log file. The default extension for data files is
.mdf, and the default for transaction log files is .ldf.
The default location for the system database files is<i><drive>:</i>\Program Files\Microsoft SQL Server\
MSSQL.X\MSSQL\Data\, where<i><drive></i>is the installation drive and<i>X</i>is the instance number (MSSQL.1
</div>
<span class='text_page_counter'>(57)</span><div class='page_container' data-page=57>
<b>System</b>
<b>Database</b>
<b>Physical Location</b>
master <i><</i>install path<i>></i>\MSSQL10.MSSQLSERVER\MSSQL\Data\master.mdf
<i><install path></i>\MSSQL10.MSSQLSERVER\MSSQL\Data\mastlog.ldf
model <i><</i>install path<i>></i>\MSSQL10.MSSQLSERVER\MSSQL\Data\model.mdf
<i><install path></i>\MSSQL10.MSSQLSERVER\MSSQL\Data\modellog.ldf
msdb <i><</i>install path<i>></i>\MSSQL10.MSSQLSERVER\MSSQL\Data\msdbdata.mdf
<i><install path></i>\MSSQL10.MSSQLSERVER\MSSQL\Data\msdblog.ldf
tempdb <i><</i>install path<i>></i>\MSSQL10.MSSQLSERVER\MSSQL\Data\tempdb.mdf
<i><install path></i>\MSSQL10.MSSQLSERVER\MSSQL\Data\templog.ldf
resource <i><</i>install path<i>></i>\MSSQL10.MSSQLSERVER\MSSQL\Binn\Mssqlsystemresource.mdf
<i><install path></i>\MSSQL10.MSSQLSERVER\MSSQL\Binn\Mssqlsystemresource.ldf
When it comes to the system databases, the following guidance is given:<i>Don’t mess with them</i>. Your ability
to manipulate the system databases in SQL Server 2008 has been extremely limited by the developers at
Microsoft. Overall, this is a good thing. Generally speaking, the only thing you are permitted to do with
system databases is back them up or move them to faster, more reliable disk arrays if they prove to
be a performance bottleneck. The ability to modify the data contained in system tables through ad hoc
updates has been almost completely removed from SQL Server 2008. To modify the system catalog, the
server must be started in Single-User mode, and even then, activity is restricted and is not supported by
Microsoft.
Data Files and Filegroups
When a user database is created, it must contain at least one data file. This first data file is known as the
<i>primary data file</i>. The primary data file is a member of the default<i>Primary filegroup</i>. Every database has
one Primary filegroup when created, which consists of at least the primary data file. Additional data files
can also be added to the Primary filegroup. More filegroups can also be defined upon initial creation of
the database, or added after the database is created. Chapter 4 describes the storage architecture of files
in greater detail, and Chapter 5 explains the advantage of filegroups. For now, it is sufficient to know
that all of the data objects in a database (such as tables, views, indexes, and stored procedures) are stored
within the data files. Data files can be logically grouped to improve performance and allow for more
flexible maintenance (see Figure 1-1).
Log Files
</div>
<span class='text_page_counter'>(58)</span><div class='page_container' data-page=58>
simultaneously. Log files, on the other hand, are not accessed in this manner. Log files are serialized to
maintain transactional consistency. Each transaction is recorded serially in the log, in the sequence it was
executed. A second log file will not be accessed until the first log file is completely filled. You can find a
complete description of the transaction log and how it is accessed in Chapter 4.
MyDB_Log.Idf
MyDB Primary Filegroup Secondary Filegroup
MyDB_Data.mdf
MyDB_Data2.ndf MyDB_Data4.ndf
MyDB_Data3.ndf
Figure 1-1: Data files and filegroups.
SQL Ser ver Security
Chapter 6 provides a thorough discussion of SQL Server 2008 security features. However, to select the
proper authentication model during installation, it is important to have a basic understanding of how
SQL Server controls user access.
SQL Server 2008 can be configured to work in either the Windows Authentication Mode or the SQL
Server and Windows Authentication Mode, which is frequently called<i>Mixed Mode</i>.
Windows Authentication Mode
In Windows Authentication Mode, only logins for valid Windows users are allowed to connect to SQL
Server. In this authentication mode, SQL Server ‘‘trusts’’ the Windows or Active Directory security
sub-system to have validated the account credentials. No SQL Server accounts are allowed to connect. They
can be created, but they cannot be used for login access. This is the default behavior of a fresh installation
of SQL Server 2008.
SQL Server and Windows Authentication Mode
(Mixed Mode)
</div>
<span class='text_page_counter'>(59)</span><div class='page_container' data-page=59>
Summar y
This chapter introduced the basic structure and purpose of SQL Server 2008, along with a brief
expla-nation of the various features available in this release of Microsoft’s database application. Subsequent
chapters delve into the technologies and features exposed in this chapter so that the database
adminis-trator can better understand and implement each feature introduced.
</div>
<span class='text_page_counter'>(60)</span><div class='page_container' data-page=60></div>
<span class='text_page_counter'>(61)</span><div class='page_container' data-page=61>
2
Installing SQL Ser ver 2008
Installing SQL Server 2008 is deceptively simple. I say<i>deceptively</i>because although SQL Server
includes several wizards and tools that make the installation process itself go smoothly, a good
database administrator will have devised a thorough plan for installing SQL Server and its requisite
components. This chapter will introduce you to the process of installing SQL Server, beginning with
an overview of the planning process. Although it would be impossible to document every possible
design decision for every possible scenario, the goal of this chapter is to help you understand the
installation process, some key design considerations, and the various components and options
available prior to and during installation.
SQL Ser ver Installation Planning
‘‘There is never enough time to do it right, but always enough time to do it twice.’’ ‘‘Measure twice,
cut once.’’ How many times have you heard these sayings? There are a number of these clich´es that
point out that doing something right the first time means not having to do it over and over again. To
avoid having to do it twice (or more!), you need to create a thorough plan. Too often installations are
rushed and then must be uninstalled when technical issues arise. The questions that must be asked
range from collation settings and named instances to the separation of log and data files. Will SQL
Server be installed in a cluster? How about Storage Area Networks (SAN) or Network Attached
Storage (NAS)? And virtualization, won’t someone<i>please</i>think of the virtualization! Although the
Installation Wizards will ask you to provide answers to several questions about<i>how</i>you want SQL
Server installed, before you launch the Wizard you should know the<i>why</i>behind your answers.
In addition to the ‘‘how’’ and ‘‘why,’’ there are the ‘‘who,’’ ‘‘what,’’ and ‘‘when’’ questions that
must be answered to create an adequate plan.
</div>
<span class='text_page_counter'>(62)</span><div class='page_container' data-page=62>
❑ The ‘‘what’’ question can be a bit more complex. The first ‘‘what’’ is ‘‘What features will be
installed?’’ However, more ‘‘what’’ questions could include ‘‘What constitutes a successful
installation?’’ or ‘‘What resources are required?’’
❑ The ‘‘when’’ question is also imperative. ‘‘When will the installation be started and when will it
be complete?’’
It would be impossible to cover all the possible variations that could arise during a SQL Server
installa-tion, so this chapter covers only the essentials. Remember, when it comes to technology, the answer to
almost every question is, ‘‘It depends.’’ There are almost always ‘‘best practices,’’ but sometimes the best
practices are based on various ‘‘ivory tower’’ assumptions. We don’t all have 50 billion dollars, 20,000 IT
professionals, and unlimited access to hardware and software. Sometimes the ‘‘best practices’’ have to be
left behind in favor of practicality and budget.
For example, as a best practice, transaction logs should be placed on a RAID 1 array as opposed to any
striped array configuration because of how the transaction log is accessed by SQL Server. However, if
the only available fault-tolerant storage is a RAID 5 striped array, then by all means it should be used to
store and protect the log data. In many cases, the only storage available because of budget and hardware
constraints is a single RAID 5 array where both the transaction log and data files are hosted. In a large
enterprise solution, this would be completely unacceptable; but for a small-to-medium business
imple-mentation, it may be the only choice. The key point is that it is very important to know what the ‘‘best’’
solution is, but also keep in mind that compromises are often necessary to meet deadlines and budgetary
constraints.
Hardware Considerations
Minimum requirements are exactly that:<i>minimum</i>. SQL Server will run on a system with minimum
hardware, but the performance is not going to be stellar. Even the ‘‘recommended’’ hardware is to be
exceeded whenever practical. I tend to think of these as ‘‘minimum to install and start the services’’ and
‘‘minimum to run a production system,’’ respectively.
Upgrading almost any hardware object on a server hosting SQL Server 2008 will result in improved
performance, but all things being equal, increasing RAM often has the best impact on performance.
An underpowered processor or slow disk system will cause just as many performance problems as
insufficient RAM, but RAM limitations will often cause processor and disk issues to be exacerbated.
A common scenario for certification exams often presents a series of questions that involve allocating
different limited resources across different types of servers such as a file server, domain controller, and
database server. Often, you’re tasked with determining where to place the faster CPU, the better disk
array, and the new RAM. I’ve been an IT generalist for many years, so I know what the test designers are
after, but when I wear my DBA hat, I want to put everything into SQL Server.
</div>
<span class='text_page_counter'>(63)</span><div class='page_container' data-page=63>
There are four main subsystems that you need to optimize for SQL Server 2008 to perform optimally.
These include the Processor, Memory, Storage, and Network subsystems. Performance of these
subsystems will affect SQL Server in a variety of ways, and as part of the pre-installation process, you
should have an understanding of what your hardware needs are. One quick note about the network
subsystem is that it is often the one the DBA has the least control over, and yet sometimes has the most
impact, depending on the number of applications and users that are being supported. You should work
with your network administrators and engineers to plan a strategy for concurrent database access by
your users.
Processor Considerations
Microsoft sets the minimum processor requirements at 1 GHz Pentium III or a compatible processor for
32-bit installations of SQL Server, and 1.4 GHz for 64-bit systems. However, 2.0 GHz is considered the
recommended speed for both platforms. SQL Server uses the processor extensively during the
compila-tion and execucompila-tion of query plans. Your server can have an extraordinarily fast disk array and plenty of
RAM, but if it has an underpowered processor, it is all for naught. As the workload of the server increases
and more and more transactions are executed against it, the processor will have to schedule and handle
the multitude of query execution plans and programmatic manipulation of data.
Chapter 10 discusses the ways to monitor SQL Server to ensure that the CPU is not a bottleneck, but from
the outset, SQL Server should be given plenty of processor power. In addition, SQL Server is very adept
at using multiple processors to execute parallel operations, so adding a second processor will often pay
larger dividends than upgrading a single processor. However, if your license is per processor, the cost
may be prohibitive to add additional processors.
<i>As of this writing, Microsoft considers multiple logical processors to be covered under a single processor</i>
<i>license. This would allow you to buy a quad-core CPU, essentially supplying SQL Server with up to</i>
<i>four CPUs for the cost of a single processor license. For example, if you wanted to buy a new server that</i>
<i>has two quad-core processors, you would be able to leverage all eight cores, but only have to buy two</i>
<i>processor licenses.</i>
Memory Considerations
The minimum amount of RAM, according to Microsoft, is 512 MB. I personally find this minimum
requirement a bit on the ridiculous side. I wouldn’t set up a Windows server running any multi-user
application with only 512 MB of RAM, let alone a RAM-hungry application like SQL Server. Would
512 MB be sufficient for a desktop machine running SQL Server 2008 Developer Edition? Maybe, as long
as no serious load was put on the server.
That’s not to say that SQL Server wastes memory or that it consumes a bloated footprint. The simple fact
is that SQL Server likes memory —<i>a lot</i>. It attempts to place as much data as possible in RAM so that the
data is readily available for processing. It also tries to keep the data in RAM as long as possible.
</div>
<span class='text_page_counter'>(64)</span><div class='page_container' data-page=64>
Having sufficient RAM on hand allows SQL Server to minimize the amount of page swapping required
and enables the data to be pre-fetched for fast processing. If you want to keep SQL Server happy, feed
it RAM. What you will get in return is a hard-working database server that efficiently and effectively
utilizes that RAM to service your requests as fast as possible. Lack of sufficient RAM can also cause
degradation in performance of the storage subsystem, as more data gets paged to disk.
Microsoft recommends just over 2 GB of RAM for both the 32-bit and 64-bit editions. Although Microsoft
considers operating system overhead when publishing their recommended values, given the relatively
low cost of RAM, I typically recommend this<i>above</i>the operating system requirements. For example, if
Windows Server 2008 recommends 2 GB of RAM for the OS, I would recommend a total of 4 GB to help
optimize performance.
Storage Considerations
An often overlooked hardware aspect of many SQL Server installations is the disk subsystem. I have
personally witnessed deployments in which undertrained personnel installed the OS, SQL Server, and
all the database files on the system partition. Although this will work, it is less than ideal. The question
of how to best place the application and database files is answered with a definite ‘‘It depends.’’
If you’re not familiar with the different levels of RAID technology, let me offer a quick primer.<i>RAID</i>, first
of all, stands for ‘‘Redundant Array of Inexpensive Disks’’ (<i>inexpensive</i>being a relative term here). When
working with SQL Server, there are four types of RAID implementations that are commonly used:
❑ <b>RAID 0</b>— RAID 0 offers no redundancy or fault tolerance, but instead helps improve
perfor-mance by striping across multiple disks. RAID 0 also allows you to use the combined storage
capacity of both disks. RAID 1, also known as<i>mirroring</i>, provides fault tolerance by making
a bit-for-bit copy of your data on two disks. While this provides basic redundancy and can
improve Read performance (by having two separate disks available to read from), you might
suffer minor loss of Write performance, since the data will have to be written across both disks.
RAID 1 has 50 percent storage overhead.
❑ <b>RAID 5</b>— RAID 5 is one of the more common implementation types of RAID, utilizing three or
more disks. RAID 5 is also called<i>striping with parity</i>, because as it stripes across multiple disks,
it writes a parity block on each stripe that allows the data to be rebuilt in case of a disk failure.
RAID 5 is considered a good option for most scenarios because it provides fault tolerance and
improved Read and Write performance and has a relatively low storage overhead. Because the
available capacity on a RAID 5 array is<i>n</i>– 1 (<i>n</i>being the total number of disks in the array),
the storage overhead decreases as the number of disks in the array increases.
</div>
<span class='text_page_counter'>(65)</span><div class='page_container' data-page=65>
RAID 1
OS
RAID 1
SQL
RAID 1
LOG
RAID 10
DATA
Figure 2-1: Optimal installation.
Notice that the application is installed on a separate set of spindles from the operating system. This
reduces contention for disk resources and makes the application more efficient. Notice use of the term
<i>spindle</i>. This is preferred to<i>drive</i>or<i>disk</i>because it leaves little room for interpretation. Physical disk
drives have one spindle, which is loosely analogous with the center of a spinning top. Granted, the
increase in capacity and general availability (as well as decreasing costs) of Solid State Drives, which
have no spinning platter, may eventually make the term<i>spindle</i>obsolete. For now, let’s agree to continue
to use that term. In the case of Figure 2-1, the two spindles that host the log file on a RAID 1 array will
actually look like a single drive to the operating system, when, in reality, there are two physical<i>disks</i>,
or<i>spindles</i>.
In addition to the application existing on a separate set of spindles, the data files and the log files are
on yet another set. The idea here is not to keep the hard disk industry in business, but to maximize
efficiency, fault tolerance, and recoverability. Placing the operating system, application, and database
all on the same spindle is basically putting all of your eggs in one basket. If the basket is dropped, you
will lose all of your eggs. Likewise, if the spindle fails, you will lose your operating system, application,
and databases. Your recovery time in this instance is tripled. Even if your server weren’t to suffer a
catastrophic failure, the amount of contention for resources on the disk subsystem could cause a severe
degradation in performance.
</div>
<span class='text_page_counter'>(66)</span><div class='page_container' data-page=66>
files and the log file are on the same spindle, a catastrophic failure of the spindle will result in all
data since the last backup being lost.
<i>Backup and recovery strategies are covered in more detail in Chapter 9.</i>
The separation of the different components of SQL Server is just part of the equation. When choosing a
disk system, it is also important to know what type of disk is best for each part of the database. Notice
in Figure 2-1 that the operating system is installed on a RAID 1 array. The same goes for the SQL Server
application and the database log file, while the data files are placed on a striped array. It is possible to
place all the SQL resources on one or more RAID 10 or RAID 5 arrays, and many organizations do just
that. However, when it comes to the transaction log, a RAID 1 configuration is more appropriate than a
RAID 5 one. A transaction log placed on a striped array will actually decrease the performance of SQL
Server. This is because of the inherent hit in Write performance on a RAID 5 array, and also because of the
way SQL Server writes serialized data to the log. Log files, by their nature, are mostly written to, which
means that often RAID 1 (or RAID 10, if you have the budget) is the best choice for performance. RAID 1
or RAID 10 is also better because of the sequential and serial nature of the transaction log as compared to
the parallel friendly nature of data files.
Each transaction is written to the transaction log before it is written to memory. This puts the transaction
log in the position to become a possible bottleneck. A fast array will help prevent the log from becoming
a performance liability.
SAN and NAS versus Local Disk Storage
Another decision to be made during a SQL Server installation is that of storage architecture. There are
many vendors in the marketplace with hundreds of possible configurations for sale. Many larger
orga-nizations have placed much of their corporate data on local and remote SANs. At the same time, other
organizations have chosen NAS, and still others (mostly smaller organizations) have chosen to place
all their data on local attached disk arrays. Although a complete discussion of these different
technolo-gies is beyond the scope of this book, a brief explanation is useful in describing the utilization of these
technologies in database implementations.
Storage Area Network (SAN)
SANs typically transmit Small Computer Systems Interface (SCSI) block commands over a network
(usually either Fibre Channel or iSCSI) in lieu of a SCSI connection for a direct-attached storage array.
This option is well-suited to SQL Server because the database application expects block access to data,
which is not easily supplied using NAS. Utilizing SAN software, multiple volumes can be created and
‘‘presented’’ to the servers, using the storage space on the SAN, as shown in Figure 2-2.
Network Attached Storage (NAS)
</div>
<span class='text_page_counter'>(67)</span><div class='page_container' data-page=67>
DB1 DB2 DB3
F:\
J:\
G:\
K:\
H:\
L:\
I:\
M:\
SAN Storage
SAN Controller
Figure 2-2: Storage Area Network.
DB1
DB2
NAS Storage
DB3
\\NASServer\Share1
\\NASServer\Share2
\\NASServer\Share3
\\NASServer\Share4
</div>
<span class='text_page_counter'>(68)</span><div class='page_container' data-page=68>
Local Attached Disk Array
There is a lot to be said for sharing storage resources among multiple servers on a high network, but some
organizations (for a variety of reasons) have chosen to dedicate local attached storage to their database
implementations (see Figure 2-4). In reality, the only differences between local attached disk arrays and
SANs are that the volumes created on the local array are only accessible to the server to which the array
is attached and that SAN controllers can optimize data transfer. Local arrays are typically connected via
a high-speed SCSI cable or Fiber Channel.
Figure 2-4: Local attached disk array.
Virtualization Considerations
SQL Server 2008 is the first version of SQL Server that is supported in virtual environments; however,
there are some limitations. Microsoft will officially only support installations of SQL Server in Hyper-V
environments on Windows Server 2008, and clustering of virtual machines is not supported. Because of
the continued improvement in virtualization technology, it is becoming a much more attractive option to
companies that want to either consolidate hardware or take advantage of some of the recovery and
porta-bility options available. It’s been my experience that the biggest bottleneck that occurs when running SQL
Server in a virtual machine is I/O performance. For this, I strongly recommend using SAN storage for
the database and transaction log files to avoid storing database information in a virtual hard drive file.
Software Prerequisites
In addition to the hardware dependencies mentioned above, there are a number of software
dependen-cies that exist to support the various features of SQL Server 2008. The System Consistency Checker does a
very thorough job of identifying all the requirements and dependencies, and informing you if anything is
missing. For example, if a critical component is missing, the installer won’t proceed until that component
has been installed. If, however, you are running with less than recommended RAM, the SCC will give
you a warning, but allow you to proceed with the installation. It is up to the DBA to evaluate the warning
to ensure that it is acceptable to continue the installation.
Another critical dependency is the operating system. As you might expect, the IA86 and x64 editions
of SQL Server 2008 can only be installed if the operating system is using the same platform. Note that
32-bit versions of SQL can be installed on 64-bit operating systems, but may actually suffer a
perfor-mance loss because it will need to run within the WOW64. The following table describes the different
operating systems required for each edition of SQL Server 2008. For a complete list of requirements, visit
</div>
<span class='text_page_counter'>(69)</span><div class='page_container' data-page=69>
<b>Operating System</b> <b>SQL Server Edition</b>
<b>Enterprise</b> <b>Standard</b> <b>Workgroup</b> <b>Web</b> <b>Developer</b> <b>Express</b>
Windows XP SP2 Pro X X X X X
Windows XP Home
Edition SP2
X X
Windows Server 2003
SP2 Web
X
Windows Server 2003
SP2 Standard
X X X X X X
Windows Server 2003
SP2 Enterprise
X X X X X X
Windows Server 2003
SP2 Datacenter
X X X X X X
Windows Vista
Ultimate
X X X X X
Windows Vista
Enterprise
X X X X X
Windows Vista
Business
X X X X X
Windows Vista Home
Premium
X X X
Windows Vista Home
Basic
X X X
Windows Vista Starter
Edition
X
Windows Server 2008
Web
X X X X X X
Windows Server 2008
Standard
X X X X X X
Windows Server 2008
Enterprise
X X X X X X
Windows Server 2008
Datacenter
X X X X X X
Windows Small
Business Server 2003,
Standard Edition SP2
X X X X X X
Windows Small
Business Server 2003,
Premium Edition SP2
</div>
<span class='text_page_counter'>(70)</span><div class='page_container' data-page=70>
SQL Ser ver Installation Center
The SQL Server 2008 setup process itself is pretty straightforward. If Autorun is enabled (I usually turn
it off), the setup splash screen will launch as soon as you insert the media. If not, the installation can be
launched from theSETUP.EXEfile located in the root folder of the installation media.
You may also note that there are three folders in the root folder of the SQL Server 2008 installation
media. Each folder contains the platform-specific setup files for the x86, x64, and IA64 platforms. When
you launch setup from the root folder, it runs a detection script to determine the platform of the current
system and launches the installer for that platform. If you have a specific need to install, for example, the
32-bit version on a 64-bit platform, the preferred method is to select the Options page of the SQL Server
Installation Center.
Before the setup application launches the SQL Server Installation Center, it checks for several
depen-dencies that are critical to installing SQL Server. This includes an updated version of the Microsoft .NET
Framework (version 3.5 SP1), and in some cases, an update to the Windows Installer service may be
required as well. Be aware that if these components have not yet been installed, a reboot will be necessary
before SQL Server setup can continue.
Once the dependent components can be installed, the SQL Server Installation Center menu pops up. From
here, you can navigate through the different pages, to learn more about the planning and installation
process. You can choose to run the System Configuration Checker manually, but all of the tests are run
as part of the Installation Wizard for SQL Server 2008.
Setup Support Rules (for Setup Support Files)
Prior to installing the SQL Server setup support files, SQL Server checks a series of conditions to ensure
that the support files can be installed before the actual setup process begins. The six items shown in
Figure 2-5 and described in the following table are checked:
<b>Component</b> <b>Description</b>
Minimum operating system
version
Checks whether the computer meets minimum operating
system version requirements.
Setup administrator Checks whether the account running SQL Server Setup has
administrator rights on the computer.
Restart computer Checks if a pending computer restart is required. A
pending restart can cause Setup to fail.
Windows Management
Instrumentation (WMI) service
Checks whether the WMI service is started and running on
the computer.
Consistency validation for SQL
Server registry keys
Checks if the SQL Server registry keys are consistent.
Long path names to files on SQL
Server installation media
</div>
<span class='text_page_counter'>(71)</span><div class='page_container' data-page=71>
Figure 2-5: Setup Support Rules results for setup files.
Once the initial validation tests have been completed and there are no errors that would halt the
instal-lation, the Registration Information screen appears and asks for your 25-character product key. After
entering the product key, you will be presented with the License Terms to review and accept.
Before proceeding with installation, you should understand some of the licensing constraints around
SQL Server 2008. Many organizations are not aware that the components of SQL Server are licensed as
a bundle, and when you purchase a server or processor license for SQL Server, you can install some or
all of those components on one machine, and one machine only. For example, if the Database Engine is
installed on one server and the Reporting Services engine is installed on a different server, a separate
license is required for each installation. This is a major area of confusion for many DBAs. Common sense
would say that a purchase of a SQL Server license that included the Database Engine, Reporting Services,
Integration Services, and Analysis Services would give an organization the right to spread these
services across as many servers as necessary, as long as only one instance of each service was used.
Common sense, in this instance, may get you into trouble with the licensing police. If you haven’t read
the licensing agreement, do so, or have your lawyer read it for you. The license agreement can also be
found in the Resources section of the SQL Server Installation Center.
</div>
<span class='text_page_counter'>(72)</span><div class='page_container' data-page=72>
Setup Support Rules (for Installation)
Another set of validation tests must be performed to verify that the system meets the conditions
for installing SQL Server. The tested components are listed in the following table and shown in
Figure 2-6:
<b>Component</b> <b>Description</b>
Fusion Active Template Library
(ATL)
Checks if a computer restart is required because of broken
fusion ATL. A pending restart can cause SQL Server Setup
to fail.
Unsupported SQL Server products Checks whether SQL Server 7.0 or SQL Server 7.0 OLAP
Services is installed. SQL Server 2008 is not supported with
SQL Server 7.0.
Performance counter registry hive
consistency
Checks if the existing performance counter registry hive is
consistent.
Previous releases of SQL Server
2008 Business Intelligence
Development Studio
Checks for previous releases of SQL Server 2008 Business
Intelligence Development Studio.
Previous CTP installation Checks whether there is an existing SQL Server 2008 CTP
installation.
Consistency validation for SQL
Server registry keys
Checks if the SQL Server registry keys are consistent.
Computer domain controller Checks whether the computer is a domain controller.
Installing SQL Server 2008 on a domain controller is not
recommended.
Microsoft .NET Application
Security
Verifies that the computer is connected to the Internet.
When a Microsoft .NET application like Microsoft
Management Studio starts, there may be be a slight delay
while the .NET security check validates a certificate.
Edition WOW64 platform Determines whether SQL Server Setup is supported on this
operating system platform.
Windows PowerShell Checks whether Windows PowerShell is installed.
Windows PowerShell is a prerequisite of Microsoft SQL
Server 2008 Express with Advanced Services.
Windows Firewall Checks whether the Windows Firewall is enabled. If the
Windows Firewall is enabled, a warning event will be
generated. This is to inform you that the SQL Server will<i>not</i>
</div>
<span class='text_page_counter'>(73)</span><div class='page_container' data-page=73>
Figure 2-6: Setup Support Rules results for installation.
Feature Selection
The next step in the Installation Wizard is the Feature Selection screen (see Figure 2-7). This is where
you will choose what aspects of SQL Server you want to install. If you intend to follow along with the
examples in this book, it’s recommended that you install all features in your test environment. In a
production environment, you should install the features you intend to use, and no more. You can always
go back and install additional services and features, but for the sake of efficiency, if you’re not going to
be using Analysis Services, there’s no reason to install it. If you’ve installed an earlier version of SQL
Server, sample databases were often included with the installation media. In the case of SQL Server
2005, installation of the sample databases was disabled, but it was still a feature that you could enable
through the advanced installation options. With SQL Server 2008, the sample databases are not included
with the media and are available online atwww.codeplex.com. More information on installing the sample
databases is covered later in this chapter.
Instance Configuration
</div>
<span class='text_page_counter'>(74)</span><div class='page_container' data-page=74>
If there is a default instance, a maximum of 49 named instances can be configured. If no default instance
is installed, 50 named instances can be configured.
Figure 2-7: Feature Selection screen.
<i>Named instances</i>are referenced by the server name followed by the instance name. For example, the server
name used in the examples for this book is<i>AughtEight</i>. The default name of the SQL Server 2008
installa-tion is the same as the server name. However, you could install a named instance on AughtEight called
<i>Dagobah</i>. To connect to the Dagobah instance of SQL Server, it must be referenced as<i>AughtEight\Dagobah</i>.
In addition to the name, any client accessing a named instance must use the SQL connection objects from
SQL Server 2000 or later. Legacy ODBC and old OLEDB drivers will be unable to enumerate a named
instance of SQL Server 2008.
The Instance Configuration screen also provides you with the opportunity to change the default location
for the SQL Server files. This sets the file location for the SQL binaries as well as the system databases.
Best practices recommend that you separate the instance folders from the OS drive.
Server Configuration
</div>
<span class='text_page_counter'>(75)</span><div class='page_container' data-page=75>
Best-practice security guidelines recommend that the local system account not be used because it grants
full administrative access to the computer on which SQL Server is installed. This expands the attack
surface of the system by allowing a compromised SQL Server to be used to attack other components
on the system. Also, services running as the local system account will have no authenticated access to
resources that exist on other servers in your environment.
A very useful feature of SQL Server is the ability to use the SQL Server Agent’s scheduling options to
run unattended jobs. If the ability to schedule SQL Server jobs that require access to external resources is
desired, then at a minimum, the SQL Agent account will need to be configured to use a domain account
so that the respective account can be granted permissions to the remote resource.
The ability to configure each installed SQL Server service individually is provided (see Figure 2-8),
which is also a security best practice, but it does increase the administrative complexity of the
system.
Figure 2-8: Service account screen.
</div>
<span class='text_page_counter'>(76)</span><div class='page_container' data-page=76>
Additionally, the SQL Server Browser Service is disabled by default. The Browser Service is only needed
if you have multiple instances of SQL Server installed on the same machine. Although you cannot change
the account being used by the Browser Service or the Full-Text Daemon Filter Launcher, these can be
changed manually after SQL Server is installed.
Collation Settings
After setting the Authentication mode of SQL Server, you can configure the collation settings of SQL
Server 2008 by selecting the Collation tab in the Server Configuration window. The first question many
people have is, ‘‘What is collation?’’ The dictionary definition of<i>collation</i>is ‘‘assembling in proper
numer-ical or lognumer-ical sequence.’’ Collation settings have two significant effects on your database: the sorting of
your character-based data and the searching of your character-based data.
A different collation can be set for both the SQL Server and Analysis Services, but Analysis Services only
supports Windows collation, whereas SQL Server can support both Windows and SQL collation. SQL
collation support is included for backward compatibility, and it is recommended to configure the server
collation with Windows collation (despite the fact that SQL collation is configured as the default).
Choosing Windows collation by selecting the Collation Designator provides a greater level of control
and more choices when it comes to customizing the collation settings for the server. The collation setting
affects what data will be returned when searching on character data and in what order the data will be
returned. It also determines what characters will be supported.
The default collation for an installation is determined by the locale with which Windows was configured.
For example, the default collation the SQL Server installation application chooses when being installed on
a Windows server configured for the United States is SQL_Latin1_General_CP1_CI_AS. A brief definition
of this underscore-delimited name is definitely in order:
❑ SQL_Latin1_General_CP1indicates that characters from the Latin Code Page One (CP1), which
is equivalent to the 1,252-character set, are supported. These characters provide support for the
storing, sorting, and searching of character data in any Latin-derived language. These languages
include Western European, English, and Latin American languages. However, it is important to
note that sort orders can be different among Latin-derived languages. For example, in German
the<i>ăo</i>character comes before<i>z</i>, but in Swedish, the opposite is true (<i>z</i>comes before<i>ăo</i>). Therefore,
small discrepancies can occur from language to language.
<i>The number 1,252 represents the character set identifier as assigned by the International </i>
<i>Orga-nizations for Standardization (ISO).</i>
❑ CI<sub>(Case Insensitive) indicates that the character data is to be sorted and searched in dictionary</sub>
order without regard to capitalization. As this setting infers, there is also aCS(Case Sensitive)
setting as well.
❑ AS(Accent Sensitive) indicates that the character data is to be sorted and searched in dictionary
order with preference to accent marks. As a result, a search for a German ‘‘spatlese’’ wine will
not return the correct spelling of this sweet late-harvest wine, which is<i>spăatlese</i>if it is stored with
the umlauts. Accent sensitivity can be turned off by specifyingAI(Accent Insensitive).
</div>
<span class='text_page_counter'>(77)</span><div class='page_container' data-page=77>
UTF-16 (16-Bit Unicode Text Format). There is also a setting for Kana sensitivity:KS(Kana Sensitive)
andKI(Kana Insensitive).<i>Kana sensitivity</i>essentially controls the sorting and searching of Asian
Uni-code characters (Japanese, Chinese, etc.) that can represent the same words using different script. For
example, when Japanese kana characters Hiragana and Katakana are treated differently, it is called<i>Kana</i>
<i>sensitive</i>; when they are treated the same, it is<i>Kana insensitive</i>.
Character data can also be sorted by their binary value. Binary sorting and searching is actually faster
than dictionary sorting and searching, but is not as user-friendly. For example, the following script creates
a table with two columns. The first column is assigned a character data type with case-sensitive dictionary
collation. The second column is assigned a character data type with binary collation:
USE TempDB
CREATE TABLE MySortTable
(DictionarySort varchar(10) COLLATE Latin1_General_CS_AS NULL,
BinarySort varchar(10) COLLATE Latin1_General_BIN)
GO
Once the tables are created, you can populate both of them with the same six rows:Alpha,Bravo,Charlie
andalpha,bravo,charlieby executing the following command:
USE TempDB
INSERT MySortTable
VALUES (’Alpha’,’Alpha’)
INSERT MySortTable
VALUES (’Bravo’,’Bravo’)
INSERT MySortTable
VALUES (’Charlie’,’Charlie’)
INSERT MySortTable
VALUES (’alpha’,’alpha’)
INSERT MySortTable
VALUES (’bravo’,’bravo’)
INSERT MySortTable
VALUES (’charlie’,’charlie’)
GO
Now that the tables are created and populated, you can query them. Notice the different order of results
using an identical query:
SELECT DictionarySort
FROM MySortTable
ORDER BY DictionarySort ASC
DictionarySort
---alpha
Alpha
bravo
Bravo
charlie
Charlie
(6 row(s) affected)
</div>
<span class='text_page_counter'>(78)</span><div class='page_container' data-page=78>
FROM MySortTable
ORDER BY BinarySort ASC
BinarySort
---Alpha
Bravo
Charlie
alpha
bravo
charlie
(6 row(s) affected)
As you can see, server collation can have a profound effect on how your data is stored and retrieved, so
careful planning is essential when deciding on a server collation. Fortunately, collation can also be set at
the database and column level, so multiple collations are supportable.
<b>As a word of caution, though, be careful when implementing incompatible</b>
<b>collations on a single server. Issues may arise when the server collation is set to a</b>
<b>collation that is not compatible with a database collation. This is because the</b>tempdb
<b>database is set to the default server collation. When temporary objects are created in</b>
tempdb<b>from a user database that uses an incompatible collation, errors can occur.</b>
Database Engine Configuration
After you have configured the server options, the next stage in the installation process requires you to
set additional configuration properties on the Database Engine. It begins with the Account Provisioning
screen, which allows you to set the Authentication mode and define administrative users. Authentication
and security are covered in great detail in Chapter 6. However, a brief explanation is appropriate at this
point.
If the default ‘‘Windows Only’’ configuration is chosen, only connections that have been authenticated
by the local Windows security subsystem (or by the domain security subsystem) are allowed to be made
to SQL Server. In this scenario, SQL Server validates that the login exists and has been authenticated, but
no password verification takes place because SQL Server ‘‘trusts’’ that the login has been validated. A
frequent connection error that occurs on servers configured for ‘‘Windows Authentication mode’’ is one
that says simply that the login failed (see Figure 2-9).
Figure 2-9: Bad login or password error message.
</div>
<span class='text_page_counter'>(79)</span><div class='page_container' data-page=79>
authentication mode’’ or something a bit more informative would have been more useful. The message
can be even more cryptic, given that the respective SQL login may, in fact, exist. Being in ‘‘Windows
Authentication mode’’ does not prevent the database administrator from creating SQL Server login
accounts. However, any attempt to connect with a valid SQL Server login when the server is in ‘‘Windows
Authentication mode’’ will result in the vague ‘‘trusted SQL Server connection’’ error.
With ‘‘Mixed Mode,’’ SQL Server can authenticate Windows logins as well as logins that have been
created locally on the SQL Server. Local SQL Server logins are validated by username and password
verification. The username and an encrypted version of the password are stored in themasterdatabase.
When a SQL login connection is requested, the SQL Server security subsystem encrypts the provided
password, compares it to the stored password, and allows or refuses the connection based on the
credentials provided.
If you choose the ‘‘Mixed Mode’’ option, you will need to specify a password for thesaaccount. Not
setting one, or setting a weak one, would expose your SQL Server to any number of potentially disastrous
results.
Invalid credentials (either bad login name or bad password) result in the same ‘‘Login failed’’ message
(see Figure 2-9) when SQL Server is configured for ‘‘Mixed Mode’’ security.
Also on this screen you will need to provide at least one Administrator account. Often, you will want to
choose the ‘‘Add Current User’’ option (to give yourself rights to the SQL Server), but you may need
to include additional users or groups as well. Most common production environments will require you to
add a group that identifies all the SQL Server administrators, which can be added through this tool.
The Data Directories tab allows you to change the default locations for data files (which will also change
the default location for the system databases, user databases, thetempdbdatabase, and the backup
directory).
The last tab in the Database Engine Configuration screen allows you to enable FILESTREAM options.
FILESTREAM is turned off by default, and if you don’t enable it from here, you can enable and configure
it using SQL Server Configuration Manager and SQL Server Management Studio. More information
about using FILESTREAM is in Chapter 5.
Analysis Services Configuration
As with the Database Engine, the Analysis Services Engine will require you to specify which users or
groups will have administrative control over the Analysis Services instance, as well as the data directories
for data, log, temp, and backup files. Note that Analysis Services does not use SQL-based logins. All
authentications are done through the Windows Authentication provider.
Reporting Services Configuration
</div>
<span class='text_page_counter'>(80)</span><div class='page_container' data-page=80>
Error and Usage Reporting
Microsoft also provides an opt-in screen to allow you to send Windows and SQL error reports, as well
as feature usage data, to Microsoft. Personally, I see some value in this, as it helps Microsoft identify
problems or bugs. That being said, I enable this only on my test and development systems and never
in my production systems, unless there is a corporate policy that dictates otherwise. Microsoft
Enter-prise licensing customers can send error reports to a Corporate Error Reporting server that allows your
administrators to selectively choose which events get sent to Microsoft.
Installation Rules
Prior to finally installing the files for SQL Server, one last set of rules is checked. These rules validate
your setup configuration options to identify potential problems that would cause undesired behavior
or prevent SQL Server from installing. The following table lists the components that are checked before
installation begins:
<b>Component</b> <b>Description</b>
Same architecture installation Checks whether the installing feature(s) are the same CPU
architecture as the specified instance.
Cross language installation Checks whether the setup language is the same as the language
of existing SQL Server features.
Existing clustered or
cluster-prepared instance
Checks if the selected instance name is already used
by an existing cluster-prepared or clustered instance on any
cluster node.
Reporting Services Catalog
Database File Existence
Checks whether the Reporting Services catalog database file
exists.
Reporting Services Catalog
Temporary Database File
Existence
Checks whether the Reporting Services catalog temporary
database file exists.
SQL Server 2005 Express tools Checks whether SQL Server 2005 Express Tools are installed.
Operating System supported for
edition
Checks whether the SQL Server edition is supported on this
operating system.
FAT32 File System Checks whether the specified drive is FAT32 file system
volume. Installing on a FAT32 file system is supported but not
recommended as it is less secure than the NTFS file system.
SQL Server 2000 Analysis
Services (64-bit) install action
Checks whether a default instance of SQL Server 2000 (64-bit)
Analysis Services is installed.
Instance name Checks whether the specified instance name is already used
by an existing SQL Server instance.
Previous releases of Microsoft
Visual Studio 2008
</div>
<span class='text_page_counter'>(81)</span><div class='page_container' data-page=81>
Final Steps
After the Install Rules have been validated, a final summary screen appears that provides you with a list
of the services and features that will be installed. Clicking ‘‘Install’’ launches the SQL Server installation,
and an Installation Progress screen appears (see Figure 2-10). The Installation Progress screen gives
summary information about all the different features required by SQL Server and shows when each
individual feature is finished installing.
Figure 2-10: Installation Progress screen.
Installing to a Windows Cluster
The most difficult part about installing SQL Server to a cluster is configuring the Windows cluster, which
is beyond the scope of this book. It is important to note that planning and configuration of the cluster
must be done prior to running SQL Server Setup. There are several dependencies that must be in place,
such as clustering the Microsoft Distributed Transaction Coordinator (MS DTC). Once the Windows
cluster is installed and configured, the installation of SQL Server to the cluster has some very significant
differences from installing to a single server. One of the first things you will most likely notice is that
when the pre-installation rule validation process runs, it detects all nodes in the cluster and ensures
that they meet the requirements for a SQL Server install (see Figure 2-11).
</div>
<span class='text_page_counter'>(82)</span><div class='page_container' data-page=82>
Instance Configuration screen appears. SQL Server 2008 supports multiple instances in a cluster, as well
as in stand-alone scenarios.
Figure 2-11: Ensuring that the requirements are met for the install.
Configuring the Virtual Server Name
</div>
<span class='text_page_counter'>(83)</span><div class='page_container' data-page=83>
virtual name used for the cluster. For my test cluster, I installed Windows Server 2008 Enterprise Edition
on two Virtual PC images and configured the two servers as nodes in a Windows failover cluster. During
the SQL Server installation, the setup utility will prompt for the instance configuration information, at
which time you can supply both the SQL Server Network Name, which is the name of the SQL Server
cluster, and the instance name (Figure 2-12).
Figure 2-12: Instance Configuration screen.
If you choose a default instance, the name of the SQL Server will be whatever you provide
for the SQL Server Network Name. If you choose a named instance, the instance name will be
NetworkName\InstanceName.
After specifying the Network Name, a cluster resource group must be created. The resource group is
where SQL Server places all failover cluster resources. You will also need to specify the shared disk (or
disks) that will be used to store shared SQL Server data (Figure 2-13). Additionally, you will need to
designate an IP address that will be used as a listener for the SQL Server cluster.
</div>
<span class='text_page_counter'>(84)</span><div class='page_container' data-page=84>
Figure 2-13: Cluster Resource Group screen.
</div>
<span class='text_page_counter'>(85)</span><div class='page_container' data-page=85>
The Cluster Security Policy configuration screen is the last dialog that is different from a stand-alone
installation. The summary screen (Figure 2-15) is presented after the services screen, and then the
installation begins.
Figure 2-15: Cluster Installation Rules.
Once SQL Server is successfully installed, it can be controlled just like any other SQL Server instance.
The only difference is the ability of SQL Server to fail over to the second node automatically in the case
of fault tolerance, or manually for scheduled maintenance events.
Sample Databases
Because SQL Server no longer ships with sample databases, in order to follow along with
many of the examples in the book, you will need to download and manually install the
sam-ple databases from Mirosoft’s CodePlex site. There are three databases available that can be
found atwww.codeplex.com/MSFTDBProdSamples. These include the AdventureWorks2008,
AdventureWorksLT2008, and AdventureWorksDW2008 databases. It is important to note that these
are not the same databases that shipped with SQL Server 2005. Although they may look similar on the
surface, they have a different schema, and they have been optimized for SQL Server 2008. Each of these
comes in a platform-specific version (x86, x64, ia64) and gives you several options for download types
(.zip and .msi). I prefer the MSI installer myself, as it makes it easy to download and deploy. There is
also an installer for some sample scripts that are used in conjunction with the databases.
</div>
<span class='text_page_counter'>(86)</span><div class='page_container' data-page=86>
Installation Review
Not every installation goes flawlessly, and not everything may behave as expected. After installing SQL
Server, it is important to review the installation to ‘‘inspect,’’ or ensure that what you expected to happen,
actually happened. Did the services get installed with the proper credentials? Are they configured to
auto-start? Are the program files and database files where they were expected to be? This may seem
to be a little overkill, but ‘‘An ounce of prevention is better than a pound of cure.’’
Summar y
Careful planning prior to the installation process prevents the need to uninstall and start over. It also
prevents a continuous struggle with an installation that is ‘‘not quite right.’’ In later chapters, the
opti-mization process, disk and memory access, as well as disaster recovery are discussed in great detail, and
the connection to a well-designed infrastructure for installation will become increasingly evident. One
of the most important aspects of installing SQL Server is having an understanding of the effects of the
options you select. Too many times I’ve seen production environments where a junior administrator who
was given the install media and no direction installed every feature under the sun. This was wasteful and
unnecessary.
This chapter described physical storage options, which are a big part of any database configuration.
By placing SQL data files and log files on separate physical disks, you decrease the chances of a major
disaster and increase the speed of recovery. By placing SQL Server’s assets on separate controllers and
arrays, you also increase the performance of SQL Server by reducing resource conflicts and maximizing
database throughput. It’s always a balancing act to try to get the most out of your system performance
while staying within a reasonable budget.
When it comes to availability, understand that Microsoft worked very hard to make SQL Server
‘‘cluster-friendly.’’ It is fairly easy to configure a failover cluster, but remember that a full discussion of
the Windows cluster was not provided. Many resources are available in the Windows Help files, online
resources such as TechNet, and in print that cover the topic of clustering in great detail. It is strongly
recommended that you research them thoroughly prior to any SQL Server cluster installation.
</div>
<span class='text_page_counter'>(87)</span><div class='page_container' data-page=87>
3
SQL Ser ver 2008 Tools
Several years ago, when I was beta testing SQL Server 2005, I was surprised to see familiar tools like
the Enterprise Manager, a Microsoft Management Console (MMC)-based interface, and the SQL
Query Analyzer done away with. In fact, with the exception of the SQL Server Profiler, pretty much
everything had been replaced with a new set of applications that were <i>. . .</i> well, different.
It’s been my experience that most database administrators (DBAs) typically fall into one of two
dis-tinct groups. The first group is made up of database administrators whose background is system
and network administration. The second group is made up of application and database developers
who have become responsible for the administration of a SQL Server infrastructure, be it a
produc-tion system or a test-bed environment. DBAs that fell into the first category, myself included, often
responded with trepidation about the new SQL Server management tools, and with good reason.
Most of the new tools available were based on the Visual Studio interface. In fact, one of them was
indeed Visual Studio (although rebranded to sound less intimidating). What was Microsoft trying
to do — make us developers?
Yes. A database administrator must be about half system administrator and half developer in order
to be completely successful. Several years ago, when Microsoft announced its Microsoft Certified
Database Administrator (MCDBA) certification, it was no real surprise that the required exams
were both from the administrative side of database administration and the programming side.
Microsoft’s intent was clear. To be a database administrator worth his or her salt, it would be
abso-lutely imperative to understand database design and database application development. This was
where Microsoft wanted DBAs to go, and they made sure we had the tools to get there. Ironically,
the current generation of certifications, the Microsoft Certified Information Technology
Profes-sional (MCITP), includes two distinct specializations for Database Administrators and for Database
Developers.
</div>
<span class='text_page_counter'>(88)</span><div class='page_container' data-page=88>
If you’ve never worked with SQL before or haven’t managed SQL since SQL Server 2000, the new tools
may seem daunting. In reality, they are more streamlined, more efficient, and yet more powerful than
anything we’ve had before.
SQL Ser ver Management Studio
SQL Server Management Studio completely replaces Enterprise Manager and Query Analyzer from
SQL Server 2000 and earlier. It also replaces some of the functionality formerly found in other
applica-tions, such as SQL Analysis Manager. The bulk of work that I often do is performed through SQL Server
Management Studio, or SSMS.
On first glance, the SQL Server Management Studio interface looks a lot like the Visual Studio IDE. It
should, since it is, in actuality, a Visual Studio shell. The Visual Studio shell brings many very useful
tools and features to the creation and organization of database objects, as well as the full feature set of
the old tools.
When the SQL Server Management Studio is first launched, the default view is a great deal like the old
Enterprise Manager with a slight Query Analyzer influence (see Figure 3-1).
Figure 3-1: SQL Server Management Studio.
Because there are many different windows that can be viewed in the Management Studio, the
manage-ment of screen real estate becomes critical. Most of the windows have the capability to either be pinned
open or configured to fly out when the mouse pointer is placed over the menu bar, or auto-hide when
the mouse cursor is placed elsewhere. If you are familiar with the Visual Studio Integrated Development
Environment (IDE), this will all be very familiar; if not, it may take a little while to get used to.
</div>
<span class='text_page_counter'>(89)</span><div class='page_container' data-page=89>
will appear vertically oriented. When the window is unpinned, it will be horizontal (see Figure 3-2), and
the toolbar will auto-hide or fly out, depending on the mouse cursor location.
Pinned
Unpinned
Figure 3-2: Object Explorer with a
pinned and unpinned window.
As mentioned before, the Visual Studio interface has a bit of a learning curve, but once you get used
to it, it’s hard to imagine any interface that works as well. The biggest advantage of the interface is
that it’s heavily customizable. Everything from window placement to colors can be altered to suit your
personal management style. I used to drive my old manager (and cowriter), Dan, crazy by setting my
Query window to a black background with bright green text (yes, it was hideous). Being able to hide
and unhide windows with little effort offers a huge benefit. This conserves a great deal of screen real
estate without having to click several menus to expose the features you want. The expanding popularity
of Netbook computers with smaller screen sizes and limited resolution makes this a more and more
attractive feature for those of us who tend to administer from the road.
Tool Windows
SQL Server Management Studio offers many different tool windows that facilitate the development and
modification of database objects, as well as the effective management of SQL Server. The various views
are accessible from the View menu as well as the Standard Toolbar. Each window can be configured
as Dockable, which is the default, but can also be configured as a Tabbed Document or a Floating
win-dow. You can change the state of the window by clicking on the down arrow next to the pushpin in the
window’s title bar, or if the window is floating, by right-clicking on the title bar (Figure 3-3).
</div>
<span class='text_page_counter'>(90)</span><div class='page_container' data-page=90>
A<i>dockable window</i>means that the window can be dragged and docked at almost any location in the
environment. If you don’t like the Object Explorer window on the left of the Studio, just drag it to the
right, top, or bottom, and dock it there. When dragging a tool window, a guide diamond will appear
in the center of the screen representing the dockable areas. Dragging the window over one of the area
representations (see Figure 3-4) will cause a shadow to appear in that area, indicating that the window
can be docked there by releasing the mouse button.
Figure 3-4: Dockable window.
Changing a windows property to Tabbed Document mode changes the window into a tab on the main
window. The Floating window option specifies that the tool window is not anchored anywhere and can
be moved around the main interface.
Object Explorer
The Object Explorer (see Figure 3-2) is more than just a way to explore the database objects on a server.
The Object Explorer is also the tool that will be used to initiate most database management tasks. It is
arranged in a standard tree view with different groups of objects nested in folders.
The Object Explorer’s functionality is exposed through the context menu. Right-clicking on any object
or folder within the Object Explorer exposes a list of context-sensitive options, from creating tables and
users to configuring replication and Database Snapshots. The context menu also presents the ability to
create scripts that manipulate. For example, right-clicking on a table exposes a context menu that allows
the user to either view or modify the table structure through the graphical interface, or create scripts to
perform actions against the table or its data (perhaps to be saved and executed later). This functionality
exists for virtually every object that is visible in the Object Explorer.
</div>
<span class='text_page_counter'>(91)</span><div class='page_container' data-page=91>
you can either save the table (which creates it) or click the ‘‘Generate Change Script’’ button on the Table
Designer toolbar (which will write the appropriate T-SQL to complete the task). Using the ‘‘Generate
Change Script’’ option can be beneficial when creating objects in a test or development environment that
will also need to be created in a production environment.
Likewise, when working with other objects in Management Studio, a Script button will appear at the
top of the respective designer, which will cause the actions performed in the designer to be scripted to
a new Editor window. This feature is particularly useful when several different objects of the same type
are to be created. The first one can be designed in the designer, the script generated for it, and that script
modified to create the remaining objects. It can also be a good learning tool, by allowing inexperience
database administrators to learn the T-SQL equivalent of a task that is performed through the Graphical
User Interface (GUI).
Try It Out
Creating a Script
In the following example, you use the Object Explorer to create a script for a new database called
DVDCollection:
1.
In Object Explorer, right-click Databases. In the context menu that appears, click ‘‘NewDatabase.’’
2.
The New Database dialog appears (see Figure 3-5).</div>
<span class='text_page_counter'>(92)</span><div class='page_container' data-page=92>
3.
Enter<b>DVDCollection</b>for the name of the database.4.
Click on the Script button at the top of the New Database dialog.5.
The Script button causes the appropriate T-SQL code to be written to a new Query window.Clicking the down arrow to the right of the Script button (Figure 3-5) gives you the option of
sending the script to a variety of locations.
6.
In the New Database dialog box, click Cancel. (Clicking OK will cause the database to be created.)The script remains, but the database is not created unless the script is executed.
Code Editor
The Code Editor in SQL Server Management Studio provides the ability to open, edit, or create new
queries. The types of queries supported by the Editor are:
❑ <b>Database Engine Queries</b>— These are written in Transact-SQL (T-SQL) against a SQL Server
OLTP database.
❑ <b>Analysis Services MDX Queries</b>— These use the<i>MultiDimensional eXpression</i>(MDX) language.
MDX queries are used to retrieve information from multidimensional objects created in Analysis
Services.
❑ <b>Analysis Services DMX Queries</b>— These are created by using extensions to the Structured
Query Language (SQL) called<i>Data Mining eXtensions</i>(DMX). DMX queries are written to return
information from data-mining models created in SQL Server Analysis Services databases.
❑ <b>Analysis Services XMLA Queries</b>
❑ <b>SQL Server Compact</b>— As the name implies, these can perform Transact-SQL queries using a
SQL Server Compact Edition database file as a data source.
The Code Editor is essentially a word processor. It provides color coding of syntax, multiple query
win-dows, and partial code execution when you highlight the desired code and click on the Execute button
or press [F5]. The SQL Server 2008 Books Online documentation will often refer to the Code Editor as the
<i>Query Editor</i>(its most common moniker),<i>Text Editor</i>, or simply the<i>Editor</i>, depending on what aspect of
SQL Server you are reading about.
</div>
<span class='text_page_counter'>(93)</span><div class='page_container' data-page=93>
USE AdventureWorks2008
Select * from HumanResources.Employee
Where Gender = ‘M’;
GO
Additionally, if you mouse-over the column name,<i>Gender</i>, the Query Editor provides you with metadata
about the gender column, as shown in Figure 3-6.
Figure 3-6: IntelliSense displaying column information.
Right-clicking on the Code Editor window, when that window is associated with a Database Engine
query, results in a context menu that includes the ‘‘Design Query in Editor’’ option (see Figure 3-7). The
Query Designer is also available from the SQL Editor toolbar described later. The Query Designer can be
very helpful when writing queries against databases that are not familiar to the query writer.
</div>
<span class='text_page_counter'>(94)</span><div class='page_container' data-page=94>
Solution Explorer
In the past, DBAs and database developers who had to keep track of saved queries that were used
together as part of a batch process, or required source control and versioning, often had to manage
multiple independent files manually. I don’t know how many times I’ve browsed a common file system
and found scattered .sql files stored here and there. SQL Server Management Studio takes full advantage
of Visual Studio’s solution system by providing the means of grouping various connection objects and
scripts into a single solution called a<i>SQL Server Management Studio Solution</i>. Each solution can have one
or more projects associated with it. For example, if you are developing several objects for a new
applica-tion that includes both Database Engine and Analysis Engine objects, you can create a new soluapplica-tion that
links them all together by creating a new SQL Server Management<i>Solution</i>with one or more associated
<i>Projects</i>(see Figure 3-8).
Figure 3-8: Associating projects and solutions.
If no solution is currently open, the Management Studio will create a new one. As you can see in
Figure 3-8, there are three types of projects to choose from:
❑ <b>SQL Server Script</b>— These projects contain T-SQL Database Engine queries.
❑ <b>Analysis Services Script</b>— These projects contain MDX, DMX, and XMLA analysis queries.
❑ <b>SQL Server Compact Edition Script</b>— These projects contain SQL Server Compact queries, as
you might expect.
The solution is managed through a SQL Server Management Studio Solution file with an .ssmssln
exten-sion. The example shown in Figure 3-8 created a new solution folder called<i>AdventureWorks Automation</i>
</div>
<span class='text_page_counter'>(95)</span><div class='page_container' data-page=95>
solution. The ‘‘Create directory for solution’’ option can also be cleared and a solution folder specified. In
this way, only a project folder will be created in the specified directory. If a solution is already opened,
creating a new project can add the project to the solution, or be configured to create a whole new solution
and close the open one. Solutions can contain many projects. For example, a project called<i>AdventureWorks</i>
<i>Data Preparation</i>can be added to organize the files for the sales piece of the solution (see Figure 3-9).
AdventureWorks
Projects
Figure 3-9: Multiple projects.
Projects contain three folders:
❑ <b>Connection Folders</b>— These folders store objects that contain connection parameters for the
queries in the solution. For example, if you look at the AdventureWorks Data Preparation
project shown in Figure 3-9, you will note that there are two connection objects, one for the
AughtEight\Administrator account and another for a SQL account named<i>ChrisL</i>.
❑ <b>Queries Folders</b>— Each of the queries in the<i>Queries folders</i>of the project will use one of those
configured connection objects. The query will run in the context of the associated connection
object.
❑ <b>Miscellaneous Folder</b>— This folder can be used to store just about any other file that is
perti-nent to the project. This may be project documentation, XML files, or even the .NET assemblies
used to create managed-code procedures.
The solution folder contains two files:
❑ <b>Solution File</b>— One file is the<i>solution file</i>, which, in this case, is called
<i>AdventureWorks Automation.ssmssln</i>. This contains a list of all the projects in the solution
and their locations.
❑ <b>SQL Solution Options File</b>— The second file is the<i>SQL Solution Options</i>file,
</div>
<span class='text_page_counter'>(96)</span><div class='page_container' data-page=96>
extension. In the previous AdventureWorks Data Integration project example, this file is called
<i>AdventureWorks Data Integration.ssmssqlproj</i>. The project definition file contains the connection
information, as well as metadata about the remaining files in the project.
Properties Window
The Properties window is linked to the Solution Explorer and simply displays the properties for the
currently selected item in the Solution Explorer window. Editable properties will be bolded.
Registered Servers
Multiple servers can be registered and managed with the Management Studio. Right-clicking on any
blank area in the Registered Servers window or on any server group name (see Figure 3-10) will expose
a context menu that allows for the addition of new server registrations. It also allows for the creation of
server groups. The Registered Servers window is not visible by default. To open it, use the View menu,
and select Registered Servers or press<i>[Ctrl]+[Alt]+G</i>.
Figure 3-10: Registered Servers
window.
If you have multiple servers in your organization, server groups can be very useful. For example, server
registrations can be segregated so that all the test and development servers are in one group and the
pro-duction servers are in another, or servers could be grouped based on function or department. Instances of
the Database Engine, Analysis Services, Reporting Services, Integration Services, and SQL Server
Com-pact can be registered in the Registered Servers window (Figure 3-10). Once registered, the Registered
Servers window provides the ability to manage the associated services or launch other SQL Server tools
associated with the respective instance.
A new feature of SQL Server 2008 includes the ability to use policy-based management,
enforce-able on multiple servers simultaneously through the use of Central Management servers. Central
Management servers can be registered in the Registered Servers window and can also have Server
Groups created to group together services with similar configuration requirements. Policy-based
administration can be used to apply policies to the Central Management server, the Server Group, or the
individual registered SQL Server. More information about Policy-Based administration is presented in
Chapter 8.
Bookmark Window
</div>
<span class='text_page_counter'>(97)</span><div class='page_container' data-page=97>
Figure 3-11: Bookmark window.
be created and then renamed with an intuitive name that identifies the bookmark (see Figure 3-11). If
the script is part of a solution, the bookmarks are saved with the solution in the Solution Options file.
Bookmarks can be added to a line by pressing<i>[Ctrl]+K</i>twice. Navigating bookmarks is easy. In addition
to selecting the bookmarks in the Bookmark window, you can use the key combinations of<i>[Ctrl]+K</i>,
<i>[Ctrl]+P</i>and<i>[Ctrl]+K</i>,<i>[Ctrl]+N</i>to move to the previous and next bookmarks, respectively. You can also
organize your bookmarks into multiple folders for each project, which can make it easier to navigate
through bookmarks by function.
Toolbox
The Toolbox window (see Figure 3-12) consists of maintenance plan tasks that can be dragged and
dropped into maintenance plan subtasks using the Maintenance Plan Designer, which is described in
more detail in Chapter 8.
</div>
<span class='text_page_counter'>(98)</span><div class='page_container' data-page=98>
Error List
The Error List can be handy when trying to troubleshoot a query, even simple ones like the example in
Figure 3-13, by providing descriptive information about the error, as well as line and position number in
the query text. As you can see, the three lines of code have generated four errors. You can now resolve
these errors before you execute your query.
Figure 3-13: Error List window.
Object Explorer Details
The Object Explorer Details window replaces the Summary View from SQL Server 2005. It is a great
deal like the List or Detail view in Windows Explorer; however, it also provides a very useful reporting
feature. This feature allows the rendering of various server and database reports. The report feature is
enabled when right-clicking on an object in the Object Explorer or in the Object Explorer Details window
that has reports associated with it, and selecting the Reports option from the context menu. The following
table contains a list of all the supported reports and where they can be found:
<b>Report Object</b> <b>Reports</b>
Server Server Dashboard
Configuration Changes History
Schema Changes History
Scheduler Health
Memory Consumption
Activity — All Blocking Transactions
Activity — All Cursors
</div>
<span class='text_page_counter'>(99)</span><div class='page_container' data-page=99>
<b>Report Object</b> <b>Reports</b>
Activity — All Sessions
Activity — Top Sessions
Activity — Dormant Sessions
Activity — Top Connections
Top Transactions by Age
Top Transactions by Blocked Transactions Count
Top Transactions by Locks Count
Performance — Batch Execution Statistics
Performance — Object Execution Statistics
Performance — Top Queries by Average CPU Time
Performance — Top Queries by Average I/O
Performance — Top Queries by Total CPU Time
Performance — Top Queries by Total I/O
Service Broker Statistics
Transaction Log Shipping Status
Server.Database Disk Usage
Disk Usage by Top Tables
Disk Usage by Table
Disk Usage by Partition
Backup and Restore Events
All Transactions
All Blocking Transactions
Top Transactions by Age
Top Transactions by Blocked Transactions Count
Top Transactions by Locks Count
Resource Locking Statistics by Objects
Object Execution Statistics
Database Consistency History
Index Usage Statistics
Index Physical Statistics
</div>
<span class='text_page_counter'>(100)</span><div class='page_container' data-page=100>
<b>Report Object</b> <b>Reports</b>
Schema Changes History
User Statistics
Server.Database.Service Broker Service Broker Statistics
Server.Database.Storage.Full Text Catalogs Active Full Text Catalogs
Server.Security Login Statistics
Login Failures
Resource Locking Statistics by Logins
Server.Management Tasks
Number of Errors
Server.Management.Data Collection Server Activity History
Disk Usage Summary
Query Statistics History
SQL Server Agent Job Steps Execution History
Top Jobs
Web Browser
SQL Server Management Studio also includes the ability to launch a Web Browser window within
the context of the management studio. The browser uses the Internet Explorer renderer, if desired,
to minimize the number of open applications and to allow direct access to Internet content from
within the Management Studio application. The Web Browser window is made visible from the
View menu (or by pressing<i>[Ctrl]+[Alt]+R</i>). You can use the address bar at the top of the window
to enter a URL, or you can use the Web Browser Search button to take you to the MSDN home
page.
</div>
<span class='text_page_counter'>(101)</span><div class='page_container' data-page=101>
Template Explorer
The Template Explorer (see Figure 3-14) contains hundreds of SQL Server, Analysis Server, and SQL
Compact scripts. Each script is grouped into folders based on their function. The template scripts can be
opened by being dragged onto an open Query window. If no Query window is open, the templates can
be opened by double-clicking with a mouse, using the Edit menu, or right-clicking on a context menu, all
of which cause a new Query window to open.
Figure 3-14: Template Explorer.
When using a template, you can modify the text directly in the Query Editor, or you can use the ‘‘Specify
Values for Template Parameters’’ option to replace the placeholders in the template (see Figure 3-15).
This dialog can be launched from the SQL Editor toolbar or through the Query menu.
Toolbars
</div>
<span class='text_page_counter'>(102)</span><div class='page_container' data-page=102>
Figure 3-15: Parameter replacement.
</div>
<span class='text_page_counter'>(103)</span><div class='page_container' data-page=103>
Try It Out
Creating a Custom Toolbar
Create a new custom toolbar by completing the following steps:
1.
Select the Customize command on the ViewToolbars menu. This will launch the Customizewindow.
2.
On the Customize window, click on the New button (see Figure 3-17), give your toolbar a newname (for this example, I just created one called<i>My Toolbar</i>), and click OK. Your new toolbar will
show up in the Toolbars list, as well as a floating toolbar on your screen.
Figure 3-17: Custom toolbar window.
3.
With your new toolbar highlighted, select the Commands tab on the Customize window. Twopanes are visible on the Commands tab: Categories and Commands. Each category contains
com-mands specific to that category. For example, the File category contains comcom-mands such as Open
File, Save Project, and so on.
</div>
<span class='text_page_counter'>(104)</span><div class='page_container' data-page=104>
Figure 3-18: Custom edit toolbar.
Creating new toolbars or customizing existing ones can help you manage your screen real estate by
allowing you to create more useful and efficient toolbars.
Database Diagram Toolbar
The Database Diagram toolbar (see Figure 3-19) exposes a great deal of functionality for use on database
diagrams.
Figure 3-19: Database Diagram toolbar.
The toolbar is not used just for diagramming the database, but also for modifying or creating database
objects from within the diagram interface. The Database Diagram toolbar features are described in the
following table:
<b>Feature</b> <b>Purpose</b>
New Table Enables the creation of new tables from within the database diagram.
Add Table Adds an existing table from the database to the diagram.
</div>
<span class='text_page_counter'>(105)</span><div class='page_container' data-page=105>
<b>Feature</b> <b>Purpose</b>
Delete Tables from
Database
Not only removes the table from the diagram, but deletes the table
and its contents as well. Use with caution.
Remove from Diagram Removes the selected table from the diagram, but not the database.
Generate Change
Script
Any changes made to database objects in the diagram (such as the creation,
deletion, or modification of attributes) can be sent to a script.
If changes are made to underlying objects and the diagram is saved, a prompt is
shown asking to confirm changes to the underlying objects.
Set/Remove Primary
Key
Sets or removes the primary key assignment to the selected column.
New Text Annotation Adds a textbox for annotation to the database diagram.
Table View Enables the changing of table presentation in the diagram, including
a customized view to configure exactly which aspects of the table are displayed.
The default is Column Names.
Show Relationship
Labels
Displays or hides the name of the foreign key constraints.
View Page Breaks Displays or hides page break lines to enable the organization of diagrams for
printing.
Recalculate Page
Breaks
Re-centers table objects onto as few pages as possible after being manually
arranged on the diagram.
Autosize Selected
Tables
Re-sizes the selected table so that all rows and columns are visible.
Arrange Selection Arranges selected tables so they do not overlap and are viewable
in the diagram.
Arrange Tables Arranges all tables so they do not overlap and are viewable in the diagram.
Zoom Increases or decreases the zoom factor on the displayed diagram.
Relationships Launches a dialog that displays existing foreign keys defined on a selected table
and enables the defining of additional foreign keys.
Manage Indexes and
Keys
Launches a dialog that displays existing primary and unique keys defined on a
selected table and enables the defining of additional keys.
Manage Fulltext
Indexes
Launches a dialog that displays existing full-text indexes on a selected table and
enables the defining of additional full-text indexes on full-text index-enabled
databases.
Manage XML Indexes Launches a dialog that displays existing XML indexes on a selected table and
enables the defining of additional XML indexes.
Manage Check
Constraints
Launches a dialog that displays existing Check Constraints on a selected table and
enables the defining of additional Check Constraints.
Manage Spatial
Indexes
</div>
<span class='text_page_counter'>(106)</span><div class='page_container' data-page=106>
Debug Toolbar
The Debug toolbar, as shown in Figure 3-20, includes several tools useful when debugging projects in
SQL Server Management Studio that let you step through long queries to help identify potential problem
areas.
Figure 3-20: Debug toolbar.
The Debug toolbar’s commands are described in the following table:
<b>Command</b> <b>Purpose</b>
Start Debugging Begins debug mode and runs the code in the Query Editor against the debugger
until a breakpoint is encountered.
Break All Sets the debugger to break all processes to which it is attached.
Stop Debugging Exits Debug mode.
Show Next Statement Moves the cursor to the next statement.
Step Into Runs the next statement.
Step Over Skips the statement immediately after the current one and executes the
statement after next.
Step Out Steps out to the next highest calling level in the query structure.
Breakpoints In Standard mode, this opens the Breakpoints window, which allows you to
view and manage Breakpoints in the current query. In Debug mode, this
provides a breakpoint menu that includes the ability to open the Locals, Call
Stack and Threads window.
Debug Location Toolbar
The Debug Location toolbar (Figure 3-21) displays thread and stack frame information about the current
command being executed in the Debug window.
Figure 3-21: Debug Location toolbar.
Help Toolbar
The Help toolbar (see Figure 3-22) provides a very easy and convenient mechanism for consulting online
help articles while using the Management Studio.
</div>
<span class='text_page_counter'>(107)</span><div class='page_container' data-page=107>
The Help toolbar’s commands are described in the following table:
<b>Command</b> <b>Purpose</b>
Web Browser
Back/Web Browser
Forward
If the Web Browser window is opened in Management Studio, the Web
Browser Back and Forward commands can be used to move from a
viewed Web page to the previously viewed Web page, and vice versa.
Web Browser Stop Stops the loading of a Web page in a Web Browser window.
Web Browser Refresh Refreshes the current Web Browser window.
Web Browser Search Launches the MSDN web site in a new Web Browser window.
Text Size Changes of the size of text in the Web Browser window. Clicking this
repeatedly will cycle the font size from Smallest, Smaller, Medium,
Larger, and Largest.
How Do I The ‘‘How Do I’’ command launches SQL Server Books Online and
loads up the How Do I section, which allows the user to navigate
through articles that explain how to perform a myriad of actions with
SQL Server 2008.
Search Launches the search feature of SQL Server Books Online.
Index Launches the SQL Server Books Online Index.
Contents Launches the SQL Server Books Online Table of Contents.
Help Favorites Launches SQL Server Books Online and opens the Help Favorites
window
for navigating any saved favorites.
Add to Help Favorites Adds the currently viewed help page to the Help Favorites.
Save Search Saves the current search in the SQL Server Books Online search page to
the Help Favorites.
Sync with Table of
Contents
If the SQL Server Books Online Table of Contents is visible, this button
will navigate to the location in the Table of Contents that the current
article window is opened to.
Ask a Question Opens the Search Community Forums home page at the MSDN web
site. Here you can create a profile and ask questions of other SQL Server
professionals or answer other people’s questions.
Check Question Status Once you have an MSDN Community Forum account, your questions
are associated with your account, so you can easily check back to see if
anyone has replied to your question.
Send Feedback The Send Feedback command allows you to provide feedback to the
SQL Server product team about SQL Server 2008.
Query Designer Toolbar
</div>
<span class='text_page_counter'>(108)</span><div class='page_container' data-page=108>
Figure 3-23: Query Designer toolbar.
To open a table for editing, follow these steps:
1.
Right-click on the table you want to open in Object Explorer.2.
Click ‘‘Edit Top 200 Rows.’’If the Query Designer was not visible, it will be when the table is opened. If it was visible, it will now be
enabled. Although opening a table in a test and development environment might be acceptable, opening
a table in this manner in a production environment is never recommended. Opening a table with the
Object Explorer dumps the data from the table in to an updatable scrollable cursor. What this means
is that while the table data is exposed in the results window, any change to the displayed data is also
made to the underlying data in the table. There is no confirmation message or warning. The data is just
modified. This can be very dangerous. Displaying the entire contents of the table can also consume a great
deal of server resources if the table is large. The default behavior of SQL Server Management Studio only
exposes the first 200 rows of a table for editing, but this can be changed through the ToolsOptions
menu. As a general rule, if the entire contents of a table need to be exposed for quick viewing, the best
way is to write a query with no filters, such as the following:
USE AdventureWorks2008
GO
SELECT * FROM Person.Person
This exposes the same information as opening the table, but does not populate an updatable cursor, so
the results are Read Only. If the data in that table needs to be updated, an update command is more
appropriate than modifying the data in an open table results window.
The Query Designer toolbar features are described in the following table:
<b>Feature</b> <b>Purpose</b>
Show Diagram
Pane
Displays or hides the Diagram Pane, which can be used to add or remove
tables from the query, add derived tables, and configure table join criteria.
Show Criteria
Pane
Displays or hides the Criteria Pane, which can be used to alias column
names, establish sort orders, and configure filter criteria.
Show SQL Pane Displays or hides the SQL Pane, which displays the resultant SQL syntax
from the Diagram Pane. The SQL syntax can also be manipulated in the
SQL Pane, resulting in changes to the Criteria and Diagram Panes.
Show Results
Pane
Displays or hides the results of the query if it has been executed.
Change Type Allows changing the type of query fromSELECTtoINSERT,DELETE, or
</div>
<span class='text_page_counter'>(109)</span><div class='page_container' data-page=109>
<b>Feature</b> <b>Purpose</b>
Execute SQL Executes the query against the database.
Verify SQL
Syntax
Validates the syntax of the query, but does not execute it.
Add/Remove
Group By
Adds aGROUP BYexpression and formats the query so that non-aggregated
columns in theSELECTlist are present in theGROUP BYlist.
Add Table Adds an existing table to the Diagram Pane and SQL Pane.
Add New
Derived Table
Adds an empty table to the Diagram Pane and the shell syntax for creating
a derived table subquery to the SQL Pane.
Source Control Toolbar
The Source Control toolbar (see Figure 3-24) is enabled when working with scripts and a Source Control
plug-in has been configured such as Visual Source Safe 2005. The addition of source-control
function-ality to SQL Server projects is a great step forward in recognizing the need for a structured solution
environment in the development of database solutions.
Figure 3-24: Source Control toolbar.
<i>The following example uses Visual Source Safe 2005 as the source-control tool, but there are other</i>
<i>source-control applications available that will interact with SQL Server Management Studio. A full</i>
<i>description of Visual Source Safe 2005 configuration and use is beyond the scope of this book, so it will</i>
<i>be limited to just the interaction with SQL Server Management Studio.</i>
To configure Management Studio to use source control:
1.
Click File, and click Launch Microsoft Visual Source Safe. The Add Visual SourceSafeDatabase Wizard will launch.
2.
Click Next on the Welcome screen. The Database Selection screen will appear, asking for thelocation of an existing Source Safe database. If you or your organization has already
config-ured a source-control database, select the ‘‘Connect to an existing database’’ option. If this is
a new installation, check the ‘‘Create a new database’’ option (see Figure 3-25).
3.
The next step is either to choose an existing source control share location or to create one.After choosing to either use an existing share or to create a new one, the summary screen for
the Wizard will appear.
4.
Clicking Finish on the Wizard will launch the Visual SourceSafe Explorer. The VisualSourceSafe Explorer can be used to create and manage project folders for both SQL Server
Management Studio and Visual Studio solutions.
</div>
<span class='text_page_counter'>(110)</span><div class='page_container' data-page=110>
source-control database to control the modification of the included files and to provide structured version
control.
Figure 3-25: Source-control database selection.
Much of the functionality of the Source Control toolbar is only enabled if the current project has already
been added to the source-control database.
To add a solution to source control, right-click on the solution in Solution Explorer and select ‘‘Add
Solution to Source Control.’’ After logging in to source control, choose a location for the solution (see
Figure 3-26) and click OK.
Figure 3-26: Add solution to source control.
</div>
<span class='text_page_counter'>(111)</span><div class='page_container' data-page=111>
The features available on the Source Control toolbar are described in the following table:
<b>Feature</b> <b>Purpose</b>
Change Source
Control
Displays a dialog that enables the linking of new and existing items in the
Solution Explorer to a source-control database folder.
Get Latest
Version
Opens the latest version of the item or items selected in the Solution
Explorer.
Get Returns a list of all versions of the selected item and allows the selection of
a particular version.
Check Out for
Edit
Opens the selected item for editing and marks its status in the
source-control database as ‘‘Open for Edit,’’ preventing other users from
editing it at the same time.
Check In Saves changes and marks the selected item in the source-control database
as ‘‘Checked In’’ and allows editing by other users.
Undo Checkout Discards any changes and marks the selected item in the source-control
database as ‘‘Checked In’’ and allows editing by other users.
View History Displays the history of a project, which includes a list of everything done
to the project from creation to deletion.
Refresh Status Queries the source-control database for the most recent status of all project
items.
Share Allows for a single item to be shared in multiple projects. Changes made to
shared items are reflected in all the projects that use the item.
Compare Compares an item to a previous version to expose the changes made.
Properties Displays detailed status information on the selected item.
Source Control
Manager
Launches the associated source control application as identified in the
Management Studio options settings.
SQL Editor Toolbar
The SQL Editor toolbar (see Figure 3-27) becomes visible (or is enabled if already visible) when a new
SQL Query window is opened. It provides the most common features used by SQL programmers and
DBAs.
</div>
<span class='text_page_counter'>(112)</span><div class='page_container' data-page=112>
The supported features available on the SQL Editor toolbar are described in the following table:}
<b>Feature</b> <b>Purpose</b>
Connect Queries can be written without being connected to a database, so when it
comes time to execute the query or validate its syntax against a database, the
Connect button displays a server connection dialog that enables the selection
of the applicable server and database.
Change Connection Enables changing the connected server. A script can be created and tested on
a test and development server and then the connection changed to the
production server for execution.
Available Databases Dropdown list box for selecting the database context for the query
Execute Executes the SQL in the current window (or the highlighted portion
of code) against the selected database.
Debug Opens the current query in the debugger.
Cancel Executing Query Terminates the active query.
Parse Checks the SQL in the current window for valid structure and syntax. It
does<i>not</i>check to ensure that referenced objects actually exist.
Display Estimated Execution
Plan
Displays a graphical execution plan for the current window. It does not
actually execute the query, but simply checks the metadata of the referenced
object and builds a query plan based on current information.
Query Options Opens a dialog box that allows you to specify query-specific options, such as
maximum rows returned, deadlock priority, and ANSI settings. You can also
configure the output settings of the query from this dialog.
IntelliSense Enabled Toggling this button allows you to enable or disable IntelliSense for this
query.
Include Actual Execution
Plan
A graphical query plan used during execution is returned along with the
results of the query.
Include Client Statistics Client statistics including statistics about the query, network packets, and
the elapsed time of the query are returned, along with the query results.
Results to Text Formats the results of any query executed in the Query Editor as text.
Results to Grid Query results are returned in a grid. By default, grid results cannot exceed
65,535 characters.
Results to File When a query is executed a Save Results window will appear, prompting for
a filename and location.
Comment Out Selected Lines Adds inline comment marks to comment out the selected lines.
Uncomment Selected Lines Removes inline comment marks.
Decrease Indent Decreases the indent of selected text.
Increase Indent Increases the indent of selected text.
Specify Values for Template
Parameters
</div>
<span class='text_page_counter'>(113)</span><div class='page_container' data-page=113>
SQL Server Analysis Services Editors Toolbar
The Analysis Services Editors toolbar (see Figure 3-28) also becomes visible (or is active if already visible)
when a new Analysis Services query is opened or created. The tools on this toolbar are a subset of the SQL
Editor tools, but contain only those tools applicable to Analysis Services queries (DMX, MDX, XMLA).
Figure 3-28: Analysis Services Editors toolbar.
SQL Server Compact Edition Editor Toolbar
The SQL Server Compact Edition Editor toolbar (see Figure 3-29) becomes visible (or enabled) when
a new SQL Compact Edition Query window is opened. The tools on the SQL Server Compact Edition
toolbar are a subset of the SQL Editor tools that are applicable for SQL Compact queries.
Figure 3-29: Compact Edition Editor toolbar.
Standard Toolbar
The Standard toolbar (see Figure 3-30) provides buttons to execute the most common actions such as
opening and saving files. It also provides buttons that will launch new queries and expose additional
tool windows.
Figure 3-30: Standard toolbar.
The commands available on the Standard toolbar are described in the following table:
<b>Feature</b> <b>Purpose</b>
New Query The New Query command launches a new Database Engine
Query window by default.
Database Engine Query Opens a new Database Engine Query window.
Analysis Services MDX Query Opens a new MDX Query window.
Analysis Services DMX Query Opens a new DMX Query window.
Analysis Services XMLA Query Opens a new XMLA Query window.
</div>
<span class='text_page_counter'>(114)</span><div class='page_container' data-page=114>
<b>Feature</b> <b>Purpose</b>
SQL Server Compact Query Opens a new SQL Server Compact query.
Open File Opens a file.
Save Saves the currently selected window, or in the case of a
Designer tool, saves the current object.
Print Sends the selected window or pane to the printer.
Activity Monitor Opens the SQL Server Activity Monitor.
Table Designer Toolbar
The Table Designer toolbar (see Figure 3-31) becomes visible (or enabled) when a new table is created
using Table Designer or an existing table is modified using Table Designer. Table Designer is launched
by right-clicking on the Table node in Object Explorer and choosing New Table from the context menu,
or by right-clicking on an existing table in the Table node of Object Explorer and choosing Design.
Figure 3-31: Table Designer
toolbar.
The following table describes the toolbar:
<b>Feature</b> <b>Purpose</b>
Generate Change Script Table creation or modification done with the Designer can be sent
to a Query window for later execution.
Set/Remove Primary Key Sets the selected column of the table as the primary key column
or removes the key if it has already been set.
Relationships Enables the creation of foreign key constraints.
Manage Indexes and Keys Enables the creation of unique keys and indexes.
Manage Fulltext Index Launches a dialog that enables the creation of full-text catalogs
and full-text indexes.
Manage XML Indexes Launches a dialog that enables the creation and management of
Primary and Secondary indexes.
Manage Check Constraints Launches a dialog that enables the creation and management of
check constraints.
</div>
<span class='text_page_counter'>(115)</span><div class='page_container' data-page=115>
Text Editor Toolbar
The Text Editor toolbar (see Figure 3-32) offers additional shortcuts to those provided in the other
language-specific editors.
Figure 3-32: Text Editor toolbar.
The features are described in the following table:
<b>Feature</b> <b>Purpose</b>
Display an Object Member List When editing T-SQL, DMX, MDX, or XMLA scripts,
invokes an IntelliSense window that displays a list of
possible script members.
Display Parameter Info Displays the parameter list for System Stored Procedures
and functions used with Analysis Services.
Display Quick Info Displays declaration information for XML objects created
or referenced in an XMLA script.
Display Word Completion Displays possible words to complete a variable,
command, or function call. If only one possible option
exists, it is implemented.
Decrease Indent Decreases the indent of selected text.
Increase Indent Increases the indent of selected text.
Comment Out Selected Lines Adds inline comment marks to comment out the selected
lines.
Uncomment Selected Lines Removes inline comment marks.
Toggle a Bookmark on the Current
Line
Adds or removes a bookmark to the current script at the
position of the cursor.
Move the Caret to the Previous
Bookmark
Moves the cursor to the previous set bookmark in the
current script project.
Move the Caret to the Next
Bookmark
Moves the cursor to the next set bookmark in the current
script project.
Move the Caret to the Previous
Bookmark in the Current Folder
Moves the cursor to the previous set bookmark in the
currently selected bookmark folder of the Bookmark
window.
Move the Caret to the Next
Bookmark in the Current Folder
Moves the cursor to the next set bookmark in the currently
selected bookmark folder of the Bookmark window.
</div>
<span class='text_page_counter'>(116)</span><div class='page_container' data-page=116>
<b>Feature</b> <b>Purpose</b>
Move the Caret to the Previous
Bookmark in the Current Document
Moves the cursor to the previous set bookmark in the
current script window.
Move the Caret to the Next Bookmark in
the Current Document
Moves the cursor to the next set bookmark in the
current script window.
Clear All Bookmarks in All Files Removes all configured bookmarks from the current
project.
View Designer Toolbar
The View Designer toolbar (see Figure 3-33) is almost exactly like the Query Designer toolbar, with the
exception of being limited to writingSELECTqueries. In addition, queries written with the View Designer
are saved as views and not just query scripts. For information about the function of the buttons on the
View Designer toolbar, consult the table in the earlier section, ‘‘Query Designer Toolbar.’’
Figure 3-33: View Designer
toolbar.
XML Editor Toolbar
The XML Editor toolbar (see Figure 3-34) contains several shortcuts that are specific to managing XML
files. This is often used with XMLA scripts.
Figure 3-34: Text Editor toolbar.
The features of the Text Editor toolbar are described in the following table:
<b>Feature</b> <b>Purpose</b>
Create Schema Generates a schema file based on the structure of the current
XML file.
Reformat Selection Applies formatting rules to selected text to ensure that the
hierarchy is properly displayed.
Format the Whole Document Applies formatting rules to the entire XML document to ensure
that the hierarchy is properly displayed.
</div>
<span class='text_page_counter'>(117)</span><div class='page_container' data-page=117>
<b>Feature</b> <b>Purpose</b>
Debug XSLT Starts debugging for the XML and XSLT style sheet.
Cancel XSLT Output Cancels the output, which can be helpful if the process is
taking too long to finish.
Display an Object Member List When editing T-SQL, DMX, MDX, or XMLA scripts,
invokes an IntelliSense window that displays a list of
possible script members.
Display Parameter Info Displays the parameter list for System Stored Procedures
and functions used with Analysis Services.
Display Quick Info Displays declaration information for XML objects created
or referenced in an XMLA script.
Display Word Completion Displays possible words to complete a variable,
command, or function call. If only one possible option
exists, it is implemented.
Decrease Indent Decreases the indent of selected text.
Increase Indent Increases the indent of selected text.
Comment Out Selected Lines Adds inline comment marks to comment out the selected
lines.
Uncomment Selected Lines Removes inline comment marks.
Toggle a Bookmark on the Current
Line
Adds or removes a bookmark to the current script at the
position of the cursor.
Move the Caret to the Previous
Bookmark
Moves the cursor to the previous set bookmark in the
current script project.
Move the Caret to the Next
Bookmark
Moves the cursor to the next set bookmark in the current
script project.
Move the Caret to the Previous
Bookmark in the Current Folder
Moves the cursor to the previous set bookmark in the
currently selected bookmark folder of the Bookmark
window.
Move the Caret to the Next
Bookmark in the Current Folder
Moves the cursor to the next set bookmark in the currently
selected bookmark folder of the Bookmark window.
Move the Caret to the Previous
Bookmark in the Current Document
Moves the cursor to the previous set bookmark in the
current script window.
Move the Caret to the Next
Bookmark in the Current Document
Moves the cursor to the next set bookmark in the current
script window.
</div>
<span class='text_page_counter'>(118)</span><div class='page_container' data-page=118>
SQL Server Management Studio Configuration
Management Studio’s look and feel can be customized through the ToolsOptions menu (see
Figure 3-35), which is accessed by selecting Tools on the main menu and clicking Options.
Figure 3-35: Options menu.
The Options dialog enables the customization of the Management Studio IDE. The configuration options
are divided into the following seven areas.
Environment
The Environment configuration section is broken down into four subareas:
❑ <b>General</b>— Start-up options and environment layout (such as tabbed windows versus MDI
win-dows) and how the windows behave. Recent file history is also configured on this screen.
❑ <b>Fonts and Colors</b>— The fonts and colors used in the Text Editor are completely customizable in
this area. The colors and fonts used for items such as reserved words, stored procedures,
com-ments, and background colors are just a small portion of what can be changed.
❑ <b>Keyboard</b>— For those database administrators who are used to Query Analyzer’s keyboard
shortcuts, this configuration area enables the setting of the keyboard shortcuts to the same ones
used in Query Analyzer. The keyboard configuration area also allows for the addition of custom
keyboard shortcuts.
❑ <b>Help</b>— The Help area enables the integration of Help into a Management Studio window or
launching Help externally. It also allows for customizing local and online help resources.
Text Editor
</div>
<span class='text_page_counter'>(119)</span><div class='page_container' data-page=119>
❑ <b>File Extension</b>— File extensions for all the possible script and configuration files can be
con-figured in the File Extension area. Known file extensions such as .sql, .mdx, .dmx, and .xml are
not listed, but are automatically associated with their respective editors. They can be reassigned
with a ‘‘with encoding’’ option so that Management Studio will prompt for specific language
encoding every time an associated file type is opened. Custom file extensions can also be
added.
❑ <b>All Languages</b>— The All Languages area is divided into two parts, General and Tabs, and
pro-vides configuration settings for IntelliSense features, word-wrap, line numbers, and indentation
for all script languages.
❑ <b>Plain Text</b>— Configuration settings for plain-text documents not associated with a particular
scripting language.
❑ <b>Transact-SQL</b>— Configuration settings specific to T-SQL. There is also a separate tab here for
enabling and configuring IntelliSense for Transact-SQL queries.
❑ <b>XML</b>— Configuration settings for XML documents. These settings consist of the same settings
from the All Languages area, as well as XML-specific settings such as automatic formatting and
schema download settings.
❑ <b>Editor Tab and Status Bar</b>— Configuration settings for the status bar, which is displayed at the
bottom of the Query Editor window. You can choose the colors of the status bar, as well as what
information is included in the display.
Query Execution
The Query Execution section provides configuration options for how queries are executed, as well as
connection properties and time-out settings. The Query Execution section is divided into two primary
areas:
❑ <b>SQL Server</b>— The SQL Server area has configuration options that control the maximum row
count and the maximum amount of text or Unicode text that is returned to the Management
Stu-dio results window. This area also has options to specify a batch delimiter other thanGOand to
specify Query Execution time-out settings. There are also Advanced and ANSI areas that
pro-vide for the configuration of specific connection level options described in the following table:
<b>Option</b> <b>Description</b>
SET NOCOUNT Suppresses the X number rows message from being
returned on the connection.
SET NOEXEC Configures the Query Processor to only parse
and compile SQL batches, but not to execute them.
SET PARSEONLY Configures the Query Processor to only check the validity
of SQL batches, but not to compile or execute them.
SET CONCAT_NULLS_YIELDS_NULL Configures the Query Processor to return aNULLfor any
string concatenated with aNULL. This setting is selected
by default.
</div>
<span class='text_page_counter'>(120)</span><div class='page_container' data-page=120>
<b>Option</b> <b>Description</b>
SET ARITHABORT Configures the Query Processor to terminate the query if an
arithmetic error, overflow, divide-by-zero, or a domain
error is encountered. This setting is enabled by default.
SET SHOWPLAN_TEXT <sub>Configures the Query Processor to only return the query</sub>
plan in text format, but not to actually execute the query.
SET STATISTICS TIME <sub>Configures the Query Processor to return the amount of</sub>
time spent in the parsing, compiling, and execution of a
script.
SET STATISTICS IO Configures the Query Processor to return the amount of
scans, physical reads, logical reads, and read-ahead reads
required to execute a script.
SET TRANSACTION ISOLATION
LEVEL
Provides the option of configuring the isolation level of SQL
scripts. The default isREAD COMMITTED.
SET DEADLOCK_PRIORITY Configures the deadlock priority of SQL scripts to either
NormalorLow. The default isNormal.
SET LOCK TIMEOUT Configures the time a connection will wait until terminating
a query that is being blocked by a lock. The default setting is
-1, which means forever.
SET QUERY_GOVERNOR_
COST_LIMIT
Configures the Query Processor to prevent any query from
executing that is calculated to take longer than the
configured limit. The default value is0, which disables the
time limit.
Suppress provider message
headers
Configures the Query Processor to suppress messages
returned by data providers such as OLEDB or SQLClient.
This setting is enabled by default.
Disconnect after the query
executes
Disconnects the active Query window from the database
after execution.
SET ANSI_DEFAULTS Sets all ANSI connection settings toOn.
SET QUOTED IDENTIFIER <sub>Configures the Query Processor to allow double quotes as</sub>
legitimate object delimiters. This setting is enabled by
default.
SET ANSI_NULL_DFLT_ON Specifies that columns created in aCREATE TABLEorALTER
TABLEstatement default to allowingNULLSif
NOT NULLis not defined in the script. This setting is enabled
by default.
SET IMPLICIT_TRANSACTIONS Configures the Query Processor to begin, but not commit a
transaction any time anUPDATE,INSERT, orDELETE
</div>
<span class='text_page_counter'>(121)</span><div class='page_container' data-page=121>
<b>Option</b> <b>Description</b>
SET CURSOR_CLOSE_
ON_COMMIT
When set toON, causes any open cursor to be closed on a
COMMIT TRANSACTIONstatement or
ROLLBACK TRANSACTIONstatement not associated with
a save point.
SET ANSI_PADDING When set toON, causes trailing spaces to be added to any
fixed-length character string, or trailing zeros to be added to
fixed-length binary strings. Trailing spaces or trailing zeros
explicitly added to variable-length strings are not trimmed.
This setting is enabled by default.
SET ANSI_WARNINGS When set toON, causes a warning to be returned if any
aggregate function encounters aNULLor an arithmetic
function fails. This setting is enabled by default.
SET ANSI_NULLS When set toON, equality or inequality operations executed
against aNULLvalue will return an empty set. This setting is
enabled by default.
❑ <b>Analysis Services</b>— Configuration setting to control the execution time-out setting for Analysis
Server queries.
Query Results
The Query Results section provides configuration options for how query results are formatted. As with
the Query Execution options, this is also divided into two sections for the SQL Server Database Engine
and the Analysis Services Engine.
❑ <b>SQL Server</b>— The SQL Server section has configuration options to specify the default location
for query results: to a grid, as text, or to a file, as well as the default location for results sent to a
file. You can also enable the Windows default beep sound to play whenever a query batch
com-pletes. The ‘‘Results to Grid’’ settings are described in the following table:
<b>Option</b> <b>Description</b>
Include the query in the
result text
The query executed is returned as part of the result. This
setting is off by default.
Include column headers when
copying or saving results.
Results copied to the clipboard or saved to a file include the
column header names. This setting is off by default.
Quote strings containing list
separators when saving
.csv results
When exporting to a .csv file format, quotes will be placed
around any column that contains a list separator, such as a
comma. This setting is off by default.
Discard results after
execution
Queries are executed, but results are immediately cleared from
the results window. This setting is off by default.
</div>
<span class='text_page_counter'>(122)</span><div class='page_container' data-page=122>
<b>Option</b> <b>Description</b>
Display results in a separate
tab
Results are sent to a separate tab instead of a results window
beneath the query window. This setting is off by default. Note
that the new tab will not automatically have focus.
Switch to results tab after
the query executes
If the above option is enabled, the Query Results tab will
automatically have focus once the results are displayed.
Maximum Characters Retrieved <sub>Grid results are limited to a specified number of characters. By</sub>
default, this limit is 65,535 characters for non-XML data and 2
MB for XML data.
The ‘‘Results to Text’’ settings are described in the following table:
<b>Option</b> <b>Description</b>
Output format The default text output format is column-aligned. Comma, tab,
space, and custom delimiters are available.
Include column headers in the
result set
Column headers are returned in the text results by default.
Include the query in the
result text
The query executed is returned as part of the result. This
setting is off by default.
Scroll as results are
received
The results window scrolls to expose the last set of rows
returned that will fit in the results window. This setting is on
by default.
Right align numeric values This option is only available when column-aligned is selected
as the Output format. This setting is disabled by default.
Discard results after query
executes
Queries are executed, but results are immediately cleared from
the results window. This setting is off by default.
Display results in a separate
tab
Results are sent to a separate tab instead of a results window
beneath the query window. This setting is off by default.
Switch to results tab after
the query executes
If the above option is enabled, the results tab can be given
focus by enabling this option. This is off by default.
Maximum characters displayed
in each column
Configures the maximum length of any column returned in
text format. The default is 256 characters.
</div>
<span class='text_page_counter'>(123)</span><div class='page_container' data-page=123>
❑ <b>Analysis Services</b>— Configuration settings for Analysis Services query results include showing
grids in separate tabs and playing the default Windows beep when the query completes. Both
settings are disabled by default.
SQL Server Object Explorer
The SQL Server Object Explorer options list contains two tabs, one for managing command settings and
another for handling scripting behavior. The command settings allow you to specify the number of rows
returned used by the menu items for the number of rows returned for theSelect Top <n> Audit records,
Edit Top <n> Rows, andSelect Top <n> Rowscommands.
The configurable scripting options are identified in the following table:
<b>Option</b> <b>Description</b>
Delimit Individual
Statements
Separate individual T-SQL statements by using the batch
separator. This is on by default.
Include descriptive
headers
Adds descriptive comments at the beginning of a script. This is
on by default.
Include VarDecimal Enables the scripting ofVarDecimalstorage formats. This is off
by default.
Script change tracking Enables including Change Tracking information. This is off by
default.
Script for server version Specifies the version of SQL Server for which the script will be
generated. The default is SQL Server 2008, but SQL Server
2005 and SQL Server 2000 are supported.
Script full-text catalogs Includes scripts for full-text catalogs. This is off by default.
Script USE <database> Includes the database context in the scripts. This is on by
default.
Generate script for
dependent objects
Dependent objects will be scripted when this setting is
enabled. This is off by default.
Include IF NOT EXISTS
clause
This clause checks to see if an object with the same name
already exists. This is off by default.
Schema qualify object
names
Uses the two-partschema.objectconvention when including
object names in the script. This is on by default.
Script Data Compression
Options
This option includes data compression settings in the target
script if they exist in the source object. This is off by default.
Script extended properties Extended properties of an object will also be scripted when
this option is enabled. This is on by default.
Script permissions Permissions will be scripted when this option is turned on. It is
off by default.
</div>
<span class='text_page_counter'>(124)</span><div class='page_container' data-page=124>
<b>Option</b> <b>Description</b>
Convert user-defined data
types to base types
This will force user-defined data types to be converted to their
respective base types. This is off by default.
Generate SET ANSI PADDING
commands
This will encloseCREATE TABLEstatements inSET ANSI
PADDING<sub>commands. This is on by default.</sub>
Include collation Enables the inclusion of collation settings in column
definitions for tables or views. This is off by default.
Include IDENTITY property This option will includeIDENTITYseed andIDENTITY
increment definitions. This is on by default.
Schema qualify foreign key
references
This enables references to include schema qualifiers for foreign
key constraints. This is on by default.
Script bound defaults and
rules
This option will includesp_bindefaultandsp_bindrule
binding stored procedure calls. This is off by default.
Script CHECK constraints IncludeCHECKconstraints. This is on by default.
Script defaults <sub>Includes default values for columns. This is on by default.</sub>
Script file groups Specifies theON <filegroup>clause for table definitions. This
is on by default.
Script foreign keys IncludeFOREIGN KEYconstraints. This is on by default.
Script full-text indexes Includes script for full-text indexes. This is off by default.
Script indexes Includes script for clustered, non-clustered, and XML indexes.
This is off by default.
Script partition schemes Table partitioning schemes are scripted when this option is
enabled. This is off by default.
Script primary keys Includes script forPRIMARY KEYconstraints. This is on by
default.
Script statistics Includes script for user-defined statistics. This is off by default.
Script triggers This will include scripts for triggers. This is off by default.
Script unique keys This will includeUNIQUEconstraints in generated scripts. This
is on by default.
Script view columns This option will declare view columns in view headers. This is
on by default.
</div>
<span class='text_page_counter'>(125)</span><div class='page_container' data-page=125>
Designers
The Designers section provides configuration options for the graphical designers used in Management
Studio. The Designers section is divided into three subareas:
❑ <b>Table and Database Designers</b>— The Table and Database Designers area allows for the
config-uration of specific designer behavior. The following table describes the Table options:
<b>Option</b> <b>Description</b>
Override connection
string time-out value
for table designer
updates
Changes the default connection string time-out. When modifying the
structure of large tables, more time is often required than the default of
30 seconds. Enabling this option also enables a textbox for entering the
new time-out value.
Auto generate change
scripts
When this option is enabled, Management Studio will automatically
generate a change script and prompt for a location to save the file any
time designer modifications are saved. The applicable modifications are
executed, as well as a script being generated.
Warn on null primary
keys
A primary key placed on a column that allowsNULLSwill cause an
error when the option is enabled. If this option is not enabled, the
designer will automatically clear the Allow Nulls attribute from the
column designated as a primary key without raising an error.
Warn about difference
detection
When selected, Management Studio will raise a warning dialog if the
changes made conflict with changes made by any other user.
Warn about tables
affected
Management Studio will raise a warning and confirmation dialog if
changes to a table affect any other table in the database.
Prevent saving
changes that require
table re-creation
This will prevent a user from making a change that will require
re-creation of a table. This includes actions such as adding a new
column to the middle of a table, dropping a column, and changing the
data type of a column.
The following table describes the Diagram options:
<b>Option</b> <b>Description</b>
Default table view Used to select the default way tables are represented in the
database diagram tool. Possible views are:
<b>Standard</b>— Shows the table header, all column names, data types,
and theAllow Nullssetting.
<b>Column Names</b>— Shows the table header and column names.
</div>
<span class='text_page_counter'>(126)</span><div class='page_container' data-page=126>
<b>Option</b> <b>Description</b>
<b>Key</b>— Shows the table header and the primary key columns.
<b>Name Only</b>— Shows only the table header with its name.
<b>Custom</b>— Allows you to choose which columns to view.
Launch add table dialog
on new diagram
When the Database Diagram Designer is opened, Management
Studio automatically prompts for the selection of existing tables
to be added to the diagram when this option is selected.
❑ <b>Maintenance Plans</b>— The Maintenance Plan Designer options determine the way new shapes
are added to the maintenance plan design area, including the precedence constraint and
posi-tioning of the new shape relative to an existing shape.
❑ <b>Analysis Designers</b>— The Analysis Designers options page provides options to set the
connec-tion and query time-out values for the Analysis Designers and the colors for the Data Mining
viewers.
Source Control
The Source Control configuration section allows for the integration of a source-control plug-in such as
Visual Source Safe 2005. The Source Control section is broken down into three different areas:
❑ <b>Plug-In Selection</b>— Here, the specific plug-in can be chosen (such as Visual Source Safe 2005, or
Visual Studio Team System).
❑ <b>Environment</b>— The Environment section allows for the configuration of the Source Control
Environment settings supported by the configured source-control plug-in. For Visual Source
Safe 2005, there are three preconfigured settings: Visual Source Safe, Independent Developer,
and Custom. These settings determine the automatic Check-In and Check-Out behavior of
source-control projects.
❑ <b>Plug-in Settings</b>— The Plug-in Settings section provides the ability to customize the
source-control actions (such as what to do with unchanged files that have been checked out and
how to manage file comparisons and timestamps).
The features available in the Source Control section are dependent on the source control application used.
Consult the documentation of the applicable program for more information.
Log F ile V iewer
The Log File Viewer (see Figure 3-36) is launched from within SQL Server Management Studio. To open
it, follow these steps:
1.
Expand the Management node in Object Explorer.2.
Expand SQL Server Logs.</div>
<span class='text_page_counter'>(127)</span><div class='page_container' data-page=127>
Figure 3-36: Log File Viewer.
One of the benefits of the Log File Viewer is that it allows consolidation of practically all the logs the
DBAs are most interested in. SQL Server logs, SQL Agent logs, and Operating System logs can be opened
in the same window for easy correlation of system and SQL Server events.
When viewing multiple logs in the Log Viewer, filters can become useful in ensuring that only the
infor-mation of interest is shown. For example, the filter settings allow the specification of a start date and an
end date. Filter settings can also be set to display only those events from a certain subsystem. Applying
the appropriate filters helps mitigate the problem of ‘‘Information Overload’’ when trying to sift through
thousands of log entries.
SQL Ser ver Business Intelligence
Development Studio
When SQL Server 2000 Reporting Services was released, Visual Studio was the only way for users to be
able to create and manage reports. However, many non-developers were scared off by an interface that
was unfamiliar to them. When SQL Server 2005 was released, Microsoft knew they had to respond to
user concerns and provide them with a new interface for not only managing reports, but one that could
be used for Analysis Services and Integration Services tasks, as well.
</div>
<span class='text_page_counter'>(128)</span><div class='page_container' data-page=128>
In all actuality, BIDS is, in fact, Visual Studio, and SQL Server 2008 includes Visual Studio 2008. Granted,
it’s not the full Visual Studio 2008, which includes the templates and compilers for Visual Basic, C#,
and ASP.NET, but many DBAs were surprised to find Visual Studio installed on their workstation after
installing the SQL Server tools. Regardless of whether you launch the Business Intelligence Development
Studio shortcut from the SQL Server 2008 folder or the Visual Studio 2008 shortcut from the Visual Studio
folder in your Start menu, they launch the exact same application. If the full Visual Studio suite has not
been installed, the only available project templates will be Business Intelligence projects. However, if the
full suite is installed, all the installed features and templates will be available.
A complete discussion of the Visual Studio IDE is beyond the scope of this book, but a very brief
descrip-tion is definitely in order.
Microsoft has divided Business Intelligence into three distinct pieces: ETL (Extract-Transform-Load),
Analysis, and Reporting. These three parts of the Business Intelligence package are implemented through
SQL Server Integration Services, SQL Server Analysis Services, and SQL Server Reporting Services.
Cor-respondingly, BIDS provides Business Intelligence project templates that focus on these three areas. The
templates are available when creating a new project from BIDS (see Figure 3-37) by selecting FileNew
Project from the main BIDS menu.
Figure 3-37: Business Intelligence Studio.
</div>
<span class='text_page_counter'>(129)</span><div class='page_container' data-page=129>
<b>Template</b> <b>Description</b>
Analysis Services
Project
Analysis Services projects are used to create SQL Server 2008
Analysis Services databases that expose the objects and features of
Analysis Cubes used for complex data analysis.
Import Analysis
Services 2008 Database
The import project enables the creation of an Analysis Services
project from an existing SQL Server 2008 Analysis Services database.
It essentially reverse-engineers the project using an existing
database.
Integration Services
Connection Project
Integration Services projects are used to create robust
Extract-Transform-Load (ETL) solutions to enable the moving and
transforming of data. This project type uses a Wizard to generate an
ETL package.
Integration Services
Project
This project type uses the Integration Services Designer for creating
and managing ETL packages.
Report Server Project
Wizard
The Report Server Project Wizard offers the same functionality as the
Report Server Project, but starts the development of the project in a
step-by-step process that guides the user through the various tasks
required to create a report. Like many wizards, this one leaves the
project in a skeleton phase, which will require more detailed
finalization.
Report Model Project Report Model projects are used to create and deploy SQL Server
Reporting Services 2008 report models, which can, in turn, be used
by end-users to create reports using Report Builder.
Report Server Project Report Server projects are used to create and deploy enterprise
reports for both traditional (paper) and interactive reports.
SQL Ser ver Profiler
The SQL Server Profiler is an absolutely essential tool for both DBAs and developers alike. Profiler
provides the ability to monitor and record virtually every facet of SQL Server activity. It is actually a
graphical interface for SQL Trace, which is a collection of stored procedures and functions that are used
to monitor and record server activity. SQL Server Profiler can be launched from the Tools menu of SQL
Server Management Studio, or from the All ProgramsMicrosoft SQL Server 2008Performance Tools
menu.
SQL Server Trace
</div>
<span class='text_page_counter'>(130)</span><div class='page_container' data-page=130>
a graphical interface for SQL Trace, and what is occurring in the background is the execution of stored
procedures and functions on the server you connect to. If the server is very busy and is operating at the
edge of its capabilities, the additional load of running SQL Trace on it may well put it over the edge.
Profiler and SQL Trace procedures are discussed in greater detail in Chapter 10.
Trace Properties
When creating a new trace, the Trace Properties dialog is shown (see Figure 3-38). The Trace Properties
dialog includes two tabs: the General tab and the Events Selection tab. A third tab, Events Extraction
Settings, will be enabled if any XMLSHOWPLANevent is selected in the Events Selection tab.
Figure 3-38: Trace Properties dialog.
General Tab
The General tab provides the ability to set the basic structure of the trace (such as the trace name, trace
template, saving options, and trace stop time). It also displays the provider name and type, because SQL
Server Profiler is not limited to the Data Engine. It can also be used to trace SQL Server Analysis Services.
</div>
<span class='text_page_counter'>(131)</span><div class='page_container' data-page=131>
custom trace over and over again, create and save a template to capture the information you are
interested in.
❑ <b>Save to File</b>— Selecting this checkbox will display a dialog prompting for a file location to save
the trace data to. The filename defaults to the name assigned to the trace with the .trc
exten-sion. However, the name can be changed if desired. The default maximum file size for a trace
file is 5 MB, but it can be set to virtually any size. When the ‘‘Save to file’’ option is selected, two
additional options are enabled: the ‘‘Enable file rollover’’ option and the ‘‘Server processes trace
data’’ option.
❑ <b>Enable File Rollover</b>— This option causes a new file to be created every time the
max-imum file size is reached. Each file created is named the same as the original file with a
sequential number added to the end of the name. Each sequential file is linked to the
pre-ceding file, so that each file can be opened in sequence, or they can all be opened in a single
trace window.
❑ <b>Server Processes Trace Data</b>— This option causes the server that the traces are running
on to also process the trace information. By default, the Profiler application processes the
trace information. During high-stress operations, if the Profiler processes the data, it may
drop some events and even become unresponsive. If the server processes the trace data,
no events will be dropped. However, having the server process the trace data and run the
trace puts an additional load on the server, which can have a negative impact on server
performance.
❑ <b>Save to Table</b>— Trace data can also be saved to a table instead of a file by selecting the ‘‘Save
to table’’ option. This is very useful if the trace data is going to be analyzed by an external
appli-cation that requires access to the data stored in a relational format. The down side is that large
traces will generate huge amounts of data that will be inserted into the storage table. This can
also cause server performance issues, but you can mitigate this by saving trace information to
a different server from your production system. If saving trace data to a table, the maximum
amount of rows to be stored can also be assigned.
❑ <b>Enable Trace Stop Time</b>— Traces can be started and configured to automatically stop at a
pre-defined time by enabling the ‘‘Enable trace stop time’’ option and assigning a stop time.
Events Selection Tab
The Events Selection tab provides the ability to choose what SQL Server events are to be traced (see
Figure 3-39). Events are grouped in 21 SQL Server event groups with a total of 170 distinct SQL Server
events, plus 10 user-definable events. There are also 11 Analysis Services Groups with 38 distinct events.
SQL Server Books Online has an excellent reference that describes each group and event. Search for the
titles of ‘‘SQL Server Event Class Reference’’ for SQL Server events and ‘‘Analysis Services Event Classes’’
for Analysis Services Events.
❑ <b>Column Filters</b>— Also in the Events Selection tab is the option to filter the events that are traced
(see Figure 3-40). The ability to filter the data is incredibly useful. For example, if you are
trou-bleshooting a particular application, you can filter on just the events generated by the application
of interest and avoid having to sift through all the events generated by SQL Server and other
applications.
</div>
<span class='text_page_counter'>(132)</span><div class='page_container' data-page=132>
data can be returned, it may very well be that the column you are most interested in is off the
screen to the left. The Organize Columns button helps prevent this.
Figure 3-39: Events to be traced.
Figure 3-40: Filtering traced events.
Events Extraction Settings Tab
</div>
<span class='text_page_counter'>(133)</span><div class='page_container' data-page=133>
first provides the ability to saveSHOWPLANinformation. AllSHOWPLANinformation can be saved to
a single file or multiple XML files that can be opened in SQL Server Management Studio. When
opened, they are displayed as graphical execution plans (which are described in detail in Chapter
10). The second group is used for saving graphical deadlock information. Because deadlocks are
automatically detected and killed by SQL Server, they are often hard to troubleshoot. SQL Server Profiler
provides the ability to trace deadlocks and graphically represent the sequence of events that led to the
deadlock.
Figure 3-41: Events Extraction Settings.
Chapter 10 describes how to use the SQL Server Profiler to gather pertinent SQL Server data and how to
use the profile traces to troubleshoot and optimize SQL Server performance.
Database Engine Tuning Advisor
The Database Engine Tuning Advisor (DTA) can analyze SQL Server scripts or SQL Server Profiler traces
to evaluate the effective use of indexes. It can also be used to get recommendations for building new
indexes or indexed views, or for creating physical table partitions.
</div>
<span class='text_page_counter'>(134)</span><div class='page_container' data-page=134>
General Tab
The General tab (see Figure 3-42) is used to define the session name, the workload for analysis, and the
database(s) to tune.
Figure 3-42: DTA General tab.
Following are some options found under this tab:
❑ <b>Session name</b>— By default, the<i>session name</i>is the name of the logged-on user combined with
the current date and time, but it can (and should) be changed to a more descriptive name.
❑ <b>Workload</b>— The Workload section provides the ability to retrieve trace information from either
a file or a table. The table designated must have been previously created by a SQL Server Profiler
trace, and the table must be located on the same server the DTA is running on. The file can be a
SQL script, a Profiler trace (.trc) file, or a Profiler trace saved as XML.
❑ <b>Database for workload analysis</b>— This option sets the initial connection information for the
DTA.
</div>
<span class='text_page_counter'>(135)</span><div class='page_container' data-page=135>
Another reason for being specific about choosing the right tables to tune is that if the DTA sees
no activity for a table that was selected for monitoring, it will recommend dropping any indexes
on that table not associated with a constraint.
Tuning Options Tab
The Tuning Options tab (see Figure 3-43) contains the controls used to configure how the DTA analyzes
the workload and what kind of recommendations it will return. At the bottom of the tab is a description
box that both describes the individual options and provides feedback for incompatible settings.
Figure 3-43: Tuning Options tab.
❑ <b>Limit tuning time</b>— Large workloads can take a very long time to fully analyze and can be very
expensive in CPU and Database Engine resources. Limiting the amount of time the DTA spends
analyzing the workload will cause it to return any recommendations generated with the amount
of workload it was able to analyze in the time allocated. For the best results, the DTA should be
allowed to run until it has completed; however, that may not always be possible on production
systems. Once analysis has started, it can be stopped by clicking the Stop Analysis button on the
DTA toolbar.
</div>
<span class='text_page_counter'>(136)</span><div class='page_container' data-page=136>
indexes only, and indexed views only. There is also an option for the DTA to only evaluate the
effectiveness of current PDS structures, but not recommend the creation of additional structures.
Filtered indexes can also be included.
❑ <b>Partitioning strategy to employ</b>— This option group is used to configure the type of physical
table partitioning to employ: no partitioning, full partitioning, and aligned partitioning. Physical
partitioning is described in Chapter 4.
❑ <b>Physical Design Structures (PDS) to keep in database</b>— When the DTA analyzes workloads,
if it determines the PDS structure is not beneficial, it may recommend dropping the structure
from the database. This option group is used to configure what PDS structures the DTA will<i>not</i>
recommend dropping. The DTA can be configured to recommend dropping any non-beneficial
PDS structure, to keep indexes only, to not recommend dropping any PDS, to keep clustered
indexes only, and to keep any aligned partitioning structure.
❑ <b>Advanced Options</b>— The Advanced Options dialog is used to configure the maximum amount
of disk space to use for recommendations, the maximum number of table columns to include per
individual index, and online indexing recommendations.
SQL Ser ver Configuration Manager
The SQL Server Configuration Manager is a Microsoft Management Console (MMC) snap-in and is used
to manage all the services and protocols employed by an instance of SQL Server. It combines all the
functionality that had been in three separate applications — SQL Server 2000’s Service Manager, Client
Network Utility, and Server Network Utility. The Configuration Manager is divided into three nodes:
❑ <b>SQL Server Services</b>— The Services node offers the similar functionality as the Services applet
in the Administrative toolset. However, because it only shows SQL Server services, it is much
easier to both control and monitor the status of SQL Server services.
❑ <b>SQL Server Network Configuration</b>— The Network Configuration node displays and enables
the configuration of all the available server protocols. The protocols available for use with SQL
Server 2008 are Shared Memory, Named Pipes, TCP/IP, and Virtual Interface Adapter (VIA).
Protocols that are not in use should be disabled (or left disabled) to minimize the attack surface
of the SQL Server.
❑ <b>SQL Native Client 10.0 Configuration</b>— The SQL Native Client Configuration node displays
and enables the configuration of the client protocols used to connect to an instance of SQL Server
2008. The configurations only affect the computer that the Configuration Manager is running on.
In addition to protocol configuration, the Native Client Configuration node enables the
configu-ration of server aliases.
Repor ting Ser vices Configuration Manager
</div>
<span class='text_page_counter'>(137)</span><div class='page_container' data-page=137>
<i>More information about Reporting Services can be found in Chapter 18. For a thorough discussion of</i>
<i>SQL Server 2008 Reporting Services, check out the book</i>Professional Microsoft SQL Server 2008
Reporting Services<i>by Paul Turley, Thiago Silva, Bryan C. Smith, and Ken Withee (Wiley, 2008).</i>
Each has its own configuration areas, including the following:
❑ <b>Report Server Status</b>— Selecting the Server name will display the Service Status area, which
allows you to monitor the status and stop and start the Reporting Services service. Although this
area is called<i>Server Status</i>, it is really only the status of the Reporting Services service.
❑ <b>Service Account</b>— This area is used to configure the account under which the Reporting Service
runs. Best practices recommend using an Active Directory domain account with the minimum
permissions required to run SQL Server Reporting Services. If a domain account is not
avail-able, the Network Service account may be used. Local System and Local Service accounts will
not work very well, unless SQL Server and Reporting Services are installed on the same
com-puter.
❑ <b>Web Service URL</b>— The Report Server Virtual Directory configuration area enables the viewing
or changing of the virtual directory on the SQL Server that hosts the Reporting Services Web
Ser-vice. Unlike prior versions of Reporting Services, the Web Service does not use IIS. The default
virtual directory name is<i>ReportServer</i>.
❑ <b>Database</b>— The Database area is used to create or configure SQL Server 2008 Report Server
databases. The Report Server databases provide storage of report definitions, report
connec-tions, and intermediately rendered reports. The database can be configured in either Native or
SharePoint Integrated mode. If you wish to switch database modes, you will have to create a
new database with the correct target mode. You can also configure the credentials that are used
by the Report Server to connect to the Report Server database. By default, the Service Account
for the Reporting Services engine is used.
❑ <b>Report Manager URL</b>— This area is where the virtual directory for the administrative
inter-face, Report Manager, is viewed or configured. This is the Virtual Directory that users will access
when creating or managing reports.
❑ <b>E-mail Settings</b>— The SMTP Server settings are very straightforward and simple. However,
using the Reporting Services Configuration tool, you can only specify the SMTP server to use
and the sender’s address. Additional configuration to the e-mail settings must be done manually
by editing the Report Server configuration file.
❑ <b>Execution Account</b>— The Execution Account is used when a report needs resources that are not
locally available (such as a graphic stored on a remote server). It can also be used to connect to
resources that do not require credentials. Configuration of an Execution Account is optional, but
may be necessary when accessing shared resources.
</div>
<span class='text_page_counter'>(138)</span><div class='page_container' data-page=138>
content, in which case, all the stored security credentials would have to be re-entered. In the past,
this functionality was provided only through theRSKEYMGMTcommand-line utility, which is still
available.
❑ <b>Scale-out Deployment</b>— SQL Server Reporting Services 2008 provides the ability to scale-out
Web Service and report access by allowing multiple Reporting Services instances to share a
com-mon Report Server database. Scaling-out provides fault tolerance (for front-end services), as well
as being able to handle more concurrent connections and specific report execution loads. SSRS
is not ‘‘Cluster Aware,’’ but can leverage Network Load Balancing (NLB) for Web Services and
clustering of the database through a Fault Tolerant Cluster.
Command- Line Tools
SQL Server 2008 comes with plenty of great graphical tools to accomplish almost everything you could
ever need to do, but there also comes a time when a simple command-line tool is the best tool for the
job. While there are a few command-line tools out there, this section will look at the more prominent
ones, which have historically been SQLCMD (and previously OSQL) and BCP, as well as introduce you
to Microsoft’s newest, and arguably most powerful, command-line utility, PowerShell.
SQLCMD
The SQLCMD utility replaces OSQL as the utility used to execute Transact-SQL statements, Stored
Proce-dures, and SQL script files from the command prompt. OSQL is still available for backward compatibility,
but SQLCMD is a more full-featured tool. SQLCMD uses OLE DB to connect to SQL Server and execute
Transact-SQL batches.
The SQLCMD utility includes the ability to use variables, connect to servers dynamically, query server
information, and pass error information back to the calling environment. Access to the Dedicated
Admin-istrator Connection (DAC) is also provided by the SQLCMD utility. The DAC is a special diagnostic
connection that can be used by the DBA to connect to a SQL Server server when all other connection
types fail to diagnose and correct server problems.
SQLCMD supports several arguments that change the way it behaves and connects to an instance of SQL
Server. An abbreviated list is included in the following table. For a complete list of the argument options,
consult SQL Server Books Online under the topic ‘‘SQLCMD Utility.’’ Unlike other command-line
utili-ties, SQLCMD command-line arguments are case-sensitive.
<b>Argument</b> <b>Description</b>
-S <sub>Specifies the SQL Server Instance name for SQLCMD to connect to.</sub>
-U Specifies a username to use when connecting with a SQL Server login.
-P Specifies the password to use when connecting with a SQL Server login.
-E Configures SQLCMD to use a trusted connection.
-i Specifies the Transact-SQL script input file to run.
</div>
<span class='text_page_counter'>(139)</span><div class='page_container' data-page=139>
<b>Argument</b> <b>Description</b>
-v Specifies the parameter(s) to pass to a SQLCMD script execution.
-Q Performs a query passed as a command-line parameter and exits.
-A Designates the SQLCMD connection as a DAC
The SQLCMD utility is typically used to execute saved Transact-SQL scripts in batch processes. This
functionality is further enhanced by the ability of SQLCMD to accept scripting parameters. The following
code is an example of a SQLCMD script that accepts a parameter calledDBNameto back up a designated
database to a file named<i>DatabasenameDB-Month-Day-Year.BAK</i>to the C:\SQLBackups folder:
DECLARE @BackupDest AS varchar(255)
SET @BackupDest = ‘C:\SQLBackups\’
+ ‘$(DBName)’
+ ‘DB-’
+ DATENAME(m,GETDATE())
+ ‘-’
+ DATENAME(dd,GETDATE())
+ ‘-’
+ DATENAME(yy,GETDATE())
+ ‘.BAK’
BACKUP DATABASE $(DBName)
TO DISK = @BackupDest
If the preceding script is saved to a file called<i>BackupDBs.SQL</i>in the C:\SQLBackups folder, it could be
executed to back up the Master database on a server called<i>AughtEight</i>using Windows authentication
with the following command line:
SQLCMD –E –S AughtEight –i C:\SQLBackups\BackupDBs.SQL –v DBName="Master"
SQL Server Management Studio makes the creation of SQLCMD scripts even easier with its SQLCMD
mode. The BackupDBs.SQL script can be written and tested with Management Studio by selecting
SQL-CMD mode in the Query menu. However, to fully test it in the Query Editor, the following command
must be inserted in the beginning of the script:
:SETVAR DBName "Master"
TheSETVARcommand can also be used in the execution of SQLCMD from the command line, but it
usually makes more sense to use the–vvariable argument.
Multiple variables can be set with theSETVARcommand, as well as passed in to a SQLCMD script with
the–vargument. The following example shows how to use multipleSETVARcommands:
USE AdventureWorks2008
GO
:SETVAR ColumnName "LastName"
:SETVAR TableName "Person.Person"
SELECT $(ColumnName)
</div>
<span class='text_page_counter'>(140)</span><div class='page_container' data-page=140>
If the preceding example is saved to a file called<i>GetContacts.SQL</i>with theSETVARcommands omitted, it
would look like the following example:
USE AdventureWorks2008
GO
SELECT $(ColumnName)
FROM $(TableName)
This script could be executed with the SQLCMD utility using the following command line:
SQLCMD –E –S AughtEight –i C:\GetContacts.SQL –v ColumnName="LastName"
TableName = "Person.Person"
Dedicated Administrator Connection (DAC)
SQLCMD is particularly useful for creating batch scripting jobs for administrative purposes. However,
as an emergency utility to diagnose and hopefully correct server problems, it has no peer. With the–A
argument, the SQLCMD utilizes an exclusive connection to SQL Server. If no other connection is possible,
the SQLCMD–Acommand is the last and best hope for diagnosing server problems and preventing
data loss. By default, only local DACs are allowed because the DAC components only listen on the
loopback connection. However, remote DACs can be enabled using thesp_configurestored procedure
by changing theremote admin connectionsoption totrue, as the following code illustrates:
sp_configure ‘remote admin connections’, 1
RECONFIGURE
Bulk Copy Program (BCP)
The BCP utility is mainly used to import flat-file data into a SQL Server table, export a table out to a flat
file, or export the results of a Transact-SQL query to a flat file. In addition, it can be used to create format
files that are used in the import and export operations.
The syntax of the BCP utility is as follows:
usage: bcp {dbtable | query} {in | out | queryout | format} datafile
[-m maxerrors] [-f formatfile] [-e errfile] [-F firstrow] [-L lastrow]
[-b batchsize] [-n native type] [-c character type] [-w wide character type]
[-N keep non-text native] [-V file format version] [-q quoted identifier]
[-C code page specifier] [-t field terminator] [-r row terminator] [-i inputfile]
[-o outfile] [-a packetsize] [-S server name] [-U username] [-P password]
[-T trusted connection] [-v version] [-R regional enable] [-k keep null values]
[-E keep identity values] [-h "load hints"] [-x generate xml format file]
BCP format files can be created in two separate formats: XML and non-XML. These files can then be
referenced in the import and export of data. The BCP is well-documented inBooks Online, but the
following examples show the most common usage of BCP.
Non-XML Format File Example
</div>
<span class='text_page_counter'>(141)</span><div class='page_container' data-page=141>
It is usually best to accept the defaults provided for the data type and the prefix length because these
values are determined by the table being referenced in the BCP command. The delimiter value can be
any character, but defaults to ‘‘None.’’
The following command uses BCP to create a format file based on theCreditCardtable in the
AdventureWorks2008<sub>database and</sub>Sales<sub>schema of the local default instance of SQL Server:</sub>
BCP AdventureWorks2008.Sales.CreditCard format nul -T -f C:\BCP\CreditCard.fmt
It is often better to provide the–Sswitch and specify the server name. Theformatargument tells BCP
that the desired output is a format file. The absence of an–xswitch specifies that the output file is not
XML. Thenulargument sends aNULLas the username, because the–Tswitch was used indicating that
BCP should use a Windows trusted connection. If–Tis not used, the–Uusername switch is required
followed by the–Ppassword switch. Ifnulis not used, BCP will fail with the error that a username was
not provided.
The result of the preceding command, accepting the defaults for the field data type and prefix length, but
entering a comma as the field delimiter, is as follows:
10.0
6
1 SQLINT 0 4 "," 1 CreditCardID ""
2 SQLNCHAR 2 100 "," 2 CardType SQL_Latin1_General_CP1_CI_AS
3 SQLNCHAR 2 50 "," 3 CardNumber SQL_Latin1_General_CP1_CI_AS
4 SQLTINYINT 0 1 "," 4 ExpMonth ""
5 SQLSMALLINT 0 2 "," 5 ExpYear ""
6 SQLDATETIME 0 8 "," 6 ModifiedDate ""
The10.0at the top of the results designates the version of BCP. ‘‘10.0’’ is SQL Server 2008, and ‘‘9.0’’
would be SQL Server 2005. The number6under the10.0specifies how many columns are in the file.
Following the column number is the SQL Server data type of the column, followed by the number of
bytes needed by the prefix length. The prefix length of a column depends on the maximum number
of bytes, whether the column supportsNULLs, and the storage type.
If the BCP command is supplied a data format argument (-cor–n), it will output a format file with all
columns mapped to the supplied format without any interaction.
XML Format File Example
This example shows how to use the BCP command to generate an XML format file:
BCP AdventureWorks2008.Sales.CreditCard format nul –x -T –f C:\BCP\CreditCard.xml
As you can see, the syntax is identical, except that the-xswitch is used to specify an XML output. The
result is as follows:
<?xml version="1.0"?>
<BCPFORMAT xmlns= />xmlns:xsi=" />
<RECORD>
<FIELD ID="1" xsi:type="NativeFixed" LENGTH="4"/>
</div>
<span class='text_page_counter'>(142)</span><div class='page_container' data-page=142>
COLLATION="SQL_Latin1_General_CP1_CI_AS"/>
<FIELD ID="3" xsi:type="NCharPrefix" PREFIX_LENGTH="2" MAX_LENGTH="50"
COLLATION="SQL_Latin1_General_CP1_CI_AS"/>
<FIELD ID="4" xsi:type="NativeFixed" LENGTH="1"/>
<FIELD ID="5" xsi:type="NativeFixed" LENGTH="2"/>
<FIELD ID="6" xsi:type="NativeFixed" LENGTH="8"/>
</RECORD>
<ROW>
<COLUMN SOURCE="1" NAME="CreditCardID" xsi:type="SQLINT"/>
<COLUMN SOURCE="2" NAME="CardType" xsi:type="SQLNVARCHAR"/>
<COLUMN SOURCE="3" NAME="CardNumber" xsi:type="SQLNVARCHAR"/>
<COLUMN SOURCE="4" NAME="ExpMonth" xsi:type="SQLTINYINT"/>
<COLUMN SOURCE="5" NAME="ExpYear" xsi:type="SQLSMALLINT"/>
<COLUMN SOURCE="6" NAME="ModifiedDate" xsi:type="SQLDATETIME"/>
</ROW>
</BCPFORMAT>
Export a Table to a Flat-File Example
Once the format file is created, it can be used to control data export and import operations. To export data
to a delimited flat file using the XML format file created in the preceding example, execute the following
code:
BCP AdventureWorks2008.Sales.CreditCard OUT C:\BCP\CreditCard.dat -T
-f C:\BCP\CreditCard.XML
Import Flat-File Example with a Format File
To test a BCP import, first create a copy of theCreditCardtable with the following script:
USE AdventureWorks2008
GO
SELECT * INTO Sales.CreditCard2
FROM Sales.CreditCard
TRUNCATE TABLE Sales.CreditCard2
Once the destination table exists, the flat file and XML format file can be used to import the data to the
newCreditCard2table with the following code:
BCP AdventureWorks2008.Sales.CreditCard2 IN C:\BCP\CreditCard.dat -T
-f C:\BCP\CreditCard.xml
PowerShell
PowerShell is a new command-line shell designed for Systems Administrators. PowerShell is both an
interactive console and a scripting interface that can be used to automate many common administrative
tasks. A complete explanation of PowerShell is beyond the scope of this book, but this section will provide
a summary of how PowerShell can be used for SQL Server Administration.
</div>
<span class='text_page_counter'>(143)</span><div class='page_container' data-page=143>
Get-Process, which returns a list of the current running processes. Another benefit of PowerShell is that
cmdlets can be piped into one another; for example, you might invoke one command to retrieve
infor-mation and then use a pipe character ( | ) on the same line to invoke another command that performs an
action or controls formatting and output of the results of the first command. You can pipe several
com-mands as a single function. PowerShell can be installed on Windows XP SP2, Windows Vista, Windows
Server 2003, and comes installed in Windows Server 2008.
SQL Server 2008 supports PowerShell for SQL Administration, and, in fact, if it’s not already installed on
the system, the SQL Server installer will install it for you. SQL Server administrators can use PowerShell
to administer any SQL Server running SQL Server 2008, SQL Server 2005, and even SQL Server 2000 SP4,
although functionality will be limited.
SQL Server 2008 also includes a limited-functionality shell known as<i>sqlps</i>. The sqlps utility is designed to
expose access to SQL Server objects and cmdlets automatically, but it is configured to run with a<i>Restricted</i>
execution policy, which prevents PowerShell scripts from running. This can be changed, if necessary.
It may be preferred to access SQL Server objects from a standard PowerShell environment, in which case,
you can create a PowerShell console that includes the snap-ins for SQL Server. The following example
shows you how to create a new PowerShell console named<i>MySQLPS.psc1</i>with the SQL Server snap-ins,
to a new folder called<i>PSConsoles</i>. In this case, PowerShell is being invoked from the Run command in
the Start Menu.
Windows PowerShell
Copyright (C) 2006 Microsoft Corporation. All rights reserved.
PS C:\Users\Administrator> md C:\PSConsoles
Directory: Microsoft.PowerShell.Core\FileSystem::C:\
Mode LastWriteTime Length Name
---- --- --
----d---- 9/23/2008 9:33 AM PSConsoles
PS C:\Users\Administrator> cd c:\PSConsoles
PS C:\PSConsoles> add-pssnapin SqlServerProviderSnapin100
PS C:\PSConsoles> add-pssnapin SqlServerCmdletSnapin100
PS C:\PSConsoles> Export-Console -Path MySQLPS.psc1
Now that you’ve created the new console, you can double-click on the file in Windows Explorer, or you
can manually invoke the console using the following command from the Run command:
powershell.exe -psconsolefile C:\PSConsoles\MySQLPS.psc1
So what can you do with PowerShell? Quite a bit, actually. The Object Explorer includes the ability to
launch PowerShell using the right-click context menu. The PowerShell console invoked is location-aware,
meaning that when you right-click theHumanResources.Employeetable in theAdventureWorks2008
</div>
<span class='text_page_counter'>(144)</span><div class='page_container' data-page=144>
PS SQLSERVER:\SQL\AUGHTEIGHT\DEFAULT\Databases\AdventureWorks20
08\Tables\HumanResources.Employee>
Try It Out
Output Data using PowerShell
In this exercise, you will use PowerShell to invoke a SQLCMD function.
1.
In Object Explorer, navigate to ServerDatabasesAdventureWorks2008.2.
Right-click on the AdventureWorks 2008 database, and select Start PowerShell (Figure 3-44).Figure 3-44: Start PowerShell.
3.
Type the following commands into the PowerShell shell:md C:\OutFiles
invoke-SQLCMD "Select TOP 10 * from HumanResources.Employee" |
ConvertTo-html | Out-file C:\OutFiles\Top10Emps.html
</div>
<span class='text_page_counter'>(145)</span><div class='page_container' data-page=145>
Figure 3-45 HTML formatted output.
At this point, you’ve barely scratched the surface of what PowerShell can do, but because the entire set
of SQL Management Objects (SMO) is exposed to PowerShell, administration of your SQL Server and its
databases can be made much easier by automating and scripting many common processes.
Summar y
This Chapter described the primary tools that are used by DBAs. Some of the less-frequently used tools
were covered briefly, as they are not often used by the DBA, but instead by an application or Business
Intelligence developer. By this point, you should have a good understanding of the tools available to you
in your role as a DBA and how to customize those tools to meet your needs.
</div>
<span class='text_page_counter'>(146)</span><div class='page_container' data-page=146>
Throughout this book, you will be using the tools described in this Chapter to build and manage SQL
Server 2008 databases. Having a solid understanding of the tools available will make it easier to perform
these tasks.
</div>
<span class='text_page_counter'>(147)</span><div class='page_container' data-page=147>
4
SQL Ser ver 2008 Storage
Architecture
I had just spent the better part of the day describing the storage architecture to a group of about
30 new database administrators when one of them approached me while the class was on break
and asked me pointedly, ‘‘Why do I need to know this stuff? I mean, who cares how SQL Server
stores data as long as it does it?’’ They were valid questions. After all, I have no idea how the fuel
injection system on my car works, but I drive it anyway. The key difference is that when my car
needs service, I take it to a mechanic. If your database doesn’t work, who are you going to take it
to? Understanding the mechanics of the SQL Server storage will help you make informed decisions
on where the data is stored, how the data is indexed, and how to troubleshoot an ailing database.
For years, SQL Server database administrators have grown accustomed to having unrestricted
access to system objects. This ability gave the DBA incredible power for both good and for evil.
For example, a database administrator could turn on ad hoc updates to the system tables and then
modify any value, including password hashes. This ability was certainly useful for correcting some
system errors; more damage was just as likely, however.
In the past, Microsoft strongly recommended that system objects not be accessed directly, while
sometimes offering solutions to database problems that required directly updating system tables.
With the release of SQL Server 2005 and continuing with SQL Server 2008, this apparent
contra-diction came to an end. Unless Microsoft (or a mysterious third party) releases some hidden secret
handshake that unlocks system objects to modification, they are completely inaccessible for updates
by the DBA. Even Read Only access to the actual system tables has been restricted and can only be
accomplished through the Dedicated Administrator Connection (DAC), and even that allowance
is made with the disclaimer ‘‘<i>Access to system base tables by using DAC is designed only for Microsoft</i>
<i>personnel, and it is not a supported customer scenario</i>.<i>’’</i>
To Microsoft’s credit, they certainly did their homework. They researched the primary reasons
that DBAs performed ad hoc updates to system tables and provided mechanisms to perform those
actions in a controlled manner without compromising the integrity of the system catalog.
</div>
<span class='text_page_counter'>(148)</span><div class='page_container' data-page=148>
The Resource Database
A big reason for the locking away of the system objects is because they all have a common source now
called theresourcedatabase. Theresourcedatabase is the physical repository for all system objects and
is inaccessible during normal operations of SQL Server. Although the system objects are physically stored
in theresourcedatabase, they are logically presented as thesysschema in each database. Microsoft
strongly recommends that theresourcedatabase be left alone, but it can be accessed if SQL Server is
started in single-user mode. Even this access, however, is Read Only, as is access to any objects in the
sysschema. Any attempt to modify a system object will result in an error, even if ad hoc updates to
the system catalog are enabled.
Persisting all the system objects in theresourcedatabase allows for rapid deployment of service packs
and upgrades to SQL Server 2008. When installing a service pack, the process is simply one of replacing
theresourcedatabase with a new version and executing whatever modifications are required to the
operating system objects. This dramatically reduces the amount of time it takes to update SQL Server.
Even though theresourcedatabase isn’t accessible during normal SQL Server operations, information
about the database can be retrieved using system functions and global variables. The following code
returns the build number of theresourcedatabase:
SELECT SERVERPROPERTY(’ResourceVersion’)
To return the date and time theresourcedatabase was last updated, the following code can be executed:
SELECT SERVERPROPERTY(’ResourceLastUpdateDateTime’)
The
<b>sys</b>
Schema
As previously mentioned, the system objects stored in theresourcedatabase logically appear in thesys
schema of each database. Thesysschema contains views that can be utilized by the DBA to retrieve
information about the objects in a database. Most (but not all) of the information the DBA typically needs
access to is available through the use of system functions and stored procedures that return metadata
from the system objects. Sometimes, however, it is beneficial to retrieve the metadata directly from the
system objects. The views in thesysschema are provided for this reason.
If you have ever used SQL Server 2000 system tables, you will find that almost all of the old system table
names have been preserved, but now are persisted as views. However, these views are only provided
for backward compatibility. They do not expose any SQL Server 2008–specific metadata. Any future
operations should be based on the new SQL Server 2008 system views. The views created to replace the
functionality of the old system tables are known as<i>backward compatibility views</i>, and Microsoft’s official
word is that these views will be removed in a future release.
</div>
<span class='text_page_counter'>(149)</span><div class='page_container' data-page=149>
Dynamic Management Views and Functions
In addition to the traditional system objects that can be used to view system metadata, new dynamic
views and functions in thesysschema expose some very useful information about SQL Server
pro-cesses and database activity. The dynamic views and functions are grouped into the following functional
categories:
❑ Common Language Runtime Related Dynamic Management Views
❑ I/O Related Dynamic Management Views and Functions
❑ Database Mirroring Related Dynamic Management Views
❑ Query Notifications Related Dynamic Management Views
❑ Database Related Dynamic Management Views
❑ Replication Related Dynamic Management Views
❑ Execution Related Dynamic Management Views and Functions
❑ Service Broker Related Dynamic Management Views
❑ Full-Text Search Related Dynamic Management Views
❑ SQL Server Operating System Related Dynamic Management Views
❑ Index Related Dynamic Management Views and Functions
❑ Transaction Related Dynamic Management Views and Functions
❑ Change Data Capture Related Dynamic Management Views
❑ Resource Governor Dynamic Management Views
❑ SQL Server Extended Events Dynamic Management Views
❑ Security Related Dynamic Management Views
❑ Object Related Dynamic Management Views and Functions
Many of the dynamic views and functions replace SQL Server 2000 system-stored procedures and
Database Consistency Checker (DBCC) commands. Most of the old stored procedures and DBCC
com-mands still exist, but they are provided only for backward compatibility and do not expose new SQL
Server 2008 objects and processes. The new views and functions provide much more detailed information
and return relational result sets that can be used with ease in custom monitoring applications.
In later chapters, many (but by no means all) of the views and functions are used and explained in the
context of describing database maintenance and monitoring tasks. For a complete description of each
system view and function, check out SQL Server Books Online under the topic ‘‘Dynamic Management
Views and Functions.’’
SQL Ser ver Database Physical Str ucture
</div>
<span class='text_page_counter'>(150)</span><div class='page_container' data-page=150>
Physical Storage Data Types
Before getting started on the physical storage of data, it is important to have a good understanding
about the types of data that SQL Server stores. SQL Server 2008 Books Online groups data types into the
following seven functional groups:
❑ Exact numerics
❑ Approximate numerics
❑ Date and time
❑ Character strings
❑ Unicode character strings
❑ Binary strings
❑ Other data types
Although the functional grouping of data types makes perfect sense when looking at data types from
a usability viewpoint, what is relevant to this discussion is how the data is stored. SQL Server data
types can essentially be grouped into three storage type groups: fixed-length data types, variable-length
data types, and large object data types. In certain circumstances, large object data types can also act like
variable-length data types, which are explained later. The data types described in this section are only
data types that can be assigned table column data types for the physical storage of the associated data.
This precludes the cursor and table data types that are described later in this chapter.
Fixed-Length Data Types
Fixed-length data types are exactly that —<i>fixed</i>. The amount of space used to store them in memory or
on disk does not change. Following is a list of fixed-length data types:
❑ bit— Thebitis an integer data type that supports a value of 0 or 1. Contrary to what its name
implies, thebitdata type actually consumes a byte of space for 8 or lessbitdata types used.
❑ tinyint<sub>— The</sub>tinyint<sub>data type uses 1 byte of storage space to store an unsigned integer value</sub>
between 0 and 255.
❑ smallint— Thesmallintdata type uses 2 bytes of storage space to store a signed integer
between –32,768 and 32,767.
❑ int— Theintdata type uses 4 bytes of storage space to store a signed integer between
–2,147,483,648 and 2,147,483,647.
❑ bigint— Thebigintdata type uses 8 bytes of storage space to store a signed integer between
–9,223,372,036,854,775,808 and 9,223,372,036,854,775,807.
</div>
<span class='text_page_counter'>(151)</span><div class='page_container' data-page=151>
precision value is specified. Storage space is dependent on the value of precision, as described in
the following table:
<b>Precision</b> <b>Storage Bytes</b>
1–9 5
10–19 9
20–28 13
29–38 17
❑ smallmoney<sub>— The</sub>smallmoney<sub>data type stores monetary values between –214,748.3648 and</sub>
214,748.3647. Thesmallmoneydata type is accurate to a ten-thousandth of whatever currency
unit is being stored and consumes 4 bytes of space.
❑ money— Themoneydata type stores monetary values between –922,337,203,685,477.5808 and
922,337,203,685,477.5807. Themoneydata type is accurate to a ten-thousandth of whatever
cur-rency unit is being stored and consumes 8 bytes of space.
❑ real— Therealdata type is a floating-point number, so its value is approximate. The values
supported byreal<sub>are negative numbers between –3.40E</sub>+<sub>38 and –1.18E-38, 0, and positive</sub>
numbers between 1.18E-38 and 3.40E+38. Therealdata type consumes 4 bytes of space.
❑ float— Thefloatdata type is a floating-point number, so its value is also approximate. The
range of values supported byfloatand the resultant storage space required is dependent on the
specified precision of the float. The precision is expressed asfloat(n), wherenis the number of
bits used to store the mantissa of the number in scientific notation. Allowable precision values
are between 1 and 53. Precision values from 1 to 24 require 4 bytes of storage space, and
preci-sion values of 25 to 53 require 8 bytes of storage space. With the default precipreci-sion of 53, the range
of values supported byfloat<sub>is negative numbers between –1.79E</sub>+<sub>308 and –2.23E-308, 0, and</sub>
positive numbers between 2.23E-308 and 1.79E+308.
❑ smalldatetime— Thesmalldatetimedata type is used to store dates and times between
Jan-uary 1, 1900 and June 6, 2079. It is accurate to the minute and consumes 4 bytes of space.
Inter-nally, SQL Server storessmalldatetimedata as a pair of 2-byte integers. The first 2 bytes are
used to store the number of days since January 1, 1900, and the second 2 bytes are used to store
the number of minutes since midnight.
❑ datetime— Thedatetimedata type is used to store dates and times between January 1, 1753
and December 31, 9999. It is accurate to 3.33 milliseconds and consumes 8 bytes of space.
Inter-nally SQL Server storesdatetimedata as a pair of 4-byte integers. The first 4 bytes are used to
store the number of days since January 1, 1753, and the second 4 bytes are used to store the
num-ber of milliseconds (rounded to 3.33) since midnight.
❑ datetime2— Thedatetime2data type is an extension of thedatetimedata type with support
of a wider range of dates and more accuracy. It can be used to store dates and times between
January 1, 0001 and December 31, 9999 and is accurate to up to 100 nanoseconds. Similar to the
</div>
<span class='text_page_counter'>(152)</span><div class='page_container' data-page=152>
the storage of fractional seconds with the default precision being seven decimal places, or 100
nanoseconds. It consumes 6 bytes of space for precisions 3 or less, 7 bytes for precisions 4 and 5,
and 8 bytes for precisions 6 and 7.
❑ datetimeoffset— Thedatetimeoffsetdata type is used to store dates and times between
January 1, 0001 and December 31, 9999 along with an offset from UTC (Coordinated Universal
Time) ranging from 14 hours before UTC to 14 hours after UTC. Like thedatetime2data type, it
is accurate to 100 nanoseconds and uses the optional precision specification.
❑ date— Thedatedata type is used to store date values only between January 1, 0001 and
Decem-ber 31, 9999. It is accurate to 1 day and consumes 3 bytes of space. Internally, SQL Server stores
datedata as a 3-byte integer that is used to store the number of days since January 1, 0001.
❑ time— Thetimedata type is used to store time values only between 00:00:00.0000000 and
23:59:59.9999999. It is accurate to 100 nanoseconds. Similar to thedecimal<sub>and</sub>numeric<sub>data</sub>
types, it is declared with an optional precision. The precision specifies the storage of fractional
seconds with the default precision being seven decimal places, or 100 nanoseconds. It consumes
3 bytes of space for precisions less than 3; 4 bytes for precisions 3 and 4; and 5 bytes for
precisions 5, 6, and 7.
❑ char— Thechardata type is used to store a fixed amount of non-Unicode data between 1 and
8,000 characters, and is expressed aschar(n), wherenis the number of characters to store. Each
character requires 1 byte of storage space.
❑ nchar— Thenchardata type is used to store a fixed amount of Unicode data between 1 and
4,000 characters, and is expressed asnchar(n), wherenis the number of characters to store. Each
character requires 2 bytes of storage space. Unicode types are appropriate if multiple languages
must be supported.
❑ binary— Thebinarydata type is used to store a fixed amount of binary data between 1 and
8,000 bytes, and is expressed asbinary(n), wherenis the number ofbinarybytes to store.
❑ rowversion<sub>or</sub>timestamp<sub>—</sub>rowversion<sub>is the data-type synonym for</sub>timestamp<sub>and consumes</sub>
8 bytes of storage space.rowversionshould be specified instead oftimestampwhenever
pos-sible, because it more accurately reflects the true nature of the data type. Thetimestampdata
type has nothing to do with time. It is actually an 8-byte binary string that is used to define a
versioning value to a row. When atimestampor its synonymrowversionis specified as a table
column’s data type, every insert or update to that table will cause a new value to be generated
by SQL Server and placed in the appropriate field.
❑ uniqueidentifier— Theuniqueidentifierdata type is stored as a 16-byte binary string
represented by 32 hexadecimal characters.uniqueidentifier<sub>s can be generated by SQL Server</sub>
with theNEWID()function, or existinguniqueidentifiers can be inserted and stored in a
uniqueidentifercolumn.
Variable-Length and Large Object Data Types
Variable-length data types are used when the exact amount of space required by data cannot be predicted
(such as a column that holds a last name of a person). Thevarchar,nvarchar, andvarbinarydata types
fall into this category.
</div>
<span class='text_page_counter'>(153)</span><div class='page_container' data-page=153>
This is explained in the following descriptions:
❑ varchar— Thevarchardata type is used to store a variable amount of non-Unicode data
between 1 and 8,000 characters, and is expressed asvarchar(n), wherenis the maximum
number of characters to store. Each character requires 1 byte of storage space. The actual storage
space used by avarchar<sub>is the value of</sub>n<sub>plus 2 bytes. The</sub>varchar<sub>data type also supports</sub>
an optional(MAX)length specification. When usingvarchar(MAX), the maximum amount of
characters supported is 2,147,483,647, consuming up to 2 GB of storage space. When the(MAX)
option is specified, SQL Server will store thevarchardata in the data row, unless the amount
of data exceeds 8,000 bytes or doing so would exceed the maximum row size of 8,060 bytes. In
these cases, SQL Server will move thevarchardata out of the row and into a separate Large
Object storage space (see the section ‘‘Data Pages’’ later in this chapter).
❑ nvarchar— Thenvarchardata type is identical to thevarchardata type, except that it is used
to store Unicode data. Each Unicode character requires 2 bytes of storage, resulting in the
maxi-mum number of characters supported being 1,073,741,824.
❑ varbinary— Thevarbinarydata type is also very similar to thevarchardata type, except that
it is used to store binary data and not character data. Other than that, the storage and use of the
(MAX)option works the same as the(MAX)option described above.
❑ text<sub>— The</sub>text<sub>data type is a Large Object data type and is very similar to the</sub>varchar(MAX)
data type in that it can also be used to store up to 2 GB of character data. The primary difference
is thattext<sub>data is stored out of the data row by default, and the</sub>text<sub>data type cannot be passed</sub>
as a parameter in SQL Server functions, stored procedures, or triggers.
❑ ntext— Thentextdata type is identical to thetextdata type, except that it is used to store
Unicode data. As a result, the 2 GB of Unicode character data represents only 1,073,741,824
characters.
❑ image— Theimagedata type is a Large Object data type and is very similar to the
varbinary(MAX)data type. It can also be used to store up to 2 GB of binary data but is
always stored outside the data row in separate Large Object data pages.
❑ XML— TheXMLdata type is a Large Object type that is used to store XML (Extensible Markup
Language) in its native format. Up to 2 GB of XML data can be stored per data row.
❑ sql_variant— Asql_variantdata type can be used in objects when the actual data type of a
value is unknown. Thesql_variantdata type can be used to store almost any value that
con-sumes less than 8,000 bytes. The type of data that is incompatible with thesql_varianttype is
text,ntext,image,timestamp,cursor,varchar(MAX), andnvarchar(MAX).
CLR Data Types
SQL Server 2008 includes three different CLR-based data types. The first ishierarchyid, which is used
to manage hierarchical data in a table structure. The other two are new spatial data types that are used to
represent information about the physical location and shape of geometric objects, such as country
bound-aries, roads, lakes, and the like. SQL Server 2008’s spatial data types conform to the Open Geospatial
Consortium (OGC) Simple Features for SQL Specification version 1.1.0.
</div>
<span class='text_page_counter'>(154)</span><div class='page_container' data-page=154>
require 5 bytes. The more rows divided into more hierarchies, the more storage space that is
required. The data type is limited to 892 bytes.
❑ geometry— This type represents data in a Euclidean (flat) coordinate system.
❑ geography<sub>— The</sub>geography<sub>data type (geodetic) stores ellipsoidal (round-earth) data, such as</sub>
GPS latitude and longitude coordinates.
In-Row Data
By utilizing the‘large value types out of row’table option, the DBA can specify that all of the
varchar(MAX),nvarchar(MAX), andvarbinary(MAX)data is treated as Large Object data and is stored
outside the row in separate Large Object data pages. The option can be set to‘ON’or‘OFF’, as shown
here:
sp_tableoption ‘<i>tablename</i>’, ‘large value types out of row’, ‘ON’
sp_tableoption ‘<i>tablename</i>’, ‘large value types out of row’, ‘OFF’
Likewise, if the DBA wants to keeptextorntextdata in the row unless it exceeds a specified size, the
table option‘text in row’can be specified. This option allows the DBA to specify a range of data to keep
in the row. The supported range is from 24 to 7,000 bytes. Instead of specifying a limit, the wordONcan
be passed, resulting in a default value of 256 bytes. To turn the option off, the wordOFFis passed:
sp_tableoption ‘<i>tablename</i>’, ‘text in row’, ‘<i>number of bytes</i>’
sp_tableoption ‘<i>tablename</i>’, ‘text in row’, ‘ON’
sp_tableoption ‘<i>tablename</i>’, ‘text in row’, ‘OFF’
FILESTREAM Data
A new enhancement added to SQL Server 2008 is the ability to store unstructured data, such as text
doc-uments, images, and videos, outside the database but linked to the row in which the column is defined.
FILESTREAM integrates the Database Engine with the NT File System by storingvarbinary(MAX)
binary large object (BLOB) data as files on the file system instead of on separate Large Object data pages
within the data file of the database. Transact-SQL statements can insert, update, query, and back up
FILESTREAM data.
In order to use FILESTREAM, the database needs a filegroup that is designated as a FILESTREAM storage
area. The following example shows how to add a FILESTREAM filegroup to the AdventureWorks2008
database:
USE Master
GO
ALTER DATABASE AdventureWorks2008
ADD FILEGROUP MyFilestreamGroup2
CONTAINS FILESTREAM
GO
</div>
<span class='text_page_counter'>(155)</span><div class='page_container' data-page=155>
ADD FILE (NAME = N’FileStreamData’
,FILENAME = N’D:\SQLData\FileStreamData’)
TO FILEGROUP MyFilestreamGroup
GO
Once the new filegroup is added to the database, tables can be added or modified to store the table’s
binary Large Object data in the file system as a Database Engine–managed object. The following example
shows how to create a table that uses the FILESTREAM storage:
USE AdventureWorks2008
GO
CREATE TABLE MyLargeData
(DocumentIdentifier uniqueidentifier ROWGUIDCOL NOT NULL UNIQUE
,DocumentFile VARBINARY(MAX) FILESTREAM NULL)
GO
Keep in mind that a table with FILESTREAM-enabled storage must have a non-NULLunique ROWGUID
column. To add a FILESTREAM column to an existing column, you must ensure that the table has a
ROWGUIDcolumn or you must add one.
Other Data Types
As previously noted, SQL Server 2008 has two data types that are not used to store data physically on
the disk by being part of a table or index definition. The following data types are used in programming
objects to manipulate data:
❑ table— Thetabledata type is used to store a set of rows in memory. It is primarily used with
Table-Valued Functions but can be used in any programming object to return an organized result
set that has most of the properties of an actual table. Atablevariable can be declared and
instan-tiated with a set of columns, a specified primary key, check constraints, and a default constraint.
❑ cursor— Transact-SQL performs best with sets of data, but occasionally it is necessary to
manipulate data one row at a time. Thecursor<sub>data type is used for this type of requirement. A</sub>
cursorholds a complete set of rows from a query and can then be manipulated to return single
rows at a time. For a complete discussion of cursors and their uses, check out the book<i>Beginning</i>
<i>T-SQL with Microsoft SQL Server 2005 and 2008</i>by Paul Turley and Dan Wood (Wiley, 2008).
SQL Server Database Files
</div>
<span class='text_page_counter'>(156)</span><div class='page_container' data-page=156>
for SQL Server databases are not enforced, so you can use anything you want, but the default extensions
are typically used because they readily identify the file’s purpose. The following sections are limited
to a description of the physical storage structure of the data and transaction log files. For a complete
description of the database creation process and how files are created and used, see Chapter 5.
Data Files
The database master data file (.mdf), or primary data file, and any secondary data files (.ndf) that are part
of the database have identical structures. Both files are used to store data, as well as all the metadata that
allows SQL Server to efficiently find, read, modify, and add data to the database. All the data from tables
and indexes and the metadata that describes that data is organized in storage objects called<i>extents</i>and
<i>pages</i>.
Extents
An<i>extent</i>is a SQL Server file storage structure that is 64 KB in size. Extents are comprised of eight
con-tiguous 8-KB pages. There are two types of extents: mixed extents and uniform extents.<i>Mixed extents</i>
contain pages from more than one object. For example, a mixed extent might contain data pages from
Table A, an index page from indexes on Table B, and still more data pages from Table C. Because there are
eight pages in an extent, it is possible for eight different objects to share an extent.<i>Uniform extents</i>contain
eight contiguous pages that belong to the same object. The differences are illustrated in Figure 4-1.
<b>Contact</b>
ContactID
NameStyle
Title
FirstName
MiddleName
LastName
<b>Contact</b>
ContactID
NameStyle
Title
FirstName
MiddleName
LastName
<b>Customer</b>
CustomerID
TerritoryID
AccountNumber
CustomerType
rowguid
ModifiedDate
<b>CreditCard</b>
CreditCardID
CardType
CardNumber
ExpMonth
ExpYear
ModifiedDate
<b>Store</b>
CustomerID
Name
SalesPersonID
Demographics
rowguid
ModifiedDate
<b>Store</b>
CustomerID
Name
SalesPersonID
Demographics
rowguid
ModifiedDate
<b>SalesPerson</b>
SalesPersonID
TerritoryID
SalesQuota
Bonus
CommissionPct
SalesYTD
<b>SalesPerson</b>
SalesPersonID
TerritoryID
SalesQuota
Bonus
CommissionPct
SalesYTD
<b>Mixed Extent</b>
<b>CreditCard</b>
CreditCardID
CardType
CardNumber
ExpMonth
ExpYear
ModifiedDate
<b>CreditCard</b>
CreditCardID
CardType
CardNumber
ExpMonth
ExpYear
ModifiedDate
<b>CreditCard</b>
CreditCardID
CardType
CardNumber
ExpMonth
ExpYear
ModifiedDate
<b>CreditCard</b>
CreditCardID
CardType
CardNumber
ExpMonth
ExpYear
ModifiedDate
<b>CreditCard</b>
CreditCardID
CardType
CardNumber
ExpMonth
ExpYear
ModifiedDate
<b>CreditCard</b>
CreditCardID
CardType
CardNumber
ExpMonth
ExpYear
ModifiedDate
<b>CreditCard</b>
CreditCardID
CardType
CardNumber
ExpMonth
ExpYear
ModifiedDate
<b>CreditCard</b>
CreditCardID
CardType
CardNumber
ExpMonth
ExpYear
ModifiedDate
<b>Uniform Extent</b>
Figure 4-1: Mixed extents and uniform extents.
</div>
<span class='text_page_counter'>(157)</span><div class='page_container' data-page=157>
Pages
All data and metadata in a SQL Server 2008 database are stored in<i>pages</i>. Unlike extents, pages always
store data from the same object. This includes rows from tables, rows from indexes, and Large Object
data. Pages are 8 KB in size and are organized on 64-KB extents, which are made up of eight contiguous
8-KB pages. Every page has a 96-byte header that contains information about the page, such as the page
number, the type of data stored on the page, the amount of free space available on the page, and what
object owns the page. SQL Server contains several different types of pages that are used both to store
data and to manage data.
Data Pages
<i>Data pages</i>contain data rows from tables. These rows cannot span pages. Because of the page header and
row offset information, the maximum row size is limited to 8,060 bytes. Row sizes are determined by the
number of columns in the row and the data type defined on each column. To maximize performance,
table and index rows should be kept as narrow as possible. For example, if a single table row were 4,100
bytes in width, only one row could be stored on each data page, leaving almost 4,000 bytes of unusable
space. Resulting reads from a table with this structure would require 8 KB of data retrieval for only 4,100
bytes of data. This is obviously very inefficient. Physical data page structure is illustrated in Figure 4-2.
Page Header
(96 Bytes)
Row 1
Row 2
Row 3
Row 4
Free
Space
Row Offsets 1 2 3 4
Figure 4-2: Physical storage
structure.
Each row-offset block consumes 2 bytes of space for every row stored on a page. Rows from tables are
physically arranged differently than their logical definition in order to optimize storage space. When a
row is stored on a data page, the row is identified with a 4-byte header, which uniquely identifies the
row on the page, followed by the fixed-length data columns, a Null block, a variable block, and then all
the variable data columns at the end of the physical row, as shown in Figure 4-3.
</div>
<span class='text_page_counter'>(158)</span><div class='page_container' data-page=158>
equal to 1 bit per column, rounded up to the nearest byte. One to eight nullable columns require a 1-byte
bitmap. Nine to 16 columns require a 2-byte bitmap, and so on.
Row
Header
(4 Bytes)
Fixed Data Null
Block
Variable
Block Variable Data
Figure 4-3: Header identifying a row.
The<i>variable block</i>, like the Null block, contains 2 bytes that indicate how many variable-length columns
are present, followed by a bitmap that indicates what the maximum length of each variable column is.
Unlike the Null block, the variable block bitmap contains 2 bytes per column that point to the end of each
variable-length column, so that all the variable data can be stored contiguously at the end of the row. If
no columns are defined as variable length, the variable block is omitted.
Index Pages
<i>Index pages</i>contain rows from indexes. They have the same structure and limitations as data pages.
Text/Image Pages
When a column is defined with a Large Object data type, SQL Server places a 16-byte pointer in the actual
data row and places the Large Object data on separate data pages. This data includes those defined as
text,ntext,image,varchar(MAX),nvarchar(MAX),varbinary(MAX), andXML.
Global Allocation Map (GAM) and Secondary Global Allocation Map (SGAM) Pages
The<i>GAM</i>and<i>SGAM pages</i>are allocation pages that manage extents on a file-by-file basis. The second
page of every data file is a GAM page, and the third page of every data file is a SGAM page. SQL Server
will add additional GAM and SGAM pages as necessary, because each GAM and SGAM page can track
only 63,904 extents. The GAM and SGAM pages form a bitmap that indicates whether an extent is a
uniform or mixed extent. The GAM and SGAM bitmap also indicates whether the extent is full, empty,
or has free data pages.
Page Free Space (PFS) Pages
<i>PFS pages</i>record the status of each page, whether or not a page has been allocated, and the amount of
free space on each page.
Index Allocation Map (IAM) Pages
</div>
<span class='text_page_counter'>(159)</span><div class='page_container' data-page=159>
Bulk Changed Map (BCM) Pages
The<i>Bulk Changed Map pages</i>contain the location of extents that were modified by bulk operations
since the last transaction log backup. Bulk operations includeUPDATETEXT,WRITETEXT,SELECT INTO,
BULK INSERT, and image operations. BCM pages are used primarily for transaction log backup
opera-tions when the database is inBULK-LOGGEDrecovery mode (see Chapter 9 for a full explanation of the
BULK-LOGGEDrecovery mode).
Differential Changed Map (DCM) Pages
The<i>Differential Changed Map pages</i>contain the identifier of any extent that has been modified since the
last database backup. The DCM pages are used when performing Differential backups.
Transaction Log
The purpose of the transaction log is to maintain a physical record of all transactions that have occurred
on a SQL Server database during a specific interval. The specific interval depends on the database
recovery mode.
In the default database configuration, the transaction log keeps a record of all database modifications and
is never cleared unless it is backed up or explicitly truncated by a database administrator.
The transaction log is a binary file. It is not simply a traditional log file that can be opened and viewed
with a log viewer or Notepad, so its contents are not readily available to the database administrator.
There are a couple of third-party products that can be used by the database administrator to open and
view the contents of the transaction log. These products can be used to audit database modifications and
also can be used to create scripts that will reverse the effects of an unwanted transaction.
The transaction log is maintained on disk as one or more physical files. In most cases, one transaction
log file is sufficient, because any additional log files will not be used until the first is completely full and
has reached its maximum size. Internally, the physical transaction log file is divided into multiple virtual
logs. The number and size of the virtual log files that a physical file or files are divided into are configured
dynamically by SQL Server and are not configurable. When SQL Server configures the transaction log
internal structure, it tries to keep the number of virtual logs small.
To help SQL Server maintain a smaller number of virtual logs, the initial size of the transaction log should
be set to accommodate all expected transactions that may occur between transaction log backups. If the
log is configured to auto-grow, the growth increments should be fairly large to avoid small repetitive
growths that will cause the creation of multiple small virtual logs.
Transactions
</div>
<span class='text_page_counter'>(160)</span><div class='page_container' data-page=160>
Auto-Commit
By default SQL Server connections use<i>Auto-Commit Transactions</i>. AnyINSERT,UPDATE, orDELETE
state-ment executed alone or in a batch will automatically be applied to the database. An example of this type
of activity is as follows:
UPDATE CheckingAccount
SET Balance = Balance + 500
WHERE AccountID = ‘123456789-CK’
UPDATE SavingsAccount
SET Balance = Balance - 500
WHERE AccountID = ‘123456789-SV’
Both of the updates in this example are transactions. In Auto-Commit mode, they will be applied to the
database independently of each other. If the first update succeeds, but the second fails, the bank will have
lost $500.00, and there will be no way to roll back the changes. Likewise, if the first update fails and the
second succeeds, you will be out $500.00, and the bank will have gained $500.00. To avoid data problems
resulting from errors involving dependent data changes, transactions should be used.
Implicit
The ANSI standard for the Structured Query Language specifies that no modifications should be made to
data unless explicitly committed. SQL Server supports this specification through a connection property
calledIMPLICIT_TRANSACTIONS. WhenIMPLICIT_TRANSACTIONSis set toON, any data modification will
implicitly begin a transaction, but will not close the transaction. The transaction will remain open until it
is explicitly committed or rolled back. An example of this is as follows:
SET IMPLICIT_TRANSACTIONS ON
BEGIN TRY
UPDATE CheckingAccount
SET Balance = Balance + 500
WHERE AccountID = ‘123456789-CK’
UPDATE SavingsAccount
SET Balance = Balance - 500
WHERE AccountID = ‘123456789-SV’
COMMIT TRANSACTION
END TRY
BEGIN CATCH
ROLLBACK TRANSACTION
RAISERROR(’Account Transfer Failed’, 14,1)
END CATCH
</div>
<span class='text_page_counter'>(161)</span><div class='page_container' data-page=161>
logic would not work, because there was no implicit or explicit transaction to commit or roll back.
Turn-ing onIMPLICIT_TRANSACTIONSturns off Auto-Commit.
Explicit
An explicit transaction requires aBEGIN TRANSACTIONto begin the transaction and an explicit
COMMIT TRANSACTIONorROLLBACK TRANSACTIONto close the transaction, as shown in the following
example:
BEGIN TRY
BEGIN TRANSACTION
UPDATE CheckingAccount
SET Balance = Balance + 500
WHERE AccountID = ‘123456789-CK’
UPDATE SavingsAccount
SET Balance = Balance - 500
WHERE AccountID = ‘123456789-SV’
COMMIT TRANSACTION
END TRY
BEGIN CATCH
ROLLBACK TRANSACTION
RAISERROR(’Account Transfer Failed’, 14,1)
END CATCH
In this example, like the implicit transaction example before it, any error can be used to immediately roll
back the transaction, ensuring data integrity.
Much of the documentation available on SQL Server states that a transaction is a ‘‘single unit of work that
must accomplish entirely, or not at all.’’ However, even if the data modifications are placed in a
trans-action, this does not guarantee that the transaction will accomplish entirely. Without theTRYandCATCH
blocks, an implicit or explicit transaction will work just like the Auto-Commit example. Any successful
modifications will be made to the database, and any failed ones will not. Proper error handling is critical
to managing transactions.
Recording Transactions
</div>
<span class='text_page_counter'>(162)</span><div class='page_container' data-page=162>
SQL Server periodically issues an event called aCHECKPOINT. When aCHECKPOINTis issued, all dirty
pages in the buffer cache are written to the data file on disk. The purpose of checkpoints is to reduce
the amount of dirty data stored in the cache to minimize the amount of time required for SQL Server to
recover from a failure. Consider the following sequence of events:
BEGIN TRANSACTION 1
UPDATE ...
INSERT ...
UPDATE ...
COMMIT TRANSACTION 1
BEGIN TRANSACTION 2
INSERT ...
UPDATE ...
<b>***CHECKPOINT***</b>
BEGIN TRANSACTION 3
DELETE ...
UPDATE ...
COMMIT TRANSACTION 3
BEGIN TRANSACTION 4
UPDATE ...
***Server Power failure***
When SQL Server restarts after the power failure, it will read the transaction log to find the last
CHECKPOINTissued. Everything from the lastCHECKPOINTto the beginning of the log has been safely
written to the disk. However, the only record of data modifications after theCHECKPOINTis in the
transaction log. Because Transaction 3 was successfully committed, the calling application was notified
of its success and should expect to see all the modifications that were submitted. In light of this, SQL
Server will roll the entire Transaction 3 forward and commit the changes to disk. Transaction 2, on the
other hand, was never successfully committed, even though the first two modifications were written to
disk by theCHECKPOINT<sub>. SQL Server will use the information in the transaction log to undo, or roll back,</sub>
the modifications. Transaction 4 was also never successfully committed, but neither was it written to the
disk. Transaction 4 data modifications will essentially be deleted from the transaction log.
Transaction Log Physical Characteristics
The transaction log is implemented as a serialized, sequential, rotary write-back log. As data
modifica-tions are written to the log, they are given a Log Sequence Number (LSN). Because the transaction log is
used to record more and more transactions, it will eventually fill up. If the transaction log has been set
up to auto-grow (see Chapter 5), SQL Server will allocate additional file space to accommodate storage
of transaction records. This behavior will continue until the transaction log’s maximum size has been
reached, or the disk that contains the transaction log fills up. If the transaction log becomes completely
full, no data modifications will be allowed on the database.
</div>
<span class='text_page_counter'>(163)</span><div class='page_container' data-page=163>
transaction log does not reduce the size of the transaction log, but it does free up space in the log for
additional transaction records.
The inactive portion of the transaction log can also be manually cleared, but this is strongly discouraged
because doing so deletes all records of data modifications since the last database backup.
As previously noted, the transaction log is a rotary file. Once the end of the physical log is reached, SQL
Server will loop back and continue writing the current logical log at the beginning of the physical log, as
shown in Figure 4-4.
Free space due to truncation
End of
Logical Log
Last Checkpoint Start of
Logical Log
Figure 4-4: Looping back and continuing to write the current
logical log.
Summar y
</div>
<span class='text_page_counter'>(164)</span><div class='page_container' data-page=164></div>
<span class='text_page_counter'>(165)</span><div class='page_container' data-page=165>
5
SQL Ser ver 2008
Databases
The database is the heart of SQL Server 2008, handling everything from storing user information for
later retrieval to acting as a temporary storage area for SQL Server operations. Previous chapters
discussed the SQL Server installation process and the internal structure of all the files that make
up a SQL Server 2008 database. This chapter delves into creating user databases and the various
options that can be configured on them.
System Databases
As mentioned in Chapter 1, when SQL Server 2008 is installed, five system databases are created to
store system information and support database operations. Four of the system databases (master<sub>,</sub>
model,msdb, andtempdb) are visible during normal database operations, but the fifth (theresource
database, as described in Chapter 4) is not. Distribution databases can also be created if the SQL
Server instance is configured as a distributor for SQL Server Replication.
User Databases
<i>User databases</i>are those databases that are created by any server login that possesses the appropriate
permissions. In past versions of SQL Server, you had the option to install theAdventureWorks2008
sample databases that were briefly described in Chapter 1, but this ability has since been
removed from the product. You can download theAdventureWorks2008sample database and
code samples from the ‘‘Microsoft SQL Server Community Projects and Samples’’ located at
www.codeplex.com/sqlserversamples.
Database Planning
</div>
<span class='text_page_counter'>(166)</span><div class='page_container' data-page=166>
support the application. In other cases, the application vendor will create setup programs that install
and configure the database automatically. I have seen many of these installations, and, with just a few
exceptions, the configuration of the supporting databases was either inefficient or flat-out wrong.
This is not to say that the application developers from software vendor companies don’t know what
they’re doing. The problem is much more complex. First, it is almost impossible to accurately predict the
hardware platform, database usage, and the amount of data stored for every installation of a database
application combination, so default values are almost always wrong. Second, and this comes from a lot
of experience, many application developers have no idea how SQL Server really works. They think of it
only as a place to stick data. The idea of leveraging the power of the data tier or optimizing the data tier
doesn’t occur to very many application developers.
Database administrators should worry about how and why a database is performing the way it is. The
best time to start managing a database is before it is created. Whether a data application is developed
internally or purchased from a software vendor, it is imperative that the database administrator be
inti-mately involved in the planning and creation of the supporting database. With that in mind, here’s a
closer look at the database creation process and the configuration options available during database
creation.
Capacity Planning
One of the first things that must be determined when planning a new database is how much disk space
will be required to support the database. The idea is to both ensure that there is sufficient disk space
available for data expansion and to reduce the amount of data and log file growths that are performed to
accommodate the data expansion to improve database efficiency.
If the database is being built to support an application purchased from a vendor, the capacity planning
for the database should be very easy. However, the simplicity depends on the software vendor providing
detailed documentation. The documentation must describe the average size of the database after periodic
intervals where a defined number of users and transactions were supported. If the documentation is
provided, you will have a good idea of what to expect from the database and can configure it accordingly.
If the vendor did not provide the information, your job as a database administrator becomes a bit more
complicated, and you may just have to guess. However, it must be an educated guess using as much
information as you are able to collect. The difficulty is often in the fact that you may not know how the
vendor is storing and retrieving data, so the database must be monitored for growth trends to adequately
predict the amount of storage space.
If the database is being designed and built internally, there are established techniques for determining
how big the data files will need to be. These techniques work because you know how much data is added
for every transaction, whereas in a vendor-provided database, that information may not be available.
One such technique that I am sure you will encounter is calculating a database size requirement by
calculating table sizes. It looks like this:
1.
Add up the total number of bytes used by the fixed-length columns in the table.2.
Average the total number of bytes used by the variable-length columns in the table.</div>
<span class='text_page_counter'>(167)</span><div class='page_container' data-page=167>
4.
Divide 8,060 (the maximum amount of data bytes in a page) by the number calculated inStep 3, and round down to the nearest whole number. This is the number of rows that will
fit on a single page. Remember that rows cannot span pages, which is why you round down.
5.
Divide the total number of expected rows by the number of rows per page calculated in Step4. This is the total number of data pages expected to support the table.
6.
Multiply the number calculated in Step 5 by 8,192 (the size of the data page). This is the totalnumber of bytes required for the table.
7.
Repeat the process for every table in the database.Sounds like fun, doesn’t it? Here’s a tip:<i>Don’t do it</i>. The results from this algorithm are misleading at best.
The calculation doesn’t take into account variables that affect storage space, such as whether or not
com-pression is enabled, the number of indexes, the fill-factor used on the indexes, and data fragmentation,
just to name a few. So, why did I even bother to explain the process? Because it does give insight into size
considerations and because, as I mentioned earlier, you will most likely encounter this technique, and I
wanted to make sure you knew its limitations.
There is a more realistic method of determining how big to make a data file. The idea is to take the
database prototype (the test or development version of the database) and fill it with an appropriate
amount of test data. After the test database has been populated, check the size of the data file on disk,
and then multiply it by 1.5. The resulting file size should be sufficient to accommodate the initial data
load of the new database with some room to spare. This technique is by no means perfect, but it is a great
deal easier than the first technique, and typically much more accurate.
Once the database is put into production, it will become extremely important to monitor the size of
the database files in order to analyze growth trends. I prefer to configure alerts that fire off when the
database grows to 75 percent full. This will allow you to increase the size of files when necessary, but
also to increase them in sufficient percentages so that the increases are seldom executed.
Planning the size of the transaction log file is much more complicated. To accurately plan the log size,
you will need to know how big the average transaction is that will be executed on the database, as well
as how often the transactions will take place and what the physical structure of the tables being
mod-ified is. For example, an insert executed on a table stored in a heap with a row size of 800 bytes and
a non-clustered index on an integer column will increase the amount of data in the transaction log by
approximately 820 bytes. This is because the new row is recorded in the transaction log along with the
new index row. The size of the transaction log is also dependent on the recovery model of the database
and how often the database transaction log is backed up. Recovery models are introduced later in this
chapter. A complete description of indexes can be found in Chapter 6. Transaction log backups and their
effect on the transaction log are described in Chapter 9.
Creating Databases
Databases are usually created either by writing and executing Transact-SQL code or through the
graph-ical user interface. In either case, the only required information during the database creation process is
the name of the new database, so the following code will create a database calledSampleDB:
</div>
<span class='text_page_counter'>(168)</span><div class='page_container' data-page=168>
Executing this Transact-SQL will cause SQL Server to create a single data file and one transaction log file
in the default location for files specified during the SQL Server 2008 installation process. For a typical
installation of a default instance of SQL Server 2008, this code, when executed, will create the following
file system objects:
C:\Program Files\Microsoft SQL Server\MSSQL10.MSSQLSERVER\
MSSQL\DATA\SampleDB.mdf
C:\Program Files\Microsoft SQL Server\MSSQL10.MSSQLSERVER\
MSSQL\DATA\SampleDB_log.ldf
The first file is the database data file, and the second file is the database transaction log file. Although this
default behavior is very convenient, it is usually better not to take advantage of it because all databases
are not created equal, besides the fact that the system partition is hardly the recommended destination
for data and log files. The database creation process allows for the specification of data file(s), transaction
log file(s), and database options.
Getting Started
Before creating a database, it is important to understand all the available settings and options that are
available. This section explains the process of creating a database with the graphical user interface and
examines each configuration setting and option, as well as how it affects the database creation process.
Once you have gone through the entire process, I’ll show you how to turn all the work into a script
that can be run again and again by specifying different values for the database name, filenames, and file
locations.
Creating a New Database
Creating a database graphically with SQL Server Management Studio is very easy and intuitive. The first
step is to open SQL Server Management Studio from the Start menu and connect to the Database Engine
of your SQL Server.
Right-click on the Databases node, and click New Database. The New Database screen appears, as shown
in Figure 5-1.
In the ‘‘Database name’’ field, enter the name of the new database. When specifying a database name,
keep in mind that it can be a maximum of 128 characters long. SQL Server Books Online also states
that a database name must start with a letter or underscore, and then subsequent characters can be
a combination of letters, numbers, and some special characters, but this requirement is not enforced.
However, data applications may be unable to make the connection to a database if the name does not
conform to accepted standards, so it is a very good idea not to deviate from them. As a best practice,
database names should be as descriptive as possible, but also kept as short as possible. Embedded spaces
in object names are also problematic, because they can cause unexpected problems when the database is
accessed programmatically.
</div>
<span class='text_page_counter'>(169)</span><div class='page_container' data-page=169>
database gains complete control of the database. Database ownership can be modified by using the
ALTER AUTHORIZATION T-SQLstatement and specifying any valid login as shown in the following example:
ALTER AUTHORIZATION ON DATABASE::SampleDB TO SA
GO
Figure 5-1: New Database screen.
There are two different ways to retrieve information about databases (such as who the owner is). The
sp_helpdbstored procedure can be used to retrieve information about all databases or a specific database
and is a lot easier to use for a quick look. For all databases, the stored procedure is executed with no
parameters. For a specific database, the name of the database is passed to the stored procedure, as
demon-strated in the following example:
USE Master
GO
EXEC sp_helpdb AdventureWorks2008
</div>
<span class='text_page_counter'>(170)</span><div class='page_container' data-page=170>
Figure 5-2:sp_helpdbresults without a database name.
Figure 5-3:sp_helpdbresults with a database name.
Another way to view database information is by using catalog views, which were introduced in SQL
Server 2005. They offer more information than their stored procedure counterparts and allow the use of
standard T-SQL commands such asWHEREandGROUP BY. The following T-SQL statement shows how to
take the sys.databases catalog view and join it with the sys.server_principals catalog view to see basic
information about all the databases on the server (see Figure 5-4):
SELECT db.name AS database_name,
sp.name AS owner,
db.create_date,
db.compatibility_level,
db.recovery_model_desc
FROM sys.databases db INNER JOIN sys.server_principals sp
ON db.owner_sid = sp.sid
To avoid any potential issues, the database owner should almost always be SA. See Chapter 6 for more
information about the SA account.
</div>
<span class='text_page_counter'>(171)</span><div class='page_container' data-page=171>
Figure 5-4: Using catalog views to retrieve database information.
Database Files
In the ‘‘Database files’’ section of the New Database dialog, notice that the Logical Name of the first
data file as well as the Logical Name for the first log file have been given names automatically. The first
data file is named the same as the database, and the log file is given the name of the database with _log
appended to the end. The<i>logical names</i>are used to refer to the files programmatically in T-SQL script.
Multiple files can be specified during the creation process, and each one could have its own configuration
settings (such as initial size and growth behavior).
Click on the Add button at the bottom of the New Database dialog. A new row for an additional file
is added to the ‘‘Database files’’ section. The new file defaults to the file type ofRows Databut can be
changed to either Log or FILESTREAM Data by selecting it from the dropdown list. Once the database is
created, the type of the file cannot be changed.
For this example, leave the file type asRows Data. Type in a Logical Name for the new data file and then
in the Filegroup column, click on the dropdown list, and choose<new filegroup>. The New Filegroup
dialog displays, as shown in Figure 5-5.
Figure 5-5: New Filegroup dialog.
Filegroups
</div>
<span class='text_page_counter'>(172)</span><div class='page_container' data-page=172>
The only required filegroup is the one called<i>Primary</i>. The<i>Primary filegroup</i>is made up of the primary
data file and any additional user-defined data files. The purpose of the primary data file is to store all
system references for the database including pointers to objects defined in theresourcedatabase. The
Primary filegroup contains all object definitions for user-defined objects if it is left as the default filegroup
as well as all system-created objects. In addition to the Primary filegroup, more user-defined filegroups
can be created as needed.
One of the biggest advantages of using user-defined filegroups boils down to one word:<i>control</i>. With
user-defined filegroups, the database administrator has complete control over what data is stored in what
location. Without user-defined filegroups, all data is stored in the Primary filegroup, so the flexibility
and scalability of the database are reduced dramatically. Although this may be perfectly acceptable for
smaller databases, once the database grows to a large size, it will become increasingly unacceptable to
have all the user and system data grouped into the same filegroup.
I wish I could tell you exactly when it becomes necessary to segregate data, but like almost all questions
in technology, the answer is, ‘‘It depends.’’ It depends on the hardware the SQL Server is running on
and how the database is being accessed; there is no hard-and-fast rule. For more information about data
segregation and the use of filegroups, check out<i>Professional Microsoft SQL Server 2008 Administration</i>by
Brian Knight, Ketan Patel, Wayne Snyder, Ross LoForte, and Steven Wort (Wiley, 2008).
Type in a name for the new filegroup, select the Default checkbox, and click OK. This sets the new
user-defined filegroup as the default so that all user-created objects will be placed in this filegroup. This
essentially segregates system data from user data and allows for more control of the database structure.
One nice feature of using filegroups is the ability to mark all data contained within that filegroup as Read
Only. This can be done by selecting the ‘‘Read-only’’ checkbox on the New Filegroup dialog. This can be
very advantageous when organizing the different objects in a database. The objects that change can be
placed in an updatable filegroup, whereas those that never (or seldom) change can be placed in a Read
Only filegroup. This segregation of objects can reduce the amount of data required to be backed up and
restored, which is a useful option with very large databases.
Maintenance or Performance?
Should filegroups be implemented to optimize performance or to optimize maintenance tasks? Why
not both? Filegroups provide the ability to improve both the performance and the maintainability of a
database by separating data across multiple physical files in groups of tables.
The maintenance advantage comes from the ability to back up and restore individual files and filegroups
as opposed to backing up entire databases. (File and filegroup backups are described in Chapter 9.) This
ability is useful with very large databases separated into multiple filegroups, and even more useful when
some of the filegroups are marked as Read Only. This segregation of Read Write data and Ready Only
data enables the database administrator to back up only the data that is subject to modification, which
can minimize backup and restore time of large databases. This ability, however, does not come without a
cost. File and filegroup backup strategies can become quite complex. The complexity of the maintenance
plans can quickly outweigh the flexibility that is gained.
</div>
<span class='text_page_counter'>(173)</span><div class='page_container' data-page=173>
data off the filegroup reserved for the regular data space. Separating non-clustered indexes from the
data enables the Database Engine to seek row locations from the index and retrieve the rows from the
tables simultaneously using separate threads. Separating infrequently accessed Large Object data from
transaction-intensive relational data can improve scan performance in some instances. The third (and
most significant) advantage that filegroups enable is the ability to physically partition large tables across
multiple filegroups. (Table and index partitioning is described later in this chapter.)
When it comes to performance, filegroups will only offer a small increase in performance to most
databases, with the exception of very large databases that can fully exploit physical table partitioning.
The best way to improve disk access to data is to implement a robust Redundant Array of Inexpensive
Disks (RAID) environment. The primary reasons for using filegroups for most database administrators
are the control it offers in the storage of the data and the ability to segregate system and user data, which
equates to maintenance concerns.
File Size
In the ‘‘Initial Size (MB)’’ column (see Figure 5-1), a value should be assigned based on how big the file
is expected to be within the first few weeks (and maybe even months) of operation. When looking for a
house and planning a large family, it would be inadvisable to buy a one-bedroom house and then have
to remodel it every time a new child is born. It makes much more sense to buy a large house that would
accommodate the family, including future children. The same goes for database files. If a file is expected
to hold 1 GB of data within the first few months of its existence, it only makes sense to allocate 1 GB of
space to that file. As a best practice, file size modifications should be kept to a minimum. Allocate enough
contiguous disk space to accommodate all the expected data plus a percentage of space for growth.
Autogrowth
Click the ellipsis button on the right of the Autogrowth column (see Figure 5-1) for the Primary data
file. The Change Autogrowth dialog displays, as shown in Figure 5-6. The Change Autogrowth dialog
enables the configuration of the maximum size and file growth setting for each individual file. Ensure
that the ‘‘Enable Autogrowth’’ checkbox is checked. Clearing this checkbox sets thefilegrowthproperty
to zero. For this example, we will use the defaults in the Change Autogrowth dialog box.
Figure 5-6: Change Autogrowth dialog.
</div>
<span class='text_page_counter'>(174)</span><div class='page_container' data-page=174>
file-growths required to accommodate data growth. Growing files in small increments results in physical
fragmentation of the files, which is detrimental to both data and log file performance.
The size of both data and log files can be restricted, allowing one more way to control the sizing of the
files. This can be done by selecting the ‘‘Restricted File Growth (MB)’’ option button and specifying a
maximum size. This size cannot be exceeded by automatic or manual file-growth operations. It is
gener-ally a best practice to set a maximum file size to safeguard against any errant process that may attempt to
insert millions of rows (instead of just a few) and also to maintain control of database growth. One thing
to keep in mind is that if the database reaches the maximum size, all data modification transactions will
fail. If this occurs, the maximum size property can be changed and additional space allocated. The size
selected should be the maximum amount of data expected for that file in a determined period of time.
This operation should be performed on every file in the database.
Path
To change the path where data and log files are located, either click on the ellipses button on the right
of the Path column in the New Database dialog for each data file and select a destination folder for
each individual file, or simply type in the correct path in the Path column. When placing files, keep in
mind that data files and log files should never be on the same physical disk; doing so puts the data
at high risk of loss caused by disk or controller failure. See Chapter 3 for more information on file
placement.
Now that all the general settings of your new database are complete, it is time to configure the database
options.
Database Options
Click Options in the ‘‘Select a page’’ section in the upper-left of the New Database dialog, as shown in
Figure 5-7. The Options window displays, enabling the setting of several database options.
Collation
Click the Collation dropdown list and review the different collation settings that are available, but leave
the setting set to<server default>.
As noted in Chapter 2, an instance of SQL Server is assigned a default server collation that determines
what characters are supported on the server by default and how those characters are searched and sorted.
Collation settings can also be assigned to the database as well. As a result, just because a SQL Server
instance has been configured to use the Latin character set doesn’t mean that a database built to support
Korean characters cannot be created on the same instance. However, also as previously described,
col-lation incompatibilities in thetempdbdatabase may occur if the database collation settings are different
from the SQL Server instance collation settings.
Recovery Model
</div>
<span class='text_page_counter'>(175)</span><div class='page_container' data-page=175>
Figure 5-7: Enabling database options.
For all intents and purposes, there are really only two recovery models, Full and Simple. The
Bulk-Logged model is meant only as an accessory to the Full recovery model for use during bulk
operations. This is because in the Full recovery model, all modifications to the database are fully logged.
Although this recovery model offers the greatest level of protection from data loss, it comes at a cost.
Because all modifications to a database are fully logged, the transaction log can grow very rapidly to large
sizes during certain operations (such as bulk loading of data or table index maintenance operations). The
Bulk-Logged recovery model is also known as<i>minimal logging</i>and was developed so that the database
could be temporarily set to Bulk-Logged during those operations that could cause the transaction log to
rapidly swell and then be set back to Full recovery once those operations were complete.
In the Simple recovery model, the transaction log is cleared of all inactive content every time a checkpoint
is issued. Checkpoints were described in Chapter 4. The repercussion of the Simple recovery model is that
the transaction log cannot be backed up or used for database restore operations. The transaction log is
only used for transactional consistency, but no long-term storage of transactional history is maintained.
Compatibility Level
</div>
<span class='text_page_counter'>(176)</span><div class='page_container' data-page=176>
level option changes the behavior of some database operations and is only necessary if an instance of
SQL Server 2008 is sharing database responsibilities with a previous release of SQL Server. SQL Server
2008 only allows for the selection of compatibility levels of 80, 90, and 100, which, as the dropdown list
indicates, correlates to SQL Server 2000, SQL Server 2005, and SQL Server 2008, respectively. In previous
versions, you were able to programmatically change the compatibility level by using the System Stored
Proceduresp_dbcmptlevel<sub>. This System Stored Procedure has been officially deprecated and has been</sub>
replaced with an addition to theALTER DATABASETransact-SQL command. The following code will set
the compatibility level of theAdventureWorks2008database to SQL 2000:
ALTER DATABASE AdventureWorks2008
SET COMPATIBILITY_LEVEL = 80
<i>For a complete discussion of all the differences between compatibility levels, there is an excellent </i>
<i>descrip-tion in SQL Server 2008 Books Online under the topic ‘‘ALTER DATABASE Compatibility Level</i>
<i>(Transact-SQL).’’ Databases upgraded from SQL Server 2000 or 2005 are configured for a compatibility</i>
<i>mode respective to their original version. For example, a SQL Server 2000 database upgraded to SQL</i>
<i>Server 2008 will have a compatibility level of 80.</i>
Other Options
By default, the ‘‘Other options’’ section of the New Database screen organizes the options
categori-cally. For purposes of this discussion, we will sort the options alphabeticategori-cally. For this exercise, leave all
the options in their default configurations. Each one is described in the following sections. Some of the
database options are also connection options. Where this is the case, the commands to set the database
option and the connection-level options are both shown. It’s important to know that connection-level
options, if specified, will override database-level options. When they are not specified, the database
option will be in effect.
Click the alphabetical sort button, which can be identified by an A and a Z with a vertical arrow pointing
down. The available options are now listed alphabetically, as shown in Figure 5-7.
ANSI NULL Default
The ‘‘ANSI NULL Default’’ setting specifies whether or not the default for columns added to a table
during aCREATE TABLEorALTER TABLEoperation is to allow nulls. When the ‘‘ANSI NULL Default’’
setting is set toFalse<sub>, columns added will not allow nulls unless explicitly specified to do so. When</sub>
connecting to SQL Server with SQL Server Management Studio, the connection setting for new queries
defaults to the settingANSI NULLS ON, which overrides the database setting. To set it at the connection
level or database level, the following commands are used:
--Connection Settings
SET ANSI_NULL_DFLT_ON OFF --ANSI NULL Default False
SET ANSI_NULL_DFLT_ON ON --ANSI NULL Default True
--Database Options
ALTER DATABASE AdventureWorks2008 SET ANSI_NULL_DEFAULT OFF
ALTER DATABASE AdventureWorks2008 SET ANSI_NULL_DEFAULT ON
ANSI NULLS Enabled
The ‘‘ANSI NULLS Enabled’’ setting controls the behavior of comparisons toNULLvalues. When set to
</div>
<span class='text_page_counter'>(177)</span><div class='page_container' data-page=177>
will returnTrueif the values are null. To set it at the connection level or database level, the following
commands are used:
--Connection Settings
SET ANSI_NULLS OFF
SET ANSI_NULLS ON
--Database Options
ALTER DATABASE AdventureWorks2008 SET ANSI_NULLS OFF
ALTER DATABASE AdventureWorks2008 SET ANSI_NULLS ON
<i>The ‘‘ANSI NULLS’’ option is deprecated as of this version of SQL Server. In a future version of SQL</i>
<i>Server, the option will be set to ON and will not be allowed to be changed. If an application attempts</i>
<i>to set the value to OFF, an error will be thrown. It is recommended that you avoid using it in all new</i>
<i>development work and make arrangements to update any applications that currently use it.</i>
ANSI Padding Enabled
When set toTrue, ‘‘ANSI Padding Enabled’’ dictates that trailing spaces for character data and trailing
zeros for binary data are appended to the end of character and binary columns that are of fixed length.
Character and binary columns that are of variable length are not padded, but trailing spaces or trailing
zeros are not trimmed either. When set toFalse, character and binary columns that are of fixed length
and set toNOT NULLbehave the same as when ‘‘ANSI Padding Enabled’’ isTrue. However, nullable
character and binary columns that are of fixed length are not padded, and any trailing spaces or trailing
zeros are trimmed. Variable-length columns behave the same as nullable fixed-length columns when
‘‘ANSI Padding Enabled’’ isFalse. To set it at the connection level or database level, the following
commands are used:
--Connection Settings
SET ANSI_PADDING OFF
SET ANSI_PADDING ON
--Database Options
ALTER DATABASE AdventureWorks2008 SET ANSI_PADDING OFF
ALTER DATABASE AdventureWorks2008 SET ANSI_PADDING ON
<i>The ‘‘ANSI Padding’’ option is deprecated as of this version of SQL Server. In a future version of SQL</i>
<i>Server, the option will be set to ON and will not be allowed to be changed. If an application attempts</i>
<i>to set the value to OFF, an error will be thrown. It is recommended that you avoid using it in all new</i>
<i>development work and make arrangements to update any applications that currently use it.</i>
ANSI Warnings Enabled
When ‘‘ANSI Warnings Enabled’’ is set toTrue, warnings will be raised by the Database Engine
when-ever an aggregate function encounters a null. When set toFalse, no warnings are raised. To set it at the
connection level or database level, the following commands are used:
</div>
<span class='text_page_counter'>(178)</span><div class='page_container' data-page=178>
ALTER DATABASE AdventureWorks2008 SET ANSI_WARNINGS OFF
ALTER DATABASE AdventureWorks2008 SET ANSI_WARNINGS ON
Arithmetic Abort Enabled
Any statement or transaction that encounters an arithmetic overflow or divide-by-zero error will
termi-nate when ‘‘Arithmetic Abort Enabled’’ is set toTrue. When set toFalse, a warning is raised, but the
statement or transaction will not be terminated. In order for this option to have the desired effect, the
‘‘ANSI Warnings’’ options must also be set toFalse. To set it at the connection level or database level,
the following commands are used:
--Connection Settings
SET ARITHABORT OFF
SET ARITHABORT ON
--Database Options
ALTER DATABASE AdventureWorks2008 SET ARITHABORT OFF
ALTER DATABASE AdventureWorks2008 SET ARITHABORT ON
Auto Close
When a database is first accessed, SQL Server opens and locks all files that are associated with the
database. When ‘‘Auto Close’’ isTrue, the database will be closed, releasing all file locks, when the
last user connected to it closes the connection. This setting is OFF by default because the act of opening
and closing the database on a server platform is unnecessary and produces unneeded overhead. The
exception to this rule is SQL Server Express Edition, because SQL Express is designed to run on a
desk-top system where resources are more restricted and an open database consumes resources. If no user is
connected, those resources can be returned to the system. To set it at the database level, the following
commands are used:
ALTER DATABASE AdventureWorks2008 SET AUTO_CLOSE OFF
ALTER DATABASE AdventureWorks2008 SET AUTO_CLOSE ON
Auto Create Statistics
When ‘‘Auto Create Statistics’’ is set toTrue, the Database Engine will generate statistics for columns
without indexes that are missing statistics and when those columns are referenced in aWHEREclause, or
theONclause of aJOINoperation. Statistics are used by the Database Engine to determine the selectivity
and distribution of data in a column. If set toFalse, it will be up to the database administrator to create
statistics manually wherever needed. To set it at the database level, the following commands are used:
ALTER DATABASE AdventureWorks2008 SET AUTO_CREATE_STATISTICS OFF
ALTER DATABASE AdventureWorks2008 SET AUTO_CREATE_STATISTICS ON
Auto Shrink
</div>
<span class='text_page_counter'>(179)</span><div class='page_container' data-page=179>
and, apart from the rare instance that a database will increasingly get smaller, it should be left set to
False. To set it at the database level, the following commands are used:
ALTER DATABASE AdventureWorks2008 SET AUTO_SHRINK OFF
ALTER DATABASE AdventureWorks2008 SET AUTO_SHRINK ON
Auto Update Statistics
When ‘‘Auto Update Statistics’’ is set toTrue, the Database Engine will automatically update statistical
information on columns to maintain the most efficient query plans possible. This typically takes place
when a query is executed and the Query Processor discovers the out-of-date statistics. If set toFalse, it
will be up to the database administrator to manually keep column statistics up to date. To set it at the
database level, the following commands are used:
ALTER DATABASE AdventureWorks2008 SET AUTO_UPDATE_STATISTICS OFF
ALTER DATABASE AdventureWorks2008 SET AUTO_UPDATE_STATISTICS ON
Auto Update Statistics Asynchronously
When ‘‘Auto Update Statistics Asynchronously’’ is set toTrue, statistics that are discovered to be
out-of-date during queries will be updated, but the query that was being executed when the discovery
was made will not wait for the new statistics. Subsequent queries will take advantage of the new
statistics. When set toFalse, query compilation will not occur until after the statistics are updated. To
set it at the database level, the following commands are used:
ALTER DATABASE AdventureWorks2008 SET AUTO_UPDATE_STATISTICS_ASYNC OFF
ALTER DATABASE AdventureWorks2008 SET AUTO_UPDATE_STATISTICS_ASYNC ON
Broker Enabled
When ‘‘Broker Enabled’’ is set toTrue, the database is configured for participation in a Service Broker
messaging system. When this is enabled in a new database, a new Service Broker identifier is created
and persisted in the database. If Service Broker is disabled and then re-enabled, the original identifier
will be used. For more information on Service Broker, see Chapter 19. To set it at the database level, the
following commands are used:
ALTER DATABASE AdventureWorks2008 SET DISABLE_BROKER
ALTER DATABASE AdventureWorks2008 SET ENABLE_BROKER
Close Cursor on Commit Enabled
When ‘‘Close Cursor on Commit Enabled’’ is set toTrue, cursors contained in a transaction will be closed
after the transaction has been committed or rolled back. When this setting isFalse, cursors will remain
open when the transaction is committed. However, rolling back a transaction will close any cursors
except those defined asINSENSITIVEorSTATICwhen set toFalse. To set it at the connection level or
database level, the following commands are used:
--Connection Settings
</div>
<span class='text_page_counter'>(180)</span><div class='page_container' data-page=180>
ALTER DATABASE AdventureWorks2008 SET CURSOR_CLOSE_ON_COMMIT OFF
ALTER DATABASE AdventureWorks2008 SET CURSOR_CLOSE_ON_COMMIT ON
Concatenate Null Yields Null
When a character string is concatenated with aNULL, it will returnNULLwhen the ‘‘Concatenate Null
Yields Null’’ setting isTrue. When set toFalse, a character string concatenated with aNULLwill
return the character string. To set it at the connection level or database level, the following commands
are used:
--Connection Settings
SET CONCAT_NULL_YIELDS_NULL OFF
SET CONCAT_NULL_YIELDS_NULL ON
--Database Options
ALTER DATABASE AdventureWorks2008 SET CONCAT_NULL_YIELDS_NULL OFF
ALTER DATABASE AdventureWorks2008 SET CONCAT_NULL_YIELDS_NULL ON
<i>The ‘‘Concatenate Null Yields Null’’ option is deprecated as of this version of SQL Server. In a future</i>
<i>version of SQL Server, the option will be set to ON and will not be allowed to be changed. If an </i>
<i>applica-tion attempts to set the value to OFF, an error will be thrown. It is recommended that you avoid using</i>
<i>it in all new development work and make arrangements to update any applications that currently use it.</i>
Cross-database Ownership Chaining Enabled
The ‘‘Cross-database Ownership Chaining Enabled’’ option is not settable in the Options dialog and only
indicates what the value is set to. When set toTrue, it indicates that the database can participate in a
cross-database ownership chain. This option is only recognized if the server level option is turned off. To
set it at the server level or database level, the following commands are used:
--Server Options
sp_configure ‘cross db ownership chaining’, 0 -- OFF
sp_configure ‘cross db ownership chaining’, 1 –- ON
RECONFIGURE
--Database Options
ALTER DATABASE AdventureWorks2008 SET DB_CHAINING OFF
ALTER DATABASE AdventureWorks2008 SET DB_CHAINING ON
Database Read-Only
The ‘‘Database Read-Only’’ option specifies that no modifications are allowed to the database when set
toTrue. Exclusive access to the database is required to set this option, except for theMasterdatabase. To
set it at the database level, the following commands are used:
ALTER DATABASE AdventureWorks2008 SET READ_ONLY
ALTER DATABASE AdventureWorks2008 SET READ_WRITE
Database State
</div>
<span class='text_page_counter'>(181)</span><div class='page_container' data-page=181>
State’’ will indicate different values based on what is occurring on the database. The following table
describes the various states the database can be in:
<b>State</b> <b>Description</b>
ONLINE The database is online and available. This will show up as the NORMAL
state.
OFFLINE The database is unavailable. Databases are set offline by executing the
commandALTER DATABASE <DBName> SET OFFLINE. This can be done if the
database administrator wants to move a database file from one location
to another. In this case, the database would be setOFFLINE, then the
ALTER DATABASE <DBName> MODIFY FILEcommand would be executed,
followed by changing the database back toONLINE.
RESTORING One or more files are being restored. The database is unavailable.
RECOVERING The database is being recovered. Except in the case of database
mirroring, this is a transient state that occurs during the automatic or
manual recovery process. The database is unavailable.
RECOVERY
PENDING
A database will be in this state if SQL Server encounters a
resource-related error during recovery. The database will be unavailable
until the database administrator resolves the resource error and allows
the recovery process to be completed.
SUSPECT One or more database files have been marked as suspect because of a
data access or Read error. This may occur if aTORN PAGEhas been
detected during database Read operations. If a database has been marked
asSUSPECT<sub>, the database is unavailable until the error has been resolved.</sub>
EMERGENCY The database will be in this state when the database administrator has set
the status toEMERGENCY<sub>. In this state, the database is in single-user mode</sub>
and may be repaired or restored. If the database has been marked as
SUSPECT, this is the first step in correcting the problem, short of a
database restore. Only members of thesysadminfixed server role can set
a database to theEMERGENCYstate.
Date Correlation Optimization Enabled
When the ‘‘Date Correlation Optimization Enabled’’ option is set toTrue, it indicates that the Database
Engine will maintain date statistics between two tables withdatetimecolumns joined by a foreign key
constraint to optimize queries between those two tables where thedatetimefield is a filter. To set it at
the database level, the following commands are used:
ALTER DATABASE AdventureWorks2008 SET DATE_CORRELATION_OPTIMIZATION OFF
ALTER DATABASE AdventureWorks2008 SET DATE_CORRELATION_OPTIMIZATION ON
Default Cursor
</div>
<span class='text_page_counter'>(182)</span><div class='page_container' data-page=182>
that a declared cursor can be referenced by any batch, stored procedure, or trigger executing on the
same connection. If set to Local, the cursor can only be referenced inside the batch, stored procedure,
or trigger in which the cursor was declared. To set it at the database level, the following commands
are used:
ALTER DATABASE AdventureWorks2008 SET CURSOR_DEFAULT LOCAL
ALTER DATABASE AdventureWorks2008 SET CURSOR_DEFAULT GLOBAL
Encryption Enabled
When the ‘‘Encryption Enabled’’ option is set toTrue, all data and log files will be encrypted. If a database
encryption key has not yet been created, trying to set this option will result in an error. See Chapter 6
for more information on ‘‘Transparent Data Encryption.’’ To set it at the database level, the following
commands are used:
ALTER DATABASE AdventureWorks2008 SET ENCRYPTION OFF
ALTER DATABASE AdventureWorks2008 SET ENCRYPTION ON
Honor Broker Priority
The ‘‘Honor Broker Priority’’ option is not configurable in SQL Server Management Studio and must be
changed through T-SQL script. When this option is turned on, SQL Server will honor priority levels for
Service Broker messages. For more information on Service Broker and message priority, see Chapter 19.
To set it at the database level, the following commands are used:
ALTER DATABASE AdventureWorks2008 SET HONOR_BROKER_PRIORITY OFF
ALTER DATABASE AdventureWorks2008 SET HONOR_BROKER_PRIORITY ON
Numeric Round-Abort
When the ‘‘Numeric Round-Abort’’ option is set toTrue, it means that any numeric rounding that occurs
will generate an error. For example, if ‘‘Numeric Round-Abort’’ is set toTrue, the following code will
generate an error:
DECLARE @Num1 AS decimal(4,3)
SET @Num1 = 7.00004 / 2.84747
SELECT @Num1 AS Answer
RESULTS:
---Msg 8115, Level 16, State 7, Line 2
Arithmetic overflow error converting numeric to data type numeric.
The error is caused because the decimal variable was declared with a scale of 3. Remember that the
scale specifies how many digits are supported to the right of the decimal place. To perform this
calcu-lation, SQL Server must round the number. If ‘‘Numeric Round-Abort’’ is set toFalse, this code will
succeed:
</div>
<span class='text_page_counter'>(183)</span><div class='page_container' data-page=183>
SELECT @Num1 AS Answer
RESULTS:
---Answer
---2.458
To set it at the connection level or database level, the following commands are used:
--Connection Settings
SET NUMERIC_ROUNDABORT OFF
SET NUMERIC_ROUNDABORT ON
--Database Options
ALTER DATABASE AdventureWorks2008 SET NUMERIC_ROUNDABORT OFF
ALTER DATABASE AdventureWorks2008 SET NUMERIC_ROUNDABORT ON
Page Verify
The ‘‘Page Verify’’ option enables the database administrator to set different options for page Write
verification. The available options are Checksum, Torn_Page_Detection, and None. As far as performance
goes, the best option is None. However, with None set, pages corrupted during disk Write operations (or
by some other disk anomaly after the page is written to disk) will not be discovered.
With the Checksum option, SQL Server will calculate a checksum value and store it in the page header.
This checksum value is very much like the Cyclic Redundancy Check (CRC) values created when files
are written to disk by the operating system. When a data page is read from the disk, SQL Server will
re-calculate the checksum and compare it to the one stored in the page header. If the values match, the
page is good. If the values do not match, the page is considered corrupted, an error 823 will be raised,
and the database status is changed fromONLINEtoSUSPECT.
In a typical configuration, only 512 bytes of data are written to the disk with each pass of the disk under
a Write head. Therefore, it takes 16 passes to write an 8-KB page. The Torn_Page_Detection option
con-figures SQL Server to write an error bit in the page header at the end of every Write cycle. If the error
bit is absent when the page is later read, an error 823 is raised, and the database status is changed from
ONLINEtoSUSPECT.
When SQL Server raises an 823 error, a record will be added to thesuspect_pagestable in themsdb
database. The record includes the database the error occurred in, the page ID, file ID, and various other
pieces of information that will be helpful to restore the page from a backup. This table will be updated
when the page is restored, but the records will<i>not</i>be removed. It is the database administrator’s job to
remove any records that are marked as restored or repaired.
</div>
<span class='text_page_counter'>(184)</span><div class='page_container' data-page=184>
option costs the most CPU cycles. The Torn_Page_Detection option is a lower-cost method of detecting
corrupted pages, but it will only detect page corruption that occurs during the Write operation. The
rec-ommended setting is Checksum because of its high degree of data integrity verification. To set it at the
database level, the following commands are used:
ALTER DATABASE AdventureWorks2008 SET PAGE_VERIFY NONE
ALTER DATABASE AdventureWorks2008 SET PAGE_VERIFY TORN_PAGE_DETECTION
ALTER DATABASE AdventureWorks2008 SET PAGE_VERIFY CHECKSUM
Parameterization
‘‘Parameterization’’ is a very interesting but advanced option that was introduced in SQL Server 2005.
By default, the Database Engine auto-parameterizes some queries so the query plans that are created
and compiled can be reused even when different values are defined in theWHEREclause. For example,
consider this code:
USE AdventureWorks2008
GO
SELECT * FROM Person.Person
WHERE LastName = N’Smith’
If you type this code in a Query window and then click on the ‘‘Display Estimated Execution’’ button on
the SQL Editor toolbar, you will find that the Database Engine compiles the query with the search criteria
ofLastName=N‘Smith’<sub>(see Figure 5-8) when the ‘‘Parameterization’’ option is set to Simple. This is</sub>
because SQL Server decides which queries to parameterize and which ones not to when Simple is set. For
this particular query, it determines that it is not worth the extra cost.
Figure 5-8: Simple parameterization.
</div>
<span class='text_page_counter'>(185)</span><div class='page_container' data-page=185>
Figure 5-9: Forced parameterization.
To set it at the database level, the following commands are used:
ALTER DATABASE AdventureWorks2008 SET PARAMETERIZATION SIMPLE
ALTER DATABASE AdventureWorks2008 SET PARAMETERIZATION FORCED
Quoted Identifiers Enabled
By default, SQL Server uses square brackets (‘‘[ ]’’) to delimit objects. Delimiting objects is only required
if the object name contains an embedded space or a reserved word. The ANSI standard delimiter is the
double quotation marks. The following examples show how to create and reference an object with an
embedded space with both square brackets and double quotation marks.
Following is an example for the ANSI double quote delimiter:
USE AdventureWorks2008
GO
CREATE TABLE "Sales.USA Customers"
( AcctNumber int IDENTITY(1,1) NOT NULL
, "Last Name" varchar(75) NOT NULL
, "First Name" varchar(75) NOT NULL)
SELECT AcctNumber, "Last Name", "First Name"
FROM "Sales.USA Customers"
Following is an example of the default square bracket delimiter:
USE AdventureWorks2008
GO
</div>
<span class='text_page_counter'>(186)</span><div class='page_container' data-page=186>
, [First Name] varchar(75) NOT NULL)
SELECT AcctNumber, [Last Name], [First Name]
FROM [Sales.USA Customers]
When the ‘‘Quoted Identifiers’’ option isTrue, both square brackets and double quotation marks are
accepted. If the ‘‘Quoted Identifiers’’ option is set toFalse<sub>, only square bracket delimiters will be</sub>
accepted. To set this option at the connection level or database level, the following commands are used:
--Connection Settings
SET QUOTED_IDENTIFIER OFF
SET QUOTED_IDENTIFIER ON
--Database Options
ALTER DATABASE AdventureWorks2008 SET QUOTED_IDENTIFIER OFF
ALTER DATABASE AdventureWorks2008 SET QUOTED_IDENTIFIER ON
<i>On a completely editorial note, I personally believe that embedded spaces in object names are wrong and</i>
<i>should never be used. They typically introduce nothing but problems to your database and application</i>
<i>design for the negligible benefit of a natural language name.</i>
Recursive Triggers Enabled
Recursive triggers are considered an advanced programming technique that allows the same trigger to
fire more than once, in sequence, in the same transaction. When set toFalse, this action is not allowed
and is the default configuration. Generally it is a good idea to leave this set toFalse. Recursive logic is
difficult at best to debug and can lead to many headaches. Almost all of the time, recursive logic can be
rewritten as non-recursive logic. To set it at the database level, the following commands are used:
ALTER DATABASE AdventureWorks2008 SET RECURSIVE_TRIGGERS OFF
ALTER DATABASE AdventureWorks2008 SET RECURSIVE_TRIGGERS ON
Restrict Access
The ‘‘Restrict Access’’ option enables the database administrator to restrict access to a database
to a defined set of logins. The default value of this option isMULTI_USER, which allows multiple
non-privileged users to access the database. Two other options exist to restrict access:SINGLE_USERand
RESTRICTED_USER.
When theSINGLE_USER‘‘Restrict Access’’ option is set, only one user account is allowed access to the
database at a time.
If theRESTRICTED_USER<sub>‘‘Restrict Access’’ option is set, only members of the</sub>db_owner<sub>,</sub>dbcreator<sub>, or</sub>
sysadminroles can connect to the database. To set it at the database level, the following commands are
used:
ALTER DATABASE AdventureWorks2008 SET MULTI_USER
ALTER DATABASE AdventureWorks2008 SET RESTRICTED_USER
ALTER DATABASE AdventureWorks2008 SET SINGLE_USER
Service Broker Identifier
</div>
<span class='text_page_counter'>(187)</span><div class='page_container' data-page=187>
Broker and is used to uniquely identify the database in a messaging infrastructure. See Chapter 19 for
more information on Service Broker.
Trustworthy
The ‘‘Trustworthy’’ setting cannot be set through SQL Server Management Studio. The ‘‘Trustworthy’’
option indicates whether or not the instance of SQL Server trusts the database to access external or
net-work resources. If this is set toFalse, database programming components created with managed code,
or database components that need to execute within the context of a highly privileged user, are not
allowed access to any resource external to the database. When one of those two situations is required,
the ‘‘Trustworthy’’ option can be set toTrue. To set it at the database level, the following commands
are used:
ALTER DATABASE AdventureWorks2008 SET TRUSTWORTHY OFF
ALTER DATABASE AdventureWorks2008 SET TRUSTWORTHY ON
VarDecimal Storage Format Enabled
The ‘‘VarDecimal Storage Format Enabled’’ feature was first introduced in Service Pack 2 for SQL Server
2005 and is now deprecated in SQL Server 2008. Row and Page Compression, new features of SQL Server
2008, replace this functionality and are discussed later in the chapter. For SQL Server 2008, it is turned on
and cannot be turned off.
Generating Database Creation Scripts
Now that you have gone through all the steps and options of creating a database, let’s take a look at how
you can script this process so that you don’t have to go through it again.
At the top of the New Database dialog is a button called<i>Script</i>, as shown in Figure 5-10.
Figure 5-10: Script button.
</div>
<span class='text_page_counter'>(188)</span><div class='page_container' data-page=188>
for creating or modifying database objects. Almost every configuration screen for creating or modifying
database objects includes the Script Action option.
Another option for reusing scripts is to replace the actual names of objects and files with variables. Then
all you have to do is update the variable values and execute the script. The only tricky part in creating
Data Definition Language (DDL) scripts is having to use dynamic SQL because variables can’t be used
directly in a DDL script. The following example demonstrates how to use dynamic SQL to create a new
database with a user-defined filegroup marked as the default:
DECLARE @DatabaseName AS nvarchar(255)
DECLARE @FileGroupName AS nvarchar(255)
SET @DatabaseName = N’SlateGravel’
SET @FileGroupName = N’UserData’
EXECUTE (
’CREATE DATABASE ‘ + @DatabaseName +
’ ON PRIMARY
( NAME = ‘’’ + @DatabaseName + ‘’’
, FILENAME = ‘’S:\SQLDataFiles\’ + @DatabaseName + ‘_data.mdf"
, SIZE = 20MB
, MAXSIZE = 100MB
, FILEGROWTH = 30%)
, FILEGROUP UserData
( NAME = ‘’’ + @FileGroupName + ‘’’
, FILENAME = ‘’S:\SQLDataFiles\’ + @DatabaseName + ‘_data.ndf’’
, SIZE = 2048KB , FILEGROWTH = 20%)
LOG ON
( NAME = ‘" + @DatabaseName + ‘_log’’
, FILENAME = ‘’T:\SQLLogFiles\’ + @DatabaseName + ‘_log.ldf’’
, SIZE = 100MB
, FILEGROWTH = 20%);
ALTER DATABASE ‘ + @DatabaseName +
’ MODIFY FILEGROUP ‘ + @FileGroupName + ‘ DEFAULT’)
<i>This script assumes the presence of an ‘‘S’’ drive, ‘‘T’’ drive, a SQLDataFiles folder, and a SQLLogFiles</i>
<i>folder. To run it in your environment, you may have to change the drive letter assignments and folder</i>
<i>names.</i>
Schemas
SQL Server 2008 implements the database schema as defined in the ANSI standard. Almost every object
in SQL Server 2008 exists within a defined schema. A<i>schema</i>is simply a way to organize your database
objects and assign permissions to the objects it contains. The schema itself can be owned by any database
principal including database roles and application roles while containing many objects owned by
var-ious users. Within the schema, objects cannot have duplicate names. However, objects can have the
same name if they exist in different schemas. For example, if a table calledInventoryis created in the
schemaSaleson the server AughtEight, its name becomesAughtEight.Sales.Inventory. An
addi-tional table calledInventorycan still be created in theMarketingschema, and its name would be
AughtEight.Marketing.Inventory<sub>. Although this is possible, it is not a good idea, in my opinion, as</sub>
</div>
<span class='text_page_counter'>(189)</span><div class='page_container' data-page=189>
be used by the database administrator to control access to all objects within the schema. This is covered
in detail in Chapter 6.
In SQL Server 2008, a database principal is assigned ownership of a schema, and that schema owns the
constituent objects such as tables, views, stored procedures, and functions. If a user who owns a schema
needs to be deleted, ownership of that schema will have to be assigned to a different user first. The easiest
solution is to have thedbouser own all the schemas. Thedbouser is a built-in user that is mapped to any
member of the fixed server rolesysadmin. Thedbouser always exists and cannot be dropped, so it is a
perfect candidate for schema ownership. For more information about thedbouser, fixed server roles, and
SQL Server 2008 security, see Chapter 6.
Schemas and Name Resolution
Because schemas are just containers for objects, it is important to set the context of object references when
calling on database objects in SQL Server 2008. Every user is assigned a default schema. When he or she
logs in to a SQL Server and calls on database objects, this default schema will play a distinct role in how
the objects must be referenced.
For example, assume that a user named<i>FredF</i>is created in theAdventureWorks2008database and
assigned the default schema ofSales. If FredF logs in and executes the querySELECT * FROM CreditCard,
theCreditCardtable will be resolved toAdventureWorks2008.Sales.CreditCardbecause Fred’s default
schema isSales. TheSales.CreditCardtable exists, and so the contents of theCreditCardtable will be
returned.
If FredF executes the query SELECT * FROM Person, the table Personwill be resolved to
AdventureWorks2008.Sales.Person, a table that does not exist. Because SQL Server is unable to
find thePersontable in FredF’s default schema, it will default to thedboschema and look for the
AdventureWorks2008.dbo.Persontable, again with no success. SQL Server will then return the error:
"Invalid object name".
Schema Creation
To create a schema, the only required information is the name of the schema. The ownership of the
schema defaults to the user who runs the creation script, but any valid database user can be specified as
the owner. The simplest approach is to designatedboas the owner of the schema, but there are situations
in which it may be desirable to designate a regular user as the owner. The syntax and an example of the
CREATE SCHEMAstatement are as follows:
CREATE SCHEMA Schema_Name [ AUTHORIZATION owner ]
USE AdventureWorks2008
GO
CREATE SCHEMA Operations AUTHORIZATION dbo
Any schema-scoped statements that follow theCREATE SCHEMAstatement will fall into the scope of the
schema just created, as the following example illustrates:
USE AdventureWorks2008
GO
</div>
<span class='text_page_counter'>(190)</span><div class='page_container' data-page=190>
(DriverID int IDENTITY NOT NULL
,LName varchar(75) NOT NULL
,FName varchar(75) NOT NULL)
GRANT SELECT ON DeliveryDriver TO FredF
Even though the schema was not specified in theCREATE TABLE<sub>statement, this script places the</sub>
DeliveryDrivertable into theOperationsschema. Even theGRANT SELECTstatement succeeds,
although the schema was not designated in the statement it defaulted to theOperationsschema,
because theCREATE SCHEMAstatement set the scope of the schema for all remaining statements in the
batch. If the script is changed slightly so that theGRANT SELECTstatement is in a different batch, the
GRANT SELECTwill fail.
CREATE SCHEMA Operations AUTHORIZATION dbo
CREATE TABLE DeliveryDriver
(DriverID int IDENTITY NOT NULL
,LName varchar(75) NOT NULL
,FName varchar(75) NOT NULL)
GO
GRANT SELECT ON DeliveryDriver TO FredF
---Msg 15151, Level 16, State 1, Line 1
Cannot find the object ‘DeliveryDriver’, because it does not exist or you do
not have permission.
TheGOkeyword placed theGRANT SELECTstatement outside the batch that created the schema, and thus
the execution context reverted to that of the user executing the script. As a best practice, the schema of an
object should always be specified to avoid any unexpected results.
CREATE SCHEMA Operations AUTHORIZATION dbo
CREATE TABLE Operations.DeliveryDriver
(DriverID int IDENTITY NOT NULL
,LName varchar(75) NOT NULL
,FName varchar(75) NOT NULL)
GRANT SELECT ON Operations.DeliveryDriver TO FredF
Remember that schema scope resolution always starts at the user’s default schema and will revert to the
dboschema if a referenced object is not scope-qualified.
Schema Maintenance
As a precaution if you attempt to drop a schema that contains objects, an error will be generated as shown
in the following example:
DROP SCHEMA Operations
</div>
<span class='text_page_counter'>(191)</span><div class='page_container' data-page=191>
Cannot drop schema ‘Operations’ because it is being referenced by object
’DeliveryDriver’.
If the object in the schema is still required, it can be transferred to a different schema with the
ALTER SCHEMAstatement:
ALTER SCHEMA Production TRANSFER Operations.DeliveryDriver
This example alters the schemaProductionby moving the tableDeliveryDriverfrom theOperations
schema to theProduction<sub>schema. Because that was the last object in the schema, it can now be dropped.</sub>
Be advised, however, that transferring an object from one schema to another clears any permissions set
on the object.
A user who owns a schema cannot be dropped from the database, which is one of the reasons why
you may decide to have thedbouser own all schemas. To change the ownership of a schema, the
AUTHORIZATIONproperty of the schema is altered. The following example changes the ownership of
theOperationsschema to FredF:
ALTER AUTHORIZATION ON SCHEMA::Operations TO FredF
Tables
SQL Server 2008, like all relational database management systems, stores data in objects called<i>tables</i>. As
mentioned in Chapter 1, it is assumed in this book that you are at least familiar with relational database
concepts, so I won’t spend much time explaining what a table is or how to create them. What is pertinent
to the SQL Server 2008 database administrator is how to maintain and secure tables to optimize the
performance and security of the database. Security is discussed in detail in Chapter 6, so for this chapter,
the discussion is limited to the maintenance of data tables, but first a little background information is
required.
Table Collation
As discussed earlier in this chapter, when creating a database, collation support can be configured that is
different from that of the server. This is also true for table columns that contain character data. Each
col-umn can be defined with a different collation setting. For example, the AdventureWorks Cycles company
wants to enable customers from all over the world to browse and search the product catalog in their own
languages. To enable this functionality, aGlobalProductDescriptiontable is built with the following
script:
USE AdventureWorks2008
GO
CREATE TABLE Production.GlobalProductDescription(
ProductDescriptionID int IDENTITY(1,1) NOT NULL,
EnglishDescription nvarchar(400) COLLATE SQL_Latin1_General_CP1_CI_AS NULL,
FrenchDescription nvarchar(400) COLLATE French_CI_AS NULL,
</div>
<span class='text_page_counter'>(192)</span><div class='page_container' data-page=192>
Each column is now sorted and searchable using the native language collation settings as defined in
the business requirement. Now, don’t let me mislead you. SQL Server definitely is not some kind of
universal translator. SQL Server just provides the framework for storing multiple languages. You will
have to arrange for the proper translation of the descriptions and place them in the appropriate columns,
and handle any collation incompatibilities that arise because oftempdb’s collation. For more information
on collation, see Chapter 2.
Table Architecture
As discussed in Chapter 4, SQL Server uses 8-KB data pages to store information. All data within a table
is stored within these data pages, but how the data on the pages is organized will differ depending on
how you create the table and what you do with it after creation. By default, all data will be stored in an
unorganized manner formally called a<i>heap</i>. SQL Server makes no attempt to keep the data organized or
sorted in any way and maintains no links between the pages. The following code creates a table that is
stored in such a way:
CREATE TABLE Employee(
EmployeeId int IDENTITY,
FirstName nvarchar(25) NOT NULL,
MiddleName nvarchar(25) NULL,
LastName nvarchar(25) NOT NULL,
HireDate smalldatetime
)
Although this arrangement works great for adding data to a table, it is less than an optimum solution
when trying to find a particular row or set of rows in a table. Think of a library. If you managed a library
that put all the books on shelves as they came in with no regard to genre, author, or title, it would take
very little effort to shelve the books as they came in. However, when it came time to find a particular
book, you would be forced to scan through all the shelves looking for the one book you wanted. This is
exactly how SQL Server works when it is looking for a record in a heap. Later on in the chapter, we will
take a look at indexes and see how they can help with this problem, but first, let’s look at how breaking
up the table into smaller chunks can help.
Partitioning Tables
SQL Server physically stores all data pages in logical units called<i>partitions</i>. Unless specifically separated,
tables are stored in a single partition defined on a single filegroup. However, SQL Server provides the
ability to separate large tables into smaller manageable units by horizontally partitioning the tables across
multiple files managed by filegroup definitions.
<i>The Table Partitioning feature is available only in the Enterprise and Developer editions of SQL Server</i>
<i>2008.</i>
For example, a transaction table with millions of rows can be physically partitioned so that all the
trans-actions for the current year are separated from those for previous years. This way, only a subset of the
table will need to be scanned to select, insert, or update current-year transactions.
To illustrate the advantages of physical table partitioning and demonstrate how to implement them,
you must first build a table that is a candidate for partitioning. Using the following script, create the
</div>
<span class='text_page_counter'>(193)</span><div class='page_container' data-page=193>
USE AdventureWorks2008
GO
CREATE TABLE dbo.Transactions(
TransactionID int NOT NULL,
ProductID int NOT NULL,
ReferenceOrderID int NOT NULL,
ReferenceOrderLineID int NOT NULL,
TransactionDate datetime NOT NULL,
TransactionType nchar(1) NOT NULL,
Quantity int NOT NULL,
ActualCost money NOT NULL,
ModifiedDate datetime NOT NULL)
To populate the newTransactionstable, insert all the rows from theTransactionHistoryand
TransactionHistoryArchivetables by using aUNIONoperator:
USE AdventureWorks2008
GO
INSERT dbo.Transactions
SELECT * FROM Production.TransactionHistory
UNION ALL
SELECT * FROM Production.TransactionHistoryArchive
Now that you have a nice-size table to work with, run a query against it to see the performance before
partitioning. The table contains a total of 202,696 rows. Of the transaction rows in the table, 12,711 took
place in 2001, 38,300 in 2002, 81,086 in 2003, and 70,599 took place in 2004.
--Pre Partition Statistics
USE AdventureWorks2008
GO
DBCC DROPCLEANBUFFERS
SET STATISTICS IO ON
DECLARE @BeginDate AS datetime, @EndDate AS datetime
SET @BeginDate = ‘2002-01-01’
SET @EndDate = ‘2002-12-31’
SELECT SUM(Quantity) AS TotalQuantity, SUM(ActualCost) AS TotalCost
FROM dbo.Transactions
WHERE TransactionDate BETWEEN @BeginDate AND @EndDate
The script uses theDBCC DROPCLEANBUFFERScommand to clear all pages from the buffer cache. This will
allow us to see how many physical Reads are required to bring all needed data into memory. It also turns
on statistic reporting with theSET STATISTICS IO ON<sub>option and then queries the</sub>dbo.Transactions<sub>table</sub>
to return the total sales amount and total quantity of products sold in 2002.
The results of the query are as follows:
TotalQuantity TotalCost
---
---1472494 16427929.3028
(1 row(s) affected)
</div>
<span class='text_page_counter'>(194)</span><div class='page_container' data-page=194>
<i>In order to see the results as shown above, you must have the results of the query displayed as text. You</i>
<i>can do this by pressing [Ctrl]+T prior to running the query. To switch back to grid view, press [Ctrl]+D</i>
<i>and re-run the query.</i>
As you can see, to satisfy the query, SQL Server had to scan the table. To find the 38,300 rows that met
the criteria of theWHERE<sub>clause, SQL Server had to scan through 202,696 rows. This scan resulted in 1,408</sub>
logical reads.
Now, let’s see what happens when you physically divide the table into multiple files by partitioning the
table so that all the transactions are divided by year.
In a perfect world, you would know that you wanted to physically partition a table before you ever
populated it with data, but perfect worlds are rare. In this case, you have decided to physically partition
theTransactionstable after it has been built. Since the data is stored in a heap, you are forced to create a
new partitioned table and move the data to it, and then drop the original table. (I will show you a much
easier way to accomplish this later in the chapter.)
The first step in partitioning the table is to create the filegroups that will hold the data files to be used to
store the partitions of the table. Remember from the previous discussion on filegroups that tables cannot
be assigned to a particular file, only to a filegroup. In this example, each filegroup will contain only one
file. This is by no means a requirement. Partitions can be defined to exist on a single file or multiple
files.
The following script adds four new filegroups with one file per filegroup to contain the
parti-tioned transaction table. As the names suggest, you will be partitioning theTransactionstable
by date:
USE MASTER
GO
ALTER DATABASE AdventureWorks2008
ADD FILEGROUP FGPre2002
GO
ALTER DATABASE AdventureWorks2008
ADD FILE
( NAME = ‘AworksPre2002’
, FILENAME = ‘E:\SQLData\AworksPre2002.ndf’
, SIZE = 20MB
, FILEGROWTH = 20% )
TO FILEGROUP FGPre2002
GO
ALTER DATABASE AdventureWorks2008
ADD FILEGROUP FG2002
GO
ALTER DATABASE AdventureWorks2008
ADD FILE
( NAME = ‘Aworks2002’
, FILENAME = ‘E:\SQLData\Aworks2002.ndf’
, SIZE = 20MB
, FILEGROWTH = 20% )
TO FILEGROUP FG2002
GO
</div>
<span class='text_page_counter'>(195)</span><div class='page_container' data-page=195>
ADD FILEGROUP FG2003
GO
ALTER DATABASE AdventureWorks2008
ADD FILE
( NAME = ‘Aworks2003’
, FILENAME = ‘E:\SQLData\Aworks2003.ndf’
, SIZE = 20MB
, FILEGROWTH = 20% )
TO FILEGROUP FG2003
GO
ALTER DATABASE AdventureWorks2008
ADD FILEGROUP FG2004AndAfter
GO
ALTER DATABASE AdventureWorks2008
ADD FILE
( NAME = ‘Aworks2004AndAfter’
, FILENAME = ‘E:\SQLData\Aworks2004AndAfter.ndf’
, SIZE = 20MB
, FILEGROWTH = 20% )
TO FILEGROUP FG2004AndAfter
GO
<i>This script assumes the presence of an ‘‘E’’ drive and a SQLData folder. To run it in your environment,</i>
<i>you may have to change the drive letter assignment.</i>
The next step in partitioning theTransactionstable is to create a<i>partition function</i>.<i>Partition functions</i>
determine the boundaries for each partition. You must specify what data type the function will work
with during creation. All data types are valid with the exception of alias data types, CLR types, or any of
the following:text,ntext,image,xml,timestamp,varchar(max),nvarchar(max), orvarbinary(max).
For example, the partition function will specify what the ranges of values are (as in 1 through 100,000,
100,001 through 1,000,000, etc.). Keep in mind that when specifying a partitioning function, you can only
partition on a single value.
In this example, all data is partitioned by date in order to group together the data in accordance to the
most frequent queries run against the table. Run the following script to create a partition function that
partitions a table into four groups of dated records. The first group is from NULL to 12/31/2001. The
second group is from 1/1/2002 to 12/31/2002. The third group is from 1/1/2003 to 12/31/2003, and the
last group is from 1/1/2004 to INFINITY.
CREATE PARTITION FUNCTION YearFunction (datetime)
AS RANGE RIGHT FOR VALUES (’1/1/2002’,’1/1/2003’,’1/1/2004’)
When creating a partition function, the optionRANGE RIGHTorRANGE LEFTcan be used. This is used to
determine which partition the row will be stored in if the value the table is partitioned on is equal to the
boundary value. For example, if you useRANGE LEFTand the value is equal to the boundary value, then
the row would be stored in the partition to the left of the boundary. If you were to use theRANGE RIGHT
partition function created in the previous script and insert a transaction into your table with a transaction
date of 1/1/2003, then the record would be placed into the third group.
</div>
<span class='text_page_counter'>(196)</span><div class='page_container' data-page=196>
the partition scheme, you must specify the same number of filegroups as partitions that are defined by the
partition function. Run the following script to create a partition scheme that maps the partitions created
by theYearFunctionto the filegroups that you created earlier:
CREATE PARTITION SCHEME YearScheme
AS PARTITION YearFunction
TO (FGPre2002, FG2002, FG2003, FG2004AndAfter)
If you wanted to partition the table but store all of the partitions on the same filegroup, you have two
choices: You could repeat the filegroup name for each partition or use theALL TO<sub>option with a single</sub>
filegroup, for example,ALL TO ([PRIMARY]).
You can also specify one additional filegroup following the last one. This filegroup is marked as the
‘‘next’’ filegroup to be used if another partition is created.
All that is left to do now is to create the actual partitioned table and move the data from the original
Transactionstable into it:
USE AdventureWorks2008
GO
CREATE TABLE dbo.PartitionedTransactions(
TransactionID int NOT NULL,
ProductID int NOT NULL,
ReferenceOrderID int NOT NULL,
ReferenceOrderLineID int NOT NULL,
TransactionDate datetime NOT NULL,
TransactionType nchar(1) NOT NULL,
Quantity int NOT NULL,
ActualCost money NOT NULL,
ModifiedDate datetime NOT NULL)
ON YearScheme(TransactionDate)
GO
INSERT INTO dbo.PartitionedTransactions
SELECT * FROM dbo.Transactions
When creating partition functions and partition schemes, remember that they can be used to partition
as many tables as needed. TheYearFunctionandYearSchemecan be used to partition any table in the
AdventureWorks2008database that has adatetimecolumn in it.
To see if you have improved the performance of your query, run the same query that you ran before on
theTransactionstable:
--Post Partition Statistics
DBCC DROPCLEANBUFFERS
SET STATISTICS IO ON
SELECT SUM(Quantity) AS TotalQuantity, SUM(ActualCost) AS TotalCost
FROM dbo.PartitionedTransactions
WHERE TransactionDate BETWEEN ‘1-1-2002’ AND ‘12-31-2002’
The results of the query are as follows:
</div>
<span class='text_page_counter'>(197)</span><div class='page_container' data-page=197>
---
---1472494 16427929.3028
(1 row(s) affected)
Table ‘PartitionedTransactions’. Scan count 1, logical reads 266, physical reads 5,
read-ahead reads 259, lob logical reads 0, lob physical reads 0, lob read-ahead
reads 0.
Now that the table is physically partitioned, the logical Reads required to retrieve the results have gone
from 1,408 to 266. The decrease in I/O cost will also cause a decrease in CPU cost, resulting in a much
more efficient query. Keep in mind that the savings in performance are on a table with only 202,696 rows.
Imagine the savings if the table contained 10 years of data comprising millions of rows and the partitions
were defined on each year. The savings when querying a specific year would be much more dramatic.
Although creating partitioned tables was available in SQL Server 2005, the only way to do it was with
code. I don’t have a problem with writing scripts every once and awhile, but if I can use the GUI to write it
for me, I am all over it. SQL Server Management Studio now has the ability to not only create partitioned
tables, but also to generate the script for it so that you could run it on any server. Another benefit is that it
could perform the operation in place so that you don’t have to worry about creating a new table and
mov-ing the data into it. Let’s walk through the process of partitionmov-ing theProduction.TransactionHistory
table in the AdventureWorks2008 database.
<i>If you were following along with the last section, you will need to drop the table, partition function, and</i>
<i>partition scheme in order to do the next section. The following script will accomplish this for you:</i>
IF EXISTS (SELECT * FROM sys.tables WHERE object_id =
OBJECT_ID(’dbo.PartitionedTransactions’))
DROP TABLE dbo.PartitionedTransactions
IF EXISTS
(SELECT * FROM sys.partition_schemes WHERE Name = ‘YearScheme’)
DROP PARTITION SCHEME YearScheme
IF EXISTS
(SELECT * FROM sys.partition_functions WHERE Name = ‘YearFunction’)
DROP PARTITION FUNCTION YearFunction
To partition a table from SQL Server Management Studio, right-click on the table you wish to partition,
select Storage, and then ‘‘Create Partition,’’ as shown in Figure 5-11.
Figure 5-11: Creating a partition using Management Studio.
</div>
<span class='text_page_counter'>(198)</span><div class='page_container' data-page=198>
Figure 5-12: Select a Partitioning Column page.
After clicking Next, you will need to choose the partitioning function that you would like to use (see
Figure 5-13). If you choose to use an existing function, you will only be able to choose a function that
can be used with the column that you selected in the previous page. If there are no partition functions
defined in the database for the data type of your selected column, then you will be have to create a new
one. Type a name for the new partition function, and click Next.
Now a partitioning scheme needs to be selected for the table (see Figure 5-14). If there is a partition
scheme available that has the correct number of filegroups defined for the choosen funtion then it can be
reused; otherwise, a new one will need to be created. Click Next to continue.
The Map Partitions page (see Figure 5-15) is used to define the boundaries of the partition function
and the mapping between the partitions and filegroups. If the partition column is adate<sub>,</sub>datetime<sub>,</sub>
smalldatetime,datetime2, ordatetimeoffset, then the ‘‘Set boundaries’’ button will be enabled. This
allows a very quick way of defining the boundary points for the partition function by specifying the Start
Date, End Date, and the Date Range. You can create partitions that are broken up by Day, Month, Quarter,
Half-Year, or Year. Once the partitions are defined, they need to be mapped to the desired filegroups. The
filegroups must already exist and cannot be created at this point. When defining the mapping, the last
one will not map to a boundary point. The filegroup is not marked as the next filegroup but the filegroup
that the last partition is placed in. See Figure 5-16 for the completed dialog box.
</div>
<span class='text_page_counter'>(199)</span><div class='page_container' data-page=199>
Figure 5-13: Select a Partition Function page.
</div>
<span class='text_page_counter'>(200)</span><div class='page_container' data-page=200>
Figure 5-15: Map Partitions page.
Figure 5-16: Set Boundaries dialog.
Data Compression
SQL Server 2008 introduces the ability to compress data in tables, indexes, or partitions. This can save I/O
requests since more data on each page equals fewer pages to read into memory. Additionally, because
more data is stored on each data page, more data can be stored in the same amount of memory. The
combination of lower I/O and having more data in memory usually translates to increased performance.
Data compression is enabled using one of two different modes: row compression or page compression.
Row Compression
</div>
<!--links-->
<a href='o/'>www.dbebooks.com - Free Books & magazineswww.it-ebooks.info</a>
<a href=''>www.wiley.com</a>
Sams Microsoft SQL Server 2008- P1
- 50
- 452
- 0


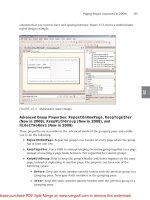


.push({});</script> </div> </div> </div> <div class="vf_link_relate px-2 my-2"> <h2 class="vf_doc_relate text-2xl font-bold my-4">Tài liệu liên quan</h2> <ul class="grid grid-cols-12 gap-2"> <li class="col-span-6 md:col-span-2"> <div class="card-doc " onclick="actionDocRelated(this)"> <a class="card-doc-img" href="https://text.123docz.net/document/701715-sams-microsoft-sql-server-2008-p1.htm" title="Sams Microsoft SQL Server 2008- P1"> <i class="icon i_type_doc i_type_doc2"></i> <img class="lazy" src="data:image/gif;base64,R0lGODlhAQABAIAAAP///wAAACH5BAEAAAAALAAAAAABAAEAAAICRAEAOw==" data-src="https://media.store123doc.com/images/document/13/to/yq/medium_yqq1382584504.jpg" width="124" height="179" alt="Sams Microsoft SQL Server 2008- P1" onerror="this.src=)