Tài liệu Parallel Blend OptionPro/ENGINEER docx
Bạn đang xem bản rút gọn của tài liệu. Xem và tải ngay bản đầy đủ của tài liệu tại đây (488.53 KB, 18 trang )
ME-430 INTRODUCTION TO COMPUTER AIDED DESIGN
Windmill – Parallel Blend Option
Pro/ENGINEER Wildfire 2.0
Dr. Herli Surjanhata
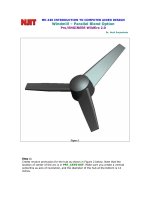
Figure 1
Step 1:
Create revolve protrusion for the hub as shown in Figure 2 below. Note that the
location of center of the arc is in PRT_CSYS-DEF. Make sure you create a vertical
centerline as axis of revolution, and the diameter of the hub at the bottom is 14
inches.
Figure 2 Revolve section of the hub
Step 2:
Click the Create datum plane icon
to create
a new datum plane DTM1 through axis A_2, and -
30º angle with FRONT datum plane.
Pick the A-2 axis, and while holding down Ctrl key,
pick FRONT datum plane.
Enter Value for rotation - 30°
Figure 3
Step 3:
From Insert pull down
menu, select Blend ->
Protrusion
For the Blend option, select Parallel -> Regular Sec ->
Sketch Sec -> Done.
Smooth blend is used to for blending the three sections of
the blade.
Smoth -> Done
Use DTM1 as sketching plane, and TOP datum plane as top reference. Pick the A_2
axis and TOP datum plane as the references.
Create THREE sections as shown in the Figures 4, 5 and 6.
Be sure to use
to create points needed to locate the
centerlines and location of the center of the circular part of the
section.
Sketch the first section as shown in Figure 4. Click
icon to continue, and from
Sketch pull-down menu, select Feature Tools -> Toggle section.
Continue with sketching the second section as shown in Figure 5, click
icon to
continue, and from Sketch pull-down menu, select Feature Tools -> Toggle
section.
And finally sketch the third section as shown in Figure 6. When you are done,
click
icon to continue, Blind -> Done.
Enter 17.5 inches for the depth
between sections.
Select OK button
Figure 4 – Section 1. Note that the arcs dimension is in diameter.
Figure 5 – Second Section shown in red
Figure 6 – The last section shown in red. Note that Section 1 is the largest, and
sketched in DTM1. Section 2 is the second largest and third section is smallest
representing the tip of the blade.


