Tài liệu Pages Fromdigital Matte Painting - Phần 1 pdf
Bạn đang xem bản rút gọn của tài liệu. Xem và tải ngay bản đầy đủ của tài liệu tại đây (1.61 MB, 23 trang )
1
Image by Yanick Dusseault aka Dusso
1
Digital Matte Painting
Techniques, Tutorials & Walk-Throughs
Collected and Compiled from a wide range of Online-Resources
Being in love with the art of Matte Painting, I collected these tutorials over one year from numerous online-
resources and eventually compiled them into this document. Originally intended for personal use only, I thought
that maybe some people out there might be interested too, so I deceided to relase them to the public. No big thing,
and defenitely nothing new – I just gathered these tutorials to have them all in one place. And if any – or all – of
these tutorials happen to be new to you – even better!
A great thanks goes out to all the artist who put a lot of their time and energy into the creation of these tutorials.
Happy painting!
MBP aka Bass.T , 12/04
2
Image by Dylan Cole
3
The Photoshop 7 Paint Engine
Part 1
Defining a custom brush tip shape
by David Nagel
Slap on your smocks and bust out your easels! We're getting down and
dirty with some natural media effects in Photoshop 7's Paint Engine. Yes,
this week we leave the timid realm of compositing for a while and kick
off a new series exploring the sloppy side of digital art.
This new series was prompted, I suppose, by the overwhelming interest in
the Nagel Series 1 Brushes I posted here on DMN a few weeks back. (My
DMN subscribers can access the ad-free version of that story here.)
Rather than answering every single "How'd you do that?" e-mail I've
received on the subject, I thought I'd take the opportunity to walk you
through the process and hopefully teach you some tricks with the
Photoshop 7 Paint Engine along the way.
We begin today with a look at creating custom tip shapes for our paint
brushes. Granted, the tip shapes are just minor details in the overall functionality of the Paint Engine. But they do
constitute the first step along the way of creating your own brushes that can go way beyond those included in the
default Photoshop 7 brush sets.
The basics
The creation of a custom tip shape can be as simple as placing a few dots on the canvas or as complex as
generating recursive tips that build upon the foundation of a basic brush tip shape. For our example today, we'll
look at the method used to create some of the "cloth" shapes used in the Nagel Series 1 Brushes. begin with a fairly
large canvas--say 300 x 300 pixels--so that you can have some maneuvering room for the tip shape creation
process. Then follow these steps.
1. First, define an irregular area on the canvas using the Lasso tool. After you've created the shape, hold down the
Option key and use the Lasso tool to cut into the shape to create something of the effect of creases or gaps.
4
2. Fill the shape with black or dark gray using the Paint Bucket tool. You can use other colors, but keep in mind that
when we actually get to the step of defining our shape as a brush, Photoshop will use luminosity information as
part of the shape's definition. Grays and black are the easiest to work with for this purpose.
3. Choose Select > Feather, and feather the shape by about 15 pixels.
4. Choose Select > Inverse, and then hit your Delete or Backspace key two or three times. This will soften up the
outer edges of our shape, which is essential for this process.
5
5. Do some touch-up work. Go in with your Eraser tool to soften up the inner edges a bit. A well defined shape is
not going to work well for our purposes, so try to create some subtle gradations on the creases, while leaving
others intact. You might also go in with a soft-edged brush and add some black back into the shape.
6. Run a few filters on the current image. I like the Grain filter (Filter > Texture > Grain). I'll run it once with the
"Vertical" setting and once with the "Horizontal" setting. Then I'll apply the Texturizer filter to the image (Filter >
Texture > Texturizer) using the Canvas texture. Apply whatever other filters you think might make for a decent
cloth look.
7. Now choose Edit > Define Brush. When the dialog box pops up, name it "Phase 1," owing to the fact that we're
not done yet. At this stage, you now have a fully functional cloth-like brush.
6
Getting recursive
Now we want to do more with this tip shape, so we'll do a little recursion. There are several ways to accomplish
this, and I'm not going to get to all of them here. I want to save some of this for future installments in this series.
Now, what do I mean by "recursion?" I mean we want to use our "Phase 1" brush as the basis for building a more
interesting tip shape. It's decent in and of itself, but we can certainly create variations with more detail and less of
a pre-defined look.
To begin, save your current document in case you want to work on it more later. Then open up a new, blank
document with transparency. You might want to make this one a little bigger than the first, say 500 x 500 pixels to
give yourself more arbeitsraum.
The first method you can use is to paint on your canvas using the Phase 1 brush. Just draw a few overlapping
strokes, trying to obliterate some of the repetitive details in the process.
When you're done, once again choose Edit > Define Brush, and call it "Phase 2." You'll have a whole new tip shape
based on the first tip shape.
Another method--and one that I much prefer--is to play with Photoshop's dynamics before doing this. I'll give you
three good methods for doing this.
Open up your Brushes palette, and choose "Shape Dynamics." Set "Size Jitter" down to 0%, but crank "Angle Jitter"
up to 100%. Next, go to the Scattering settings in the Brushes palette, and turn on Scattering. Leave it around 90%
to 100%. You don't want to go nuts with this, or your brushes will go off the canvas, and you'll be left with hard
edges. Finally, go to Opacity Jitter in the Brushes palette. If you have a Wacom tablet, turn the jitter to 0%, but set
the control to "Pen Pressure." This will allow you to control the opacity of your stroke with your pen. If you don't
have a tablet, turn the control off, but set the jitter to some value between 50% and 100%.
7
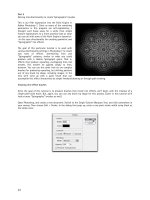
Now position your cursor near the center of your canvas and draw a short stroke.
Notice how the texture in your tip shape is more random? This makes for a much better natural media look. You
might then also go in with a white color on top of the black to bring out some of the detail that can be lost in the
center of the stroke.


