Tài liệu Thiết kế flash với flash cs5 part 37 doc
Bạn đang xem bản rút gọn của tài liệu. Xem và tải ngay bản đầy đủ của tài liệu tại đây (629.21 KB, 5 trang )
ptg
246
Chapter 8
Wondering where Timeline Effects have gone in Flash. They are now a
part of the Motion Editor. You can add many Timeline Effects by using
filters in the Motion Editor. You can add filter effects, such as Drop
Shadow, Blur, Glow, Bevel, Gradient Glow, Gradient Bevel, and Adjust
Color, to a motion tween. You can also add color effects, such as
Alpha, Brightness, Tint and Advanced Color, to a motion tween. You can
apply more than one effect or filter to an object to create a different
effect. If an applied color effect or filter doesn’t work for you, you can
remove it.
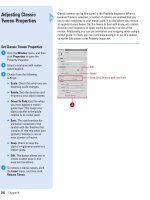
Adding Color Effects
and Filters
Add Color Effects and Filters to a
Motion Tween
Select an object on the Stage with
a tween applied.
Click the Window menu, and then
click Motion Editor to open the
panel.
Click the triangle to expand the
Color Effect or Filters category.
Use any of the following:
◆
Color Effect. Click the Add
button on the Color Effect
category, and then select an
option.
The options include Alpha,
Brightness, Tint, and Advanced
Color.
◆
Filters. Click the Add button on
the Filters category, and then
select an option.
The options include Drop
Shadow, Blue, Glow, Bevel,
Gradient Glow, Gradient Bevel,
and Adjust Color.
Specify the options you want for
the category; options vary
depending on the color effect or
filter that you choose.
5
4
3
2
1
1
Drop Shadow
filter
Bevel filter
Gradient Grow
and Blur filters
3
1
2
4
5
From the Library of Wow! eBook
ptg
Chapter 8 Animating with Motion Tweening
247
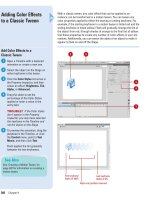
Work with Color Effects and
Filters
Select an object on the Stage with
a tween applied.
Click the Window menu, and then
click Motion Editor to open the
panel.
Click the triangle to expand the
Color Effect or Filters category.
Specify the options you want for
the category; options vary
depending on the color effect or
filter that you choose.
To remove a color effect or filter,
click the Remove button on the
Color Effect or Filter category, and
then select the effect or filter that
you want to remove.
To reset values back to the default,
click the Reset Values button for
the effect or filter.
6
5
4
3
2
1
1
2
6
3
4
5
From the Library of Wow! eBook
ptg
248
Chapter 8
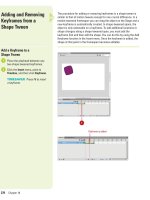
When you select a tween space, a tweened object, or motion path, the
Motion Editor panel displays tween property values in categories and a
grid with a graph for each property. Each keyframe property for a spe-
cific property appears as a control point on the graph. You can add or
remove a property keyframe at any time. Control points can be either
smooth or corner points. When a point is smooth, Bezier handles
appear, which you can adjust. Some properties in the Motion Editor are
associated with each other, such as Scale X and Scale Y. You can use
the Link icon to constrain values to match to each other.
Working with
Property Keyframes
Work with Property Keyframes
Select an object on the Stage with
a tween applied.
Click the Window menu, and then
click Motion Editor to open the
panel.
Click the triangle to expand a
category.
To work with property keyframes,
do any of the following:
◆
View. Click the Go To Previous
Keyframe or Go To Next
Keyframe arrows.
◆
Add. Place the playhead where
you want to property keyframe,
and then click the Add or
Remove Keyframe button.
◆
Remove. Right-click (Win) or
Control-click (Mac) the control
point in the graph, and then
click the Remove Keyframe.
◆
Smooth or Corner. Alt-click
(Win) or Command-click (Mac)
the control point to toggle
between smooth and corner.
◆
Link. Click the Link icon to
constrain values to match for
associated pairs. Click the icon
again to unlink a pair.
4
3
2
1
3
1
Control points
Go To Preview/next keyframe
2
Add or Remove keyframe
From the Library of Wow! eBook
ptg
Chapter 8 Animating with Motion Tweening
249
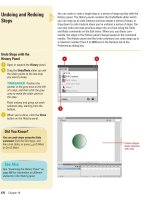
If you want to change the x-, y-, or z-axes, it’s easier to make bigger
adjustments in the motion path of a tween on the Stage and minor ones
in the Motion Editor. You can move the entire motion path to another
location on the Stage or edit individual points on the path. If segments
within the path become to fast or slow, you can use the roving property
for the x-, y-, and z- axes to make the speed consistent throughout the
tween.
Editing the Path of a
Motion Tween
Edit the Path of a Motion Tween
Select an object on the Stage with
a tween applied.
To make changes directly on the
Stage, do any of the following:
◆
Object Position. Place the
playhead in the frame you want
to move, click the Selection
tool, and then drag the target
object to a new location.
◆
Motion Path Position. Click the
Selection tool, click the motion
path, and then drag the path.
◆
Motion Path Size. Click the
Free Transform tool, click the
motion path, and then drag a
resize handle.
◆
Motion Path Shape. Click the
Selection tool, click away from
the motion path, and then drag
any line segment on the path.
Click the Subselection tool,
click the path, and then drag a
control point to move it, or click
a control point, and then drag
the Bezier handles of the
control point to reshape it.
◆
Delete Motion Path. Click the
Selection tool, double-click the
motion path, and then press
Delete.
◆
Roving. Right-click (Win) or
Control-click (Mac) the tween
span or an individual control
point in a Motion Editor graph,
and then click Roving to toggle
on and off.
2
1
1
Path
2
Subselection tool
Selection tool
Free Transform tool
From the Library of Wow! eBook
ptg
250
Chapter 8
If you have a complex animation in the timeline that you want to con-
vert into ActionScript 3.0 code, you can use the Copy Motion as
ActionScript 3.0 command to get the job done. When you use the com-
mand, Flash copies the properties that define the motion tween on the
timeline and writes the ActionScript 3.0 code for you to apply to a sym-
bol. You can apply the code as timeline code or in class files for the
Flash document file.
Copying Motion as
ActionScript
Copy Motion as ActionScript 3.0
Create the animation using a
symbol on the timeline in a layer
that you want to copy as
ActionScript 3.0 code.
Create a new layer.
Create a new symbol or drag
another instance of your existing
symbol on the Stage.
Select the entire animation that
you want to copy on the animation
layer of the timeline. Click the first
frame, press Shift, and then click
the last frame.
Right-click (Win) or Control-click
(Mac) the animation, and then
click Copy Motion as ActionScript
3.0.
Type an instance name to use in
the ActionScript code. Enter the
instance name of the instance that
you want to apply the ActionScript
code to.
Select your second instance that
you added to layer 2 (from Step 2),
and type the instance name you
entered into the Properties panel.
Create a new layer (for the
ActionScript), and select the first
frame of that layer.
Open the Actions panel and paste
the code into the Script pane.
Before you test the animation,
make sure layer 2 has the same
number of frames as the animation
layer.
9
8
7
6
5
4
3
2
1
1
42 8
3
5
9
Pasted ActionScript 3.0 code
6
From the Library of Wow! eBook