Tài liệu Lab 6.1.6 Configuring Static Routes doc
Bạn đang xem bản rút gọn của tài liệu. Xem và tải ngay bản đầy đủ của tài liệu tại đây (162.94 KB, 6 trang )
1 - 6 CCNA 2: Routers and Routing Basics v 3.0 - Lab 6.1.6 Copyright 2003, Cisco Systems, Inc.
Lab 6.1.6 Configuring Static Routes
Objective
• Configure static routes between routers to allow data transfer between routers without the use of
dynamic routing protocols.
Background/Preparation
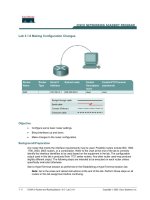
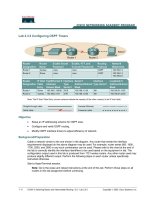
Setup a network similar to the one in the previous diagram. Any router that meets the interface
requirements may be used. Possible routers include 800, 1600, 1700, 2500, 2600 routers, or a
combination. Refer to the chart at the end of the lab to correctly identify the interface identifiers to be
used based on the equipment in the lab. The configuration output used in this lab is produced from
1721 series routers. Any other router used may produce slightly different output. The following steps
are intended to be executed on each router unless specifically instructed otherwise.
Start a HyperTerminal session as performed in the Establishing a HyperTerminal session lab.
Note: Go to the erase and reload instructions at the end of this lab. Perform those steps on all
routers in this lab assignment before continuing.
Step 1 Configure both routers
a. Enter the global configuration mode and configure the hostname as shown in the chart. Then
configure the console, virtual terminal, and enable passwords. If there are any difficulties, refer to
2 - 6 CCNA 2: Routers and Routing Basics v 3.0 - Lab 6.1.6 Copyright 2003, Cisco Systems, Inc.
the Configuring router passwords lab. Configure interfaces and IP host tables. If there are any
difficulties, refer to the Configuring Host Tables lab.
Step 2 Configure the workstations
Configure the workstations with the proper IP address, subnet mask, and default gateway.
a. Check connectivity between the workstations using ping.
C:\>ping 192.168.16.2
Pinging 192.168.16.2 with 32 bytes of data:
Request timed out.
Request timed out.
Request timed out.
Request timed out.
Ping statistics for 192.168.16.2:
Packets: Sent = 4, Received = 0, Lost = 4 (100% loss),
Approximate round trip times in milli-seconds:
Minimum = 0ms, Maximum = 0ms, Average = 0ms
b. Was the ping successful?
__________________________________________________
c. Why did the ping fail?
______________________________________________________
Step 3 Check interface status
a. Check the interfaces on both routers with the command show ip interface brief.
b. Are all the necessary interfaces up?
____________________________________________
Step 4 Check the routing table entries
a. Using the command show ip route, view the IP routing table for GAD.
GAD>show ip route
output eliminated
Gateway of last resort is not set
C 192.168.14.0/24 is directly connected, FastEthernet0
C 192.168.15.0/24 is directly connected, Serial0
b. Use the command show ip route, view the IP routing table for BHM.
BHM>show ip route
Output eliminated.
Gateway of last resort is not set
C 192.168.15.0/24 is directly connected, Serial0
C 192.168.16.0/24 is directly connected, FastEthernet0
c. Are all of the routes needed in the routing tables?
__________________________________
d. Can a host on subnet 192.168.16.0 see a host on network 192.168.14.0?
_________________
If a route is not in the routers to which the host is connected, the host cannot reach the
destination host.
3 - 6 CCNA 2: Routers and Routing Basics v 3.0 - Lab 6.1.6 Copyright 2003, Cisco Systems, Inc.
Step 5 Adding static routes
a. How can this situation be changed so that the hosts can ping each other?
Add static routes to each router or run a routing protocol.
b. In global configuration mode, add a static route on Router1 to network 192.168.16.0 and on
Router2 to network 192.168.14.0.
GAD(config)#ip route 192.168.16.0 255.255.255.0 192.168.15.2
BHM(config)#ip route 192.168.14.0 255.255.255.0 192.168.15.1
c. Why is a static route needed on both routers?
___________________________________
Step 6 Verify the new routes
a. Use the command show ip route, view the IP routing table for GAD.
GAD>show ip route
output eliminated
Gateway of last resort is not set
C 192.168.14.0/24 is directly connected, FastEthernet0
C 192.168.15.0/24 is directly connected, Serial0
S 192.168.16.0/24 [1/0] via 192.168.15.2
b. Using the command show ip route, view the IP routing table for BHM.
BHM>show ip route
Output eliminated.
Gateway of last resort is not set
S 192.168.14.0/24 [1/0] via 192.168.15.1
C 192.168.15.0/24 is directly connected, Serial0
C 192.168.16.0/24 is directly connected, FastEthernet0
c. Are all of the routes needed in the routing tables?
__________________________________
d. Can a host on subnet 192.168.16.0 see a host on network 192.168.14.0?
_________________
Step 7 ping host to host again
a. Check connectivity between the workstations using ping.
C:\>ping 192.168.16.2
Pinging 192.168.16.2 with 32 bytes of data:
Reply from 192.168.16.2: bytes=32 time=20ms TTL=254
Reply from 192.168.16.2: bytes=32 time=20ms TTL=254
Reply from 192.168.16.2: bytes=32 time=20ms TTL=254
Reply from 192.168.16.2: bytes=32 time=20ms TTL=254
Ping statistics for 192.168.16.2:
Packets: Sent = 4, Received = 4, Lost = 0 (0% loss),
Approximate round trip times in milli-seconds:
Minimum = 20ms, Maximum = 20ms, Average = 20ms
4 - 6 CCNA 2: Routers and Routing Basics v 3.0 - Lab 6.1.6 Copyright 2003, Cisco Systems, Inc.
b.
If the ping was not successful, check routing table to make sure static routes are entered
correctly.
Upon completion of the previous steps, logoff by typing exit. Turn the router off.
5 - 6 CCNA 2: Routers and Routing Basics v 3.0 - Lab 6.1.6 Copyright 2003, Cisco Systems, Inc.
Erasing and reloading the router
Enter into the privileged EXEC mode by typing enable.
If prompted for a password, enter class. If “class” does not work, ask the instructor for assistance.
Router>enable
At the privileged EXEC mode, enter the command erase startup-config.
Router#erase startup-config
The responding line prompt will be:
Erasing the nvram filesystem will remove all files! Continue?
[confirm]
Press Enter to confirm.
The response should be:
Erase of nvram: complete
Now at the privileged EXEC mode, enter the command reload.
Router(config)#reload
The responding line prompt will be:
System configuration has been modified. Save? [yes/no]:
Type n and then press Enter.
The responding line prompt will be:
Proceed with reload? [confirm]
Press Enter to confirm.
In the first line of the response will be:
Reload requested by console.
After the router has reloaded the line prompt will be:
Would you like to enter the initial configuration dialog? [yes/no]:
Type n and then press Enter.
The responding line prompt will be:
Press RETURN to get started!
Press Enter.
The router is ready for the assigned lab to be performed.


