Tài liệu Building a More Complex Application doc
Bạn đang xem bản rút gọn của tài liệu. Xem và tải ngay bản đầy đủ của tài liệu tại đây (44.52 KB, 6 trang )
Building a More Complex Application
In this section, you'll see a more complex Web form that uses Label, TextBox,
RadioButtonList, DropDownList, and RequiredFieldValidator controls. The form will
prompt the user for their name (a required field), favorite season (spring, summer, fall, or
winter), and gender (male or female). The form will also feature a Button control, which
when pressed will set the Text property of one of the Label controls to a string containing
the user's name, gender, and favorite season. Figure 15.4
shows how your final form will
appear.
Figure 15.4: The appearance of the final form
Perform the following steps:
1. To create the new project, select File ➣ New Project in VS .NET. Select Visual
C# Projects from the Project Types area on the left of the New Project dialog box,
and select ASP .NET Web Application from the Templates area on the right. Enter
http://localhost/MyWeb-Application2 in the Location field. VS .NET will
display a blank form to which you can add controls.
2. Now, add the four Label controls listed in Table 15.2
to your blank form. This
table shows the ID and Text property to set for each of your Label controls.
Table 15.2: Label CONTROLS
ID PROPERTY Text PROPERTY
HelloLabel Hello
NameLabel Enter your name
SeasonLabel Favorite season
Table 15.2: Label CONTROLS
ID PROPERTY Text PROPERTY
SexLabel Sex
3. Next, add a TextBox control to the right of NameLabel. Set the ID property for
your TextBox control to NameTextBox. The user will enter their name in
NameTextBox when the form is run.
4. We want the user to have to enter their name; if they don't, we want to display a
message prompting them to do so. To achieve this, you use a
RequiredFieldValidator control. Add a RequiredFieldValidator control below
NameTextBox. Set the ID property for your Required-FieldValidator control to
NameRequiredFieldValidator. Set the Text property to You must enter your name!
Finally, set the ControlToValidate property to NameTextBox.
5. Next, add a RadioButtonList control to the right of SeasonLabel. The user will
select their favorite season from this control. Set the ID property for your
RadioButtonList control to SeasonRadioButtonList. To add radio buttons to
SeasonRadioButtonList, click the ellipsis (…) button in the Items property. This
displays the ListItem Collection Editor, which you use to add, modify, or remove
items in the Items collection for the control. When the form is run, any items you
add to the collection are displayed as radio buttons. Figure 15.5
shows the
ListItem Collection Editor with the required entries for your form.
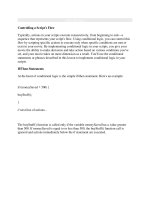
Figure 15.5: The ListItem Collection Editor
6. The Selected property indicates whether the item is initially selected in the running
form. The Text property contains the text displayed with the item. The Value
property is the returned value when the item is selected.
7. Now click the Add button to add the first item to your RadioButtonList control.
Set the Selected property for the item to True-this causes the radio button to be
initially selected. Set the Text property for the item to Spring; this is the text
displayed in the radio button. Set the Value property to 0; this is the actual value
selected. Table 15.3
shows the Selected, Text, and Value properties for this radio
button, along with the three other radio buttons to add to your RadioButtonList
control.
Table 15.3: RadioButtonList ITEMS
Selected PROPERTY Text PROPERTY Value PROPERTY
True Spring 0
False Summer 1
False Fall 2
False Winter 3
8. Next, add a DropDownList control to your form. This control will allow a user to
select their gender (male or female). Set the ID property for your DropDownList
control to SexDropDown-List. You add items to a DropDownList control using
the ListItem Collection Editor, which you access using the ellipsis button through
the Items property. Open the ListItem Collection Editor and add the items shown
in Table 15.4
.
Table 15.4: DropDownList ITEMS
Selected PROPERTY Text PROPERTY Value PROPERTY
True Male 0
False Female 1
9. Finally, add a Button control to your form. Set the ID property for your Button
control to OkButton, and set the Text property to Ok. Double-click OkButton to
edit the code for the OkButton_Click() method, and add the following lines of
code to this method:
10. HelloLabel.Text =
11. "Hello "+ NameTextBox.Text +
12. ", you are "+ SexDropDownList.SelectedItem.Text +
13. "and your favorite season is " +
14. SeasonRadioButtonList.SelectedItem.Text;
As you can see, this line sets the Text property for the HelloLabel control to a string
containing the user's entry in the NameTextBox, SexDropDownList, and
SeasonRadioButton controls.
Run your completed form by pressing Ctrl+F5. Press the OK button without entering a
name, and you'll see the message "You must enter your name!", as shown in Figure 15.6
.
This message comes from the NameRequiredFieldValidator control.
Figure 15.6: Message from the NameRequired-FieldValidator control
When you've finished running your form, close it and return to the VS .NET form
designer. You can view the HTML containing the ASP.NET tags for your form by
clicking the HTML link at the bottom of the form designer. Click the HTML link to view
the code for your form. Listing 15.3
shows the WebForm1.aspx file for the form. You'll
notice that this file contains the various controls that were added to the form.
Listing 15.3: THE WebForm1.aspx FILE
<%@ Page language="c#" Codebehind="WebForm1.aspx.cs"
AutoEventWireup="false"
Inherits="WebApplication2.WebForm1" %>
<!DOCTYPE HTML PUBLIC "-//W3C//DTD HTML 4.0 Transitional//EN" >
<HTML>
<HEAD>
<title>WebForm1</title>
<meta name="GENERATOR" Content="Microsoft Visual Studio 7.0">
<meta name="CODE_LANGUAGE" Content="C#">
<meta name="vs_defaultClientScript" content="JavaScript">
<meta name="vs_targetSchema"
content="
</HEAD>
<body MS_POSITIONING="GridLayout">
<form id="Form1" method="post" runat="server">
<asp:Label id="HelloLabel" style="Z-INDEX: 101; LEFT: 17px;
POSITION: absolute; TOP: 16px" runat="server"
Width="322px" Height="23px">Hello</asp:Label>
<asp:Label id="NameLabel" style="Z-INDEX: 102; LEFT: 17px;
POSITION: absolute; TOP: 54px" runat="server"
Width="114px" Height="22px">Enter your name</asp:Label>
<asp:Label id="SeasonLabel" style="Z-INDEX: 103; LEFT: 17px;
POSITION: absolute; TOP: 107px" runat="server"
Width="101px" Height="32px">Favorite season</asp:Label>
<asp:Label id="SexLabel" style="Z-INDEX: 104; LEFT: 17px;
POSITION: absolute; TOP: 221px" runat="server"
Width="33px" Height="15px">Sex</asp:Label>
<asp:TextBox id="NameTextBox" style="Z-INDEX: 105; LEFT: 130px;
POSITION: absolute; TOP: 51px" runat="server"
Width="135px" Height="30px"></asp:TextBox>
<asp:RequiredFieldValidator id="NameRequiredFieldValidator"
style="Z-INDEX: 106; LEFT: 130px; POSITION: absolute;
TOP: 84px" runat="server" ErrorMessage="RequiredFieldValidator"
ControlToValidate="NameTextBox">You must enter your name!
</asp:RequiredFieldValidator>
<asp:RadioButtonList id="SeasonRadioButtonList"
style="Z-INDEX: 107; LEFT: 130px; POSITION: absolute;
TOP: 107px" runat="server" Width="152px" Height="107px">
<asp:ListItem Value="0" Selected="True">Spring</asp:ListItem>
<asp:ListItem Value="1">Summer</asp:ListItem>
<asp:ListItem Value="2">Fall</asp:ListItem>
<asp:ListItem Value="3">Winter</asp:ListItem>
</asp:RadioButtonList>
<asp:DropDownList id="SexDropDownList" style="Z-INDEX: 108;
LEFT: 130px; POSITION: absolute; TOP: 220px" runat="server"
Width="90px" Height="27px">
<asp:ListItem Value="0" Selected="True">Male</asp:ListItem>
<asp:ListItem Value="1">Female</asp:ListItem>
</asp:DropDownList>
<asp:Button id="OkButton" style="Z-INDEX: 109; LEFT: 17px;
POSITION: absolute; TOP: 261px" runat="server"
Width="83px" Height="27px" Text="Ok"></asp:Button>
</form>
</body>
</HTML>
The WebForm1.aspx.cs file contains the code behind your form. You can view this code
by selecting View ➣ Code, or you can press F7 on your keyboard.