Tài liệu Sams Teach Yourself CSS in 24 Hours- P3 pdf
Bạn đang xem bản rút gọn của tài liệu. Xem và tải ngay bản đầy đủ của tài liệu tại đây (1.29 MB, 50 trang )
So far you have learned how to create CSS rules using simple selectors—type
selectors based on the HTML tag and class or id selectors based on attributes in
the HTML.
A type selector is simply the name of an HTML tag minus the
<> angle brackets. For
example:
h1 { color: blue; }
This selects all <h1> tags and specifies that they’re the color blue. Type selectors are the
easiest to use because they’re so straightforward, but they’re also very limited. What if
you want only some of the <h1> tags to be blue and others to be green? That’s when
you’d use class and id selectors.
82 Hour 5
Although I said type selectors had to be HTML tags, I must admit that’s only
half true. They actually have to be any sort of legitimate element for the
language you’re styling; this is how you can use CSS with XML, for example.
And in fact, you don’t have to have the actual tag present! HTML (but not
XML or XHTML) lets you leave out certain tag declarations entirely, such as the
<body> element. The opening and closing tags are implied. If you have a rule
based on body, such as ‘body { font-family: Arial; }’, a CSS-compliant
browser will still apply your font to the implied <body> even though no tags
are present.
In Hour 4, “Using CSS with HTML,” you learned how you can set class and id selec-
tors in your rules based on HTML attributes of class and id,such as
#here { font-size: large; }
.there { color: green; }
An id selector uniquely identifies part of a page, whereas a class selector allows you to
identify specific tags as being part of a certain set you’ve defined.
Using class and id Selectors
You can combine class selectors (or even id selectors) with <div> tags to desig-
nate specific sections of a page that should receive special styling. For example,
consider the HTML page shown in Listing 5.1, which has a class attribute set on
each <div> tag.
09 0672324091 ch05 6/13/02 10:39 AM Page 82
Please purchase PDF Split-Merge on www.verypdf.com to remove this watermark.
LISTING 5.1 HTML Sections Set via <div> and class
<! imgtip-5.1.html >
<! Accessibility tips for images >
<! By Kynn Bartlett, >
<html>
<head>
<title>Image Accessibility</title>
<link type=”text/css” rel=”stylesheet”
media=”screen” href=”tips-5.2.css”>
</head>
<body>
<div class=”nav”>
<a href=””>access.idyllmtn.com</a>
·
<a href=” />·
<! this page’s short title >
Images
</div>
<div class=”header”>
<h1>Image Accessibility</h1>
<h2>Making your graphics accessible</h2>
</div>
<div class=”tips”>
<p>
Here’s some helpful tips on making your graphical
content accessible to users who can’t see images:
</p>
<ul>
<li>Always include an <tt>alt</tt> attribute on your
<tt><img></tt> tag.</li>
<li>The <tt>alt</tt> attribute should contain a short
replacement for the graphic, in text. If the image
itself has text, list that in <tt>alt</tt>.</li>
<li>If the image is purely decorative and doesn’t convey
any additional information, use <tt>alt=””</tt>.</li>
<li>If there is more information in the graphic than you
can convey in a short <tt>alt</tt> attribute, such
as the information in a graph or chart, then use
the <tt>longdesc</tt> attribute to give the URL of
a page which describes the graphic in text.</li>
</ul>
</div>
<div class=”footer”>
<hr>
<address>
Copyright © 2002 by Kynn Bartlett
</address>
Selectors 83
5
continues
09 0672324091 ch05 6/13/02 10:39 AM Page 83
Please purchase PDF Split-Merge on www.verypdf.com to remove this watermark.
</div>
</body>
</html>
As you can see, you linked in an external style sheet, tips-5.2.css,using a <link> tag.
That style sheet defines a style for each section of the page; your sections are “
nav,”
“
header,” “tips,” and “footer.” The style sheet is shown in Listing 5.2.
LISTING 5.2 Sectional Styles Using Classes
/* tips-5.2.css */
/* By Kynn Bartlett, */
.nav /* Navigation bar */
{
font-family: Verdana, sans-serif;
}
.header /* Top heading of the page */
{
color: white;
background-color: maroon;
font-family: Verdana, sans-serif;
}
.tips /* A list of tips for accessibility */
{
color: white;
background-color: gray;
font-family: Arial, sans-serif;
}
.footer /* Bottom of the page */
{
color: green;
background-color: white;
font-family: “Times New Roman”, serif;
}
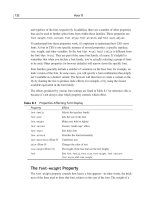
The effect of applying these styles is shown in Figure 5.1. You’ll notice that I’ve used
background colors to make two of the <div> sections visible; in practice, this can be a
somewhat unattractive effect; some of my examples are written simply to illustrate a
principle rather than to be aesthetically appealing, especially in the limited black, white,
and gray shades available in this book.
84 Hour 5
LISTING 5.1 Continued
09 0672324091 ch05 6/13/02 10:39 AM Page 84
Please purchase PDF Split-Merge on www.verypdf.com to remove this watermark.
The Universal Selector
In addition to type, class, and id selectors, CSS also defines a universal selector. The
universal selector applies to all tags and content within a page and is represented by an
asterisk (*). Here’s an example of a universal selector rule:
* { color: blue; }
Selectors 85
5
FIGURE 5.1
Netscape 6 displays
sectional styles set by
<div> and class.
Workaround for Netscape 4 and Internet Explorer
The 4.0 versions of both Netscape and Internet Explorer do not support the
universal selector. For this reason, you’ll probably want to write your univer-
sal selectors to also include the <body> tag, like this:
*, body { font-family: Arial; }
If you’re writing a rule that uses the universal selector and there’s something else to that
rule, such as a class selector, you can leave out the asterisk. In fact, the general way of
writing class selectors is just a special case of the universal selector with the asterisk
omitted. The following two declarations are identical:
09 0672324091 ch05 6/13/02 10:39 AM Page 85
Please purchase PDF Split-Merge on www.verypdf.com to remove this watermark.
*.there { color: green; }
.there { color: green; }
You may wonder why there’s a need for a universal selector; as you’ve seen before, you
can affect the style of an entire page by using a selector of the <body> tag. It’s important
to understand that the universal selector sets the style on all elements and doesn’t just set
an inherited default. What do I mean? Consider the following style sheet:
* { color: green; }
h1 { color: blue; }
Let’s assume you’ll link that to an HTML file that includes this:
<h1>This is <em>very</em> important</h1>
What color will the word “very” be? It will be green and in the middle of a blue headline
because the universal rule says everything has the color green explicitly set, just as if
there were a rule for every possible element, reading
element { color: green; }
In practice, you’d probably want the color of the <em> to inherit from the <h1>’s style, so
you need to be very careful about when and where you use a universal selector. You’ll
learn more about inheritance in Hour 7, “Cascading and Inheritance.”
Combining Simple Selectors
To get the most utility out of your CSS rules, you’ll want to write combined rules.
You’ve already learned a little about grouping selectors together; now you’ll see how you
can use descendant selectors as well.
Grouping Selectors
As you learned in Hour 2, you can combine rules by listing the selectors together, sepa-
rating them by commas. You can combine any sort of selectors in this way, such as in the
following rule:
/* Anything that is sorta heading-like is in Arial;
only odd headings are maroon and the rest are green */
h1, h2, h3, h4, h5, h6, .heading, .standout, #headline
{ font-family: Arial; }
h1, h3, h5, dt, .heading, .standout, #headline
{ font-color: maroon; }
h2, h4, h6
{ font-color: green; }
You could have written the same set of rules in this manner:
/* Anything that is sorta heading-like is in Arial;
only odd headings are maroon, and the rest are green */
86 Hour 5
09 0672324091 ch05 6/13/02 10:39 AM Page 86
Please purchase PDF Split-Merge on www.verypdf.com to remove this watermark.
h1, h3, h5, dt, .heading, .standout, #headline
{ font-family: Arial;
font-color: maroon; }
h2, h4, h6
{ font-family: Arial;
font-color: green; }
Writing it the first way makes it easier to change the font color if you need to; the declara-
tion font-family: Arial; appears only one place in your document. The way you group
your rules can improve the ease with which you can modify them. Note, though, that
there’s a drawback to this approach, as well; to change how one type of selector is ren-
dered (say, anything in the standout class), you’ll need to edit several rules. There are no
hard-and-fast guidelines, therefore, about how you can group your rules in modules; as
you gain experience with CSS, you’ll form your own methods for style rules grouping.
Descendant Selectors
One of the most useful ways to group selectors together is to use a descendant selector.
A descendant, in HTML and XML, is an element that’s completely contained within
another element’s content. As an example, the <h2> is a descendant of the <div>, and the
<em> of the <h1>,in Listing 5.3. The <em> is also a descendant of the <div>,as it’s con-
tained by both the <div> and the <h1>.
LISTING 5.3 Descendants in HTML
<! babe-5.3.html >
<! By Kynn Bartlett >
<html>
<head>
<title>Best Family Movie Ever</title>
<link type=”text/css” rel=”stylesheet”
href=”babe-5.4.css”>
<style type=”text/css”>
</style>
</head>
<body>
<div class=”header”>
<h1>Movie Review: <cite>Babe</cite></h1>
<p>
Mini-Review by Joe Moviefan
</p>
</div>
<div class=”opinion”>
<h2>The Best Family Movie <em>Ever</em></h2>
<p>
The movie <cite>Babe</cite> was the best family
movie ever produced! This great movie featured
Selectors 87
5
continues
09 0672324091 ch05 6/13/02 10:39 AM Page 87
Please purchase PDF Split-Merge on www.verypdf.com to remove this watermark.
talking animals, a cantankerous old man, and
subtle-yet-Oscar-winning special effects who
could ask for more? The clever writing and
humorous touches make this all-ages movie great
for children while still very enjoyable by
adults. Feel like a kid again see
<cite>Babe</cite>!
</p>
</div>
<hr>
<div class=”footer”>
<p>
Copyright © 2002 by
<a href=”mailto:”>Joe Moviefan</a>
</p>
</div>
</body>
</html>
Descendant selectors define rules based on where a given tag appears within the page by
combining together simple selectors, separated by spaces. For example, here’s a rule to
change the color of all <cite> tags contained within paragraphs:
p cite { color: white; background-color: black; }
You’ll notice that I listed the outside tag first and then the inside. If you did it the other
way around, you wouldn’t match anything because there are no cite tags that contain
paragraph tags.
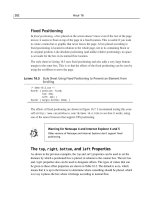
If you add this rule to the
<style> element of your HTML page from Listing 5.3, you
get the effect shown in Figure 5.2. Notice that the <cite> within the <h1> is not styled
by this rule, just the <cite> inside the <p> element.
It’s important to keep in mind that a descendant selector means any descendant, not just
an immediate child. A descendant could be an element inside an element inside an ele-
ment. This allows us to make rules that apply to any descendant element, no matter how
deeply it’s nested.
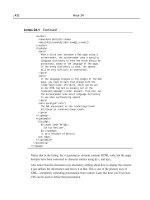
You can combine section styles (set via
class and <div>) with element-based type selec-
tors, as well; for example, the following code changes the font face of <p> tags within
the header section but modifies no others:
.header p { font-family: “Courier New”, monospace; }
The effects of this rule are shown in Figure 5.3.
88 Hour 5
LISTING 5.3 Continued
09 0672324091 ch05 6/13/02 10:39 AM Page 88
Please purchase PDF Split-Merge on www.verypdf.com to remove this watermark.
Selectors 89
5
FIGURE 5.2
Netscape 6 displays
the second
<cite>
with your chosen style.
Header paragraph
FIGURE 5.3
Changing the header
paragraph font style, as
shown in Netscape 6.
09 0672324091 ch05 6/13/02 10:39 AM Page 89
Please purchase PDF Split-Merge on www.verypdf.com to remove this watermark.
A more complete style sheet that demonstrates how to set a number of different combined selec-
tors is listed in Listing 5.4. Figure 5.4 shows how Listing 5.3 looks with this style sheet applied.
LISTING 5.4 A Variety of Selectors in a Single Style Sheet
/* babe-5.4.css: Style sheet for Babe review */
/* Written by Kynn Bartlett <> */
body
{
font-family: Arial, sans-serif;
color: black;
background-color: white;
}
.header h1
{
font-family: Verdana, sans-serif;
color: fuchsia;
}
.header p
{
font-family: “Courier New”, monospace;
color: teal;
font-size: larger;
}
.header cite
{
color: purple;
}
.opinion h2
{
color: white;
background-color: navy;
font-family: Arial, sans-serif;
}
em
{
font-size: larger;
}
p cite
{
color: white;
background-color: black;
}
90 Hour 5
09 0672324091 ch05 6/13/02 10:39 AM Page 90
Please purchase PDF Split-Merge on www.verypdf.com to remove this watermark.
Pseudo-classes and Pseudo-elements
In addition to type selectors and class selectors, CSS also allows pseudo-class and
pseudo-element selectors.
A pseudo-class selector is a selector based on a set of predefined qualities that an HTML
element can possess. These qualities function in practice similar to a
class attribute on
the element, so in CSS terms, they are called pseudo-classes. No actual
class attributes
exist in the markup that correspond to these pseudo-classes; instead, they represent some
Selectors 91
5
Body Text
Footer
Opinion
Header
.footer
{
font-family: “Times New Roman”, serif;
font-size: small;
}
.footer a
{
color: green;
}
FIGURE 5.4
Displaying various
selectors in Netscape 6.
LISTING 5.4 Continued
09 0672324091 ch05 6/13/02 10:39 AM Page 91
Please purchase PDF Split-Merge on www.verypdf.com to remove this watermark.
aspect of the element to which they’re applied, or even the state of the browser’s user
interface relative to that element.
A pseudo-element selector identifies a virtual element, one that doesn’t exist in the
markup but can be deduced by the browser and used to apply a style. Like pseudo-
classes, there is no markup that corresponds to the pseudo-element.
Simple Pseudo-classes
The pseudo-classes in CSS are shown on Table 5.1. The :active,:focus, and :hover
pseudo-classes are covered in Hour 11, “Styling Links;” the :lang pseudo-class is dis-
cussed in Hour 21, “Accessibility and Internationalization.”
TABLE 5.1 CSS Pseudo-classes
Pseudo-class Selects
:active Elements that have been activated (such as active links)
:first-child The first child of an element
:focus Elements that have focus (such as form fields receiving input)
:hover Elements that are pointed at (such as by a mouse)
:lang() Styles for a specific language
:link Unfollowed links
:visited Previously visited links
Pseudo-classes can stand alone in a style rule, as classes can, but most commonly they’re
used with elements as a type selector, as follows:
:link { color: red; }
a:link { color: red; }
Both of these rules are valid; the former applies to any element that happens to be a link,
whereas the latter rule covers only <a> tags. In practice, these are the same things in
HTML, only the <a> elements are links, and so the rules mean the same thing.
You can combine pseudo-classes with real classes or even other pseudo-classes by
putting them together with no spaces between, just the
. and : indicators. For example,
here’s HTML with class attributes set on links:
<a href=”search.html” class=”nav”>
Search the Site
</a>
<a href=” class=”offsite”>
Idyll Mountain Internet
</a>
92 Hour 5
09 0672324091 ch05 6/13/02 10:39 AM Page 92
Please purchase PDF Split-Merge on www.verypdf.com to remove this watermark.
Here are rules to work with each of those links; note that the order of the class and the
pseudo-class doesn’t matter:
a:link.nav { color: cyan; }
a.offsite:link { color: green; }
The :link and :visited Pseudo-classes
In HTML, you can use attributes on the <body> tag to determine the colors of links:
<body link=”red” visited=”gray”>
CSS gives the same functionality through pseudo-classes, and by combining pseudo-
class selectors with class or id selectors, you can put different link colors on different
parts of the page as you’ll see later in this hour.
The
:link pseudo-class is the equivalent of the <body> attribute link in HTML; it defines a
style for links that have yet to be followed. You’ll usually set these on the <a> tag because
<a> is the only visible linking element in HTML. Here’s an example CSS rule using :link:
a:link { color: red; }
Visited links are those that the user has already been to; the browser keeps track of a list
of visited URLs and colors them differently. The :visited pseudo-class is used to write
rules applying to those types of links, as follows:
a:visited { color: gray; }
The :link and :visited pseudo-selectors are mutually exclusive; a given link is either
one or the other at any given time and can’t be both at once. However, you can write a
rule that applies to both, such as
a:link,
a:visited { color: blue; }
Selectors 93
5
Note that changing the :link and :visited colors to the same value can
cause problems for users! Most users expect links to change to some color—
anything other than the original, although usually from blue to purple—after
visiting links. Unless you’ve got a good reason for it, you’ll probably want to
supply different :link and :visited colors.
Unlike HTML, which lets you change only the colors of links, CSS allows you to apply
nearly any style to unvisited or visited links by using the :link and :visited pseudo-
selectors. For example:
a:link { color: black;
background-color: lime;
font-family: Arial, sans-serif; }
09 0672324091 ch05 6/13/02 10:39 AM Page 93
Please purchase PDF Split-Merge on www.verypdf.com to remove this watermark.
a:visited { color: gray;
background-color: yellow;
font-family: “Times New Roman”, serif; }
This puts your unvisited links in black text on a lime green background and puts the vis-
ited links in gray on a yellow background. Unvisited links are in Arial font, and visited
links are in Times New Roman. Now, apart from an illustrative example, you may never
want to write rules like these; it doesn’t make sense, for example, for the font face to
change when you’ve clicked on a link, and some of my color choices are just plain ugly.
Background colors on links do help them stand out from rest of the page, though, and
that’s not such a bad thing. You’ll learn more about styling links in Hour 11.
To color links differently on different sections of the page, combine
:link and :visited
pseudo-selectors with section classes in a descendant selector, like this:
.nav { background-color: black;
color: white; }
.nav a:link { color: cyan; }
.nav a:visited { color: fuchsia; }
This creates a black navigation bar with unvisited links in cyan (bright blue) and visited
links in fuchsia (bright purple). If you add these styles to the style sheet in Listing 5.2,
the accessibility tip page from Listing 5.1 will look like the page shown in Figure 5.5.
94 Hour 5
Visit Link
Unvisited Link
Navigation Bar
FIGURE 5.5
Netscape 6 demon-
strates pseudo-class
selectors coloring
links on a page.
09 0672324091 ch05 6/13/02 10:39 AM Page 94
Please purchase PDF Split-Merge on www.verypdf.com to remove this watermark.
The :first-child Pseudo-class
The :first-child pseudo-class is used to select an element that’s the first child of
another element. The first child is the first tag within some other element; if the first
child matches the base type of the selector—the part before the :first-child pseudo-
class—then the rule applies to that element.
Listing 5.5 shows the start of a short story; you want to make the first paragraph larger,
for effect. The style sheet to do this is shown in Listing 5.6, and the results are displayed
in Figure 5.6.
LISTING 5.5 A Few Paragraphs in HTML
<! story-5.5.html >
<! By Kynn Bartlett >
<html>
<head>
<title>Fortune of Reversal</title>
<link type=”text/css” rel=”stylesheet”
href=”story-5.7.css”>
</head>
<body>
<h1 class=”storytitle”>Fortune of Reversal</h1>
<div class=”storybody”>
<p>
They dined on heaping platters of Szechuan chicken, of
spicy beef, of shrimp and vegetables in some exotic dish
without a name. Bits of food were passed from chopsticks
to chopsticks, violating all known laws of Chinese
cuisine etiquette. The tea flowed hot and fast that night,
until the meal finally concluded itself.
</p>
<p>
“Thank you for dining here tonight,” said the badgeless,
anonymous waitress. She placed a small tray containing the
check and two wrapped fortune cookies on the edge of the
table, and hefted the empty plates one by one, forming a
stack on the crook of her elbow.
</p>
<p>
“Absolutely delicious,” declared Oliver as he pulled a card
from his wallet and flicked it onto the bill. He picked up
the two cookies, an afterthought. “Fortune cookie, my
love?” he asked Amanda.
</p>
Selectors 95
5
continues
09 0672324091 ch05 6/13/02 10:39 AM Page 95
Please purchase PDF Split-Merge on www.verypdf.com to remove this watermark.
</div>
</body>
</html>
LISTING 5.6 A Style Sheet Using :first-child Pseudo-class Selector
/* story-5.6.css */
/* By Kynn Bartlett */
.storytitle
{ font-family: Verdana; }
.storybody p
{ font-family: Arial; }
.storybody p:first-child
{ font-size: large; }
96 Hour 5
FIGURE 5.6
Netscape 6 uses
the
:first-child
selector to style the
first paragraph.
Workaround for Netscape 4, Internet Explorer (Windows),
and Opera
Only Netscape 6, Mozilla, and Internet Explorer 5 (Macintosh) support the
:first-child pseudo-element; other browsers ignore it. For maximum
LISTING 5.5 Continued
09 0672324091 ch05 6/13/02 10:39 AM Page 96
Please purchase PDF Split-Merge on www.verypdf.com to remove this watermark.
Pseudo-elements in CSS
Cascading Style Sheets defines four pseudo-elements—virtual elements created from
their content in the document in relationship to a base element. These are shown in
Table 5.2. The pseudo-elements :before and :after are used to insert generated con-
tent and are discussed in Hour 22, “User Interface and Generated Content.”
TABLE 5.2 The Pseudo-elements of CSS
Pseudo-element Selects
:before Inserts something before an element
:after Inserts something after an element
:first-letter The first letter of a block element
:first-line The first line of a block element
The pseudo-elements :first-line and :first-letter select portions of another ele-
ment, and these portions operate as if they were separate inline elements; however,
only certain properties can be applied to these pseudo-elements, as shown in Table 5.3.
TABLE 5.3 Recognized Properties for :first-line and :first-letter Selectors
Property or Category :first-line :first-letter Hour Covered
Background properties yes yes Hour 10
Border properties yes Hour 13
Color properties yes yes Hour 9
Font properties yes yes Hour 8
Margin properties yes Hour 13
Selectors 97
5
continues
compatibility, set a
class attribute manually on your first child elements,
such as class=”firstone”, and then include that class as an additional
selector in your rule. For example:
storybody p:first-child, .storybody p.firstone
{
font-size: large;
}
Of course, by doing so you’ve made the first half of the selector redundant,
as Netscape 6, Mozilla, and IE 5/Mac all understand the class-based
workaround! So you may want to drop the use of :first-child if you’re
going to add the workaround.
09 0672324091 ch05 6/13/02 10:39 AM Page 97
Please purchase PDF Split-Merge on www.verypdf.com to remove this watermark.
Padding properties yes Hour 13
clear yes yes Hour 16
float yes Hour 16
letter-spacing yes Hour 12
line-height yes yes Hour 12
text-decoration yes yes Hour 9
text-shadow yes yes Hour 9
text-transform yes yes Hour 9
vertical-align yes yes Hour 12
word-spacing yes Hour 12
The :first-line Pseudo-element
The :first-line pseudo-element is a virtual element used to identify the first line of an
element for adding specific styles that apply only to the first line. For example, you
might want to put the first line of a news story in larger print to make it stand out. Such a
rule would look like this:
p:first-line { font-size: large; }
A :first-line pseudo-element creates a fictional tag set that is similar to a <span> or
another inline element but whose content is determined when the page is rendered. As
much as will fit on one line is included in the fictional tag; as this will vary depending on
the size of the user’s browser window, the font size, and other factors, there’s no way to
calculate it beforehand. This means that there aren’t any viable workarounds for browsers
that don’t support :first-line because there’s no way to know what will fit on one line.
In fact, many browsers currently don’t support
:first-line; Netscape 4.0 and
(Windows) Internet Explorer 4.0 and 5.0 will ignore it, whereas Mozilla, Netscape 6,
Opera, and Internet Explorer 5.5 (Windows) or 5 (Mac) support it. Because of this and
the lack of workarounds, :first-line should be considered an optional part of your
design process; if it works in any given browser, it may enhance the appearance of the
page for those users, but your design should not depend on it.
The :first-letter Pseudo-element
A :first-letter selector also references one of those imaginary, generated elements
that doesn’t appear in the source code but can be referenced by CSS rules. In this case,
the imaginary tag is one surrounding the first letter of the element. The most common
use for this is creating an initial capital letter that’s larger than surrounding text.
98 Hour 5
TABLE 5.3 Continued
Property or Category :first-line :first-letter Hour Covered
09 0672324091 ch05 6/13/02 10:39 AM Page 98
Please purchase PDF Split-Merge on www.verypdf.com to remove this watermark.
Here’s an example of a style sheet that uses both :first-letter and :first-line:
/* story-5.7.css */
/* By Kynn Bartlett */
.storytitle
{ font-family: Verdana; }
.storybody p
{ font-family: Arial; }
.storybody p:first-child
{ font-size: large; }
.storybody p:first-child:first-line
{ font-size: x-large; }
.storybody p:first-letter
{ font-size: larger; }
The result of applying this style sheet to the story sample from Listing 5.5 can be seen in
Figure 5.7.
Selectors 99
5
First letter
First line
FIGURE 5.7
A large initial capital
letter styled by a
:first-letter rule, as
shown in Netscape 6.
Naturally, :first-letter selectors work only in browsers that support them; once again,
that’s limited to Mozilla, Netscape 6, Opera, and Internet Explorer 5.5 and higher
(Windows) or 5.0 and higher (Mac).
09 0672324091 ch05 6/13/02 10:39 AM Page 99
Please purchase PDF Split-Merge on www.verypdf.com to remove this watermark.
100 Hour 5
Summary
The selector is the part of the CSS rule that designates the recipient of the styles defined in
the style declaration. Type selectors can be used to style specific types of HTML elements,
and class and id selectors choose them according to attribute values. The universal selec-
tor sets a style on all elements.
You create a descendant selector by combining two or more simple selectors together to
show the hierarchy of the elements on the page. Using this technique, you can apply dif-
ferent styles to different sections of the page.
Pseudo-element and pseudo-class selectors let you select parts of the page that aren’t other-
wise distinguished in the HTML. Rules with
:link and :visited pseudo-class selectors
can be used to style hypertext links. The :first-child, :first-letter, and :first-line
selectors are used for text formatting.
Browser Support Report Card
CSS Feature Grade Notes
The universal selector (*) C Partial workaround in Netscape 4 and
Internet Explorer 4
Descendant selectors A
:link selectors A
:visited selectors A
:first-child selectors B- Requires workaround for Netscape 4, Internet
Explorer (Windows), and Opera
:first-line selectors C No viable workarounds exist
:first-letter selectors B+ Requires workaround for Netscape 4 and
Internet Explorer 4
Workaround for Netscape 4, Internet Explorer 4
Unlike :first-line, the first letter can be easily determined at the time of
HTML creation. Therefore, you can use a
<span> element with a class
attribute around the first letter, like this:
<p>
<span class=”firstletter”>I</span>t was the best of times
</p>
Then your CSS rule would look like this:
p:first-letter, p span.firstletter { font-size:x-large; }
09 0672324091 ch05 6/13/02 10:39 AM Page 100
Please purchase PDF Split-Merge on www.verypdf.com to remove this watermark.
Selectors 101
5
Q&A
QAre there other selectors that aren’t covered here?
A Yes, but unfortunately they’re very poorly supported by the browsers. These
advanced selectors are very powerful and useful, so you’ll learn about them in
Hour 19, “Advanced Selectors.”
Q Can I string together as many selectors as I like?
A Certainly. You aren’t limited to just two items in a descendant selector, for example.
You could write a rule with a selector like the following, if you wanted:
body div #content p.special a:visited { color: green; }
Workshop
The workshop contains quiz questions and activities to help reinforce what you’ve learned
in this hour. If you get stuck, the answers to the quiz can be found after the questions.
Quiz
1. Which of the following selectors means “select any <em> tag that’s both part of the
class old and within a <p> tag?”
(a.)
em.old p
(b.) em.old, p
(c.) p.old em
(d.) p em.old
2. What rules would you write to make all visited links red and all unvisited links
lime, and to make both kinds of link display in Arial font?
3. Which pseudo-element or pseudo-class can’t be duplicated by using a
<span> tag
with an appropriate class set, and why?
(a.)
:first-child
(b.) :first-line
(c.) :first-letter
Answers
1. The correct answer is (d.), p em.old.
2. Here is one set of CSS rules to make unvisited links lime and visited links red,
both in Arial font:
a:link { color: red; font-family: Arial, sans-serif; }
a:visited { color: lime; font-family: Arial, sans-serif; }
09 0672324091 ch05 6/13/02 10:39 AM Page 101
Please purchase PDF Split-Merge on www.verypdf.com to remove this watermark.
3. The :first-line cannot be duplicated by the <span> tag because the author of the
Web page doesn’t know where the first line will end when displayed on the user’s
browser.
Activity
In this hour, you saw several HTML pages and associated style sheets that used selectors
to style the page. To further explore selectors, you can create additional style rules by
selecting specific elements and styling them appropriately.
102 Hour 5
09 0672324091 ch05 6/13/02 10:39 AM Page 102
Please purchase PDF Split-Merge on www.verypdf.com to remove this watermark.
HOUR
6
The CSS Box Model
This hour we are going to get into the core of Cascading Style Sheets—the
part of the specification that defines how parts of a Web page are displayed,
as stacks of boxes. The visual presentation of CSS is defined as a series of
boxes based on the structure of the original document.
In this hour, you’ll learn
•How Web content is displayed visually in CSS as boxes
• What categories of display elements are used and how you can affect
an element’s display type
•How CSS browsers interpret and display Web pages
•How to set margins, borders, and padding on a box
Displaying Content in CSS
The content of a Web page is the information encoded within the HTML
page, found between the opening and closing tags of the HTML markup.
These tags define the structure of the content, a framework that gives mean-
ing to the content. For example, consider the following HTML:
10 0672324091 ch06 6/13/02 10:29 AM Page 103
Please purchase PDF Split-Merge on www.verypdf.com to remove this watermark.
<p>This is the <strong>tricky part</strong>,
so pay attention!</p>
The content in this example is simply the sentence This is the tricky part, so pay
attention! The tags embedded within (and surrounding) the content create the struc-
ture, which gives meaning to the content. Any browser that understands HTML will
know that the whole thing is a paragraph (identified by the <p> tag) and that the phrase
tricky part is strongly emphasized.
The presentation of the content, however, is not defined by the HTML; instead, it’s deter-
mined by CSS rules. The browser has default rules for
<p> and <strong> tags, which say
that a <p> is shown visually as a paragraph on lines of its own, with leading and trailing
space, and that the <strong> is shown as bold text within that paragraph.
Both the
<p> and <strong> tags are shown as display boxes, which is how CSS browsers
deal with HTML elements. Each HTML element corresponds to a display box, although
not all elements are shown on the screen. A display box is a rectangular shape on the
screen that can contain text content, images, form controls, or other display boxes.
The exact method by which HTML elements are shown as CSS display boxes is called
the visual formatting method. The visual formatting method tells browsers how they
should show HTML content on the screen.
Types of Elements
In the visual formatting model, markup elements are classified into two basic types—
block and inline. The type of element determines how CSS browsers will display
instances of that element.
The initial type of each HTML element is set by the HTML specification. For example,
<p> tags are block elements, and <em> tags are inline elements. The full list is given in
the HTML 4.01 Recommendation; each tag has an indication as to what type it is. You
can change the type of a specific element using CSS, although often you won’t need to.
Certain CSS properties can be set only on block or inline elements; for example, the
text-indent property (which you’ll learn about in Hour 12, “Alignment and Spacing”)
applies only to block elements.
Block
A block element is one that is intended to be displayed as a distinct block of content,
starting and ending with a new line. Besides the <p> tag, other block elements in HTML
include <div>, <blockquote>, <table>, <br>, <ol>,and the <h1> to <h6> tags.
Block elements are listed one after another, vertically down the page. They are as wide
as they can be, which means that unless they’re constrained in some way (by other
104 Hour 6
10 0672324091 ch06 6/13/02 10:29 AM Page 104
Please purchase PDF Split-Merge on www.verypdf.com to remove this watermark.
block elements, by CSS properties, or by HTML markup), they’ll stretch across the
whole page.
The CSS Box Model 105
6
One thing you’ll notice when you start using CSS is that your headers (<h1>
and friends) go all the way across! Set the background-color property on an
<h1> and you’ll see how big it really is.
Inline
An inline element doesn’t begin and end lines; instead, it is contained within the flow of
the text. Examples of inline tags include <em>, <span>, <b>, <img>, <input>, and <a>.
Inline elements flow one after another in a line, with no line breaks, horizontally across
the page until the end of the available space is used up; then they just continue where
they left off on the next line down.
The display Property
You can change the type of an element by using the display property. This property can
take several values; the ones we’re primarily concerned with in this hour are block and
inline. There’s another important value for display that’s called none; something that
has the display property set to none will not display at all, nor will anything inside of it
be displayed.
Setting the
display property to block or inline will change the type of that element to
the specified type. For example, let’s say that we want to make a navigation menu, and
we want all of our <a> elements within that menu to appear as block elements. Our
HTML code may look like this:
<div class=”navmenu”>
<a href=”friends.html”>My Friends</a>
<a href=”dogs.html”>My Dogs</a>
<a href=”friendsdogs.html”>My Friends’ Dogs</a>
<a href=”dogsfriends.html”>My Dogs’ Friends</a>
</div>
To display these <a> tags as block tags, we use this rule:
.navmenu a { display: block; }
Figure 6.1 shows the effect of applying this rule; the first set of links is identical to the
second, except that the previous rule and a silver background have been applied to it. The
background illustrates that the block element goes all the way across the browser window
10 0672324091 ch06 6/13/02 10:29 AM Page 105
Please purchase PDF Split-Merge on www.verypdf.com to remove this watermark.
and doesn’t stop at the end of the text within it. Also, the links are clickable even on the
far right side of the screen, not just on the blue underlined words.
106 Hour 6
FIGURE 6.1
Before and after, dis-
played in Internet
Explorer 5.1 (Mac).
Understanding the Box Model
Within the visual formatting model, all elements generate specific types of boxes. The
method for displaying these boxes is called the box model, and understanding the box
model is crucial for understanding how Cascading Style Sheets will display Web pages.
The box model is defined in terms of elements, documents, trees, and of course, boxes.
Many of us are not used to thinking about Web pages in terms of these elements unless
we’ve done a lot with XML or SGML. So first we’ll take a look at the assumptions that
CSS makes about Web documents.
In formal W3C specifications, they rarely use terms such as Web page;
instead they talk about documents. Likewise, they don’t say much about
tags and browsers but are always referring to elements and user agents.
Although it may seem that this is just semantic snobbishness—and to some
degree it is!—there are actually some valid reasons for drawing these dis-
tinctions when speaking formally. In this book, I try to avoid writing like
a W3C Recommendation; if you want one of those, you can find it on the
W3C site at However, terminology counts for this dis-
cussion, and my apologies if I sound formal.
10 0672324091 ch06 6/13/02 10:29 AM Page 106
Please purchase PDF Split-Merge on www.verypdf.com to remove this watermark.