Tài liệu Adobe Photoshop 7.0 for Photographers- P2 pdf
Bạn đang xem bản rút gọn của tài liệu. Xem và tải ngay bản đầy đủ của tài liệu tại đây (1.99 MB, 50 trang )
Adobe Photoshop 7.0 for Photographers
ages such as custom shape tools and layer clipping paths. This raises some interesting possibilities – with Photoshop you can create various graphical elements like
type, shape layers, layer clipping paths which are all resolution-independent. These
‘vector’ elements can be scaled up in size in Photoshop without any loss of detail,
just as you can with an Illustrator graphic.
Figure 2.2 Digital images are constructed of a
mosaic of pixels. Because of this a pixel-based
digital image always has a fixed resolution and is
said to be ‘resolution-dependent’. If you enlarge such an image beyond the size at which
it is meant to be printed, the pixel structure
will soon become evident, as can be seen in
the right-hand close-up below. But suppose the
picture shown opposite was created not as a
photograph, but as an illustration in a program
like Adobe Illustrator™. If the picture is drawn
using vector paths, the image will be resolution-independent. The mathematical numbers
used to describe the path outlines shown in
the bottom left example can be scaled to reproduce at any size: from a postage stamp to a
billboard poster.
Photograph: Eric Richmond.
30
Please purchase PDF Split-Merge on www.verypdf.com to remove this watermark.
Resolution
Terminology
Before proceeding further let me help clarify a few of the confusing terms used and
their correct usage when describing resolution.
ppi: pixels per inch. Describes the digital, pixel resolution of an image. You will
notice the term dpi is often inappropriately used to describe digital resolution. Scanning devices are sometimes advertised with their scanning resolution expressed in
dots per inch. Strictly speaking, this is an incorrect use of the term ‘dpi’, because
input devices like scanners produce pixels and only output printers produce dots.
However, it’s fallen into common parlance and unfortunately only added to the confusion. Photoshop always refers to the input resolution as being in pixels per inch or
pixels per centimeter, and so should you. Monitor resolution is also specified in ppi:
Macintosh monitors have a resolution of 72 ppi, whereas PC monitors are usually 96
ppi. One of the reasons for the Macintosh default resolution of 72 ppi (which dates
back to the era of the first Apple Macs) is that it helps graphic designers get a better
feel for the weight of their fonts when laying out a page.
lpi: lines per inch. The number of halftone lines or ‘cells’ in an inch, also described
as the screen ruling. The origins of this term go back way before the days of digital
desktop publishing. To produce a halftone plate, the film exposure was made through
a finely etched crisscross screen of evenly spaced lines on a glass plate. When a
continuous tone photographic image was exposed this way, dark areas formed heavy
halftone dots and the light areas, smaller dots, giving the impression of a continuous
tone image when printed on the page and viewed from a normal distance.
dpi: dots per inch. Refers to the resolution of a printing device. An output device
such as an imagesetter is able to produce tiny 100% black dots at a specified resolution. Let’s say we have an imagesetter capable of printing at a resolution of 2400
dots per inch and the printer wished to use a screen ruling of 150 lines per inch. If
you divide the dpi of 2450 by the lpi of 150, you get a figure of 16. Within a matrix
of 16 × 16 printer dots, an imagesetter can generate a halftone dot varying in size
from 0 to 255, which is 256 print dots (see Figure 2.3). It is this variation in halftone
cell size (constructed from the combined smaller dots) which gives the impression of
tonal shading when viewed from a distance. Desktop inkjet printers produce an
output made up of small dots at resolutions of between 360 and 2880 dots per inch.
Remember, an inkjet output is not the same as the reprographic process – the screening
method is quite different.
Above all you need to understand that an image displayed on the screen at 100%
does not represent the actual physical size of the image, unless of course your final
picture is designed for screen use only, such as for the Web or CD-ROM display.
31
Please purchase PDF Split-Merge on www.verypdf.com to remove this watermark.
Adobe Photoshop 7.0 for Photographers
1 The halftone screen shown here is angled at
zero degrees. If the pixel resolution were calculated at ×2 the line screen resolution, the RIP
would use four pixels to calculate each halftone dot.
2 To reproduce a CMYK print output, four plates
are used, of which only the yellow plate is actually angled at zero degrees. The black plate is
normally angled at 45 degrees and the cyan and
magenta plates at less sharp angles. Overlay the
same pixel resolution of ×2 the line screen and
you will notice that there is no direct relationship between the pixel and line screen resolutions.
The pixel resolution (ppi) is the number of pixels
per inch in the input digital image.
The line screen resolution (lpi) is the frequency
of halftone dots or cells per inch.
4 Each halftone dot is rendered by a PostScript
RIP from the pixel data and output to a device
called an imagesetter.The halftone dot illustrated
here is plotted using a 16 × 16 dot matrix. This
matrix can therefore reproduce a total of 256
shades of gray. The dpi resolution of the image
setter, divided by 16, will equal the line screen
resolution. 2400 dpi divided by 16 = 150 lpi screen
resolution.
32
3 There is no single empirical formula that can
be used to determine the ideal ‘half toning factor’. Should it be ×2 or ×1.5? The black plate is
the widest at 45 degrees and usually the black
plate information is more prominent than the
three color plates. If a halftoning factor of ×1.41
(the square root of 2) were used, the pixel resolution will be more synchronized with this angled
halftone screen. There is no right or wrong
halftoning factor – the RIP will process pixel data
at any resolution. If there are too few pixels, print
quality will be poor. Having more than the optimum number does not necessarily equate to better output, it is just more pixels.
Please purchase PDF Split-Merge on www.verypdf.com to remove this watermark.
Resolution
Repro considerations
You can see from the previous description where the term ‘lines per inch’ originated.
In today’s digital world of imagesetters, the definition is somewhat archaic, but is
nonetheless commonly used. You may hear people refer to the halftone output as dpi
instead of lpi, as in the number of ‘halftone’ dots per inch, and the imagesetter resolution be referred to as having so many spi, or spots per inch. Whatever the terminology I think we can all logically agree on the correct use of the term pixels per inch,
but I am afraid there is no clear definitive answer to the mixed use of the terms dpi,
lpi and spi. It is an example of how the two separate disciplines of traditional repro
and those who developed the digital technology chose to apply different meanings to
these terms.
The structure of the final print output appearance bears no relationship to the pixel
structure of a digital image. A pixel in a digital image does not equal a cell of halftone dots on the page. To explain this, if we analyze a CMYK cell or rosette, each
color plate prints the screen of dots at a slightly different angle, typically: Yellow at
0 or 90 degrees, Black: 45 degrees, Cyan: 105 degrees and Magenta: 75 degrees. If
the Black screen is at a 45 degree angle (which is normally the case), the (narrowest)
horizontal width of the black dot is 1.41 (square root of 2) times shorter than the
width of the Yellow screen (widest). If we extend the width of the data creating the
halftone cell, then multiplying the pixel sample by a factor of 1.41 would mean that
there was at least a 1 pixel width of information with which to generate the black
plate. The spacing of the pixels in relation to the spacing of the 45 degree rotated
black plate is thereby more synchronized.
For this reason, you will find that the image output resolution asked for by printers is
usually at least 1.41 times the halftone screen frequency used, i.e. multiples of ×1.41,
×1.5 or ×2. This multiplication is also known as the ‘halftone factor’, but which is
best? Ask the printer what they prefer you to supply. Some will say that the 1.41:1 or
1.5:1 multiplication produces crisper detail than the higher ratio of 2:1. There are
also other factors which they may have to take into account such as the screening
method used. Stochastic or FM screening, which, it is claimed, permits a more flexible choice of ratios ranging from 1:1 to 2:1.
Image size is therefore determined by the final output requirements and at the beginning of a digital job, the most important information you need to know is:
•
•
•
•
How large will the picture appear on the page, poster etc.?
What is the screen frequency being used by the printer – how many lpi?
What is the preferred halftone factor used to determine the output resolution?
Will the designer need to allow for page bleed, or want to crop your image?
33
Please purchase PDF Split-Merge on www.verypdf.com to remove this watermark.
Adobe Photoshop 7.0 for Photographers
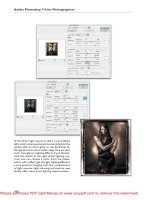
Figure 2.3 The New document dialog.
Ideally this information needs to be known before the image is scanned (or digitally
captured). Because if you calculate that only 10 MB worth of RGB data will actually
be required, there may be no point in capturing more image data than is absolutely
necessary. If the printer’s specification is not available to you, then the only alternative is to scan or shoot at the highest practical resolution and resample the image
later. The downside of this is that large image files consume extra disk space and
take longer to process on the computer. If a print job does not require the images to
be larger than 10 MB, then you’ll want to know this in advance rather than waste
time and space working on unnecessarily large files. On the other hand, designers
like to have the freedom to take a supplied image and scale it in the DTP layout to
suit their requirements. Use the ×2 halftone factor, and there will be enough data in
the supplied file to allow for a 20% scaling without adversely compromising the
print quality.
Inkjet output resolution
I said earlier that the pixel resolution of an image should be clearly specified using the
numbers of pixels per inch (ppi) so as to avoid confusion when using the number of dots
per inch (dpi) to describe the imagesetter output resolution (although sometimes dpi is
used to refer to the number of halftone cells per inch). Inkjet printers also use the term
34
Please purchase PDF Split-Merge on www.verypdf.com to remove this watermark.
Resolution
‘dots per inch’ to describe the output resolution of the printer. The dpi output of a typical
inkjet will range from 360 to 2880 dpi. And although this is a correct usage of dpi, in this
context the dpi means something else yet again. Most inkjet printers use similar methods
to lay down a scattered pattern of tiny dots of ink that accumulate to give the impression
of different shades of tone, depending on either the number of dots, the varied size of the
dots, or both. The principle is roughly similar to the halftone process, but it is not really
the same. If you select one of the finer print resolutions such as 1440 or 2880 dpi, you
should see smoother print outputs when they are viewed in close-up. The optimum pixel
resolution should ideally be the printer dpi divisible by a whole number. The following
pixel resolutions could be used: 144, 160, 180, 240, 288, 320, 360. To make large inkjet
prints for viewing at a greater distance, use a low pixel resolution. For smaller sized
portfolio prints I normally use a 240 ppi pixel resolution. I doubt very much you will
notice any improvement in print quality if you choose a resolution that is higher than this.
Creating a new document
If you want to create a blank new canvas in Photoshop, go to the File menu and
choose New... This will open the dialog shown in Figure 2.3. In Photoshop 7.0 you
can select a new preset setting. This will automatically configure the physical size
dimensions for your new image. However, Photoshop will not adjust the resolution
for you, this must be entered manually. Advanced users can create their own custom
document size presets by going to the Presets folder and following the instructions in the
New Doc Sizes.txt document and editing the values for the height, width and units.
Altering the image size
The image size dimensions and resolution can be adjusted via the Image Size dialog,
shown in Figure 2.4. By default the dialog will open with the Resample image box
checked. This means that you can enter new pixel dimension values to increase or
decrease the image size. Or if you enter new physical dimensions, or change the
image resolution, you can also increase or decrease the image size (and you will see
the pixel dimensions adjust simultaneously). Remember the rule I mentioned earlier:
the number of pixels = physical dimension × (ppi) resolution. You can put that rule to
the test here and use the Image Size dialog as a training aid to help understand better
the relationship between the pixels, dimensions and resolution. The constrain proportions checkbox links the horizontal and vertical dimensions, so that any adjustment is automatically scaled to both axis. Only uncheck this box if you wish to
squash or stretch the image when adjusting the image size. Any adjustment made to
the image will not alter the total pixel size. If you adjust the dimensions the resolution value will adjust to compensate and vice versa.
35
Please purchase PDF Split-Merge on www.verypdf.com to remove this watermark.
Adobe Photoshop 7.0 for Photographers
When Resample Image is checked the image can be enlarged or reduced by making
the number of pixels in the image greater or smaller. This resampling is also known
as interpolation and Photoshop can use one of three methods when having to assign
(approximate) values for any new pixels that are generated. The interpolation options
are located next to the Resample Image checkbox. Bicubic interpolation provides
the best image quality when resampling continuous tone images. Photoshop will read the
values of neighboring pixels, vertically, horizontally and diagonally to calculate a
weighted approximation of each new pixel value. In other words, Photoshop guesses
the new pixel values, but does so with a modicum of machine intelligence. Bilinear
is a less sophisticated form of interpolation, reading only the horizontal and vertical,
neighboring pixels. Nearest Neighbor is the simplest interpolation method and yet I
use this quite a lot, such as when I want to enlarge a screen grab of a dialog box for
this book by 200% and I don’t want the sharp edges of the dialog boxes to appear
fuzzy.
Figure 2.4 To change the image output resolution without altering the physical size, check the Resample
Image box and enter a new resolution. To change image output dimensions without altering the
resolution, leave the Resample box unchecked. Auto resolution will help you pick the ideal pixel
resolution for repro work based on the line screen resolution.
I consider ‘interpolating up’ an image in Photoshop to be preferable to the interpolation methods found in basic scanner software. Digital files captured from a scanning
back or multishot digital camera are extremely clean, and because there is no grain
present, it is usually possible to magnify a digitally captured image much more than
you would to a scanned image of equivalent size. There are other programs like
Resolut and ColorShop which are used to good effect when interpolating digital
capture files. Interpolation works most effectively on a raw scan – one that has not
already been pre-sharpened. Unsharp masking should always be applied last as the
file is being prepared for repro. Interpolating after sharpening will enhance the image artifacts introduced by the sharpening process. If you need to apply an extreme
36
Please purchase PDF Split-Merge on www.verypdf.com to remove this watermark.
Resolution
image resize either up or down in size, I suggest you consider resizing the image in
stages rather than all in one go. Increase or decrease the resolution by 50 ppi at a
time. For instance, start with an image at 300 ppi (or make it 300 ppi in the Image
Size dialog box, with Resample Image checked) and reduce to 250 ppi, then 200 ppi,
till the pixel dimensions get close to the desired number. This is not something I
recommend you must do with every picture. I will probably only use this method when
sampling down a large image that is destined to appear prominently on a web page.
Figure 2.5 If Image Size is proving too confusing, the Resize Image assistant is on hand to help guide
you. This wizard is located in the Help menu and can be used to resize images both for print and for
the Web.
Once an image has been scanned at a particular resolution and manipulated there is
no going back. A digital file prepared for advertising usages may never be used to
produce anything bigger than a 35 MB CMYK separation, but you never know – that
is why it is safer to err on the side of caution – better to sample down than have to
interpolate up. It also depends on the manipulation work being done – some styles of
retouching work are best done at a magnified size and then reduced. Suppose you
wanted to blend a small element into a detailed scene. To do such work convincingly,
you need to have enough pixels to work with to be able to see what you are doing.
For this reason some professional retouchers will edit a master file that is around 100
MB RGB or bigger even. Another advantage of working with large file sizes is that
you can always guarantee being able to meet clients’ constantly changing demands.
Although the actual resolution required to illustrate a glossy magazine double-page
full-bleed spread is probably only around 40–60 MB RGB or 55–80 MB CMYK.
Some advertising posters may even require smaller files than this, because the print
screen on a billboard poster is that much coarser. When you are trying to calculate
the optimum resolution you cannot rely on being fully provided with the right advice
from every printer. Sometimes it will be necessary to anticipate the required resolution by
referring to the table in Figure 2.7. This shows some sample file size guides for
different types of print job.
37
Please purchase PDF Split-Merge on www.verypdf.com to remove this watermark.
Adobe Photoshop 7.0 for Photographers
Inches
Centimeters
Inches
Centimeters
Pixel size
Megapixels
MB
(RGB)
MB
(CMYK)
200 ppi
80 ppc
300 ppi
120 ppc
1600 x 1200
2
6 MB
7.5 MB
8x6
20 x 15
5.5 x 4
13.5 x 10
2400 x 1800
4.3
12.5 MB
16.5 MB
12 x 9
30 x 22.5
8x6
20 x 15
3000 x 2000
6
17.5 MB
23.5 MB
15 x 10
37.5 x 25
10 x 6.5
25 x 17
3500 x 2500
8.75
25 MB
33.5 MB
17.5 x 12.5
44 x 31
11.5 x 8.5
29 x 21
4000 x 2850
11.4
32.5 MB
43.5 MB
20 x 14
50 x 36
13.5 x 9.5
33.5 x 24
4500 x 3200
14.4
41 MB
54.5 MB
22.5 x 16
56 x 40
15 x 10.5
37.5 x 27
5000 x 4000
20
57 MB
76 MB
25 x 20
62.5 x 50
16.5 x 13.5
42 x 33.5
Figure 2.6 The above table shows a comparison of pixel resolution, megapixels, megabyte file size
and output dimensions at different resolutions, both in inches and in centimeters.
Output use
Screen x1.5 Output
ruling resolution
MB
Mono
MB
CMYK
x2 Output
resolution
MB
Mono
MB
CMYK
A3 Newspaper
single page
85 lpi
130 ppi
3
12.5
170 ppi
5.5
21.5
A3 Newspaper
single page
120 lpi
180 ppi
6
24
240 ppi
10.5
42.5
A4 Magazine
mono single page
120 lpi
180 ppi
3
na
240 ppi
5.3
na
A4 Magazine
mono double page
120 lpi
180 ppi
6
na
240 ppi
10.6
na
A4 Magazine
single page
133 lpi
200 ppi
3.7
14.8
266 ppi
6.5
26.1
A4 Magazine
double page
133 lpi
200 ppi
8
29.6
266 ppi
13
52.2
A4 Magazine
single page
150 lpi
225 ppi
4.7
18.7
300 ppi
8.3
33.2
A4 Magazine
double page
150 lpi
225 ppi
9.4
37.4
300 ppi
17
66.4
Figure 2.7 Here is a rough guide to the sort of file sizes required to reproduce either a mono or
CMYK file for printed use. The table contains file size information for output at multiples of ×1.5 the
screen ruling and ×2 the screen ruling.
38
Please purchase PDF Split-Merge on www.verypdf.com to remove this watermark.
Resolution
Practical conclusions
Amid all the conflicting opinions on how large a digital file should be, I find the
guidelines given by some of the photographic picture libraries instructive. Photographers who submit digital work are asked to supply digital files of around 40–50 MB
RGB. The thinking is that for the vast majority of picture purchases, these file sizes
will be ample and in fact the majority of pictures purchased are probably printed
using 20 MB of RGB data or less anyway. You can be sure that in any magazine
publication you care to look at, it does not matter how large the original scans were,
the same amount of digital information was eventually used to make the halftone
separations on each page you are looking at. There are photographers and also clients who insist nothing less than a high resolution scan from a 5 × 4 or 10 × 8 sheet
of film will provide good enough quality for advertising work. I do believe an overobsession with ‘pixel correctness’ gets in the way of appreciating just how good the
technical output quality can be from smaller format cameras or what can be created
on a modern computer desktop setup in the hands of a talented artist.
In theory the larger a picture is printed, the further away it is meant to be viewed and
the pixel resolution does not have to alter in order to achieve the same perception of
sharpness. There are limits though below which the quality will never be sharp enough
at normal viewing distance (except at the smallest of print sizes). It also depends on
the image subject matter – a picture containing a lot of mechanical detail will need
more pixels to do the subject justice and reproduce successfully. If you had a picture
of a softly lit cloudy landscape, you could quite easily get away with enlarging a
small image through interpolation, beyond the normal constraints.
An enormous industry was based around photographers supplying films to clients,
who made positional scans for layout purposes. They in turn then sent the film for
repro scanning at the bureau to make the final separations. Along comes a photographer armed with his or her computer loaded with Photoshop, offering to cut out a
large chunk of the repro process, supplying repro quality digital files themselves.
Tread on somebody’s toes once and they won’t like you very much. Stamp all over
them and they begin to squeal (loudly), especially if they believe you don’t have a
clue what you are talking about. Obviously, repro specialists should know best when
it comes to getting the best printed results, but remember they have a vested interest
too in keeping the likes of you out of the equation. This leads to occasional ‘spoiling’
tactics, designed to make you look foolish in front of the end client, but I reckon
companies with attitudes like these are dying out now. The smart businesses recognize the digital revolution will continue apace with or without them and they have to
continually adapt to the pace of modern technology and all its implications. Besides,
repro companies have been getting into the supply of digital photography themselves and the boundaries between our industries are constantly blurring.
39
Please purchase PDF Split-Merge on www.verypdf.com to remove this watermark.
Chapter Three
Configuring Photoshop
I
n order to get the best performance out of Photoshop, you need to ensure that your
computer system is well optimized for image editing work. When I first began
writing my Photoshop for Photographers series of books, it was very necessary
to guide readers on how to buy the most suitable computer for Photoshop work and
what hardware specifications to look for. These days I would suggest that almost any
computer you can buy is capable of at least running Photoshop at a basic level and
capable of being upgraded to run it faster.
As always, I try to avoid making distinctions between the superiority of the Macintosh
or PC systems. If you are an experienced computer user, you know what works best
for you and I see no reason to evangelize my preference for using a Mac. Throughout
my computer career, it’s what I have grown up with and it feels like home. The same
arguments apply if you’re a Windows PC user and apart from anything else, once
you have bought a bunch of programs, you are locked into that particular system. If
you switch, it means facing the prospect of buying your favorite software packages
all over again. And apart from anything else, the battle of the operating systems is
such a bore. Comparing like for like between the two systems may reveal marginal
speed benefits one way or the other as one system leapfrogs another, but the cost of
buying all the hardware for a Macintosh or PC system is going to be about the same
these days, especially since many computer peripherals share the same interface
connections. One of the key features of Photoshop 7.0 is that it has been adapted to
run on Windows XP and Mac OS X systems (more of which later). But first let’s
look at the basic hardware components of a computer system, what they do and how
they can be customized or upgraded to provide improved Photoshop performance.
40
Please purchase PDF Split-Merge on www.verypdf.com to remove this watermark.
Configuring Photoshop
Buying a system
As I say, almost any new computer system you buy will be capable of allowing you
to run Photoshop. If you require state-of-the-art performance, then you will still have
to fork out big bucks. My main buying advice for beginners remains the same. If you
are new to computing and Photoshop, don’t splash out on a top of the range system
just yet. If you later decide image editing is not for you, then at least you can make
use of your computer for general purpose office use, linking to the Internet or shooting
down rogue asteroids. In a year or two you can either upgrade your current system or
purchase a machine that will probably be at least twice as fast as the most powerful
computers around today. And besides, even a basic system can include a pretty goodsized monitor and plenty of opportunities for expansion. If you purchase a new
machine in a year or two, it will probably be at least twice as fast as the most powerful computers that are around now.
Today’s entry level computer will contain everything you need. For example, take
the Apple 500 MHz iMac. At the time of writing, this entry level iMac features a fast
G4 processor, has the CRT equivalent of a 17" resolution monitor, runs the Radeon
video card and has 128 MB of on-board RAM which can be upgraded to a maximum
of 512 MB. It’s got a fast 20 GB hard drive and the video performance is provided by
an ATI Rage 128 graphics card. Personally, I would probably want to add another
128 MB of RAM at the time of purchase and I would prefer working with a larger
screen, but otherwise it’s got quite enough to get you started. If you purchased the
basic 733 MHz Quicksilver G4 Macintosh, then this too has excellent specifications
for Photoshop work and its processor can be upgraded. Again, I would want to add at
least another 128 MB of RAM to take the memory up to 256 MB total. On the PC
side there are many more choices and I would say that without being able to pinpoint
any particular model, nearly all the basic packages will (like the iMac and the G4) be
able to satisfy all your basic Photoshop requirements. I shall be dealing with the
specifics shortly but I would assume that at the very least your entry level computer
should have the following: a fast Pentium III processor, 10 GB hard drive and 128
MB of RAM that can be expanded to at least 256 MB. If you are able to get all of this
and more, then you have yourself the beginnings of a powerful image editing system.
If you have acquired an old computer system (which in computer terms means more
than four years old!) you may encounter various problems such as a lack of
compatibility with the latest peripherals and find yourself with limited expansion
opportunities. Even so, converter devices are available to connect USB devices via
older SCSI or SDB ports. And you will also need a later version of the operating
system software. For example, Photoshop 7.0 will only run on Mac OS 9.04/9.1, Mac
OS X, or Windows 98, NT, ME, or Windows XP.
41
Please purchase PDF Split-Merge on www.verypdf.com to remove this watermark.
Adobe Photoshop 7.0 for Photographers
Monitor display
The monitor is the next most important part of your kit. For Photoshop work, a
multiscan Trinitron or Diamondtron cathode ray tube (CRT) is best. I would advise
getting a 20"–22" sized screen, but there are also plenty of affordable 17" monitors
of this type on the market. I would not recommend you get anything smaller than this.
I am currently working with a 22" LaCie Blue screen monitor. This has a good sized
screen display and is supplied with a dark hood to help shield the surface of the
screen from extraneous light hitting the surface of the screen. The Barco Calibrator
is an expensive display screen, but it does feature sophisticated self-calibrating features that ensure impeccable, consistent viewing conditions, which is very important
for good color management. This will be explained more thoroughly in the following chapter.
Flat panel TFT type screens are also becoming more popular. The latest flat screen
displays are extremely comfortable to work with and the cost of these has come
down considerably in recent years. A major benefit of these is that they are physically
smaller in size and therefore occupy less desk space. But the problem with TFT
screens is they are mostly nigh on impossible to calibrate for consistent color output.
The color and brightness of the display can vary enormously as you adjust your
angle of view relative to the screen. Someone jokingly suggested that monitor
calibration of a TFT screen could be possible, so long as you were prepared to wear
a head brace that locked your head position relative to the screen! There are exceptions
though. The Apple 22" Cinema display does have a fairly consistent screen output at
a range of viewing angles. Silicon Graphics have also had a similar type of TFT
screen, designed for prepress work, on the market for a few years now. You cannot
attach a normal calibrator device with suckers to the delicate surface of a TFT screen
but it is possible to get special TFT screen calibrators that use a simple cantilever
device to allow gravity to gently press the calibrator against the angled surface of the
display.
If you are able to run two monitors from your computer, then you might want to
invest in a second, smaller screen and have this located beside the main monitor and
use it to display the Photoshop palette windows and keep the main screen area clear
of palette clutter. To run a second monitor screen you will need to buy an additional
PCI card that can provide a second video port. The drawback of second monitors is
one of calibration. Since both monitors will share a single monitor profile, the profile
used can only be correct for one monitor only.
42
Please purchase PDF Split-Merge on www.verypdf.com to remove this watermark.
Configuring Photoshop
Video cards
If Photoshop is accused of being slow, in comparison to dedicated high-end image
editing systems that is not so much a fault of the software, but rather the architecture
of the computer used to run Photoshop. You have to realize that desktop computers
are designed to perform all types of tasks. This jack-of-all-trades compromise is one
thing which separates the desktop computer from other dedicated high-end systems.
However, most modern desktop computers have PCI expansion slots on the
motherboard. These allow you to add dedicated cards to the basic computer, and
these allow you to convert it to a customized workstation for broadcast video editing, 3D modeling or professional image editing.
The view output on your monitor display is processed by a graphics card in your
computer. An accelerated graphics card will enable your screen to do several things.
It will allow you to run your monitor at higher screen resolutions, it will allow you to
view your display in millions of colors and it will also hold more image screen view
data in memory. When more of the off-screen image data remains in memory the
image scrolling is enhanced and provides generally faster screen refreshes. In the old
days, computers were sold with a limited amount of video memory. If you were
lucky you could just about manage to run a small monitor screen in millions of
colors. If you buy a computer today the chances are that it will already be equipped
with a good, high performance graphics card, easily capable of doing all of the above.
These cards will contain 32 MB (or more) of dedicated memory. If you need added
video performance, a PCI graphics card will fit in an empty PCI slot on a Mac or PC
computer. The Matrox Millennium, ATI Rage and the Formac ProFormance cards
are recommended good buys.
Extras
An internal 24× or faster CD-ROM drive is standard issue these days. Other things to
buy could include a second hard drive to use as a scratch disk plus a removable
media storage device such as the Iomega Zip drive or a CD writer. You need these to
back up your main hard disk and store all your image documents (the hard disk
should be kept as empty as possible). Removable media disks are ideal for transferring documents to a bureau for printing. Bureaux should be able to satisfactorily read
Mac and PC format files. If you are going to continue using any SCSI devices, check
to see if you need to install a SCSI card interface. If you are buying from scratch then
you need not worry about SCSI, as it is not going to be supported any more as
standard. USB and FireWire™ (IEEE 1394) are the latest connection standards
for peripheral devices. You can have up to 127 USB devices linked to a single computer and you can plug and unplug USB devices while the machine is switched on,
43
Please purchase PDF Split-Merge on www.verypdf.com to remove this watermark.
Adobe Photoshop 7.0 for Photographers
which you were most definitely advised not to do with SCSI. USB data transfer rates
are rather slow though and USB is best for connecting control devices such as the mouse,
Wacom tablet and printer. FireWire™ has the potential to provide fast data transfer
rates of 100 MB+ per second. So use FireWire™ wherever possible to connect
devices that rely on fast data transfer such as hard drives, CD writers, digital cameras
and scanners.
A digitizing pad or graphics tablet is highly recommended. It replaces the mouse as
an input device, is easier to draw with and is pressure responsive. Bigger is not
necessarily better. Some people use the A4-sized tablets, others find it easier to work
with an A5 or A6 tablet like those in the Wacom Intuos™ range, which feature a
cordless mouse and switchable pens. You don’t have to move the pen around so
much with smaller pads and these will therefore be easier for painting and drawing.
Once you have experienced working with a pen, using the mouse will seem like
trying to draw while wearing a pair of boxing gloves. Wacom recently introduced the
Cintiq, which is a combination of an LCD monitor and digitizing pen pad. This
radical new design will potentially introduce a whole new concept to the way we can
interact with the on-screen image. I don’t know if it is going to be generally seen as
the ideal way of working for photography work, but early reports suggest that it
makes painting and drawing a more fluid experience and that could be of significance to
those who are interested in making use of the new paint engine in Photoshop 7.0.
Retailers
Mail order companies are hard to beat on price, although in my experience the
customer service ranges from excellent to appalling. Always try to find out if anyone
else has had a bad experience with a particular dealer before parting with your money.
Under UK consumer law, any claim on your warranty will require you take up the
matter via the company which sold the equipment to you. Legally your consumer
rights are protected. For extra protection, use your credit card to make mail order
purchases. In practice, these suppliers are working in a very competitive market and
they make small margins on all equipment sold from the warehouse. Consequently,
you can expect little in the way of technical support and the procedures for handling
complaints can be very slow. If you do have a problem, and wish to ensure your
complaint is dealt with swiftly, be patient, be polite, but above all be methodical in
pursuing your complaint – note down dates and times of any calls you make. Computer
trade shows are a good place to find special offers, but again check who you are dealing
with. Remember prices are always dropping – the system you buy today could be selling
for half that price next year (assuming it is still manufactured). Your capital investment is not
going to hold its value. Businesses that rely on their equipment to be working every day
44
Please purchase PDF Split-Merge on www.verypdf.com to remove this watermark.
Configuring Photoshop
of the week will choose to buy from a specialist dealer – someone who will provide
professional advice and equipment tailored to their exact needs and, most important
of all, instant backup in case things go disastrously wrong.
Improving Photoshop performance
Keep the imaging workstation free of unnecessary clutter – when more applications
and files are loaded, the machine will soon slow down. It is best to have a separate
computer to run the office software Internet/modem connections and games etc. Switch
off non-essential extensions, this will reduce startup times and improve overall operating speed. Make sure you understand what you are doing and can correctly identify
what each extension does (you’ll need to refer to a system book). Some extensions
are essential to run software and external drives but most you don’t really need.
Photoshop can run without any extensions at all, but you will definitely want to have
things like ColorSync, hard drive extensions, CD-ROM and High Sierra access etc.
Although in the case of Mac OS X, there are no longer extensions.
Chip speed
Microchip processing speed is expressed in megahertz, but performance speed also
depends on the chip type. A 500 MHz Pentium II is not as fast as a 500 MHz Pentium
III chip. Speed comparisons in terms of the number of megahertz are only valid
between chips of the same series. Some of the latest Pentiums and NT computers are
enabled with twin processing. And Apple have only just begun to make multiprocessor computers once more. To take full advantage of multiprocessing, the user must
run enabled software. Adobe have designed Photoshop to run on multiprocessor
computers, but you won’t necessarily feel the benefits if working in OS X (see
later on in this chapter). The latest Macintosh Motorola G4 processor includes
AltiVec, that is also described as a ‘velocity engine’. This helps in providing several
instructions per clock cycle to enabled programs such as Photoshop, and is claimed
can boost performance speeds of certain operations by at least a third. Windows
machines use a similar speed enhancer which is known as MMX.
Another factor is bus speed. This refers to the speed of data transfer from RAM
memory to the CPU (the central processing unit, i.e. the chip). High performance
computers (read more expensive) have faster bus speeds and are therefore better for
Photoshop work, where large chunks of data are always being processed. CPU performance is nearly always restricted by slow bus speeds.
45
Please purchase PDF Split-Merge on www.verypdf.com to remove this watermark.
Adobe Photoshop 7.0 for Photographers
Chip acceleration
Upgrading the processor chip is the most dramatic way you can boost a computer’s
performance. But not all computers will allow you to do this. If you have either a
daughter card slot or some other processor upgrade slot then you will be able to
upgrade your old computer and give it a new lease of life. The upgrade card will
probably also include an increase of backside cache memory to further enhance performance. The cache memory stores frequently used system commands and thereby
takes the strain away from the processor chip allowing faster performance on application tasks.
RAM memory and scratch disks
The amount of RAM memory you have installed is a key speed-determining factor
for image editing in Photoshop. A minimum of 35 MB application memory is recommended for Photoshop 7.0, but I doubt you would want to run with anything less
than 64 MB specifically allocated to the program. Ideally, when you buy a computer
you will want to install as much RAM memory as the computer will allow. Most PCs
and Macs use DIMMs (Dual Inline Memory Modules). The specific RAM memory
chips may vary for each type of computer, so check carefully with the vendor that
you are buying the right type for your machine. RAM memory used to cost a small
fortune, but these days the price of RAM is almost inconsequential. If you have
three RAM slots on your machine, you should easily be able to install 3 × 512 MB
RAM chips, especially now that Photoshop is able to recognize when you have more
than a gigabyte of RAM installed. The speed boost gained from having the maximum amount of RAM installed in your machine will be very significant.
The general rule used to be that Photoshop requires available RAM memory of 3–5
times the image file size to work in real time. That will still hold true except under
certain circumstances where the History options are set to allow a great many multiple undos and you are performing global changes, with each operation affecting the
entire image, like applying a series of filters to the whole image. If you do that the
memory requirements will soon escalate to many times the document file size. If, for
example, you are editing a 30 MB RGB image in Photoshop, you will need around
90 MB to 150 MB of RAM memory beyond the amount of RAM used by the system
and Photoshop itself, to edit the picture in real time. And that is assuming you have
no layers added to the image, in which case the RAM memory requirements will be
even greater. To get round this memory devouring problem, Photoshop utilizes free
hard disk space as an extension of RAM memory. It uses all the available free hard
disk as ‘virtual memory’. In Photoshop terms, this is known as a ‘scratch disk’.
46
Please purchase PDF Split-Merge on www.verypdf.com to remove this watermark.
Configuring Photoshop
The Apple Macintosh and Windows operating systems are able to pull off a similar
trick with their own virtual memory management systems. It used to be the case that
you would be advised to turn these off. This is no longer valid and you should leave
the operating system virtual memory left switched on. The Windows VM file should
be set to at least 1.5 times your physical memory size. There are some software
utilities that claim to double your RAM – these will conflict with Photoshop’s virtual
memory and should not be used. Certain calculations like Photoshop filters always
work best in real RAM. If you are making extensive use of scratch disk space in
place of real RAM, you will see a real slowdown in performance.
The free hard disk space must be at least equivalent to the amount of RAM allocated
for Photoshop. To use an extreme example, if you have 200 MB of free RAM allocated to Photoshop but only 100 MB of free disk space on the drive allocated as the
primary scratch disk, Photoshop will use only 100 MB of the real RAM. For optimal
image editing, at least 2 GB of free hard disk space is recommended. Under these
conditions, Photoshop will use all the available free RAM for real-time calculations
(mirroring the actual RAM on the scratch disk) and when Photoshop runs out of real
memory, it uses the extra space on the scratch disk as a source of virtual memory.
Green: MO disk; Red: ZIP disk; Blue: External AV HD; Black: Internal AV HD; Cyan: RAID SCSI 3 drive
Figure 3.1 The above chart shows a comparison of hard disk sustained data transfer rates measured
using the ATTO Performance Utility. The test results show data transfer speed on the vertical axis
against increasing data block sizes on the horizontal axis. The slowest test result was for a Magneto
Optical media disk. The ZIP proved slightly faster. The internal AV hard disk demonstrates a faster
sustained speed, while the RAID performance figures dwarf everything else.
47
Please purchase PDF Split-Merge on www.verypdf.com to remove this watermark.
Adobe Photoshop 7.0 for Photographers
Photoshop is designed always to make the most efficient use of real RAM memory.
There are slight differences between the way this works on Windows PC and
Macintosh systems respectively, but essentially the program tries to keep as much
RAM as possible free for memory intensive calculations. Low level data like the
‘last saved’ version of the image are stored in the scratch disk memory giving priority to the current version and last undo versions being held in RAM. Photoshop
continually looks for ways to economize the use of RAM memory, writing to the
hard disk in the background, whenever there are periods of inactivity. Scratch disk
data is also compressed when not in use, unless the optional extension that prevents
this has been loaded at Startup.
With all this scratch disk activity going on, the hard disk performance of your
scratch disk plays an important role in enhancing Photoshop speed. Most modern
Macs and PCs have IDE, ATA or ATA 160 drives as standard. A fast internal hard
disk is adequate for getting started. But for better performance results, you should
really install a second hard drive, and have this dedicated as the primary scratch disk
(assign it as the primary scratch disk in the Photoshop preferences). Most likely your
computer will have the choice of a USB or FireWire™ connector for linking external
devices. USB is about as fast as an old SCSI 1 connection. FireWire™ (IEEE 1394)
is the latest connection standard and has many advantages over the older SCSI
interface. First of all FireWire™ is a lot faster and second, it will allow you to hot
swap a drive between one computer and another. This is particularly useful when
you wish to shuttle very large files around quickly. Although the promised FireWire™
data transfer speeds of 100+ MB sounds impressive, most external FireWire™ drives
are not actually any faster than the SCSI drives they replaced. But with the advent of
the Oxford (Bridge) Chipset, FireWire™ is now approaching the promised speed.
FireWire™ drives are still IDE drives with a bridge to the FireWire™ standard, and
the Oxford Chipset came out to enhance the throughput closer to the theoretical
limit. An old external SCSI port is usually of a SCSI 1 standard and is suited for
connecting all types of SCSI devices. Internal SCSI connections are often SCSI 2,
which provides a quicker data transfer standard (data transfer not data access time is
the measure of disk speed to look out for).
Until we see fast data transfer rates provided with FireWire™ drives, you really need
to look at using a wide array RAID disk connected via a SCSI accelerating PCI card
like a SCSI 3 standard. Specifications vary according to the drives and the PCI card,
but Figure 3.1 quite clearly shows that the sustained performance of a 25 MB per
second RAID system is a huge improvement over a standard internal drive. But
whichever type of drive you allocate as a scratch disk, you should ensure that it is a
separate, discrete hard drive and is not shared with the disk which is running either
Photoshop or the operating system. There is provision in Photoshop for as many as
48
Please purchase PDF Split-Merge on www.verypdf.com to remove this watermark.
Configuring Photoshop
four ×2 gigabyte scratch disks. So if you have four separate physical drives allocated
as individual scratch disks this will provide the ability for one drive to be reading,
while the second is writing and vice versa. This makes for more efficient and faster
disk usage.
Clearing the Photoshop memory
Allocate most of the RAM available to Photoshop and ideally run the application on
its own – this is because Photoshop wants all the memory it can get. Whenever you
perform a Photoshop task that uses up a lot of program memory, you can see this in
in the lower left window display or in the
the document status box
Status bar of a PC. The right-hand figure shows the amount of memory available and
the left, the amount used so far. Photoshop stores data such as recent history states
and clipboard data in its memory on the scratch disk. Copying a large selection to the
clipboard also occupies a lot of memory. Should you experience a temporary slow down
in performance you might want to purge Photoshop of any excess temporarily data held
in the memory. To do this, choose Edit > Purge > Undo, Clipboard, Histories or All.
Configuring the RAM memory settings (Macintosh OS 9)
In the Finder desktop, go to the Apple menu and choose ‘About this Macintosh’. The
dialog box will show you how much RAM is used by the system and how much
application RAM remains – see Largest Unused Block. Next, find the unopened application icon and choose File > Get Info from the desktop menu. Change the Preferred Size
setting to the largest unused block figure minus 10–20 MB. This is the largest amount
of RAM you can safely allocate to Photoshop.
Configuring the RAM memory settings (Windows and Mac OS X)
When you first install Adobe Photoshop 7.0, 60% of all available system RAM is
automatically allocated for Photoshop use (50% on Windows). You can improve
upon this memory allowance by increasing the partition. For example, if you are
running Mac OS X and have a gigabyte or more of RAM memory, you can increase
the memory allocation in the Memory and Image Cache preferences to 90% or higher.
But on a Windows system, do not go higher than 75–85%, as this percentage does not
take into account the percentage used by the operating system. If you want to run other
programs simultaneously with Photoshop, then lower the percentage of RAM that is
allocated to Photoshop. In either case, you have to quit and relaunch Photoshop for
these changes to take effect.
49
Please purchase PDF Split-Merge on www.verypdf.com to remove this watermark.
Adobe Photoshop 7.0 for Photographers
Photoshop and Mac OS X
Macintosh System 10 (or Mac OS X as it is more commonly known) is a brand new
Apple operating system. Because OS X is based on the UNIX operating system, the
Adobe engineers had to rewrite a lot of the existing program code. This was certainly
an enormous challenge, but for all that, many Macintosh users are still going to be
frustrated by the end result. Any third-party plug-ins or device drivers that are nonOS X compliant will simply not show up in Photoshop 7.0 whenever it is run in the
native, Mac OS X environment. Basically it will be down to the third party developers to rectify this and Macintosh users are bound to discover that certain peripherals
(such as old inkjet printers) will also have to be replaced with a newer device, or wait
until the manufacturer releases OS X driver updates (see below: Installing Mac OS
X and Photoshop).
Photoshop 7.0 is able to run in both Classic and native OS X operating system environments. If you are new to Mac OS X, you will notice that the OS X system loads
much faster than before and is more stable. Mac OS X features memory protection,
which will prevent any application-level memory leaks from affecting another open
application, resulting in fewer system-level crashes. While OS X may be a more
stable operating system, it is unlikely that Photoshop 7.0 will actually run any faster
in OS X compared with OS 9. If you are in the habit of running several applications
simultaneously on the same computer, then you will undoubtedly gain a benefit from
working in OS X mode. But if you are a power user running Photoshop on its own
and use lots of third-party plug-ins and devices, you may find it better to stick to
running in OS 9. Remember also that the OS X system will require at least 128 MB
of RAM memory to run the operating system and consequently there will be less
memory available to run Photoshop. And the symmetric multiprocessing under OS
X means that Photoshop will receive less of a speed boost on the new multiprocessor
Macintoshes.
And that’s not all. The OS X system itself will at times devour a sizeable chunk of
the processor’s resources. For example, the anti-aliasing engine that produces the
rounded corners on the windows and the transparency support will place extra
demands on the processor chip. The OS X throbbing buttons alone can consume up
to 10% of the processor’s resources! On a G3 computer OS X can appear to be
noticeably slow compared to running OS 9. But if you are running a more recent
twin processor G4, these high overhead demands on the processor are much less
noticeable. In my opinion OS X is a very smart looking operating system that in
many ways is ahead of its time. Sure, the interface lacks some of the refinements and
niceties of Classic OS 9, but this is a promising start. But above all do not expect OS
X to run Photoshop any faster. Mac OS X demands you run it on a fast G4 and it is
much to the credit of the Adobe engineers that despite everything, Photoshop can
50
Please purchase PDF Split-Merge on www.verypdf.com to remove this watermark.
Configuring Photoshop
actually run almost as fast in OS X as it can in Classic. It may also help to know that
the Photoshop team have lobbied Apple hard to get the necessary extra OS support
built into OS X 1.3, which is the minimum OS X install that Photoshop 7.0 should be
run on. Among other things, OS X 1.3 (the latest version is OS X 1.4) provides
improved support for the brushes engine.
Installing Mac OS X and Photoshop
In OS X operating mode all OS X compliant applications and utilities will be able to
operate within this native system environment. The standard Aqua blue interface is
rather too colorful for my taste, but you can easily switch to using the Graphite look
instead via the system preferences. Any non-OS X compliant program can be run
from native OS X, but it will do so by launching the Classic OS 9 operating system
from within OS X (you basically end up with a classic window appearing within the
OS X operating system). The Mac OS X software package contains clear guidance
on how to install the OS X and the Classic OS. I have a G4 Macintosh with the main
hard drive divided into two partitioned drives. The first partition is 8 Gigabytes (the
recommended maximum) and I installed Mac OS X onto this partition first. I then
installed OS 9.2 on the secondary partition.
Install Photoshop 7.0 while running OS X and the program will automatically open
in the OS X system environment (as shown in the dialog screenshots illustrated
throughout this book). Photoshop users typically rely on the use of third-party plugins such as filters and import/export plug-ins to add functionality to the program. If
any of your plug-ins are not OS X compliant, they will not function within OS X.
Photoshop 7.0 will still launch OK, but the non-compliant items will fail to appear in
the program menus. And sadly this is all too likely going to be the case for a lot of
Photoshop users, until more third-party plug-ins are updated for OS X. In the early
days of OS X there were not even any OS X compliant drivers for the majority of
inkjet printers or pressure sensitive tablets. But this situation should be successfully
addressed by the time Photoshop 7.0 hits the shelves.
In the meantime you will want to do the following: install Photoshop 7.0 on the OS
X system drive. Install any plug-ins that you require as before. If you can manage
without the use of plug-ins that are non-OS X compliant, then operate Photoshop in
OS X. For those times when you do need the full use of these plug-ins, you can
instruct Photoshop to launch in the Classic environment. Locate and highlight the
Photoshop application icon and choose File > Show Info and check the ‘Open in the
Classic environment’ checkbox. To revert to Aqua mode again, uncheck this box in
the File Info window. Running Photoshop 7.0 in Classic mode from within OS X
will probably help you to run non-OS X filter plug-ins, but it may still not be possible
51
Please purchase PDF Split-Merge on www.verypdf.com to remove this watermark.
Adobe Photoshop 7.0 for Photographers
to get Photoshop to recognize all non-OS X input and output devices. Professional
Photoshop users like myself will have customized their computer systems with addons such as Ultra Wide SCSI RAID drives plus high-end drum scanners, digital
cameras and print devices. Some of these are old SCSI devices and because there
may never be any drivers available for OS X, there will be no other option but to
bypass OS X completely and restart the computer using the OS 9 partition instead.
Photoshop 7.0 will then readily open up in OS 9 mode.
If you have a scanner or printer that is not supported by an OS X driver yet, it is
always worth checking the manufacturer’s website or enquiring if and when such a
driver will become available. This is one of those unfortunate situations where
everyone in the Mac support industry is waiting for everyone else to make the first
move. It will probably have helped that Microsoft released Office for Mac OS X first
and this will have encouraged the inkjet manufacturers in particular to get the ball
rolling. But I suspect a lot of manufacturers will be holding out on updating drivers for all
these graphics devices until they see that Photoshop 7.0 is about to ship. Even then, the
OS X Mac kernel is still in its infancy and new driver updates are likely to be more buggy.
In my bureau office setup I have two Macintosh computer workstations. One of
them operates mainly in Classic mode and handles all the scanning and output work,
plus general office application work. This is connected via a high-speed Ethernet link to
the other Mac, where I happily do most of my Photoshop retouching running Mac OS X.
Shared and non-shared items
To summarize, you only need to install one version of Photoshop 7.0 and I recommend
that you do this using the OS X partition drive. Photoshop 7.0 can open in OS X
either as a native classic application, or it can be made (via the File > Get Info dialog) to open in Classic mode. If you startup from the OS 9 partition, Photoshop 7.0
will only open in Classic. So you have one program but with two ways of running it.
While some items are shared, such as the plug-ins folder and Preset folder contents,
other things such as the preference settings are not. So if you configure the scratch
disk preferences in Classic mode, these will not be recognized in OS X mode and
you will have to make a separate configuration.
Windows XP
While Apple were bringing out OS X, Microsoft were busy developing the Windows
XP operating system. Like OS X, Windows XP has radically abandoned the previous
Windows interface design. The standard Windows XP interface design is known as
52
Please purchase PDF Split-Merge on www.verypdf.com to remove this watermark.
Configuring Photoshop
Luna. The dark blue color featured in Luna is rather distracting for Photoshop work
and so I would advise you to dump the Luna interface and choose the ‘Silver’ theme
instead. Both OS X and XP feature advanced operating systems, and are more reliable and not prone to regular crashing, like their predecessors. Or if a program does
crash, at least it does not disrupt the system and freeze the whole computer. Photoshop
users will be interested to know that Windows XP does have a neat way of displaying
image folder information, which in a way complements the Photoshop 7.0 file browser.
The XP file navigation system can enable you to browse the images contained in a
folder as a slide show, which is very cool.
Adapting to a new system can be a slow learning process. Fortunately, Windows XP
features the ability to revert to a previous system configuration. This is particularly
useful if you were to install a driver that proved troublesome. You simply revert to
earlier system setup. Windows XP is a much refined version of the Windows NT
operating system, so it has a good solid legacy. Although OS X is based on a UNIX
core, and has a great Aqua interface, much of OS X is very recent and there are a
number of neat features from the OS 9 system that are sadly missing in OS X, like
the ability to grab and drag a document window from one of the sidebars.
Office environment
Your computer working area matters. Even if space is limited there is much you can
do to make your work space as comfortable as possible to work in. Choose a
comfortable operator’s chair, ideally one with arm rests and adjust the seating position so that your wrists are comfortably resting on the table top. The monitor should
be level with your line of view or slightly lower. Lighting levels should be consistent
throughout the day and any artificial lights should be daylight balanced. Make sure
no direct light hits the screen and that the walls are painted with a neutral color. Once
you start to build an imaging workstation, you will soon end up with lots of electrical
devices. While these in themselves may not consume a huge amount of power, do
take precautions against too many power leads trailing off from a single power point.
External sound speakers must be shielded, unless they are placed at a distance from
the computer monitor. Cathode ray tube monitors are vulnerable to damage from the
magnets in an unshielded speaker or the electrical motor in an inkjet printer. Just try
not to position any item other than the computer too close to a CRT monitor screen.
Interference from other electrical items can cause problems as well. I recently noticed all
my monitors were flickering after moving to a new office and consequently had to
consider shielding the computer monitors with a special material. This was all
because of assorted cables contained behind the office wall. To prevent damage or
53
Please purchase PDF Split-Merge on www.verypdf.com to remove this watermark.
Adobe Photoshop 7.0 for Photographers
loss of data from a sudden powercut, place an uninterruptible power supply unit
between your computer and the mains source. These devices will also smooth out
any voltage spike surges in the electricity supply.
System software
A computer that is in daily use will after a month noticeably slow down unless you
do some housekeeping. You should regularly rebuild the desktop file by holding
down the Command and Option keys (Mac OS 9) simultaneously at startup. This
maintenance operation makes it easier for the computer to locate files (just as when
you tidy up your own desk). PC users should search for temporary files while no
applications are running, using the Find command and entering ‘*.tmp’, to search
for any files that have the .tmp (temporary) file extension. These should then be
deleted. With Mac OS X you can also purge the cache, which has a similar effect to
rebuilding the desktop in OS 9. Norton Utilities is a suite of programs that add functionality. Image files continually read and write data to the hard disk, which leads to
disk fragmentation. Norton’s Speed disk (which has to be run from a separate startup disc), will defragment files on the main hard disk or any other drive. Windows
users should also look out for a program like Windows Disk Defragmenter. This is
essential on the drives you allocate as the scratch disks in Photoshop. If you’re
experiencing bugs or operating glitches and want to diagnose the problem, run
Norton’s Disk Doctor. This will hunt out disk problems and fix them on the spot.
On the subject of Norton, Rod Wynne-Powell has this extra advice to offer: I have
never read it in print or in Norton’s literature, but an essential procedure for running
Norton is that you run it more than once, if you find that it reports any error at the
end. On the second or subsequent runs you may ignore the search for bad blocks, as
if they occur you have more than a simple glitch, but in this way you find out whether
any ‘fixed’ item has caused any other anomalies. If you are unlucky enough to have
‘bad blocks’ do not assume that their reallocation has solved the problem; it may
well have reassigned the faulty block, but it could be that the data present in that area
is now invalid, and could be a vital system component, which will now start to corrupt more of your disk. The advice is simple, and not welcome; the hard disk must be
reformatted, and the system and applications all reloaded. If bad blocks recur the
drive needs replacing. And another thing to note is this. Of late Apple has gone
against its own advice and introduced files that are preceded by a period (files such
as .FS). It should be noted that these must not be changed, yet Norton throws these
up as damaged. The consequence of this is that currently you will always receive a
'Minor problems' warning at the end of your session.
54
Please purchase PDF Split-Merge on www.verypdf.com to remove this watermark.