Tài liệu Thiết kế flash với flash cs5 part 51 doc
Bạn đang xem bản rút gọn của tài liệu. Xem và tải ngay bản đầy đủ của tài liệu tại đây (544.74 KB, 6 trang )
ptg
Working with Video
Introduction
The Flash Video Import Wizard lets you import a video clip as
a file that is streamed from a Flash server, progressively
downloaded from a Web server, embedded (stored in movie)
or linked (stored out of movie). It guides you through the
steps for the specific deployment method. During the import
process, you have the ability to compress the video using
user-defined profiles, or preset values, set cue points, and
trim excess video. It's important to understand that although
Flash can import a video file, it can't make the quality of the
video any better than the original. If you receive your video
from outside sources, there is little you can do; however, if
you're the one shooting the footage, pay close attention to
lighting, camera angles, and distractions within the video.
The more time and attention you spend taking the video, the
better the video will be when imported into Flash. If you do
need to tweak a video file, video-editing applications such as
Adobe's Premiere (Mac/Win), and Apple's Final Cut Pro (Mac)
are excellent choice for the budding movie director.
If you have a video-editing application and Flash, you can
create a movie against a blue screen and then mask the area
out using alpha channel masks. They do this in the movies all
the time. The process involves opening the image within a
video-editing application, and creating the transparency
using a specific color (referred to as blue or green screening),
using luminosity levels, or actually creating a mask in an
image-editing application such as, Adobe Photoshop, and
then importing the mask. When you open the movie in Flash,
any other background you place behind the movie will
replace the original green screen.
13
13
What You’ll Do
Use the Video Import Wizard
Work with Video on the Stage
Work with Video on the Timeline
Use Movie Clips with Video Files
Add Cue Points to a Video
Use Video with ActionScript
Control Video Through Movie Clips
Use the FLV Playback Component
Work with the Video Encoder
Work with Alpha Channel Masks
Export as a QuickTime Video
Export as a FLV File
325
From the Library of Wow! eBook
ptg
326 Chapter 13
Importing video into Flash is not much more difficult than importing a
graphic or audio file. The Video Import Wizard is Flash's way of helping
you through the process of importing video files into Flash. When you
import video, the Wizard lets you import a video clip as a file that is
streamed from a Flash server, progressively downloaded from a Web
server, embedded (stored in movie) or linked (stored out of the movie).
It guides you through the steps for the specific deployment method.
During the import process for some methods, you have the ability to
compress the video using user-defined encoding profiles, set cue
points, and trim excess video. You can choose to accept the Wizard's
recommendations or make changes. You can also attach movie play-
back controls with different looks, known as skins (New!). The Wizard
seamlessly uses the Skinning component to attach movie controls.
Using the Video
Import Wizard
Use the Video Import Wizard
Click the File menu, point to
Import, and then click Import
Video.
◆ For the FLV format, use Import
To Library since the file is
native to Flash and doesn’t
need to be encoded.
Flash saves the video in the active
document's Library.
Select a video file location option:
◆ Click the On Your Computer
option, click Browse to
manually locate the video file.
Choose a video method from
the following options:
◆ Load external video with
playback component.
◆ Embed FLV in SWF and play
in timeline.
◆ Import as mobile device
video bundled in SWF.
◆ Click the Already deployed to a
web server, Flash Video
Steaming Service, or Flash
Media Server option, and then
enter in the file's URL.
Click Next.
3
2
1
2
3
Skinning options
From the Library of Wow! eBook
ptg
Chapter 13 Working with Video 327
Options vary depending on the
deployment method; select the
ones you want.
◆ Skinning. Specify the
appearance and position of the
play controls (New!);
additional skins added.
◆ Embedding. Specify a symbol
type, and other embedding
options.
Click Next.
Click Finish.
Flash will automatically create an
FLV component, and drop it into
the active layer on the Timeline.
Flash places the external video on
the Stage with the first frame of
the video (New!) and playback
controls at the bottom.
Click the Control menu, point to
Test Movie, and then click Test.
7
6
5
4
4
5
6
Extension Description
.flv, f4v Adobe Flash Video
.mp4, .m4v, .avc Moving Picture Experts Group
.mov, .qt QuickTime
.3gp, .3gpp, .3gp2, 3GPP/3GPP2 for Mobile Devices
.3gpp2, .3g2
Supported Import Video Formats
See Also
See “Working with the Video Encoder”
on page 340 for information on Flash
video encoding settings.
From the Library of Wow! eBook
ptg
328 Chapter 13
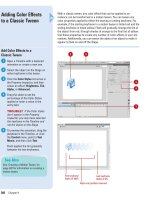
When you import video into a source document, Flash places the exter-
nal video on the Stage with the first frame of the video (New!) and
playback controls at the bottom. You can use the playback controls on
the Stage to play and work with the video (New!). In addition, you can
make changes to video settings in the Properties panel as you work
with the video on the Stage. In the Properties panel, you can change
the position and size, alignment, skin, volume, autoplay, and cuepoints.
You can no longer change video properties in the Component Inspector
panel on the Parameters tab (New!).
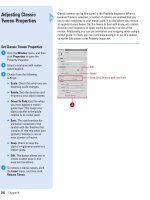
Working with Video
on the Stage
Move a Video File Directly
to the Stage
Open a Flash document (.fla) that
contains one or more video files.
Select the video.
Use the playback controls to work
with the video.
Click the Window menu, and then
click Properties to open the
Properties panel.
Use the Properties panel to
change the options you want.
◆ align. Specify FLV file alignment
in the player.
◆ autoPlay. Select or deselect to
automatically play the FLV file.
◆ cuePoints. Specify a string with
the cue points for the video.
◆ isLive. Select or deselect
whether the FLV is streaming
live.
◆ preview. Creates a preview for
authoring purposes.
5
4
3
2
1
2
3
4
From the Library of Wow! eBook
ptg
Chapter 13 Working with Video 329
◆ scaleMode. Select an option to
maintainAspectRatio, noScale,
or exactFit.
◆ skin. Select a skin for the FLV
video player.
◆ skinAutoHide. Select or
deselect to automatically hide
or show the skin.
◆ skinBackgroundAlpha. Specify
a background alpha channel for
the skin.
◆ skinBackgroundColor. Specify
a background color for the skin.
◆ source. Specify the path to the
video source file.
◆ volume. Specify a volume
setting for the video.
Click the Control menu, point to
Test Movie, and then click Test.
6
5
Skin for the FLV player
6
From the Library of Wow! eBook
ptg
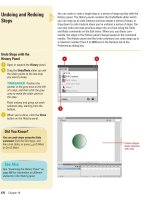
330 Chapter 13
When you import video into a source document, Flash stores a copy of
the video in the active document's Library. Even if you import the video
directly to the Stage, Flash will still place a copy in the Library. It's
always best to import video files first into the Library; that way you have
control of the video and how it's brought onto the Stage. Moving a
video file directly to the Stage is the easiest way to incorporate video
into a Flash movie. In fact, once the video file has been imported into
Flash, it's a simple drag and drop operation. However, video files should
always be held within a separate layer. That gives you control over the
display of the video and lets you place other Flash elements in other
layers.
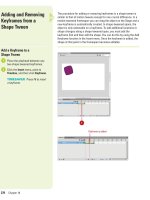
Working with Video
on the Timeline
Move a Video File to the Stage
from the Timeline
Open a Flash FLA document that
contains one or more video files in
the Library or use the Video Import
Wizard.
IMPORTANT
To w ork di rectly
with video files on the Timeline,
you will have to Import them using
the Embed video in SWF and play
in Timeline (see Using the Video
Import Wizard).
Click the Window menu, and then
click Library to open the Library
panel.
Click the Insert Layer button, name
the new layer video_1, and then
select the new layer.
Drag the video file from the Library
onto the Stage.
Click Yes, if prompted to a dialog
box indicating how many frames
the video file will occupy on the
Stage.
Click the Control menu, point to
Test Movie, and then click Test.
6
5
4
3
2
1
4
3
Video file in the Library
5
From the Library of Wow! eBook