Tài liệu The Adobe Photoshop Layers Book P2 ppt
Bạn đang xem bản rút gọn của tài liệu. Xem và tải ngay bản đầy đủ của tài liệu tại đây (1.11 MB, 10 trang )
The Adobe Photoshop Layers Book
14
option will take up the least amount of screen landscape, but will
make you rely entirely on layer naming which negates the value of
visual cues.
You can change this option at any time; it applies to the palette,
and not to actual layer content.
Getting Started Creating Layers
There are many ways to create new layers in Photoshop, and
the methods serve di erent purposes. Table 1.3 describes various
methods, and the most common ones.
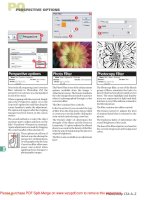
FIG 1.6 The Layers Palette Options.
Function How To
Duplicate Layer • Drag any layer (including the background layer) to the Create
a New Layer button. This creates a duplicate layer and adds the
word ‘copy’ to the new layer name.
• Choose the Duplicate Layer command from the layers palette
menu or layers menu. Creates a duplicate and adds the word
‘copy’ to the new layer name.
TABLE 1.3 Methods to create new layers in Photoshop.
Ch01-K52076.indd 14Ch01-K52076.indd 14 6/21/07 2:11:24 PM6/21/07 2:11:24 PM
The Basics of Layers: Layer Functions and Creation
15
Function How To
• From the top menus choose Layer-ϾNew-ϾLayer Via Copy or
press CommandϩJ / CtrlϩJ with no selection active. Creates a
duplicate and adds the word ‘copy’ to the new layer name.
• With two images open, click on a layer in the layers palette and
drag to the currently inactive image. Hold the Shift key on the
keyboard while dragging to center the image in the image you
are dragging it to. Creates a new layer in the second document
with the same name as the layer in the originating document.
Blank layer • Click the Create a New Layer button. Creates a new layer with
the default name Layer # (where the number is sequential,
starting with 1).
• Choose the Layer-ϾNew-Ͼ Layer command or New Layers from
the layers. Creates a new layer with the default name Layer #
(where the number is sequential, starting with 1).
Layer via copy • Create a selection, then Copy (CommandϩC / CtrlϩC) and paste
(CommandϩV / CtrlϩV). Creates a duplicate of the selected area
in a new layer with the default name Layer # (where the number
is sequential, starting with 1).
• Choose Layer-ϾNew-ϾLayer Via Copy or press Commandϩ
J / CtrlϩJ with a selection active. Duplicates selected area to a
new layer with the default name Layer # (where the number is
sequential, starting with 1).
• Press CommandϩOptionϩShiftϩE / CtrlϩAltϩShiftϩE. Merges
visible layer content to a new layer with the default name Layer
# (where the number is sequential, starting with 1).
Layer from Background • Double-click the background layer in the layers palette.
Converts Background to layer. The new layer will be created with
a default name of Layer 0. Does not add to the layer count.
New Background Layer • Choose LayerϾNewϾBackground From Layer. This changes the
active layer to the Background layer. Does not add to the layer
count.
Adjustment Layer • Choose any of the New Adjustment Layer submenu options
from the Layers menu (including Levels, Hue/Saturation, Invert,
etc.). A New Layer dialog will open allowing you to change
Name, Clipping, Color, Mode and Opacity. Once you accept the
New Layer option by clicking OK, a function dialog will appear
as appropriate.
TABLE 1.3 (Continued)
Ch01-K52076.indd 15Ch01-K52076.indd 15 6/21/07 2:11:25 PM6/21/07 2:11:25 PM
The Adobe Photoshop Layers Book
16
Function How To
• Choose any of the adjustment layer options from the Create
New Adjustment or Fill Layer menu o the Layers palette. A
function dialog will appear as appropriate to the function
selected.
Fill Layer • Choose any of the New Fill Layer submenu options from the
Layers menu (Solid Color, Gradient, Pattern). A New Layer dialog
will open allowing you to change Name, Clipping, Color, Mode
and Opacity. Once you accept the New Layer option by clicking
OK, a function dialog will appear as appropriate.
• Choose any of the ll layer options from the Create New
Adjustment or Fill Layer menu o the Layers palette. A function
dialog will appear as appropriate to the function selected.
• Choose the Shape tool, then be sure the Shape Layers option
is selected on the Option bar (use mouse tool tip to nd the
button for the option). Click-and-drag on the image.
Type Layer • Choose the type tool and click on the image. Use the keyboard
to enter text once the cursor appears. The type tool can be used
in combination with vectors to make type on a path and with
shapes to make text in a shape.
• Choose the type tool and Click-and-drag on the image. Makes
a text box that will contain the text that is entered. Use the
keyboard to enter text once the cursor appears.
If you take a moment and sit down in front of the computer
and run down the bullet list, you can test out creating all these
new layers. Of course there are reasons to create layers, but right
now gain some familiarity with the basic creation methods. This
will help you locate them later when you need them, and play is
a great way to become familiar and comfortable with creating
layers. It won’t be long till we are immersed in serious layer
work!
If you do go through the exercise of creating the layers, you’ll
notice that di erent layer types can be identi ed by di erent layer
icons in the layers palette.
Table 1.4 shows icons and what they
mean.
Try It Now
TABLE 1.3 (Continued)
Ch01-K52076.indd 16Ch01-K52076.indd 16 6/21/07 2:11:25 PM6/21/07 2:11:25 PM
The Basics of Layers: Layer Functions and Creation
17
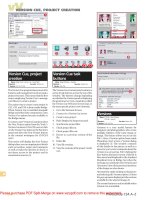
Icon Layer type
Black & White
Brightness/Contrast
Channel Mixer
Color Balance
Curves
Exposure
Solid Color
Gradient
Gradient Map
Hue/Saturation
Invert
Levels
Pattern
Photo Filter
Posterize
Selective Color
Threshold
Type
TABLE 1.4 Identi cation of di erent layer icons.
Ch01-K52076.indd 17Ch01-K52076.indd 17 6/21/07 2:11:25 PM6/21/07 2:11:25 PM
The Adobe Photoshop Layers Book
18
At this point we have dissected enough of the layers palette and
the things that you will see there to have a reasonable orientation
as to what to expect.
Exercise
Running through the bullet list and creating random layers in a
stack may be interesting, but not nearly as interesting as working
through a practical example. In this exercise, we will take an image,
add a copyright, burn in the frame, and add a drop shadow using
some simple layer creation and techniques. The exercise is a fairly
easy, more or less practical run-through of some layer creation
techniques that will take about 15 minutes and requires little or no
understanding of layers. This is meant to be a glimpse into layer
functionality; while there is some explanation of what is going
on during the exercise, better understanding of the features we
are looking at will come as we explore the possibilities of layers
throughout the rest of the book.
There is almost always more than one way to execute a
set of steps to accomplish a result in Photoshop. Though you
may usually use di erent methods, even for simple steps,
it is suggested that you follow the steps as written the rst
time you run through any exercise in this book – especially
when a speci c means of accessing a function is suggested.
Experimenting with other methods may yield somewhat
di erent or confusing results. If an option or function step is
not speci cally mentioned, it is left up to you to choose.
Try it Now
1. Open any image and atten if necessary (Layer>Flatten Image).
The image should have only a Background layer when viewed in
the Layers palette.
2. Double-click the Background layer. This will open the New Layer
dialog (see Figure 1.7).
FIG 1.7 The New Layer dialog.
Ch01-K52076.indd 18Ch01-K52076.indd 18 6/21/07 2:11:26 PM6/21/07 2:11:26 PM
The Basics of Layers: Layer Functions and Creation
19
4. Set the background swatch color to white. To do this press D
on the keyboard (sets default colors). This color selection will
a ect the results of the next steps.
5. Create a new layer (click the Create a New Layer button on the
Layers palette). This creates a new layer above the 1 Original
Background layer.
6. Make the new layer into the background layer by choosing
Background From Layer (LayerϾNewϾBackground From Layer).
This will change the layer to a background and ll with white.
7. Choose Canvas Size from the Image menu. When the dialog
appears, choose the following options: New Size: Width:
120% (Choose from the menu in the dialog box), New Size:
Height: 120%, do not check the Relative box, leave the anchor
(White box in center) at the default, Canvas Extension Color:
Background. Click OK to accept the changes. This will create a
white border around your image.
FIG 1.8 Change the layer Name.
Canvas Extension Color is new to Photoshop CS3.
‘Background’ is the default for earlier versions, so there is
nothing to change in CS2 and previous versions.
8. Choose the Type tool by pressing T on your keyboard.
9. With the type tool selected, choose a font and font color for
a copyright from the Options bar. If you don’t know what to
choose, pick Arial, Regular, 12pt and black. These options can
be found on the Options bar, just below the program menu.
10. Click on the 1 Original Background layer in the layers palette to
activate it and then click on the image with the type tool. This
will create a new type layer in the layers palette just above the
1 Original Background layer, and a blinking cursor will show on
the image.
3. Change the layer name of the Background Copy layer to ‘1
Original Background’ by typing in the Name eld. Click OK to
accept the changes (Figure 1.8).
Ch01-K52076.indd 19Ch01-K52076.indd 19 6/21/07 2:11:26 PM6/21/07 2:11:26 PM
The Adobe Photoshop Layers Book
20
11. Type in ‘Copyright © 2007 [your name]’, click the Commit Any
Current Edits button on the Type Options bar, and move the
copyright to a place in the image that seems suitable using the
Move tool. To choose the Move tool, click the Move tool on the
toolbar, or press V on your keyboard.
12. Change the name of the type layer you just created by adding
a ‘2’ to the beginning of the name. To do this, choose Layer
Properties from the Layers menu or the Layers palette menu.
Once you have completed the name change click OK to accept
the changes. At this point your layers should look similar to
Figure 1.9.
FIG 1.9 Layers after step 12.
13. Create a new layer at the top of the layer stack, and name the
layer ‘3 Frame Burn’.
14. Hold down the Command / Ctrl key [Mac/PC] and click directly
on the thumbnail for the 1 Original Background layer. This will
load the solid part of that layer as a selection.
Commit Any Current Edits Button
Cancel Any Current Edits Button
To get the copyright symbol, press OptionϩG on a Mac; on
Windows, hold down the Alt key and press the following keys
on the number pad in order: 0, 1, 6, 9, then release the Alt key. If
this does not work immediately or if you have a keyboard with
no number pad, turn on the Numlock feature from the keyboard
(press the Numlock or similar button). For more information
about Numlock on PCs, consult your computer’s user manual.
Ch01-K52076.indd 20Ch01-K52076.indd 20 6/21/07 2:11:27 PM6/21/07 2:11:27 PM
The Basics of Layers: Layer Functions and Creation
21
15. Invert the selection (press CommandϩShiftϩI / CtrlϩShiftϩI).
16. Fill the selection with black on the 3 Frame Burn layer. To do
this, be sure the 3 Frame Burn layer is active, choose Fill from
the Edit menu, and when the Fill dialog appears choose these
options: Use: Black, Mode: Normal, Opacity: 100%, do not
check the Preserve Transparency checkbox. See the dialog in
Figure 1.10. Click OK to accept the changes. This will ll the frame
area with black.
FIG 1.10 Layers after step 16.
17. Deselect by pressing CommandϩD / CtrlϩD. Deselecting
assures you will apply the next changes to the whole image.
18. Move the layer down in the stack by pressing Commandϩ[ /
Ctrlϩ[ . This will switch the order of the 2 and 3 layers.
19. Apply a Gaussian Blur to the layer. Choose Gaussian Blur from
the Blur submenu on the Filter menu (FilterϾBlurϾGaussian
Blur). Set the Radius to 50, and click OK to accept the
changes.
20. Change the Opacity of the 3 Frame Burn layer to 40%, and
change the Mode to Multiply using the Mode drop list and
Keystrokes will always be noted in the steps in the same
way, and a reminder of the order will appear once in each
exercise when the rst keystroke appears. Mac keystrokes will
always be followed by PC keystrokes, separated by a slash.
Ch01-K52076.indd 21Ch01-K52076.indd 21 6/21/07 2:11:27 PM6/21/07 2:11:27 PM
The Adobe Photoshop Layers Book
22
Opacity slider on the layers palette. Lowering the Opacity will
lessen the e ect of the change.
21. Click on the Background layer to activate it.
22. Create a new layer, and name it ‘4 Drop Shadow’. Because you
activated the background before creating the layer, it will
appear in the layer stack just above the Background.
23. Hold down the Command / Ctrl key and click on the 1 Original
Background layer thumbnail to load it as a selection.
24. Fill the 4 Drop Shadow layer with 50% gray. Use the Fill
function from the Edit menu, and change the Use drop list
under Contents to 50% gray. This will ll in color under the
1 Original Background layer and no change should be
apparent in the image.
25. Deselect. CommandϩD / CtrlϩD. This will release the
selection.
26. Choose Gaussian Blur from the Filter menu (FilterϾBlurϾ
Gaussian Blur). When the Gaussian Blur dialog appears, use a
radius of 20 pixels, and click OK to accept the changes. This will
soften the edges of the 4 Drop Shadow layer.
27. Choose the Move tool (press V), and move the 4 Drop Shadow
by holding down the Shift key and pressing the right arrow
on the keyboard twice and then the left arrow twice. Release
the Shift key. This action will have moved the content of the
current layer 20 pixels down and 20 pixels right. At this point,
the layers should look like
Figure 1.11.
FIG 1.11 Layers after step 27.
Ch01-K52076.indd 22Ch01-K52076.indd 22 6/21/07 2:11:28 PM6/21/07 2:11:28 PM
The Basics of Layers: Layer Functions and Creation
23
28. Make a Hue/Saturation adjustment layer by choosing Hue/
Saturation from the New Adjustment Layer submenu on the
Layers menu (LayerϾNew Adjustment LayerϾHue/Saturation).
When the New Layer dialog appears, click the Use Previous
Layer to Create Clipping Mask checkbox and change the name
of the layer to 5 Shadow Color before clicking OK. The Hue/
Saturation dialog will appear. Click the Colorize box and adjust
the Hue, Saturation and Lightness sliders to adjust the color
of the drop shadow to something pleasing. Moving the Hue
slider (right or left) will change hues as if they are on a color
wheel. Moving the Saturation slider to the right will increase
saturation; moving it to the left will decrease saturation.
Moving the Lightness slider to the right will lighten the
shadow; moving the slider left will darken the shadow. Click
OK to accept the changes.
The use of Previous Layer to Create Clipping Mask
checkbox has been named di erent things in almost every
other versions of Photoshop. It is the only checkbox on the
New Layer dialog, and it always does the same thing: it creates
a clipping group from the layer you are creating. See the Types
of Layers Table 1.2 for more information.
FIG 1.12 Layers after step 28.
Ch01-K52076.indd 23Ch01-K52076.indd 23 6/21/07 2:11:28 PM6/21/07 2:11:28 PM