Tài liệu Targeting the Main Movie ppt
Bạn đang xem bản rút gọn của tài liệu. Xem và tải ngay bản đầy đủ của tài liệu tại đây (14.37 KB, 3 trang )
< Day Day Up >
Targeting the Main Movie
The main (root) movie represents the main timeline of an SWF. All of your project's
other timelines exist, in some way, inside this one.
Targeting the main timeline is simple. The syntax is:
_
root.play();
You can place this script on any timeline, exactly as shown, and it will always cause the
main timeline to play.
N
OTE
An external movie (SWF) loaded into a level is also considered a root timeline. In the
section "Targeting Movies on Levels
," we'll explain how this affects your scripting.
1. Open rootTarget1.fla in the Lesson03/Assets folder.
This file is identical to the one we just finished working on except that two buttons
appear on the lower-right portion of the stage. We will script these buttons to
resize the main timeline when they are clicked. We will then copy these buttons,
place them inside our movie clip instances, and—without modifying the target
paths used in the script—demonstrate how you can use _root to target the main
timeline apart from any other timeline in the SWF.
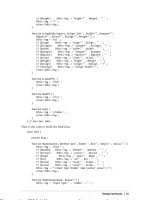
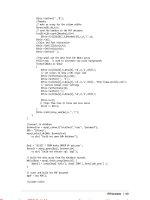
2. With the Actions panel open, select the button with the minus sign over it and add
the script:
3.
4. on (release) {
5.
6. _root._xscale = _root._xscale - 10;
7.
8. _root._yscale = _root._yscale - 10;
9.
10. }
11.
When this button is pressed and released, the main timeline's size will be reduced
by 10 percent. Because the button to which we're attaching this action resides on
the main timeline—which is also the timeline affected by the button—this script
doesn't require a target path. We use an absolute target path here to demonstrate its
universal effectiveness.
3. With the Actions panel open, select the button with the plus sign over it and add
the script:
4.
5. on (release) {
6.
7. _root._xscale = _root._xscale + 10;
8.
9. _root._yscale = _root._yscale + 10;
10.
11. }
12.
This script is similar to the one in Step 2 except that when this button is pressed
and released, the main timeline's size will increase by 10 percent.
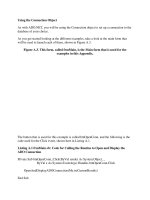
4. Drag-select both buttons and the text on top of the buttons and copy them. Double-
click one of the movie clip instances on the stage to edit it in place. Paste the
buttons on the Change root Buttons layer on the movie clip's timeline, and center
them just below the current graphics.
Although these copies of the buttons on the main timeline exist within this movie
clip timeline, the actions attached to them still target the main timeline because a
_root target path always refers to the main timeline of the movie (the SWF).
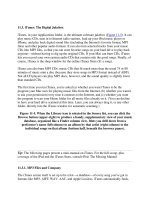
5. Choose Control > Test movie to test the project.
The first thing you'll notice is that every instance of our movie clip includes the
buttons. In addition, the buttons appear in their original placement—on the lower-
right portion of the stage. Click any of these buttons (on the main timeline, or
within a movie clip instance) and you get the same result: the main timeline is
resized. As it resizes, however, something interesting occurs: the other timelines
are resized as well. This resizing is due to the parent-child relationship between
the main timeline and the movie clip instances on it—we'll discuss this topic in
more detail in the next exercise.
6. Close the testing environment to return to the authoring environment. Save the
project as rootTarget2.fla.
We build on this file (with a few modifications) in the next exercise.
< Day Day Up >
![Tài liệu Beginning the Linux Command Line [Apress 2009] ppt](https://media.store123doc.com/images/document/13/ce/kn/medium_zPbk2szWHh.jpg)