Illustrated Guide to Home Forensic Science Experiments pptx
Bạn đang xem bản rút gọn của tài liệu. Xem và tải ngay bản đầy đủ của tài liệu tại đây (21.34 MB, 450 trang )
www.it-ebooks.info
www.it-ebooks.info
BEIJING • CAMBRIDGE • FARNHAM • KÖLN • SEBASTOPOL • TOKYO
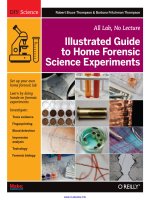
Illustrated Guide to
Home Forensic Science
Experiments
Robert Bruce Thompson and Barbara Fritchman Thompson
First Edition
diy Science
All Lab, No Lecture
www.it-ebooks.info
Illustrated Guide to
Home Forensic Science Experiments
All Lab, No Lecture
The O’Reilly logo is a registered trademark of O’Reilly Media, Inc. The DIY Science series designa-
tions, Illustrated Guide to Home Forensic Science Experiments: All Lab, No Lecture, and related
trade dress are trademarks of O’Reilly Media, Inc. The trademarks of third parties used in this work
are the property of their respective owners.
Important Message to Our Readers: Your safety is your own responsibility, including proper use
of equipment and safety gear, and determining whether you have adequate skill and experience.
Chemicals, electricity, and other resources used for these projects are dangerous unless used
properly and with adequate precautions, including safety gear. Some illustrative photos do not
depict safety precautions or equipment, in order to show the project steps more clearly. These
projects are not intended for use by children.
Use of the instructions and suggestions in Illustrated Guide to Home Forensic Science Experi-
ments: All Lab, No Lecture is at your own risk. O’Reilly Media, Inc., and the authors disclaim all
responsibility for any resulting damage, injury, or expense. It is your responsibility to make sure
that your activities comply with applicable laws, including copyright.
ISBN: 978-1-449-33451-2
[TI]
by Robert Bruce Thompson and Barbara Fritchman Thompson
Copyright © 2012 Robert Bruce Thompson and Barbara Fritchman Thompson. All rights reserved.
Printed in Canada.
Published by O’Reilly Media, Inc., 1005 Gravenstein Highway North, Sebastopol, CA 95472.
O’Reilly Media books may be purchased for educational, business, or sales promotional use.
Online editions are also available for most titles (my.safaribooksonline.com). For more information,
contact our corporate/institutional sales department: 800-998-9938 or
Print History
July 2012
First Edition
Editor: Brian Jepson
Production Editor: Melanie Yarbrough
Copy Editor: Bob Russell, Octal Publishing, Inc.
Proofreader: Linley Dolby
Indexer: Bob Pfahler
Cover Designer: Mark Paglietti
Cover Photograph: Robert Bruce Thompson
Interior Designer: Ron Bilodeau
Illustrator: Rebecca Demarest
www.it-ebooks.info
To Edmond Locard (1877 - 1966), often called the French Sherlock Holmes, who, as a professor of forensic medicine and criminology
at the University of Lyons, in 1910 established the world’s first police crime laboratory. Locard’s lab occupied two attic rooms staffed
by two assistants provided grudgingly by the Lyons police department, and was initially less well equipped than the home forensics
lab we used in writing this book. Despite these limited resources, Locard’s results soon convinced police departments worldwide,
including Scotland Yard and the FBI, to found their own crime labs.
Locard was the first to state the fundamental principle of forensic science, now known as Locard’s Exchange Principle: “Wherever
he steps, whatever he touches, whatever he leaves, even unconsciously, will serve as a silent witness against him. Not only his
fingerprints or his footprints, but his hair, the fibers from his clothes, the glass he breaks, the tool mark he leaves, the paint he
scratches, the blood or semen he deposits or collects. All of these and more bear mute witness against him. This is evidence that
does not forget. It is not confused by the excitement of the moment. It is not absent because human witnesses are. It is factual
evidence. Physical evidence cannot be wrong, it cannot perjure itself, it cannot be wholly absent. Only human failure to find it, study
and understand it, can diminish its value.”
www.it-ebooks.info
www.it-ebooks.info
Contents v
Contents
Preface xiii
1 Laboratory Safety 1
2 Equipping Your Forensics Laboratory 5
Optical Equipment 5
Laboratory Equipment 13
Chemicals and Reagents 19
Specimens 26
Group I Soil Analysis 31
Lab I-1 Gather and Prepare Soil Samples 35
Equipment and Materials 35
Background 36
Procedure I-1-1: Gather Soil Specimens 37
Procedure I-1-2: Dry Soil Specimens 38
Review Questions 40
Lab I-2 Examine the Physical Characteristics of Soil 43
Equipment and Materials 43
Background 44
Procedure I-2-1: Observe and Categorize Soil Color 44
Procedure I-2-2: Determine Soil Density 46
Procedure I-2-3: Determine Soil Settling Time 48
Procedure I-2-4: Determine Soil Particle Size Distribution 49
Review Questions 52
Lab I-3 Examine the Microscopic Characteristics of Soil 55
Equipment and Materials 55
Background 56
Procedure I-3-1: Examine Soil Specimens under Magnification 57
Review Questions 58
Lab I-4 Assay Phosphate Concentrations in Soil Specimens 61
Equipment and Materials 61
Background 62
Procedure I-4-1: Extract Soil Specimens 63
Procedure I-4-2: Assay Soil Phosphate Concentrations 64
Review Questions 65
www.it-ebooks.info
vi DIY Science: Illustrated Guide to Home Forensic Science Experiments
Lab I-5 Examine the Spectroscopic Characteristics of Soil 67
Equipment and Materials 67
Background 68
Procedure I-5-1: Extract Ion Species from Soil Specimens 69
Procedure I-5-2: Test Soil Specimen Extracts with the Spectrometer 69
Procedure I-5-3: Identify Ions Present in Exemplar 72
Review Questions 73
Group II Hair and Fiber Analysis 75
Lab II-1 Gathering Hair Specimens 79
Equipment and Materials 79
Background 80
Procedure II-1-1: Obtain Hair Specimens with Forceps 81
Procedure II-1-2: Obtain Hair Specimens with Lift Tape 82
Review Questions 83
Lab II-2 Study the Morphology of Human Scalp Hair 85
Equipment and Materials 85
Background 86
Procedure II-2-1: Macroscopic Examination of
Human Scalp Hair 87
Procedure II-2-2: Wet-Mount Hair Specimens 88
Procedure II-2-3: Microscopic Examination of Human Scalp Hair 89
Review Questions 91
Lab II-3 Make Scale Casts of Hair Specimens 93
Equipment and Materials 93
Background 93
Procedure II-3-1: Make and Observe Scale Casts of Human Hair 95
Review Questions 96
Lab II-4 Study the Morphology of Animal Hair 99
Equipment and Materials 99
Background 100
Procedure II-4-1: Observe Animal Hair 101
Review Question 101
Lab II-5 Individualize Human Hair Specimens 103
Equipment and Materials 103
Background 104
Procedure II-5-1: Obtain Hair Specimens 105
Procedure II-5-2: Observe and Characterize Hair Specimens 105
Review Questions 106
Lab II-6 Physical and Chemical Tests of Fibers 109
Equipment and Materials 109
Background 110
Procedure II-6-1: Test Fiber Specimens by Burning 111
Procedure II-6-2: Test Fiber Specimens by Solubility 115
Procedure II-6-3: Test Fiber Specimens by Dye Stripping 118
www.it-ebooks.info
Contents vii
Procedure II-6-4: Test Fiber Specimens by Dyeing 120
Review Questions 122
Lab II-7 Study the Morphology of Fibers and Fabrics 127
Equipment and Materials 127
Background 128
Procedure II-7-1: Macroscopic Examination of Fabrics 129
Procedure II-7-2: Microscopic Examination of Fibers and Fabrics 130
Procedure II-7-3: Cross-Sectional Examination of
Fiber Specimens 132
Procedure II-7-4: Determine the Refractive Index of Fibers with
RI Matching Liquids 134
Procedure II-7-5: Examining Fibers by Polarized Light 139
Review Questions 141
Group III Glass and Plastic Analysis 145
Lab III-1 Determine Densities of Glass and Plastic Specimens 149
Equipment and Materials 149
Background 150
Procedure III-1-1: Determine Density by Displacement 152
Procedure III-1-2: Determine Density by Flotation 153
Review Questions 154
Lab III-2 Compare Refractive Indices of Glass and Plastic Specimens 157
Equipment and Materials 157
Background 158
Procedure III-2-1: Compare RI of Questioned and
Known Specimens 159
Review Question 160
Lab III-3 Observe Shatter Patterns 163
Equipment and Materials 163
Background 164
Procedure III-3-1: Produce Glass Shards 164
Procedure III-3-2: Observe and Compare Glass Shards 165
Review Questions 165
Group IV Revealing Latent Fingerprints 167
Lab IV-1 Dusting and Lifting Latent Fingerprints 177
Equipment and Materials 177
Background 177
Procedure IV-1-1: Dusting Latent Fingerprints 178
Procedure IV-1-2: Lifting Developed Fingerprints 179
Review Questions 180
Lab IV-2 Revealing Latent Fingerprints Using Iodine Fuming 183
Equipment and Materials 183
Background 184
Procedure IV-2-1: Fuming Latent Fingerprints with Iodine 185
Review Questions 187
www.it-ebooks.info
viii DIY Science: Illustrated Guide to Home Forensic Science Experiments
Lab IV-3 Revealing Latent Fingerprints Using Ninhydrin 189
Equipment and Materials 189
Background 190
Procedure IV-3-1: Developing Latent Fingerprints
with Ninhydrin 191
Procedure IV-3-2: Ninhydrin After-Treatments 192
Review Questions 193
Lab IV-4 Revealing Latent Fingerprints Using Superglue Fuming 197
Equipment and Materials 197
Background 198
Procedure IV-4-1: Preparing for Superglue Fuming 199
Procedure IV-4-2: Fuming Latent Fingerprints with Superglue 199
Procedure IV-4-3: Dusting and Lifting Superglue-fumed Fingerprints 200
Review Questions 201
Lab IV-5 Revealing Latent Fingerprints On Sticky Surfaces 203
Equipment and Materials 203
Background 204
Procedure IV-5-1: Preparing Specimens for Gentian
Violet Development 205
Procedure IV-5-2: Developing Specimens with Gentian Violet 205
Review Questions 207
Lab IV-6 Revealing Latent Fingerprints On Brass Cartridge Cases 209
Equipment and Materials 209
Background 210
Procedure IV-6-1: Treat Specimens with Acidified
Hydrogen Peroxide 210
Review Question 211
Group V Detecting Blood 213
Lab V-1 Testing the Sensitivity and Selectivity of Kastle-Meyer Reagent 217
Equipment and Materials 217
Background 218
Procedure V-1-1: Prepare Known Dilutions of Blood 219
Procedure V-1-2: Spot Known Dilutions of Blood 220
Procedure V-1-3: Test Sensitivity of Kastle-Meyer Reagent 221
Procedure V-1-4: Test Selectivity of Kastle-Meyer Reagent 222
Procedure V-1-5: Field Testing with Kastle-Meyer Reagent 222
Review Questions 223
Group VI Impression Analysis 227
Lab VI-1 Tool Mark Analysis 231
Equipment and Materials 231
Background 232
Procedure VI-1-1: Produce and Compare Compression Specimens 233
Procedure VI-1-2: Produce and Compare Scoring Specimens 235
Review Questions 236
www.it-ebooks.info
Contents ix
Lab VI-2 Matching Images to Cameras 239
Equipment and Materials 239
Background 239
Procedure VI-2-1: Matching Films to Cameras 241
Procedure VI-2-1: Forensic Examination of Digital Image Files 243
Review Questions 244
Lab VI-3 Perforation and Tear Analysis 247
Equipment and Materials 247
Background 247
Procedure VI-3-1: Produce and Examine Tape Specimens 248
Review Question 249
Group VII Forensic Drug Testing 251
Lab VII-1 Presumptive Drug Testing 253
Equipment and Materials 253
Background 256
Procedure VII-1-1: Testing Specimens Against Presumptive Reagents 260
Procedure VII-1-2: Verifying Test Results 261
Review Questions 263
Lab VII-2 Detect Cocaine and Methamphetamine on Paper Currency 265
Equipment and Materials 265
Background 266
Procedure VII-2-1: Testing a Control Specimen 266
Procedure VII-2-2: Testing Currency for Cocaine 267
Procedure VII-2-3: Testing Currency for Methamphetamine 268
Review Questions 270
Lab VII-3 Analysis of Drugs by Chromatography 273
Equipment and Materials 273
Background 274
Procedure VII-3-1: Prepare Chromatography Jars and Strips 275
Procedure VII-3-2: Prepare Solutions of Known and Questioned Specimens 276
Procedure VII-3-3: Spot and Develop the Chromatograms 277
Procedure VII-3-4: Visualize the Chromatograms 278
Review Questions 279
Lab VII-4 Observation of Drug Microcrystalline Structures and
Precipitation Reactions 281
Equipment and Materials 281
Background 282
Procedure VII-4-1: Preparing Solutions of Known and Questioned Specimens 282
Procedure VII-4-2: Observing microcrystalline Structures 283
Procedure VII-4-3: Analysis of Drugs by Precipitation 284
Review Questions 285
www.it-ebooks.info
x DIY Science: Illustrated Guide to Home Forensic Science Experiments
Lab VII-5 Assay Vitamin C in Urine by Iodometric Titration 287
Equipment and Materials 287
Background 288
Procedure VII-5-1: Prepare a Standard Vitamin C Solution 289
Procedure VII-5-2: Titrate the Standard Vitamin C Solution 290
Procedure VII-5-3: Titrate the Questioned Urine Specimen 291
Review Questions 292
Group VIII Forensic Toxicology 295
Lab VIII-1 Salicylate Determination by Visual Colorimetry 299
Equipment and Materials 299
Background 300
Procedure VIII-1-1: Prepare an Array of Salicylate Concentrations 302
Procedure VIII-1-2: Test the Reagent 302
Procedure VIII-1-3: Test the Questioned Specimen(s) 303
Review Questions 304
Lab VIII-2 Detect Alkaloid Poisons with Dragendorff’s Reagent 307
Equipment and Materials 307
Background 308
Procedure VIII-2-1: Prepare Questioned Alkaloid Specimens 309
Procedure VIII-2-2: Test Specimens for the
Presence of Alkaloids 310
Procedure VIII-2-3: Analyze Alkaloids Using Paper Chromatography 311
Review Questions 313
Group IX Gunshot and Explosive Residues Analysis 315
Lab IX-1 Presumptive Color Tests for Gunshot Residue 317
Equipment and Materials 317
Background 318
Procedure IX-1-1: Produce Gunshot Residue (GSR) Specimens 321
Procedure IX-1-2: Make up Modified Griess Reagent Test Paper 323
Procedure IX-1-3: Test for Nitrite Residue in GSR Specimens 324
Procedure IX-1-4: Test White GSR Specimens for Lead Residue 325
Procedure IX-1-5: Test Colored or Patterned GSR Specimens for Lead Residue 327
Review Questions 328
Lab IX-2 Presumptive Color Tests for Explosives Residues 331
Equipment and Materials 331
Background 332
Procedure IX-2-1: Test Known Specimens 336
Procedure IX-2-2: Extract Explosives Residues 336
Procedure IX-2-3: Test Swabs for Explosives Residues 337
Review Questions 338
Group X Detecting Altered and Forged Documents 341
www.it-ebooks.info
Contents xi
Lab X-1 Revealing Alterations in Documents 345
Equipment and Materials 345
Background 346
Procedure X-1-1: Test Ink Solvents 347
Procedure X-1-2: Produce Questioned Document Specimens 348
Procedure X-1-3: Examine Questioned Documents by Visible
and Ultraviolet Light 349
Procedure X-1-4: Examine Questioned Documents Microscopically 350
Procedure X-1-5: Examine Questioned Documents by
Iodine Fuming 350
Procedure X-1-6: Examine Questioned Documents
by Chemical Treatment 351
Review Questions 351
Lab X-2 Analysis of Inks by Chromatography 353
Equipment and Materials 353
Background 354
Procedure X-1-1: Prepare Chromatography Jars 356
Procedure X-1-2: Prepare the Questioned Ink Specimen 356
Procedure X-1-3: Prepare and Spot Chromatograms 357
Procedure X-1-4: Develop Chromatograms 357
Review Questions 359
Lab X-3 Forensic Analysis of Paper 361
Equipment and Materials 361
Background 362
Procedure X-3-1: Examine Paper Specimens Visually 364
Procedure X-3-2: Examine Paper Specimens Microscopically 364
Procedure X-3-3: Examine Paper Specimens by
Differential Staining 364
Review Questions 365
Group XI Forensic Biology 369
Lab XI-1 Pollen Analysis 373
Equipment and Materials 373
Background 374
Procedure XI-1-1: Examining Known and Questioned
Pollen Grains 376
Review Questions 376
Lab XI-2 Diatom Analysis 379
Equipment and Materials 379
Background 380
Procedure XI-2-1: Digest Diatom Specimens 382
Procedure XI-2-2: Mount and Observe Diatoms 383
Review Questions 384
www.it-ebooks.info
xii DIY Science: Illustrated Guide to Home Forensic Science Experiments
Lab XI-3 Extract, Isolate, and Visualize DNA 387
Equipment and Materials 387
Background 388
Procedure XI-3-1: Extract DNA 389
Procedure XI-3-2: Isolate DNA 389
Procedure XI-3-1: Visualize DNA 390
Review Questions 391
Lab XI-4 DNA Analysis by Gel Electrophoresis 393
Equipment and Materials 393
Background 394
Procedure XI-3-1: Build a Gel Electrophoresis Apparatus 398
Procedure XI-3-2: Prepare DNA Specimens 401
Procedure XI-3-3: Prepare and Cast Gel(s) 401
Procedure XI-3-4: Load and Run the DNA Specimens 403
Procedure XI-3-5: Stain and Visualize the Gel(s) 404
Review Questions 404
Index 407
www.it-ebooks.info
Preface xiii
Preface
You’re reading this preface, so it’s a fair assumption that you’re interested in forensic
science. You’re in good company. For more than 100 years, forensic science has fascinated
a lot of people. Popular interest in forensic science started with the detective stories of
Edgar Allen Poe and Wilkie Collins in the mid-19th century, and got a major boost in 1887
when Arthur Conan Doyle published the first of his immensely popular series of Sherlock
Holmes stories. Its popularity continued to build through the early- to mid-20th century
with the publication of hundreds of forensic-based mystery novels by such bestselling
Golden Age authors as Agatha Christie, R. Austin Freeman, and many others. Forensic-
themed novels from such authors as Patricia Cornwell, Kathy Reichs, and Tess Gerritsen
continue to top the bestseller lists today.
Hollywood recognized the popular interest in forensic science and has produced hundreds
of films in which forensic science—sometimes accurately portrayed, but more often
not—plays a central role. Sherlock Holmes has been featured in many films, as have other
fictional forensic experts such as Freeman’s Dr. John Evelyn Thorndyke. Nor were television
producers unaware of this popular fascination with forensic science. In 1965, the television
series The F.B.I. premiered on ABC. Based loosely on the 1959 film, The FBI Story, this long-
running series was the first television program that portrayed forensic science realistically
and regularly. Even better, it generally got the science right, which may be no small part of
why it became a top-10 series.
The F.B.I. was soon followed by a television series that did more than simply feature aspects
of forensic science. In 1976, NBC introduced Quincy, M.E., a television series with forensic
science at its very core and a forensic pathologist as the lead character. Like The F.B.I.
before it, Quincy, M.E. quickly became a top-10 hit. It lasted well into the 1980s, and set the
stage for a plethora of forensic-based television programs, from cable series such as Dexter
and Waking the Dead to mainstream network series like Bones, Crossing Jordan, NCIS, and
the CSI franchise.
www.it-ebooks.info
xiv DIY Science: Illustrated Guide to Home Forensic Science Experiments
If your only knowledge of forensic science comes from watching
CSI and similar programs, you may wonder whether modern
forensic science is just a matter of white-smocked acolytes and
hard-bodied assistants awaiting answers from expensive high-
tech instruments, which answers they invariably get in time
to solve the crime before the closing credits roll. The reality is
far different. Sherlock Holmes with his magnifying glass and
Dr. John Evelyn Thorndyke with his microscope and lab bench
are much more realistic representations of actual day-to-day
forensic science work.
Here’s a startling fact: the vast majority of forensic work, even
today, is done with low-tech procedures that would be familiar
to a forensic scientist of 100 years ago. For every suspect illicit
drug sample that is analyzed on a $100,000 spectrometer,
hundreds of such samples are analyzed by using presumptive
color spot tests, a technology that dates back to the 19th
century. For every specimen examined with a $1,000,000
scanning electron microscope, hundreds or thousands of
specimens are examined with ordinary optical microscopes.
That’s not to say that all of that expensive equipment is useless.
Far from it. Instrumental analysis allows today’s forensic
scientists to do things that were unimaginable just a few years
ago, laying bare secrets that formerly would have remained
forever hidden. A forensic scientist from 100 years ago would
have regarded today’s instruments as nothing short of magic.
But these instruments aren’t cheap, which means there can’t be
a full selection of instruments on every forensic scientist’s lab
bench. Also, instrumental analyses may be time-consuming—
both in terms of preparing specimens for testing and in time
needed to run the test—and therefore impractical for analyzing
many questioned specimens in a short time. For these reasons,
most preliminary screening is done with fast, cheap, low-tech
procedures such as color tests and optical microscopes, with
the slower, more expensive, instrumental methods reserved for
confirmatory tests.
And that’s all to the good for anyone who’s interested in
doing real forensic science, instead of just reading about it.
Presumably, if you’ve read this far, that includes you. You
don’t need a multi-million dollar lab to do real, useful forensic
investigations. All you need are some chemicals and basic
equipment, much of which can be found around the home,
improvised, or purchased inexpensively. There are exceptions,
of course. You’ll need a decent microscope—the fundamental
tool of the forensic scientist—but even an inexpensive student
model will serve. You’ll need some basic lab equipment and
some specialty chemicals, all of which can be purchased from
specialty lab supply vendors and law-enforcement forensics
supply vendors.
In fact, to make it as easy and inexpensive as possible to
acquire the special equipment and chemicals needed for
many of the procedures in this book, we sell a customized
kit through our company, The Home Scientist, LLC (www.
thehomescientist.com). You don’t need to buy the kit to
do the procedures; we provide complete details about
what you’ll need, and how to make up special reagents
yourself. All of the equipment and reagents are readily
available from numerous online sources. If you intend to
perform only a few of the procedures in this book, it may
be less expensive to buy what you need piecemeal. On the
other hand, if you plan to do many (or even several) of the
procedures, it’ll probably be less expensive to buy the kit.
With such minimal equipment, you’ll be prepared to delve
deeply into real forensics work. You’ll analyze soil, hair, and
fibers, individualize plastic and glass specimens, develop
latent fingerprints and reveal hidden bloodstains, analyze tool
marks and other impressions, test for illegal drugs and poisons,
analyze gunshot and explosives residues, detect forgeries and
fakes, individualize questioned pollen and diatom samples, and
extract DNA samples and separate them by gel electrophoresis.
And you’ll learn an important lesson as you do the laboratory
sessions in this book. On television, the forensics expert always
succeeds. Fingerprints are invariably crisp and clear, and
technicians always find a hair or fiber on the bad guy’s clothes
that links him to the victim. There’s never any question about
the test results. Real life isn’t like that. Forensic test results are
often ambiguous, and sometimes fail completely to establish
any link between questioned and known specimens. Good
forensic work is painstaking and difficult. There are seldom any
easy answers, but hard work and persistence usually pay off.
In doing these lab sessions, you’ll gain a real appreciation for
just how good real forensic scientists are at what they do, how
persistent and inventive they have to be, and just how hard they
work to get the job done. Welcome to the world of real forensics.
www.it-ebooks.info
Preface xv
INDIVIDUAL VERSUS CLASS EVIDENCE
Throughout this book, we refer to the two categories of forensic evidence. Individual evidence is evidence—such as a fingerprint
or a DNA specimen—that can be identified unambiguously as having originated from a specific, particular source. Class
evidence is evidence—such as glass or paint specimens—that can at most be identified as being consistent with a particular
source, but not necessarily as having originated from that specific source.
The steady improvement in testing methodologies means that some types of evidence that were formerly class evidence can
now be individualized. For example, prior to the advent of DNA testing, a blood specimen was inherently class evidence. It
could be tested for blood type and other factors—which large numbers of people share—but the blood specimen could not be
individualized to a particular person. With DNA testing, that blood specimen becomes individualized evidence, because it can
now be identified unambiguously as having originated from one specific individual.
In forensics analyses, we are always comparing the physical, chemical, and other properties of an unknown (or questioned)
specimen to those of similar specimens from known sources. If the questioned and known specimens share identical
individualizable characteristics, a forensic scientist may categorize them as “matching” specimens. If only class characteristics
are present, forensic scientists avoid using the word “match,” because it implies a greater degree of certainty than actually
exists. Instead, the forensic scientist may describe one specimen as being “consistent with” the other.
Comparing multiple types of class evidence may narrow the possible sources considerably. For example, before DNA testing
was available, blood and other body fluids were often analyzed in great detail. A simple ABO blood type test could rule out a
significant percentage of the population as possible sources, and testing for the presence or absence of the Rhesus factor and
other blood factors could greatly narrow the possible range of sources, sometimes to a small fraction of 1% of the population.
As useful as such results are, particularly as exculpatory evidence, they remain class evidence, because they cannot point
unambiguously to one individual as the source.
Forensic scientists constantly strive to develop new methods to individualize class evidence, but analyzing class evidence will
remain a major part of the work of any forensic lab for the foreseeable future. In that respect, much of forensics work can be
considered an attempt to reduce uncertainty, which is often the most that can be hoped for.
WHO THIS BOOK IS FOR
This book is for anyone, from responsible teenagers to adults,
who wants to learn about forensic science by doing real, hands-
on laboratory work. DIY hobbyists and forensics enthusiasts
can use this book to learn and master the essential practical
skills and fundamental knowledge needed to pursue forensics
as a lifelong hobby. Home school parents and public school
teachers can use this book as the basis of a year-long, lab-based
course in forensic science.
For a textbook, we recommend Criminalistics: An Introduction to Forensic Science by Richard Saferstein (Prentice Hall). As is
generally true of textbooks, the current (10th) edition is very expensive. The 9th edition is available used for only a few dollars
and is perfectly suitable for a high school or even college-level first-year forensics course. Forensic science has advanced
between the 2006 9th edition and the 2010 10th edition, but the changes are not significant for our purposes.
www.it-ebooks.info
xvi DIY Science: Illustrated Guide to Home Forensic Science Experiments
We consider forensics to be the ideal introductory lab-based
science course for freshman or sophomore high school
students as well as an ideal supplemental science course for
11th or 12th grade students. Even students who dread biology,
chemistry, and physics are often excited about doing forensics
lab work, and such work is an ideal introduction for later
science courses. Although forensic science teaches students
about the scientific method and incorporates elements of
biology, chemistry, earth science, and the other sciences,
detailed knowledge of these subjects is not a prerequisite for an
introductory forensics course.
A forensics course is also cost-effective. Most high school
science labs and many home-schoolers already possess
microscopes, basic chemistry labware, and most of the other
equipment and chemicals needed to complete the lab sessions
in this book. Home school parents can add a forensic science
course to the curriculum at little incremental cost beyond what
they’ll spend anyway for the equipment and materials required
to teach later courses in biology, chemistry, and physics.
With very few exceptions, included for learning purposes,
the forensic science procedures in this book are not
merely educational; they’re the real deal. Real forensic
scientists and technicians actually use these procedures—
or ones very like them—every day to analyze real evidence
in real criminal cases. In fact, we’re honored that major
metropolitan law-enforcement organizations have used
our materials and videos to train their own CSI staffs.
HOW THIS BOOK IS ORGANIZED
The first part of this book is made up of narrative chapters that
cover the essential “book learning” you need to equip your
forensics lab and work safely in your lab.
1. Laboratory Safety
2. Equipping a Forensics Lab
The bulk of the book is made up of the following 11 hands-on
laboratory chapters, each devoted to a particular topic. Each
of the laboratory chapters is self-contained, so you can pick
and choose the topics that are most interesting to you, and
complete any or all of the chapters in any order you wish.
Within a chapter, it’s a good idea to do the lab sessions in order,
because some sessions use the materials or results from earlier
sessions in that chapter.
I. Laboratory: Soil Analysis
II. Laboratory: Hair and Fiber Analysis
III. Laboratory: Glass and Plastic Analysis
IV. Laboratory: Revealing Latent Fingerprints
V. Laboratory: Blood Detection
VI. Laboratory: Impression Analysis
VII. Laboratory: Forensic Drug Testing
VIII. Laboratory: Forensic Toxicology
IX. Laboratory: Gunshot and Explosives Residues Analysis
X. Laboratory: Detecting Forgeries and Fakes
XI. Laboratory: Forensic Biology
ACKNOWLEDGMENTS
Although only our names appear on the cover, this book is
very much a collaborative effort. It could not have been written
without the help and advice of our editor, Brian Jepson, who
contributed numerous helpful suggestions. As always, the
O’Reilly design and production staff, who are listed individually
in the front matter, worked miracles in converting our draft
manuscript into an attractive finished book.
Finally, special thanks are due to our technical reviewers.
Dennis Hilliard is the director of the Rhode Island State Crime
Laboratory. In addition to the administration of the State
Crime Laboratory, his work includes analysis of evidence and
court testimony in the areas of fire debris analysis, hair and
fiber analysis, DNA analysis, and breath and blood alcohol
www.it-ebooks.info
Preface xvii
analysis. He has worked in the forensic field since 1980. He
was appointed acting director of the State Crime Laboratory in
1992, appointed to the director’s position in 1995, and has held
a position in the University of Rhode Island College of Pharmacy
as an adjunct assistant professor of biomedical sciences
since 1994. He is a member of several professional forensic
organizations and is a past president of the NorthEastern
Association of Forensic Scientists (NEAFS).
Mary Chervenak holds a Ph.D. in organic chemistry from Duke
University and is a research chemist for Arkema. Mary has
long been interested in forensic science in general and forensic
chemistry in particular, and jumped at the opportunity to
contribute her thoughts to this book.
Paul Jones holds a Ph.D. in organic chemistry from Duke
University and is a professor of organic chemistry at Wake
Forest University. Our thanks to Paul for his great patience
in answering a lot of dumb questions without making us feel
stupid.
Dennis, Mary, and Paul outdid themselves as technical
reviewers, flagging our mistakes and contributing innumerable
useful suggestions and comments. With their help, this is a much
better book than it might otherwise have been. Thanks, guys.
HOW TO CONTACT US
We have verified the information in this book to the best of our
ability, but you may find things that have changed (or even that
we made mistakes!). As a reader of this book, you can help us to
improve future editions by sending us your feedback. Please let
us know about any errors, inaccuracies, misleading or confusing
statements, and typos that you find anywhere in this book.
Please also let us know what we can do to make this book more
useful to you. We take your comments seriously and will try to
incorporate reasonable suggestions into future editions. You
can write to us at:
MAKE
1005 Gravenstein Hwy N.
Sebastopol, CA 95472
(800) 998-9938 (in the U.S. or Canada)
(707) 827-7000 (international/local)
(707) 829-0104 (fax)
MAKE unites, inspires, informs, and entertains a growing
community of resourceful people who undertake amazing
projects in their backyards, basements, and garages. MAKE
celebrates your right to tweak, hack, and bend any technology
to your will. The MAKE audience continues to be a growing
culture and community that believes in bettering ourselves, our
environment, our educational system—our entire world. This is
much more than an audience, it’s a worldwide movement that
MAKE is leading—we call it the Maker Movement.
For more information about MAKE, visit us online:
MAKE magazine: />Maker Faire:
Makezine.com:
Maker Shed: />To comment on the book, send email to:
The O’Reilly website for Illustrated Guide to Home Forensic
Science Experiments lists examples, errata, and plans for future
editions. You can find this page at:
/>For more information about this book and others, see the
O’Reilly web site:
To contact the authors directly, send mail to:
www.it-ebooks.info
xviii DIY Science: Illustrated Guide to Home Forensic Science Experiments
We read all mail we receive from readers, but we cannot
respond individually. If we did, we’d have no time to do anything
else. But we do like to hear from readers.
We also maintain a dedicated landing page on our main
website to support Illustrated Guide to Home Forensic Science
Experiments. This page contains links to equipment kits
customized for this book, corrections and errata, supplemental
material that didn’t make it into the book, and so on. Visit this
page before you buy any equipment or chemicals and before
you do any of the experiments. Revisit it periodically as you use
the book.
www.thehomescientist.com/forensics
THANK YOU
Thank you for buying Illustrated Guide to Home Forensic Science
Experiments. We hope you enjoy reading and using it as much as
we enjoyed writing it.
AUTHOR BIOS
Robert Bruce Thompson is the author of numerous articles,
training courses, and books about computers, science, and
technology, including many co-authored with his wife, Barbara.
He built his first home lab as a teenager and went on to major in
chemistry in college and graduate school. Robert maintains a
home laboratory equipped for doing real chemistry, forensics,
biology, earth science, and physics.
Barbara Fritchman Thompson is, with her husband Robert,
the co-author of numerous books about computers, science,
and technology. With her masters in library science and 20
years’ experience as a public librarian, Barbara is the research
half of our writing team.
www.it-ebooks.info
www.it-ebooks.info
www.it-ebooks.info
Chapter 1 : Laboratory Safety 1
1
Laboratory
Safety
First things first. This is a short chapter, but a very important one. Many of the lab sessions
described in this book use chemicals, such as strong acids and bases, that are dangerous
if handled improperly. Some lab sessions use open flame or other heat sources, and many
use glassware. To state the obvious, you can get hurt working in a lab. Fortunately, there are
steps you can take to minimize or eliminate hazards.
If you remember one thing from this chapter, remember this: If there is even the slightest
chance that you will be exposed to any hazardous chemical, always wear chemical
splash goggles, gloves, and protective clothing. We follow this advice ourselves, without
exception.
DENNIS HILLIARD COMMENTS
Whenever you are working with any chemicals, glassware,
and/or biological material, always wear chemical splash
goggles, gloves, and protective clothing. Protective
clothing works two ways: it protects the analyst from
chemical, sharps, and biological hazards associated with
evidence collection and processing; and it protects from
contamination of the evidence by the collector/analyst.
Although working in any lab has its dangers, so does driving a
car. And, just as you must remain constantly alert while driving,
you must remain constantly alert while working in a lab. But
it’s also important to keep things in perspective. More serious
injuries occur every year among a few hundred thousand
high school football players than have ever occurred in total
among millions upon millions of student scientists in the 200-
year history of student labs. Statistically, students are much,
much safer working in a home or school lab than they are out
skateboarding or riding bicycles.
Most injuries that occur in student labs are minor and easily
avoidable. Among the most common are nicks from broken or
chipped glassware and minor burns. Serious injuries are very
rare. When they do occur, it’s nearly always because someone
did something incredibly stupid, such as using a flammable
solvent near an open flame or absentmindedly taking a swig
from a beaker full of a toxic liquid. (That’s why one of the rules of
laboratory safety is never to smoke, drink, or eat in the lab.)
The primary goal of laboratory safety rules is to prevent injuries.
Knowing and following the rules minimizes the likelihood of
accidents and helps to ensure that any accidents that do occur
will be minor ones.
The following are the laboratory safety rules we recommend:
Prepare properly
• All laboratory activities must be supervised by a
responsible adult.
www.it-ebooks.info
2 DIY Science: Illustrated Guide to Home Forensic Science Experiments
Direct adult supervision is mandatory for all of the activities
in this book. This adult must review each activity before
it is started, understand the potential dangers of that
activity and the steps required to minimize or eliminate
those dangers, and be present during the activity from
start to finish. Although the adult is ultimately responsible
for safety, students must also understand the potential
dangers and the procedures that should be used to
minimize risk.
• Familiarize yourself with safety procedures and equipment.
Think about how to respond to accidents before they
happen. Have a fire extinguisher and first-aid kit readily
available and a telephone nearby in case you need
to summon assistance. Know and practice first-aid
procedures, particularly those required to deal with burns
and cuts. If you have a cell phone, keep it with you while
you’re working in the lab.
One of the most important safety items in any lab is
the cold water faucet. If you burn yourself, immediately
(seconds count) flood the burned area with cold tap water
for several minutes to minimize the damage done by the
burn. If you spill a chemical on yourself, immediately rinse
the chemical off with cold tap water, and keep rinsing for
several minutes. Ideally, every lab should have an eyewash
station, but most home labs do not. If you do not have an
eyewash station and you get any chemical in your eyes,
immediately turn the cold tap on full and flood your eyes
until help arrives.
WARNING
Everyone rightly treats strong acids with great respect, but
many students handle strong bases casually. That’s a very
dangerous practice. Strong bases, such as solutions of
sodium hydroxide, can blind you in literally seconds. Treat
every chemical as potentially hazardous, and always wear
splash goggles.
Keep a large container of baking soda (sodium
bicarbonate) on hand to deal with acid or base spills.
Baking soda neutralizes either type of spill. We keep a
12-pound bag from Costco on hand for this purpose.
• Always read the Material Safety Data Sheet (MSDS) for
every chemical you will use in a laboratory session.
The MSDS is a concise document that lists the specific
characteristics and hazards of a chemical. Always read the
MSDS for every chemical that is to be used in a lab session.
If an MSDS was not supplied with the chemical, locate one
on the Internet. For example, before you use lead nitrate in
an experiment, do a Google search using the search terms
“lead nitrate” and “MSDS”.
• Organize your work area.
Keep your lab bench and other work areas clean and
uncluttered, before, during, and after laboratory sessions.
Every laboratory session should begin and end with your
glassware, chemicals, and laboratory equipment clean and
stored properly.
Dress properly
• Wear approved eye protection at all times.
Everyone present in the lab must at all times wear splash
goggles that comply with the ANSI Z87.1 standard.
Standard eyeglasses or shop goggles do not provide
adequate protection, because they are not designed to
prevent splashed liquids from getting into your eyes.
Eyeglasses may be worn under the goggles, but contact
lenses are not permitted in the lab. (Corrosive chemicals
can be trapped between a contact lens and your eye,
making it difficult to flush the corrosive chemical away.)
• Wear protective gloves and clothing.
Never allow laboratory chemicals to contact your bare
skin. When you handle chemicals, particularly corrosive
or toxic chemicals or those that can be absorbed through
the skin, wear gloves of latex, nitrile, vinyl, or another
chemical-resistant material. We recommend disposable
nitrile gloves, which you can purchase at Costco, Walmart,
or any drugstore. We are comfortable using disposable
nitrile gloves for handling any of the chemicals used in
this book. If you want to be extra cautious when handling
corrosive and/or toxic chemicals, either double-glove with
disposable nitrile gloves or wear heavier gloves, such as the
thick “rubber” gloves sold by lab supply vendors and in the
supermarket for household use.
Wear long pants, a long-sleeve shirt, and leather shoes or
boots that fully cover your feet (NO sandals). Avoid loose
sleeves. To protect yourself and your clothing, wear a
lab coat or a lab apron made of vinyl or another resistant
material. Wear a disposable respirator mask if you handle
chemicals that are toxic by inhalation.
www.it-ebooks.info
Chapter 1 : Laboratory Safety 3
Avoid laboratory hazards
• Avoid chemical hazards.
Never taste any laboratory chemical or sniff it directly.
(Use your hand to waft the odor toward your nose.) Never
use your mouth to fill a pipette. When you heat a test tube
or flask, make sure the mouth points in a safe direction.
Always use a boiling chip or stirring rod to prevent liquids
from boiling over and being ejected from the container.
Never carry open containers of chemicals around the
lab. Always dilute strong acids and bases by adding the
concentrated solution or solid chemical to water slowly
and with stirring. Doing the converse can cause the liquid
to boil violently and be ejected from the container. Use the
smallest quantities of chemicals that will accomplish your
goal. In particular, the first time you run a reaction, do so
on a small scale. If a reaction is unexpectedly vigorous, it’s
better if it happens with 1 mL of chemicals in a spot plate
than 500 mL in a large beaker.
• Avoid fire hazards.
Never handle flammable liquids or gases in an area where
an open flame or sparks might ignite them. Extinguish
burners as soon as you finish using them. Do not refuel a
burner until it has cooled completely. If you have long hair,
tie it back or tuck it up under a cap, particularly if you are
working near an open flame.
• Avoid glassware hazards.
Assume all glassware is hot until you are certain otherwise.
Examine all glassware before you use it, and particularly
before you heat it. Discard any glassware that is cracked,
chipped, or otherwise damaged. Learn the proper
technique for cutting and shaping glass tubing, and make
sure to fire-polish all sharp ends.
Don’t Do Stupid Things
• Never eat, drink, or smoke in the laboratory.
All laboratory chemicals should be considered toxic by
ingestion, and the best way to avoid ingesting chemicals is
to keep your mouth closed. Eating or drinking (even water)
in the lab is very risky behavior. A moment’s inattention can
have tragic results. Smoking violates two major lab safety
rules: putting anything in your mouth is a major no-no, as is
carrying an open flame around the lab.
• Never work alone in the laboratory.
No one—adult or student—should ever work alone in the
laboratory. Even if the experimenter is adult, there must at
least be another adult within earshot who is able to respond
quickly in an emergency.
• Never horse around.
A lab isn’t the place for practical jokes or acting out, nor for
that matter for catching up on gossip or talking about last
night’s ball game. When you’re in the lab, you should have
your mind on lab work, period.
• Never combine chemicals arbitrarily.
Combining chemicals arbitrarily is among the most
frequent causes of serious accidents in home labs. Some
people seem compelled to mix chemicals more or less
randomly, just to see what happens. Sometimes they get
more than they bargained for.
Laboratory safety is mainly a matter of common sense. Think
about what you’re about to do before you do it. Work carefully.
Deal with minor problems before they become major problems.
Keep safety constantly in mind, and chances are any problems
you have will be very minor ones.
www.it-ebooks.info