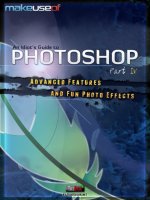
An Idiot’s Guide to Photoshop: Advanced Features and Fun Photo Effects
Bạn đang xem bản rút gọn của tài liệu. Xem và tải ngay bản đầy đủ của tài liệu tại đây (3.9 MB, 76 trang )
An Idiot’s Guide to
Photoshop, Part 4:
Advanced Features
and Fun Photo
Effects
By Azamat “Bohed” E.,
Edited by Justin Pot
This manual is the intellectual property of
MakeUseOf. It must only be published in its
original form. Using parts or republishing
altered parts of this guide is prohibited without
permission from MakeUseOf.com
Think you’ve got what it takes to write a
manual for MakeUseOf.com? We’re always
willing to hear a pitch! Send your ideas to
; you might earn up
to $400.
Table of Contents
Introduction
Content-Aware Feature
Puppet Warp
Working With 3D In Photoshop
Background Eraser
Morphing A Face In Photoshop (Basics)
Quick Tips On Speeding Up Photoshop CS5
Conclusion
MakeUseOf
Introduction
It’s my great pleasure to offer you another
guide from our Photoshop series. I hope you
have downloaded and read the first three
parts (Part I, II and III) already, since you will
need that knowledge as you go through this
guide.
The team at Adobe does some really great
work, surprising and amazing us with new
features. When you buy your copy of
Photoshop you get more than you thought you
would. This guide, like the guides before it, is
intended to help you explore this powerful and
multifunctional program. Once you have it and
learn how to use it you will have a
professional image processing lab on your
computer.
To master this lab, you need to practice. I say
it all the time the more tutorials and guides
you go through, the more methods and tools
you will have at your disposal. But reading
isn’t enough. To really learn, you need to open
Photoshop and follow the steps outlined. Do
that with this manual and you’ll pick up some
new skills.
In this guide, I’ll show you how to make use of
some amazing features that came with CS5,
such as Content-Aware and Puppet Warp,
along with some tools that we had before
CS5.
Some tools are overlooked by users, even
Photoshop veterans, but that doesn’t mean
those tools can’t make your life easier and
enhance your workflow. We’ll go through
some of them as well.
Also, I will show you how to create a basic
animation in Photoshop and how to use it to
create a morphing effect.
Note that in most cases I will skip basic
explanations, assuming that you are familiar
with basic tools and techniques (which were
already described in previous guides).
However, I will try to make things as simple
as possible.
Also note that I’m using Windows, so Mac
users will have to use slightly different key
combinations (like the Command key instead
of Ctrl, and Option instead of Alt).
Content-Aware Feature
Every Photoshop user was excited when they
first heard about Content-Aware. The Adobe
team released videos showing how awesome
the feature is and they spread like wildfire.
This makes sense it is an awesome feature
but it’s important to realize these videos use
“best-case” scenarios, like removing some
tiny trash from a grassy background, a lonely
tree standing in the middle of a field and so
on.
The thing is that the Content-Aware tool uses
surrounding information, trying to “guess”
what is supposed to be in the selection you’ve
chosen. So when you use Content-Aware to
remove a ball from a soccer field, it’s pretty
easy:
Open your image in Photoshop and make a
quick selection around the ball and its shadow
(you don’t have to be precise):
Apply Content-Aware Fill (right-click -> Fill
or Shift+F5 and select Content-Aware):
The result is not bad for a few seconds’ work:
That was an easy job for Photoshop. So
when you have an object much smaller than
the surroundings, and relatively consistent
surroundings, you can use this method to get
a quick result.
Spot Healing Brush Tool
Sometimes you will get unwanted artifacts
after applying Content-Aware Fill. Here
comes another new Content-Aware tool
called Spot Healing Brush Tool:
Make sure it is set to Content-Aware in the
upper options panel:
Using this tool is similar to using the normal
Brush tool. Just “paint” over the unwanted
object and you’re done:
There’s a lot of talk on the Internet about
which one of these methods is best. I would
say a combination of both tools is the best
practice.
Some tips for better results:
a) The higher the image resolution, the better;
b) Make selections a bit bigger than the
object;
c) For small objects use the Spot Healing
Brush Tool;
d) It is better to use the Spot Healing Brush
Tool when removing lines (wires, sticks, traffic
signs, tubes, etc.);
e) Do not rely on Content-Aware completely:
in most cases you will need to fix things
“manually” to get better results.
Content-Aware Scale
Another tool that has the Content-Aware
feature is Content-Aware Scale. (Edit-
>Content-Aware Scale)
This basically lets you scale an image without
distorting its primary subjects. You might have
seen presentation videos on this too, but
again, these videos represent “best case”
scenarios.
Reality is not as perfect. It doesn’t help much
when applied to images with backgrounds
containing more than just a gradient, sky,
water, grass, etc. If you try it on a regular
photo with many details on the background,
you will see that it distorts just about
everything.
Knowing that, how can you best make use of
Content Aware Scale? In my opinion, this tool
is best used when you need to turn a
horizontal (album) photo into a vertical
(portrait) one. Let’s try doing that.
Select an image with a simpler background.
I’ve chosen Kobe Bryant going for a slam
dunk.
Open your image in Photoshop; unlock the
Background layer by double-clicking on it. Go
to Edit->Content-Aware Scale and scale it
from left to right:
Wow, the result is amazing! It didn’t touch our
Kobe at all while scaling the background. If
you compare the final image to the original
you will see the changes:
See how it played with the lights? OK, this
was too easy.
Sometimes, when you edit a photo, you have
to cut or scale the image and it comes with
white spaces when printed. It happens
because there are certain proportions you
have to keep for the printer.
You can use the Crop (C) tool’s presets in
the upper settings menu:
Let’s say you have edited an image and the
final version of it doesn’t have the right
proportions, like this:
Let’s say that, for printing, we want a 5 inch x
3 inch photo. Set the Crop tool’s size to 5 inch
by 3 inch from Tool Presets (see above) and
apply it to the image:
We have some empty area to fill now, so we’ll
use the Content-Aware Scale tool, using its
Protect option. It is used to protect important
objects from distortion.
First, make a quick selection around objects
that you want to protect. In our example those
objects are ducks:
Save the selection (from the right-click menu):
Deselect (Ctrl+D). Select the Content-Aware
Scale tool (from the Edit menu) and choose
your saved selection from the drop-down list
right next to the “Protect” option:
Now, our ducks are protected and you can
stretch your image:
Pretty good, isn’t it? Our ducks are not
distorted and feeling just as fine as before.
And our background looks pretty natural.
There’s also a Protect Skin tones option (a
button with a human silhouette), which is best
used when you have a human being as the
main object. But I suggest protecting saved
selections instead.
Some quick tips for the Content-Aware
Scale tool:
a) If you are scaling the image in multiple
directions, it is better to apply changes after
each step. For example: do you need to scale
vertically and horizontally? Scale in one
direction and hit enter (or double-click) and
then scale in the other direction and apply;
b) It is best used when you have an image for
printing and need to seamlessly transform the
background. Also, it’s better to use the
Content-Aware Scale when you want to make
a portrait image out of a horizontal one, or
vice versa;
Conclusion
As you see, the Content-Aware feature is
great but do not rely on it completely. The tool
won’t give you a perfect result, so to get the
best results you will still need to do some
work after applying it. Let’s say it’s a time-
saver, which gives you a nice starting point to
work with. Play around, try different
selections and you will see that it gives
different results every time you apply it.


