a0004 blender xna precision modellin morebook vn 7063
Bạn đang xem bản rút gọn của tài liệu. Xem và tải ngay bản đầy đủ của tài liệu tại đây (4.45 MB, 7 trang )
Introduction
This guide was created to assist Artists and Engineers, to learn the basics of
mesh modelling of non deformable objects with 'Blender'. It uses a structured
approach to introducing Blenders tools and work-methods. Following the
guide should enable you to become familiar with blender and create models
from the simplest of parts to complex accurate engineering assemblies and
designs.
The guide focuses solely on Blenders Mesh Modelling capabilities, it ignores
the myriad of animation, texturing and photo-realistic rendering tools and
concentrates solely on getting started and producing accurate models suited
for both artistic and engineering purposes.
The guide was originally made as a series of web pages that documented the
design ideas and Blender methods used do design a few of the components I
will be making for a rebuild of my CNC router. It has been ported to this .pdf
book from the web pages, so some references in the guide will still only relate
to the on-line version.
The Small Print
This guide is provided as a free reference to new and existing Blender users. The contents of
the guide are copyright Robert Burke © 2007, but permission is granted for you to store a
copy on your computer or print a hard copy for personal use only. You may not use this guide
for any commercial purposes without written permission. (I have donated my time and knowledge
free to produce the guide, I don't expect people to make money from it)
THIS GUIDE IS PROVIDED "AS IS" AND WITHOUT ANY EXPRESS OR IMPLIED WARRANTIES, INCLUDING,
WITHOUT LIMITATION, THE IMPLIED WARRANTIES OF MERCHANTIBILITY AND FITNESS FOR A
PARTICULAR PURPOSE.
Blender - Precision Modelling Guide
By: Robert Burke
www.rab3d.com
-2-
Contents
Page No
Introduction
2
Contents
3
Getting Started
4
Overview of Controls
5
Blender Units and Precision
9
Modelling in Blender
11
Modelling a 608 Bearing
Part -1
Part – 2.
Part – 3
Part – 4
Part – 5
Part – 6
Part – 7
Part – 8
Part – 9
Part – 10
Part – 11
Reference Geometry
The Inner and Outer Race
Adding the Ball Bearings
Modelling the Bearing Cage
Detailing the Cage Securing Clasp
Modelling the Dust Shield
Modelling the Circlip
The Low Polygon Bearing
Materials and Rendering
Constructing a Page Layout
The Scale Drawing Layout
13
21
30
35
46
51
59
62
68
73
79
Modelling a Guide Roller
Part – 1
Part – 2
Part – 3
Part – 4
Modelling the 'V' Roller
The Guide Roller Axle
Detailed Thread Profile
Laying out the Component Drawing
89
98
109
119
Positioning the Components
The Initial Layout
Roller Nut Mounting Brackets
Completing the Casting
130
136
142
148
Designing a Casting
Part – 1
Part – 2
Part – 3
Part – 4
Blender - Precision Modelling Guide
By: Robert Burke
www.rab3d.com
-3-
Starting Blender
There is a wealth of information available on the Internet in the form of
manuals, guides and tutorials that cover the full potential of this program. This
Guide is intended as a starter for people interested in the creation of mesh
models and more specifically, dimensionally accurate mesh models. Appendix
1 gives a short list of useful Internet links.
Obtaining and loading Blender
The Open Source and freely available creative package Blender can be
downloaded from www.blender.org. Once on the site, click the download link
to open the download page. Choose the file to suit your operating system and
follow the simple installation instructions at the bottom of the download page
to install the program.
What you see when the program starts
When you run blender for the first time you are presented with the default
screen. It contains the user preference’s window at the top of the screen. The
main 3D work area in the centre of the screen and the buttons window at the
bottom of the screen.
Blender - Precision Modelling Guide
By: Robert Burke
www.rab3d.com
-4-
A Quick Overview of the controlls.
Relevant sections of the program
When you first start modelling, the main two screens are already open, the 3D
workspace and the Buttons window. A cube object (1) is in the centre of the
3D view and the window is orientated so you are looking down onto the top of
the cube. There is also a Lamp (2) to illuminate the cube and a Camera (3) to
output a 2D bitmap of the cube.
3D View: Header Bar
At the bottom of the 3D view is blenders View Header Bar. The purpose of
each section within the view header is detailed below.
1) Window Type
Click on the window type button and a menu
will appear showing all the different window
types. Each window has a function within
the process of 3D modelling, image creation
or animation. However our initial interest lies
just with the following windows:
3D View:
Buttons Window:
This contains Blenders control
buttons.
Outliner:
A structured view of objects within the
3D scene and there relationships to
each other.
Script Window:
To run useful add on scripts.
2) Pull up menu
A context sensitive menu showing the operations that can be carried out and
the keyboard shortcut for the operation.
Blender - Precision Modelling Guide
By: Robert Burke
www.rab3d.com
-5-
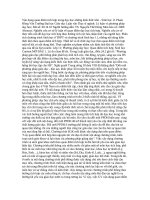
Extrude the holes and the outer edge back to give the casting
thickness.
Once all the elements of the back face are on the correct
alignment build faces between them in a similar manner to the
front face.
Because I haven't done any investment casting
before I am not sure how thin the mould can be
before it won't fill properly. Because of this I have
increased the thickness behind the pockets to 4mm.
Select the loop of faces from around the outer
edge of the inner face. These will be extruded to
provide a mounting point for the Y-axis and also
offer some protection to the components of the Xaxis.
Extrude the faxes 30mm to clear the V-rollers
then cut clearance holes for the lead screw and
guide shaft.
Blender - Precision Modelling Guide
By: Robert Burke
www.rab3d.com
- 150 -
This completes the casting for the X-axis
of my CNC router. All that remains is for
me to make a wax pattern, which will be
fabricated, from templates printed at a
scale of 1 to 1 from the Blender model.
This model is constructed at finished size.
Extra metal will be required on the areas
that are to be machined.
I will detail the progress of the casting in
the Engineering section of my web site.
This is the final part of the Engineers Guide to Blender. Hopefully you have
been able to understand the processes introduced in the Guide and will be
able to build on your experience by producing designs of your own.
If you were new to Blender when you started the guide and have worked
through to this final page, you should now be comfortable with Blenders way
of modelling. Theirs still a lot to learn and many more tools and techniques
available to improve your modelling skill. How you progress from here is up to
you, but the Internet community offers numerous tutorials and guidance, so
you have no excuses for not progressing and becoming a Blender pro.
Blender - Precision Modelling Guide
By: Robert Burke
www.rab3d.com
- 151 -