Adobe Dreamweaver CS3 Unleashed- P6 ppsx
Bạn đang xem bản rút gọn của tài liệu. Xem và tải ngay bản đầy đủ của tài liệu tại đây (676.11 KB, 50 trang )
Allow multiple consecutive spaces— By default, inserting a normal space into a web page is
represented by the Non-Breaking Space ( ) special character. The Non-Breaking Space is
accessible by choosing Insert, HTML, Special Characters, Non-Breaking Space or by pressing the
keyboard shortcut Ctrl+Shift+space. Check this option to insert a Non-Breaking Space when the
spacebar is pressed.
Use <strong> and <em> in place of <b> and <i>— For standards compliancy, this option should
remain enabled. In fact, the World Wide Web Consortium (W3C) discourages the use of the <b> and
<i> tags. Choosing this option guarantees that the <strong> tag (Bold) is used in place of the <b> tag
and the <em> tag (Italic) is used in place of the <i> tag when their respective buttons are selected
from the either the Property inspector or from the Text, Style submenu.
Use CSS instead of HTML tags— As you saw in Chapter 2, deselecting this option allows you to work
with traditional HTML formatting options. As you'll see in Chapter 6, "Page Formatting Using Cascading
Style Sheets," you would check this option to work with standards-compliant CSS.
Warn when placing editable regions within <p> or <h1>-<h6> tags— This option specifies
whether Dreamweaver displays a warning message whenever you save a Dreamweaver template that
has an editable region within a paragraph or heading tag. The message tells you that users will not be
able to create more paragraphs in the region. It is turned on by default.
Centering— This option group allows you to specify how centering of content should be handled when
the Align Center icon within the Property inspector is selected on an element. Choose the standards-
compliant <div> tag option when you want to wrap your element within a <div align="center"> tag,
attribute, and value. Choose the <center> tag option when you want to use the deprecated <center>
tag. The latter option is not recommended by the W3C.
Maximum number of history steps— Specifies the maximum number of history steps to store in
memory. These steps, also represented by repeatedly choosing Edit, Undo (or by pressing Ctrl+Z/
+Z) are also visible within the History panel. Although you can increase this number, be aware that
these steps are stored in memory. The higher you increase this number, the more of your computer's
memory Dreamweaver will consume.
Spelling dictionary— Lists the various dictionaries to use with the spell checker. By default this
option is set to English (American).
The Accessibility Category
As you can see from Figure 4.2, the Accessibility category of the Preferences window enables you to
customize how you work with various accessibility features within Dreamweaver.
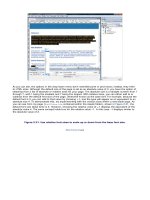
Figure 4.2. The Accessibility category enables you to customize how you work with accessibility
features in Dreamweaver.
[View full size image]
Note
More information on Accessibility can be found in Appendix A, "Accessibility."
Following is a complete list of customizable functionality:
Show attributes when inserting— As you will see in Appendix A, "Accessibility," form objects,
frames, media elements, and images all carry accessibility attributes that you can set. Checking these
boxes guarantees that whenever we insert a form object, create a frame, or insert a media or image
element, a dialog appears allowing for customization of accessibility attributes for the respective
element. If these check boxes are left unchecked, an accessibility dialog will not automatically appear
when you insert the previously mentioned elements onto the page. Again, we'll discuss these options
with more detail in Appendix A.
Keep focus in the panel when opening— Maintains focus on any panel, which makes it accessible
to screen readers. If you use a screen reader and don't select this option, the focus remains on the
Document window when you open a panel and the screen reader won't know anything is different.
(Windows only).
Offscreen Rendering— Select this, Windows-only option if you use a screen reader and
Dreamweaver.
The AP Elements Category
AP Elements, as you will learn in Chapter 7, "Page Structuring Using Cascading Style Sheets," are HTML
elements that can contain text, images, media, and so on. The benefit to using AP Elements is that they are
stackable and moveable within the design window, enabling pinpoint accurate designs. As shown in Figure
4.3, the AP Elements category in the Preferences dialog allows you to customize the look of the AP Element
when it's inserted into the design window.
Figure 4.3. Use the AP Elements category to customize the initial look of <div> tags as they are
inserted into your page.
[View full size image]
Note
Most of these customizable features are also available from the Property inspector after an AP
Element has been inserted into the Document window. The options in the Preferences merely
customize the look of AP Elements when inserted for the first time.
A complete list of functionality exposed by the AP Elements category is given next:
Visibility— Choose an option from this menu to set the initial display properties of the AP Element.
Options include default, inherit, visible, and hidden. Again, you will learn more about these options in
Chapter 7.
Width— Sets the width in pixels of the AP Element when it's first inserted into the Document window.
Height— Sets the height in pixels of the AP Element when it's first inserted into the Document
window.
Background color— Sets the background color of the AP Element when it's first inserted into the
Document window.
Background image— Sets the background image of the AP Element when it's first inserted into the
Document window. If a background image is set and it is smaller than the width and height of the AP
Element, the image will tile vertically and horizontally.
Nesting— Enable this option to automatically nest an AP Element within another AP Element if it is
initially created within the boundaries of an existing AP Element. Disabling this option causes the AP
Element to stack instead of nest.
Netscape 4 compatibility— Enable this option to allow Dreamweaver to automatically insert
JavaScript code within the <head> tag of the web page to fix a known problem within Netscape 4
browsers that automatically causes an AP Element to lose its positioning values if a user resizes the
browser window. Alternatively, you can manually add/remove this code by choosing Commands,
Add/Remove Netscape Resize Fix.
The Code Coloring Category
One of the subtle benefits to working in the code environment within Dreamweaver is that all code is
separated into colors. For instance, most ordinary HTML elements appear as blue, styles as maroon, scripts
as red, form elements as orange, literal text as black, and so on. You may want to pursue these colors even
further and customize them to your liking. Even better, you might want to create more color combinations
for tags. If this is the case, the Code Coloring category of the Preferences dialog is for you. As you can see
from Figure 4.4, the Code Coloring category allows you to customize how elements within a specific tag
library are displayed.
Figure 4.4. The Code Coloring category allows you to customize the color of elements within
various tag libraries.
[View full size image]
As you will see, aside from plain HTML, other tag libraries exist and can be modified. A complete list of
customizable functionality follows:
Document type— This list includes all the document libraries that are supported and can be
customized within Dreamweaver. After you've found the tag library whose colors you'd like to
customize, select it, and click the Edit Coloring Scheme button (discussed next).
Edit Coloring Scheme— After you've selected a tag library from the Document type list box, and
you've clicked the Edit Coloring Scheme button, the Edit Coloring Scheme dialog box appears. As you
can see from Figure 4.5, the Edit Coloring Scheme for <your tag library> dialog allows you to pick
from a Tag list on the left and customize the color of that tag on the right. Dreamweaver also gives
you the options of adding a background color to the tag and changing the weight to Bold, Italic, and
even Underline. After you've customized how you want the tag to look, review it within the Preview
pane and click OK to apply the changes.
Figure 4.5. The Edit Coloring Scheme for HTML dialog box allows you to customize tag colors
as they will appear within the Code view in the Document window.
[View full size image]
Default background— Sets the background color of the Code view. By default, the color is set to
white (represented by the hexadecimal value #FFFFFF).
The Code Format Category
Although the Code Coloring category allows you to make tailored changes that affect the color of code as it's
added to the coding environment, the Code Format category of the Preferences dialog box, shown in Figure
4.6, allows you to customize how the code is added and subsequently formatted within the coding
environment.
Figure 4.6. HTML code is formatted within the coding environment based on modifications you
make within the Code Format category.
[View full size image]
A complete list of customizable functionality follows:
Indent— Enable this option to allow Dreamweaver to automatically indent HTML code according to the
rules specified to the right of this check box. If this option is enabled, specify how many spaces or tabs
Dreamweaver should indent code.
Tab size— The value in this text box determines how many characters wide each tab character
appears in the Code view. For example, with the Tab size set to 4, the default, each tab is displayed in
Code view as a four-character-wide blank space.
Automatic Wrapping— Enable this check box to have Dreamweaver insert a line-break character
when a line reaches the specified column width within the code. Because Dreamweaver inserts line-
break characters only in places where they don't change the appearance of the document in browsers,
some lines may remain longer than the Automatic Wrapping option specified.
Line break type— Choose from one of the three options within this list to set the type of line break
based on the remote server's operating system. Choosing the correct version ensures that your pages
are accurately formatted on the remote server. As you can see from this list, options include Carriage
Return Line Feed (CR LF) for Windows, Carriage Return (CR) for Macintosh, and Line Feed (LF) for
UNIX.
Default tag case— Choose from one of the two options in this menu to force Dreamweaver to add
tags in either uppercase or lowercase format. Because of XHTML compliancy standards, it's generally a
good idea to stick with lowercase.
Default attribute case— Choose from one of the two options in this menu to force Dreamweaver to
add tag attributes in either uppercase or lowercase. Again, because the Web is moving toward XHTML
compliancy, it's generally a good idea to stick with lowercase.
Override case of: Tags and Attributes— Use these powerful check boxes to always force the two
uppercase/lowercase rules mentioned previously. By enabling this option, Dreamweaver converts the
case of code in any document opened within Dreamweaver to lowercase/uppercase. This is a great
way to enforce the rules that you set previously, even for documents you open within Dreamweaver
that weren't created in Dreamweaver.
No break after TD— Choose this option if you don't want Dreamweaver to add a line break after the
<td> (table data for the parent <table>) tag is inserted in code, such as: <td>Hello World</td>.
Disabling this option simply adds a line break after the opening <td> tag and then again after the
literal text.
Advanced Formatting (CSS)— Click this button to launch the CSS Source Format Options dialog
(shown in Figure 4.7). Within this dialog box, you can set generic properties for how Dreamweaver
writes and formats CSS code. Options within this dialog include the following:
Indent properties with— Sets the indentation value for properties within a rule. You can
specify tabs or spaces.
Each property on separate line— Places each property within a rule on a separate line.
Opening brace on separate line— Places the opening brace for a rule on a separate line from
the selector.
Only if more than 1 property— Places single-property rules on the same line as the selector.
All selectors for a rule on same line— Places all selectors for the rule on the same line.
Blank line between rules— Inserts a blank line between each rule.
Figure 4.7. The CSS Source Format Options dialog allows you to customize how
Dreamweaver writes and formats CSS code.
Advanced Formatting (Tag Libraries)— As you will see later in the chapter, selecting this option
opens the Tag Library Editor, which lets you set the formatting of individual tags in contrast to global
settings that appear within this preferences category.
The Code Hints Category
You can set options within the Code Hints category of the Preferences dialog box to customize how
Dreamweaver helps you along in the coding environment. Shown in Figure 4.8, the Code Hints category
allows you to enable or disable automatic tag completion as well as delay in milliseconds the time it will take
for the Code Hints drop-down menu to appear as you write code in Code view.
Figure 4.8. Set preferences in this category to customize how Dreamweaver works with tag
completion and code hints.
[View full size image]
A complete list of customizable functionality follows:
Close tags— Choose from one of the options in this option group to set how and whether
Dreamweaver will automatically close tags for you as you type. For instance, selecting the first option
button (after typing "</") guarantees that if you type the <td> tag, the closing tag won't
automatically appear until you type "</". Selecting the second option button (after typing the open
tag's ">") guarantees that if you type the <td> tag, the closing tag will automatically appear when
you close the opening tag with the ">" symbol. Selecting the Never option guarantees that
Dreamweaver will never automatically close tags.
Options: Enable code hints— As discussed in Chapter 2, the Code Hints menu is a collection of tags,
attributes, and values for various languages supported within Dreamweaver. This option enables or
disables the Code Hints menu that appears when you write code in the Code view.
Delay— Choose a time in seconds from this slider to set the delay of the Code Hints menu. If you
prefer the Code Hints menu to appear instantly, set the slider to 0; if you prefer a longer delay, move
the slider to the right.
Menus— Choose from the check boxes in this list box to set which type of code hints you want
displayed while typing. You can enable a few or all of these options.
The Code Rewriting Category
As you can see, each code category within the Preferences dialog allows you customize the look, formatting,
and in general, the interaction of Dreamweaver and code within Code view. The Code Rewriting category,
shown in Figure 4.9 is no different. It is within this category that you will customize how Dreamweaver
rewrites code of a certain type, encodes special characters, encodes URLs, and so on.
Figure 4.9. Use the Code Rewriting category to customize how Dreamweaver should handle the
rewriting of code of a certain type, how it should encode URLs, and how it should encode special
characters.
[View full size image]
A complete list of functionality is given here:
Fix invalidly nested and unclosed tags— Choose this option to rewrite tags that are invalidly
nested or accidentally left unclosed. For instance, the code <strong><em>Hello
World</strong></em> is rewritten as <strong><em>Hello World</em></strong>.
Rename form items when pasting— This option ensures that forms are always given unique names
when pasting. For instance, if you have <form name="form1"><form> and you copied and pasted that
form somewhere else on the page, it would be renamed to <form name="form2"><form>
automatically. If this option was disabled, the new form would be pasted in with the same name giving
you duplicate forms with the same name.
Remove extra closing tags— Choose this option to force Dreamweaver to delete closing tags that
have no corresponding opening tag.
Warn when fixing or removing tags— When the Fix Invalidly Nested and Unclosed Tags option or
the Remove Extra Closing Tags option is enabled, this option becomes available and can be enabled or
disabled. Enabling this option forces Dreamweaver to display a list of attempted fixes within the
Results panel.
Never rewrite code— Useful when working with languages that have third-party tags, this option
ensures that Dreamweaver doesn't rewrite code in files with the filename extensions that you list in
the In Files with Extensions text field.
Special characters (Encode)— Enabling this option ensures that attribute values that you enter or
edit using Dreamweaver tools such as the Property inspector contain only legal characters.
URL Encoding (Do not encode special characters)— Select this option button to prevent
Dreamweaver from changing URLs to use only legal characters.
URL Encoding (Encode special characters in URLs using &#)— Enabled by default, this option
guarantees that URLs edited with tools within Dreamweaver such as the Property inspector contain
legal characters.
URL Encoding (Encode special characters in URLs using %)— Similar to the previous option, this
option simply uses a different method of encoding more suited to older browsers, but less compatible
with some languages.
Active Content (Insert using browser safe scripts)— This option ensures that active content
(such as Flash or Shockwave media elements) that you insert with Dreamweaver use tags that will
display the content correctly in the latest versions of Internet Explorer. By default, Dreamweaver will
create a Scripts directory and place the file AC_RunActiveContent.js within it and will add a reference
to this file within your pages that contain active content.
Active Content (Convert tags to scripts on file open)— The previous check box guarantees that
Dreamweaver will include and use the AC_RunActiveContent.js file when you insert active content
into your page. This check box creates and implements that same .js file whenever a page is opened
that contains the <object>, <embed>, and <applet> tags. Dreamweaver will then render those tags
null and instead make a direct reference to the .js file within the Scripts directory.
The Copy/Paste Category
You can use the Copy/Paste category, shown in Figure 4.10, to set how Dreamweaver handles the pasting of
text by default when using Edit, Paste or pressing Ctrl+V ( +V).
Figure 4.10. Use the Copy/Paste category to set how Dreamweaver should handle the pasting of
text when using the Edit, Paste option.
[View full size image]
A complete list of functionality is outlined next:
Text only— Check this box to have Dreamweaver paste unformatted text. If the original text is
formatted, all formatting, including line breaks and paragraphs, will be removed, and all text will flow
into one continuous line.
Text with structure— Check this box to have Dreamweaver paste text and retain structure, but not
retain basic formatting. For example, you can paste text and retain the structure of paragraphs, lists,
and tables without retaining bold, italic, and other formatting.
Text with structure plus basic formatting— Check this box to have Dreamweaver paste both
structured and simple HTML-formatted text such as paragraphs and tables, as well as <b>, <i>, <u>,
<strong>, <em>, <hr>, <abbr>, and <acronym>.
Text with structure plus full formatting— Check this box to have Dreamweaver paste text that
retains all structure, HTML formatting, and CSS styles.
Retain line breaks— Enable this check box to have Dreamweaver retain line breaks in pasted text.
This option is disabled when pasting with the Text only option enabled.
Clean up Word paragraph spacing— Select this check box if you selected the Text with structure
option or Text with structure plus basic formatting option and want to eliminate extra spaces between
paragraphs when pasting text from Microsoft Word.
The CSS Styles Category
The CSS Styles category controls how Dreamweaver writes the code that defines CSS styles. As you can see
from Figure 4.11, the CSS Styles category is heavily centered around CSS shorthand preferences. CSS
shorthand, which is a cleaner and more concise way of writing CSS, is not correctly interpreted by older
browsers. Because this is the case, format the options in this category respective to what you think your
target audience's browsers will be.
Figure 4.11. Use the CSS Styles category to define how Dreamweaver writes the code that
defines CSS styles.
[View full size image]
A complete list of functionality is given here:
When creating CSS rules (Use shorthand for)— Choose from this list of options to declare the CSS
styles for which Dreamweaver should use shorthand. Options include Font, Background, Margins and
Padding, Border and Border Widths, and List Styles.
When editing CSS rules (Use shorthand)— Choose from these options to control whether
Dreamweaver rewrites existing CSS styles in shorthand. Choose the If Original Used Shorthand option
to keep styles as they are when CSS styles are edited or check the According to Settings Above option
to rewrite CSS based on settings you choose from the Use Shorthand For check boxes. This is the
option that is selected by default. Keep the Open CSS Files When Modified option checked if you want
Dreamweaver to automatically open the CSS file when a change to the file has been detected from
within a CSS styles editing tool in Dreamweaver, such as the CSS Styles panel. Personally, I find it
rather annoying that the CSS file opens every time I make edits. For this reason, I always uncheck this
box.
When double-clicking in CSS panel— Choose an option from this list to set which built-in CSS
editor opens when you double-click within the CSS Styles panel. Options include the CSS dialog, the
Properties pane, and Code view.
The File Compare Category
A file compare program is a software application that allows you to compare, line by line, differences
between two files. For instance, if you've made changes to a file, saved it with a different name, and then
wanted to compare the changes in the new file versus the structure of the original file, you could easily
compare the two using a file compare program. The file compare program would scan the files line by line
and present both files side by side with the differences highlighted. While file compare programs have been
around for some time, support for file compare programs being integrated directly into Dreamweaver is a
real time-saver. In the next two sections we'll walk through identifying and installing a file compare program
and then setting Dreamweaver to use the file compare program from within the Preferences dialog.
Installing a File Compare Program (Windows)
Although numerous file compare programs exist for you to download and try, the one that I've been using
for years, WinDIFF, is a program that is arguably rather archaic in its implementation but is simple to install
and use. Even better, it's free! To download and install WinDIFF, follow these steps:
1.
Go to www.dreamweaverunleashed.com/dw/resources_software.htm and choose the WinDIFF option.
The WinDIFF.zip file will begin to download.
2.
Create a folder called WinDIFF within the Program Files directory of your computer.
3.
Open the ZIP file you just downloaded and extract the windiff.exe and gutils.dll files, copying
them into the C:\Program Files\WinDIFF folder.
That's it! You're now ready to begin using WinDIFF.
Installing a File Compare Program (Macintosh)
On the Macintosh side of things, a number of choices also are available to you for file comparison utilities.
The one that seems most popular, and is also free, is called TWDiff, and it comes with a text editor called
TextWrangler. To download and install TextWrangler and TWDiff follow these steps:
1.
Go to www.barebones.com/products/textwrangler/download.shtml and choose a server to download
from. TextWrangler will begin to download.
2.
When the download finishes, the disk image should mount on its own. Drag the TextWrangler program
icon to your Applications folder and run it.
3.
The first time TextWrangler gets run, it brings up a registration dialog. The important option on this
dialog is the Install the Current Command-Line Tools check box. Keep it selected and choose Register
Now, Later, or Skip Registration to finish loading TextWrangler and install TWDiff.
That's it! You're now ready to begin using TWDiff.
Setting Dreamweaver to Use the File Compare Program
After you've installed your file comparison utility, you're ready to set the File Compare preferences within
Dreamweaver. Doing this will allow Dreamweaver to automatically open the external program when you
want to compare two files within Dreamweaver. To set up your file compare program within Dreamweaver's
preferences, follow these steps:
1.
If you closed the Preferences, reopen it by choosing Edit, Preferences (Dreamweaver, Preferences) or
by pressing Ctrl+U ( +U).
2.
Select the File Compare category.
3.
Click the Browse button and navigate to C:\Program Files\WinDIFF\windiff.exe (usr/bib/twdiff
on a Mac) or you can type the path directly into the text field.
4.
Click OK to close the Preferences dialog.
You can now compare files within Dreamweaver.
Comparing Files
Now that you've successfully downloaded the file comparison utility and referenced the executable from
within the Preferences dialog, you're ready to compare files. Although the situation for comparing files will
differ for each user, this section aims to expose the process so when that situation arises, you'll understand
how to do it. To compare two files in Dreamweaver, follow these steps:
1.
If you don't have the Files panel open, open it now by choosing Window, Files or by pressing F8.
2.
From the Local Files list, choose both the contactus.html and index.html pages by holding down the
Ctrl (Command) key and clicking to select both files. As you saw in the previous chapter, these files
should still be located at C:\VectaCorp\Chapter03.
3.
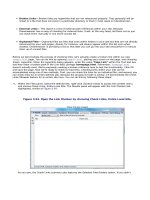
Right-click (Control+click) one of the files and choose the Compare Local Files option from the context
menu similar to Figure 4.12.
Figure 4.12. Choose the Compare Local Files option from the context menu.
[View full size image]
4.
After you've clicked the Compare Local Files option, your file compare program opens and displays the
differences in code between the two files.
The File Types/Editors Category
One of the more important categories within the Preferences dialog is the File Types/Editors category.
Shown in Figure 4.13, the File Types/Editors category allows you to set preferences for specific file types as
well as external editors that should be opened when an element of a specific file type is edited directly from
Dreamweaver.
Figure 4.13. Use the File Types/Editors category to configure how Dreamweaver handles the
direct editing of elements with specific file types.
[View full size image]
A complete list of functionality is given next:
Open in Code view— Use this text box to maintain a list (separated by spaces) of specific file
extensions that should be opened directly in Code view.
Enable BBEdit Integration— When checked, this Mac-only preference tells Dreamweaver to beef up
its collaborative efforts when BBEdit is set as the External Code Editor. This causes Dreamweaver to
track what goes on in BBEdit and notify you if you try to return to Dreamweaver with a more recently
modified version of your file than what is currently loaded in Dreamweaver.
External code editor— Assuming that you're using a language that contains third-party tags not
supported in Dreamweaver, you can set the program to be used as the external editor by browsing to
it from here.
Reload modified files— Use this option to specify what you want Dreamweaver to do when it detects
that changes have been made externally to a document that is open in Dreamweaver.
Save on launch— Use this option to specify whether Dreamweaver should always save the current
document before starting the editor, never save the document, or prompt you to ask whether to save
each time you start the external editor.
Fireworks— Specify the path to your Fireworks installation within this text box. Numerous
Dreamweaver operations depend on Fireworks—for instance, the image optimizing options within the
Property inspector when an image is selected in the Document window.
You can also set external editor preferences for specific file types. Consuming the bottom half of the File
Types/Editors screen, the Extensions and Editors panes allow you to quickly browse for and set external
editors for specific file types. To set an external editor for a file type, follow these steps:
1.
Select the extension for which you would like to configure an external editor within the Extensions list
box. If an extension you're using is not listed within this pane (not likely), click the + icon to manually
add it. For the sake of demonstration, I'll choose the .gif extension.
2.
Click the Add (+) icon located above the Editors pane.
3.
The Select External Editor dialog appears, allowing you to browse to the executable of the program. In
my case, I'll add Photoshop as an editor. On my computer, Photoshop is located at C:\Program
Files\Adobe\Photoshop CS3\photoshop.exe. Yours may differ. After you've found the program, click
OK.
4.
Dreamweaver will then add the program to the Editors list. You can then choose between
primary/secondary editors by choosing the editor and clicking the Make Primary button.
That's it! You can repeat the process for the other file types that appear within the Extensions pane if you'd
like.
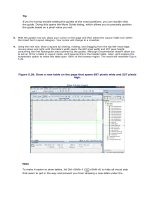
Although the benefit of adding an external editor won't be immediately clear, it does become obvious when
you have an image that you want to edit quickly. To demonstrate this, close the Preferences dialog, create a
new HTML page, insert an image (I'll insert header.gif because I set the file editor options for the .gif
image type in the previous steps). Then immediately select the image. Right away, you'll notice one unique
feature. Because I specified Photoshop as the primary editor of choice for the .gif file type, the Photoshop
icon appears within the Edit button list in the Property inspector. Furthermore, if I right-click (Control+click)
the image, I can quickly choose the Photoshop option from the Edit With submenu. Secondary editors will
also appear within this list.
Note
If you don't specify an editor for a file type, Dreamweaver instead displays a small pencil icon where
the Photoshop icon currently resides. Clicking the pencil icon doesn't produce a result. Additionally,
had we chosen Fireworks as the editor of choice, the Fireworks icon would be displayed within the
Property inspector. And, obviously, selecting the Fireworks icon would open the image directly within
Fireworks for editing purposes.
The Fonts Category
You can use the Fonts category, shown in Figure 4.14, to change the fonts that Dreamweaver uses within
the Document window, Code view, and within certain tags.
Figure 4.14. Use the Fonts category to change the fonts Dreamweaver uses for display.
[View full size image]
Remember, Dreamweaver uses the fonts listed here for display purposes only. Ultimately, these settings
have no effect on what end users see in their browsers. End users always have the power of customizing the
fonts they see on all web pages by customizing the browser to use one of their system fonts rather than the
one you specify. For a complete list of functionality exposed through the fonts category, refer to the
following list:
Font settings— Choose a language from this list to specify the set of fonts to be used in
Dreamweaver for documents that use a given type of encoding.
Proportional font— Choose an available system font and size to set the display of most text
elements within the Design view.
Fixed font— Choose an available system font and size to set the display of text within <pre>, <code>,
and <tt> tags.
Code view— Choose an available system font and size to set the display of the Code view and Code
inspector.
Use dynamic font mapping— Choose this option if you prefer Dreamweaver to check whether the
selected font family has the necessary glyphs (images) to render each character. If the font family
lacks the glyphs, Dreamweaver substitutes an appropriate font family that can display the needed
characters. This prevents unwanted characters from appearing when you use multiple languages in a
single document. Enabling this option results in a slight increase in the amount of time pages take to
load into a browser. This option is available only on the Windows platform. On the Mac, fonts are
always dynamically mapped.
The Highlighting Category
You can use options available from the Highlighting category of the Preferences dialog, shown in Figure
4.15, to customize the colors Dreamweaver uses to identify template regions, library items, third-party tags,
layout elements, and code.
Figure 4.15. Use the Highlighting category to customize the colors Dreamweaver uses to identify
special elements.
[View full size image]
Note
Although the Highlighting category may appear similar to the Code Coloring category, they are in
fact different. The Code Coloring category outlines how specific tags in code should be colored. The
Highlighting category specifies how certain elements within Design view will be color coded to
distinguish them from others.
Specific customizations that can be made include mouse-over, editable regions, nested editable, locked
regions, library items, third-party tags, and translated and untranslated live data elements. You may need
to make various changes within this category as you progress through the book and begin to pick up on the
functionality of these various elements. To make a change, identify the element's highlight color that you'd
like to change, choose a custom color from the color picker, and then enable the Show check box to
highlight the specific element. Alternatively, you can decide not to highlight a specific element by
unchecking the Show text box next to the specific element name.
The Invisible Elements Category
Invisible elements are HTML components that, in most cases, don't have visual interfaces. Instead, invisible
elements, such as the Named Anchor you saw in Chapter 2, are represented by various yellow shield icons.
You can use the Invisible Elements category of the Preferences dialog, shown in Figure 4.16, to customize
which, if any, invisible elements are displayed in Design view.
Figure 4.16. Use the Invisible Elements category to customize which, if any, invisible elements
will be displayed.
[View full size image]
Following is a complete list of functionality exposed by the Invisible Elements category:
Show— Enable or disable the display of the following invisible element types: Named Anchors,
Scripts, Comments, Line Breaks, Client-Side Image Maps, Embedded Styles, Hidden Form Fields, Form
Delimiter, Anchor Points for AP Elements, Anchor Points for Aligned Elements, Virtual Server Markup
Tags, Nonvisual Server Markup Tags, and CSS Display: None. When working in Design view, you'll be
able to differentiate the invisible elements by their representative shield icons.
Show dynamic text as— As you will see in Part V, "Dynamic Web Page Development," Dreamweaver
displays dynamic text directly within the Design view using either brackets or the text Recordset.Field
within brackets. You can choose which to display using this drop-down menu. Occasionally I'll choose
the bracket option alone. The reason for this is simple: if I'm working with an intricate design, it's
more important to conserve on space than it is to display the text Recordset.Field.
Server-Side includes— Server-side includes are text files that you can reference within an HTML file
using the <! #include file="filename" > tag. The benefit to using server-side includes is that
they let you "include" large amounts of text, HTML elements, and so on into any HTML file without
taking up a lot of visual space within the Code view. The downside to using server-side includes is that
they can be used in excess, ultimately becoming unmanageable. Enable this check box to show the
contents of the server-side include within the document. Disable this check box to display an invisible
element icon instead.
The Layout Mode Category
In general, Dreamweaver supports two development modes: Standard and Layout. Up until now, you've
been using the Standard mode for developing your web pages. In the next chapter, we'll examine the
Layout mode in much more detail. In support of that chapter, you can set layout preferences within the
Layout category of the Preferences dialog, shown in Figure 4.17, to customize the look of elements outlined
by Layout mode.
Figure 4.17. Use the Layout Mode category to customize the look of elements outlined by Layout
mode.
[View full size image]
A complete list of functionality provided by the Layout Mode category is given next:
Autoinsert spacers— Choose the When Making Autostretch Tables option to insert a spacer image to
control the width, the height, or both of a table cell. Choose the Never option if you'd prefer not to
have Dreamweaver automatically add the spacer image to your table.
Spacer image for site— Choose an option from this menu to set the defined site for which the spacer
image will be created.
Image file— Click the Browse button to search for an existing spacer image file or click Create to
have Dreamweaver create a 1x1 pixel transparent GIF within your selected site. Spacer images will be
discussed in more detail in the next chapter.
Cell outline— Choose from this color picker to set the color of the outlines of layout cells.
Table outline— Choose from this color picker to set the color of the outlines of layout tables.
Table background— Choose from this color picker to set the color used for areas of layout tables in
which there are no layout cells.
The New Document Category
You can use the New Document category of the Preferences dialog, shown in Figure 4.18, to specify default
properties for a newly created document. Everything from the default extension of the document to its
encoding type can be specified here.
Figure 4.18. Use the New Document category to specify default properties for a newly created
document.
[View full size image]
A complete list of functionality exposed by the New Document category is given next:
Default document— Choose an option from this list to set a default document type. Whenever you
create a new document, this is the file type that it will default to. The default is HTML. If you work
primarily in PHP, you could set this to PHP to save you from having to select it from the New
Document dialog every time.
Default extension— Enter the three- or four-letter extension within this text box. For instance, if
you're working with HTML, you may elect to enter .htm or .html.
Default Document Type (DTD)— Enter the DTD that will initially appear within the New Document
dialog. The default is XHTML 1.0 Transitional.
Default encoding— As you saw from the Modify Page Properties dialog in Chapter 2, a document's
encoding specifies how characters and fonts within a document should be rendered within
Dreamweaver and the browser. Although you can change this option on a per-page basis, you can also
set it here to default every page to a specific encoding type. You can also enable the check box below
the Default Encoding menu to have Dreamweaver automatically add the <meta> tag that's used to set
the encoding on pages that do not specify an encoding type.
Unicode Normalization Form— Dreamweaver lets you specify which Unicode Normalization Form to
use with your selected encoding type in this menu. Four Unicode Normalization Forms are listed as
options, but the most important is Normalization Form C (NFC) because it's the most common form
used in the Character Model for the World Wide Web. For completeness, Adobe provides the other
three Unicode Normalization Forms. You can also include the Unicode signature (Byte Order Mark, or
BOM) by enabling the check box directly below the Unicode Normalization Form menu. The BOM is 2 to
4 bytes at the beginning of a text file that identifies a file as Unicode, and if so, the byte order of the
following bytes.
Show New Document dialog box on Control+N— Enable this option to show the New Document
dialog when you press the Ctrl+N ( +N) shortcut key combination.
The Preview in Browser Category
In the previous chapters you learned that you can quickly preview your web pages in a browser by choosing
the Preview/Debug in Browser button located within the Document toolbar, or File, Preview in Browser.
Within that list resides the names of the browser(s) available on your computer at the time Dreamweaver
was installed. If you ever install new browsers or find that you use one browser more than another, you can
customize those preferences within the Preview in Browser category (see Figure 4.19).
Figure 4.19. Use the Preview in Browser category to add, remove, and edit browsers for use
within Dreamweaver.
[View full size image]