Lập trình Androi part 05 ppsx
Bạn đang xem bản rút gọn của tài liệu. Xem và tải ngay bản đầy đủ của tài liệu tại đây (368.35 KB, 10 trang )
29
29
Chapter
Employing Basic Widgets
Every GUI toolkit has some basic widgets: fields, labels, buttons, and so on. Android’s
toolkit is no different in scope, and the basic widgets will provide a good introduction to
how widgets work in Android activities.
Assigning Labels
The simplest widget is the label, referred to in Android as a TextView. As in most GUI
toolkits, labels are bits of text that cannot be edited directly by users. Typically, they are
used to identify adjacent widgets (e.g., a “Name:” label next to a field where you fill in a
name).
In Java, you can create a label by creating a TextView instance. More commonly,
though, you will create labels in XML layout files by adding a TextView element to the
layout, with an android:text property to set the value of the label itself. If you need to
swap labels based on certain criteria, such as internationalization, you may wish to use a
resource reference in the XML instead, as will be described in Chapter 20.
TextView has numerous other properties of relevance for labels, such as the following:
android:typeface: Sets the typeface to use for the label (e.g.,
monospace).
android:textStyle: Indicates that the typeface should be made bold
(bold), italic (italic), or bold and italic (bold_italic).
android:textColor: Sets the color of the label’s text, in RGB hex
format (e.g., #FF0000 for red).
For example, in the Basic/Label project, you will find the following layout file:
<?xml version="1.0" encoding="utf-8"?>
<TextView xmlns:android="
android:layout_width="fill_parent"
android:layout_height="wrap_content"
android:text="You were expecting something profound?"
/>
5
CHAPTER 5: Employing Basic Widgets
30
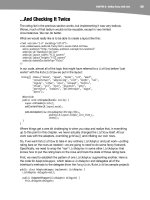
Just that layout alone, with the stub Java source provided by Android’s project builder
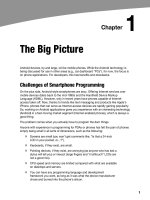
(e.g., android create project), gives you the demo shown in Figure 5–1.
Figure 5–1. The LabelDemo sample application
Button, Button, Who’s Got the Button?
You have already seen the use of the Button widget in the previous two chapters. As it
turns out, Button is a subclass of TextView, so everything discussed in the preceding
section also applies to formatting the face of the button.
However, Android 1.6 adds a new feature for the declaration of the “on-click” listener for
a Button. In addition to the classic approach of defining some object (such as the
activity) as implementing the View.OnClickListener interface, you can now take a
somewhat simpler approach:
Define some method on your Activity that holds the button that takes
a single View parameter, has a void return value, and is public.
In your layout XML, on the Button element, include the
android:onClick attribute with the name of the method you defined in
the previous step.
For example, you might have a method on your Activity that looks like this:
public void someMethod(View theButton) {
// do something useful here
}
Then you could use this XML declaration for the Button itself, including
android:onClick:
CHAPTER 5: Employing Basic Widgets
31
<Button
android:onClick="someMethod"
/>
This is enough for Android to wire together the Button with the click handler.
Fleeting Images
Android has two widgets to help you embed images in your activities: ImageView and
ImageButton. As the names suggest, they are image-based analogues to TextView and
Button, respectively.
Each widget takes an android:src attribute (in an XML layout) to specify which picture
to use. These usually reference a drawable resource, described in greater detail in
Chapter 20. You can also set the image content based on a Uri from a content provider
via setImageURI().
ImageButton, a subclass of ImageView, mixes in the standard Button behaviors, for
responding to clicks and whatnot. For example, take a peek at the main.xml layout from
the Basic/ImageView sample project:
<?xml version="1.0" encoding="utf-8"?>
<ImageView xmlns:android="
android:id="@+id/icon"
android:layout_width="fill_parent"
android:layout_height="fill_parent"
android:adjustViewBounds="true"
android:src="@drawable/molecule"
/>
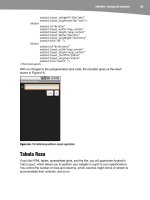
The result, just using the code-generated activity, is simply the image shown in Figure 5–2.
Figure 5–2. The ImageViewDemo sample application
CHAPTER 5: Employing Basic Widgets
32
Fields of Green. Or Other Colors.
Along with buttons and labels, fields are the third anchor of most GUI toolkits. In
Android, they are implemented via the EditText widget, which is a subclass of the
TextView used for labels.
Along with the standard TextView properties (e.g., android:textStyle), EditText has
many other properties that will be useful to you in constructing fields, including the
following:
android:autoText: Controls if the field should provide automatic
spelling assistance.
android:capitalize: Controls if the field should automatically
capitalize the first letter of entered text (useful for name or city fields,
for example).
android:digits: Configures the field to accept only certain digits.
android:singleLine: Controls if the field is for single-line input or
multiple-line input (e.g., does pressing Enter move you to the next
widget or add a newline?).
Most of these properties are also available from the new android:inputType attribute,
introduced in Android 1.5 as part of adding “soft keyboards” to Android (discussed in
Chapter 10).
For example, from the Basic/Field project, here is an XML layout file showing an
EditText widget:
<?xml version="1.0" encoding="utf-8"?>
<EditText xmlns:android="
android:id="@+id/field"
android:layout_width="fill_parent"
android:layout_height="fill_parent"
android:singleLine="false"
/>
Note that android:singleLine is set to "false", so users will be able to enter in several
lines of text.
For this project, the FieldDemo.java file populates the input field with some prose:
package com.commonsware.android.field;
import android.app.Activity;
import android.os.Bundle;
import android.widget.EditText;
public class FieldDemo extends Activity {
@Override
public void onCreate(Bundle icicle) {
super.onCreate(icicle);
setContentView(R.layout.main);
CHAPTER 5: Employing Basic Widgets
33
EditText fld=(EditText)findViewById(R.id.field);
fld.setText("Licensed under the Apache License, Version 2.0 " +
"(the \"License\"); you may not use this file " +
"except in compliance with the License. You may " +
"obtain a copy of the License at " +
"
}
}
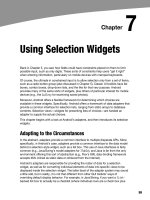
The result, once built and installed into the emulator, is shown in Figure 5–3.
Figure 5–3. The FieldDemo sample application
Another flavor of field is one that offers autocompletion, to help users supply a value
without typing in the whole entry. That is provided in Android as the
AutoCompleteTextView widget, discussed in greater detail in Chapter 9.
Just Another Box to Check
The classic check box has two states: checked and unchecked. Clicking the check box
toggles between those states to indicate a choice (e.g., “Add rush delivery to my order”).
In Android, there is a CheckBox widget to meet this need. It has TextView as an ancestor,
so you can use TextView properties like android:textColor to format the widget.
Within Java, you can invoke the following:
CHAPTER 5: Employing Basic Widgets
34
isChecked(): Determines if the check box has been checked.
setChecked(): Forces the check box into a checked or unchecked
state.
toggle(): Toggles the check box as if the user checked it.
Also, you can register a listener object (in this case, an instance of
OnCheckedChangeListener) to be notified when the state of the check box changes.
For example, from the Basic/CheckBox project, here is a simple check box layout:
<?xml version="1.0" encoding="utf-8"?>
<CheckBox xmlns:android="
android:id="@+id/check"
android:layout_width="wrap_content"
android:layout_height="wrap_content"
android:text="This checkbox is: unchecked" />
The corresponding CheckBoxDemo.java retrieves and configures the behavior of the
check box:
public class CheckBoxDemo extends Activity
implements CompoundButton.OnCheckedChangeListener {
CheckBox cb;
@Override
public void onCreate(Bundle icicle) {
super.onCreate(icicle);
setContentView(R.layout.main);
cb=(CheckBox)findViewById(R.id.check);
cb.setOnCheckedChangeListener(this);
}
public void onCheckedChanged(CompoundButton buttonView,
boolean isChecked) {
if (isChecked) {
cb.setText("This checkbox is: checked");
}
else {
cb.setText("This checkbox is: unchecked");
}
}
}
Note that the activity serves as its own listener for check box state changes, since it
implements the OnCheckedChangeListener interface (via
cb.setOnCheckedChangeListener(this)). The callback for the listener is
onCheckedChanged(), which receives the check box whose state has changed and the
new state. In this case, we update the text of the check box to reflect what the actual
box contains.
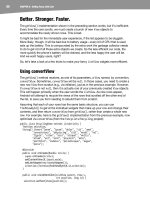
What’s the result? Clicking the check box immediately updates its text, as shown in
Figures 5–4 and 5–5.
CHAPTER 5: Employing Basic Widgets
35
Figure 5–4. The CheckBoxDemo sample application, with the check box unchecked
Figure 5–5. The same application, with the check box checked
Turn the Radio Up
As with other implementations of radio buttons in other toolkits, Android’s radio buttons
are two-state, like check boxes, but can be grouped such that only one radio button in
the group can be checked at any time.
CHAPTER 5: Employing Basic Widgets
36
Like CheckBox, RadioButton inherits from CompoundButton, which in turn inherits from
TextView. Hence, all the standard TextView properties for font face, style, color, and so
on are available for controlling the look of radio buttons. Similarly, you can call
isChecked() on a RadioButton to see if it is selected, toggle() to select it, and so on, as
you can with a CheckBox.
Most times, you will want to put your RadioButton widgets inside a RadioGroup. The
RadioGroup indicates a set of radio buttons whose state is tied, meaning only one button
in that group can be selected at any time. If you assign an android:id to your
RadioGroup in your XML layout, you can access the group from your Java code and
invoke the following:
check(): Checks a specific radio button via its ID (e.g.,
group.check(R.id.radio1)).
clearCheck(): Clears all radio buttons, so none in the group are
checked.
getCheckedRadioButtonId(): Gets the ID of the currently checked
radio button (or -1 if none are checked).
For example, from the Basic/RadioButton sample application, here is an XML layout
showing a RadioGroup wrapping a set of RadioButton widgets:
<?xml version="1.0" encoding="utf-8"?>
<RadioGroup
xmlns:android="
android:orientation="vertical"
android:layout_width="fill_parent"
android:layout_height="fill_parent"
>
<RadioButton android:id="@+id/radio1"
android:layout_width="wrap_content"
android:layout_height="wrap_content"
android:text="Rock" />
<RadioButton android:id="@+id/radio2"
android:layout_width="wrap_content"
android:layout_height="wrap_content"
android:text="Scissors" />
<RadioButton android:id="@+id/radio3"
android:layout_width="wrap_content"
android:layout_height="wrap_content"
android:text="Paper" />
</RadioGroup>
Using the stock Android-generated Java for the project and this layout, you get the
result shown in Figure 5–6.
CHAPTER 5: Employing Basic Widgets
37
Figure 5–6. The RadioButtonDemo sample application
Note that the radio button group is initially set so that none of the buttons are checked
at the outset. To preset one of the radio buttons to be checked, use either setChecked()
on the RadioButton or check() on the RadioGroup from within your onCreate() callback
in your activity.
It’s Quite a View
All widgets, including the ones shown in the preceding sections, extend View, and as
such, give all widgets an array of useful properties and methods beyond those already
described.
Useful Properties
Some of the properties on View most likely to be used include the following, which
control the focus sequence:
android:nextFocusDown
android:nextFocusLeft
android:nextFocusRight
android:nextFocusUp
Another useful property is android:visibility, which controls whether the widget is
initially visible.
CHAPTER 5: Employing Basic Widgets
38
Useful Methods
You can toggle whether or not a widget is enabled via setEnabled() and see if it is
enabled via isEnabled(). One common use pattern for this is to disable some widgets
based on a CheckBox or RadioButton selection.
You can give a widget focus via requestFocus() and see if it is focused via isFocused().
You might use this in concert with disabling widgets, to ensure the proper widget has
the focus once your disabling operation is complete.
To help navigate the tree of widgets and containers that make up an activity’s overall
view, you can use the following:
getParent(): Finds the parent widget or container.
findViewById(): Finds a child widget with a certain ID.
getRootView(): Gets the root of the tree (e.g., what you provided to the
activity via setContentView()).
Colors
There are two types of color attributes in Android widgets. Some, like
android:background, take a single color (or a graphic image to serve as the
background). Others, like android:textColor on TextView (and subclasses), can take a
ColorStateList, including via the Java accessor (in this case, setTextColor()).
A ColorStateList allows you to specify different colors for different conditions. For
example, a TextView can have one text color when it is the selected item in a list and
another color when it is not selected (selection widgets are discussed in Chapter 7). This
is handled via the default ColorStateList associated with TextView.
If you wish to change the color of a TextView widget in Java code, you have two main
choices:
Use ColorStateList.valueOf(), which returns a ColorStateList in
which all states are considered to have the same color, which you
supply as the parameter to the valueOf() method. This is the Java
equivalent of the android:textColor approach, to make the TextView
always a specific color, regardless of circumstances.
Create a ColorStateList with different values for different states,
either via the constructor or via an XML document.