Lập trình Androi part 26 pps
Bạn đang xem bản rút gọn của tài liệu. Xem và tải ngay bản đầy đủ của tài liệu tại đây (306.71 KB, 8 trang )
177
177
Chapter
Launching Activities
and Subactivities
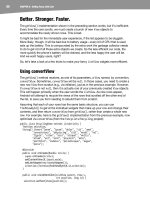
As you’ve learned, the theory behind the Android UI architecture is that developers
should decompose their application into distinct activities Each activity is implemented
as an Activity, and each is reachable via intents, with a “main” activity being the one
launched by the Android launcher. For example, a calendar application could have
activities for viewing the calendar, viewing a single event, editing an event (including
adding a new one), and so forth.
This implies that one of your activities has the means to start up another activity. For
example, if someone selects an event from the view-calendar activity, you might want to
show the view-event activity for that event. So, you need to be able to cause the view-
event activity to launch and show a specific event (the one the user chose). This chapter
describes how to do that.
NOTE: This chapter assumes that you know which activity you want to launch, probably because
it is another activity in your own application. It’s also possible that you have a content Uri to do
something, and you want your users to be able to do something with it, but you do not know up
front what the options are. This situation requires more advanced handling, which I cover in my
book The Busy Coders Guide to Advanced Android Development (CommonsWare, 2009).
Peers and Subs
One key question you need to answer when you decide to launch an activity is this:
Does your activity need to know when the launched activity ends?
For example, suppose you want to spawn an activity to collect authentication
information for some web service you are connecting to—maybe you need to
authenticate with OpenID ( in order to use an OAuth service
18
CHAPTER 18: Launching Activities and Subactivities
178
( In this case, your main activity will need to know when the
authentication is complete so it can start to use the web service.
On the other hand, imagine an e-mail application in Android. When the user elects to
view an attachment, neither you nor the user necessarily expect the main activity to
know when the user is finished viewing that attachment.
In the first scenario, the launched activity is clearly subordinate to the launching activity.
In that case, you probably want to launch the child as a subactivity, which means your
activity will be notified when the child activity is complete.
In the second scenario, the launched activity is more a peer of your activity, so you
probably want to launch the child just as a regular activity. Your activity will not be
informed when the child is done, but, then again, your activity really doesn’t need to
know.
Start ’Em Up
The two pieces for starting an activity are an intent and your choice of how to start it up.
Make an Intent
As discussed in the previous chapter, intents encapsulate a request, made to Android,
for some activity or other intent receiver to do something.
If the activity you intend to launch is one of your own, you may find it simplest to create
an explicit intent, naming the component you wish to launch. For example, from within
your activity, you could create an intent like this:
new Intent(this, HelpActivity.class);
This stipulates that you want to launch the HelpActivity. This activity would need to be
named in your AndroidManifest.xml file, though not necessarily with any intent filter,
since you are trying to request it directly.
Or you could put together an intent for some Uri, requesting a particular action:
Uri uri=Uri.parse("geo:"+lat.toString()+","+lon.toString());
Intent i=new Intent(Intent.ACTION_VIEW, uri);
Here, given that you have the latitude and longitude of some position (lat and lon,
respectively) of type Double, you construct a geo scheme Uri and create an intent
requesting to view this Uri (ACTION_VIEW).
Make the Call
Once you have your intent, you need to pass it to Android and get the child activity to
launch. You have two choices:
CHAPTER 18: Launching Activities and Subactivities
179
The simplest option is to call startActivity() with the Intent. This
will cause Android to find the best-match activity and pass the intent
to it for handling. Your activity will not be informed when the child
activity is complete.
You can call startActivityForResult(), passing it the Intent and a
number (unique to the calling activity). Android will find the best-match
activity and pass the intent over to it. Your activity will be notified when
the child activity is complete via the onActivityResult() callback.
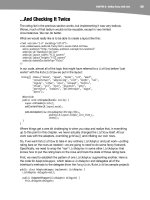
With startActivityForResult(), as noted, you can implement the onActivityResult()
callback to be notified when the child activity has completed its work. The callback
receives the unique number supplied to startActivityForResult(), so you can
determine which child activity is the one that has completed. You also get the following:
A result code, from the child activity calling setResult(). Typically, this
is RESULT_OK or RESULT_CANCELLED, though you can create your own
return codes (pick a number starting with RESULT_FIRST_USER).
An optional String containing some result data, possibly a URL to
some internal or external resource. For example, an ACTION_PICK intent
typically returns the selected bit of content via this data string.
An optional Bundle containing additional information beyond the result
code and data string.
To demonstrate launching a peer activity, take a peek at the Activities/Launch sample
application. The XML layout is fairly straightforward: two fields for the latitude and
longitude, plus a button.
<?xml version="1.0" encoding="utf-8"?>
<LinearLayout xmlns:android="
android:orientation="vertical"
android:layout_width="fill_parent"
android:layout_height="fill_parent"
>
<TableLayout
android:layout_width="fill_parent"
android:layout_height="wrap_content"
android:stretchColumns="1,2"
>
<TableRow>
<TextView
android:layout_width="wrap_content"
android:layout_height="wrap_content"
android:paddingLeft="2dip"
android:paddingRight="4dip"
android:text="Location:"
/>
<EditText android:id="@+id/lat"
android:layout_width="fill_parent"
android:layout_height="wrap_content"
android:cursorVisible="true"
android:editable="true"
android:singleLine="true"
CHAPTER 18: Launching Activities and Subactivities
180
android:layout_weight="1"
/>
<EditText android:id="@+id/lon"
android:layout_width="fill_parent"
android:layout_height="wrap_content"
android:cursorVisible="true"
android:editable="true"
android:singleLine="true"
android:layout_weight="1"
/>
</TableRow>
</TableLayout>
<Button android:id="@+id/map"
android:layout_width="fill_parent"
android:layout_height="wrap_content"
android:text="Show Me!"
/>
</LinearLayout>
The button’s OnClickListener simply takes the latitude and longitude, pours them into a
geo scheme Uri, and then starts the activity.
package com.commonsware.android.activities;
import android.app.Activity;
import android.content.Intent;
import android.net.Uri;
import android.os.Bundle;
import android.view.View;
import android.widget.Button;
import android.widget.EditText;
public class LaunchDemo extends Activity {
private EditText lat;
private EditText lon;
@Override
public void onCreate(Bundle icicle) {
super.onCreate(icicle);
setContentView(R.layout.main);
Button btn=(Button)findViewById(R.id.map);
lat=(EditText)findViewById(R.id.lat);
lon=(EditText)findViewById(R.id.lon);
btn.setOnClickListener(new View.OnClickListener() {
public void onClick(View view) {
String _lat=lat.getText().toString();
String _lon=lon.getText().toString();
Uri uri=Uri.parse("geo:"+_lat+","+_lon);
startActivity(new Intent(Intent.ACTION_VIEW, uri));
}
});
}
}
CHAPTER 18: Launching Activities and Subactivities
181
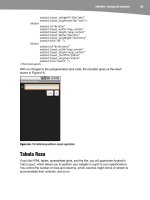
The activity is not much to look at, as you can see in Figure 18–1.
Figure 18–1. The LaunchDemo sample application, with a location filled in
If you fill in a location (e.g., 38.8891 latitude and -77.0492 longitude) and click the
button, the resulting map is more interesting, as shown in Figure 18–2.
Figure 18–2. The map launched by LaunchDemo, showing the Lincoln Memorial in Washington DC
Note that this is the built-in Android map activity; we did not create our own activity to
display this map. In Chapter 33, you will see how you can create maps in your own
activities, in case you need greater control over how the map is displayed.
CHAPTER 18: Launching Activities and Subactivities
182
NOTE: This sample application may not work on an Android 2.0 AVD in the emulator, as the AVD
appears to lack the Maps application.
Tabbed Browsing, Sort Of
One of the main features of the modern desktop web browser is tabbed browsing,
where a single browser window can show several pages split across a series of tabs. On
a mobile device, this may not make a lot of sense, given that you lose screen real estate
for the tabs themselves. In this book, however, we do not let little things like sensibility
stop us, so let’s demonstrate a tabbed browser, using TabActivity and Intent objects.
As you may recall from Chapter 9, a tab can have either a View or an Activity as its
contents. If you want to use an Activity as the content of a tab, you provide an Intent
that will launch the desired Activity; Android’s tab-management framework will then
pour the Activity’s UI into the tab.
Your natural instinct might be to use an http: Uri the way we used a geo: Uri in the
previous example:
Intent i=new Intent(Intent.ACTION_VIEW);
i.setData(Uri.parse(""));
That way, you could use the built-in browser application and get all of the features that it
offers.
Alas, this does not work. You cannot host other applications’ activities in your tabs; only
your own activities are allowed, for security reasons.
So, we dust off our WebView demos from Chapter 13 and use those instead, repackaged
as Activities/IntentTab.
Here is the source to the main activity, the one hosting the TabView:
public class IntentTabDemo extends TabActivity {
@Override
public void onCreate(Bundle savedInstanceState) {
super.onCreate(savedInstanceState);
TabHost host=getTabHost();
host.addTab(host.newTabSpec("one")
.setIndicator("CW")
.setContent(new Intent(this, CWBrowser.class)));
host.addTab(host.newTabSpec("two")
.setIndicator("Android")
.setContent(new Intent(this, AndroidBrowser.class)));
}
}
CHAPTER 18: Launching Activities and Subactivities
183
As you can see, we are using TabActivity as the base class, and so we do not need our
own layout XML, since TabActivity supplies it for us. All we do is get access to the
TabHost and add two tabs, each specifying an Intent that directly refers to another
class. In this case, our two tabs will host a CWBrowser and an AndroidBrowser,
respectively.
Those activities are simple modifications to the earlier browser demos:
public class CWBrowser extends Activity {
WebView browser;
@Override
public void onCreate(Bundle icicle) {
super.onCreate(icicle);
browser=new WebView(this);
setContentView(browser);
browser.loadUrl("");
}
}
public class AndroidBrowser extends Activity {
WebView browser;
@Override
public void onCreate(Bundle icicle) {
super.onCreate(icicle);
browser=new WebView(this);
setContentView(browser);
browser.loadUrl("
}
}
They simply load a different URL into the browser: the CommonsWare home page in
one and the Android home page in the other.
TIP: Using distinct subclasses for each targeted page is rather wasteful. Instead, you could
package the URL to open as an “extra” in an Intent and used that Intent to spawn a general-
purpose BrowserTab activity, which would read the URL out of the Intent extra and use that.
The resulting UI shows what tabbed browsing could look like on Android, as shown in
Figures 18–3 and 18–4.
CHAPTER 18: Launching Activities and Subactivities
184
Figure 18–3. The IntentTabDemo sample application, showing the first tab
Figure 18–4. The IntentTabDemo sample application, showing the second tab