Preservation of fruit and vegetables - Part 2 pot
Bạn đang xem bản rút gọn của tài liệu. Xem và tải ngay bản đầy đủ của tài liệu tại đây (245.84 KB, 16 trang )
Preparation 15
3 Preparation
Fruits and vegetables should be prepared for preservation as soon as
possible after harvesting, in any case within 4 to 48 hours. The likeli-
hood of spoilage increases rapidly as time passes. This chapter dis-
cusses preparation methods used for the various preservation methods
discussed in Chapters 4 to 7.
3.1 Cleaning and washing
First, the fruits or vegetables have to be thoroughly cleaned to remove
any dirt or insecticide residues. The outer layers of onions also have to
be removed. This cleaning process usually involves washing the pro-
ducts under a faucet with running drinking-water or in a bucket with
clean water that is regularly refreshed. When cleaning leafy vege-
tables, it is best to first remove the stems. Some types of fruit, such as
cherries, strawberries and mushrooms are not washed, because this
would actually increase the spread of micro-organisms. It is also not
advisable to wash cucumbers, because this shortens their shelf-life.
Dried beans and nuts are soaked in water for 16-20 hours before being
processed further. To prevent the beans and nuts from turning black, a
stainless steel pan or bowl, or other galvanized material, should be
used. The temperature of the soaking water should remain constant.
3.2 Lye dip
Some products, such as plums and grapes, are immersed for 5-15 sec-
onds in a pan of hot, almost boiling, lye (NaOH; 10-20g lye/litre wa-
ter) to make the peel rough and to thereby speed up the general drying
process. The peel then also separates more readily from the fruit,
which makes it easier to remove. After such a treatment, the fruit has
to be rinsed vigorously with cold water to remove the lye residues.
Lemon juice can also be used to neutralize any remaining lye residues.
Preservation of fruit and vegetables 16
The preparation method described above is considered to be ecologic-
ally harmful because alkaline is transported by the waste water into
the environment. Other disadvantages of using lye are that the food
can become discoloured and the metal pan could become corroded.
The use of too-high concentrations of lye is also unhealthy for the
people working with it.
3.3 Sorting
To achieve a uniformly sized product, fruits and vegetables are sorted
immediately after cleaning according to their size, shape, weight or
colour. Sorting by size is especially important if the products are to be
dried or heated, because their size will determine how much time will
be needed for these processes.
3.4 Peeling
Many types of fruits and vegetables have to be peeled in order to be
preserved. This can easily be done with a stainless steel knife. It is
extremely important that the knife be made of stainless steel because
this will prevent the discolouration of the plant tissues. It is best to
first submerge citrus fruits, tomatoes and peaches, whose peels are all
securely connected to the fruit, in hot water for 1 ½ to 3 minutes. The
softened peel can then be removed without too much effort.
3.5 Cutting
Cutting is important because you will need approximately uniform
pieces for the heating, drying and packing stages. Fruits and vege-
tables are usually cut into cubes, thin slices, rings or shreds. The cut-
ting utensils have to be sharp and clean to prevent micro-organisms
from entering the food. From the moment they are cut, the quality of
the products decreases due to the release of enzymes and nutrients for
micro-organisms. A decrease in quality is also caused by the damage
done to the plant tissues. For this reason, the interval between peel-
ing/cutting and preserving has to be as short as possible.
Preparation 17
3.6 Blanching
Blanching or ‘pre-cooking’ is done by immersing fruits or vegetables
in water at a temperature of 90-95
°
C. Exposing them to steam is also
possible. The result is that fruits and vegetables become somewhat
soft and the enzymes are inactivated. Leafy vegetables shrink in this
process and some of the micro-organisms die. Blanching is done be-
fore a product is dried (see Chapter 5) in order to prevent unwanted
colour and odour changes and an excessive loss of vitamins. Fruit that
does not change colour generally does not need to be blanched. On-
ions and leek are not at all suited for blanching.
Blanching is quite simple. The only thing you need is a large pan with
a lid and a metal, or in any case heat-resistant, colander (see Figure 1).
Place the fruit or vegetable in the colander (a linen cloth with a cord
will also do) and immerse this in a pan with sufficient nearly boiling
water to cover the food completely. Leave the colander in the pan for a
few minutes and turn the food occasionally to make sure that it is
heated evenly. Immediately after the colander is removed from the pan
the food has to be rinsed with cold, clean running water. Make sure
that the extra water can run off. If no faucet is available, a container
with drinking-water can also be used, as long as the water is cold and
clean. During the blanching process, it is important to monitor the
time and the water temperature (Appendix 4 gives an overview of
recommended blanching times per vegetable).
The disadvantage of this blanching method is that many vitamins are
lost in the hot water. Steaming is therefore a better alternative. Only a
small amount of water has to be added to the pan and brought to the
boil. Make sure that the fruit or vegetable in the colander is touched
by the steam but not by the water. This blanching method is similar to
the method for extracting juice described in Figure 12 and Chapter 7.
Preservation of fruit and vegetables 18
Figure 1: Blanching
Preserving by heating 19
4 Preserving by heating
4.1 Introduction
One of the most common and effective ways to preserve fruits and
vegetables is to prepare them and place them in air-tight containers,
which are then heated. The high temperatures ensure that micro-
organisms are killed and the enzymes are inactivated. Any remaining
spores will not have the right conditions to grow into bacteria and
microbial contamination from outside is prevented. However, it is
important to remember that some micro-organisms are unfortunately
less sensitive to heat: Clostridium and Staphylococcus can still multi-
ply and spoil the food through the poisonous substances they produce.
Clostridium can cause botulism and result in tragic deaths. This bac-
teria does not thrive as well in more acidic products such as fruit (pH
< 4.5).
The heating method for fruit is different than for most vegetables. As
noted above, fruit has a low pH level. It can be heated in boiling water
(100
°
C), whereas most vegetables have to be heated at temperatures
above 100
°
C, because they have a higher pH and are thus more sus-
ceptible to bacterial contamination.
This preservation method produces the best results, but only if fresh
products are used and the instructions for heating are followed exactly.
As with other methods, heating has advantages and disadvantages as
outlined below.
Advantages
? Most micro-organisms are destroyed so there is less chance of spoil-
age.
? After being sterilized and stored, the food can be kept longer and
more safely.
Disadvantages
? Heating requires the following investments:
Preservation of fruit and vegetables 20
• Heat-resistant storage containers (which can be difficult to
obtain) such as cans or glass jars. The latter are preferred
because they can be reused.
• Cooking utensils, such as a steamer
• Fuel
? These investment costs will have to be represented in the final cost
of the product.
? This method is labour intensive.
? It requires access to abundant clean water.
? Preserved fruits and vegetables have a lower nutritional value and
generally less taste than fresh products. However, fewer nutrients
are lost using the heating method than any other preservation
method.
Pasteurization and sterilization are two methods of heating food prod-
ucts to prevent them from rotting and to prepare them for storage in
glass jars or tins. These methods will be explained later in this chapter,
but first we will discuss the packing and preparation of vegetables.
4.2 Packing
Even though increasing the container volume decreases the cost per
kilogram of packing a product, there are two reasons to avoid using
large containers. First, the entire content of the container has to be
consumed within 24 hours after opening it; and second, it will take
much longer before the food in the middle of the container is heated
sufficiently to kill all the bacteria. Heating the product longer will
increase the energy costs. If large volumes are desired, it is best to
work with flat tin containers, since the distance from the nearest edge
of the container to the centre is smaller and the product will therefore
heat up quicker.
Of course the packing material must be clean. The more micro-
organisms that come in contact with the food, the longer the heating
process will have to take. The two types of containers used to preserve
food with the heating method (tins and glass) are described below.
Preserving by heating 21
Tins
These are iron cans, which are covered with a thin layer of tin. They
are especially used for sterilizing, and are very suitable for sterilizing
larger amounts. Unfortunately, they can only be used once. There are
many different types available with varying volumes and shapes (cy-
lindrical tins are long, round and narrow, while flat tins are wide and
shallow). A few common volumes are: 0.58 l / 0.85 l / 0.95 l / 3.1 l.
Tins can also vary with respect to the presence or absence of a varnish
layer on the inside. Unvarnished tins are often good enough. However,
varnished tins must be used for special products, such as cherries,
berries and plums, in order to maintain good colour and taste. In these
and other products, tin triggers chemical reactions that change the
product’s colour and/or taste. Varnish thus avoids contact between the
tin and the product.
Every tin comes with a lid, which can be hermetically sealed with the
help of a tin sealer. Various types are available, ranging from simple
hand-operated tools to new automatic machines. The seal must be
properly adjusted to prevent leakage. This can be checked by closing
the tin with a little water inside and immersing it in boiling water. If,
after a few minutes, steam is seen to escape, the seal must be re-
adjusted.
Tins delivered from the factory are fairly clean, and do not require
extra washing. Store them upside down to keep out contaminants. If
they are not clean, wash them in hot soda water (1.5%), rinse with hot
water and let them drip dry on a clean cloth. The lids must also be
clean.
Glass
Glass bottles and jars can be used for sterilization and pasteurization
and they are normally reusable. However, they are also breakable and
they do not protect food from the negative effects of light. This prob-
lem can be alleviated by storing the filled bottles and jars in a dark
place.
Preservation of fruit and vegetables 22
Glass bottles, those previously used for soft drinks or beer for ex-
ample, are well suited for heating and storing fruit pulp, puree or juice.
They have to be sealed with a metal screw cap. Their volume can vary
from 0.2 to even 2 litres. These bottles and their screw caps can easily
be reused.
Figure 2: Glass jars with different sealing mechanisms
It is important that the bottles or jars be completely hermetically
sealed. This can be done by inserting a soft layer of rubber or other
similar material between the bottle or jar and the cap or lid. This rub-
ber layer can be separate or attached to the cap as shown in Figure 2.
Producers of glass bottles and jars often also sell accompanying rub-
ber rings and lids or caps. The best results are achieved when the glass
containers and sealing mechanisms (rings, caps and lids) are made by
the same company.
Preserving by heating 23
The bottles or jars and their caps or lids must first be thoroughly
cleaned with soda (15 gram/litre) and hot water. Allow them to soak in
the hot water until the moment they are used.
4.3 Preparation
Before a product is heated in its storage container, it must be prepared
as explained in Chapter 3. Read that chapter again before proceeding,
because the preparation step is very important for the success of the
entire preserving process. Specific information about the appropriate
ways to prepare and preserve the various types of fruits and vegetables
can be found in Appendixes 1,2 and 3:
1 Pasteurization (heating up to 100°C) – for products that will be sub-
sequently stored at temperatures below 20°C (Section 4.4.1 and
Appendix 1);
2 Sterilization at 100°C – only for acidic products (Section 4.4.2 and
Appendix 2);
3 Sterilization (above 100°C) in a pressure cooker or an autoclave
(large pressure cooker) (Section 4.4.3 and Appendix 3).
Each appendix consists of two tables. The first table lists the recom-
mended preparation method for each product and the content of the
fluid with which the fruit or vegetable is preserved. The second table
lists the temperature at which the glass container or tin should be filled
and the recommended duration of heating for various sizes of glass
and tins. The food to be preserved is usually heated in a large pan and
then packed while still hot, before the actual heating process even
begins. This is the most efficient method, because it is faster to thor-
oughly heat a large amount of food in a large pan by continually stir-
ring it than to heat smaller amounts of food in individual sealed bottles
or tins. It takes much more time for the heat to penetrate to the centre
of the food in the jars.
Preservation of fruit and vegetables 24
4.4 Three types of heating
The previous section mentioned three types of heating (1, 2 and 3
above). Before discussing each of these in detail, we will give an ex-
ample of how tins, jars and bottles should be filled. The products are
first prepared as described in the appendixes. The following example
demonstrates how these appendixes should be used:
To preserve white beans in 0.85 litre tins:
First peel and wash the beans and then blanch them for 3 minutes (see
Chapter 3). Large beans should first be soaked in water overnight.
After blanching and straining the beans, put them in the cans, which
are then filled almost to the brim with boiling, salted (2%) water (see
Appendix 3a). Seal the cans while the content is at a temperature of at
least 60°C. Place the cans in a pressure cooker and heat them for 85
minutes at a temperature of 115°C (see Appendix 3b).
The tins or jars have to be filled up to 0.5 cm below the sealing edge.
For leafy greens the fluid has to be poured into the tin or glass con-
tainer first, followed by the vegetable. Make sure to eliminate as many
air bubbles as possible. The sealing temperature is very important. It
may never be lower than indicated in the appendix. If the temperature
of the food is lower, the jars and tins must be quickly reheated in a
shallow water bath until the temperature of the food in the middle of
the tin is equal to or higher than the indicated temperature. Always
measure the temperature in the middle of the tin. Seal quickly and
apply the recommended heat treatment. Put the filled bottles or jars in
the water before it boils to prevent the glass from breaking due to the
sudden increase in temperature. Tins can be placed immediately in
boiling water.
Important: If a sugar solution of 40% has to be used, this is not 400
grams of sugar with 1000 ml (1 l) water, but 400 grams of sugar in
600 ml water.
Preserving by heating 25
Pasteurization
Pasteurization is a mild heating treatment at temperatures up to 100
°
C
(which is the boiling point of water at elevations up to 300 metres
above sea level). This method causes only a slight decrease in taste
and nutritional value. The enzymes are inactivated and most, but not
all, bacteria are killed. Pasteurized products therefore spoil faster than
sterilized products. To prevent the surviving spore-producing micro-
organisms from multiplying, the products should be stored in tempera-
tures below 20°C. To extend the shelf-life of fruit preserves, a lot of
sugar is often added, which allows them to remain edible for months.
Chapter 7 gives more information on preserving fruit with sugar. The
more acid or sugar contained in a pasteurized product, the longer it
will stay good because the remaining micro-organisms do not have a
chance to develop.
A product is pasteurized by heating it for a time in a closed glass or tin
container in a pan of hot water (see Figure 3). It is important that the
lid of a glass jar fit well, but it should not be twisted tightly closed,
because some air should be allowed to escape while it is being heated.
Close the lid tightly immediately after removing the jar from the pan.
As the product cools, a vacuum will develop within the container. In
this way the food has no chance
of coming in contact with the air
and becoming contaminated.
The water in the pan has to be
warm and at least the same tem-
perature as the filled bottles and
tins. Start monitoring the heat-
ing time as soon as the water
has reached the recommended
temperature listed in the appen-
dix. Remove the bottles or tins
as soon as the recommended
time has elapsed and allow them
to cool.
Figure 3: Jars in a pan
Preservation of fruit and vegetables 26
Remember that the boiling point of water decreases as elevation in-
creases. In areas up to 300 metres above sea level the boiling point is
100°C. At higher elevations the heating time will have to be increased
as indicated in the following table in order to compensate for the
lower boiling temperatures.
Table 1: Heating time at different altitudes
Altitude in metres Heating time in minutes Example
0 - 300 a a = 10 minutes
300 - 600 a + 1/5 a total 12 minutes
600 - 900 a + 2/5 a total 14 minutes
900 - 1200 a + 3/5 a total 16 minutes
Since pasteurization sometimes requires heating at 100°C and the food
can be kept for only a limited time, it is better not to pasteurize food
(as described in App. 1) at elevations higher than 300 m, but rather to
sterilize it (possibly under pressure) as explained in App. 3. Products
that have to be heated at temperatures below 100°C can be made at
higher elevations, as long as the required temperature can be achieved.
Fruit juices, which are not listed in the appendixes, have to be pasteur-
ized at temperatures between 60 and 95
°
C. More information on fruit
juices can be found in Chapter 7.
Always cook the preserved vegetables for 15 minutes before eating
them. Never eat spoilt food and never eat from jars that have opened
during storage.
Sterilization in a bath of boiling water
Sterilization in a boiling water bath is performed at 100°C. This proc-
ess will kill all the micro-organisms present, but not the spores they
produced. Under the right conditions, these spores can grow into
spoilage-causing bacteria. Since the spores do not grow well in acidic
conditions, acid is often added to the preserved food. Sugar has the
same preventative effect. Thus by adding sugar or acid, you can en-
Preserving by heating 27
sure that even after heating at just 100°C the preserved product can be
considered to be sterilized: its shelf-life is much longer than a product
heated at 100°C to which no extra acid or sugar has been added. Ap-
pendix 2 provides the information you will need to sufficiently steril-
ize various types of fruits and vegetables.
Sterilization with a pressure cooker or autoclave
Sterilization carried out properly in an autoclave or pressure cooker
(see Figure 4) will kill not only the micro-organisms but also the
spores. In this way a long shelf-life can be achieved without adding
extra acid or sugar.
In an autoclave or pressure cooker the
boiling point of water is at a temperature
higher than 100°C. If the atmospheric
pressure (at sea level) is increased by 0.7
bar, then the water in this pan will boil at
115°C; if the pressure is increased by 1
bar the boiling point becomes 121°C.
Here too, the boiling temperature is
lower the higher above sea level you are.
This decrease can be compensated by
increasing the pressure by 0.1 bar for
every 1000 metres above sea level. To
sterilize canned vegetables the tempera-
ture is allowed to reach 115-121
°
C. In
general, all foods with a high pH (which
includes most vegetables) have to be
preserved at a temperature above 100
°
C.
We recommend that a pressure cooker be
purchased for this purpose. Appendix 4
provides temperature and time combina-
tions needed to sterilize foods in a pres-
sure cooker or autoclave.
Figure 4: Autoclave
Preservation of fruit and vegetables 28
The following instructions generally apply when sterilizing foods:
? Place a rack on the bottom of the pan to ensure that the
jars/bottles/tins do not come in too close contact with the heat
source.
? Remember not to place the filled glass jars or bottles directly in
boiling water, because they will most likely break. Heat the water in
the pan up to about the same temperature as the filled jars or bottles,
and then place them in the water.
? Do not screw the lids on too tightly, to ensure that some air will be
able to escape (see Section 4.4.1 or Section 6.1.2).
? Do not pack the jars or bottles too tightly in the pan. Leave some
space between them and between the jars/ bottles and the sides of
the pan.
? The jars or bottles should be covered by at least 5 cm of water.
? The sterilization time begins at the moment the water reaches the
desired temperature.
? For optimal results use jars of the same size and volume.
? Never try to open the autoclave or pressure cooker while the water
is boiling. The high pressure in the pan and the high temperature of
the water make this very dangerous!
Remember the following points when sterilizing under high pressure
using tins or glass.
Tins
After the processing, let the steam escape from the pan slowly. This
can be done quicker with small tins than with bigger ones, but still
should be done slowly and carefully, as the tins can deform or even
burst. When the pressure is again normal the lid of the pan can be
opened. Remove the tins and immerse them in cold water, which
should be refreshed occasionally to keep it cold. When the tins are
cool dry them.
Glass jars
Wait until the pressure cooker cools down and the pressure inside of it
has gone down before opening the lid. Remove the jars and tighten the
Preserving by heating 29
lids immediately. The disadvantage of glass jars is that they cannot be
cooled quickly. The safest way to cool them is to set them in the open
air until they are lukewarm, and then put them in cold water.
The advantage of an autoclave over a pressure cooker is that it can be
cooled down faster. On the other hand, an autoclave requires more
water and thus more energy to heat.
4.5 Storage and consumption
Always store the preserved food in a cool place, at a temperature pref-
erably below 20°C. Keep glass bottles and jars out of the light. Label
the containers so that you know what they contain and the date they
were preserved. Always consume the older products first. The storage
area has to be dry and have a consistent temperature. Moisture will
make tins rust. Pay close attention when opening preserved food. A
bulging lid or tin indicates gas formation by bacteria and thus food
spoilage. Look carefully at the food and smell it. Heat the food if nec-
essary and never eat anything you suspect may be spoilt.
Remember that preserving vegetables and fruit is always a risky un-
dertaking. Always follow the rules described in this booklet and keep
in mind that the heating times given in the appendixes represent the
minimum time that is required. Never heat products for a shorter time
than indicated. Heating food for a longer time decreases the chance of
spoilage, but it also decreases the food’s taste and nutritional value.
Preservation of fruit and vegetables 30
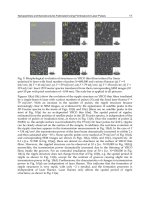
Figure 5: Examples of products that are spoilt