Adobe PageMaker 7.0 Classroom in a Book- P6 doc
Bạn đang xem bản rút gọn của tài liệu. Xem và tải ngay bản đầy đủ của tài liệu tại đây (916.6 KB, 30 trang )
LESSON 4
140
Jewelcase booklet
3 With the loaded graphic icon displayed,
click anywhere on page 3 to place the photo-
graph. Then drag the photograph until it
aligns to the bottom left corner of column 1.
The text overlaps the photograph. You will
use the Text Wrap command to define how
the text will wrap around the photograph.
4 With the photograph still selected, choose
Element > Text Wrap. For Wrap Option,
click the second icon (rectangular wrap).
For Text Flow, make sure the third icon
(wrap-all-sides) is selected. For Standoff in
Picas, type 0 for Left, p9 for Right, and 0 for
both Top and Bottom. Then click OK.
The text stands 9 points from the right edge
of the photograph.
5 With the pointer tool selected, click the
text to select it as a text block, and drag the
bottom windowshade handle down to dis-
play the last line of the paragraph.
6 Choose File > Save.
Placing a graphic
You will place and position another photo-
graph in the upper portion of page 3.
1 Choose File > Place, and double-click the
04ArtG.tif file in the 04Lesson folder.
2 With the loaded graphic icon displayed,
select the Art layer in the Layers palette, and
click the upper portion of page 3 to place the
photograph.
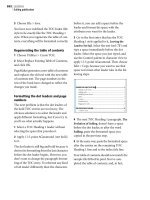
3
Preserving an extensive body of work
assembled by a team of photographers from
1991 to 1995, The Architecture of Italy CD-
ROM disc is a compilation of more than three
hundred sumptuous photographs. With cross-
referenced text provided for each photograph,
this collection can be used as a resource for
many endeavors. Much more than a “digital
coffee-table book,” you are free to modify, rent,
lease, distribute, or create derivative works
based upon the original images found in this
collection. Included in this collection are St.
Mark’s Cathedral in Venice; the Tower and
Baptistry at Pisa; the Colliseum, the Forum,
the Vatican, and highlights from the Vatican
Museum in Rome; the Duomo, the Medici
Palace, the Ponte Vecchio, and the Gates of
Heaven in Florence. More than 75 superb
architectural examples, which have received
little recognition, have also been included.
The Photographers
Gina Antonelli is known for her works on Italian
3
Preserving an extensive body of work
assembled by a team of photographers from
1991 to 1995, The Architecture of Italy CD-
ROM disc is a compilation of more than three
hundred sumptuous photographs. With cross-
referenced text provided for each photograph,
this collection can be used as a resource for
many endeavors. Much more than a “digital
coffee-table book,” you are free to modify, rent,
lease, distribute, or create derivative works
based upon the original images found in this
collection. Included in this collection are St.
Mark’s Cathedral in Venice; the Tower and
Baptistry at Pisa; the Colliseum, the Forum,
the Vatican, and highlights from the Vatican
Museum in Rome; the Duomo, the Medici
Palace, the Ponte Vecchio, and the Gates of
Heaven in Florence.
More than 75 superb
architectural examples,
which have received
little recognition, have
also been included.
141
ADOBE PAGEMAKER 7.0
Classroom in a Book
3 With the image still selected, drag the
photograph until it snaps to the top left cor-
ner of column 2.
4 Choose File > Save.
Placing the caption
After placing and aligning the caption below
the pantheon photograph, you will reduce
the size of the caption text block.
1 Select the Text layer in the Layers palette.
2 Choose File > Place, and double-click
04TextD.doc in the 04Lesson folder.
3 Position the loaded text icon on page 3,
column 2, underneath the photograph you
just placed, and click to place the text.
4 Select the text tool (), click the caption
to establish an insertion point, and choose
Edit > Select All.
5 In the Control palette, click the Character-
view button
(), and type 10 for Size ()
and 13 for Leading
(). Then click the Bold
button
().
Yo u’ll now zoom in to the area you are work-
ing, so you can align the caption with the
adjacent text.
6 Hold down Ctrl (Windows) or Command
(Macintosh) together with the spacebar, and
drag the mouse diagonally across the
bottom right quadrant of the page, stopping
just above the page number. Be sure to
include a small portion of the text in
column 1.
3
Preserving an extensive body of work
assembled by a team of photographers from
1991 to 1995, The Architecture of Italy CD-
ROM disc is a compilation of more than three
hundred sumptuous photographs. With cross-
referenced text provided for each photograph,
this collection can be used as a resource for
many endeavors. Much more than a “digital
coffee-table book,” you are free to modify, rent,
lease, distribute, or create derivative works
based upon the original images found in this
collection. Included in this collection are St.
Mark’s Cathedral in Venice; the Tower and
Baptistry at Pisa; the Colliseum, the Forum,
the Vatican, and highlights from the Vatican
Museum in Rome; the Duomo, the Medici
Palace, the Ponte Vecchio, and the Gates of
Heaven in Florence.
More than 75 superb
architectural examples,
which have received
little recognition, have
also been included.
Above: The Pantheon of
Rome (est. 118 and 128 C.E.)
still endures as one of the
finest masterpieces of
architecture.
LESSON 4
142
Jewelcase booklet
7 From the horizontal ruler, drag to create a
horizontal ruler guide at approximately
15p8, aligning it with the baseline of the text
in column 1. From the vertical ruler, drag to
create a vertical ruler guide at approximately
19p8.
You are ready to align the caption with the
adjacent text.
To toggle between the pointer tool
and the currently selected tool, hold
down Ctrl (Windows) or Command
(Macintosh) and press spacebar.
8 Select the pointer tool, position the
pointer over the caption and hold down the
mouse button until the pointer changes to
an arrowhead. Then drag the text block until
the baseline of the first line of text is aligned
with the horizontal ruler guide.
9 Choose View > Fit in Window.
Yo u’ll now reverse the text to the paper color
and then move the text block onto the black
box.
10 Select the text tool (), click the caption
to establish an insertion point, and choose
Edit > Select All. In the Character-view of
the Control palette, click the Reverse button
().
11 Select the pointer tool, and then select
the text block. Hold down Shift (to con-
strain the movement) and drag the text
block to the right until it snaps to the 19p8
vertical ruler guide, maintaining its baseline
alignment with the adjacent text.
You now need to resize the text block to fit in
its new location.
12 With the text block still selected, in the
Control palette, select the top left reference
point in the Proxy icon. Then type 6p5 for
W and 7p7 for H, and press Enter or Return.
13 Choose File > Save.
Creating a caption style
All captions in this publication will be
formatted identically. You’ll save time by
creating a style that you can apply to each
caption.
1 Select the text tool (), and click the
caption you just formatted to establish an
insertion point. Then choose Type > Define
Styles.
Notice that [Selection] is highlighted, and
that the attributes of the caption are
displayed under the style list. You’ll create a
new Caption style, replacing the default style
of the same name.
3
Preserving an extensive body of work
assembled by a team of photographers from
1991 to 1995, The Architecture of Italy CD-
ROM disc is a compilation of more than three
hundred sumptuous photographs. With cross-
referenced text provided for each photograph,
this collection can be used as a resource for
many endeavors. Much more than a “digital
coffee-table book,” you are free to modify, rent,
lease, distribute, or create derivative works
based upon the original images found in this
collection. Included in this collection are St.
Mark’s Cathedral in Venice; the Tower and
Baptistry at Pisa; the Colliseum, the Forum,
the Vatican, and highlights from the Vatican
Museum in Rome; the Duomo, the Medici
Palace, the Ponte Vecchio, and the Gates of
Heaven in Florence.
More than 75 superb
architectural examples,
which have received
little recognition, have
also been included.
Above: The
Pantheon of Rome
( est. 118 and 128
C.E.) still endures
as one of the finest
masterpieces of
architecture.
143
ADOBE PAGEMAKER 7.0
Classroom in a Book
2 Click New. Type Caption for Name, and
click OK. When asked if you want to replace
the existing style, click OK, and then click
OK to close the dialog box.
PageMaker creates the new style using the
attributes of the caption. The Styles palette
displays the style Caption.
You will apply the style Caption to the
caption. In this way, if you ever modify the
Caption style, all captions will change
uniformly.
3 With the insertion point still established
in the caption, click Caption in the Styles
palette.
You have completed assembling the first
double-page spread.
4 Choose File > Save.
Assembling the second
double-page spread
In addition to placing and formatting
more text and graphic elements on the sec-
ond double-page spread, you will create a
rule above a paragraph. You will also use
the Image Control command to modify an
image.
Creating a rule aligned with a
single-line paragraph
To frame each subhead visually, you will add
a thick paragraph rule to the subheads. As in
earlier steps in this lesson, you open a series
of dialog boxes to set the stroke style and
weight, color, horizontal width, and vertical
positioning of the paragraph rules.
Remember: Rules are paragraph attributes
and not independent graphic objects; they
cannot be selected or edited with the pointer
tool.
1 Click the page 4 icon to view the second
double-page spread.
2 Magnify the view of the top portion of
column 1 on page 5.
3 If necessary, select the text tool (), and
triple-click the subhead Photographers to
select it.
4 In the Control palette, type 7 for Size ()
and 13 for Leading
(). Choose Very Loose
from the Tracking
() pop-up menu.
Then click the Bold
(), Reverse (), and
All Caps buttons
().
2
3
What’s Inside
Part 1 - Churches
Part 2 - Ancient Ruins
Part 3 - Palaces
Part 4 - Castles
Preserving an extensive body of work
assembled by a team of photographers from
1991 to 1995, The Architecture of Italy CD-
ROM disc is a compilation of more than three
hundred sumptuous photographs. With cross-
referenced text provided for each photograph,
this collection can be used as a resource for
many endeavors. Much more than a “digital
coffee-table book,” you are free to modify, rent,
lease, distribute, or create derivative works
based upon the original images found in this
collection. Included in this collection are St.
Mark’s Cathedral in Venice; the Tower and
Baptistry at Pisa; the Colliseum, the Forum,
the Vatican, and highlights from the Vatican
Museum in Rome; the Duomo, the Medici
Palace, the Ponte Vecchio, and the Gates of
Heaven in Florence.
More than 75 superb
architectural examples,
which have received
little recognition, have
also been included.
Above: The
Pantheon of Rome
( est. 118 and 128
C.E.) still endures
as one of the finest
masterpieces of
architecture.
LESSON 4
144
Jewelcase booklet
5 With the subhead still selected, choose
Type > Paragraph, and type 2 for Left (to
specify size of the indent). Make sure Left is
selected for Alignment, and click the Rules
button.
6 Select Rule Above Paragraph, and choose
Custom for Stroke Style. In the Custom
Stroke dialog box, choose the solid line, type
11 for Stroke Weight, leave Transparent
Background selected, and click OK.
7 In the Paragraph Rules dialog box, choose
Dark Blue for Stroke Color, and leave the
Width of Column option selected. For
Indent, type 4 for Right (to specify a 4-pica
indentation).
Note: The indent option indents the rule from
the right or left edge of the column (for Width
of Column) or text (for Width of Text).
8 Click the Options button. Type p8 for Top
(to specify where the top of the rule starts
above the baseline), hold down Shift
(Windows) or Option (Macintosh) and
click OK to close all the dialog boxes.
9 Choose File > Save.
Creating and applying a subhead style
Since one more subhead must be formatted,
you will save time by creating a style using
the subhead you have already formatted.
1 With the subhead still selected, choose
Type > Define Styles, and click New.
2 Type Subhead for Name, hold down Shift
(Windows) or Option (Macintosh), and
click OK.
3 With the subhead still selected, click
Subhead in the Styles palette.
You will apply the Subhead style to another
subhead. To center the subhead within the
rule, you will change the indent of the sec-
ond subhead.
5
PHOTOGRAPHERS
Gina Antonelli is known for her works on Italian
fine art, as well as several previous photographic
publications: “Italy’s Best Loved Gardens,” the series
“Italian Tradition in Color and Form” (Dress;
Cuisine; Architecture; Pastimes), and two editions
of the book “Italian Traditional Patterns.” In
addition to completing the Rome and Naples
photography assignment, photographer and art
historian Tomas Panini assembled and edited the
explanatory notes for the 300 photographs.
Photographer Anton Harris, having apprenticed at
Maria Guerra Atelier in Paris for seven years,
contributed his own unique insights to the Venice
and Rome assignments. In 1984 Mr. Anton Harris
won the Paris Exhibition Prize for his Design Study
photographic series, consisting of three books.
System Requirements
A Macintosh with a minimum of 1 megabyte of
RAM (2 megabytes is preferred) to run the Master
Index. Or an Apple II with a SCSI interface card.
Apple CD SC or other compatible CD-ROM drive.
For more information about our products write to:
145
ADOBE PAGEMAKER 7.0
Classroom in a Book
4 Scroll to the bottom half of the page. With
the text tool selected, click in the next sub-
head, System Requirements, to establish an
insertion point. In the Styles palette, click
Subhead.
5 With the insertion point still established
in the second subhead, choose Type > Para-
graph, and type 1 for Left, and click OK.
You will roll up the windowshade handle of
this text block to push the system require-
ments subhead and paragraph to page 7
(where the remainder of the story is placed).
6 Select the pointer tool, click the text in
column 1 to select it as a text block. Drag the
bottom windowshade up just above the sub-
head System Requirements.
7 Choose File > Save.
Placing and cropping a graphic
After placing a photograph on the left page
of the second double-page spread, you’ll
crop the edges of the photograph to align it
with the edges of the page.
1 Choose View > Fit in Window. In the
Layers palette, select the Art layer.
2 Choose File > Place and double-click
04ArtH.tif in the 04Lesson folder.
3 When prompted to include a copy of the
graphic in the publication, click No.
4 With the loaded graphic icon displayed,
click the upper portion of the left page
(page 4).
Using the control palette, you’ll align the
right edge of the photograph precisely with
the inside edge of the page, letting its other
edges overlap the outside edges of the page.
5 In the Control palette Proxy icon, select
the top right reference point. Type 0 for X,
and –0p9 for Y. Press Enter or Return.
5
PHOTOGRAPHERS
Gina Antonelli is known for her works on Italian
fine art, as well as several previous photographic
publications: “Italy’s Best Loved Gardens,” the series
“Italian Tradition in Color and Form” (Dress;
Cuisine; Architecture; Pastimes), and two editions
of the book “Italian Traditional Patterns.” In
addition to completing the Rome and Naples
photography assignment, photographer and art
historian Tomas Panini assembled and edited the
explanatory notes for the 300 photographs.
Photographer Anton Harris, having apprenticed at
Maria Guerra Atelier in Paris for seven years,
contributed his own unique insights to the Venice
and Rome assignments. In 1984 Mr. Anton Harris
won the Paris Exhibition Prize for his Design Study
photographic series, consisting of three books.
SYSTEM REQUIREMENTS
A Macintosh with a minimum of 1 megabyte of
RAM (2 megabytes is preferred) to run the Master
Index. Or an Apple II with a SCSI interface card.
Apple CD SC or other compatible CD-ROM drive.
4
LESSON 4
146
Jewelcase booklet
As with all images in this project that extend
to the edge of the page, this photograph was
sized to allow for a bleed. Once again, you’ll
crop the photograph to the page edges.
6 Select the cropping tool (), position the
tool over the top left graphic handle of the
photograph, and drag down and right to the
corner of the page.
7 With the cropping tool still selected,
position the cursor over the bottom-center
graphics handle, and drag up to the bottom
edge of the page.
8 Choose File > Save.
Placing a graphic
You will place a photograph in the lower
right corner of page 5. You’ll align it to a
ruler guide just above the page-number and
the right margin.
1 Magnify the view of the lower half portion
of page 5.
2 From the horizontal ruler, drag to create a
horizontal ruler guide at approximately
25p6.
3 Choose File > Place, and double-click
04ArtI.tif in the 04Lesson folder.
4 With the loaded graphic icon displayed,
click anywhere in the lower right corner of
the right page to place the photograph.
5 Once placed, drag the photograph until its
bottom edge snaps to the 25p6 horizontal
ruler guide and the right margin guide.
6 Choose File > Save.
Placing and modifying an image
The Image Control command makes it pos-
sible to alter the appearance of line art or
bitmap or grayscale images, adjusting the
lightness or darkness of an entire image and
adjusting the screen pattern (where you
specify whether the image is composed of
dots or lines).
4
5
PHOTOGRAPHERS
Gina Antonelli is known for her works on Italian
fine art, as well as several previous photographic
publications: “Italy’s Best Loved Gardens,” the series
“Italian Tradition in Color and Form” (Dress;
Cuisine; Architecture; Pastimes), and two editions
of the book “Italian Traditional Patterns.” In
addition to completing the Rome and Naples
photography assignment, photographer and art
historian Tomas Panini assembled and edited the
explanatory notes for the 300 photographs.
Photographer Anton Harris, having apprenticed at
Maria Guerra Atelier in Paris for seven years,
contributed his own unique insights to the Venice
and Rome assignments. In 1984 Mr. Anton Harris
won the Paris Exhibition Prize for his Design Study
photographic series, consisting of three books.
147
ADOBE PAGEMAKER 7.0
Classroom in a Book
Yo u will place a grayscale image and use the
Image Control command to reverse the light
and dark areas within the image.
Note: You cannot use the Image Control
command to alter a color image. Also, images
adjusted with the Image Control command
must be printed to a PostScript printing
device.
1 Choose View > Fit in Window.
2 Choose File > Place, and double-click
04ArtJ.tif in the 04Lesson folder.
3 With the loaded graphic icon displayed,
click in the upper right corner of the right
page (in the black box) to place the illustra-
tion.
4 With the illustration still selected, in the
Control palette make sure the top left refer-
ence point in the Proxy icon is selected. Type
20p4 for X and p7 for Y, and press Enter or
Return to position the illustration.
5 With the illustration still selected, choose
Element > Image > Image Control.
Refer to the Adobe PageMaker 7.0 User Guide
for more information about the Image Con-
trol command.
6 Depending upon your system, do one of
the following:
• Windows: Set the Contrast option to -50,
and click OK.
• Macintosh: Click the Reverse Grey Levels
button
(), and click OK.
The black portions of the image reverse to
white, and vice versa.
Note:: Unlike text, you cannot reverse an
imported bitmap image by applying the paper
color to it. PageMaker applies a color to only
the black and gray portions of the image. The
white would remain white.
7 Choose File > Save.
5
PHOTOGRAPHERS
Gina Antonelli is known for her works on Italian
fine art, as well as several previous photographic
publications: “Italy’s Best Loved Gardens,” the series
“Italian Tradition in Color and Form” (Dress;
Cuisine; Architecture; Pastimes), and two editions
of the book “Italian Traditional Patterns.” In
addition to completing the Rome and Naples
photography assignment, photographer and art
historian Tomas Panini assembled and edited the
explanatory notes for the 300 photographs.
Photographer Anton Harris, having apprenticed at
Maria Guerra Atelier in Paris for seven years,
contributed his own unique insights to the Venice
and Rome assignments. In 1984 Mr. Anton Harris
won the Paris Exhibition Prize for his Design Study
photographic series, consisting of three books.
LESSON 4
148
Jewelcase booklet
Placing the captions
After placing the captions that accompany
the illustration and photograph on the right
page, you will apply the style Caption and
position the captions above the photograph.
1 From the vertical ruler, drag to create a
vertical ruler guide at approximately 19p8.
2 Magnify the view of the portion of the
black box between the two images, then click
the Text layer in the Layers palette.
3 Choose File > Place, and double-click
04TextE.doc in the 04Lesson folder.
4 With the loaded text icon displayed, drag
to define a text block that extends from the
19p8 vertical ruler guide to the right margin
guide on the right page (exact height is not
important), taking note of its approximate
position to be able to select it with the text
tool.
Since the placed text is colored black, it can-
not be viewed on the black rectangle.
5 Select the text tool (), click in the area
where you just placed the captions to estab-
lish an insertion point, choose Edit > Select
All, and select Caption in the Style palette.
(Windows only) If the captions remain
invisible, press Ctrl together with the Shift
and F12 keys to redraw the screen.
6 From the horizontal ruler, drag to create a
horizontal ruler guide at approximately
12p5, aligning it with the baseline of the text
in column 1. (You may need to scroll the
page.)
7 Select the pointer tool, and click the cap-
tion text to select the text block. Use the
arrow keys or Control palette nudge buttons
to move the text block until the baseline of
the first line of the caption is aligned with
the 12p5 horizontal ruler guide.
8 With the captions still selected as a text
block, drag the bottom windowshade han-
dle down to display the entire story.
You need to separate the two captions. You’ll
edit the Caption style to include space after
each paragraph.
5
PHOTOGRAPHERS
Gina Antonelli is known for her works on Italian
fine art, as well as several previous photographic
publications: “Italy’s Best Loved Gardens,” the series
“Italian Tradition in Color and Form” (Dress;
Cuisine; Architecture; Pastimes), and two editions
of the book “Italian Traditional Patterns.” In
addition to completing the Rome and Naples
photography assignment, photographer and art
historian Tomas Panini assembled and edited the
explanatory notes for the 300 photographs.
Photographer Anton Harris, having apprenticed at
Maria Guerra Atelier in Paris for seven years,
contributed his own unique insights to the Venice
and Rome assignments. In 1984 Mr. Anton Harris
won the Paris Exhibition Prize for his Design Study
photographic series, consisting of three books.
Above: Plan for the
Pisa Museum of Art.
149
ADOBE PAGEMAKER 7.0
Classroom in a Book
9 Hold down Control (Windows) or Com-
mand (Macintosh), and click the Caption
style. Click the Para button, and type p26 for
After. Then hold down Shift (Windows) or
Option (Macintosh), and click OK to close
the dialog boxes.
PageMaker inserts 26 points between the
captions. Because 26 points is twice the lead-
ing value, the captions remain aligned with
the adjacent text.
The second double-page spread is complete.
10 Choose View > Fit in Window.
11 Choose File > Save.
Assembling the last spread
The design of the last spread closely follows
the design of the previous spread.
Placing the large graphic on page 6
As with page 4, you’ll place a full-page ver-
sion of one of the photographs from the
cover onto page 6. Rather than repeat the
steps of placing, positioning, and cropping
the image, you can copy and paste the image
from page 4, and then replace it with the
new image. PageMaker will replace the
image, using the existing cropping rectangle.
1 With the pointer tool selected, click the
image on page 4 to select it. Choose Edit >
Copy.
Yo u’ll now paste it on page 6 using the power
paste option, which pastes a copy in the
exact same position on the page.
2 Click the page 6 icon. Hold down Alt
(Windows) or Option (Macintosh), and
choose Edit > Paste.
3 With the pasted image still selected,
choose File > Place. Click 04ArtK.tif in the
04Lesson folder (do not double-click it).
Select Replacing Entire Graphic, and make
sure Retain Cropping Data is selected, then
click Open (Windows) or OK (Macintosh).
PageMaker replaces the image. In addition
to cropping the image using the existing
cropping rectangle, PageMaker also scales
the image, if necessary, to fit within the
bounding box of the original image.
4 Choose File > Save.
4
5
PHOTOGRAPHERS
Gina Antonelli is known for her works on Italian
fine art, as well as several previous photographic
publications: “Italy’s Best Loved Gardens,” the series
“Italian Tradition in Color and Form” (Dress;
Cuisine; Architecture; Pastimes), and two editions
of the book “Italian Traditional Patterns.” In
addition to completing the Rome and Naples
photography assignment, photographer and art
historian Tomas Panini assembled and edited the
explanatory notes for the 300 photographs.
Photographer Anton Harris, having apprenticed at
Maria Guerra Atelier in Paris for seven years,
contributed his own unique insights to the Venice
and Rome assignments. In 1984 Mr. Anton Harris
won the Paris Exhibition Prize for his Design Study
photographic series, consisting of three books.
Above: Plan for the
Pisa Museum of Art.
Below: Detail from
The Roman Forum.
4
LESSON 4
150
Jewelcase booklet
Finishing the last spread
After placing and positioning a photograph
on page 7, you’ll move the address and copy-
right information to the bottom of the page
and reformat it.
1 From the horizontal ruler, drag to create
a horizontal ruler guide at approximately
25p6.
2 Choose File > Place and double-click the
04ArtL.tif file in the 04Lesson folder.
3 With the loaded graphic icon displayed,
make sure the Art layer is still selected, and
click in the lower portion of page 7 to place
the photograph. Then drag the photograph
until its bottom right corner snaps to the
intersection of the 25p6 ruler guide and the
right margin guide.
Yo u’ll now zoom in to the area you’ll be
working on.
4 Hold down Ctrl (Windows) or Command
(Macintosh) together with the spacebar, and
drag across the top two-thirds of column 1,
page 7 (as shown below), enclosing the
entire text block and a small portion of the
image in column 2.
Before you move the address and copyright
information to the bottom of the page,
you’ll first change the text to a smaller point
size and reduce the leading.
5 Select the text tool (), position the tool
over the sentence that begins “For more
information,” and triple-click to select the
entire paragraph. Hold down Shift, and click
the last line (containing the words “All rights
reserved.”).
PageMaker extends the selection to the end
of the text block.
6 In the control palette, type 7 for Size ()
and 9 for Leading (), and click the Apply
button
().
7 Select the pointer tool, click the text to
select it as a text block. Drag the bottom
windowshade handle up, just below the last
line of the paragraph listing the system
requirements.
8 Click the down arrow in the bottom win-
dowshade handle. The pointer changes to
the loaded text icon. Position the icon in the
lower portion of column 1, and click. (You’ll
reposition the text block once it is placed.)
9 Select the hand tool (). Position the tool
in the middle of the page and drag the page
up to display the bottom half of the page.
10 Select the pointer tool. Drag the text
block to align the baseline of the last line of
text with the 25p6 ruler guide.
You have finished this spread.
7
SYSTEM REQUIREMENTS
A Macintosh with a minimum of 1 megabyte of
RAM (2 megabytes is preferred) to run the Master
Index. Or an Apple II with a SCSI interface card.
Apple CD SC or other compatible CD-ROM drive.
For more information about our products write to:
Express Electronic Publishing, Inc.
900 High Street, Dublin, WY8 N45, Ireland.
© Copyright 1996 Express Electronic Publishing,
Inc. All rights reserved.(email: )
151
ADOBE PAGEMAKER 7.0
Classroom in a Book
11 Double-click the hand tool to switch to
the fit-in-window view.
12 Choose File > Save.
Assembling the back cover
The back cover uses the same four images as
found on the front cover. As with the front
cover, you will deselect the display of the
master-page elements.
1 Click the page 8 icon to switch to the back
cover. Then, choose View > Display Master
Items to deselect the option.
PageMaker turns off the display of the
master page elements.
You are now ready to copy the four images
from the cover.
2 Click the page 1 icon.
3 In the Layers palette, click the lock col-
umn (next to the eye icon) in the Text layer
to lock the layer. The Lock icon appears.
Click the Art layer to activate it.
4 Select the pointer tool, and choose Edit >
Select All. Then, choose Edit > Copy.
5 Click the page 8 icon. Then Choose Edit >
Paste.
Because the images were on a right page and
the back cover is a left page, PageMaker
pastes the images on the pasteboard to the
right of page 8 (where a right page would
be).
Yo u’ll now use the control palette to position
the images on the page. The top right corner
of the page is the zero point and therefore is
the easiest point to use for alignment.
6 With the images still selected, click the top
right reference point in the Proxy icon. Type
0 for both X and Y, and click Enter or
Return.
PageMaker positions the images on the
page.
You have finished assembling the booklet.
7 Choose View > Hide Guides to hide the
guides.
8 Choose File > Save to save the
04Work.pmd publication.
If you have determined that your service
provider will perform all the prepress tasks
(including resetting the bleeds), you are
6
7
For more information about our products write to:
Express Electronic Publishing, Inc.
900 High Street, Dublin, WY8 N45, Ireland.
© Copyright 1996 Express Electronic Publishing, Inc. All
rights reserved.(email: )
SYSTEM REQUIREMENTS
A Macintosh with a minimum of 1 megabyte of
RAM (2 megabytes is preferred) to run the Master
Index. Or an Apple II with a SCSI interface card.
Apple CD SC or other compatible CD-ROM drive.
LESSON 4
152
Jewelcase booklet
ready to deliver the 04Work.pmd file to your
service provider. Be sure to include all image
files that are linked to the publication.
9 If you would like to Print the Jewelcase
booklet, choose File > Print. Select the
printer you want to print to (Windows) and
select the appropriate PPD. Click Print. You
can also Export Adobe PDF, as described in
Creating an Adobe PDF version of the flyer
on page 41.
Building a booklet
The Build Booklet plug-in lets you create a
copy of your current publication in which
pages are arranged for printing multipage
spreads or signatures. This publishing tech-
nique is known as page imposition. For this
project, two pages are printed on each sheet
of paper. When the paper is folded, the book
pages are in the correct order. In your book-
let, the first and last pages will be printed on
one page, the second page on the same sheet
as the second-to-last page, and so on.
Previewing the pages
Before building the booklet, you want to
make sure that your text and layout are fin-
ished. Major changes may change the pagi-
nation and require that you rebuild your
booklet.
To help you understand the results of using
Build Booklet, you’ll also open a finished
version of the booklet with the pages already
rearranged by Build Booklet.
1 Browse through your publication, making
sure that everything is in order.
PageMaker’s page sorting option lets you
view thumbnails of your publication pages
so you can see the entire publication at once.
2 Choose Layout > Sort Pages. On the Mac-
intosh, click the Options button, select Show
Detailed Thumbnails, and click OK.
Resize the window if necessary to see all the
pages at once.
3 Click Cancel when you have finished
viewing the pages.
4 Choose File > Open, and double-click
04FnlBkt.pmd in the 04Lesson folder.
5 Choose Layout > Sort Pages. Resize the
window if necessary to see all the pages at
once. To increase the size of the thumbnails,
click the Build Booklet zoom tool.
The eight pages of the booklet have been dis-
tributed between four larger pages. Page 1 of
the booklet contains the original page 1 and
page 8. Booklet page 2 contains the original
pages 2 and 7; booklet page 3 contains orig-
inal pages 3 and 6; and booklet page 4 con-
tains original pages 4 and 5.
6 Click Cancel when you have finished
viewing the pages.
7 Choose File > Close to close
04FnlBkt.pmd and return to your publica-
tion. If prompted to save before closing,
click No.
Using Build Booklet
You are now ready to use Build Booklet.
1 With 04Work.pmd open, choose
Utilities > Plug-ins > Build Booklet.
153
ADOBE PAGEMAKER 7.0
Classroom in a Book
2 Choose 2-up Saddle Stitch for Layout.
This option is for standard booklet printing,
where double-sided pages are folded once
and fastened along the fold.
After you choose a layout, PageMaker
calculates the spread size for you.
The Build Booklet plug-in gives you several
additional options for arranging your book-
let. You can adjust the spread size, delete
extra pages, insert blank pages, rearrange
pages, and adjust for creep. For more infor-
mation, refer to the Adobe PageMaker 7.0
User Guide.
3 Leave the Place Guides in Gutter option
selected. Click OK to create the booklet.
4 When prompted, choose to save your
original document.
The Build Booklet plug-in saves and closes
the current document, and then opens a
new, untitled version that has the expanded
spread size and new page sequence.
5 Save the new file as 04Booklt.pmd in the
04Lesson folder.
Page 1 of the booklet is a 56p7 by 28p6 page
that contains the original page 1 and page 8.
Notice that the left edge of page 1 and the
right edge of page 8 abut each other and will
not need to bleed. Because this is a saddle-
stitch booklet, the binding edge of each page
always abuts another page in the printed sig-
nature. Therefore any cropping you applied
to images on the binding edge will be left in
place during the prepress preparations.
Continue to page through your document.
6 When you have finished browsing
through the booklet, close all open files and
quit the Adobe PageMaker application.
Printing the booklet
In addition to trapping and resetting the
bleeds, the prepress tasks will include speci-
fying a custom page size and including
printer’s marks and page information. For
more information on these prepress tasks,
refer to the Adobe PageMaker 7.0 User Guide.
Designed to be printed on a commercial
printing press, this publication requires a
total of four process color (CMYK) film sep-
arations. Knowing your printer plans to
print this publication using a line screen fre-
Architectural
Treasures
of Italy
A Photographic Reference of Palaces, Churches, and Ruins
LESSON 4
154
Jewelcase booklet
quency of 150 lpi, your service provider will
create the four film separations on a image-
setter at a resolution of 2400 dpi. Once the
film separations are prepared, you can
deliver them to your printer.
Review questions
1 What is meant by the term bleed?
2 What are some advantages to using layers?
3 How do you adjust the position of text
within a frame?
4 How do you make text flow around a
graphic?
Answers
1 Printed areas that extend beyond the trim
marks of the page.
2 Layers let you do the following:
• Work with objects without accidentally
moving or modifying objects on other layers
• Treat similar objects together without
grouping
• Hide or display objects
• Lock a layer to prevent modification of its
objects
• Quickly change the stacking order of
objects
3 Choose Element > Frame > Frame
Options. Select options and click OK.
4 Select the graphic, and choose Element >
Te xt Wrap. For Wrap Option, click the sec-
ond (rectangular wrap) icon. For Text Flow,
PageMaker selects the third (wrap-all-sides)
icon. Type the degree of offset you want and
click OK. For irregular wraps, you can click
on the text-wrap border to add new handles,
and drag edges or handles to modify the area
that keeps text away.
Lesson 5
Cycling guidebook
In this eight-page guidebook to the Tour de
France, one of the world’s great cycling events,
you get a chance to go beyond the basics of
using PageMaker. As you assemble and change
this dramatic and playful piece, you will learn
the power of PageMaker’s automatic layout
adjustment options, see how multiple master
pages and paragraph styles can streamline the
production of a publication, and become
adept at manipulating text blocks and frames.
LESSON 5
156
Cycling guidebook
To create this guidebook, you begin by
opening an Adobe PageMaker publication
that has been partially completed. First you
will finish the cover, then resize the page and
margins to see how PageMaker can auto-
matically adjust the layout for you. Next,
you will edit the other master pages to match
the Document Master. Then you will revise
the paragraph styles and refine the layout
on several spreads.
This project covers:
• Creating a polygon frame
• Placing text or graphics within frames
• Converting an existing rectangle into
a frame
• Editing styles
• Basing one style on an existing style
• Using the Bullets and Numbers plug-in
• Using the Drop Cap plug-in
• Using the adjust layout options when
changing page size, margins, and master
pages
• Editing and applying master pages
At the end of this lesson, you’ll have an
eight-page, six-color booklet.
It should take you about 2 hours to complete
this project.
Before you begin
1 Before launching PageMaker, return
all settings to their defaults by deleting
the PageMaker 7.0 preferences file. See
“Restoring default settings” in Lesson 1.
Note: Windows users need to unlock the
lesson files before using them. For infor-
mation, see Copying the Classroom in a
Book files on page 4.
2 In addition to the commonly used fonts
listed in the Getting Started chapter, make
sure that the following fonts are installed:
AGaramond, AGaramond Bold, Myriad
Bold, Myriad Roman, and Zapf Dingbats.
Windows only: Because of the way Windows
handles fonts, you must apply bold to Myriad
Roman to use Myriad Bold.
For this lesson, you need the French
hyphenation and spelling dictionary.
3 If you did not install the French dictionary
when you installed PageMaker, drag the
Français folder from the 05Lesson folder
into either PageMaker 7.0\rsrc\linguist\prx
(Windows) or Adobe PageMaker 7.0:RSRC:
Linguist:Proximity (Macintosh).
157
ADOBE PAGEMAKER 7.0
Classroom in a Book
4 Start PageMaker, and then open the
05Final.pmd file in the 05Lesson folder.
This publication is an eight-page booklet
containing photographs, maps, and text.
The text was entered and formatted in
a word-processing application, and then
placed into the Adobe PageMaker
document.
5 If the publication window does not fill
the screen, click the Maximize button in the
title bar to expand the window.
6 Leave this file open so you can use it
as a visual reference during the lesson.
Click the page icons in the bottom left
corner to examine each spread in the
document. Zoom in where you want
to take a closer look.
Setting up the document
Start by opening a document that has been
partially completed for you.
1 Choose File > Open, and then open
05Begin.pmt in the 05Lesson folder.
Since the focus of this project is automatic
layout adjustment and working with para-
graph styles, much of the placing and posi-
tioning of text and graphic elements has
been done for you. Some colors, styles, and
master pages have already been defined in
the Colors, Styles, and Master Pages palettes
as well.
This booklet starts out as an eight-page doc-
ument, 6 inches by 9 inches in size. Once
you finish the cover, you will change its page
size and margins to see how PageMaker can
automatically adjust a publication for you.
2 If the publication window does not fill the
screen, click the Maximize button in the title
bar to expand the window.
3 Choose File > Preferences > General.
Choose Picas for both Measurements In and
Ve rtical Ruler. In order to speed up screen
redraw, keep Standard selected for Graphics
display. Leave all other settings at their
default values as well. Click OK.
The three palettes you’ll use most often in
creating this booklet are the Styles, Colors
and Master Pages palettes. You can combine
the three, and leave more room to view
your page.
LESSON 5
158
Cycling guidebook
4 Choose Window > Show Master Pages.
Drag the Master Pages tab to the Colors and
Styles palette, and then click the Close box
of the Layers palette.
5 Choose File > Save As, type 05Work.pmd
for the name, and save the publication in the
05Lesson folder.
Finishing the cover
The cover of the booklet is complete except
for a photographic image, which you’ll place
in a polygon frame.
Creating the polygon frame
Yo u’ll first create the polygon frame on the
cover and set the frame options.
1 If necessary, click the page 1 icon in the
bottom left corner to go to the cover page.
2 Drag the Control palette over the paste-
board just right of the page so you can view
the entire page. You need to see only the X
and Y values of the Control palette to draw
the polygon frame. Minimize and move the
palettes as well if they are blocking your view
of the page.
3 Choose View > Show Guides.
The prepositioned guides and the Control
palette will help you position the points of
the polygon.
4 Select the polygon frame tool (). Start-
ing at the center of the wheel, position the
tool at each location shown in the illustra-
tion and click to create the points of the
polygon. Keep in mind the following tips:
• Create the polygon in a clockwise
direction.
• Let the tool snap to the guides.
• Click only once for each point. (If you
double-click before you complete the
polygon, PageMaker closes the polygon,
but does not draw a stroke between the
start and end points. If you double-click
over the starting point, PageMaker closes
the polygon, and begins another polygon
at the same point.)
• Use the Control palette to determine the
tool location.
• Hold down shift as you create the hori-
zontal or vertical edges of the polygon, that
is, as you move between B and C, C and D,
and D and E.
• Press Backspace or Delete to erase the last
point you clicked.
159
ADOBE PAGEMAKER 7.0
Classroom in a Book
• To close the polygon, position the tool
over the center of the wheel (the pointer
changes to a square), and click.
A. Start and end here: x=15p, y=36p
B. x=22p, y=0p C. x=36p, y=0p D.
x=36p, y=54p
E. x=22p,
y=54p
It is important that the polygon touch the
edges of the page. If it doesn’t, PageMaker
may not resize it correctly. You can reposi-
tion the points of a polygon after you have
drawn it.
5 If you need to reposition some points of
the polygon, double-click the polygon to
display its points. Drag the points to the cor-
rect locations. (Remember to pause before
you drag so PageMaker will display the
mouse position in the Control palette.)
6 With the frame still selected, choose
Element > Frame > Frame Options.
The frame options control the position of
the content within the frame, as well as rec-
onciling the difference in size between the
frame and the content. You can choose
whether PageMaker should clip the content
to fit the frame, resize the frame to fit the
content, or scale the content to fit the frame.
For this cover, you’ll clip the content (a pho-
tograph) to match the frame. By clipping
(rather than scaling) the photograph, the
image maintains its original dimensions,
even when you increase the page size later.
7 Click Open or OK to accept the default
setting.
8 Choose File > Save to save the publication.
Placing the image in the frame
Yo u’ll place the photographic image directly
into the frame and then apply a color to it.
Once you’ve placed a graphic inside a frame,
you cannot rotate, skew, or flip it indepen-
dent of its frame. However, depending upon
the type of image, you can apply a color,
B C
DE
A
LESSON 5
160
Cycling guidebook
manipulate the image using image control
or Photoshop effects, or pan the image
within the frame.
1 Select the pointer tool and select the
frame.
2 Choose File > Place and select 05ArtA.tif
(in the 05Lesson folder). Click Open
(Windows) or OK (Macintosh) to accept the
default place options.
Default option inserts content into selected frame
PageMaker inserts the photograph into the
frame, clipping the portion that doesn’t fit
within its boundaries.
Just like any other PageMaker drawn object,
a frame can have both a stroke and fill.
Because the photograph fills the entire
frame, the fill of this frame is not visible.
However, if the image was small, you could
apply a fill as well. For this project, you’ll
remove the stroke from the frame.
3 With the frame still selected, click the Col-
ors tab to display the Colors palette. Then,
click the Stroke button
() in the Colors
palette and select None.
You may notice a gray outline around the
polygon frame. Unlike a regular polygon,
a polygon frame displays a non-printing
gray outline, even when it has no stroke, to
help you distinguish between the two types.
You will apply a green spot color to the
image. It is important to note that if you
select only the frame and apply a color, you
change the color of its stroke or fill or both
(depending upon which button is selected
in the Colors palette). If you select the con-
tent and apply a color, you apply the color
to the image.
4 To select the content, hold down Ctrl
(Windows) or Command (Macintosh) and
click the image until four special handles
161
ADOBE PAGEMAKER 7.0
Classroom in a Book
appear as shown below. If you click on top of
other objects, you may have to click several
times to select the frame content.
Special selection handles mark frame content
5
With the content still selected, select
Pantone 802 2x CVC in the Colors palette.
Note: Yo u can apply color to 1-bit (mono-
chrome) and grayscale bitmap images,
but not
color bitmap images.
The polygon is covering other objects on the
page and needs to move back in the stacking
order. It should be behind all the objects
except the orange background. Rather than
use the Send Backward command repeat-
edly to send it back object by object in the
stacking order, you’ll send it all the way to
the back, and then bring it up one level.
6 With the pointer tool selected, select the
frame (currently the content is selected,
not the frame). Choose Element >
Arrange > Send to Back. (The polygon dis-
appears behind the orange background.)
Choose Element > Arrange > Bring For-
ward.
The cover is complete.
7 Choose File > Save to save the publication.
Changing the page size and margins
Yo u’ll now change the page size and margins
of the Document Master and watch
PageMaker adjust the layout automatically.
When you change the page settings of a pub-
lication, PageMaker can move and scale text
and graphics automatically, based on their
relationships to the page edges, margins,
and guides.
LESSON 5
162
Cycling guidebook
1 Choose File > Preferences > Layout
Adjustment and select “OK to Resize Groups
and Imported Graphics.” Leave all other
settings at their default values. Click OK.
2 Choose File > Document Setup. Set the
page dimensions to 36 by 57 picas. Select
Adjust Layout. For Margins, type 2p6 for
Inside, Outside, and Top, and type 2p10 for
Bottom. Then click OK.
PageMaker changes the page size and mar-
gins. It adjusts the column width, and
because the yellow frame spanned the col-
umn, it stretches it to the new width. The
polygon frame and the orange background,
which are aligned precisely to the edges of
the page, also stretch to match the page size.
However, the image within the polygon
frame does not change size because the
frame option “Clip content to fit frame”
maintains the original size of the content,
regardless of how you change the frame.
Before After
3
Choose File > Save to save the publication.
4 Click the page 2 icon to switch to the
next spread.
Notice that PageMaker changed the page
size throughout the document, but did not
change the margins on this spread. When
you change margins using the Document
Setup dialog box, PageMaker changes the
margins of only the Document Master
(master page) and any pages that have the
1903
Une course cy-
cliste de classe
mondiale
L’astuce publicitaire
lancée il y a environ
100 ans pour éviter la
faillite s’est développée de façon
à être aujourd’hui la plus grande
course cycliste annuelle au
monde : le Tour de France.
En 1903, des courses cyclistes
d’une durée d’un jour entre Pa-
ris et Bordeaux avaient beau-
coup de succès. Ce qui fit réflé-
chir le contrôleur des finances de
L’Au to, un journal français con-
naissant des difficultés financiè-
res : une compétition qui dure
plusieurs jours et couvre des cen-
taines de kilomètres attirerait
sans aucun doute un plus grand
public, avide de lire les compte-
rendus journaliers d’un grand
tour de la France. Henri
Desgrange, le directeur du jour-
nal, suivit cette suggestion ambi-
tieuse et lança le Tour de France.
Sous la direction de Desgrange,
le Tour de France se développa
en une course sur route tradition-
nelle. C’est ainsi que, aujourd’hui,
20 équipes de neuf coureurs
prennent chaque année la route
La victoire en équipe
le plus de chances de
mener une équipe vers la
victoire est désignée
comme le coureur et est
soutenue par d’autres
coureurs cyclistes appelés
les domestiques. L’équipe
peut également inclure un
directeur technique qui
est en général un ancien
coureur cycliste
connaissant les trucs du
métier et servant
d’entraîneur des coureurs
domestiques.
La stratégie
Fausto Coppi, l’Italien qui
ajouta le Tour de France
de 1949 et de 1952 à son
impressionnant palmarès
de victoires cyclistes,
octroya autant
d’importance à la tactique
et la stratégie qu’à
l’entraînement physique.
Les stratèges actuels
mettent généralement les
coureurs en tête du
peloton, suivis des
domestiques.
Quelques minutes
suffisent pour obtenir la
victoire après plusieurs
journées de course; c’est
pour cette raison que les
domestiques s’efforcent
pour que leur coureur ait
le dessus. Roulant dans
un ou deux groupes
principaux suivis de
quelques traînards, les
domestiques déterminent
Survivre la cadence
E
n moins d’un mois, cette
exténuante course de route
couvre environ 4 000 kilomètres
en étapes journalières pouvant
atteindre 260 kilomètres. Le
maillot jaune passe d’un ga-
gnant d’étape à l’autre. Mais le
coureur finissant la course en le
moins de temps gagne le grand
prix.
✬ Les participants à la course
de 1992 parcoururent sept
pays —l’Allemagne, la Belgi-
que, l’Espagne, la France, l’Ita-
lie, le Luxembourg et les
Pays-Bas — couvrant 3 800
kilomètres en 22 jours.
✬ La course de 1993 ne quitta
la France que pour faire un
bref détour par l’Andorre, le
pays minuscule situé entre la
France et l’Espagne — accu-
mulant 3 734 kilomètres en
21 jours.
✬ En 1994, les coureurs péda-
lèrent à travers le tunnel ré-
cemment ouvert sous la
manche, de Calais, en France,
jusqu’à Folkestone, en Angle
Gagner le Tour de France
requiert habituellement la par-
ticipation d’une équipe. La
personne qui semble avoir
163
ADOBE PAGEMAKER 7.0
Classroom in a Book
Document Master applied to them. To
change the margins of pages that have other
master pages applied to them, you must
modify each master page individually.
5 Click the Master Pages palette tab to
display the Master Pages palette.
Notice that the 2-Col / 3-Col master is
selected for pages 2 and 3.
So that you can see the power of the Adjust
Layout option, you will first change the mar-
gins without selecting Adjust Layout.
6 Choose Master Page Options from the
Master Page palette menu. Change the
Inside, Outside, and Top margins to 2p6
and change the Bottom margin to 2p10.
Click OK.
You can copy a value in an edit box,
and paste it in another edit box. First select
the value, hold down Ctrl (Windows) or
Command (Macintosh) and press C. Move
the cursor to the next edit box by pressing
tab. Then hold down Ctrl (Windows) or
Command (Macintosh) and press V.
PageMaker changes the margins and col-
umn guides, but leaves any existing text or
graphics untouched.
After margin change without Adjust Layout
7
Choose Edit > Undo Change Master.
The spread returns to the previous margin
settings. Now change the margins again
using the Adjust Layout option.
8 Choose Master Page Options from the
Master Page palette menu. Once again,
change the Inside, Outside, and Top margins
to 2p6 and change the Bottom margin to
2p10. Select Adjust Layout, and click OK.
1903
La victoire en équipe
le plus de chances de
mener une équipe vers la
victoire est désignée
comme le coureur et est
soutenue par d’autres
coureurs cyclistes appelés
les domestiques. L’équipe
peut également inclure un
directeur technique qui
est en général un ancien
coureur cycliste
connaissant les trucs du
métier et servant
d’entraîneur des coureurs
domestiques.
La stratégie
Fausto Coppi, l’Italien qui
ajouta le Tour de France
de 1949 et de 1952 à son
impressionnant palmarès
de victoires cyclistes,
octroya autant
d’importance à la tactique
et la stratégie qu’à
l’entraînement physique.
Les stratèges actuels
mettent généralement les
coureurs en tête du
peloton, suivis des
domestiques.
Quelques minutes
suffisent pour obtenir la
victoire après plusieurs
journées de course; c’est
pour cette raison que les
domestiques s’efforcent
pour que leur coureur ait
le dessus. Roulant dans
un ou deux groupes
principaux suivis de
quelques traînards, les
domestiques déterminent
Une course cy-
cliste de classe
mondiale
L’astuce publicitaire
lancée il y a environ
100 ans pour éviter la
faillite s’est développée de façon
à être aujourd’hui la plus grande
course c ycliste annuelle au
monde : le Tour de France.
En 1903, des courses cyclistes
d’une durée d’un jour entre Pa-
ris et Bordeaux avaient beau-
coup de succès. Ce qui fit réflé-
chir le contrôleur des finances de
L’Au to, u n journal français con-
naissant des difficultés financiè-
res : une compétition qui dure
plusieurs jours et couvre des cen-
taines de kilomètres attirerait
sans aucun doute un plus grand
public, avide de lire les compte-
rendus journaliers d’un grand
tour de la France. Henri
Desgrange, le directeur du jour-
nal, suivit cette suggestion ambi-
tieuse et lança le Tour de France.
Sous la direction de Desgrange,
le Tour de France se développa
en une course sur route tradition-
nelle. C’est ainsi que, aujourd’hui,
20 équipes de neuf coureurs
prennent chaque année la route
Survivre la cadence
E
n moins d’un mois, cette
exténuante course de route
couvre environ 4 000 kilomètres
en étapes journalières pouvant
atteindre 260 kilomètres. Le
maillot jaune passe d’un ga-
gnant d’étape à l’autre. Mais le
coureur finissant la course en le
moins de temps gagne le grand
prix.
✬ Les participants à la course
de 1992 parcoururent sept
pays —l’Allemagne, la Belgi-
que, l’Espagne, la France, l’Ita-
lie, le Luxembourg et les
Pays-Bas — couvrant 3 800
kilomètres en 22 jours.
✬ La course de 1993 ne quitta
la France que pour faire un
bref détour par l’Andorre, le
pays minuscule situé entre la
France et l’Espagne — accu-
mulant 3 734 kilomètres en
21 jours.
✬ En 1994, les coureurs péda-
lèrent à travers le tunnel ré-
cemment ouvert sous la
manche, de Calais, en France,
jusqu’à Folkestone, en Angle
Gagner le Tour de France
requiert habituellement la par-
ticipation d’une équipe. La
personne qui semble avoir
LESSON 5
164
Cycling guidebook
PageMaker changes the margins and col-
umn guides, adjusting the text and graphics
that were aligned to the guides to the new
layout.
After margin change with Adjust Layout
The sidebar on page 2 was originally
touching the yellow frame containing
1903. Because the sidebar was not aligned
to any horizontal guides, PageMaker did
not move it as it did the yellow frame.
9 Select the pointer tool, hold down Shift
(to constrain the movement), and then drag
the black frame on page 2 up until its top
edge touches the bottom edge of the yellow
frame.
This guidebook includes one more master
page, 3-Col / 3-Col. You need to change the
margins on this master as well.
10 Double-click 3-Col / 3-Col in the Master
Pages palette.
Note: This shortcut opens the Master Page
Options dialog box but does not apply the
master page to the currently displayed pages.
1903
La victoire en équipe
appelés les domestiques.
L’équipe peut également inclure
un directeur technique qui est
en général un ancien coureur
cycliste connaissant les trucs du
métier et servant d’entraîneur
des coureurs domestiques.
La stratégie
Fausto Coppi, l’Italien qui
ajouta le Tour de France de
1949 et de 1952 à son
impressionnant palmarès de
victoires cyclistes, octroya
autant d’importance à la
tactique et la stratégie qu’à
l’entraînement physique. Les
stratèges actuels mettent
généralement les coureurs en
tête du peloton, suivis des
domestiques.
Quelques minutes suffisent
pour obtenir la victoire après
plusieurs journées de course;
c’est pour cette raison que les
domestiques s’efforcent pour
que leur coureur ait le dessus.
Roulant dans un ou deux
groupes principaux suivis de
quelques traînards, les
domestiques déterminent la
cadence des autres coureurs
cyclistes, observent la tactique
de la concurrence et bloquent
les concurrents qui essaient de
se détacher d’un groupe de
coureurs.
La récompense
La récompense des coureurs
cyclistes dévoués est
l’inestimable prestige de gagner
le Tour. Mais il y a également un
prix en argent liquide pouvant
Une course cycliste
de classe mondiale
L’astuce publicitaire lancée
il y a environ 100 ans pour
éviter la faillite s’est développée de fa-
çon à être aujourd’hui la plus grande
course cycliste annuelle au monde : le
Tou r de France.
En 1903, des courses cyclistes d’une du-
rée d’un jour entre Paris et Bordeaux
avaient beaucoup de succès. Ce qui fit ré-
fléchir le contrôleur des finances de
L’Auto, un journal français connaissant
des difficultés financières : une compéti-
tion qui dure plusieurs jours et couvre des
centaines de kilomètres attirerait sans
aucun doute un plus grand public, avide
de lire les compte-rendus journaliers d’un
grand tour de la France. Henri Desgrange,
le directeur du journal, suivit cette sug-
gestion ambitieuse et lança le Tour de
France .
Sous la direction de Desgrange, le Tour
de France se développa en une course sur
route traditionnelle. C’est ainsi que,
aujourd’hui, 20 équipes de neuf coureurs
prennent chaque année la route à la re-
cherche de la gloire et de la fortune ins-
tantanées, et de ce fameux « maillot
jaune », le maillot qui, depuis la reprise
des courses après la première guerre
mondiale, honore le participant qui mène
la course dans l’ensemble.
Survivre la cadence
E
n moins d’un mois, cette
exténuante course de route couvre
environ 4 000 kilomètres en étapes jour-
nalières pouvant atteindre 260 kilomètres.
Le maillot jaune passe d’un gagnant
d’étape à l’autre. Mais le coureur finissant
la course en le moins de temps gagne le
grand prix.
✬ Le s participants à la course de 1992 par-
coururent sept pays —l’Allemagne, la
Belgique, l’Espagne, la France, l’Italie, le
Luxembourg et les Pays-Bas — cou-
vrant 3 800 kilomètres en 22 jours.
✬ La course de 1993 ne quitta la France
que pour faire un bref détour par l’An-
dorre, le pays minuscule situé entre la
France et l’Espagne — accumulant
3 734 kilomètres en 21 jours.
✬ En 1994, les coureurs pédalèrent à
travers le tunnel récemment
ouvert sous la manche, de Calais, en
France , jusqu’à Folkestone, en An-
gleterre, pour être rapatriés via
ferry v ers Cherbourg — parcourant
3 955 kilomètres en 23 jours.
✬ La course de 1995 vit les par-
ticipants prendre l’avion entre la
Bretagne en France et la Belgique,
ensuite des Alpes aux Pyrénées
avant de terminer la course à Paris
— un parcours de 3 515 kilomètres
en 23 jours.
Gagner le Tour de France requiert
habituellement la participation d’une
équipe. La personne qui semble avoir
le plus de chances de mener une équipe vers la victoire est désignée
comme le coureur et est soutenue par d’autres coureurs cyclistes
1903
Une course cycliste
de classe mondiale
L’a stuce publicitaire lancée
il y a environ 100 ans pour
éviter la faillite s’est développée de fa-
çon à être aujourd’hui la plus grande
course cycliste annuelle au monde : le
Tou r de France.
En 1903, des courses cyclistes d’une du-
rée d’un jour entre Paris et Bordeaux
avaient beaucoup de succès. Ce qui fit ré-
fléchir le contrôleur des finances de
L’Auto, un journal français connaissant
des difficultés financières : une compéti-
tion qui dure plusieurs jours et couvre des
centaines de kilomètres attirerait sans
aucun doute un plus grand public, avide
de lire les compte-rendus journaliers d’un
grand tour de la France. Henri Desgrange,
le directeur du journal, suivit cette sug-
gestion ambitieuse et lança le Tour de
France.
Sous la direction de Desgrange, le Tour
de France se développa en une course sur
route traditionnelle. C’est ainsi que,
aujourd’hui, 20 équipes de neuf coureurs
prennent chaque année la route à la re-
cherche de la gloire et de la fortune ins-
tantanées, et de ce fameux « maillot
jaune », le maillot qui, depuis la reprise
des courses après la première guerre
mondiale, honore le participant qui mène
la course dans l’ensemble.