The Adobe Illustrator CS Wow- P6 ppsx
Bạn đang xem bản rút gọn của tài liệu. Xem và tải ngay bản đầy đủ của tài liệu tại đây (4.99 MB, 30 trang )
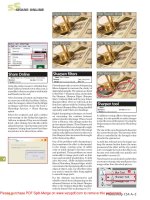
Chris Bucheit / DesignTime
Musician and artist Chris Bucheit decided to
show his graphic design class the step-by-
step process of creating the CD packaging for
his group's latest album. Bucheit began with
pencil sketches that he scanned and placed
in Illustrator. To lend a painterly look to the
artwork, Bucheit used gradient meshes, gra-
dients, and transparency. For the mermaid's
hair, Bucheit created custom art brushes that
tapered at both ends. To do this, he drew a lens
shape with the Pen that he copied and pasted
to produce four objects. He filled the objects
with gold, brown and reddish-brown colors,
and then used the Direct Selection tool to
select and move points on each lens object so
that all four objects were of different shapes.
He moved the objects together to adjoin or
slightly overlap and then dragged the artwork
to the Brushes palette. In the New Brush dia-
log box he specified Art Brush and in the Art
Brush Options dialog he gave the new brush a
descriptive name. After making several custom
brushes, he drew strands of hair with the Pen
tool and applied the art brushes to them.
Chapter 4 Brushes & Symbols
125
Ink Brush Strokes
Making Naturalistic Pen and Ink Drawings
Overview: Adjust the Paintbrush
tool settings; customize a Calligraphic
brush; trace or draw your composi-
tion; experiment by using other
brushes to stroke the paths.
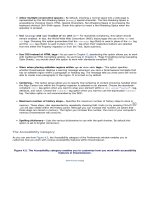
The composite photo of Sylvie saved as TIFF and
placed as an Illustrator template layer
Maintaining your pressure
Only brush strokes initially drawn
with pressure-sensitive settings
can take advantage of pressure-
sensitivity. Also be aware that
reapplying a brush after trying
another may alter the stroke
shape.
It's easy to create spontaneous painterly and calligraphic
marks in Illustrator—perhaps easier than in any other
digital medium. And then after creating these highly
variable, responsive strokes (using a graphics tablet and
a pressure-sensitive, pen-like stylus), you can edit those
strokes as paths, or experiment by applying different
brushes to the existing paths. This portrait of Sylvie was
drawn using one custom Calligraphic Brush and a pres-
sure-sensitive Wacom tablet.
1 If you are tracing artwork, prepare your template
layer. You can draw directly into Illustrator, but if you
want to trace a scanned photo or sketch, you'll need to
prepare an image to use as a template layer. For her tem-
plate image, Steuer scanned photos of Sylvie taken by
photographer Susan Wilson (www.susanwilson.com) and
composited them together in Photoshop. She then saved
the composite in TIFF format, and placed the TIFF as a
template layer in Illustrator. To place a TIFF or Photo-
shop image as a template layer, choose File > Place, locate
your file when prompted, enable the Template check
box, and click the Place button. Toggle between hiding
and showing the template layer using -Shift-W
126
Chapter 4 Brushes & Symbols
(Mac)/Ctrl-Shift-W (Win), or by clicking in the visibility
column in the Layers palette (the icon for a template layer
is a tiny triangle/circle/square, instead of the Eye icon).
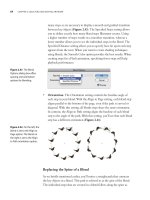
2 Setting your Paintbrush Tool Preferences and cus-
tomizing a Calligraphic brush. In order to sketch freely
and with accurate detail, you'll need to adjust the default
Paintbrush tool settings. Double-click the Paintbrush
tool in the Tools palette to open Paintbrush Tool Prefer-
ences. Drag the Fidelity and Smoothness sliders all the
way to the left and disable the "Fill new brush strokes"
and "Keep Selected" options.
To create a custom brush, select a Calligraphic brush
(one of the first brushes in the default Brushes palette).
Then click the New Brush icon at the bottom of the pal-
ette and click OK for a New Calligraphic Brush. Experi-
ment with various settings, name your brush, and click
OK. For this portrait, Steuer chose the following settings:
Angle=90 /Fixed; Roundness=10%/Fixed; Diameter=4
pt/Pressure/Variation=4 pt. If you don't have a pres-
sure-sensitive tablet, try Random as a setting for any of
the three Brush Options, since Pressure won't have any
effect. The Paintbrush uses your current stroke color (if
there isn't a stroke color, it will use the previous stroke
color or the fill color). Now draw. If you don't like a mark:
1) choose Undo to delete it, or 2) use the Direct Selection
tool to edit the path, or 3) select the path and try redraw-
ing it using the Paintbrush (to hide or show selection out-
lines, choose View >Hide/Show Edges). To edit a brush,
double-click it in the Brushes palette, or drag it to the
New Brush icon to duplicate it, then edit the copy.
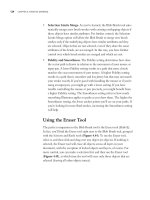
3 Experimenting with your artwork. Save any versions
of your artwork that you like. Now try applying differ-
ent brushes to specific strokes and to the entire piece. To
access more Adobe-made Calligraphic Brushes, choose
Window > Brush Libraries >Artisitic_Calligraphic (at
right, see two default Adobe brushes applied to the same
strokes as the custom paths).
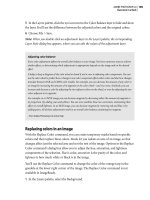
Customizing the Paintbrush Tool Preferences
Creating a new Calligraphic brush
Angle, Roundness, and Diameter can be set to
respond to pressure, to vary randomly, or to re-
main fixed; the new brush in the Brushes palette
viewed with tool tips and in List View
Strokes made with Steuer's customized 4 pt
flat brush (left); applying Adobe's default 3 pt
Round brush (center), then the 7 pt Oval brush
Chapter 4 Brushes & Symbols
127
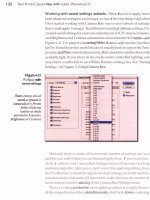
Sharon Steuer
Using the same Calligraphic Brush as
in her preceding lesson, Sharon Steuer
drew the seashells in black. On layers
below (for help see the Layers chap-
ter), she created a background gradi-
ent (see the Blends, Gradients & Mesh
chapter), and then used the Pencil tool to
draw enclosed areas of flat color (shown alone
below right). On a layer above, she drew a few
details in color with the Calligraphic Brush. To
create the textured background, she made two
copies of the gradient layer, then transformed
the first gradient copy into a gradient mesh
(Object > Expand, Gradient Mesh) so she could
select a few interior points and add highlights
(see the Blends, Gradients & Mesh chapter for
more details about mesh).
Chapter 4 Brushes & Symbols128
Lisa Jackmore
Lisa Jackmore often begins her Illustrator paint-
ings by making smaller versions of the default
Calligraphic Brushes. Although she often pre-
fers more rounded brushes and draws in black
for the initial sketch, sometimes she just makes
a variety of brushes, then "doodles until the
shape of a line inspires" her. Occasionally Jack-
more will even save a doodle and figure out
later how to incorporate it into the artwork.
She constructs her illustration, then colors the
brush strokes toward the end of the project. To
make a custom charcoal Art Brush, Jackmore
used Adobe Streamline to turn a scanned char-
coal mark into an Illustrator object. Jackmore
opened the object in Illustrator and dragged
it into the Brushes palette, then used the new
brush to create the marks under the notepaper
and in the framed painting.
Chapter 4 Brushes & Symbols 129
Jen Alspach
Jen Alspach started with a digital photograph
of her cat Static, which she placed into a
template layer (see the Layers chapter). In a
new layer above, she traced over the photo,
using brushes, with a Wacom "Pen Partner"
4" x 5" tablet. Alspach used darker, heavier
brushes to draw the basic outline and the
important interior lines like the eyes, ears, and
neck (all attributes set to Pressure with a
2 pt Diameter and a 2 pt variation). In
another pressure-sensitive brush, she set a
Fixed Angle and Roundness (diameter of 6 pt),
while in a third brush she set all attributes to
Random. Using the Wacom tablet with the
pressure-sensitive Calligraphic Brushes, she
was able to use very light hand pressure to
draw the fine lines around the eyes and
the whiskers.
Chapter 4 Brushes & Symbols130
Ellen Papciak-Rose / In The Studio
n this magazine illustration for Newsweek
International, Ellen Papciak-Rose used a
scratch board technique to capture the hip-
hop feel of Kwaito music, in South Africa.
She began by creating several variations of a
default charcoal brush found in the (Window >
Brush Libraries>Artistic_ChalkCharcoalPencil
brush library. After importing the "Charcoal
Rough" brush into the Brushes palette, Pap-
ciak-Rose made a copy of the brush by drag-
ging it to the New Brush icon. Papciak-Rose
double-clicked on the brush copy and in the
Art Brush Options dialog box she altered
the new brush by clicking on the direction
arrows and entering a percentage to change
the width. She then painted the strokes of
the drawn objects using various custom-built
rough charcoal brushes. Papciak-Rose drew all
the letters in her illustration with the Pen tool
and applied graphic styles made of multiple
brush strokes. (See the "Scratchboard Art" les-
son in the Live Effects & Graphic Styles chapter
for more about her scratchboard techniques.)
Chapter 4 Brushes & Symbols 131
Preparing Art
Adding Brushes to Existing Artwork
Overview: Modify existing art-
work; change closed paths to open
paths; apply Art Brushes to modified
artwork.
Red outlines indicate the type of closed paths to
change in the original clip art
Use the Scissors tool to cut a closed path into
two paths, swap the fill and stroke, then delete
one path
Sandee Cohen, a vector expert and Illustrator Wow! con-
sultant, enjoys working with Illustrator's brushes to mod-
ify existing art. This lesson shows how Cohen changed
ordinary clip art into more sophisticated artwork. Her
technique can be used to give both commercial clip art,
and any of your own existing artwork, a bit more pizzaz.
1 Examine the clip art shapes. First, Cohen examines the
artwork in the Outline mode in order to plot her steps.
She typically ignores open paths because they take brush
strokes very well. She also does not worry about closed
paths if they have large areas. She is most interested in
finding thin closed paths that mimic the look of brush
strokes. These paths are often found in artwork created by
previous versions of Illustrator.
2 Split closed paths and delete segments. So they will
accept the brush strokes, Cohen splits thin closed paths
with the Scissors tool. She swaps the fill and stroke colors
of selected paths by pressing Shift-X to make it easier to
see each path. (You can also change from Preview to Out-
line View to see paths without fills.) After cutting a path,
she deletes one of the cut paths, usually the smaller one.
132
Chapter 4 Brushes & Symbols
3 Apply natural-looking brush strokes to simplified
paths. Once the artwork is cleaned up, the simplified
paths are ready to have brushes applied to them. Many
different types of looks can be created without mov-
ing or deleting any more of the paths in the illustration.
Cohen applies her choice of brushes to the simplified,
open paths. Among Cohen's favorite brushes is Charcoal,
one of the natural-looking brushes found in Illustrator's
default set. She also uses brushes found in the Artistic
brush libraries under Window > Brush Libraries.
4 Apply brushes to large closed paths. In most cases,
Cohen leaves large, closed paths filled with solid color.
Some of the large, closed paths could be made to look
more organic by applying Art brushes to their strokes.
For instance, Cohen applies natural-media brushes,
such as Chalk Scribbler and Fire Ash to the large, closed
shapes. Warning: These natural brush forms contain
hundreds of points in each brush stroke. While there may
be few points in each path, use of these brushes can add
dramatically to the file size—a consideration if your com-
puter is slow, or if you need a small file size for storage or to
transfer by email.
5 Experiment with Calligraphic brushes. Cohen also
uses Calligraphic brushes set to thin roundness and vari-
ous angles to replicate the feeling of the original artwork.
She creates several Calligraphic brushes, each set at a dif-
ferent angle, to apply various appearances to the paths.
Cohen accesses the Brush Options in the Brushes palette
menu and chooses the Random setting for the Angle,
Roundness, and Diameter options. She then experiments
with the numeric settings of each option.
If you alternate between applying a Calligraphic brush
with Random settings and another brush, each time you
return to the randomized Calligraphic brush the results
will be different. Cohen often applies the same brush
several times to the same object until she achieves the
appearance she likes.
Once the artwork has been cleaned up, you are
ready to apply brushes
The Charcoal brush (shown in black) gives the
art more of a hand-rendered appearance
The Chalk Scribbler (top left) and Fire Ash
(bottom right) brushes applied to large closed
shapes create a more organic look
A Calligraphic brush set to an angle of 90 de-
grees, roundness of 10%, and diameter of 9
points brings back the look of the original art
Chapter 4 Brushes & Symbols 133
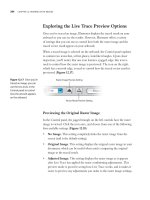
Pattern Brushes
Creating Details with the Pattern Brush
Overview: Create interlocking chain
links by drawing and cutting dupli-
cate curve sections; select the link art-
work and create a new Pattern brush;
draw a path and paint it with the new
brush.
At the left, the ring drawn with the Ellipse tool
and given a thick stroke; in the middle, the el-
lipse cut into four curve sections shown in Out-
line view (sections are separated to show them
better); on the right, the four curve sections
shown in Outline view, after using the Object >
Path >Outline Stroke command
On the left, the two left curve sections copied
and pasted, and colors changed to light brown
in the middle; on the right, the two sections are
slid to the right to form the right half link
On the left, the half-link selected and reflected
using the Reflect tool (the X in the middle of the
guide ellipse served as the axis); on the right,
both half-links in position
One look at a Bert Monroy image and you will immedi-
ately recognize the intricacy and rich realism of his style
of illustration. When crafting an image like the Rendez-
vous Cafe (see the Gallery image that follows for the
complete image), Monroy travels between Illustrator and
Photoshop, stopping long enough in Illustrator to con-
struct the intricate shapes and details that turn his scenes
into slices of life in Photoshop. The easel chain is one such
detail that Monroy created in Illustrator using a custom-
made Pattern brush.
1 Drawing, cutting, copying, and reflecting curves.
To build a chain-link Pattern brush, Monroy first created
one link that was interconnected with half-links on either
side (the half-links would connect with other half-links
to form the chain once the Pattern brush was applied to
a path). To create the pattern unit with the Ellipse tool,
begin the center link by drawing an ellipse with a thick
stroke. Copy the ellipse, Paste in Back; then turn the
ellipse into a guide (View >Guides >Make Guides). You'll
use this guide later when making the half-links. Now
select the original ellipse and use the Scissors tool to cut
the ellipse near each of the four control points (choose
Chapter 4 Brushes & Symbols
134
View >Outline to better see the points). Shift-select the
four curved paths with the Direct Selection tool and
select Object > Path > Outline Stroke. Illustrator automati-
cally constructs four closed-curve objects.
To make the right half-link, select the left two curve
objects and duplicate them to make the right half-link by
dragging the two objects to the right while holding down
the Opt/Alt key; then change the color of the copies. For
the left half-link, select the two curves you just dragged
and colored, choose the Reflect tool, hold down the Opt/
Alt key and click in the center of the ellipse guide (the
center point is an X). In the Reflect dialog box, click the
Vertical Axis button and click Copy to create a mirror-
image of the right half-link for the left half-link.
Note: The center link must be aligned exactly in-between
the two half-links, so that the half-links join when applied
to a path as a Pattern brush.
2 Finishing the link. The two adjoining half-links should
look like they're entwined with the link. Monroy selected
the top objects of both the left and right half-links and
moved them behind the center link (Object > Arrange >
Send to Back). You can create a different look by selecting
the top of the left half-link, and the bottom of the right
half-link, and moving them to the back.
3 Making and using a Pattern brush. To make the brush,
select the artwork and drag it into the Brushes palette.
Choose New Pattern Brush in the New Brush dialog box;
in the next dialog box, name the brush and click OK
(leave the default settings as you find them). You can now
apply the chain pattern to a path by selecting the path and
clicking on the brush in the Brushes palette.
Depending on the size of your original links artwork,
you may need to reduce the size of the brush artwork to
fit the path better. You can do this by reducing the origi-
nal artwork with the Scale tool and making a new brush,
or by double-clicking the brush in the Brushes palette and
editing the value in the Scale field of the dialog box.
Finished link artwork; at the left, the links as
Monroy created them; at the right, an alterna-
tive version of the interconnected links
The Pattern Brush Options dialog box showing
default settings
Original path on top; below, path painted with
Chain Link Pattern brush
Drop Shadows
Even if your artwork is destined
for Photoshop, you can make a
drop shadow for it in Illustrator.
Select the artwork, then choose
Effect >Stylize>Drop Shadow.
Copy the object (which automati-
cally copies all of its appearances)
and paste in Photoshop (Edit >
Paste >Paste as Pixels). (See the
Transparency & Appearances chap-
ter for more on appearances, and
the Illustrator & Other Programs
chapter for more on using Photo-
shop with Illustrator.)
Chapter 4 Brushes & Symbols
135
Bert Monroy
Artist Bert Monroy incorporates elements he
draws in Illustrator into the detailed realism he
paints in Photoshop. In this cafe scene, Monroy
used Illustrator Pattern brushes for the sign
post and the easel chain. For the leaves in the
foreground, Monroy first drew one leaf object
and made it into a Scatter brush (he used
Random settings for the brush parameters).
He brought resulting foliage into Photoshop
where he detailed it further. (See the Illustrator
& Other Programs chapter to learn more tech-
niques for using Illustrator with Photoshop.)
Chapter 4 Brushes & Symbols136
Shayne Davidson
Shayne Davidson began this medical illustra-
tion by airbrushing the soft background col-
ors in Photoshop. After placing the image in
Illustrator, she used custom-made Calligraphic
brushes to draw the outlines and details. To
create a brush, she opened the Brushes palette,
selected New Brush from the palette's menu
and picked New Calligraphic Brush from the
New Brush dialog. This brought up the Cal-
ligraphic Brush Options dialog, where she left
the brush Angle at 0° (Fixed), Roundness at
100% (Fixed), and specified a Diameter (she
used diameters between 0.8 and 4 points). She
also set Diameter to Pressure, and Variation
to the same point size as the Diameter (this
establishes the maximum width of the stroke
on either side of the path), and clicked OK. She
repeated this process to create brushes with
different diameters.
Chapter 4 Brushes & Symbols
137
Steve Spindler / Bike Maps
When cartographer Steve Spindler begins using
a new version of Illustrator, he quickly adopts
its new features to his method of making
maps. In this bike map of part of Long Island,
New York, Spindler created Art brushes for
the bike route and railroad track. He placed
scanned photographs on a template layer to
draw the vineyard grapes and lighthouse. For
the grapes, he used the Tapered Stroke brush
for the outlines of the leaves and the Marker
brush to draw the stems (both brushes are
installed with Illustrator CS, access them from
the Brushes palette pop-up menu by choosing
Open Brush Library >Artistic_lnk). To create a
Scatter brush from the grapes, Spindler first
expanded the artwork (because Illustrator can-
not build a brush from artwork that already
contains a brush), then dragged the artwork
into the Brushes palette. For the compass
rose, Spindler imported a custom brush library
(Brush Library >Other Library ) containing a
collection of his own cartographic Art and Scat-
ter brushes.
Chapter 4 Brushes & Symbols
138
Jacqueline Mahannah
Drawing the delicate structure of the iris of
the human eye to illustrate glaucoma surgery,
artist Jacqueline Mahannah combined Illustra-
tor brushes with the pressure-sensitivity of a
Wacom tablet. For the iris structure, Mahannah
used the Marker brush from the Ink Brushes
library (found on the Adobe Illustrator Applica-
tion CD, in Illustrator Extras >Brush Libraries >
Artistic). She adjusted the width setting of
this brush by double-clicking the brush in the
palette, then editing the Width field in the Art
Brush Options dialog. Mahannah chose a light
blue color for the brush and drew the inner-
most strokes. Then she chose a darker color and
drew the next set of strokes, letting them over-
lap the first strokes. She continued working
outward, sometimes overlapping dark brush
strokes with lighter ones to suggest highlights
and texture.
Chapter 4 Brushes & Symbols
139
Building Brushes
Building Brushes for Lettering
Overview: Draw and shape
letterforms; create and
vectorize brush strokes in
Photoshop; bring brush
paths into Illustrator and
edit them; add brushes to the Brushes
palette; adjust color and layering,
and apply effects and transparency.
Hand-drawn letterform paths using Pen and
Pencil tools
Donaldson hand-drew two different sets of let-
terforms and positioned them on two different
layers; each was then painted with a different
brush (see Step 4 at right)
Brush stroke created in Photoshop using the
Paintbrush tool; below, brush stroke edited with
Eraser and Airbrush tools
Timothy Donaldson's style of abstract calligraphy
challenges the lettering artist to look beyond Illustrator's
default brushes (like the brushes sets found under Win-
dow > Brush Libraries) to paint programs like Photoshop
and Painter, where he develops brush strokes with the
look of traditional art tools.
1 Drawing, smoothing and shaping letterform paths.
Donaldson began the composition "abcxyz" by drawing
letterform paths with the Pen and Pencil tools, going back
over the paths with the Pencil to smooth them. (Use the
Pencil Tool Preferences menu's Smoothness Tolerance to
control how the Pencil will simplify and smooth a line
you've drawn.) Once you draw the letterforms, refine
them further with the Shear and Scale tools until you are
satisfied with their shapes.
2 Creating brush strokes in a paint program. To build
a custom brush, open any paint program that offers
paintbrushes (Donaldson works in Painter and Photo-
shop). Start a new file in the paint program, specifying
a resolution of 72 ppi and a transparent background. Set
the foreground and background colors to black and white
(this will make it easier when vectorizing the brush stroke
in the paint program later). Next, select the Paint brush
Chapter 4 Brushes & Symbols
140
tool and edit the brush settings or preferences (opacity,
blending mode, textures, pressure-sensitivity and others).
(See The Photoshop Wow! Book by Linnea Dayton and
Jack Davis, or The Painter Wow! Book by Cher Threinen-
Pendarvis for more about painting with brushes.)
Now you're ready to paint a brush stroke. Hold down
the Shift key (to constrain the cursor to straight move-
ments) and make a stroke with the brush tool. Modify the
look of the brush stroke with the Eraser or other painting
tools, or with niters (but avoid filters that blur or other-
wise anti-alias the brush stroke edge). If your paint pro-
gram can export vector paths as an EPS or Illustrator file,
then select the pixels of the brush stroke with the Magic
Wand, or other selection tool, and convert the pixels to
paths. Otherwise, save the image as a TIFF.
3 Opening, then editing brush strokes in Illustrator.
Bring your brush stroke into Illustrator by opening the
EPS or placing the TIFF image. Use Illustrator's Auto
Trace tool to vectorize the raster brush stroke, or manu-
ally trace over it using the Pen and Pencil tools. You can
reshape the brush artwork using the selection tools or the
Pencil tool. (See the Drawing & Coloring chapter for more
on modifying paths.) Convert your brush stroke artwork
into an Illustrator brush by selecting the artwork and
dragging it into the Brushes palette. Select New Art Brush
from the New Brush dialog and set various brush param-
eters in the Art Brush Options dialog box.
4 Applying different brushes. Donaldson created mul-
tiple brushed letterforms by duplicating the layer with
the paths (drag the layer to the New Layer icon in the
Layers palette). For each layer with letterforms, select the
paths and click on a custom brush in the Brushes palette.
Alter the look of your composition by changing colors
or brushes, adjusting the stacking order of layers in the
Layers palette, or applying effects to modify transparency
and blending (see the Transparency & Appearances and
Live Effects & Graphic Styles chapters for details).
Top, work path based on selection made in
Photoshop before being saved as an Illustrator
file; bottom, path in Illustrator after editing and
being filled with black
Three different brushes (outlined here in red)
applied to the hand-drawn letterforms "ab"
In the background, Feather Effect applied to
gray letterforms; in the middle, an 80% trans-
parency and Multiply blending mode assigned
to greenish letterforms; in foreground, red let-
ters given a Screen blending mode with 65%
transparency
Chapter 4 Brushes & Symbols
141
Map Techniques
Simplifying Complex Image Creation
Advanced Technique
Overview: Use Simplify to reduce
points in paths; create and select
Scatter Brushes; create multicolored
dashes, tapered lines and self-adjust-
ing scales; import brushes from
another document.
Top, the original lake shape, created from im-
ported geographical data (195 points); middle,
using Simplify reduces the lake to 89 points
without noticeable distortion of shape; bottom,
Simplify reduces the lake to 38 points but with
some distortion of shape
From line simplification to brushes that solve many prob-
lems, Illustrator now offers professional illustrators and
map makers many tools and features that help streamline
the creation and updating of complex artwork. In creat-
ing a city bus map for Orlando, Florida, cartographer
David Nelson was able to take advantage of dozens of
recently added Illustrator features.
1 Simplifying paths. When you trace detailed lines such
as rivers and roads, or bring clip-art or geographical data
into Illustrator, you will likely have paths with too many
points. To remove unnecessary points while preserv-
ing an accurate path shape, first select a line and choose
Object > Path >Simplify. In the Simplify dialog, click to
enable Preview and use the Curve Precision control to
reduce points (a lower percentage results in fewer points
but more distortion to the shape of the path). Use the
Angle Threshold setting to make minute changes to
some of the curves in the path by smoothing the curve at
corner points with angles larger than those specified in
the setting.
2 Making, placing and selecting Scatter brush "sym-
bols." Scatter brushes are an ideal way to help manage
map symbols. Create symbols for such features as schools,
airports, parks, museums, golf courses, and the like.
Chapter 4 Brushes & Symbols
142
When you've finished making a symbol, drag it into the
Brushes palette. In the New Brush dialog, choose New
Scatter Brush, then in the Scatter Brush Options dialog,
specify 0% Fixed in the Scatter field and select None for
the Colorization Method. To place symbols on the map,
click once with the Pen tool and select a Scatter brush
you made.
While Illustrator doesn't provide a way for you to
select all strokes made with a particular Scatter brush, it
can locate and select objects by color, so you can "cheat."
Simply set a unique color as a stroke or fill, then click
with the Pen tool to create the points to which you'll
apply a particular Scatter brush. If you need to select all
of the points you painted with a brush, click on a brush
stroke on the map and choose Select > Same > Fill Color.
Illustrator will select all brushes whose points have the
same fill or stroke color as the brush you chose.
3 Creating complex dashed lines. In Illustrator you can
even make custom graphic styles for applying complex
multicolored dashed lines to paths. Draw stroked paths
and color each stroke with a different color. Arrange the
paths end-to-end. One way to accomplish this is to make
sure you've enabled View > Snap to Point, then position
the cursor over the endpoint of one segment and drag
it so it snaps on the endpoint of another segment. After
you've arranged the colored paths, select and drag them
into the Brushes palette. In the New Brush dialog, choose
New Pattern Brush. Then in the Pattern Brush Options
dialog, choose the "Stretch to fit" option. (See "Pattern
Brushes" lesson earlier in this chapter for details.)
If your dashes are uneven or gapped when applied to
a path, select the path and use the Smooth tool (from the
Pencil tool pop-up palette) to "iron out" the problems (see
Nelson's "Zooming more means smoothing less" Tip in
the "Tracing Details" lesson in the Layers chapter).
4 Creating tapered brushes. You can use custom brushes
to create elements that taper, like creeks. Draw a color-
On the top and the bottom-left, Scatter brushes
representing map symbols and north arrow; on
the bottom-right, the New Brush dialog
Selecting a Fill color on the left; in the middle,
the points created with the Pen tool; on the
right, the points after applying a Scatter brush
End-to-end strokes (shown enlarged) are made
into a Pattern brush
Pattern brush dashes on a path shown before
(left) and after being adjusted with the Smooth
tool
Two of the objects made into tapered brushes
Auto-replacing brush objects
To replace all applications of a
brush, hold Option/Alt and drag
one brush over another in the
Brushes palette (you may wish
to duplicate the brush being re-
placed first!). —David Nelson
Chapter 4 Brushes & Symbols
143
Reversing Brush strokes
To change the direction of a brush
stroke on an open path, first se-
lect the path and then click on an
endpoint with the Pen tool to es-
tablish the new direction toward
that point. —David Nelson
Three "self-adjusting scale" brushes and a map
legend that includes a scale drawn with one of
the brushes
The active document's Brushes palette (top);
Window >Brush Libraries >Other Library dialog
and the selected document's Brushes palette
(middle); the active document's default Brushes
palette after importing four new Scatter Brushes
filled rectangle; Nelson's was about 4 inches long and
2-3 points wide. Select the right pair of anchor points
and Average (Object >Path > Average), creating a triangle.
Drag this path into the Brushes palette and define it as an
Art brush, using the point-width in the name of the brush.
Select the path that you wish to make into a tapered object
and choose your new brush (if the path tapers the wrong
way, see "Reversing Brush strokes," at the left). To create a
brush that tapers at a different rate, adjust the shape of the
triangular object (adding or editing points) and create a
new brush with that version.
5 Making a "self-adjusting" scale. Create a scale, using
evenly-spaced divisions to represent miles, kilometers
or another unit of measure. (One way of creating evenly
spaced tick marks is by creating a blend between the two
end marks on the scale; see the Blends, Gradients & Mesh
chapter for more on setting up a blend with the Specified
Steps option.) Because you are making a multi-purpose
brush that you'll use on different maps, don't add text or
numbers to your scale artwork. Now, select your artwork
and drag it to the Brushes palette. In the New Brush
dialog, choose New Art Brush. On your map, draw a
horizontal line whose length represents X units of mea-
sure in your document (miles, kilometers, etc.) and apply
your new brush—which will adjust proportionately to the
length of the line. Add numbers for the units and other
necessary text.
6 Sharing custom brushes between documents. You
can bring custom brushes into a document by choosing
Window > Brush Libraries > Other Library. In the dialog,
select a document that contains the brushes you'd like to
import. After you select the document and click Open, a
palette containing that document's brushes appears with
the name of the document in the palette tab. To move
brushes, drag from this document palette to your active
document's Brushes palette, or apply brushes from the
document palette to objects in your active document.
Chapter 4 Brushes & Symbols
144
Joe Lertola/TIME
For this medical infographic, artist Joe Lertola
relied on the suppleness of Illustrator's Art
brushes to show closely packed skin cells. To
begin the top layer of cells (1 and 2 in the illus-
tration above), Lertola built a single cell from
two blends, stacking the smaller brown blend
on top of the lighter skin-colored blend. Select-
ing both blends, Lertola chose Object > Expand.
Then he dragged the expanded artwork into
the Brushes palette and selected New Art Brush
from the New Brush dialog. Next, Lertola devel-
oped three more cells, varying the oval shape
of each cell before turning it into an Art brush.
To make the cells, Lertola drew short paths and
painted each with one of the four cell brushes.
Lertola finished the illustration by rasterizing
the skin cells in Photoshop and exporting a
color and grayscale version of the cells. He
imported the grayscale cells into the Lightwave
3D modeler software, where he built a model
of the cells and applied the color version of the
cells as a color map. (To learn more about using
Illustrator artwork with other software, see the
Illustrator & Other Programs chapter.)
Chapter 4 Brushes & Symbols 145
Symbol Basics
Creating and Working with Symbols
Overview: Create background ele-
ments; define symbols; use Symbolism
tools to place and customize symbols.
The background and symbol artwork
Kaoru Hollin created this Tropical Card for Adobe to
use as sample art that would show the power and variety
of effects possible using the new Symbolism tools. After
creating a concept sketch, Hollin defined a library of sym-
bols and then used the Symbolism tools to place and cus-
tomize the symbols, almost as though they were brushes.
1 Creating the Background art. Based on her sketch, Hol-
lin created the background art using eight simple layered
objects, filled with gradients. To create the luminous col-
ors, Hollin applied varying amounts of transparency to
each of the objects. Hollin then added depth and richness
to the water by applying Effect > Stylize > Inner Glow to
Chapter 4 Brushes & Symbols
The concept sketch
146
the upper water curve, and Outer Glow to the lower water
curve. Gradients, transparency, and effects are discussed
in detail later in the book.
2 Creating symbols. Hollin created the artwork for each of
the 20 symbols that she would use to create the piece. The
simplest way to turn a piece of artwork into a symbol is to
select the artwork and drag it onto the Symbols palette.
To make your artwork on the Artboard become a
symbol instance at the same time you create a symbol,
hold down the key (Mac) or Ctrl key (Win) as you drag
the artwork onto the Symbols palette.
3 Applying symbols. After creating a new layer for the
fish, Hollin selected the fish symbol in the Symbols pal-
ette and created the school of fish with a single stroke of
the Symbol Sprayer tool. You can experiment with the
Symbol Sprayer by adjusting the Density and Intensity
settings (double-click on any Symbolism tool to access the
Symbolism Tool Options), and the speed of your spray
strokes. Don't worry about getting an exact number or
precise placement for each symbol as you spray; you can
fine tune those and other symbol attributes using other
Symbolism tools.
4 Resizing symbols. To create a sense of depth, Hol-
lin used the Symbol Sizer tool to make some of the fish
smaller. By default, the Sizer tool increases the size of
symbols within the tool's brush radius. To make a symbol
smaller, hold down the Option (Mac)/Alt (Win) key as
you brush over it with the Symbol Sizer tool.
To make the diameter of a Symbolism tool visible,
double-click on any Symbolism tool and enable the Show
Brush Size and Intensity option. As for brushes, use the
] key to make the Symbolism tool diameter larger and the
[ key to make it smaller.
5 Modifying symbol transparency and color. To modify
the appearance of symbols, use the Symbol Screener,
The artwork for the 20 symbols that were used
to complete the piece
The raw fish after being sprayed on with the
Symbol Sprayer tool
The Symbolism tools tear off palette, see "Tear-
off palettes" in the Illustrator Basics chapter
To access the other Symbolism tools, hold down
Control-Option-click (Mac) or Alt-right-click
(Win) and drag toward the tool you want to use
until the Tool icon changes. —Mordy Golding
Hollin used the Symbol Sizer tool to make some
of the fish smaller and to add depth
Chapter 4 Brushes & Symbols 147
The Symbol Stainer tool set to random was used
to vary the color of the fish
Use the Symbol Spinner tool to adjust the rota-
tion of symbols
After using the Symbol Shifter tool with a small-
er brush size to adjust the fish positions
The final fish after more fine tuning with the
Symbol Sizer, Shifter, and Spinner tools
Stainer, and Styler tools. The Screener tool adjusts the
transparency of symbols. The Stainer tool shifts the color
of the symbol to be more similar to the current fill color,
while preserving its luminosity. The Styler tool allows you
to apply (in variable amounts) styles from the Graphic
Styles palette. See the User Guide for details about the col-
oring modes and application methods of these tools.
Hollin used the Symbol Stainer tool, set to Random,
to tint the fish a variety of colors with just one stroke.
Later, she also used the Stainer tool on the hibiscus and
starfish, and the Screener tool on the butterflies.
6 Rotating symbols. To make the first rough adjustment to
the orientation of the fish, Hollin used the Symbol Spin-
ner tool set to User Defined (which sets the spin based
on the direction that the mouse is moved). See "Working
with Symbols" in the Introduction to this chapter and the
User Guide for an explanation of the User Defined and
Average modes.
7 Moving symbols. Hollin used the Symbol Shifter tool
with a smaller brush size to adjust the position of the fish.
The Shifter tool was not designed to move symbols
large distances. To maximize symbol movement, first
make the brush size as large as you can—at least as large
as the symbol you wish to move. Then drag across the
symbol, as though you were trying to push the symbol
with a broom.
Symbols Stacking Order
To change the stacking order for
your symbols, use the Symbol
Shifter tool and:
• Shift-click the symbol instance
to bring it forward.
• Option (Mac) or Alt (Win)
shift-click to push the symbol
instance backward.
8 Deleting symbols. At this point, Hollin felt there were
too many fish in the school. To remove the unwanted
fish, Hollin used the Symbol Sprayer tool with the Option
(Mac)/Alt (Win) key held down. She chose a narrow
brush size and clicked on the fish to be removed.
Finally, in order to make the school of fish conform
more to the shape of the waves in the background, Hollin
used the Symbol Sizer, Shifter, and Spinner tools to make
further adjustments.
Chapter 4 Brushes & Symbols
148
Sandee Cohen & Sharon Steuer
Starting with Sharon Steuer's illustration in
the "Organic Creation" lesson (following),
Sandee Cohen created only four symbols to
add the grass, stars, and water you see above.
After spraying the stars onto the sky, Sandee
then used the Symbol Screener tool to mute
the intensity of some stars in order to create
a sense of depth. After spraying the fore-
ground grass symbol (which includes the grass
shadow), Sandee used the Symbol Sizer tool to
vary the grass heights. One symbol was used
to create the grass between the dunes. Sandee
used the Symbol Stainer tool to vary the color
of the grass, and the Symbol Spinner tool to
vary the angles of some of the grass. For the
water, Sandee used one wave of dark blue as
the symbol, which she then sprayed over the
gradient background, which goes from almost
white under the moon to dark blue at the sides
of the artwork. To finish the water, Sandee
used the Symbol Stainer tool to make some of
the waves lighter shades of blue.
Chapter 4 Brushes & Symbols
149