Essential Blender- P3 ppsx
Bạn đang xem bản rút gọn của tài liệu. Xem và tải ngay bản đầy đủ của tài liệu tại đây (1.39 MB, 30 trang )
/01+#234S5#67+#1+()+1#>1+@.+9#G'(+&3
?.(%E(%"&(18.#-S(1M ('&./&'N
F6)22#fUX:#KB*8#/2)62#()$*6)#@@#fUX#,2#0%2"#1,+)13#8.*,&)5#"%#%&)#%7#G;#Q'2#2&*\\3#aH<%2n#%6#
S*2.(%*65#7)*"/6)2:#i%#"%#".)#;8)&)#(/""%&2>#fUN>#*&5#81,8+#".)#(,-#"*&#Oa]SaO#(/""%&:#?.)&#-%#
8.*&-)#3%/6#aH<%2n#2.%6"8/"#,&#".)#B*8'2#8%&"6%1#<*&)1>#()8*/2)#3%/'11#()#/2,&-#fUX#*11#".)#",0)#,&#
41)&5)6:P
/01+#234W5#L#1+()+1#%H#;7+#)+H'0&;#,?+(+3
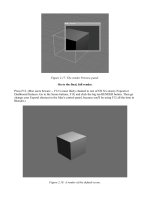
?.)#5)7*/1"#8/()#6)&5)62#76%0#".)#<)62<)8",9)#%7#".)#8*0)6*>#1,"#(3#".)#2,&-1)#1*0<:#R%%#.%%k#G&8)#
3%/'6)#5%&)#0*69)1,&-#*"#".,2#VS#0*2")6<,)8)>#<6)22#".)#a28@+)3#"%#</"#".)#6)&5)6#$,&5%$#,&#".)#
(*8+-6%/&5#*&5#6)"/6&#"%#".)#0*,))&5)6#,&")67*8):
;%>##&%$#3%/#+&%$#".)#%9)6*11#(*2,82#%7#".)#41)&5)6#,&")67*8):#?.*"#$*2&'"#2%#(*5>#$*2#,"M
E50,"")513>#".)6)#,2#*#1%"#0%6)#"%#1)*6&>#(/"#".)#-6)*"#".,&-#,2#".*"#*"#".,2#<%,&">#3%/#8*&#<,8+#,"#/<#*2#
3%/#-%:#!7#3%/#8*0)#"%#".,2#(%%+#$*&",&-#"%#1)*6&#A/2"#*#2<)8,7,8#2)8",%&#%7#41)&5)6>#3%/'6)#&%$#
)Z/,<<)5#"%#A/0<#"%#".*"#<*6"#%7#".)#(%%+#*&5#2"*6"#,&:#G7#8%/62)>#3%/'6)#2",11#,&9,")5#"%#2",8+#*6%/&5#
7%6#".)#$.%1)#2.%$:#L%/'9)#5%&)#".)#.*65#<*6">#$.,8.#,2#A/2"#-)"",&-#<*2"#".)#1%%+#*&5#7))1#%7#".)#
,&")67*8):
?.)#6)2"#$,11#()#)*23:
Chapter 3: Object Animation Basics
By Roland Hess
Animation is a change over time in some aspect of your Scene. That change can be something
simple, like a change in the color or intensity of a light, or it could be something complicated,
like the changes in position and shape of an entire group of characters dancing in time to music,
while the camera whirls around the dance floor. Regardless of what happens in your Scene, there
must be a way to track and record those changes.
In Blender, as in most animation software, these changes are recorded as "keyframes" or "keys"
for short. A key is just a marker in time of some state, value or setting.
Tip:
Animation information is stored in "keys".
Time
Before we review the keying tools, you should learn how to navigate in time.
The most visual method for doing this is to use the Timeline Window, found in the center of the
default Animation Screen, but easily accessible in any window from the Window Type pop-up
menu. (Remember: to access the default Animation Screen, use the Screens menu from the
header at the very top of the Blender window.)
Figure OAD.1: The View menu on the Timeline window header.
The timeline can be viewed in either seconds or in frames. Blender's default is to break each
second into 25 frames, the PAL video standard. (Most film/movie work uses 24 frames per
second, while the North American video standard, called NTSC, uses roughly 30 frames per
second). To change the display method of the timeline, you go through the Timeline Window
header's View menu, or simply press the T-key with the mouse over the timeline. Frames per
second can be set either with the "Set Frames/sec" entry in the Playback menu, or on the
"Frs/sec" spinner in the Render buttons (F10).
The vertical green marker in the Timeline indicates the current frame. Using LMB in the timeline
sets the marker and the current frame. The current frame is also displayed in the lower left hand
corner of the 3D view, and in the header of the buttons window.
Figure OAD.1.1: The current frame number can be found in many places on the default
animation screen.
Tip:
The current frame can be set by LMB clicking within the
timeline.
In addition to using the timeline to navigate through time, you can also use (surprise!) keyboard
shortcuts.
Image:Dummy.png
Figure OAD.2: The arrow keys can be used to change the current frame.
The Right and Left arrow keys step forward and backward one frame. Up and down arrows step
forward and backward by ten frames. Shift-Left arrow moves to the Start frame, while Shift-
Right arrow moves to the End frame.
Tip:
Right and Left arrow keys change the frame by one. Up and
Down arrow keys change the frame number by ten.
The Start and End frames, which can be set in either the timeline's header or in the Render
buttons, indicate the range of frames that will be shown when you give a "play back" command.
You can tell Blender to play the animation between the Start and End frames in a couple of ways:
the "play" button on the timeline header or with Alt-A in a 3D Window.
Tip:
Alt-A with the mouse over a 3D view plays the animation
in that view.
Creating Animation Keys
Keys can be set throughout Blender with the I-key. Pressing the I-key will almost always pop up
an "Insert Key" menu, with entries appropriate to the mouse's location.
If the mouse is over the 3D window when the I-key is pressed, a key will be set for the active
object.
Figure OAD.3: The Insert Key menu for the active object.
Blender's basic animation workflow is simple:
1. Use the time tools to find the frame where you would like to record a setting for
animation;
2. Adjust your object how you want it to be at this point in time (location, colors, shapes,
etc.);
3. Use the I-key to bring up the "Insert Key" menu, then select the appropriate key.
All objects can have Rotation, Location or Scale keys. The Insert Key menu shows several
different combinations of those choices. In the menu, Loc stands for Location and Rot for
Rotation. Thus, the LocRot entry in the menu creates a key for both Location and Rotation.
LocRotScale creates keys for Location, Rotation and Scale. If you are only changing the location
of an object in your animation, just use the Loc type key. Likewise, if you are only rotating an
object, you would choose LocRot.
The Layer entry on the I-key menu sets an animation key for the layer settings of an object. You
can make objects appear and disappear from a scene by keying them to move to a hidden layer at
a certain frame.
Explanations for the rest of the entries in the object I-key menu wouldn't make much sense to you
at this point, so we'll leave them for a more advanced text.
Tip:
I-key brings up the "Insert Key" menu that lets you save
states and settings for animation.
Once you have inserted a key for an object, you continue throughout the timeline to create your
animation: pick a frame, adjust your object, set a key. Pick, adjust, set.
Many settings in Blender are keyable beyond simple object transformations. You can consult the
documentation to find a comprehensive list of which settings and values can be keyed, but a
better way to find out is to hover the mouse over the window of the item you would like to key
and press the I-key.
Figure OAD.4: The I-key brings up a keying menu appropriate to the window you are working
in.
Ipos and Ipo Curves
The upper right portion of the default Animation screen is used as an Ipo Window. Many new
and migrating users are confused by the term Ipo, but it's simple, really. In order to create the
animation between different keys, Blender (like any other 3D program) must "interpolate"
between the keys. "Ipo" is just an abbreviation of InterPOlation. So the Ipo Window is just a
window in which you can view the actual interpolation between animation keys.
Figure OAD.5: The Ipo window.
Once you have created keys for an object, they will show up, along with some curves, in the Ipo
window. Each different setting gets its own curve, and in the illustration you can see that there
are curves for LocX, LocY and LocZ - the x, y and z locations of the object. The Ipo window will
show the curves for the active object in the 3D window, so if you want to see the Ipo curves of a
different object, select that object in the 3D view.
You can drag with the LMB in the Ipo window to scrub through the animation, just like you
could in the Timeline window. In fact, the horizontal axis in the Ipo window is the timeline, in
frames, with current time marked by the vertical green line. The vertical axis shows the actual
values of the keys.
Rotation Key Values
The exception to the rule about the vertical axis in the Ipo window is rotation keys. Rotation keys
are represented in the Ipo window as one tenth of their actual value. In other words, a cube with a
Y rotation of 125.25 degrees will show in the Ipo window as 12.52. This is done simply to keep
the scales of the different curves in the Ipo window relatively similar. Although confusing at first,
you'll soon not think twice about it.
Working with Ipo Curves
The Ipo window shares controls with other areas of Blender. The scroll wheel and MMB function
as zoom and view changing controls like they do in the 3D view (MMB only pans the view here).
Also, the Home key automatically zooms and translates to show all the available objects, which
in this case are keys. Curves can be selected with the RMB, and the G-key and S-key will move
and scale the entire curve. With a curve selected, the Tab key can be used to enter Edit mode,
allowing you direct access to the key points which you may move as you choose.
Tip:
The Ipo window shares hotkeys and functions with the 3D
window. RMB, and G-key and S-key for selecting and
transforming curves. Tab key for Edit mode on curves.
Like the 3D window, the N-key brings up a Transform Properties panel that shows the exact
values of selected curves and key points, and lets you edit them directly by typing in new values.
Figure OAD.5.1: The Transform Properties panel for the Ipo window.
Although you can use these tools to change the actual key values (like changing an x location key
from x=5 to x=10), you will most often use the Ipo window to change curve interpolation styles,
to set the extend mode and to adjust key timing, as you'll see next.
Tip:
N-key brings up Transform Properties panel for curves and
keys.
Interpolation Styles
Blender allows three different ways for values to change from key to key.
The default, which you've seen in the illustrations so far, is called "Bezier" mode, and refers to
the style of curve in the preceding section. This mode leads to smooth transitions between key
values, slower at the beginning and end of the change, and faster in the middle. Using the
example of a ball moving between two locations, Bezier interpolation would have the ball start
out slowly, reaching its maximum velocity halfway between the keyed locations, then slowing
down before coming to a stop on the last key.
Linear mode moves between keys at a constant velocity. This interpolation type is useful when
animating mechanical or non-natural motion.
Constant mode is of limited use. It causes values to stay the same (constant!) until the next key is
reached, at which point they immediately change to the new value. It would be used, for example,
to cause an object to seem to "teleport" from one location to another.
Figure OAD.6: The different interpolation types.
Interpolation styles can be set by selecting the curves whose style you wish to change, then
selecting the appropriate style from the Interpolation Mode entry in the Curves menu of the Ipo
Window header. Alternately, you can use the T-key shortcut (think "inTerpolation") to pop up a
menu directly within the Ipo window.
Figure OAD.6.1: Choosing interpolation types from the Curve menu on the Ipo window header.
Tip:
T-key brings up the Interpolation mode menu, letting you
choose from Bezier, Linear and Constant.
Extend Modes
Sometimes, you will want to create a bit of animation that continues forever. A quick way to do
this is to create one piece of the animation, and then use Ipo Extend Modes.
Very simply, if the Ipo curves in this illustration represent the motion of an object moving around
in a circle:
Figure OAD.7
Then this illustration represents that same motion repeating over and over.
Figure OAD.8: The same Ipo curves in Cyclic mode.
You access Extend Modes by selecting the Ipo curves you wish to extend, then choosing the
extend style you would like from the Extend Mode entry in the Curve menu on the header.
Figure OAD.8.1: Choosing an Extend mode from the Curve menu on the Ipo window header.
Constant: this is the default Extend Mode that all Ipo curves have. This is what you would
consider "normal" Ipo curve behavior, and the only one you have seen so far.
Extrapolation: this mode takes the slope of the curve at the first and last keys and simply extends
them, forward and backward in time, forever.
Cyclic: cyclic extend causes the animation between the first and last keys to repeat over and over,
resetting each time.
Cyclic Extrapolation: this mode repeats the animation like cyclic mode, but instead of resetting, it
uses the last repetition's endpoint as its starting point.
Figure OAD.9: The Extend modes.
Tip:
Extend modes can be set through the Curves menu on the
Ipo window header.
Key Timing
When you are setting keys for your animations, you probably will be guessing as to how long
certain actions should take. How quickly should the ball fall toward the floor? How long does it
take for a character to turn his head in surprise? The odds are that you won't know the answer
until you play back your animations to see what looks right. Although the proper location and
rotation keys may be in place for such things, their correct timing is just as crucial.
Adjusting key timing in the Ipo window is quick and easy.
Within the Ipo window, press the K-key to enter Key mode. Every frame that has a key now
shows a vertical line that is selectable with the RMB. Using the G-Key to move that vertical line
will move all keys that fall along it to the left or right (backward or forward) along the timeline.
This illustration shows the circular motion animation curves in Key mode. The keys on Frame 16
have been RMB selected.
Figure OAD.10: The Ipo window in Key mode.
Using the G-key, you can move the entire set of keys from Frame 16 to the left or the right to
adjust their timing. As you do this, the curves update in real time.
Figure OAD.11: The curves adjust to follow the movement of keys.
Tip:
The K-key toggles Key mode in the Ipo window, which lets
you quickly adjust the timing of your keys.
While this chapter has shown you the mechanics of moving and animating objects in Blender, it
hasn't even touched on the artistic aspects of animation. Indeed, entire books have been written
on the subject. Once you are comfortable with the mechanics of animation in Blender, you're
encouraged to start practicing and improving your art.
Chapter 3: Object Manipulation Basics
By Roland Hess
Note: For almost every hotkey function in this chapter, there is a corresponding entry in the
Select and Object menus in the 3D View header. Although Blender's hotkey system was
originally designed for maximum efficiency (and still retains much of that quality), it can be a bit
daunting to new users. If you find yourself at a loss for the hotkey for a particular function, check
out the menus. In fact, periodically browsing the menus is a great way to discover new
functionality. This book is really just a primer - there is a lot more depth to be found, and the
menus are a nice way to start experimenting once you've mastered the basics.
Coordinates
Understanding the coordinate system is the absolute baseline of 3D manipulation. If you have any
experience with this at all, you can skip to the next section without fear.
Image:Dummy.png
Figure OMD.1: [no text]
In the illustration, you'll see a line labeled "X", with value markings along it, and a circle whose
center is a dot. The circle's center dot rests on the marker labeled "3". In graphics terminology,
you would say that the location of the circle is, simply, 3.
Image:Dummy.png
Figure OMD.2: [no text]
Now, we've added another dimension to the illustration. This time, the center of the circle can be
traced down to the "3" on the "X" line and to the "2" on the "Y" line. Each of these lines is called
an "axis". When you talk about the location of the circle, you say that its x and y coordinates are
3 and 2. This is commonly written as "(3,2)".
Image:Dummy.png
Figure OMD.3: [no text]
We're in 3D now (3 Dimensions: x, y and z). The center of the circle is still at (3,2) along the x
and y axes, but we've added a third axis, z. The circle's center point is four units up on the z axis,
so it's final coordinate is (3,2,4).
As you can see on the axes in the illustrations, the coordinate systems go off into both positive
and negative directions, so (x,y,z) values will not always be positive.
The 3D Cursor
Figure OMD.5: The 3D cursor.
The 3D Cursor is a focus for activity in Blender's workspace. You set its location by using LMB
in a 3D view. When new objects are created and added to a Scene, they are born at the location of
the 3D Cursor. When objects are rotated or resized, the 3D Cursor can be used as the center of the
transformation. Some beginners find it useful to think of the 3D Cursor like the standard cursor in
a word processor: you set its location with the LMB, and when you type, it's where the letters
appear.
The 3D Cursor is also useful as a quick reference point when you are animating. For example, if
you are animating a character and want to make sure that its elbow remains still, despite the rest
of the body moving around, you could set the 3D Cursor to match the starting location of the
elbow, giving you a quick visual reference for adjusting the elbow's location later.
Tip:
LMB click sets the location of the 3D Cursor.
Types of Objects that Can Be in a Scene
Scenes are made up of geometry objects, control objects that can affect geometry objects' motion
and shape, lamp objects that provide light, and camera objects that provide a viewpoint from
which to render. Of the available types of objects, the most commonly used are:
Mesh: Most of your 3D models will be Mesh objects. There are many starting points for Mesh
objects, all accessible from the toolbox Add menu, including a cube, cylinder, plane, circle, cone
and two kinds of spheres.
Figure OMD.7: A selection of mesh primitives.
Empty: An Empty object functions as a sort of placeholder in 3D space. They have many uses
that you will find throughout the rest of this book.
Figure OMD.8: Several different visualizations of Empty objects. The default method is shown in
white.
Lamp: Lamp objects are used to define from where light is cast within a scene. The type of lamp
object determines what style of light is produced.
Figure OMD.9: An assortment of lamp objects.
Armature: Armature objects are best thought of as skeletons. They do not show up in images you
create, but are used as control objects to change the shape of (usually) Mesh objects, in much the
same way that your own skeleton defines and controls the overall shape of your body.
Figure OMD.10: There are several drawing methods for armatures.
Camera: Scenes can be viewed and rendered from the perspective of Camera objects. You can
have several cameras in the same scene.
Figure OMD.10.1: The camera object from different angles.
Creating and Adding Objects