The CSS Anthology: 101 Essential Tips, Tricks & Hacks- P8 doc
Bạn đang xem bản rút gọn của tài liệu. Xem và tải ngay bản đầy đủ của tài liệu tại đây (913.95 KB, 20 trang )
117 Navigation
</head>
<body>
<p>Lorem ipsum dolor sit amet, <a href="page2.html">consectetur
adipiscing elit</a>. Aenean porta. Donec eget quam. Morbi
libero.Curabitur ut justo vehicula elit feugiat lacinia. Morbi
ac quam. <a href="">Sed venenatis</a>,
lectus quis porta viverra, lectus sapien tempus odio, ac
volutpat mi dolor ac elit.</p>
</body>
</html>
We can use a CSS3 selector to target the link that starts with http: and add an icon
to it:
chapter04/external_links.css
a[href ^="http:"] {
padding-left: 20px;
background-image: url(link_icon_external.gif);
background-repeat: no-repeat;
}
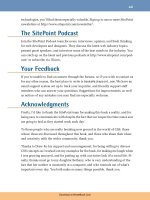
Figure 4.17. The external link displays with an icon
Any links on our page that start with http: (which should be external as it is unne-
cessary to link to pages on our own site like that) will display with the world icon.
Discussion
This CSS3 attribute selector is widely supported in modern browsers, although it
will be ignored in Internet Explorer 6. In browsers that lack support for this selector
the link will just display as normal; so, it’s a nice enhancement for browsers with
support but leaves the experience unchanged for those with older browsers.
Download at WoweBook.Com
The CSS Anthology118
Let’s take a closer look at that selector: a[href ^="http:"].
The attribute that we’re selecting is the href attribute, and we want our selector to
match when it finds the text http: at the beginning of the attribute value. The ^=
operator means “begins with”. You could use a similar selector to match all email
links, for example, a[href ^="mailto:"].
Another useful attribute selector is to select on the file extension of a link. This
means you can add a small icon to show that a document is a PDF or other document
type, depending on the extension. The selector a[href $=".pdf"] will match any
link that has a file extension of .pdf. The $= operator means “ends with”, so this
selector will match when an href attribute value ends with .pdf. The example below
shows all three types in action:
chapter04/external_links.html
<ul class="links">
<li><a href="">Go somewhere else</a></li>
<li><a href="/files/example.pdf">Download a PDF</a></li>
<li><a href="mailto:">Email someone</a></li>
</ul>
chapter04/external_links.css
a[href ^="http:"] {
padding-left: 20px;
background-image: url(link_icon_external.gif);
background-repeat: no-repeat;
}
a[href ^="mailto:"] {
padding-left: 20px;
background-image: url(link_icon_email.gif);
background-repeat: no-repeat;
}
a[href $=".pdf"] {
padding-left: 20px;
background-image: url(link_icon_pdf.gif);
background-repeat: no-repeat;
}
Download at WoweBook.Com
119 Navigation
Figure 4.18. Links with icons for external and email links, and PDF files
2
Attribute selectors are a very useful part of CSS and you can safely use them in this
kind of situation where you’re just adding an enhancement to your design.
How do I change the cursor type?
It’s common for the cursor to change to a hand icon when the cursor’s moved over
a link on any part of the page. Occasionally—perhaps to fit in with a particular
interface—you might want to change the cursor to represent a different action.
Solution
We change the cursor using the CSS cursor property. For example, if we wanted
to change the cursor on anchor elements that link to help documentation we can
specify the style like so:
a.help {
cursor: help;
}
Table 4.1 identifies the properties that are available in CSS 2.1, and how they appear
in Internet Explorer 8.
2
The icons you can see in Figure 4.18 are from
Download at WoweBook.Com
The CSS Anthology120
Table 4.1. The CSS 2.1 Standard Cursors in IE8
crosshairdefaultpointer
movehelptext
nw-resizene-resizen-resize
sw-resizese-resizes-resize
waitw-resizee-resize
custom imagebrowser-determined
url("url")autoprogress
Discussion
The cursor property can take a range of values. Changing the cursor display can
be a useful way for web applications with friendly interfaces to provide valuable
user feedback. For example, you might decide to use a question mark cursor for
indicating help text.
Download at WoweBook.Com
121 Navigation
Changing the Cursor Can Cause Confusion!
You should use this effect with care, and keep in mind that people are generally
used to standard browser behavior. For instance, users are familiar with the
cursor representing a pointing hand icon when hovered over a link.
Table 4.1 lists the various properties that are available in the CSS standard; these
are supported by most modern browsers, including Internet Explorer 6 and above,
Safari, Opera, Firefox, and Chrome. Browser support for the complete range of values
varies so make sure to test.
CSS3 increases the range of cursor values available, as shown in Table 4.2, but
browser support for these values varies. They’re well supported by Safari, Firefox,
and Chrome, and IE8 supports most of them; however, Opera, as of the time of
writing, only supports CSS 2.1 cursor values.
Table 4.2. New CSS3 Cursors
Appearance (as in IE8)
cursor value
unsupported
copy
unsupported
alias
unsupported
cell
all-scroll
no-drop
not-allowed
col-resize
row-resize
vertical-text
Download at WoweBook.Com
The CSS Anthology122
How do I create rollover images in my
navigation without using JavaScript?
CSS-based navigation can provide some really interesting effects, but there are still
some effects that require the use of images. Is it possible to enjoy the advantages of
text-based navigation and still use images?
Solution
It is possible to combine images and CSS to create JavaScript-free rollovers. This
solution is based on a technique described at WellStyled.com.
3
Here’s the code
you’ll need:
chapter04/images.html
<!DOCTYPE html PUBLIC "-//W3C//DTD XHTML 1.0 Strict//EN"
"
<html xmlns=" lang="en-US">
<head>
<title>Lists as navigation</title>
<meta http-equiv="content-type"
content="text/html; charset=utf-8" />
<link rel="stylesheet" type="text/css" href="images.css" />
</head>
<body>
<ul id="nav">
<li><a href="#">Recipes</a></li>
<li><a href="#">Contact Us</a></li>
<li><a href="#">Articles</a></li>
<li><a href="#">Buy Online</a></li>
</ul>
</body>
</html>
chapter04/images.css
ul#nav {
list-style-type: none;
padding: 0;
3
Download at WoweBook.Com
123Navigation
margin: 0;
}
#nav a:link, #nav a:visited {
display: block;
width: 150px;
padding: 10px 0 16px 32px;
font: bold 80% Arial, Helvetica, sans-serif;
color: #FF9900;
background: url("peppers.gif") top left no-repeat;
text-decoration: none;
}
#nav a:hover {
background-position: 0 -69px;
color: #B51032;
}
#nav a:active {
background-position: 0 -138px;
color: #006E01;
}
The results can be seen in Figure 4.19, but to enjoy the full effect I suggest you try
it for yourself. Remember to click on a link or two!
Figure 4.19. Using images to advantage in the completed menu
Download at WoweBook.Com
The CSS Anthology124
Discussion
This solution offers a means of using images in your
navigation without having to resort to preloading lots
of separate files.
The navigation has three states, but there’ s no need to
use three separate images to depict these states. In-
stead, we use one large image that contains the
graphics for all three states, as shown in Figure 4.20.
The navigation is marked up as a simple list:
Figure 4.20. All three rollover states
chapter04/images.html (excerpt)
<ul id="nav">
<li><a href="#">Recipes</a></li>
<li><a href="#">Contact Us</a></li>
<li><a href="#">Articles</a></li>
<li><a href="#">Buy Online</a></li>
</ul>
We control the display of the background image within the declaration block for
the navigation links. However, because the image is far bigger than the area required
for this element, we only see the yellow pepper at first:
chapter04/images.css (excerpt)
#nav a:link, #nav a:visited {
display: block;
width: 150px;
padding: 10px 0 16px 32px;
font: bold 80% Arial, Helvetica, sans-serif;
color: #FF9900;
background: url("peppers.gif") top left no-repeat;
text-decoration: none;
}
When the :hover state is activated, the background image moves up the exact
number of pixels required to reveal the red pepper. In this example, I had to move
it by 69 pixels, but this figure will vary depending on the image that you use. You
Download at WoweBook.Com
125Navigation
could probably work it out mathematically, or you could do as I do and simply in-
crement the background position a few pixels at a time, until it appears in the right
location on hover:
chapter04/images.css (excerpt)
#nav a:hover {
background-position: 0 -69px;
color: #B51032;
}
When the :active state is activated, the background image shifts again, this time
to display the green pepper when the link is clicked:
chapter04/images.css (excerpt)
#nav a:active {
background-position: 0 -138px;
color: #006E01;
}
That’s all there is to it! The effect can fall apart if the user resizes the text in the
browser to a larger font, which allows the edges of the hidden images to display.
You can anticipate this to some degree by leaving quite a large space between each
of the three images—keep this in mind when preparing your images.
Image Flickering in Internet Explorer
This technique sometimes causes the navigation to flicker in Internet Explorer.
In my tests, this only tends to be a problem when the image is larger than the ones
we’ve used here; however, if your navigation items flicker, a well-documented
remedy is available.
4
4
Download at WoweBook.Com
The CSS Anthology126
How should I style a site map?
A site map is a helpful page on your web site that lists all pages in the site. It can
help those who are unable to find what they’re looking for through the navigation—as
well as providing a quick way to see what’s available at a glance and go to it with
one click.
Solution
A site map is really a list of all of the destinations available on your site and so is
ideally marked up as a set of nested lists. The first list is your main navigation, with
the internal navigation nested within each main navigation point. A list works even
if your site structure has many levels and should be easy to generate from your
content management system. Figure 4.21 displays the results of the following code:
chapter04/sitemap.html (excerpt)
<ul id="sitemap">
<li><a href="/about">About us</a>
<ul>
<li><a href="/about/team">The team</a></li>
<li><a href="/about/history">Our history</a></li>
</ul>
</li>
<li><a href="/products">Our products</a></li>
<li><a href="/order">Ordering information</a>
<ul>
<li><a href="/order/shops">Our shops</a></li>
<li><a href="/order/stockists">Other stockists</a></li>
<li><a href="/order/onlinestockists">Online stockists</a></li>
</ul>
</li>
<li><a href="/contact">Contact us</a></li>
</ul>
Download at WoweBook.Com
127Navigation
chapter04/sitemap.css (excerpt)
ul#sitemap {
margin: 0;
padding: 0;
list-style: none;
}
ul#sitemap ul {
padding-left: 1em;
list-style: none;
}
ul#sitemap li {
border-bottom: 2px solid #FFFFFF;
}
ul#sitemap li a:link, ul#sitemap li a:visited{
background-color: #CCCCCC;
display: block;
padding: 0.4em;
text-decoration: none;
color: #057FAC;
}
ul#sitemap li a:hover {
background-color: #999999;
color: #FFFFFF;
}
ul#sitemap li li a:link, ul#sitemap li li a:visited{
background-color: #FFFFFF;
display: block;
padding: 0.4em;
}
ul#sitemap li li a:hover {
background-color: #FFFFFF;
color: #057FAC;
}
Download at WoweBook.Com
The CSS Anthology128
Figure 4.21. The styled sitemap
Discussion
The sitemap starts life as a list for the main navigation elements with the submenus
nested inside—in the same way as the list with subnavigation discussed earlier in
this chapter. The difference with the sitemap is that all menus will display their
subnavigation. If the sitemap becomes deeper (with further levels), you just continue
nesting in the same way, with subpages being a sublist of their parent page.
Take care to nest the list items properly. The submenu needs to go before the closing
</li> of the parent list. Without CSS the sitemap displays as in Figure 4.22. We
can then style the parent list and sublists. I’m taking the margins and padding off
the main list, but giving nested lists a left padding of 1em to indent them and make
it clear that they’re nested inside their parent list item:
Download at WoweBook.Com
129Navigation
Figure 4.22. The marked up sitemap without CSS
chapter04/sitemap.css (excerpt)
ul#sitemap {
margin: 0;
padding: 0;
list-style: none;
}
ul#sitemap ul {
padding-left: 1em;
list-style: none;
}
I then want to give the main list items a strong style to show that they represent the
main sections of my site. As with the navigation, I put most of the styling onto the
a element and set the display property to block, so as to make the full width of
the item clickable, as opposed to just the link text itself:
chapter04/sitemap.css (excerpt)
ul#sitemap li {
border-bottom: 2px solid #FFFFFF;
}
ul#sitemap li a:link, ul#sitemap li a:visited{
background-color: #CCCCCC;
display: block;
padding: 0.4em;
text-decoration: none;
Download at WoweBook.Com
The CSS Anthology130
color: #057FAC;
}
ul#sitemap li a:hover {
background-color: #999999;
color: #FFFFFF;
}
As we’re selecting elements within the sitemap list, we’ll also select the nested a
elements which should have no gray background color. So to finish off we need to
deal with these elements with a more specific selector:
chapter04/sitemap.css (excerpt)
ul#sitemap li li a:link, ul#sitemap li li a:visited{
background-color: #FFFFFF;
display: block;
padding: 0.4em;
}
ul#sitemap li li a:hover {
background-color: #FFFFFF;
color: #057FAC;
}
That’s all there is to styling a sitemap using CSS. Just as with site navigation you
can develop all kinds of creative effects working from this simple idea.
Can I create a drop-down menu
using only CSS?
A previous edition of this book included a CSS-only drop-down menu that I have
removed in this edition.
When this book was originally written, I—like many other web developers—was
really looking forward to a utopia where we would just use CSS for everything,
managing without JavaScript to create effects like drop-down menus. As we’ve
learned more about these technologies and also about the ways in which people
Download at WoweBook.Com
131 Navigation
use the Web, I’ve come to the opinion that in this circumstance, JavaScript is a far
better choice.
It is possible to create a drop-down navigation using only CSS. However, the tech-
niques used to do this can actually be less accessible in practice than a well-thought
through JavaScript-driven, drop-down menu would be. It’s possible to make
JavaScript menus navigable with the keyboard, for example, and to ensure that links
are unhidden using display: none;, which renders them hidden for screen readers
as well as those viewing the site on screen. If you really need a drop-down menu
I’d advise taking a look at the excellent UDM4 menu,
5
which can be styled using
CSS but provides a good experience for all of your visitors.
How can I use CSS to keep image-based
navigation clean and accessible?
While there are many benefits to using text-based navigation styled with CSS rather
than images, it’ s likely that sometimes you’ll need to use images to gain a particular
effect or to use a certain font. When this happens, you can use all you know about
CSS to ensure that the images are used in a way that is as problem-free as possible.
This solution pulls together several different techniques to create a slick image-
based navigation.
Solution
This solution starts with text-based navigation and replaces it, using CSS and a
single image, with image-based navigation. Figure 4.23 shows us the final product,
and here’s the code:
chapter04/image_nav.html (excerpt)
<ul id="nav">
<li class="recipes"><a href="#"><span>Recipes</span></a></li>
<li class="contact"><a href="#"><span>Contact Us</span></a></li>
<li class="articles"><a href="#"><span>Articles</span></a></li>
<li class="buy"><a href="#"><span>Buy Online</span></a></li>
</ul>
5
Download at WoweBook.Com
The CSS Anthology132
chapter04/image_nav.css (excerpt)
ul#nav {
width: 360px;
height: 30px;
overflow:hidden;
margin: 0;
padding: 0;
list-style: none;
}
ul#nav li {
float: left;
}
ul#nav li a span {
margin-left: -5000px;
}
ul#nav li a {
background-image: url(reflectonav.gif);
background-repeat: no-repeat;
display: block;
width: 75px;
overflow:hidden;
}
ul#nav li.recipes a {
background-position: 0 0;
}
ul#nav li.recipes a:hover {
background-position: 0 -42px;
}
ul#nav li.contact a {
background-position: -75px 0;
width: 105px;
}
ul#nav li.contact a:hover {
background-position: -75px -42px;
}
Download at WoweBook.Com
133Navigation
ul#nav li.articles a {
background-position: -180px 0;
width: 85px;
}
ul#nav li.articles a:hover {
background-position: -180px -42px;
}
ul#nav li.buy a {
background-position: -265px 0;
width: 85px;
}
ul#nav li.buy a:hover {
background-position: -265px -42px;
}
Figure 4.23. The completed navigation
Discussion
In this solution we want to ensure that any text-only devices such as screen readers
and search engines still understand our navigation, even though we’re using images.
Therefore, we start out as usual by creating an unordered list of navigation items.
The only addition is a span element wrapped around the text inside the element:
chapter04/image_nav.html (excerpt)
<ul id="nav">
<li class="recipes"><a href="#"><span>Recipes</span></a></li>
<li class="contact"><a href="#"><span>Contact Us</span></a></li>
<li class="articles"><a href="#"><span>Articles</span></a></li>
<li class="buy"><a href="#"><span>Buy Online</span></a></li>
</ul>
Download at WoweBook.Com
The CSS Anthology134
Our navigation is now just a structured list. Next, we need to create our images for
the navigation. As with the rollover navigation image above we’re going to use a
composite image with several image states in it—in this case all of the navigation
images and their rollover states in one image, as shown in Figure 4.24.
Figure 4.24. The background image used in this example
Using one image saves making multiple requests to the server, and the file size for
our one large image will be less that it would be if we had eight images chopped
up. Now that we have our markup and image we can start to style the navigation
using CSS. First, we remove the default browser styling on the ul element and float
our list items left to make a horizontal navigation bar.
We also give the navigation width and height values. As the navigation is made up
of images, we know how tall it will be and specifying the height ensures that there
are no parts of the background showing through:
chapter04/image_nav.css (excerpt)
ul#nav {
width: 360px;
height: 30px;
overflow:hidden;
margin: 0;
padding: 0;
list-style: none;
}
ul#nav li {
float: left;
}
We now want to hide the text from browsers that support images and CSS. We do
this by setting a large negative margin on the span within the list items, throwing
them off the left side of the screen:
Download at WoweBook.Com
135Navigation
chapter04/image_nav.css (excerpt)
ul#nav li a span {
margin-left: -5000px;
}
We can now replace the text with the background image. Create a rule for the element
in which display is set to block so it takes up the full area of the li, then add the
background image:
chapter04/image_nav.css (excerpt)
ul#nav li a {
display: block;
background-image: url(reflectonav.gif);
background-repeat: no-repeat;
width: 75px;
overflow:hidden;
}
If you look at your navigation in a browser after adding the above rules you’ll see
that it shows the “Recipes” item 4 times. This is because you’ve added the back-
ground image to each link in the navigation bar and the image displayed is positioned
at the top left of that item, as Figure 4.25 shows.
Figure 4.25. After adding the background image to the element
To correct this situation we need to position the background image differently for
each navigation item. As with the rollover images above, it’s often simplest just to
tweak the position pixel by pixel until it appears in the right place. The following
CSS shows how we position the background for each link, and Figure 4.26 shows
the results:
Download at WoweBook.Com
The CSS Anthology136
chapter04/image_nav.css (excerpt)
ul#nav li.recipes a {
background-position: 0 0;
}
ul#nav li.contact a {
background-position: -75px 0;
width: 105px;
}
ul#nav li.articles a {
background-position: -180px 0;
width: 85px;
}
ul#nav li.buy a {
background-position: -265px 0;
width: 85px;
}
Figure 4.26. After positioning the background image
The final task we need to do is add our hover state. This is created in much the
same way as the rollover background images in the earlier example. Using CSS, we
can move the background image on hover so that the rollover state comes into view:
Download at WoweBook.Com