ADOBE INDESIGN CS2 REVEALED- P5 pptx
Bạn đang xem bản rút gọn của tài liệu. Xem và tải ngay bản đầy đủ của tài liệu tại đây (1.03 MB, 15 trang )
INDESIGN 2-10 Working with Text
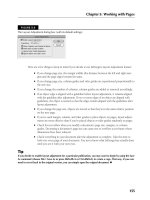
Create superscript characters
1. Click View on the menu bar, click Fit Page
in Window, click the Zoom Tool , then
drag a selection box that encompasses all of
the body copy on the page.
2. Click the Type Tool , then select the
number 1 after the words Doberman
Pinscher at the end of the fourth paragraph.
3. Click the Character palette list arrow, then
click Superscript.
The character’s size is reduced and it is posi-
tioned higher than the characters that pre-
cede it, as shown in an enlarged view in
Figure 13.
4. Select the number 2 after the word cows in
the last paragraph, then apply the Superscript
command.
TIP When the Superscript command is
applied to text, its designated font size
remains the same.
5. Select the number 1 beside the footnote at
the bottom of the page, apply the
Superscript command, select the number 2
below, apply the Superscript command
again, then deselect the text.
Your footnotes should resemble Figure 14.
You applied the Superscript command to format
selected text as footnotes.
FIGURE 13
Applying the Superscript command
FIGURE 14
Using the Superscript command to format footnotes
Superscript character
Superscript
characters
Inserting footnotes automatically
While you can insert footnotes using the techniques in this lesson, if you have many foot-
notes in a document, you can use the InDesign CS2 enhanced footnote feature to insert
them quickly and easily. In InDesign, a footnote consists of a reference number that
appears in document text, and the footnote text that appears at the bottom of the page or
column. To add a footnote, place the insertion point in the document location where you
want the reference number to appear. Click Type on the menu bar, then click Insert
Footnote. The insertion point moves to the footnote area at the bottom of the page or
column. Type the footnote text; the footnote area expands as you type. If the text contain-
ing a footnote moves to another page, its footnote moves with it.
Lesson 1 Format Text INDESIGN 2-11
Underline text
1. Click View on the menu bar, click Fit Page
in Window, click the Zoom Tool , then
drag a selection box that encompasses both
footnotes at the bottom of the page.
2. Click the Type Tool , then select In Love
with the Min-Pin in the first footnote.
3. Click the Character palette list arrow, then
click Underline.
Only the selected text is underlined, as
shown in Figure 15.
TIP The weight of the line is automatically
determined, based on the point size of the
selected text.
4. Select Working Toy Breeds in the second
footnote, then apply the Underline command.
5. Select the entire first footnote except the
number 1, double-click the Font Size text
box, type 8, then press [Enter] (Win) or
[return] (Mac).
6. Select the entire second footnote except the
number 2, change its font size to 8 pt, then
click to deselect the text.
Your footnotes should resemble Figure 16.
TIP To specify how far below the baseline
the underline is positioned, click the
Underline Options command on the
Character palette menu, then increase or
decrease the Offset value.
You selected text, then applied the Underline com-
mand from the Character palette menu.
FIGURE 15
Underlining text
FIGURE 16
Formatting footnotes
8 pt text
Formatting footnotes
If you use the Insert Footnote command to enter footnotes in a document, you can specify
a number of formatting attributes. Click Type on the menu bar, then click Document
Footnote Options. On the Numbering and Formatting tab, you can select the numbering
style, starting number, prefix, position, style, or separator. The Layout tab lets you set the
spacing above and between footnotes, as well as the rule that appears above them.
Formatting changes you make to footnotes affect all existing and new footnotes.
FIGURE 17
Paragraph palette
LESSON 2
What You’ll Do
INDESIGN 2-12 Working with Text
Using the Paragraph Palette
The Paragraph palette, shown in
Figure 17, is the command center for
modifying paragraphs or blocks of text
also known as body copy. The Paragraph
palette works hand in hand with the
Character palette, which is why they are
often grouped together.
The Paragraph palette is divided into three
main sections. The top section controls
alignment. Of the nine icons offering
In this lesson, you will use the Paragraph
palette and various keyboard commands
to modify paragraph attributes.
▼
Left indent text box
Space After text box
Right Indent text box
Palette list arrow
Alignment buttons
Do Not Align to
Baseline Grid button
Align to Baseline Grid
button
First Line Left indent
text box
Space Before
text box
Drop Cap Number of
Lines text box
Drop Cap One or More
Characters text box
FORMAT
PARAGRAPHS
Lesson 2 Format Paragraphs INDESIGN 2-13
options for aligning text, the first four—
Align left, Align center, Align right, and
Justify with last line aligned left—are the
most common. The remaining five are
subtle modifications of justified text and
are used less often.
The next section offers controls for indents.
Use an indent when you want the first line
of each paragraph to start further to the
right than the other lines of text, as shown
in Figure 18. This figure also shows what is
commonly referred to as a pull quote. You
have probably seen pull quotes in most
magazines. They are a typographical design
solution in which text is used at a larger
point size and positioned prominently on
the page. Note the left and right indents
applied to the pull quote in Figure 18. They
were created using the Left Indent and
Right Indent buttons in the Paragraph
palette.
The third section of the Paragraph palette
controls vertical spacing between para-
graphs and applying drop caps. For large
blocks of text, it is often most pleasing to
the eye to create either a subtle or distinct
space after every paragraph. In InDesign,
you create these by entering values in the
FIGURE 18
First line indent and left and right indents
First line
indent
Left indent
Right indent
Pull quote
Space After or the Space Before text boxes
in the Paragraph palette. Of the two, the
Space After text box is more commonly
used. The Space Before text box, when it is
used, is often used in conjunction with the
Space After text box to offset special page
elements, such as a pull quote.
A drop cap is a design element in which
the first letter or letters of a paragraph are
increased in size to create a visual effect. In
the figure, the drop cap is measured as
being three text lines in height. If you click
to place the cursor to the right of the drop
cap then increase the kerning value in the
Character palette, the space between the
drop cap and all three lines of text will be
increased. Figure 19 shows a document
with a drop cap and a .25 inch space after
every paragraph.
INDESIGN 2-14 Working with Text
FIGURE 19
A drop cap and paragraphs with vertical space applied after every paragraph
Drop cap
Vertical space
applied after
every paragraph
Lesson 2 Format Paragraphs INDESIGN 2-15
Understanding Returns and
Soft Returns
A paragraph is a block of text, a line of text,
or even a single word, that is followed by a
paragraph return. A paragraph return,
also called a hard return, is inserted into
the text formatting by pressing [Enter]
(Win) or [return] (Mac). For example, if I
type my first name and then enter a para-
graph return, that one word—my first
name—is a paragraph. You are more famil-
iar with paragraphs as blocks of text, which
is fine. But the definition doesn’t change.
When working with body copy, paragraphs
appear as blocks of text, each separated by a
single paragraph return.
Here’s an example of incorrect formatting.
When typing body copy, often many design-
ers will want a space after each paragraph
because it is visually pleasing and helps to
keep paragraphs visually distinct. The
mistake many designers make is that they
press [Enter] (Win) or [return] (Mac) twice
to create that space after the paragraph.
Wrong! What they’ve done is created two
paragraphs. The correct way to insert space
between paragraphs is to enter a value in the
Space After text box in the Paragraph palette.
Here’s a similar problem: When creating a
first line paragraph indent, many users will
press [Spacebar] 5 or 10 times and then
start typing. This too is incorrect format-
ting. Paragraph indents are created using
the First Line Left Indent setting in the
Paragraph palette, not by inserting multi-
ple spaces.
Why is this a problem? For one thing, it’s an
example of not using the features of the soft-
ware properly. Also, space characters are not
always consistent. If you press [Spacebar]
5 times to indent every paragraph in a
document, you might be surprised to find
that your indents will not necessarily be
consistent from paragraph to paragraph.
Untold numbers of formatting problems
occur from these incorrect typesetting
behaviors, especially from misusing
paragraph returns. “But,” you may ask,
“what if I need to move a word down to
the next line?”
As you edit text, you may encounter a “bad
line break” at the end of a line, such as an
oddly hyphenated word or a phrase that is
split from one line to the next. In many cases,
you will want to move a word or phrase to
the next line. You can do this by entering a
soft return. A soft return moves words
down to the next baseline but does not create
a new paragraph. You enter a soft return by
pressing and holding [Shift] and then press-
ing [Enter] (Win) or [return] (Mac).
Creating bulleted and numbered lists
A great new feature in InDesign CS2 lets you create lists with bullets or numbers.
Simply select text, then choose Bullets & Numbering from the Paragraph palette
menu which opens the Bullets and Numbering dialog box. Depending on the list type
you choose, InDesign will place a bullet or a number after every return in the
selected text. You can also specify that a glyph—an asterisk, for example—be used in
place of the bullet. Remember that bullets and numbers applied this way aren’t text
characters; InDesign regards them more as adornments that can be turned on or off.
However, you can convert the bullets or numbers to text by choosing Convert Bullets
to Text from the Paragraph palette menu. Once they are converted, InDesign no
longer regards the paragraph as being part of a bulleted or numbered list and lets you
treat the bullets as characters. Be sure to experiment with this feature—it is useful,
powerful, and one you are likely to use often.
INDESIGN 2-16 Working with Text
Use the Paragraph palette and
Character palette to modify
leading and alignment
1. Click View on the menu bar, click Fit Page
in Window, then click the first instance of
The in the first paragraph four times.
TIP Clicking a word four times selects the
entire paragraph.
2. Click the same word five times.
TIP Clicking a word five times selects all
the text in the text frame.
3. Click the Leading list arrow in the Character
palette, then click 30 pt.
The vertical space between each line of text
is increased, as shown in Figure 20.
TIP Because leading can be applied to a
single selected word as well as to an entire
paragraph, the Leading setting is in the
Character palette.
4. Double-click the Leading text box, type 16,
then press [Enter] (Win) or [return] (Mac).
5. Click the Paragraph palette name tab to dis-
play the Paragraph palette, then click the
Justify with last line aligned left button .
6. Click Introducing at the top of the document
three times, then click the Align center
button in the Paragraph palette.
7. Click Edit on the menu bar, then click
Deselect All.
Your document should resemble Figure 21.
You modified the leading and alignment of a block
of selected text.
FIGURE 20
Modifying leading
FIGURE 21
Modifying alignment
Increased leading adds
more vertical space
between lines of text
Text justified with
last line aligned left
Lesson 2 Format Paragraphs INDESIGN 2-17
Apply vertical spacing
between paragraphs
1. Click the Type Tool , click anywhere in
the body copy, click Edit on the menu bar,
then click Select All.
TIP The keyboard shortcut for Select All is
[Ctrl][A] (Win) or [A] (Mac).
2. Click the Space After up arrow in the
Paragraph palette three times, so that the
value reads .1875 in, then Deselect All.
.1875 inches of vertical space is applied after
every paragraph, as shown in Figure 22.
TIP You may need to click the Palette list
arrow, then click Show options to
expand the palette.
3. Select the two footnotes at the bottom of the
document, double-click the Space After text
box in the Paragraph palette, type 0, then
press [Enter] (Win) or [return] (Mac).
4. Select only the first of the two footnotes,
double-click the Space Before text box in
the Paragraph palette, type .25, then press
[Enter] (Win) or [return] (Mac).
.25 inches of vertical space is positioned
above the first footnote.
5. Click Edit on the menu bar, then click
Deselect All.
Your document should resemble Figure 23.
You used the Space After and Space Before text
boxes in the Paragraph palette to apply vertical
spacing between paragraphs.
FIGURE 22
Increasing the Space After value
FIGURE 23
Using an increased Space Before value to move the footnotes
down the page
Space before
value increased
INDESIGN 2-18 Working with Text
Apply paragraph indents
1. Click Type on the menu bar, then click Show
Hidden Characters.
As shown in Figure 24, hidden characters
appear in blue, showing blue dots for spaces,
created by pressing [Spacebar], and para-
graph marks for paragraph returns.
2. Select all the body copy on the page except
the two footnotes, then click the First Line
Left Indent up arrow in the Paragraph palette
four times to change the value to .25 in, as
shown in Figure 25.
The first line of each paragraph is
indented .25 in.
3. Select by Christopher Smith, then change the
left indent value to .5 in.
4. Click anywhere in the third paragraph,
change the First Line Left Indent value to
0 in, change the Left Indent value to .75 in,
then change the Right Indent value to .75 in.
5. Click any word in the third paragraph four
times to select the entire paragraph, click the
Character palette name tab, change the font
size to 18 pt, change the leading to 20 pt,
then deselect the paragraph.
Your document should resemble Figure 26.
You showed hidden characters so that you could
better identify each paragraph. You indented the
first lines of every paragraph, and then you added
substantial left and right indents to a paragraph
and increased its point size to create a “pull quote.”
FIGURE 24
Showing hidden characters
FIGURE 25
Applying a first line left indent
FIGURE 26
Using indents to format text as a pull quote
Space symbol
Paragraph return symbol
First line left
indent value
Pull quote formatted
with increased left
and right indents
Lesson 2 Format Paragraphs INDESIGN 2-19
Apply drop caps and soft
returns
1. Click the Paragraph palette name tab, click
anywhere in the first paragraph, then change
the First Line Left Indent value to 0.
2. Click the Drop Cap Number of Lines up
arrow three times, so that the text box dis-
plays a 3, as shown in Figure 27.
A drop cap at the height of three text lines is
added to the first paragraph.
3. Select all the body copy text, including the
two footnotes, then change the font to
Garamond or a similar font.
4. Click the Zoom Tool , then drag a selec-
tion box around the entire last paragraph.
5. Click the Type Tool , click before the capi-
tal letter O of the word On in the third sen-
tence of the last paragraph, press and hold
[Shift], then press [Enter] (Win) or [return]
(Mac) to create a soft return.
6. Click Type on the menu bar, click Hide
Hidden Characters, click View on the menu
bar, point to Grids and Guides, then click
Hide Guides if necessary.
7. Click View on the menu bar, then click Fit
Page in Window.
Your document should resemble Figure 28.
8. Click File on the menu bar, click Save, then
close Min-Pin Intro.
You created a drop cap and a soft return, which
moved text to the next line without creating a new
paragraph.
FIGURE 27
Creating a drop cap
FIGURE 28
Viewing the finished document
Drop Cap Number
of Lines text box
No new
paragraph
LESSON 3
What You’ll Do
INDESIGN 2-20 Working with Text
Working with Character and
Paragraph Styles
Imagine that you are writing a book—let’s
say a user’s manual for how to care for
houseplants. This book will contain seven
chapters. In each chapter, different sec-
tions will be preceded by a headline that is
the same font as the chapter title, but a
smaller font size. Within those sections
would be subheads—same font, smaller
size. This would be a perfect scenario for
using styles.
A style is a group of formatting attributes,
such as font, font size, color, and tracking,
that is applied to text—whenever and
wherever you want it to appear—through-
out a document or multiple documents.
Using styles saves you time, and it keeps
your work consistent. Styles are given
descriptive names for the type of text they
are applied to. Figure 29 shows three
styles in the Character Styles palette. You
use the Character Styles palette to create
styles for individual words or characters,
such as a footnote, and you use the
Paragraph Styles palette to apply a style to
a paragraph. Paragraph styles include for-
matting options such as indents and drop
caps. The Paragraph Styles palette is
shown in Figure 30.
In this lesson, you will use the Character
Styles and Paragraph Styles palettes to
create and apply styles to text.
▼
CREATE AND
APPLY STYLES
Lesson 3 Create and Apply Styles INDESIGN 2-21
FIGURE 30
Paragraph Styles palette
FIGURE 29
Character Styles palette
In the above scenario of the houseplant
book, if you weren’t using styles, you would
be required to format those chapter head-
lines one at time, for all seven chapter
heads. You’d need to remember the font
size, the font style, and any tracking, kern-
ing, scaling, or other formatting. Then
you’d need to do the same for every section
headline, then every sub-headline. For any
body copy, you’d risk inconsistent spacing,
indents, and other formatting options.
Using styles, you define those formats one
time and one time only. A much better
solution, don’t you think?
Another important feature about styles is
that they are very useful when you change
your mind and want to modify text. Simply
modify the style, and all the text that is
assigned to that style will be automatically
updated—throughout the document!
QUICKTIP
Glyphs are type characters that you won’t find on your
keyboard—characters such as trademark and register mark
signs, arrows, cent signs, boxes, and so forth. InDesign
makes it easy to find and use glyphs. Click Type on the
menu bar, then click Glyphs to display the Glyph palette.
Click the document window with the Type Tool, then double-
click the glyph in the Glyph palette that you wish to insert.
Three styles
Two styles
INDESIGN 2-22 Working with Text
Create character styles
1. Open ID 2-2.indd, then save it as Jake’s Diner.
2. Click Window on the menu bar, point to
Type & Tables, then click Character Styles.
TIP Pull the Character Styles palette away
from the right side of the document window,
if necessary.
3. Click the Character Styles palette list
arrow, then click New Character Style.
4. Type Dishes in the Style Name text box of
the New Character Style dialog box, then
click Basic Character Formats in the left
column, as shown in Figure 31.
5. Click the Font Family list arrow, click Impact,
click the Size list arrow, click 14 pt, click the
Leading text box, type 16 pt, then click
Advanced Character Formats in the left column.
6. Type 85 in the Horizontal Scale text box,
then click OK.
The style “Dishes” now appears in the
Character Styles palette.
7. Click the Character Styles palette list arrow,
click New Character Style, type Descriptions
in the Style Name text box, then click Basic
Character Formats in the left column.
8. Click the Font Family list arrow, click
Garamond or a similar font, click the Font
Style list arrow, click Italic, change the font
size to 10 pt, change the leading to 12 pt,
then click OK.
The style “Descriptions” now appears in the
Character Styles palette.
9. Click the Character Styles palette list
arrow, click New Character Style, type
continued
FIGURE 31
New Character Style dialog box
Using Data Merge
InDesign lets you create documents that are customized for each recipient, much
like a mail merge in a word processing program, that you can use for letters, name
labels, postcards, and the like. In a data merge, you use a data source (usually a text
file) that contains fields (labels such as “First Name”) and records (rows represent-
ing information for each recipient, such as “Bob Jones”). A target document is an
InDesign file containing the text that will be seen by all recipients, such as a letter, as
well as placeholders representing fields, such as <<First Name>>. In a data merge,
InDesign places information from each record in the appropriate places in the target
document, as many times as necessary. The result is a merged document contain-
ing the personalized letters.
To perform a data merge, select a data source from the Data Merge palette, available
from the Window/Automation menus. On the Data Merge palette menu, click Select
data source, locate the data source file, then click Open. This displays the merge
fields in the Data Merge palette. Click in a text frame and click field names to enter
them in the frame. In InDesign CS2, if you place placeholders on Master Pages, the
merged document is connected to the data source, and you can automatically update
the merged document with the most recent version of your data source.
To merge the document, click the Data Merge palette menu, then click Create
Merged Document. Select the records to include, then click OK.
Lesson 3 Create and Apply Styles INDESIGN 2-23
Prices in the Style Name text box, then click
Basic Character Formats in the left column.
10.Change the font to Garamond or a similar
font, change the font style to Bold, change the
font size to 12 pt, change the leading to 14 pt,
then click OK.
Your Character Styles palette should resem-
ble Figure 32.
You created three new character styles.
Apply character styles
1. Click the Type Tool , triple-click the word
Eggs in the first title to select the entire title
“Eggs and Bacon,” then click Dishes in the
Character Styles palette.
The Dishes character style is applied to the title.
2. Select the entire next paragraph (beginning
with the word Two), then click Descriptions
in the Character Styles palette.
3. Select the first price ($5.95), click Prices in
the Character Styles palette, click Edit on the
menu bar, then click Deselect All.
Your first menu item should resemble
Figure 33. If you used a different font, your
text may wrap differently.
4. Apply the Dishes style to the remaining
seven dish titles.
5. Apply the Descriptions style to the remaining
seven descriptions.
6. Apply the Prices style to the remaining seven
prices, then deselect so that your document
resembles Figure 34.
You applied character styles to format specific
areas of a document.
FIGURE 32
Character Styles palette
FIGURE 33
Applying three different character styles
FIGURE 34
Viewing the document with all character styles applied
Dishes style
Descriptions style
Prices style
INDESIGN 2-24 Working with Text
Create paragraph styles
1. Click Window on the menu bar, point to
Type & Tables, then click Paragraph Styles.
TIP Pull the Paragraph Styles palette away
from the right side of the document window,
if necessary.
2. Click the Paragraph Styles palette list
arrow, then click New Paragraph Style.
3. Type Prices in the Style Name text box, then
click Indents and Spacing in the left column.
TIP Note that the New Paragraph Style dia-
log box contains Basic Character Formats
and Advanced Character Formats windows—
the same that you find when working in the
New Character Style dialog box.
4. Click the Alignment list arrow, then
click Center.
5. Type .25 in the Space After text box, then
click Paragraph Rules in the left column.
TIP The term rules is layout jargon for
lines. Rules can be positioned on a page as
a design element, or text can be underlined
with rules.
6. Click the Paragraph Rules list arrow, click
Rule Below, then click the Rule On check
box to add a check mark.
7. Type .125 in the Offset text box, type .25 in
the Left Indent text box, type .25 in the Right
Indent text box, press [Tab] so that your dia-
log box resembles Figure 35, then click OK.
The paragraph style “Prices” now appears in
the Paragraph Styles palette, as shown in
Figure 36.
You created a paragraph style, which included a
center alignment, a space after value, and a para-
graph rule.
FIGURE 35
Paragraph Rules window in the New Paragraph Style dialog box
FIGURE 36
Paragraph Styles palette
Using QuickApply
When you apply styles to text or objects, it can be time-
consuming to scroll through a long list of styles. To find
and apply a style rapidly, select text or a text frame, click
Edit on the menu bar, then click Quick Apply. Begin typ-
ing the style name, which displays matching styles in the
Quick Edit list. Select the style you want from the list,
then click Enter (Win) or Return (Mac) to apply it. Press
[Shift] while you press Enter or Return to apply the style
and leave the Quick Edit list open.